These May reflections are part of the Seasonal Reflections series — a year-long practice of living with the rhythm of nature.
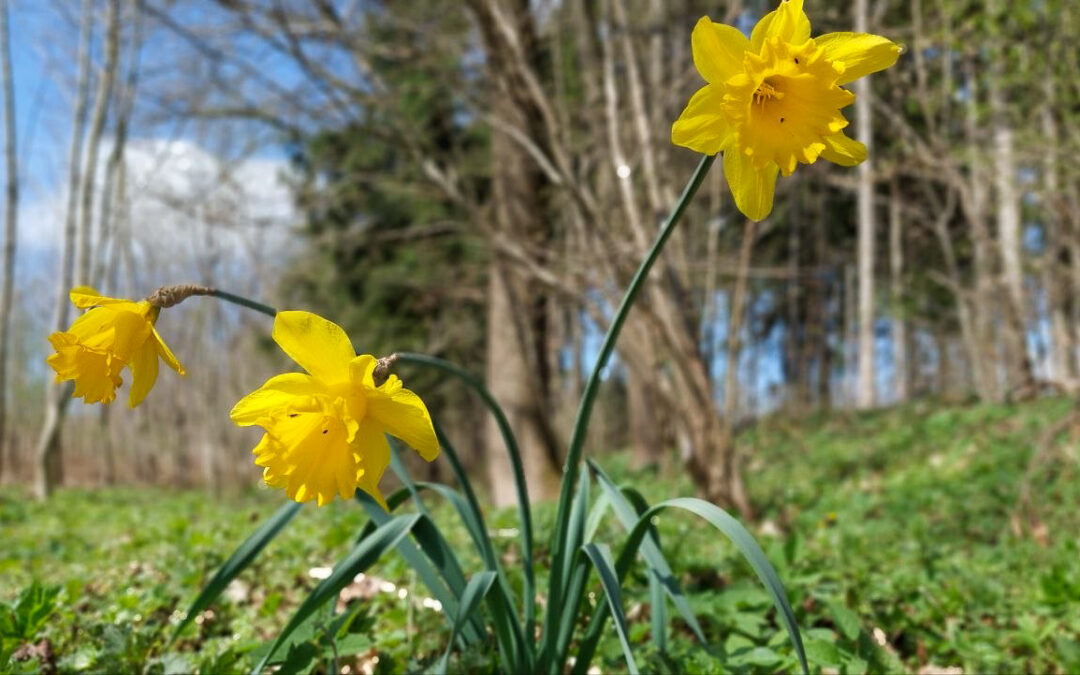
May brings all that March and April have promised: new growth, new green, new light and oh, the smell of all the flowers and blooming trees and shrubs! Finally, we’re in full spring mode – even though we may not be used to it yet.
👉 In these May reflections: the garden, the kitchen, and the art of not rushing through the best month of the year.
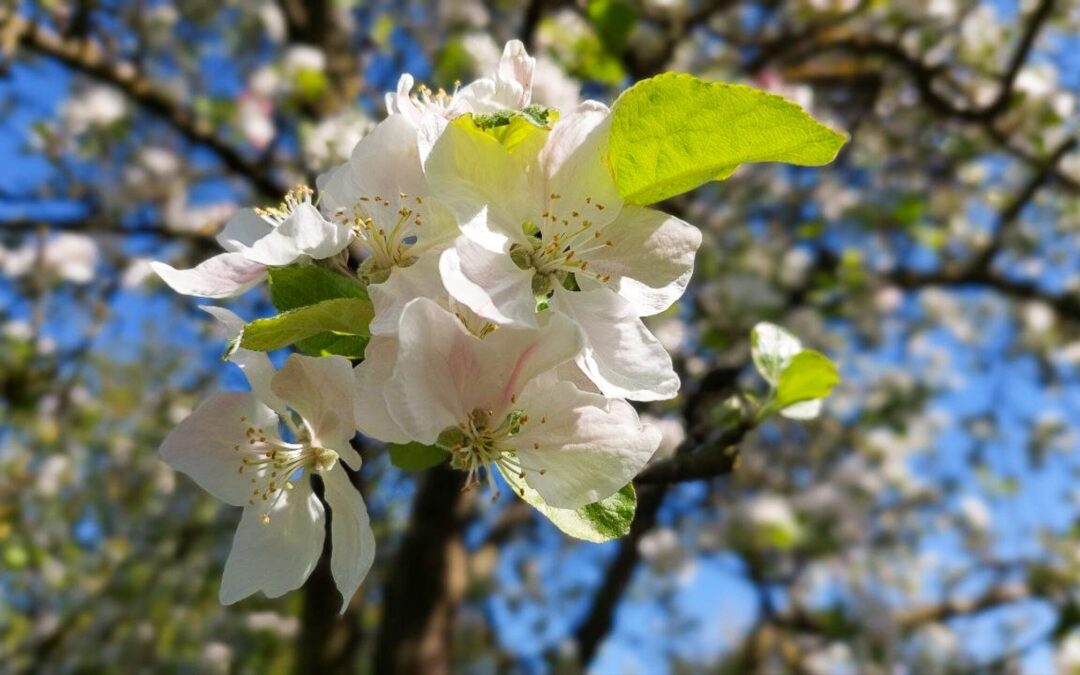
A few days ago, I left the flat early in the morning and put my shoes on to leave for work. I was still a bit tired, and out of the corner of my eye, I saw my neighbours’ pear tree through the window. It was white, and I thought: “God, it has snowed tonight” – until I realised that the tree was covered in bloom!
And this is exactly what living seasonally in May feels like…
May in Nature
Nights can still be cold, though. Here in Bavaria, we can expect night frosts until mid-May. In fact, starting from May 11, we celebrate the days of the “Frost Saints” (“Eisheilige” in German), a bunch of saints whose commemoration days fall on the last expected frost dates around here. That doesn’t mean, of course, that from May 16 onward there won’t be any more night frosts, but mid-May is pretty accurate.
Everything seems to be happening at once: the grass suddenly shows a lush, vibrant green again, leaves and blooms burst out of trees that were still bare yesterday, and the birds and insects are busily hustling and bustling around.
The fruit trees are not the only plants in courtship mode, though. Early vegetables are ready to be picked as well.
🌿 Living with the rhythm of the seasons? Join my Seasonal Letters for gentle reflections, monthly guidance, and reminders to slow down with nature.
May In The Garden
While we still had to be careful about what we planted and sowed in the garden in April, now in May, we can finally transplant even the heat-lovers amongst our vegetables.
Remember when we seed-started peppers and chillies in January? Mid to end of May, we can bring them outside.
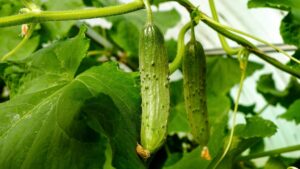
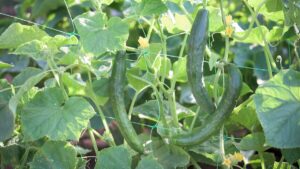
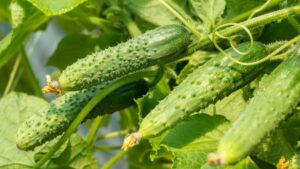
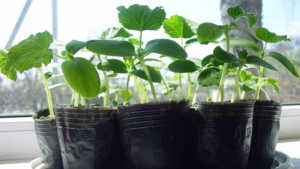
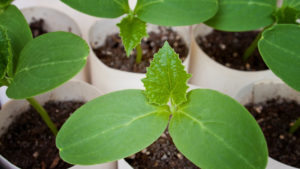
The cucumbers we grew from scratch? Plant them outdoors after the last night frosts.
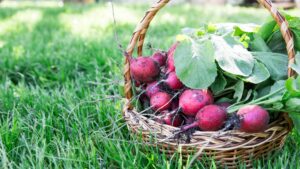
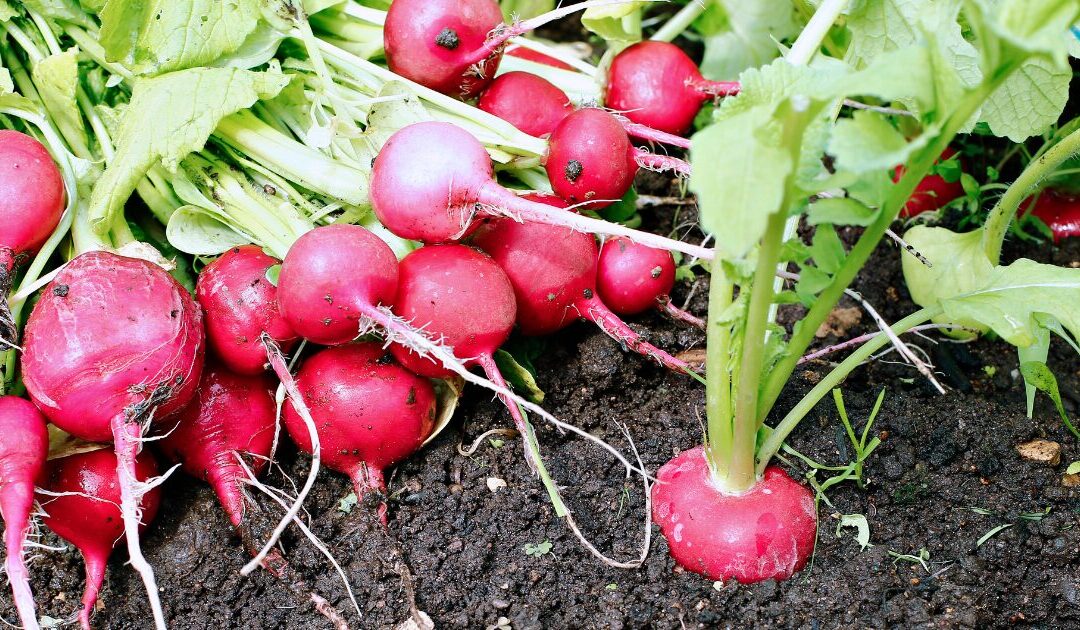
In many temperate climates, May is also the time of our first outdoor harvest. The radishes we sowed earlier, spinach, peas and salad are the first vegetables ripe for harvest now. I don’t know about you, but my body longs for fresh, homegrown food after all those months of preserves and ferments. A spring salad with eggs is now often all I need.
We can close the gaps that have formed when we harvested these early vegetables by sowing or planting others. This principle is called succession planting and, if done cleverly, it not only makes sure that you use your garden space efficiently, but also keeps pests and diseases at bay. Here you can read up on succession planting in more detail.
But what to do when it rains? Well, let’s step inside and see.
May In The Kitchen And At Home
When I have planted most of my vegetables, it’s time to clean the windows. Starting from January, when peppers and chillies moved in, my windowsills had become crowded during the last few months. Now, I enjoy the new minimalism with just some orchids – and maybe one or two seed trays with the next batches of veggies for the next gap closing.
To be honest, I don’t do much at home in May regarding cleaning, cause I’m mostly in the garden or outdoors to enjoy the “new green”.
In my opinion, you can either have a great garden or a clean house.
I’m choosing the former.
However, the first harvests need to be preserved. So, if I am indoors, you’ll probably find me in the kitchen, fermenting radishes, cooking woodruff syrup or making honey from dandelions or spruce tips. I mean, is there anything better than picking fresh vegetables from the garden or foraging in the woods and then coming home and making that harvest last?
Don’t let yourself become overwhelmed, though. There’s no need to hustle through May. Instead, let’s see what we can do for ourselves.
Self-Care in May
It’s so lovely to get outside right now. I didn’t know how I’d missed bird song and flowers, the scent of blooming trees, and the warmth on my skin until it all came back.
I don’t know about you, but I just don’t wanna rush through May. Instead, I’d rather choose a slow-living spring.
There’s only one May per year; let’s enjoy it to the fullest with these simple spring self-care ideas.
Self-Care for Body…
It’s easy now to wake up with the light, so why not grab the opportunity to do so? The sun rises early enough to have a long day ahead, but not so early that we get tired by noon. Even if you don’t want to get up with the sun on a workday, try it on the weekend. The slow energy of a May morning and the promise of a whole fine spring day ahead are worth the effort.
Get outdoors whenever you can, no matter the weather. Even a shower of spring rain can be wonderful for the skin (or so I keep telling myself). I, for example, love visiting the botanical garden in my town and enjoying all the blooming plants and the promise of flowers yet to come. But even when my time is limited, I try to enjoy my lunch or coffee break outside. Just a few minutes of sunshine can work miracles.
…For Mind…
Any creative project you do now, do it outside. If that’s not possible, try doing it at an open window.
If you want to learn something new, why not try to make bouquets of wild flowers, make daisy chains or press flowers for later journaling.
Being the classical music lover that I am, May always means Mozart for me. Fortunately, Augsburg has a Mozart festival this month, and I’m looking forward to attending the exceptional performances. If there’s one composer who could capture the light-heartedness and cheerfulness of May, it is Mozart.
I also love reading poems in spring, especially those about spring itself and the power of renewal and new beginnings.
… And Soul
I love taking a few minutes every day and either going outdoors or opening the window and listening to the sound of spring. Often, I close my eyes, cause I can concentrate better that way. If you want to give it a try, check how many different birds you can make out, listen for bees or other insects, and see what other natural sounds you can hear.
When it’s raining, I love sitting next to a window or under the patio roof and watching the splatter of raindrops, hydrating the earth. It’s one of the pillars of the growth that’s now happening abundantly, and instead of complaining about the “bad weather”, let’s make it a habit of being grateful for the rain.
🌿 May Invitation
This week, drink one cup of coffee or tea outdoors.
No phone, no rush.
Just the sounds, scents, and light of May around you.
Living seasonally begins with small moments of attention.
Enjoy The Vibrant Energy of May
May asks us to be present while things speed up.
The key to not getting swept away is simple: step outside. Listen. Smell. Look up at a tree that was bare last week and is now full of green. Drink your coffee in the garden. Pick the first radishes with your hands.
Spring only comes once a year. All those long, dark winter months, we’ve waited for it. Now let us have it.
And although there’s a lot we can finally do again, we don’t have to match Nature’s pace. I rather think that participating in all that spring has to offer outweighs the hustle of productivity.
After all, how better to honour the gift of renewed life than by simply enjoying it?
If these reflections inspired you to get outside or into the kitchen, you might enjoy browsing the garden section for seasonal growing guides, or the preserving section for ideas on what to do with your first harvests. And if you missed last month, you can read my April reflections here.
Want to continue living with the season? Check out all the articles of the Seasonal Reflections Series:
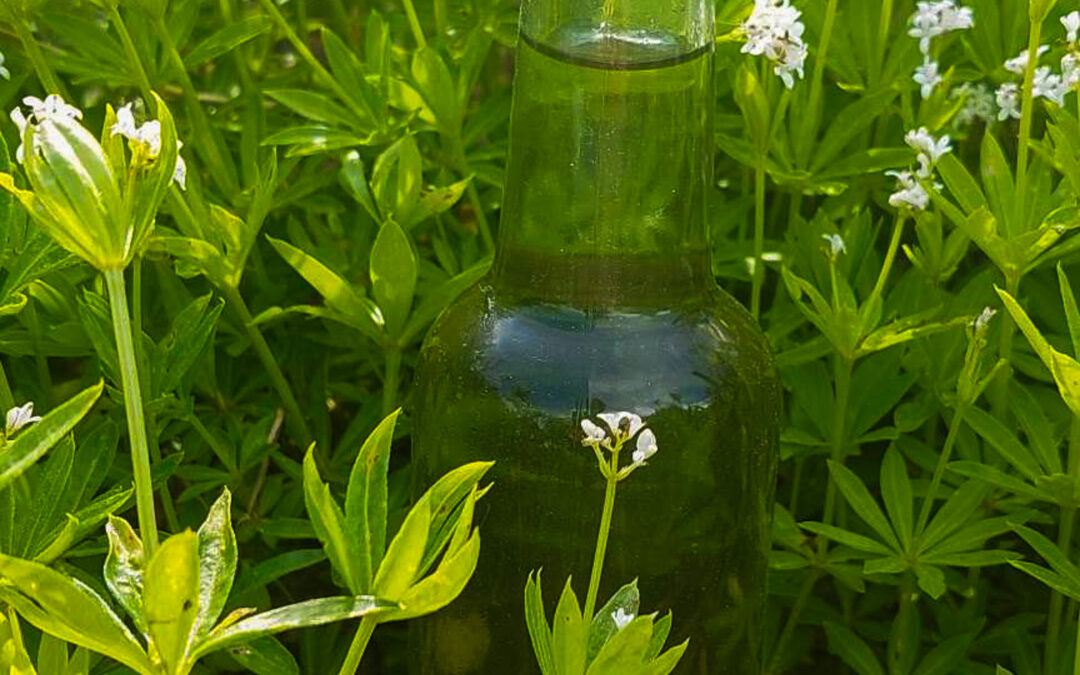
Woodruff syrup — known as Waldmeistersirup in German — is a traditional Central European spring speciality. As the name indicates, it’s made from sweet woodruff (Galium odoratum), a woodland herb famous for its delicate scent of hay, vanilla, and almonds. In Germany, it’s known as Waldmeister and used for lemonade, desserts, and May wine. In this article, I’ll show you how to make it naturally at home — without artificial green colouring.
🌿 The Complete Guide to Woodruff
Modest in appearance, but impossible to ignore once it’s in bloom — let me introduce you to woodruff.
Why I Fell In Love With Woodruff
When I was a kid, woodruff sherbet powder was totally en vogue! Sometimes, when my friends and I were walking back from school, we went to the local store and bought some of it as a treat. There was also a “woodruff” jelly of an almost neon-green colour and overly sweet taste, but my mum refused to buy “this purely chemical sh…stuff” (she didn’t say “stuff”). So for a long time, the only reference I had about how Woodruff tasted was the sherbet powders.
Real woodruff, however, has a far more complex flavour than anything that was artificially produced.
One day, while taking a stroll through the woods with my boys, I found some lovely flowers growing in the half-shade. I picked some and brought them home, where I wanted to put them into a vase.
Which I forgot to do.
When I remembered the plants, they had already wilted – and were spreading the most wonderful scent of hay and vanilla (nothing chemical about that). We had accidentally found woodruff!
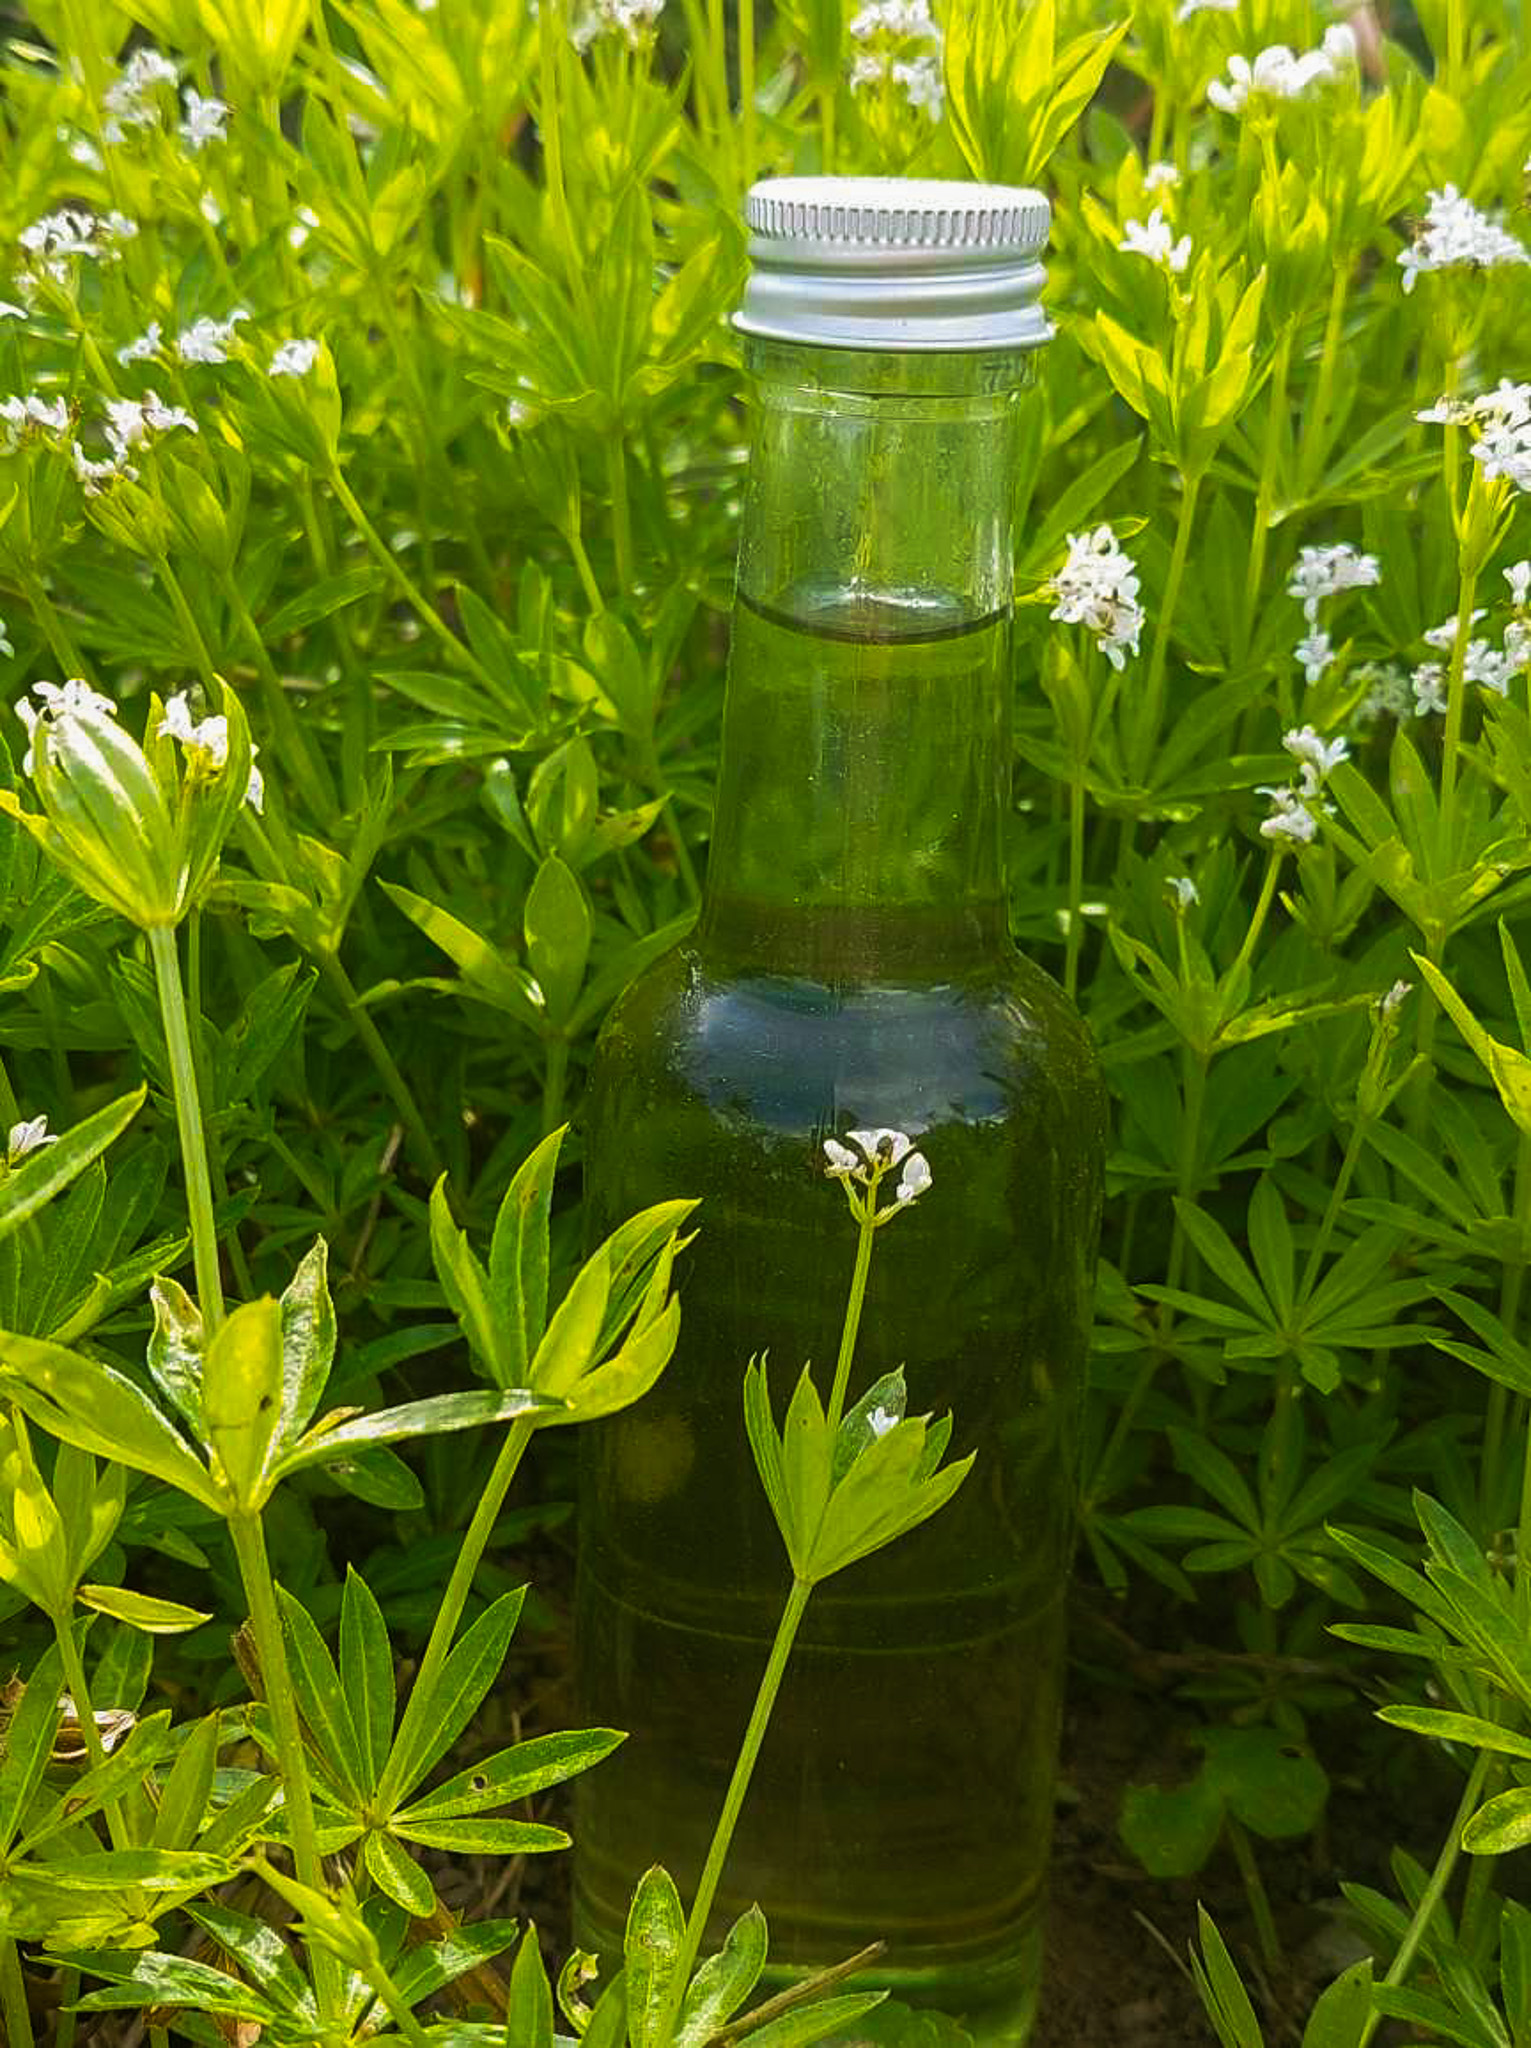
Today, I grow woodruff in my herb garden, and every spring I make woodruff syrup to preserve its extraordinary scent. No chemical taste, no green colour, just four simple ingredients for a wonderfully herbal syrup with notes of hay and vanilla.
If you enjoy seasonal recipes, garden harvests and simple homemade traditions, you might like my newsletter.
What is Woodruff (Waldmeister)?
Woodruff (Galium odoratum) is a herb of the cleaver family. It mainly grows in deciduous forests of the temperate regions in Europe and Asia. It’s not native to the US but grows there as a neophyte.
How To Identify Woodruff
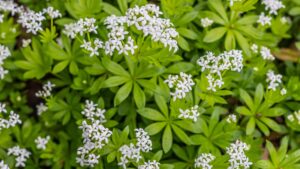
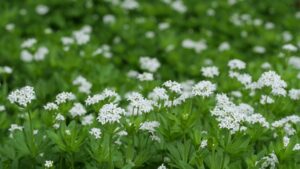
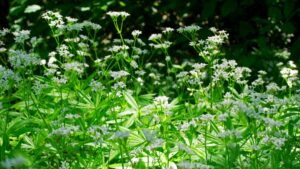
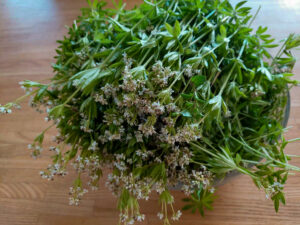
Woodruff is a perennial wintergreen herb that grows to a height of 5-50 cm (2-20 inches). It has an unbranched, smooth stalk with lance-shaped leaves in whorls.
Depending on the location, woodruff blooms from April to May, sometimes June, with small, white, star-shaped flowers. It’s used as a medicinal and condiment plant, for example, in May wine and desserts.
An inexperienced forager may confuse woodruff with white cleaver, which is safe to consume as well. Some sites state that woodruff can also be mistaken for lily of the valley (which is poisonous), but honestly, that’s highly unlikely.
If unsure, check the scent: fresh woodruff doesn’t smell but develops its characteristic scent only after wilting.
What Does Woodruff Taste Like?
How do you describe the taste woodruff releases once it has wilted? The first comparison I find is hay. Whenever I dry woodruff in my home, it smells so strongly of hay that I sometimes invite people intentionally to share that scent with them.
But it isn’t hay alone — otherwise I could simply use hay. Woodruff’s fragrance also bears a strong undercurrent of vanilla and almond, which adds sweet and slightly bitter notes.
Mix that with the scent of freshly mowed grass, and you have the soft herbal sweetness of woodruff in a nutshell.
Why Is Woodruff Often Bright Green?
Well, it isn’t – at least not naturally. When you buy ready-made woodruff syrup or jelly, it’s always artificially flavoured and coloured.
Homemade woodruff syrup is colourless to pale yellow.
Is Woodruff Safe? (Coumarin Explained)
The small amount of woodruff used in this recipe stays well within safe traditional consumption levels. Enjoy woodruff syrup occasionally, just as it has been used in Central Europe for generations.
The most famous ingredient of woodruff is coumarin, the stuff that makes it smell so good when it’s wilting.
However, coumarin can be slightly toxic when consumed in abundance. The German Federal Institute for Risk Assessment (BfR) states a tolerable daily intake (TDI) of 0.1 mg of coumarin per kilogram of body weight.
What does that mean for our syrup?
Woodruff emits about 1 % coumarin from dry mass. The average weight of dry mass is about 14.5 % of fresh weight. For this recipe, we use 8 – 10 stalks of dried woodruff, which amount to about 3 – 3.5 grams. With that, the amount of coumarin will not exceed 5 mg/l and would be within the TDI the BfR recommends. Additionally, syrup is always diluted, which even minimises the coumarin amount.
In short: woodruff syrup is considered safe when consumed in normal culinary amounts. As always with aromatic herbs, moderation is key — woodruff syrup is meant to be enjoyed diluted and occasionally, not consumed in large quantities.
Can You Grow Woodruff At Home?
Absolutely, I’ve been doing so myself for years. Seeing as woodruff is a herb that grows in the forest, though, we must consider that it grows best in partial shade. When it has found the right place, though, it spreads readily. So, you can use it as a perennial groundcover if you like. It’s the perfect herb for woodland gardens.
When To Harvest Woodruff For Syrup?
The coumarin content in woodruff is the highest when the plant is in full bloom, which makes the best time to harvest woodruff shortly before the flowers burst into bloom. Here in Bavaria, that’s from mid-March to the end of April (in cold springs up to the beginning of May).
If you gather woodruff in full bloom, I recommend using it for other purposes, for example, as a decorative bouquet in fragrant sacs that you hang in your closet.
To harvest woodruff, cut it off directly above the soil, leaving the roots in the earth. From there, it will grow out again.
When you’ve harvested woodruff, you can’t use it immediately but must let it wilt first. I’ll show you why:
Why Woodruff Must Wilt Before Use
In fresh woodruff, the coumarin is bound to sugar and doesn’t smell of anything. Only when the cell walls are destroyed – by wilting, drying or freezing – an enzyme splits off the sugar and releases the now free coumarin. That’s when the typical flavour appears.
Fresh
Wilted
little aroma
full aroma
coumarin bound
coumarin released
Traditional Uses Of Woodruff
The best-known use for woodruff is as an ingredient in May wine (our German “Maibowle”), where wilted woodruff is used to infuse white wine and topped off with prosecco. This is a very traditional German spring drink.
Next in line comes our syrup, which is the basis not only for different drinks but also for cakes and desserts.
Further, woodruff is used in natural and folk medicine (although there’s no scientific evidence for its use) as an anti-inflammatory, anti-spasmodic, blood-cleansing and calming herb. However, it’s not advisable to use woodruff as a home remedy. The coumarin can damage the liver if consumed in high amounts.
I’m sure you know lavender sacs that you can put on your pillow, but did you know that you can also sew woodruff into sacs that you hang in the closet? They will slightly scent your clothes and even keep moths away.
Once the woodruff has wilted and released its fragrance, the rest of the process is beautifully simple.
Woodruff Syrup
A traditional spring syrup made from sweet woodruff, gently infused to capture its delicate aroma of hay, vanilla, and fresh herbs. This homemade woodruff syrup is perfect for lemonade, desserts, or sparkling wine and preserves the scent of early summer in a bottle. Simple to make with just a few ingredients and a little patience.
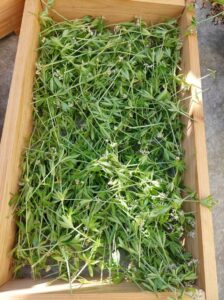
Pick the woodruff and let it wilt for at least 4 - 6 hours, better overnight, until you can clearly smell its scent.
Sterilise the bottles and caps and let them dry.
Combine the sugar and water in a saucepan and bring to a boil, stirring constantly until the sugar is fully dissolved.
Cut the lemon into slices and add them to the mixture.
Let the sugar syrup cool down. When it reaches room temperature, add the woodruff and leave it there for 2 - 3 days.
After that time, remove the lemon slices and the woodruff, bring the syrup to the boil. Fill the syrup into bottles while it's still hot and seal them immediately.
Notes
Woodruff syrup can be stored in a cool and dark place for up to one year.
Want more seasonal recipes like this? Sign up for my newsletter:
How Long Does Woodruff Syrup Last?
Store unopened bottles of woodruff syrup in a cool and dark place, and it’ll last for at least a year.
Once a bottle is opened, store it in the fridge and consume it within a few weeks.
If the syrup gets cloudy, develops mould or smells funny, it’s spoiled, and you must throw it away.
How To Use Woodruff Syrup
The first use, of course, is to dilute woodruff syrup (or any other syrup for that matter) with water and enjoy it as a drink. But there are so many more ways to enjoy it! Let me show you:
Can I Use Fresh Woodruff Instead Of Wilted Woodruff?
No. The scent only develops when the woodruff has wilted for at least several hours, and only then can you use it to infuse the syrup.
Can I Reduce The Sugar?
Yes, but just slightly. Sugar is a preservative and makes sure our syrup doesn’t spoil when stored. Instead of using 1 kg of sugar in 1 litre of water, you could reduce the amount to 800 grams.
What Does Woodruff Syrup Taste Like?
The taste is a mixture of hay, vanilla, almonds and freshly mowed grass.
Can I Freeze Woodruff?
Yes, freezing will also make it release its fragrance.
Why is commercial woodruff syrup green?
It’s an artificial colour added to the product.
Can I Dry Woodruff For Later Use?
Absolutely. Store the dried herb in a closed container and use it when you’re ready.
Ready to try Woodruff?
Woodruff syrup is one of those small spring rituals I look forward to every year — a way of bottling a moment before it disappears again for another twelve months. If you’ve never tasted real woodruff before, I hope this recipe surprises you as much as that forgotten bunch of wilted flowers once surprised me.
👉 While you wait for your syrup to infuse, enjoy more spring favourites:
Cucumbers are a great vegetable to grow in your garden – and it’s easier than you might think. Even if you’re a beginner gardener, I promise you that you can harvest an abundance of cucumbers that will taste so much better than the store-bought stuff. In this complete guide on how to grow cucumbers, you’ll find everything from seed-starting to harvest.
Imagine going out into your garden or greenhouse in the summer, picking a large, ripe cucumber in passing, and biting into it right away. The crunchy sound it makes, the burst of fresh flavour on your tongue, and its juice dripping from the corner of your mouth… You can have all that.
In this guide, I’ll show you everything I know about growing cucumbers — from starting seeds and creating the right growing conditions to harvesting an abundant, flavourful crop.
Quick overview
Stage
Key Requirements
Timing
Seed-starting
22 - 29 °C / 72 - 84 °F soil temperature
Beginning to mid-April
Germination time
5 - 10 days
Transplanting
After the last frosts
Mid to end of May
Sunlight
6 - 8 hours per day
All season
Nutrients
Nitrogen and potassium; phosphorus when blossoms form
Every 3 - 4 weeks
Harvest
Regular picking
8 - 10 weeks after sowing
Beginner Success Checklist
❄️ Plant cucumbers only after frost danger has passed
🌞 Choose a warm, sunny location
🌱Grow plants vertically on a trellis
💦 Keep soil consistently moist
🥒 Harvest fruits regularly to encourage new growth
What are Cucumbers?
Many people are astonished when they learn that cucumbers belong to the same plant family as melons and pumpkins. This family is called Cucurbits or, in Latin, Cucurbitaceae.
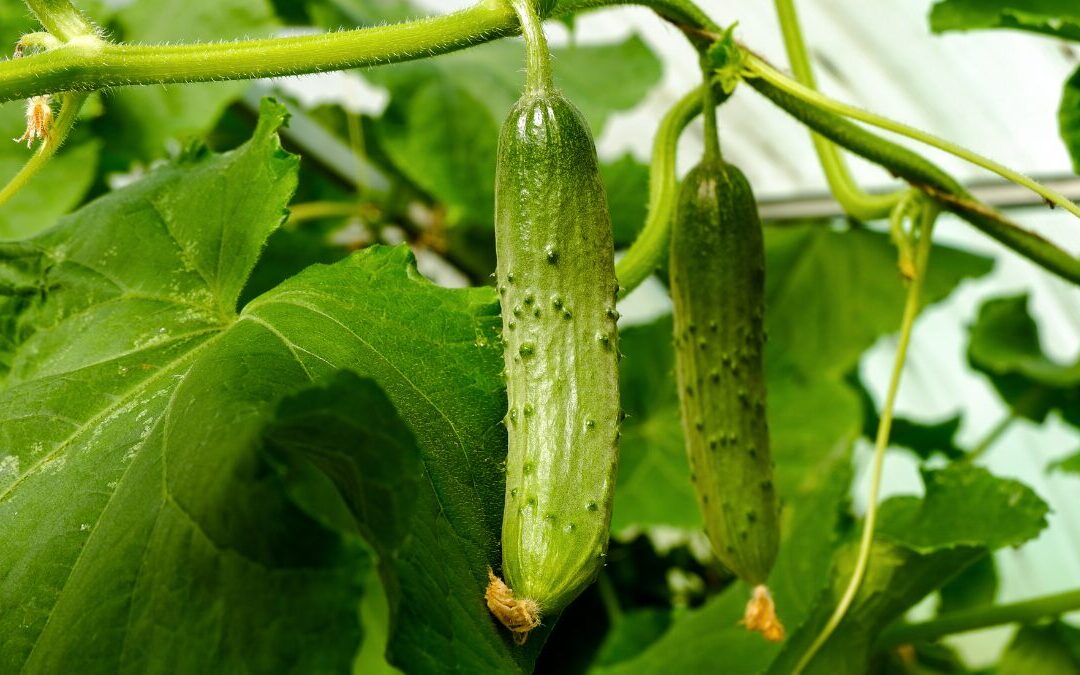
Cucumbers (Cucumis sativus), like pumpkins, melons and zucchini, are botanically speaking berries, a so-called “pepo”. A pepo is defined by a relatively thick peel, juicy flesh and seeds within.
Choosing the Right Cucumber Variety
Some cucumbers are just larger and longer than others, and that’s it, right? Wrong. There’s much more to cucumbers than meets the eye…
Variety
If you believe cucumbers are just those long, slender, green fruits you can find neatly aligned in supermarket shelves, you don’t know cucumbers yet. Stay with me, and I’ll show you.
Common cucumber types
The main distinction between cucumber types is by their intended use.
Salad cucumbers or snake cucumbers
Salad or snake cucumbers are probably the best-known cucumber type in the mid-latitudes. Their fruit is cylindrical, straight with a slight bend, and with both edges a bit thinner. They have smooth skin and are mostly eaten fresh – in salads, on sandwiches or as sticks with a dip.
Snake cucumbers are said to be sensitive and thus are often cultivated in a greenhouse. Fortunately, there are many more robust snake cucumber varieties that grow excellently outdoors.
Did you know that it’s quite easy to build a greenhouse without breaking the bank? In my guide on how to build a greenhouse, I show you how you can do it from scratch.
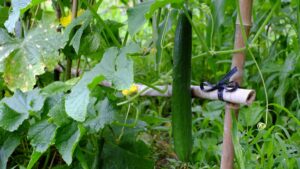
Salad cucumbers are mostly cultivated on trellises, where they produce straight fruits. You can also grow them without a trellis, lying on the ground, where their fruits will become bent. That said, if you want to get straight cucumbers, grow them on a trellis.
My favourite snake cucumber varieties are “Telegraph Improved” (greenhouse), “Delicius” (outdoors), “Tanja” (outdoors) and “Straight Eight” (greenhouse).
Pickling cucumbers or gherkins
Pickling cucumbers are commonly cultivated outdoors because they’re more robust and require less warmth. As the name indicates, pickling cucumbers (or gherkins) are mostly used for pickles, either by preserving them in a vinegar brine or by fermenting. You can, however, eat them fresh as well.
By preserving cucumbers, we make sure that we can eat cucumbers all year round.
My favourite pickling cucumber varieties are “Boston Pickling”, “Vorgebirgstraube” (a German variety), and “Homemade Pickles”.
Stewing cucumbers
As the name suggests, stewing cucumbers are mostly used for steaming and stewing. They grow well outdoors and produce large, thick fruits that turn yellow as they mature. They’re often used in Asian cuisine for curries and chutneys.
Colour and shape varieties
Cucumbers are not only green – they can be white, yellow, orange, brown and sometimes even blue.
The same goes for their form: we mostly know cucumbers as longish fruits, but there are also bent, curved, short and even round varieties with wrinkled, reticulated, warty or even spiky peels.
Even the taste differs. Salad cucumbers are crunchy, fresh and juicy, but rather neutral in taste; there are varieties with fruity, sweet or slightly sour flavours.
How to select the right cucumber varieties for your garden
Space
A greenhouse is nice to grow cucumbers in, but not absolutely necessary. In fact, you can cultivate cucumbers even in a pot on the patio or balcony, IF you live in at least zone 5 and the pot is at least 50 cm / 1.5 feet in diameter.
In the patch, cucumbers need about 50 cm / 1.5 feet of space between each other and are best grown on a trellis.
Quantity
In general, outdoor cucumber plants typically produce 6–12 fruits per season in temperate climates.
For salad cucumbers, calculate about 2 plants per person in your household, more if the plant produces small cucumbers. Depending on the variety and growing conditions, one cucumber plant typically produces between 5 and 20 fruits over the season. Smaller pickling varieties often yield more fruits than large slicing cucumbers.
If you want to make your own pickles, you need at least 4 pickling cucumber plants per person.
As a beginner, I’d recommend choosing resistant cucumber varieties like “Tanja” and “Telegraph Improved” as salad cucumbers and “Vorgebirgstraube” and “Boston Pickling” as pickling cucumbers.
Cucumbers need at least 6 hours of sunlight per day, better 8 or more. Choose a spot in your vegetable garden that lies in full sun and is protected from harsh winds.
My garden, for example, is facing southwards and has no houses or trees on the east and west sides that could cast a shadow on the vegetable patches.
Normally, that would expose the garden to the west winds that usually blow here, but it lies in a slight hollow, which creates a microclimate that’s slightly warmer than the surroundings.
Water
Cucumbers need regular, thorough watering, or else their fruits become bitter.
Outside in the garden, I usually water them twice a week or, when it’s really hot and dry, every other day. To check if they need water, I poke a hole of about 2 -3 cm (1 inch) in the soil with my finger. If it’s still moist under the surface, I don’t do anything, but if it’s dry, I get the watering can.
In the greenhouse, where temperatures are usually higher, I water them every day or at least every other day.
In pots, watering daily is a must, especially when it’s hot outside.
Water your cucumbers in the morning rather than in the evenings and avoid splashing water onto their leaves.
Garden vs Containers
You can cultivate cucumbers outside in a garden patch, indoors in a greenhouse or even in containers on a balcony or patio.
I’ve tried all three methods and learned the following:
Growing Cucumbers Outdoors
Cucumbers can grow well outside in a patch in your vegetable garden, but only if you use outdoor varieties. They grow quite well outside, even if the summer is not all hot and dry. Last year, for example, was quite rainy here in Bavaria, but the salad and pickling cucumbers I grew outdoors still produced fruit. Admittedly, the harvest has been larger in warm summers, but with the cucumbers from the greenhouse, it was enough.
Growing Cucumbers in a Greenhouse
To have a more stable harvest, I love cultivating cucumbers additionally in the greenhouse. There, I’m in control of watering, and temperatures are always a bit higher than outside. It’s important, however, to keep the greenhouse properly ventilated so that temperatures don’t climb too high.
Growing cucumbers in containers
Lastly, I also grew a cucumber in a container on my balcony. I chose a pot with about 40 L volume, which turned out to be ok. Ensure the seedlings get enough light while being protected from rain. When it gets too cold or moist outside, you can easily carry them in and pamper them there until the weather’s right again.
Cucumbers in containers need more water than those in a patch or greenhouse. Make sure to water them thoroughly at least once a day, better twice.
Soil
Cucumbers need nutritious, well-draining soil that can hold water but without waterlogging. To prepare your garden or greenhouse before planting, distribute compost on the patch and rake it roughly in.
It’s great to have your own compost, and it’s not as complicated as you might think. Here’s my beginner’s guide to composting that will tell you how to do it.
Before you plant cucumber seedlings, make sure the soil is warm, between 15 – 18 °C (60 – 65 °F). Otherwise, they’ll stop growing for quite some time.
If you grow cucumbers in containers, fill them with mature compost, mixed with rock flour, nettles and well-rotted manure or sheep wool. The nutrients in these components will slowly release into the soil, where they can be absorbed by the plants.
Spacing
As cucumbers grow, they become broader. It’s important, therefore, that we plant them with enough space between them and also between the rows so that they have enough space.
If we plant them too closely, they’ll not only produce less fruit but will also be prone to diseases and pests.
In the patch, the right spacing between cucumber plants is 50 – 60 cm (20 – 25 inches) and 80 – 100 cm between rows (2 – 3 feet).
The row spacing for pickling cucumbers is smaller. I usually install a trellis at the north side of a patch and plant the cucumbers on both sides with about 40 cm (20 inches) between rows.
In containers, logically, we put only one cucumber plant. When they grow, we can easily pull the pots apart, creating enough space for our plant babies.
The perfect companions for cucumbers
Proper vegetable companions strengthen and protect our cucumbers while at the same time making the most of the (usually too small) space in the patch. The best-known companion plant for cucumbers is dill, but there are many other options:
Basil: Repels pests, attracts pollinators and promotes growth
Dill: Attracts pollinators
Nasturtium: Attracts aphids
Peppers/Chillies: Similar light and water requirements
Beans: Enrich the soil with nitrogen
Garlic: Protects from fungal diseases and aphids
Onions: Repel pests like white fly
Corn: Works as a windbreaker and natural trellis
Lettuce: Keeps the soil moist
Spinach: Keeps the soil moist
Radishes: Repel pests like cucumber beetle
Avoid planting cucumbers near these crops, as they compete for nutrients or share diseases:
Now that we know the growing conditions for cucumbers, let’s start growing them!
How to Start Cucumber Seeds Indoors vs. Direct Sowing
You can either seed-start cucumbers indoors or sow them directly into the garden patch.
The best way is to combine both methods.
Start your first cucumber seedlings indoors, plant them out after the last frost and at the same time sow further cucumbers directly into the patch. When the pre-started plants get a disease, like for example mildew, or stop producing fruit, you can rip them out and still have a harvest from the directly sown cucumbers.
Let me show you how to start cucumbers from seeds
Seed-starting cucumbers – The What, When and How
When to start cucumbers indoors
In Bavaria, the last frost is expected in mid-May, so that would allow me to sow cucumbers as early as mid-April.
I’ve tried it several times, and it never worked. That’s why I always start all of my cucumber varieties indoors.
Cucumbers grow relatively fast, and if we seed-start them too early, they can easily become thin and spindly and thus would be weak and prone to pests and diseases.
The best time to seed-start cucumbers, therefore, is about 4 – 6 weeks before the last expected frost date. In my hardiness zone 7b, that’s beginning to mid-April.
Equipment
For seed-starting, you need a container, planting soil, your seeds and water.
Container
There are many pre-made seed-starting containers to buy at the store, for example, mini greenhouses and special seed-starting trays. They usually have a transparent lid that creates a warm, protected environment. I got some and use them every year.
Cucumbers, however, like all the members of the Cucurbit family, don’t like their roots disturbed. For that reason, it’s better to sow them into single pots, one seed per pot. That way, we don’t have to thin them out and dig up their roots when transplanting them from the large seed-starting container to a pot or even outdoors.
Soil mix
The best soil for seed-starting cucumbers is either store-bought cultivation soil or well-rotted compost. Seeds have all the nutrients they need for germination in themselves. A rich, nutrient-dense soil would only lead to spindly and weak seedlings.
Put the soil in the containers you want to use and make sure to distribute it well to the edges. Press it slightly flat and fill up more soil if necessary. There should be a gap of about 1 cm (0.4 inches) from the soil to the edge of the container.
Seed-starting process
Put the cultivation soil into the pots and press it slightly in. When applying a bit of pressure with your hand, it should be firm but not brick-hard.
Poke a hole in the middle of each pot and put one seed in.
Label the pots. Honestly, that’s crucial to identify the plants later. No, you won’t remember where you put which variety and yes, it’s absolutely necessary to take the (short) time and stick labels into each pot.
Carefully water the pots and cover them either with a transparent lid (if part of a kit) or just wrap them with cling film. That way, we create a greenhouse-like atmosphere that holds the warmth and moisture at a constant level.
It’s important to open the covering daily to allow airflow and prevent fungal diseases.
Put the pots in a warm place with temperatures between 22 and 29 °C (72 – 84 °F) until they germinate, which is usually after 5 – 14 days. When the seedlings show, move the pots to a slightly colder (20 – 22 °C / 68 – 72 °F) room with enough light.
Before we can release the seedlings into the wild outdoors, we have to harden them off. Start about a week before transplanting and put the seedlings outside for a couple of hours.
It’s important to monitor the temperature, as cucumbers are sensitive. Make sure it’s a warm day and put the seedling tray or pots in the shade so they don’t get too hot or even sunburnt.
Each day, prolong the time the plants stay outdoors, and after 3 days, you can start placing them in the sunlight (not around noon, that would be too much).
To make them accustomed to the wind, gently brush them with your hand, simulating wind movement.
After one week of hardening off, the cucumbers are ready for transplanting.
Transplanting Cucumbers to the Garden or Containers
When the nights finally stay warm, it’s time to get our cucumbers outside.
I always transplant my seedlings on a cloudy day or in the late hours of the afternoon to reduce the risk of plant shock.
First, I lay the pots or carefully uprooted plants out on the patch so that I can adjust the distance between them. Remember: it’s 50 – 60 cm (20 – 25 inches) between plants and 80 – 100 cm between rows (2 – 3 feet). If you plant in large pots, you can skip that step, of course, as it’s only one plant per pot.
In each planting hole, I put a small shovel full of moistened, well-rotted manure and half a handful of rock flour as a long-term fertiliser. This provides my cucumbers with some quickly available nutrients (manure) and a long-term fertiliser (rock flour). More on fertilising in “Daily Care and Maintenance”.
Then I put the plants as deep as the first real leaves. They’ll build further roots on the stem that’ll help them take up more water and nutrients.
I cover the hole with the soil I removed earlier and carefully press it down around the roots.
I water the seedlings properly after planting so that the soil settles around the roots, leaving no air holes.
When all my cucumbers are in the ground, I cover the soil between them with mulch. This could be hay, straw, pulled weeds, leaves, sheep wool, or wood shavings. If you plant in pots, mulch as well. Mulch helps reduce water evaporation, so you don’t have to water too often. It also reduces the growth of weeds, which I appreciate because weeding is not my favourite task.
If you live in a cooler climate and don’t have a greenhouse, you may want to consider foil tunnels around the plant rows. I wouldn’t use covers as they are too heavy and could eventually break the plants off.
Daily Care and Maintenance for Cucumbers
We’ve got our cucumber babies safely in the earth; now we’ve got to make sure that they thrive.
Watering Routines
Cucumbers consist mostly of water, and that’s why they need lots of it. Water cucumbers thoroughly every two days, daily when it’s hot. If they get too little water, cucumbers produce bitter fruits that are also slightly poisonous.
To check if my cucumbers need watering, I test the soil by touching the surface and even poking my finger into the ground. If it feels dry, it’s time to water.
I water the plants thoroughly, but ensure I don’t overwater them. With good drainage, either in the patch or the pot, that’s no problem.
Fertilising
Once your plants are thriving, the next step is to support them with the right nutrients.
Cucumbers are heavy feeders, which means they need a lot of nutrients. I prepare the patches in spring by adding compost and raking it in.
After the first fertilisation during transplanting (see above), I don’t feed the plants until the first buds show. Now they need phosphorus and potassium, and we can feed them with a tomato fertiliser.
Every 3 – 4 weeks, I add some nettle manure to the water and water my cucumbers with it.
Temperature control
We can’t control the temperature outside, of course, but we can monitor it in a greenhouse. I also had times when I forgot to open the windows of my greenhouse and only got there around noon or even later. Especially on sunny summer days, temperatures get high very fast in a greenhouse, and although cucumbers need it to be warm, hot is too hot, and temperatures above 35 °C (95 °F) can stress plants and cause blossoms to drop.
The same goes for colder temperatures. Below 10 °C (50 °F), cucumbers will stop growing. When low temperatures are forecast, we just protect our babies with a foil tunnel or by closing the greenhouse windows.
If you cultivate cucumbers in pots, put them indoors when it’s too cold outside. If it gets warmer, you can always put them back out.
How to build a cucumber trellis
The easiest method to build a trellis for your cucumbers is by binding three long rods together at their upper end and installing them like a tipi. The cucumbers will climb upwards, and the fruits will stay clean.
This trick also allows you to plant more cucumbers in the same space.
To protect cucumbers from thrips and spider mites, I usually use beneficial insects like lacewing larvae and predatory mites. This method works best in the greenhouse; outdoors, it’s a bit trickier.
The best prevention against pests and diseases, though are healthy plants! Follow the care guidelines in this article—consistent watering, proper spacing, good air circulation, and companion planting—and you’ll avoid most problems.
Pollination and Fruit Development
Cucumbers develop male and female blossoms, which can be easily distinguished. Understanding the “who’s who” of cucumber blossoms improves pollination chances and makes it easier for you to pollinate by hand if necessary.
Understanding male and female flowers
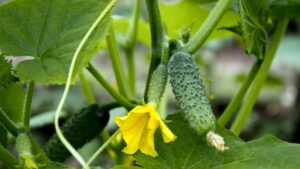
Cucumber plants produce male and female flowers on the same plant. Both flowers are yellow and have five petals that grow thinner towards the end and slightly bend outwards.
The petals build a corolla, which is surrounded by green sepals.
Male flowers
The male blossoms have a tube at the base of the corolla from which the stamens develop, which produce pollen. Male blossoms grow in bundles on thin stems in the leaf axils.
Female cucumber flowers
Female blossoms develop pistils instead of stamens. They grow separately on the plant and show a slight fruit setting.
Some cucumber varieties, the so-called parthenocarpic varieties, only produce female flowers. They don’t need pollination and are especially suitable for greenhouses. Outdoor cucumbers, however, need male flowers for pollination, so they should generally not be removed.
Should you remove male cucumber flowers?
It’s not necessary to remove the male flowers, but in some cases it can help to enhance the number of fruits and their quality.
Male flowers lack fruit set at the base. Their main task is pollination.
When you see that your cucumber plants have too many male flowers compared to female ones, you can remove some of the male flowers to concentrate the plants’ energy on female flowers and thus fruit formation.
Don’t overdo it, though. There should always be enough male flowers on the plants to guarantee pollination.
How to remove male flowers the right way
Identify the male flowers: they have a slim stem with no small cucumber at the flower base.
Choose the right time: The best time to remove male flowers is in the early mornings when the plant is not stressed (yet), and the flowers are still closed.
Clean tools: Use a clean and sharp knife or garden scissors to remove male flowers to prevent infecting the plants with diseases.
Cut off the flower: Cut the male flower stem about 2 – 3 cm (3/4 – 1 1/4 inches) below the flower, without damaging the nearby leaves or stems.
Training and Pruning Cucumbers
It’s common knowledge that we need to prune tomatoes, but what about cucumbers? Well, let’s say there’s no common consensus on whether pruning cucumbers is necessary.
Let me explain to you the reasons behind that and how it’s done. After that, you can decide for yourself if you want to prune your cucumbers or not.
Why prune cucumbers?
Limited space
In general, we only prune cucumbers that climb up a trellis and have limited space to grow. Cucumber plants can claim lots of space – if we let them. To prevent them from proliferating, especially in a greenhouse, we guide one or two shoots upwards. All other side shoots are pruned.
Prevent diseases
Cucumber diseases like mildew especially appear in a humid and warm climate. The danger of infection is enhanced when there are too many leaves on the plants that keep the humidity inside. Pruning removes side shoots and their leaves and ensures improved aeration.
Enhance fruit formation
One shoot can only care for a limited number of fruits. When the main shoot has many fruits, the side shoots should be pruned. After all, we don’t want more leaves but more fruits.
Additionally, by the end of August, it’s not sensible to let the cucumber plant produce flowers. It’s too late for fruits that develop then to mature before cold temperatures strike.
When you have enough space – usually outdoors instead of in the greenhouse – you can just let the cucumbers grow as they like, as long as they don’t get in the way of other plants.
How to prune cucumbers
Pruning cucumbers in itself is quite easy. Simply cut off suckers that develop in the axis between the main and side shoot, either with your fingers or with a knife or garden scissors.
Also, remove side shoots and leaves from the two feet at the bottom. That way, you can water more easily without wetting the leaves.
When your cucumber plants have reached the top of the trellis, cut off the shoot tips. That way, they won’t grow any higher.
Make sure your hands and tools are clean when pruning so that you can’t spread diseases.
Hand pollination techniques
Usually, pollination is done by flying insects like bees, bumble bees and others. However, due to unfavourable climatic conditions like cool soil temperature and high humidity, pollinators may not be able to do their job properly. In that case, we may have to pollinate our cucumbers ourselves:
The best time for hand pollination is mid-morning when the flowers start to open. Make sure you have both male and female flowers at the same time.
Pick a fresh male flower and carefully remove the petals to expose the stamens.
Rub the male stamens directly on the stigma of the female flower. Alternatively, you can use a small, clean brush to take the pollen and transfer it to the stigma of the female blossom.
If successfully pollinated, female cucumber blossoms will soon develop little cucumber fruits below the flower.
But how do we know when cucumbers are ready to harvest? And how to harvest them properly? I’ll show you.
Harvesting Cucumbers – When and How
Finally! Our cucumbers are ready to be harvested. Depending on the variety, that can be as early as 8 weeks after seed-starting.
It’s best to harvest middle-large cucumbers. Very young cucumbers don’t taste good, yet very large fruit have a thick skin and contain many seeds.
To harvest cucumbers, cut them off with a sharp knife or garden scissors. If you try to rip the fruit off the branch, you usually end up ripping off the branch or part of the fruit. Yep, speaking from experience here.
The fruit stem, or at least part of it, should always remain at the fruit so that it stays closed. This is especially important when you want to store the fruit.
How to Store Cucumbers
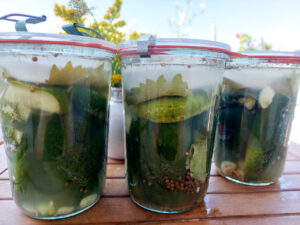
Fermented gherkins
Fresh cucumbers should always be stored in a dry and cool place, optimally at 10 – 13°C (50-55°F). They shouldn’t lie next to apples or tomatoes, as these fruits emit the gas ethylene, which makes cucumbers spoil faster.
Cucumbers don’t store equally well in the fridge, as the temperatures are too cold for them.
For long-term storage, preserve your cucumbers. Pickled gherkins are a classic, as are fermented gherkins.
And if you have more cucumbers than you and your family could ever eat, give them to friends and neighbours. I’m sure they’ll love it!
Troubleshooting
1. Why do my cucumber plants have flowers but no fruit?
Common Causes & Solutions:
Immature plants: It takes about 4 weeks from pollination to harvest. Stay patient!
Temperature stress: Temps are either too high or change a lot between high and low. Provide shade in extreme heat and protect your plants from cold nights with fleece or bring the pots indoors.
Pollination problems (especially in the greenhouse). Open the windows and door, and plant insect-friendly flowers and herbs to attract pollinators.
2. Why are my cucumbers bitter?
Common Causes & Solutions:
Irregular watering: Water cucumbers thoroughly at least every other day, if in containers, at least once a day.
Heat stress: Temps are either too high or change a lot between high and low. Provide shade in extreme heat and protect your plants from cold nights with fleece or bring the pots indoors.
3. Why are my cucumber leaves turning yellow?
Common Causes & Solutions:
Overwatering: Poke a hole near the cucumber roots and check the soil. If it’s dry, water thoroughly
Nutrient deficiency: Cucumbers are heavy feeders and need a lot of nutrients. Add nettle manure or tomato fertiliser
Natural ageing: With age, cucumber leaves turn yellow and die
4. Why do cucumber plants suddenly wilt?
Common Causes & Solutions
Heat stress: Temps are either too high or change a lot between high and low. Provide shade in extreme heat and protect your plants from cold nights with fleece or bring the pots indoors.
Underwatering: Water cucumbers thoroughly at least every other day, if in containers, at least once a day.
Root damage: If the damage is small, the plant could recover
Fungal disease: Remove the infected leaves immediately and discard them in the garbage (not the compost). The plant may recover.
5. Why do my cucumbers grow small or misshapen?
Common Causes & Solutions
Poor pollination: Attract more pollinators by planting flowers and flowering herbs; open the windows and doors of your greenhouse to let the insects in.
Inconsistent watering: Water cucumbers thoroughly at least every other day, if in containers, at least once a day.
Nutrient deficiency: Cucumbers are heavy feeders and need a lot of nutrients. Add nettle manure or tomato fertiliser
6. What is the white powder on my cucumber leaves?
The Cause: This is powdery mildew, a fungal disease prone to cucumbers.
The solution: If just a few leaves are infected, remove them immediately and discard them in the garbage (not the compost). Also, make sure that air gets to the plant and, if necessary, prune it.
If the disease has spread too far, remove the whole plant.
7. Why did my cucumber plants stop producing fruit?
Common Causes & Solutions
Natural ageing: With age, cucumber plants stop producing fruit
Nutrient deficiency: Cucumbers are heavy feeders and need a lot of nutrients. Add nettle manure or tomato fertiliser
Diseases: Diseases weaken the plant
Lack of harvesting: The more you harvest, the more fresh fruits the plants produce
FAQs – Questions and Quick Answers
✔️ How long does it take to grow cucumbers?
Depending on the variety, between 50 and 75 days from seed-starting to harvest.
✔️ Do cucumbers need a trellis?
It’s advisable, especially when your space is limited. It’s optional, though.
✔️ How many cucumber plants do I need per person?
About 2 plants of salad cucumbers and 4 plants of pickling cucumbers per person.
✔️ Can cucumbers grow in pots or containers?
Absolutely. Just make sure they are large enough (diameter about 40 cm / 16 inches)
✔️ How often should I water cucumbers?
Check the soil and water when it feels dry. Outdoors, water regularly and deeply every 1 – 2 days, in a container, water daily or – if very hot – twice a day.
✔️ When is the best time to plant cucumbers?
After the last night frost, in zone 7b, that’s mid-May. In the greenhouse, you may plant two weeks earlier.
✔️ Can cucumbers grow in partial shade?
Yes, but only if the space is protected from wind, the soil has good drainage, and the plants are properly fertilised.
Time to Get Growing
Remember when I told you earlier how wonderful it would be to just go into the garden, pick a cucumber and bite into it right away? You’re just a few steps away from cultivating your own cucumbers this season.
I hope I’ve shown you that it’s not rocket science and that you definitely have it in you to grow cucumbers this year!
Just keep in mind to start them from seeds about 4 – 6 weeks before transplanting, leaving them enough space and at best, grow them on a trellis.
If you then water and fertilise them regularly during the summer and make sure that they stay healthy, there’s nothing between you and a delicious bowl of cucumber salad!
Ready to get started? Your cucumber-growing adventure begins now! 🥒
If you want to grow more delicious vegetables in your garden, you can read on here:
Lacto-fermented radishes are among the easiest ferments to make, and now I’ll show you how it’s done.
Radishes are among the first rewards of the spring garden — if you’re wondering what else to start early, my guide to what to sow and plant in March might be helpful. With a cultivation time of just 3 – 4 weeks, they can be ready to eat by early to mid-April, if we sow them as early as March, in the greenhouse or a cold frame. If you’re planning your spring garden, have a look at what to sow and plant in March to make sure you don’t miss the first radish harvest of the year.
One of my greatest delights in spring is to make a large spring salad bowl and add the first radishes, freshly harvested from the greenhouse. But that’s not all…
Why ferment radishes at all?
Now, I don’t know about you, but I always seem to sow too many radishes. Or is it just that they all seem to ripen at once? Anyway, delicious as they are, I can only eat so many of them. To keep the surplus for later and thus prolong the season, I always make lacto-fermented radishes.
As you know, lacto-fermented vegetables not only taste wonderful but they’re also rich in probiotics, which is great for your gut health. So apart from preserving our harvest, we also make something really beneficial for our health.
Fermentation Safety Basics
If you’ve never fermented before, or if you just need a little reminder: fermentation is perfectly safe when you observe a few rules:
Wash the vegetables in cold water before processing them
Make sure that they stay under brine all the time.
When the brine smells tangy, that’s good. If your ferments have developed mould or get slimy, discard them.
Fermentation equipment
Good news: you don’t need special equipment.
A cutting board and a knife come in handy, and I think it’s safe to assume that you already have those in your kitchen.
If you have fermentation jars or pot with weights, that’s wonderful. But honestly, you don’t have to go all crazy with equipment when fermenting, especially if this is your first time. A large jar with a fitting lid will do nicely. As a weight, you can use a freezer bag filled with brine and closed tightly.
Wash the radishes and dry them. Cut off the root and the leaves.
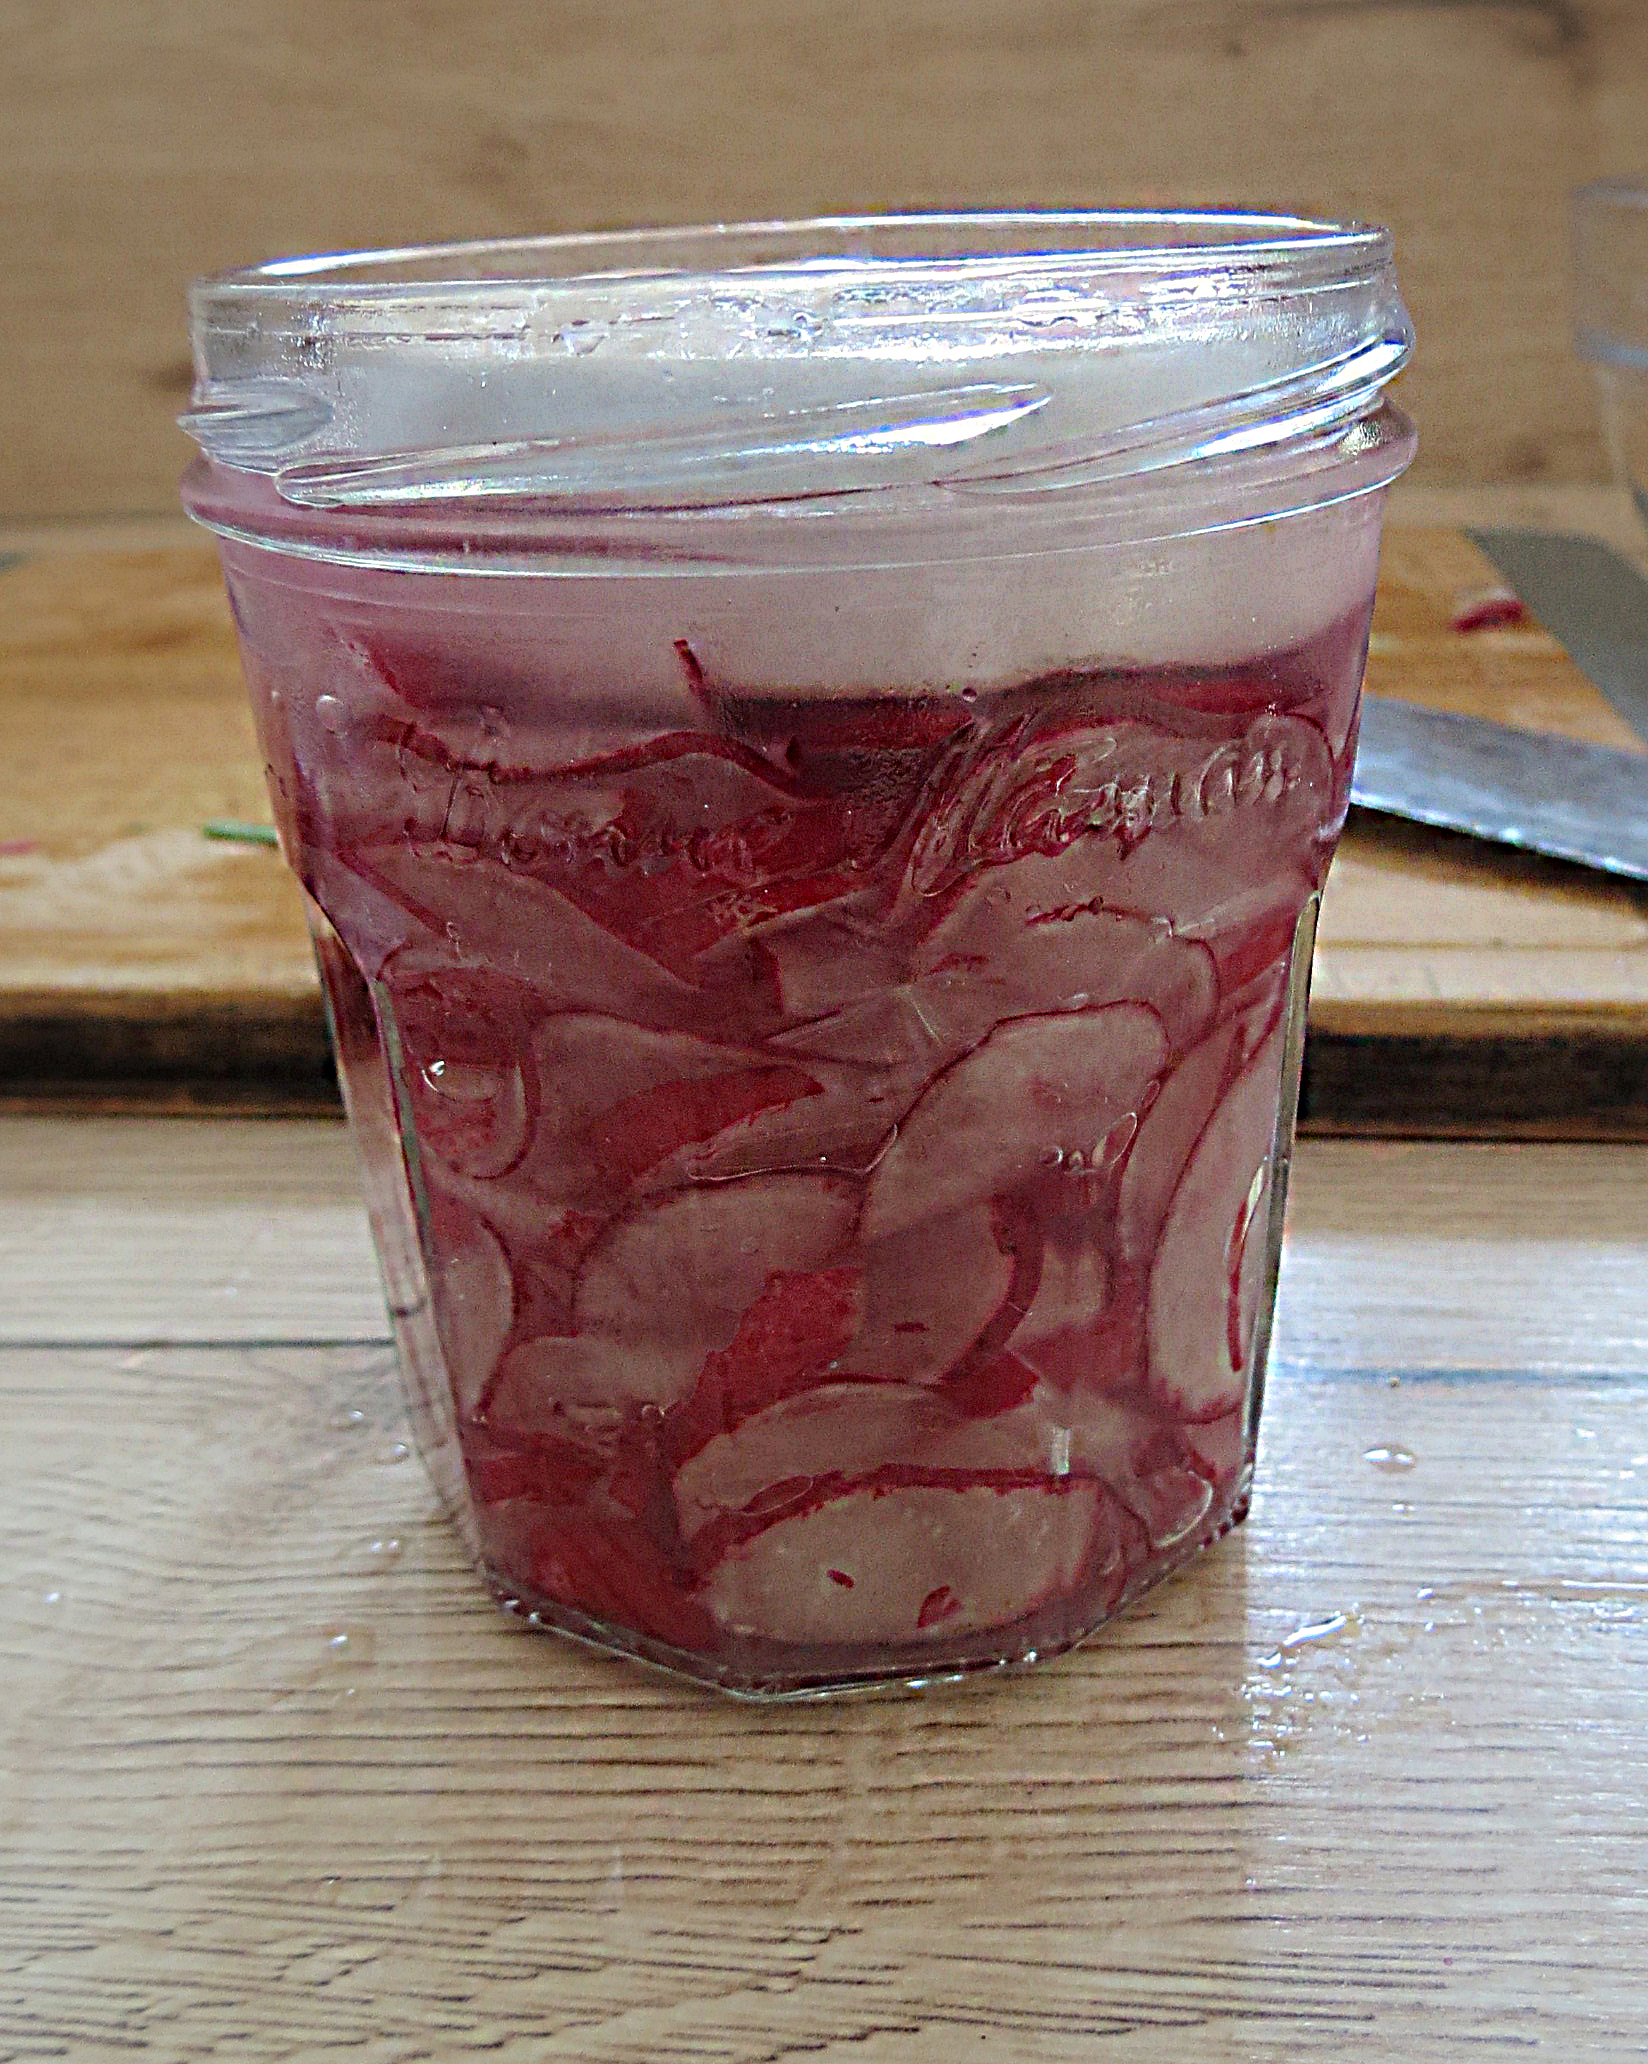
On your cutting board, slice the radishes thinly.
Put the radish slices into a bowl and mix them with half the amount of salt. Rub the salt in well and taste the radishes: they should be salty but not too much. If necessary, add some salt. The radishes become wet and soft, and slowly a brine builds.
Now, put the radishes portion by portion into the fermentation container of your choice and press them tightly with your hands or a tamper into the jar to avoid air bubbles. There should be enough brine to cover the radishes.
Leave about 2 cm to the lid, put a weight onto the radishes so they stay under the brine, and close the container.
Put the bowl onto a tray and let the radishes ferment for 5 - 14 days in a cool place without direct sunlight. Make sure that there's always enough brine.
Taste the radishes after 5 days. If they are ready, store them in the fridge or another cool place; if not, leave them out to ferment further until you like the taste.
Notes
Fermented radishes can be stored in the fridge or in a cool basement for up to 6 months.
Whole fermented radishes
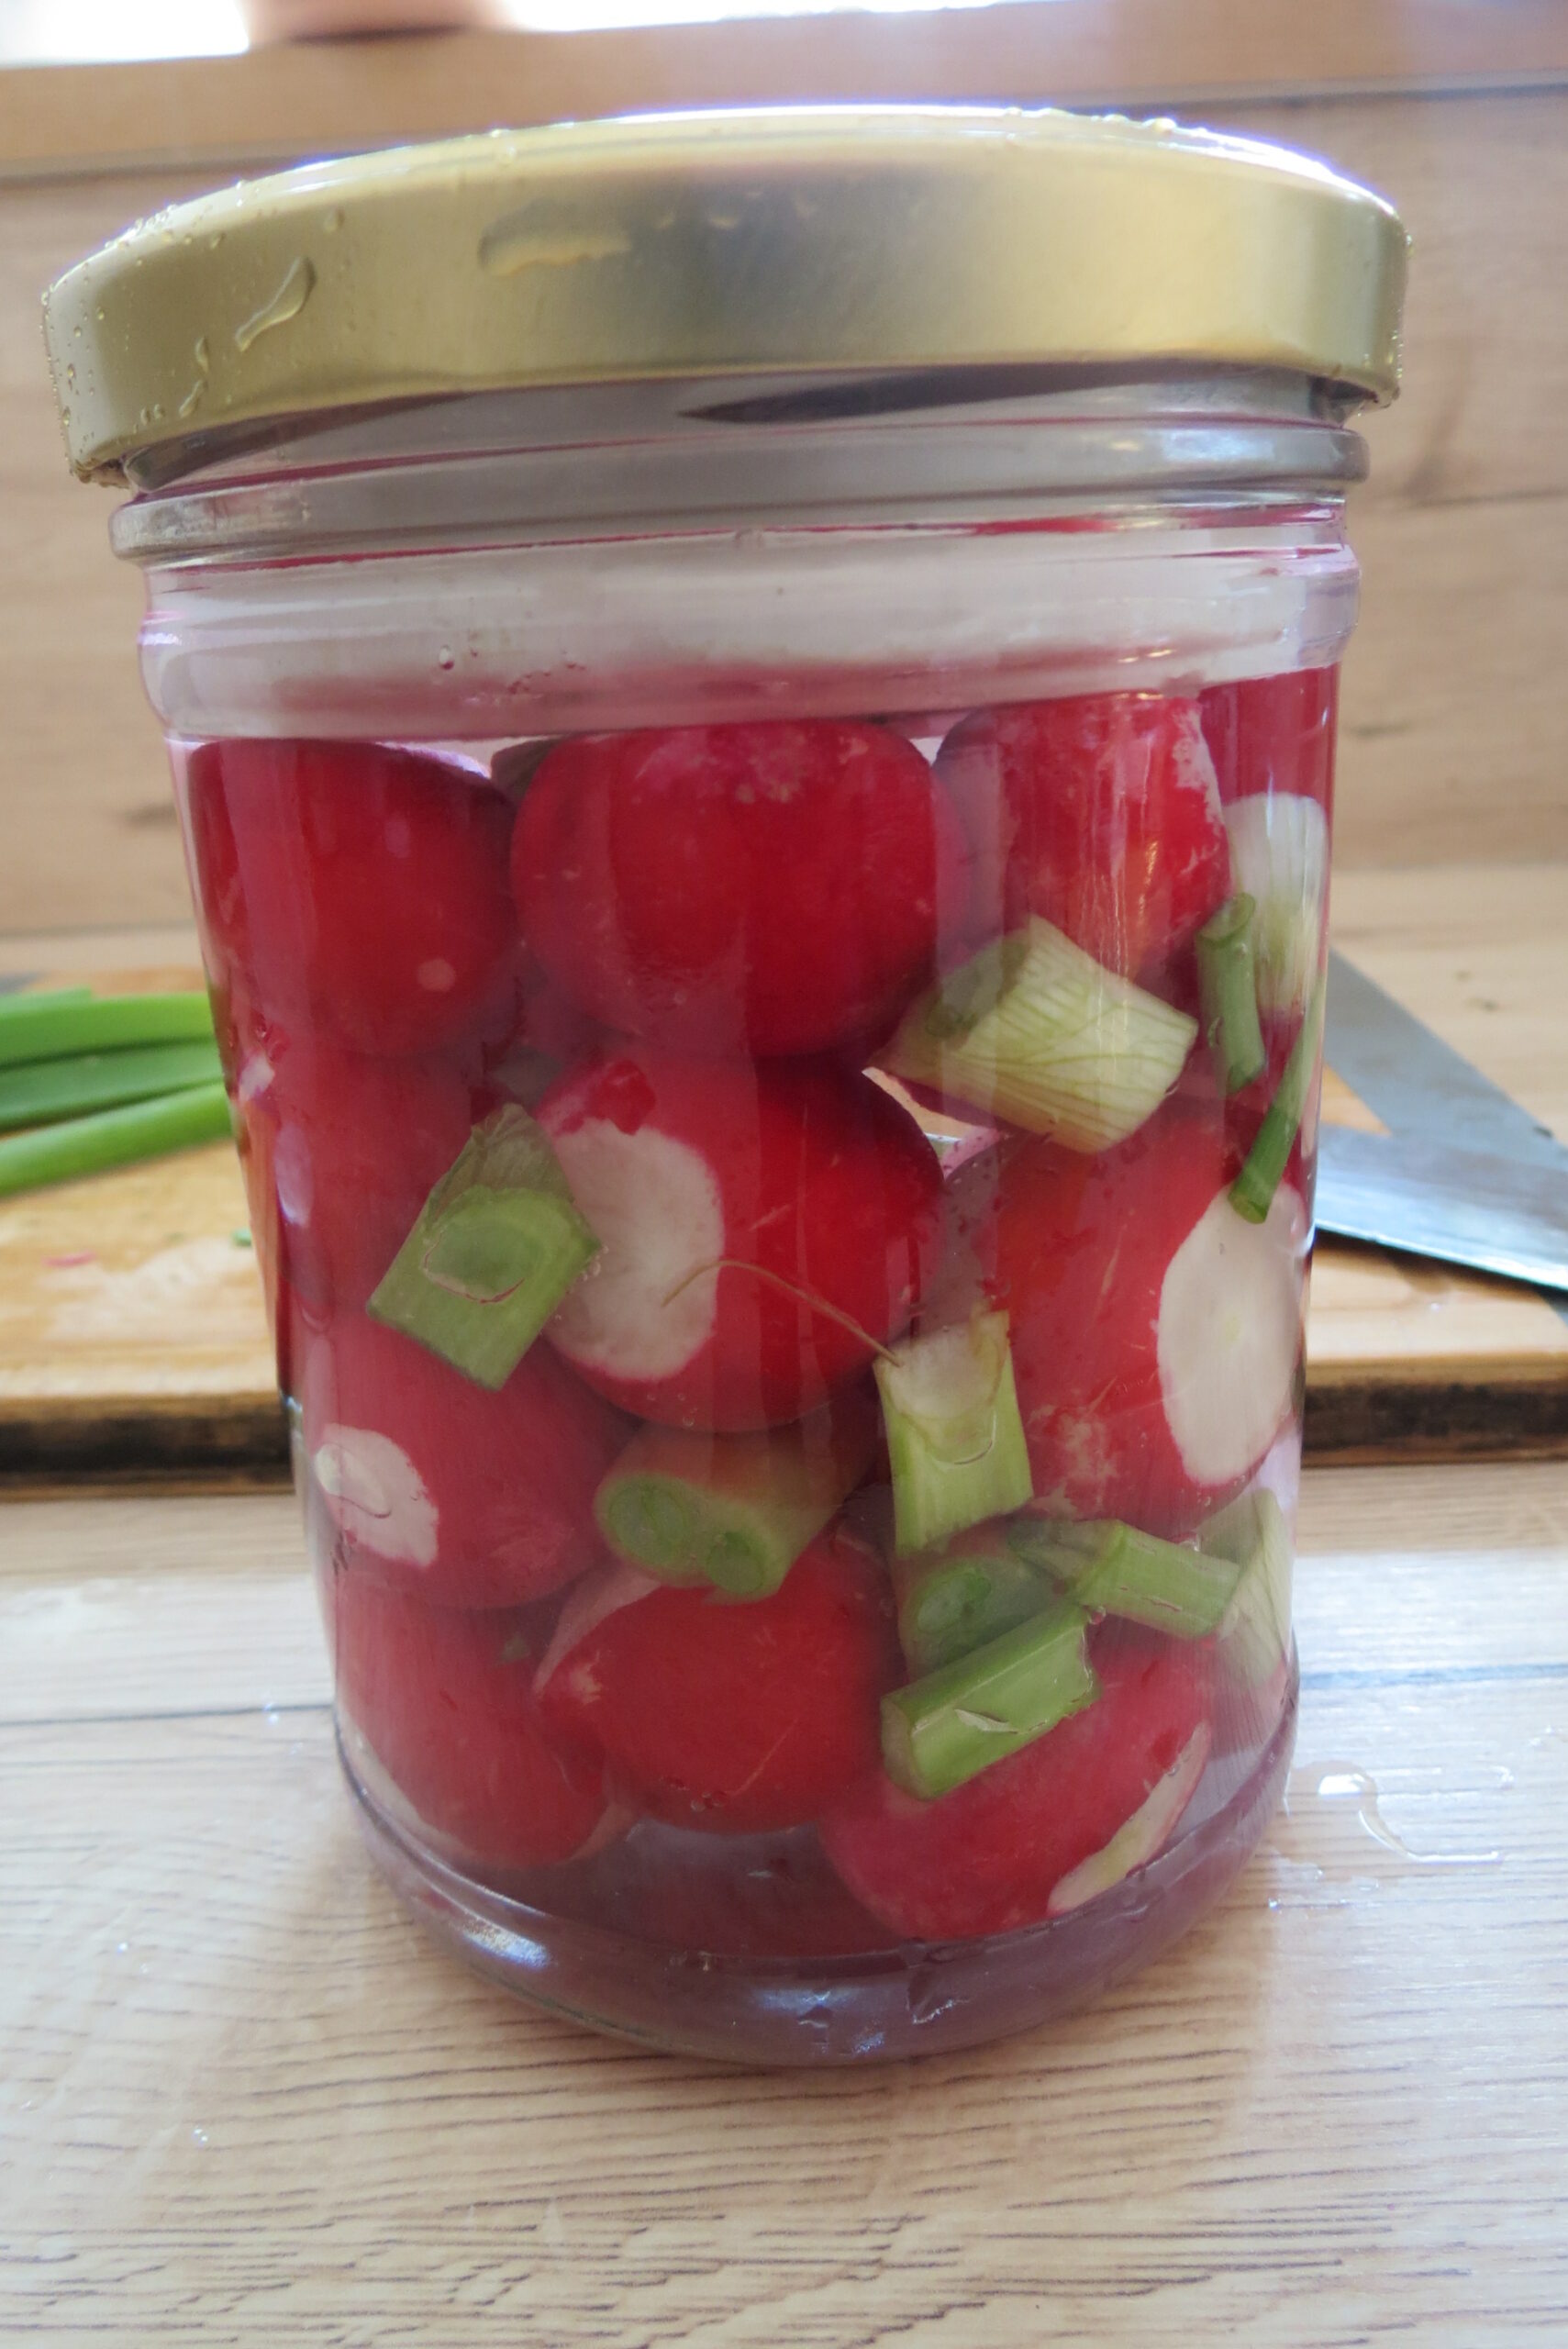
This recipe uses a different method. As the radishes are left whole, we make a brine of salt and water and cover them with it.
Fermented whole radishes
Ferment whole radishes with spring onions in a simple brine for a crisp, tangy preserve that keeps for up to six months.
Wash the radishes and spring onions in cold water and put them into the fermentation container of your choice. Make sure the vegetables are stacked tightly.
For the brine, dissolve the salt and sugar in the water and pour so much brine over the vegetables that they are fully covered.
Store the leftover brine (up to one week) in the fridge.
Secure the lid on the fermentation container.
Put the jar onto a tray and let the radishes ferment for 7 - 10 days in a cool place without direct sunlight.
If too much brine evaporates, fill up with the brine in your fridge.
After 7 days, taste the radishes. If you are satisfied with the taste, store the radishes in the fridge. If not, leave them out to ferment further until you like the taste.
Notes
You can store the fermented radishes in the fridge or a cool basement for up to 6 months.
Variations
Once you master the basic ferment, try these variations:
Add ground coriander for an exotic flavour
Minced garlic adds some sharpness
For more spiciness, add chilli flakes or grated ginger.
Slices of thick, organic lemon peel make the fermented radishes more tangy.
These are just a few additions for fermented radishes. But don’t let me stop you there. Get creative!
Serving Suggestions For Fermented Radishes
Now that your radishes are ready, here are some of my favourite ways to enjoy them:
Add fermented radishes to your grain or Buddha bowls
Use them as a side dish for meat or fish
Top your salads with them for an extra tangy kick
Fermented radishes make a wonderful crunchy side to Asian-inspired dishes
Eat them on homemade sourdough or rye bread with butter
Sneak some of them into your children’s lunch box 😁
Frequently Asked Questions
What radishes can I ferment?
You can make this recipe with any variety available, red, white and even daikon radishes. Red varieties, however, are particularly pretty.
Why did my fermented radishes lose their colour?
That’s totally normal. In the course of the fermentation process, the radishes will lose their colour, and the brine becomes opaque.
Why does my ferment smell strong?
If your brine smells tangy, salty and sharp, that’s perfectly normal. If it smells mouldy, however, (and if mould has formed), discard the ferment.
How long do fermented radishes take?
Radishes take between 5 and 14 days to ferment. It depends on the size of the radishes (whole ones will take longer to ferment than slices) and temperature. Taste your fermented radishes after 5 days, and if you like the taste, store them in the fridge or a cool basement.
How long can I store fermented radishes?
When you’re satisfied with the taste, store fermented radishes in the fridge or a cool basement for up to 6 months.
Bringing the Season into the Kitchen
Seasonal cooking and preserving doesn’t have to be complicated. Small habits — sowing a few seeds, harvesting what grows, preserving a little at a time — slowly shape a more seasonal rhythm in everyday life. That’s exactly what I explore here on Seasonal Simple Life.
Fermented radishes are a small spring miracle — made in minutes, enjoyed for months. I hope these two recipes inspire you to make the most of your harvest, however abundant it turns out to be. Have you tried fermenting radishes before? Or are you giving it a go for the first time? I’d love to hear how it goes.
Continue your seasonal journey. If you’re enjoying working with your spring harvest, here are a few more ideas to help you grow, preserve, and cook with the season:
These April reflections are part of a monthly practice of noticing what each season asks of us.
In this article, I share why April’s unpredictability may make its demands, but also how we can learn from nature to embrace this unsteadiness and live with April’s energy instead of against it. Living seasonally in April is the key to the flexibility this month is demanding from us.
April is not known for its temperance. One day, it’s raining, and a harsh wind is blowing, the next the sun is shining, and it gets so warm that you haul out your shorts and t-shirt. Only to get back to your down jacket because it’s snowing the next day. Yet, even though it may still be cold, there’s a discernible shift in the air. The light is changing visibly, and all of a sudden, nature is getting busy.
The transition from winter to spring is not always as smooth as it is in March. Instead, the seasonal rhythm shifts into the next gear. April, therefore, is more like a bridge between the soft, slow awakening of early spring and the full vibrancy of late spring and early summer.
Here in Bavaria, March has been rather warm and dry. Early bloomers like cherry trees, hawthorn, daffodils and hyacinths have sprung into bloom, painting a lovely picture of vibrant colours on the background canvas of still-dull greens and browns. Last week, however, started in April-like fashion with temperature changes of more than 20 °C / 36 °F (- 3 °C / 27 °F during the night and 18 °C / 65 °F during the day), giving us a hint of what April will have in store.
I use all those blooms as an example of resilience and flexibility, though. They defy the weather and bloom nevertheless, delighting us (and the busy insects) with their colour and overwhelming scents.
The energy of spring and summer is already there; let’s take our cue from the blossoms and meet it with the same resilience.
As nature accelerates, our own activity naturally follows.
The Garden in Full Motion
While in March the garden was slowly stirring back to life, it’s now buzzing with energy. When I’m in the garden, I love watching the bees humming busily while looking for early blooms they can pinch nectar from. The birds are on the lookout for twigs, straws and other nesting material, picking worms in the meantime for sustenance. Even the odd squirrel is hopping nervously from patch to patch, trying to remember where it buried its nuts last autumn.
When the soil has warmed, we can already sow some cold-hardy vegetables like spinach and radishes and plant the first lettuce.
Also, you may want to plant some blooms in your garden to attract more of those busy pollinators.
Natural as it may be to head out into the garden, though, we’ll also want to prepare our house for spring.
Preparing the Home for Spring
If you haven’t done so already, now is kind of the last opportunity for a spring cleaning. Daunting as it may sound, it’s actually quite satisfying to organise, throw out and deep clean your house. Top it with some fresh flowers and Easter decorations, and spring can come.
Speaking of Easter: the return of the light, blooms and life didn’t go unnoticed with our elders. What we now celebrate as Easter has had a long tradition before that. It’s the celebration of the earth’s awakening after winter and its newfound vigour, vitality and fertility. A new year lay ahead (remember that in ancient times the new year was celebrated at the spring equinox), and with it the promise of new life and the possibility to grow everything that’s needed for survival.
Today, few of us rely on Mother Nature for survival, at least not directly. But whether you live self-sufficient or not, the joy at the start of a new growing season and the reverence for all that grows again is a wonderful reason to celebrate.
Self-Care in April
It’s easy to become infected with the new energy of spring, but it’s equally easy to fall into the “busy trap” that leads to overwhelm and fatigue. I mean, I get it, been there numerous times. We not only want to do everything at once, now that the sun’s out and it’s warm again. We also have the feeling of being behind and too slow.
None of it is true, however. There’s enough time to do our garden work and cleaning. Consistency, as always, is key here, and it’s more advisable to take small, manageable steps instead of overloading our to-do lists.
Self-care is an important factor in April. Short, mindful breaks help us to preserve our newfound energy and recharge our batteries.
Self-care for body….
How better to serve our bodies in April than with fresh food? The first radishes are ready, as is spinach and by the end of the month, we can even harvest asparagus – or buy it at a farmers’ market. Early herbs like chive and chervil can be found now and used to spruce up a freshly cooked dish.
I don’t know about you, but in spring I start craving fresh salads again, for example, this spring salad with poached eggs. As a dessert, I love rhubarb cake now or something with fresh, tangy lemons.
To burn it all off, a walk or a bike ride is perfect. Walking in spring sunshine is a wonderful opportunity to watch the wildlife and flowers. But don’t let the weather keep you from your outdoor exercise. Just grab a thicker coat and your umbrella and take a quick stroll. And when was the last time you put on your wellies and hopped into puddles? You’re never too old for that.
… For Mind…
After a short stroll in the rain, I can’t wait to snuggle back in on my couch with either a good book or some good music. Right now it’s Bachs passions for me as they’re performed a lot before Easter. And honestly, every time I listen to this divine music, I gather something new. Magnificent.
If classical music is not your thing, curate a spring playlist with your favourite songs. Music is an important means of well-being.
On sunny or at least dry days, I like drinking my morning coffee on the balcony. Sometimes, I get out there after lunch, grab a good book and read for a quarter of an hour in the fresh air. After months of looking out at the garden through the window, it’s so lovely to be out again!
… and Soul
The energy of the new season can give you the boost to try out something new. If you have pondered starting water colouring, embroidery or soap making but didn’t have the energy to get into gear, now is the perfect time.
I also love visiting the flower fields in our botanical garden here in Augsburg in April. There are lots of spring flowers and trees in full bloom now. It’s not only a sight for sore eyes but also a challenge for the nose, as many of these blooms endow us with overwhelming scents which go straight into our limbic system and rewire us for spring. Crazy, isn’t it?!
Another of my favourite leisure activities in April is going on a photography trip. That sounds fancier than it is, though. It means just grabbing my camera or phone and taking photos in nature. This not only rewards me with nice photos but also sharpens my eye for the small daily changes outdoors that I would otherwise overlook.
Easter is the perfect opportunity to invite friends and family for a brunch and maybe even an Easter egg hunt afterwards. When everybody brings something to eat, you won’t have to do all the work and can enjoy this spring gathering.
What April’s Unpredictability Can Teach Us
April is unsteady, no denying it. Some days are warm, sunny and just wonderful, while others are cold and harsh.
Seasonal living does not mean fighting against these quick changes. Instead, April invites us to adjust, to stay flexible, and to respond to what each day brings.
You planned to do some garden work today, but now it’s raining? Clean up your house instead, listen to your spring playlist and maybe decorate Easter eggs.
The laundry is piling up, waiting to be ironed, but the sun has come out again? Head outside and get your hands in the dirt. I promise, no one will touch your laundry in the meantime 😉.
Uncertainty is what makes April special – and teaches us trust. Trust in change, in becoming, and in the quiet unfolding already underway.
Until next month — stay in rhythm with the season.