
.
As you may know, I preserve a variety of foods for my little family every year, and I enjoy trying out new recipes. One of the undebatable must-make preserves, however, is homemade gherkin pickles. That satisfying crunch when you bite into a perfectly pickled gherkin can hardly be topped.
But that’s not the only way to use them. In fact, gherkin pickles are extremely versatile: they make a wonderful addition to a cold lunch and sandwiches and are an essential ingredient for burgers, hot dogs and traditional German rouladen. Or you just snack on them between meals right out of the jar. At least it’s healthier than that bar of chocolate 😉
I used to think that pickling gherkins was complicated and only for an experienced chef, but it’s actually pretty easy, and you only need a few ingredients. And the best thing: it tastes so much better than the store-bought stuff! Are you ready to learn how to make homemade gherkin pickles? Let’s dive in.
Understanding Gherkins
What Are Gherkins?
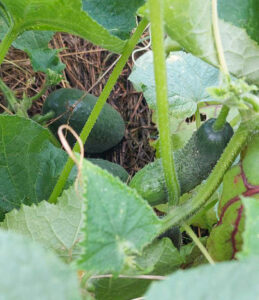
Contrary to what many may think, gherkins are not just regular baby cucumbers but specific cultivars or even an entirely different species, like Mexican sour gherkins.
Gherkins are typically harvested small (3 – 8 cm/1 – 3 inches), and even if you’d let them grow (which you wouldn’t unless you want to harvest the seeds), they hardly exceed 15 cm (6 inches). Cucumbers, on the other hand, grow larger and are harvested when they are 15 – 20 cm (6 – 8 inches) long, some even longer.
As gherkins are picked small, they contain fewer seeds and less water, which makes their texture firmer and crunchier than that of regular cucumbers. Due to their high water content, cucumbers are only partially suitable for pickling as they tend to become mushy.
Gherkin skin is also thicker and bumpier, which helps it hold up better during the pickling process. At the same time, gherkin skin is also more porous, allowing the brine to penetrate more effectively.
As gherkins maintain their shape and crispiness much better during the pickling process than regular cucumbers, they are the preferred choice for homemade and commercial pickles. You can use cucumbers for a quick pickle, as well, but when it comes to long-term storage, they won’t hold up.
When to harvest gherkins
Once your gherkin plants start to flower, check them daily. Like zucchini, gherkins can grow from tiny to monster in (almost) seconds.
Gherkins should be hard when you squeeze them gently; their skin should be glossy and the bumps well-defined.
During peak growing season, you’ll want to harvest gherkins every 1 – 2 days to catch them at the right stage. Gherkins are best harvested in the mornings when they are still hydrated from the overnight moisture.
Good harvesting sizes are
- Cornichons: 3 – 4 cm (1 – 1.5 inches) for the smallest, most premium pickles
- Small gherkins: 4 – 6 cm (1.5 – 2.5 inches) for classic pickle size
- Medium gherkins: 6 – 8 cm (2.5 – 3 inches); don’t let them grow larger or they’ll become too seedy
If you don’t grow gherkins in your garden, check out local farmers’ markets or speciality stores for fresh produce.
Essential Equipment and Ingredients
Equipment Needed
There’s some general equipment you’ll need for pickling, which is:
Glass jars
You can either use Mason jars or twist-off jars. It’s best to pick them not too large, as the pickles don’t last long once the jar’s open. So, better make smaller portions.
Bowl
in which you can let the gherkins soak in salt brine overnight.
Pot
Use a non-reactive pot in which you can prepare the brine.
Measuring tools and scales
You’ll need a measuring cup for the liquids, scales for weighing the sugar and a tablespoon for measuring the salt and spices.
Core Ingredients
Now we come to the ingredients. You’ll need
Gherkins
Well, obviously. They’re best when freshly picked, of course, but it’s also fine to use them after they’ve been harvested a day or two. Just make sure they don’t shrivel or become soft.
Also, check whether the skin is hard and unmarred. Dismiss any gherkins with blemishes and spots.
Salt
It’s best to use pickling salt as it doesn’t contain any additives like iodine or anti-caking agents, which can make the brine cloudy. It’s also finely grained so that it’ll dissolve quickly and completely in the brine.
An alternative to pickling salt is high-quality sea salt, but make sure you take one without additives.
Kosher salt is also acceptable, but as it’s less dense than other salts, measurements must be adjusted: you’ll need about 25 % more salt to make the brine equally saline. Also, kosher salt is rather coarse and takes longer to dissolve.
Vinegar
There’s a variety of vinegars you can try for your pickles! Here are my favourites:
White distilled vinegar
This is the most common choice for most pickle recipes. It has a clear, sharp taste that doesn’t compete with your pickles and spices. Also, it makes a clear brine and has a long shelf-life when used in pickles.
Apple cider vinegar
It has a milder and mellower taste and adds a bit of sweetness to your brine. As its colour is a light brown, it’ll tint your brine a bit, but in exchange, it add more complex flavours. Raw, unfiltered versions are the best, and you can use your homemade apple cider vinegar! Just make sure that it contains at least 5 % acetic acid.
White wine vinegar
This is the premium version for pickles, as it tastes cleaner than apple cider vinegar but more complex than white distilled vinegar. It costs a bit more, but it creates really elegant pickles.
Rice vinegar
If you want to try out Asian inspired pickles, rice vinegar is your preferred choice. Its taste is gentler and less aggressive, and it works wonderfully with ginger, garlic and sesame flavours.
Champagne vinegar
Now, this is the luxury version of vinegar, which you can see reflected in its price. However, it has a very delicate and refined taste and is ideal for special occasion pickles.
Pro tip: Blend vinegars for custom flavour profiles. Try a mixture of 2/3 of white wine vinegar and 1/3 apple cider vinegar, for example. Just make sure that the acidity is at least 5 %.
What vinegars should you avoid?
Some vinegars are just not suitable for pickling:
Balsamico vinegar
It’s too sweet and would overpower the pickles’ taste. Also, it would make the brine dark and cloudy.
Flavoured vinegars
Rather, add the flavours you want with your selection of herbs and spices
Vinegars with an acidity below 5%
5 % of acidity is necessary to keep the food safely in the sour zone where certain (dangerous) bacteria can’t grow.
Water
I use our tap water for pickling, and it works just fine. However, if you live in a region where your tap water is highly chlorinated or the house you live in has old (rusty) pipes that could leak iron, it’s best to carbon-filter your tap water before using it for pickling (or drinking or cooking for that matter).
If in doubt, taste your tap water. Smelling and tasting good? Then go on and use it for pickling. If it’s got a metallic or chlorine taste, filter it first.
Distilled water is NOT a good alternative, as – due to the lack of minerals – it tastes very bland and lets the pickles go mushy.
Flavour Enhancers and Spices
You can, of course, make pickles just with the above ingredients, and they’d taste ok, but to enhance the flavour, add spices and herbs.
The traditional herbs and spices for pickled gherkins are, of course, dill, peppercorns and mustard seeds, but try adding onions, garlic, bay leaves and tarragon.
Thyme and oregano are other herbs you can use.
If you want to experiment even more, include chilli flakes, juniper berries and/or fennel seeds.
Homemade Gherkin Pickles – Step by Step
Let’s dive in and make those yummy gherkin pickles!
Here are the ingredients you need for 3 – 4 jars of 500 ml:
1 kg gherkins
1 bunch of dill (including the flowers)
5 small laurel bay leaves
2 stems of savoury
2 stems of tarragon
1 tbsp peppercorns
1 tbsp mustard seeds
1 onion
800 ml water
400 ml white wine vinegar
50 g + 2 tbsp salt
250 g brown sugar
1. Sterilise your jars and lids by washing them with boiling water. Let them cool on a rack and dry them out.
2. Wash the gherkins thoroughly. Put them into a bowl, mix 50 g salt with 1 litre of water and pour this brine over the gherkins. They should all be under the brine. Cover the bowl with a plate and let them rest for 8 – 12 hours, at best overnight.
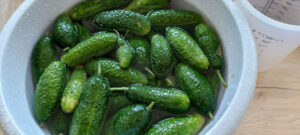
This is an essential step. The salt will pull out water from the gherkins (i.e. dehydrate them) and thus help them stay crisp for a long time. Don’t skip this step!
3. The next day, pour off the brine and dry the gherkins with a cloth.
4. Now, cut off the blossom end (that’s the one where there’s no vine attached), because it contains certain enzymes that may lead to mushy gherkins. You can also cut off the stalk end, but that’s optional. I usually leave about 0.5 – 1 cm (0.2 – 0.4 in) of vine on the gherkins.
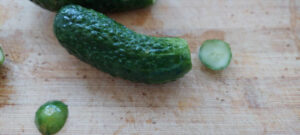
5. If the gherkins are very large, you may cut them into slices or sticks.
6. Wash and dry the dill and carefully remove the flower tips.
7. Wash and dry the savoury and tarragon.
8. Peel the onion and cut it into rings.
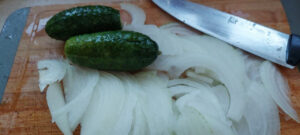
9. Layer the gherkins, herbs, onions and spices into the jars.
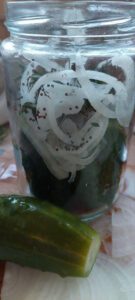
10. Put water, vinegar, 2 tbsp salt and sugar into a pot and bring the mixture to a boil. Stir until sugar and salt have dissolved.
11. Carefully pour the vinegar brine over the gherkins into the jars and close the lids immediately.
12. Let the jars cool down. Now you can either store them in the fridge for 2–4 months or preserve them in a water bath canner for 30 minutes at 90 °C. That way, the gherkins can be stored for at least a year.
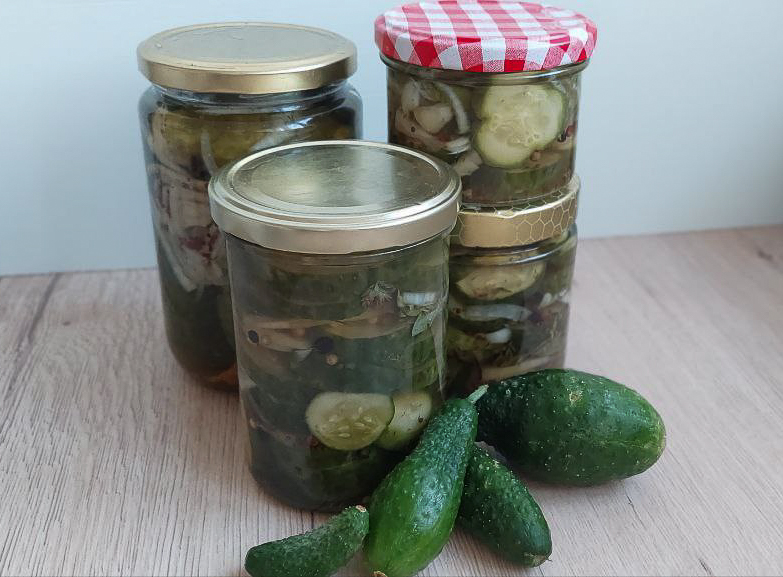

Homemade Gherkin Pickles
Ingredients
Method
- Sterilise your jars and lids by washing them with boiling water. Let them cool on a rack and dry them out.
- Wash the gherkins thoroughly. Put them into a bowl, mix 50 g salt with 1 litre of water and pour this brine over the gherkins. They should all be under the brine. Cover the bowl with a plate and let them rest for 8 – 12 hours, at best overnight.This is an essential step. The salt will pull out water from the gherkins (i.e. dehydrate them) and thus help them stay crisp for a long time. Don’t skip this step!
- The next day, pour off the brine and dry the gherkins with a cloth.
- Now, cut off the blossom end (that’s the one where there’s no vine attached), because it contains certain enzymes that may lead to mushy gherkins. You can also cut off the stalk end, but that’s optional. I usually leave about 0.5 - 1 cm (0.2 – 0.4 in) of vine on the gherkins.
- If the gherkins are very large, you may cut them into slices or sticks.
- Wash and dry the dill and carefully remove the flower tips.
- Wash and dry the savoury and tarragon.
- Peel the onion and cut it into rings.
- Layer the gherkins, herbs, onions and spices into the jars.
- Put water, vinegar, 2 tbsp salt and sugar into a pot and bring the mixture to a boil. Stir until sugar and salt have dissolved.
- Carefully pour the vinegar brine over the gherkins into the jars and close the lids immediately.
- Let the jars cool down. Now you can either store them in the fridge for 2–4 months or preserve them in a water bath canner for 30 minutes at 90 °C. That way, the gherkins can be stored for at least a year.
Troubleshooting Common Issues
Sometimes, things go wrong, and your gherkins won’t taste the way you expected. Here are some common issues with gherkin pickles and how to fix them:
Texture Problems
Mushy pickles
One of the reasons for mushy pickles is that you likely skipped the dehydration step, where you let the gherkins sit in salt brine for several hours. This is an essential step, don’t skip it!
Another reason is that you used distilled water. As it doesn’t contain any minerals, it’s more likely that gherkins go mushy.
It’s also possible that you used too little salt. Or the pickles weren’t completely covered with brine. When they get air contact, the gherkins will become mushy
Flavour Issues
To maintain a good balance of acidic, sweet and salty, stick to the above ratio of vinegar, water, salt and sugar.
If you use too much vinegar, for example, you’ll get overly acidic pickles. Too little vinegar will result in a dull flavour and possible safety issues.
Too much salt will preserve the pickles well, but you won’t want to eat them due to their overly salty flavour. Too little salt, on the other hand, will leave the pickles bland.
Too much sugar and you’ll get gherkin sweets, too little and the taste will be very one-dimensional.
Safety and Storage Concerns
Watch out for any visual signs of spoilage like white scum on the surface, mouldy gherkins above the brine or a cloudy brine that has been clear before (although a little cloudiness can be normal). These pickles have gone bad, and you must throw them away.
Also, discard any pickled gherkins that have gone dark or slimy or if the jar lids are bulging.
If the gherkins’ texture has become mushy and slimy and they fall apart, you shouldn’t eat them anymore.
Also, watch out for any smell or taste that seems “wrong” or unpleasant.
Variations and Creative Recipes
There are (almost) endless variations for flavouring pickled gherkins.
Herbs
You can, for example, just use dill and onions for German-style dill gherkins, or you add chillies or even jalapenos for hot pickles.
For French cornichons, add tarragon and pearl onions, and for an Asian variation, use rice vinegar and ginger.
Use caraway seeds, juniper berries and chervil for a Northern variation or Za’atar, sumac and preserved lemon for a Middle Eastern touch.
Vinegar
Experiment with different vinegars or even vinegar blends (see above).
You could even try out different vinegar strengths while maintaining the proper acidity for safety.
Sweetener
Replace the sugar with honey, maple syrup, agave or even molasses for different flavour notes.
Additional Vegetables
Who says that gherkins have to stay alone in the jar? Layer in onions, carrots, cauliflower or radishes with the gherkins.
Or add just fennel bulb slices. Or mix in green beans and asparagus. Get creative!
Liquids
Use part beer or white wine in the brine or, instead of water, use vegetable or herb-infused broth.
An interesting way to add more depth to the flavour is by including pickle juice from a previous batch.
Texture
Apart from mustard seeds, you could also add toasted sesame or other seeds for a bit of “pop”.
Also, experiment with different salt types like flavoured, smoked or sea salt. Just be careful that the salts don’t have any additives that may harm the brine.
Serving Suggestions and Uses
How can you use gherkin pickles now?
- Well, apart from the classic pairing with sandwiches, burger or charcuterie boards, gherkin pickles add depth to a potato, egg or chicken salad.
- Chop them into relishes, remoulade or aioli.
- Gherkin pickles are an essential ingredient for German “rouladen” (beef rolls) and can be wonderfully included in stuffing for poultry or pork as the acidity cuts the richness.
- You can even use the brine in cocktail sauces or barbecue sauces or as a vinegar replacement in salads. Or drink it straight as an electrolyte replacement or mix it with beer for a “pickleback” style drink.
Conclusion
Buying gherkin pickles is a fast solution when you’re pressed for time but making them yourself not only gives you numerous flavouring possibilities but the certainty of knowing what’s inside the jar – and, more importantly, what’s not. Once you’ve found out that it’s actually quite easy to make gherkin pickles at home and how great they taste, I promise you’ll never touch the store-bought version ever again!
As long as you stick to the ratios of vinegar, salt, sugar and water, you can start experimenting with different flavours. From mild and deep to hot and spicy, everything is possible!
Just keep in mind to pickle only gherkins without any blemishes and harvested not longer than a few days ago.
The most important step to follow is soaking the clean gherkins overnight in a salt brine to dehydrate them a bit and thus make sure that they stay crunchy when preserved. Also, remove the blossom end of the gherkins (the end without the stem) as it contains an enzyme that lets the gherkins go soft and mushy.
Easy, right? So, what are you waiting for? Get along, grab some gherkins, jars and the few ingredients you like and start pickling your very first (or second, or third) batch of gherkins!
These pickling recipes may also interest you:
Pickled Zucchini: From Garden Surplus to Flavour-Packed Treasure
Looking for more ways to preserve your harvest? Browse my library of preserving posts for all my canning, fermenting, and storage tutorials.
0 Comments