April is one of the most important months in the vegetable garden. As soil temperatures rise and frost risk slowly decreases, it’s the perfect time to sow seeds, plant seedlings, and kickstart the growing season.
With longer days and warming temperatures, April is prime time for both direct sowing and transplanting a wide variety of vegetables. Whether you’re a seasoned gardener or trying your hand at growing food for the first time, this month’s activities will set the stage for months of fresh, homegrown produce.
Let’s explore what vegetables you can sow and plant in April in your garden and how to give them the best start for a successful growing season.
Please note that timing may vary depending on your climate and hardiness zone.
What to Sow and Plant in April (Quick Overview)
Here’s a cheatsheet of what you can sow and plant in April:
Sow winter leek indoors now. I either sow 2 – 3 seeds per small pot, or I take a larger container and sow them in rows that I will be thinning later.
Brassicas
Although we can plant the first batch of brassicas like broccoli, kohlrabi, cauliflower, white and red cabbage outdoors now, we should still sow a second batch indoors. That way, we can transplant them outdoors several weeks from now and have a continuous harvest of brassicas instead of one overwhelming flood of harvest.
I’ve found that, as those second batches will be outside in the summer, we may have to choose late instead of early varieties.
Lettuce
Like with cabbage, the second round of lettuce-starting has begun! Now, however, we want to choose varieties that like warmer weather, like, for example, iceberg and oak leaf lettuce.
Tomatoes
If you haven’t seed-started tomatoes for outdoor planting already, mid-April is the latest time to do so. Sow several seeds per pot and thin them later.
The cucurbit family consists of cucumbers, zucchini, melons and pumpkins, and they can all be seed-started indoors in April. None of them, however, takes thinning very well and therefore they all need to be seed-started in separate pots.
🌱 Want gentle monthly reminders of what to sow and plant in the garden? Join here:
Vegetables to Sow Outdoors in April
These early sowings reward you with the first fresh harvests of late spring. In fact, over the years, I’ve noticed that early April sowings often outperform later ones because spring moisture supports germination naturally.
Broad beans
The beginning of April is the latest time to sow broad beans. They are very tolerant of low temperatures and can even withstand light frosts, which is why they don’t need protection against the cold.
Peas / Sugar peas
There are early varieties that can be sown outdoors mid to end of March. Just remember that peas are climbers and therefore install a trellis or net between the rows.
Carrots
Again, we’re talking early varieties here. If you planted onion bulbs in autumn, sow the carrots in the rows between the onions. That way, carrots and onions will protect one another from harmful pests.
Radishes
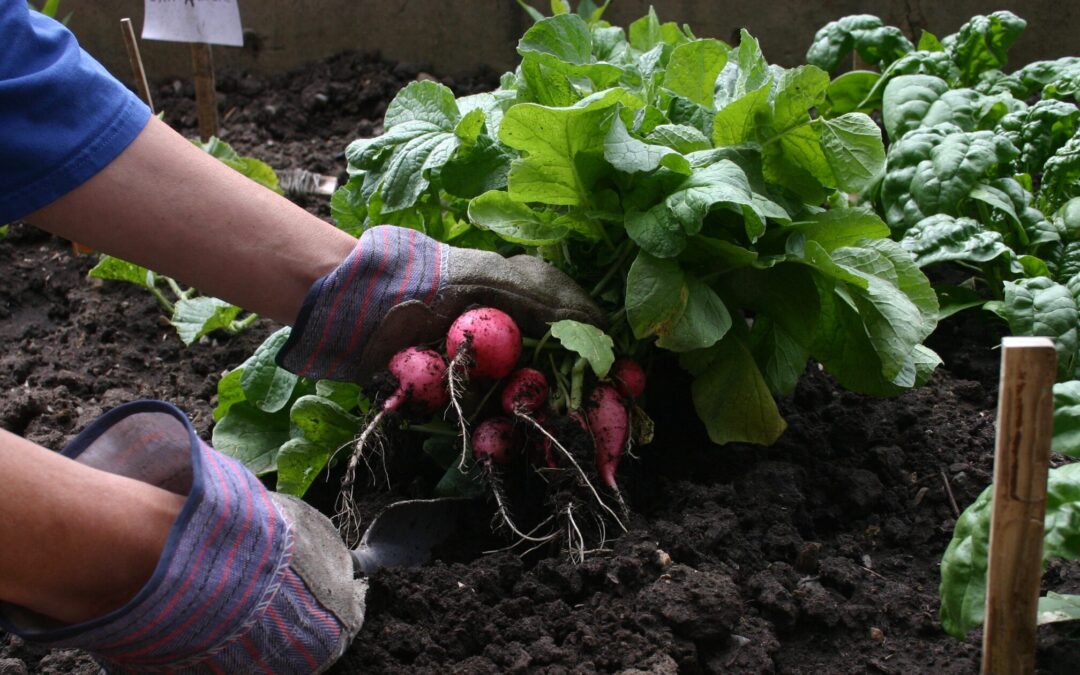
Carrots need quite some time to germinate, and it’s difficult, therefore, to weed the rows. A trick to still see where the carrots have been sown is to mix radish seeds between the carrot seeds. Radishes need only a few days to germinate and then not only show us the row but are a yummy vegetable for salads or preserve them by fermenting radishes.
Lettuce
Contrary to the varieties we start indoors now, lettuce we sow outdoors in April has to be very tolerant of cold temperatures, like Asian lettuce. If we mix the early varieties we sow now and the later varieties we seed-start indoors, we can continually harvest different kinds of leafy greens. This method of sowing vegetables every 3 – 4 weeks is called succession planting, which not only ensures a continuous harvest but also that the soil in our patches is always covered.
All lettuce varieties germinate in light only. Do not cover them with soil!
Rocket salad
Rocket salad is one of the easiest crops to grow! Sow it, harvest the leaves, and when you let it bloom, it will spread itself.
Spinach
Spinach is almost a no-brainer: I sow it every April, cover it with winter protection fleece, and just let it grow. It’s usually quite tolerant of the cold and will grow well under protective cover.
Beetroot
Although you can seed-start beetroot indoors, that’s only advisable when you have a small garden or want to grow just some of them. In our family, we need plenty of beetroot for salads, pickles, fermented or cooked, and that’s why I sow them directly in April.
Salsify
Salsifies need a deep, loose soil to grow long, straight roots. A patch where potatoes grew the year before would therefore be ideal.
Vegetables to Plant Outdoors in April
Before we plant anything outdoors, it’s important to harden the seedlings off by gradually exposing them to outdoor temperatures. Start by putting your plants outside or in the greenhouse for 2 – 3 hours at first and prolong that time over a week before transplanting.
Lettuce
The lettuce that we started in February or March is now ready for transplanting outside. Make sure that the seedlings are not planted too deeply, or they may rot. As a rule of thumb, put them into the soil as deep as they were in the pot.
Brassicas
All early brassica seedlings like kohlrabi, early Savoy cabbage and cauliflower, as well as white and red cabbage, can be planted outdoors in April. Leave plenty of space between the seedlings so that you can plant celery in between later. Cabbage and celery are great companions in the patch and repel each other’s pests.
Leek
Plant leeks between the cabbage rows. That way, you not only make the best use of space here, seeing that cabbage grows on the ground and leeks on the “first floor”, but they also deter pests from one another. For the best protection, however, cover them with a pest protection net.
Like garlic, onions and shallots can be planted now. Either plant small bulbs you can buy at the nursery or the seedlings you’ve started earlier that year indoors.
Potatoes
In my hardiness zone 7b, I don’t plant potatoes before the end of April. Considering that our last night frosts can happen until mid-May, the end of April is perfect for putting the pre-sprouted potatoes in the ground. When the shoots start looking out of the soil, the worst weather will be over.
Frequently Asked Questions About Planting in April
Planting in April raises many questions, especially about timing and frost protection. Here are the most common ones:
Can I plant tomatoes outside in April?
If your hardiness zone is 9 and above, you can plant tomatoes outside in April; in all other zones, it’s too early.
What vegetables grow fastest from April sowing?
Radishes are one of the fastest-growing vegetables; they only need about 30 days from sowing to harvest.
Is April too late to start a vegetable garden?
Absolutely not. On the contrary, April is a good month to start a vegetable garden as the growing season is just starting.
What if frost returns?
Check the weather forecast, and if frost is predicted, cover your crops with a garden fleece.
What vegetables can I plant in April?
Lettuce
Brassicas
Leek
Garlic
Onions / Shallots
Potatoes
When does frost danger end?
That depends on your hardiness zone. In my zone 7b, for example, the last frosts are expected by mid-May.
April Planting Summary
April is the perfect month to begin sowing hardy crops outdoors, start warm-season vegetables indoors, and transplant early seedlings. With proper timing and frost protection, your vegetable garden will quickly gain momentum for the growing season ahead.
The gardening season has officially started! Time to dig in the dirt!
Not enough garden talk? You may like these articles:
April is one of the busiest months in the vegetable garden, with sowing, planting, protecting seedlings, and preparing beds for the growing season.
In this guide, therefore, I’ll show you:
what to sow outdoors
how to protect seedlings from frost
how to prevent pests
essential maintenance tasks
Let’s break down garden tasks we can do in April:
April Garden Checklist (Quick Overview)
Every April I feel the real gardening season finally begins. If you only have time for a few things, focus on these essential April garden tasks:
Weed garden beds early
Harden off seedlings
Sow vegetables outdoors
Fertilise plants
Protect seedlings from frost
Prevent pests
Plant tomatoes in greenhouse
Plant strawberries
Support pollinators
Here’s a quick overview of the most important garden tasks to tackle in April.
Garden Task
Best Time in April
Priority
Weed patches
After rain when soil is loose
High
Harden-off seedlings
One week before planting
High
Sow and Plant
In warm weather
Medium
Protect seedlings from cold
When temperatures fall below 5 °C (40 °F)
High
Fertilise plants
When planting and after seedlings develop real leaves
Medium
Protect seedlings from pests
As soon as planted
High
Plant tomatoes in greenhouse
End of April
Medium
Plant strawberries
In warm weather
Low
Attract pollinators
When planting vegetables
Medium
Protect leeks and onions
When weather gets warm
Medium
Weed Garden Beds Early
✔️ Why it matters: Weeds compete for nutrients
Earlier in March, we removed the mulch from the patches so the sun could warm the soil. With rising temperatures, however, weeds will also find their way towards the light. To be honest, I underestimate every year how fast they actually grow once it’s a bit warmer…
Now, when they’re still small, is the right time to pull them out and keep the patches free for our vegetables.
Quick tip: Weed after rain when the soil is loose.
Harden off Seedlings Before Planting
✔️ Why it matters: Plants must get used to outdoor conditions
Some of the vegetables we have seed-started indoors during the last weeks can be planted outdoors in April. Before we do that, we must harden them off so they won’t get a shock when they move from that cosy, protected atmosphere indoors to the outside garden, where temperatures are colder and the wind can blow harshly.
Imagine you were plonked from your cosy, warm couch and dropped into an ice bath. You wouldn’t like that, would you? Unless you’re regularly taking ice baths. In that case, forget this comparison, you freak, but harden off your seedlings anyway.
To harden off our seedlings, we put them outside in the shade. At first, for a few hours and each day longer. After about a week, they can be planted outside in our April vegetable garden.
✔️ Why it matters: Plants need nutrients to grow optimally.
Our vegetables have outgrown the baby and toddler stage and are now teenagers. Ravenous teenagers! Which means they need plenty of food, or in that case, fertiliser. Gardening in April, therefore, involves fertilising our vegetables.
After planting our seedlings outdoors, they’ll be grateful for a healthy dose of organic liquid fertiliser to push their growth.
✔️ Why it matters: Young plants can freeze to death when it gets too cold.
Sowing and planting outdoors brings so much fun, but remember that it can still get cold, especially during the nights. In my hardiness zone 7b, the danger of frosts won’t be over before mid-May! Thus, the April vegetable garden still needs some protection against harsh weather conditions.
Check out your hardiness zone to learn when the last frosts can be expected.
To protect our sensitive seeds and baby vegetables from harsh weather, we must cover them with a fleece. Although that won’t seem much, it will be enough to keep the air and soil underneath well above freezing.
Quick tip: Watch the weather forecast and cover your seedlings with a garden fleece when temperatures drop below 5 °C (40 °F).
Protect cabbage and leeks from pests
✔️ Why it matters: Pests can destroy your harvest.
Cabbage and leeks that we can plant outdoors now are especially prone to pests like the cabbage white butterfly and the leek fly. To protect them, we can cover them with a protective net, which is much lighter than a fleece. It won’t keep off the cold, only the pests. Most often, you can buy protective nets as a set with half-arches that you can stick across the vegetables and put the net on top. That way, our plants have plenty of room to grow while being safe from pests. Just make sure that you fix the net thoroughly into the ground.
By the way, celery is a good companion for cabbage. In the unlikely event that a cabbage fly finds its way under the net, it may find itself repelled by the celery smell.
Quick tip: Protect your plants from the beginning to keep pests out.
Protect your seedlings from snails and slugs
✔️ Why it matters: Slugs feast on seedlings.
Are there any pests more dreaded than snails and slugs? I don’t think so. They are practically everywhere and, especially in spring, eat all they can find. Our seedlings are kind of a huge buffet to them, and if we want to harvest some vegetables for ourselves, we must make sure that snails and slugs won’t get near them!
A good way to keep those little suckers off our seedlings is to put snail collars around them, which they can’t overcome. Or you get out in the wee hours of the morning or in the evening with a bucket and collect them. Choose your way, but I prefer the collars.
Quick tip: Snail fences and collars keep snails off your seedlings.
Plant tomatoes in the greenhouse
✔️ Why it matters: Conditions are warmer in a greenhouse, and your tomatoes will get a head start.
By the end of April, you can plant your tomato seedlings in the greenhouse. It’s still a good deal too early for outdoors, but in the protected atmosphere of a greenhouse – and if there’s no forecast of severe frosts – planting them in the greenhouse is okay.
Quick tip: When night temps in your greenhouse don’t fall below 10 °C (50 °F), you can plant the tomatoes.
Plant strawberries in April
✔️ Why it matters: Now’s the best time for planting berries.
Another garden task in April is planting new strawberries and protecting them with a garden fleece if necessary. If you have strawberries in your garden already, remove all wilted leaves now, as they may be infected with diseases. If you want to make strawberry jam this year, plant the berries now!
Quick tip: Prepare the new strawberry bed by loosening the soil and working in some compost.
Attract Pollinators
✔️ Why it matters: Pollinators increase our harvest.
All fruit-bearing vegetables, as well as fruit trees and bushes, need pollinators to produce their fruits. We can help attract all those bees and insects by sowing flower strips as insect pastures, either on the borders of our vegetable garden or in the patches between the plants. Calendula, for example, is not only a great attractor for pollinating insects but can be used for teas as well as an ingredient in many homemade body care products like soap and oil.
It depends on the hardiness zone. In zone 9 – 11, you may plant tomatoes out in April but in zone 7b, for example, where I live, it’s too early. Instead, I plant my tomatoes into the greenhouse at the end of April when temperatures don’t fall below 10 °C (50 °F) at night.
Do seedlings need frost protection in April?
Yes, nighttime temperatures can still drop below freezing in many regions.
When should seedlings be hardened off?
Start hardening off your seedlings about one week before you intend to plant them out.
Is frost still a risk in April?
Yes, in most hardiness zones it is. Protect your seeds and seedlings with a gardening fleece when temperatures fall below 5 °C (40 °F) at night.
Why April Garden Tasks Matter
After the relatively quiet winter months, April can seem a bit overwhelming. But don’t let the list of tasks discourage you. You don’t have to do everything at once. It’s rather a question of timing and consistency.
Prepare the garden by weeding the patches, sowing and planting your hardened-off seedlings, and then it’s our job to protect the plants from harsh weather and pests and support beneficial insects.
All these tasks will pay off in a few weeks, when we can harvest the first vegetables.
The gardening season has started! Let’s get out and green the world.
Can’t get enough? These articles may also interest you:
When Oma’s sisters came to visit, they always switched to Eierlikör after coffee. Now, Oma poured hers straight from the bottle, but there are some delicious Eierlikör variations I’m sure she would have loved.
Eierlikör makes a wonderful last-minute gift, especially around Easter. But sometimes the occasion calls for something a little more festive and seasonal than the classic version.
In this article, I’ll show you 9 easy homemade Eierlikör variations you can make using one simple base recipe. From fruity spring flavours to rich and indulgent twists, there’s something for every taste. Pro tip: make a double portion and keep half of it to yourself 😉.
Before You Start
These homemade Eierlikör variations are quick and easy to make and perfect for Easter, gifts or special occasions.
Most of the recipes add the additional flavouring ingredient to the ready-made Eierlikör.
The lemon and coconut variations, however, require a different approach. While lemon Eierlikör needs the cream to be infused before starting to make the Eierlikör, the coconut variation uses slightly different ingredients.
Coffee Eierlikör Variation
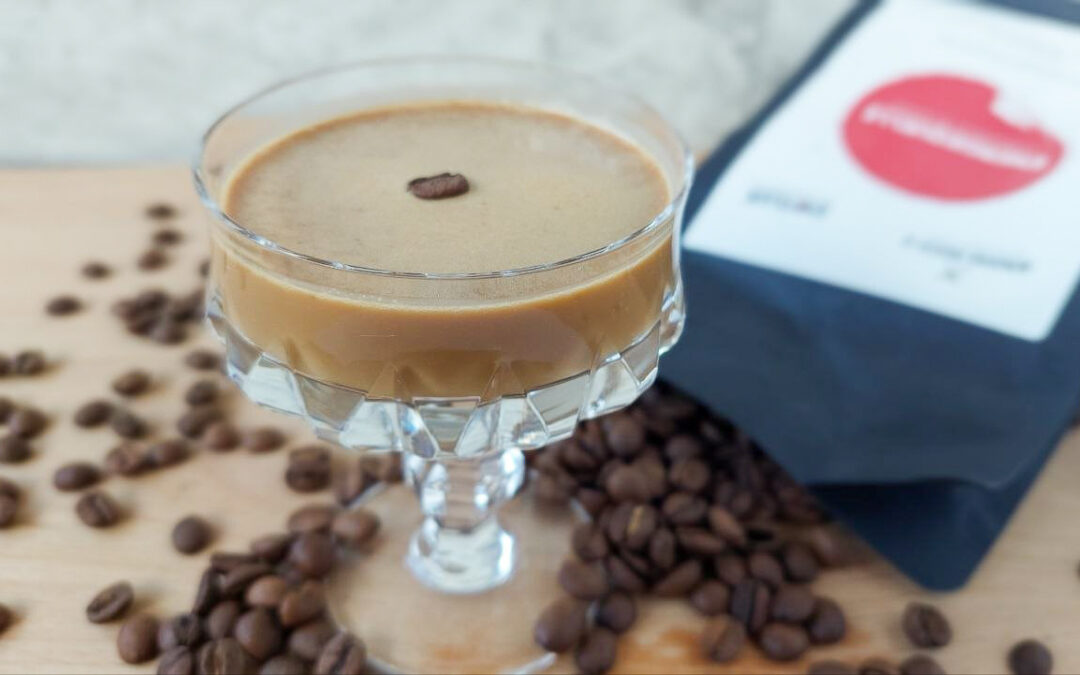
This coffee Eierlikör is rich, smooth and perfect for anyone who loves the combination of creamy liqueur and bold coffee flavour. It has a slightly more intense taste than the classic version and pairs beautifully with desserts or an afternoon coffee.
How to make coffee Eierlikör
Prepare the homemade Eierlikör as described in the base recipe.
Dissolve 1–2 teaspoons of instant espresso powder in a small amount of warm cream or liqueur until smooth, then stir it into the finished Eierlikör.
Alternatively, add 50 ml of strong espresso to the Eierlikör.
Mix well to ensure the flavour is evenly distributed.
For a stronger coffee note, you can increase the amount slightly, but be careful not to overpower the creamy base.
Tips
When using brewed coffee, the liqueur becomes a bit thinner. If you want to avoid that, use instant powder instead.
Add the coffee gradually and taste as you go.
This variation tastes especially good served with desserts or added to coffee.
Chocolate Eierlikör Variation
This chocolate Eierlikör is heaven for chocoholics with its velvety, indulgent flavour. Dark chocolate pairs best with the sweet creaminess of traditional Eierlikör, but feel free to try milk chocolate for a sweeter and lighter variety.
How to make chocolate Eierlikör
Prepare the homemade Eierlikör as described in the base recipe.
Dissolve 1–2 teaspoons of dark chocolate powder (unsweetened) in a small amount of warm cream or liqueur until smooth, then stir it into the finished Eierlikör.
Alternatively, add 50 g of melted dark chocolate to the Eierlikör.
Mix well to ensure the flavour is evenly distributed.
For a stronger chocolate note, you can increase the amount slightly, but be careful not to add too much, as the mixture will become thicker.
Tips
Chocolate and chocolate powder will thicken the Eierlikör, so make sure not to use too much of them. Alternatively, add a bit more cream to the mixture.
Add the chocolate gradually and taste as you go.
This variation tastes especially good served with desserts or added to hot chocolate.
Hazelnut Eierlikör Variation
This hazelnut Eierlikör adds a new level of creaminess to the already rich Eierlikör and is perfect for anyone who loves nuts. If you like, substitute the hazelnuts with almonds, walnuts or any nuts you like.
How to make hazelnut Eierlikör
Prepare the homemade Eierlikör as described in the base recipe.
Dissolve 2 teaspoons of hazelnut butter (unsweetened) in a small amount of warm cream or liqueur until smooth, then stir it into the finished Eierlikör.
Mix well to ensure the flavour is evenly distributed.
For a stronger hazelnut note, you can roast finely ground hazelnuts in a pan and stir them into the Eierlikör mixture. This will alter the texture a bit as you’ll feel the nut flour in your mouth.
Tips
Hazelnut butter and ground nuts will thicken the Eierlikör, so make sure not to use too much of them. Alternatively, add a bit more cream to the mixture.
Use almond, walnut, cashew, macadamia or peanut butter as alternatives.
This variation tastes especially good served with poached fruit (Peach Hélène, for example) or added to coffee.
Strawberry Eierlikör Variation
Nothing describes spring better than strawberries, and I haven’t met anyone yet who wouldn’t love this strawberry Eierlikör!
How to make strawberry Eierlikör
Prepare the homemade Eierlikör as described in the base recipe.
Puree 150 g fresh strawberries or let 150 g frozen strawberries thaw and puree them.
Put the strawberry puree in a pot and bring it to a boil. Boil it briefly for about 30 seconds, then add the puree to the finished Eierlikör. Mix well to ensure the flavour is evenly distributed.
For a stronger colour, you can add a bit of red food colouring, but this is purely optional.
If you don’t like the small seeds, pour the puree through a sieve into the Eierlikör.
Tips
Strawberry puree will make the Eierlikör more liquid, but it’s still creamy and stable; by cooking the puree, part of the water evaporates, thus preventing the liqueur from getting too thin.
This variation tastes especially good just as a fruity spring drink or on an Eierlikör cake.
Raspberry Eierlikör Variation
Raspberries add a sweet, yet tangy note to our homemade Eierlikör. This raspberry Eierlikör is perfect for anyone who loves a rich, fruity drink that’s not too sweet.
How to make raspberry Eierlikör
Prepare the homemade Eierlikör as described in the base recipe.
Puree 150 g fresh raspberries or let 150 g frozen raspberries thaw and puree them.
Put the raspberry puree in a pot and bring it to a boil. Boil it briefly for about 30 seconds, then add the puree to the finished Eierlikör. Mix well to ensure the flavour is evenly distributed.
For a stronger colour, you can add a bit of red food colouring, but this is purely optional.
If you don’t like the small seeds, pour the puree through a sieve into the Eierlikör.
Tips
Raspberry puree will make the Eierlikör more liquid, but it’s still creamy and stable; by cooking it, part of the water evaporates, thus preventing the liqueur from getting too thin.
This variation tastes especially good just as a fruity spring drink or served on vanilla ice cream.
Lemon Eierlikör Variation
This tangy, zesty Eierlikör version is perfect for anyone who loves the combination of creamy and citrus flavours.
How to make lemon Eierlikör
Before preparing homemade Eierlikör, grate the zest of one organic lemon. Put the zest in a bowl and pour the cream on it. Heat the cream to 60 °C and let it infuse with the lemon zest for about 2 hours.
Prepare the Eierlikör as described in the base recipe.
To enhance the flavour, blend one tablespoon of homemade candied lemon peel and add it to the finished Eierlikör. Mix well to ensure the flavour is evenly distributed.
Tips
The trick here is to infuse the liqueur with lemon zest instead of adding fruit puree or juice. Lemon juice would make the Eierlikör curdle!
This variation tastes especially good with buttermilk or yoghurt desserts
Apricot Eierlikör Variation
This apricot Eierlikör is a fresh and fruity variation and brings a promise of summer.
How to make apricot Eierlikör
Prepare the homemade Eierlikör as described in the base recipe.
Puree 150 g fresh or canned apricots or let 150 g frozen apricots thaw and puree them.
Put the apricot puree in a pot and bring it to a boil. Boil it briefly for about 30 seconds, then add the puree to the finished Eierlikör. Mix well to ensure the flavour is evenly distributed.
Tips
Apricot puree will make the Eierlikör more liquid, but it’s still creamy and stable; by cooking it, part of the water evaporates, thus preventing the liqueur from getting too thin.
To get the drink smooth, press the puree through a sieve.
Mango Eierlikör Variation
This mango Eierlikör is tropical, sweet and perfect for anyone who loves a more exotic flavour.
How to make mango Eierlikör
Prepare the homemade Eierlikör as described in the base recipe.
Puree 150 g fresh mango or let 150 g frozen mango thaw and puree it.
Put the mango puree in a pot and bring it to a boil. Boil it briefly for about 30 seconds, then add the puree to the finished Eierlikör. Mix well to ensure the flavour is evenly distributed.
Tips
Mango puree will make the Eierlikör more liquid, but it’s still creamy and stable; by cooking it, part of the water evaporates, thus preventing the liqueur from getting too thin.
This variation tastes especially good on exotic desserts or just as an exotically flavoured drink.
Banana Eierlikör Variation
This banana Eierlikör is smooth, velvety and perfect for anyone who loves bananas and can’t get enough of them.
How to make banana Eierlikör
Prepare the homemade Eierlikör as described in the base recipe.
Puree one fresh banana and add the puree to the finished Eierlikör. Mix well to ensure the flavour is evenly distributed.
Tips
Unlike other fruit purees, the banana is not cooked as it would brown.
Although the Eierlikör contains sugar and alcohol to preserve it, the banana bits will turn brown within a few days. That said, banana Eierlikör is best consumed within two days.
This variation tastes especially good on exotic desserts or added to hot chocolate.
Coconut Eierlikör Variation
This coconut Eierlikör is another exotic version of the classic Eierlikör and perfect for anyone who loves Caribbean flavours.
How to make coconut Eierlikör
Instead of adding some flavour to the finished Eierlikör, we twist the original recipe:
Use coconut cream instead of cream and white rum instead of vodka or corn schnapps.
Prepare the Eierlikör as indicated in the recipe and fill it in bottles.
Tips
To enhance the flavour, toast a tablespoon of coconut shavings and let the coconut cream infuse with them. Sieve them off before adding the cream to the liqueur.
This variation tastes especially good on exotic desserts or added to hot chocolate.
Now it’s your turn
Looking at all these variations, I’m absolutely sure that my Oma and her sisters would have liked those Eierlikör flavourings and I can very well imagine them sitting around her coffee table, tasting the different liqueurs and ranking them!
What I love most about Eierlikör is how easy it is to adapt. With just a few simple additions, you can turn a classic recipe into something completely new — fruity, nutty, chocolaty or even a little adventurous.
So why not try one of these variations yourself? Or better yet, experiment with your own ideas and create a flavour that’s uniquely yours. You might just discover a new favourite — or even start a tradition of your own.
German Eierlikör (or Eierlikoer as it is sometimes spelled) is a wonderfully tasty cream liqueur and makes for a great last-minute gift, especially (but not only) for Easter.
Oma (my granny) had five sisters, who regularly visited her on her birthday. Each year on January 22, all those lovely great-aunts — or “aunties” as we called them — came to celebrate, talk and laugh with her. When none of them could possibly eat any more cake, Oma got up, went to the large sideboard and fetched a large bottle of Eierlikör, which was greeted with great enthusiasm. At least by the adults.
After our aunties had left several hours later in a spirited mood and giggling happily, Oma let us dip our fingers in the empty glasses and taste what Eierlikör was left in them. It was wonderfully creamy and rich and bore a hint of vanilla. And to be honest, just those few drops made us feel like grown-ups.
Nowadays, I make my own homemade Eierlikör, and I’m here to show you how it’s done. With a few simple ingredients, some basic equipment and my traditional recipe, you can whip up this delicious German Eierlikör in under 10 minutes.
This homemade Eierlikör recipe shows you how to make traditional German egg liqueur with egg yolks, cream and vodka in just 10 minutes.
What is Eierlikör?
Eierlikör is a creamy German liqueur made from egg yolks, sugar and alcohol. It has an alcohol content between 14 and 20 %. A thicker variety containing at least 140 g of egg yolks per litre is called Advocaat (also spelled Avocat or Advocat).
So Advocaat and Eierlikör are essentially the same drink, just known under different names.
No matter the name, the liqueur is usually drunk pure or together with coffee (like Oma used to).
The origin of Eierlikör
In the 17th century, European conquistadores in Brazil were introduced to a beverage called Abacate, made with avocados. They mixed the drink with rum and sugar and thus created the first version of an “Advocaat”. In Europe, however, avocados were unknown at that time and could neither be cultivated nor imported.
The Dutch entrepreneur Eugen Verpoorten, who later founded the enterprise Verpoorten, substituted the avocados with egg yolks, and so the Eierlikör was born.
I don’t know if this story is true, but I think it’s quite cute, so let’s pretend it is 😉.
How to Make Eierlikör
Making Eierlikör at home is neither difficult nor complex. Let me show you:
Equipment For Making Eierlikör
To make this classic German Eierlikör recipe at home, you’ll need
A pot
A metal bowl that fits into the pot
A whisk or electric mixer
A thermometer (analogue or digital, range from 0 – 100 °C (32 – 212 °F)
A rubber spatula
A funnel and sieve (optional)
Glass bottles; I use 2 – 3 bottles of ¼ l (the last will not be full). It’s better to use bottles with a wide rim instead of a small one because the liqueur will thicken during cooling and may be difficult to pour.
Ingredients and variations
There are a few standard ingredients you need for making the classic Eierlikör – eggs, for example 😉. All other ingredients can be easily varied.
Egg yolks are the basis for this recipe, and it’s best to use organic, free-range eggs that are not older than one week. Before making the liqueur, take them out of the fridge at least 3 hours ahead so that they can reach room temperature.
Sugar not only sweetens the liqueur but also works as a conservation agent and enhances volume. You can either use granulated sugar, in which case you have to whisk the egg yolks longer until the sugar has dissolved or icing sugar.
Cream makes the Eierlikör very, well, creamy and rich. Alternatively, you can use condensed milk (10 % fat) or part cream, part milk. In the latter case, the liqueur is more liquid and has a more alcoholic taste.
Alcohol preserves the egg liqueur. The most recommended alcohol for Eierlikör is neutral vodka, but you can also use other varieties like corn schnapps, Doppelkorn or white rum. They work equally well but bring their own flavour.
Speaking of which: you can flavour your liqueur, for example, with vanilla, cinnamon or grated tonka bean.
Fill half the pot with water and bring it to a boil.
Separate the eggs and put the yolks, sugar and vanilla pulp in the bowl.
Hang the bowl in the pot with the hot water. This is called a bain-marie or double boiler.
Whisk the ingredients together until they become a fluffy, light yellow mass.
6. Constantly check the temperature with a thermometer. It should not exceed 60 °C (140 °F), or else the eggs will start to clot.
7. Now add the alcohol and the cream and whisk until the mixture noticeably thickens — this usually takes 5–10 minutes. Again, make sure the temperature does not exceed 60 °C (140 °F).
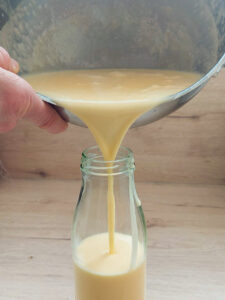
8. Use a funnel and sieve to fill the Eierlikör into bottles.
How to store Eierlikör
The sugar and alcohol in the Eierlikör work as preservatives so that it won’t spoil easily. However, store your homemade Eierlikör in the fridge to be on the safe side. There, it will last for 4–6 weeks.
125 mlvodka, corn schnapps, doppelkorn or white rum
1/2vanilla pod (pulp)
Equipment
1 pot
1 metal bowl that fits into the pot
1 Whisk or electric mixer
1 thermometer (analogue or digital, range from 0 – 100 °C (32 – 212 °F)
1 rubber spatula
1 funnel optional
1 sieve optional
2 - 3 glass bottles 250 ml, at best with a wide rim
Method
Eierlikör: Step-by-Step
Sterilise the bottles by rinsing them and the lids with boiling water and letting them cool down and dry.
Fill half the pot with water and bring it to a boil.
Separate the eggs and put the yolks, sugar and vanilla pulp in the bowl.
Hang the bowl in the pot with the hot water. This is called a bain-marie or double boiler.
Whisk the ingredients together until they become a fluffy, light yellow mass.
Constantly check the temperature with a thermometer. It should not exceed 60 °C (140 °F), or else the eggs will start to clot.
Now add the alcohol and the cream and whisk until the mixture noticeably thickens — this usually takes 5–10 minutes. Again, make sure that the temperature does not rise above 60 °C (140 °F).
Use a funnel and sieve to fill the Eierlikör into bottles.
Notes
You can add different flavours to your Eierlikör by substituting the vanilla with 1/2 tablespoon of cinnamon or a pinch of grated tonka bean.Store the Eierlikör in the fridge where it will last for 4 - 6 weeks.
How to serve Eierlikör
Eierlikör is often served in small glasses or chocolate-coated wafer cups. But that’s only one of many options.
Pour your homemade Eierlikör over an ice cream cup. It works wonderfully with vanilla, chocolate or hazelnut ice cream, but also with fruity ones like strawberry or raspberry.
Sneakily add German Eierlikör to your coffee. No one will see it, and it tastes delicious.
There are several cake recipes with Eierlikör, which I intend to post soon. Stay tuned.
Eierlikör can pimp many a dessert and take it from “meh” to “wow”. Whether it’s a tiramisu (forgive me, my Italian friends!), an Eton mess (a British cream dessert) or just whipped cream: a healthy dollop of Eierlikör can make a huge difference.
As Eierlikör is made from eggs, it’s natural that it’s connected with Easter, where it’s often served at celebrations. This is a lovely tradition I absolutely intend to keep!
German Eierlikör – A Treat Made in No Time
Whenever I see Eierlikör, I think of my Oma and aunties and the fun they had together. I miss them and the happy days and moments I shared with them.
Today, I make my own Eierlikör, and I encourage you to make your first (or second, or third…) batch with this quick and easy recipe. It doesn’t need fancy equipment or lots of ingredients and is done in about 10 minutes.
You can drink all of it by yourself, of course. I won’t judge you. But it’s more fun to share it with family and friends. And who knows, you could even start a new tradition that your kids and grandchildren will remember fondly one day.
I toast my granny for that. Cheers, Oma!
If you’re looking for more simple recipes to make from scratch, head over to my Recipes page — there’s plenty more to explore.
These March reflections are part of a monthly practice of noticing what each season asks of us — and March asks quite a lot.
After months of rest and quiet preparation, transition is finally here: the snow retreating, the first crocuses pushing through, the days growing noticeably longer. In this article, I share how the sights, sounds, and feel of early spring — birdsong returning, sunlight warming your face, squirrels stirring — signal that it’s time to wake up alongside the garden.
The snow has (mostly) disappeared and been replaced by rain, and the first spring flowers like crocuses and snowflakes (the flowers, not the actual thing) begin to appear. The light is shifting, and finally, the days become perceptibly longer.
A promise of spring lies in the air.
I notice all of this before most people are awake since I start working pretty early, at 6 o’clock to be precise. Last week, I heard a bird singing before I went into the office, and I realised only then that I hadn’t heard birdsong for months! When the birds sing again, spring has stepped onto the stage.
Now is a wonderful time to go outside, even when it’s raining and the wind is blowing harshly. Yet there’s so much change out there that we can witness almost daily. Early blooms push through the soil, and squirrels look for their long-forgotten storage chambers.
This winter was particularly cold and long, but March has started with warm temperatures and sunshine, and I swear I’m a new person altogether. Just because those little beams of sunlight hit me, and the warmth makes me pull off my thick down jacket and replace it with a lighter version.
That shift isn’t just in me — step outside, and you can see it everywhere.
The Garden Awakens
With longer days and shifting light, the garden stirs back to life — slowly, almost shyly at first.
The soil may be wet and even still frozen on the surface, and it can be hard to see any change at all. But temperatures are slowly rising, and underneath, things are moving. Spring is advancing while winter still lingers.
On dry, sunny days, it’s worth pulling back the mulch from your garden beds and letting the soil soak up some warmth. Watch the buds on your trees and shrubs — they’re swelling, quietly promising to burst open, although the nights are still cold and even frosty. The garden is responding to both seasons at once. If you haven’t pruned yet, early March is often your last chance before new growth begins.
In ancient times, the Spring equinox was celebrated as the beginning of a New Year, which, in my opinion, makes much more sense than beginning a new year in the depths of winter. I’ve written about that in detail in my January reflections.
I can feel the energy of new beginnings and making plans. Yet, sometimes it’s necessary to remove some of the old stuff and make room for the new. While winter slowly leaves the stage, we prepare the space for spring. That’s why March is such a great month to declutter, organise and clean your home.
Declutter A Small Space
I know – I feel overwhelmed, too, when I hear the word declutter. The good news is, you can start small. Choose a drawer, for example. You know which one I mean: the one every household has where all the knick-knacks and stuff land that you don’t know where else to put, and where packets of hankies, dried-out pens and tiny plastic toys from the Kinder Egg wait to be rediscovered.
This is our drawer of doom. Posh on the outside, but chaotic within.
I like to spread everything out on the kitchen table, then sort through the stuff and throw away everything that’s broken or I don’t need anymore. Put the remaining stuff where it belongs, and only put back in the drawer what you really want to be there.
Spring Cleaning
I’m sorry to admit that I’m not a huge fan of cleaning. It feels tedious and pointless because dust and dirt will always find a way. On the other hand, I like my home to be clean. Contradictory, I know. But as the Dowager Countess in Downton Abbey once said, women are perfectly entitled to be contrary — and she was rarely wrong about anything.
If you’re in for a good spring cleaning, grab a bucket of hot water and a cleaning cloth and get started. If it helps, listen to an audiobook while working on your new dust-free home (I love a good cosy crime, for example) or play some music, whatever helps you do the job. The reward of a deep-clean house and sparkling windows is waiting for you.
Prepare for the Garden Season
I can think best in a clean environment. Maybe that makes me a little like Monk, but that’s how my mind works. A good spring cleaning not only satisfies my eyes but also sets my creative motor in motion.
When the weather suddenly turns cold and wintry again after a few warm, sunny days, I sometimes feel like howling in misery! It sometimes feels like handing a child a bar of chocolate and then telling them they can’t have it.
In those moments of despair (yeah, sometimes I’m a real drama queen), I remind myself that March is a month of transition. It’s not clicking a button and voilà: spring is here all of a sudden.
March feels more like a dance between winter and spring. One day, spring has a solo and shows us all it has to offer; the next day, winter takes over the stage, putting on one last performance.
While spring gains strength, winter slowly loses its power. The times “on stage” diminish until the last farewell before it retreats completely until the end of the year.
This dance can feel surprisingly long, but we know that spring will stay in the end and take over again. In the meantime, let’s see what we can do for ourselves to keep our balance.
March Self-Care for Body…
I’ve started jogging again, and between jogging and long walks, I enjoy being outdoors no matter the weather.
Even if you don’t like jogging, spend some time outdoors. I particularly enjoy watching how nature awakens again. Crocuses and coltsfoot suddenly push through the soil, birds are singing, and the buds of trees and bushes start to swell. The progress is slow, but it is unmistakable.
In the evenings, however, I sometimes feel quite exhausted. Whether it’s the exercise, the shifting temperatures or simply spring fever, I couldn’t say. But no matter the reason, it’s important to be kind to oneself and learn to move with the season’s rhythm. Take a break when you need one, have a nap or simply go to bed early.
Learn from nature and don’t overdo it. Your strength will return soon enough, and the tiredness will be forgotten.
… For Mind…
March is a time when organising and planning become important to me. I love to have a clear vision of what I want to do in the garden, what new recipes to try with our vegetables and how to preserve my harvest. Many of these aspects are routine, of course, but I want to try out some new things every year, be it new vegetables or varieties, new recipes or even new preserving methods. While the garden is only beginning to wake, our ideas are already stepping forward.
March is also a good time to start new creative projects. Have you ever tried soapmaking, for example? In my section about Home & Body, you’ll find several easy soap recipes and instructions. It’s a wonderful beginner project if you enjoy working with natural ingredients.
In the evenings, though, I love retreating with a good book, especially when I feel I have been productive during the day. Let’s not forget the relaxing power of experiencing other lives through a well-written story.
… and Soul
For me, March is the perfect month for inviting people over. Where I was too self-absorbed in January, and I know I’ll become too outdoors-focused as soon as the outdoor gardening season begins in April, I now have both the energy and time to prepare luscious cakes for a tea party or cook a wonderful meal for an evening dinner with friends.
For these gatherings, I often decorate our home with flowers as a sign that spring is entering the house. It doesn’t matter that they’re store-bought; they bring a touch of spring into our home and our spirits.
If you want to invite guests over, why not do so on the Spring equinox, the moment when day and night are perfectly balanced? You could celebrate the ancient New Year and even start a new tradition. Or simply light a candle for yourself and the new season with all its promises.
While March brings the promise of spring and new beginnings, it can sometimes feel harsh and cold. Just remember that it’s a time of transition where winter and spring find themselves in a dance. One day, spring leads, the next winter takes over.
If nothing else, March teaches us patience. We know that winter will retreat eventually and spring will take its place. Let’s observe nature’s rhythm and take it as our model. Learning to move with that rhythm is part of seasonal living.
In the meantime, let us enjoy every new flower that blooms, birdsong in the early morning, or tea with friends. These are signs that spring is slowly taking the lead.