These August reflections are part of the Seasonal Reflections series — a year-long practice of living with the rhythm of nature.
And suddenly it’s August, the last month of summer.
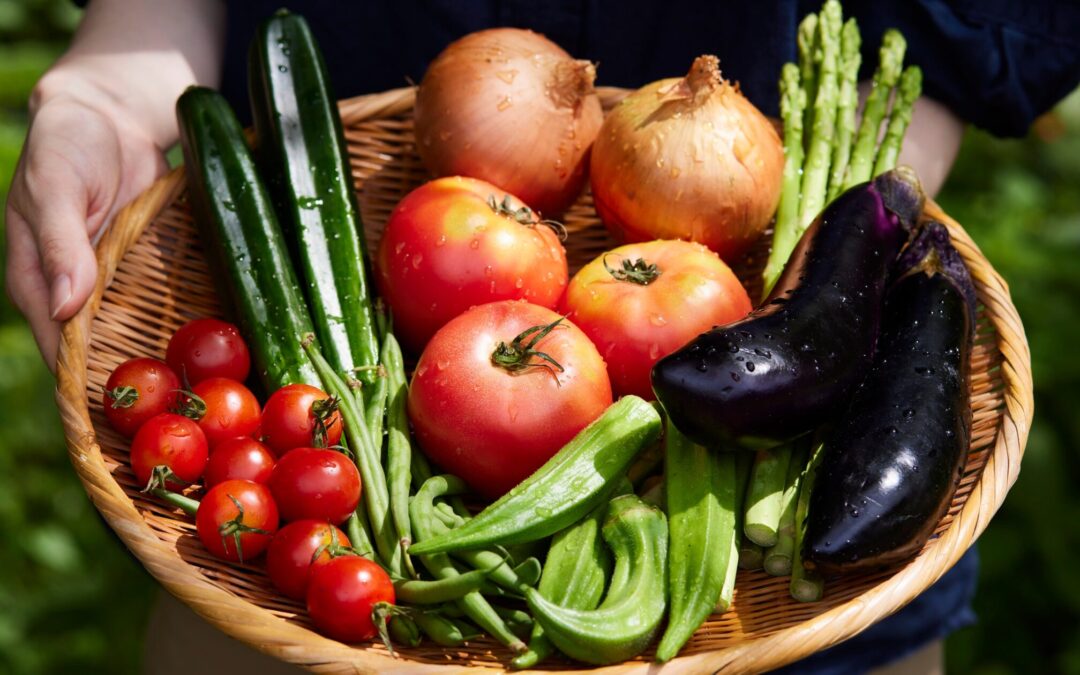
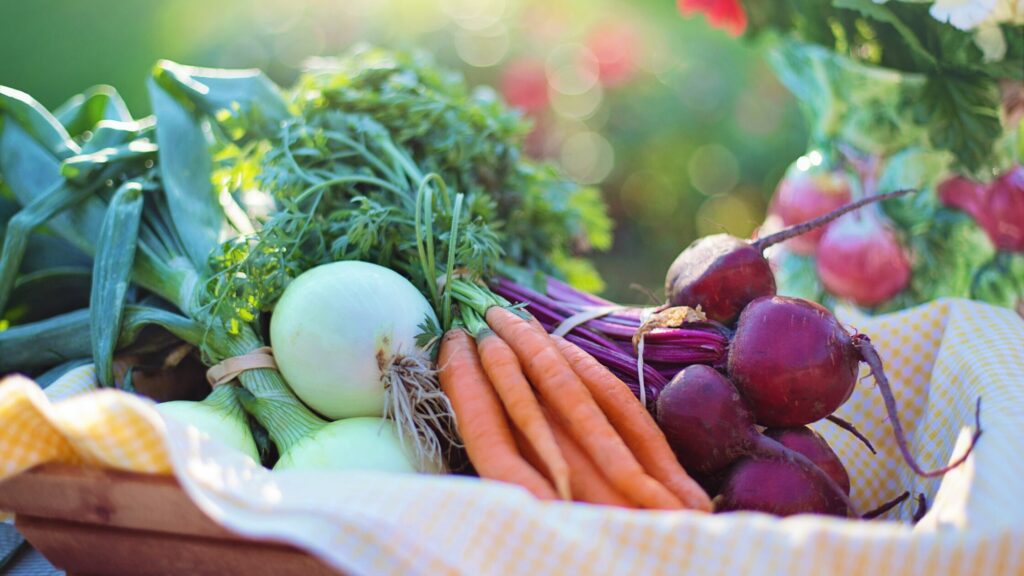
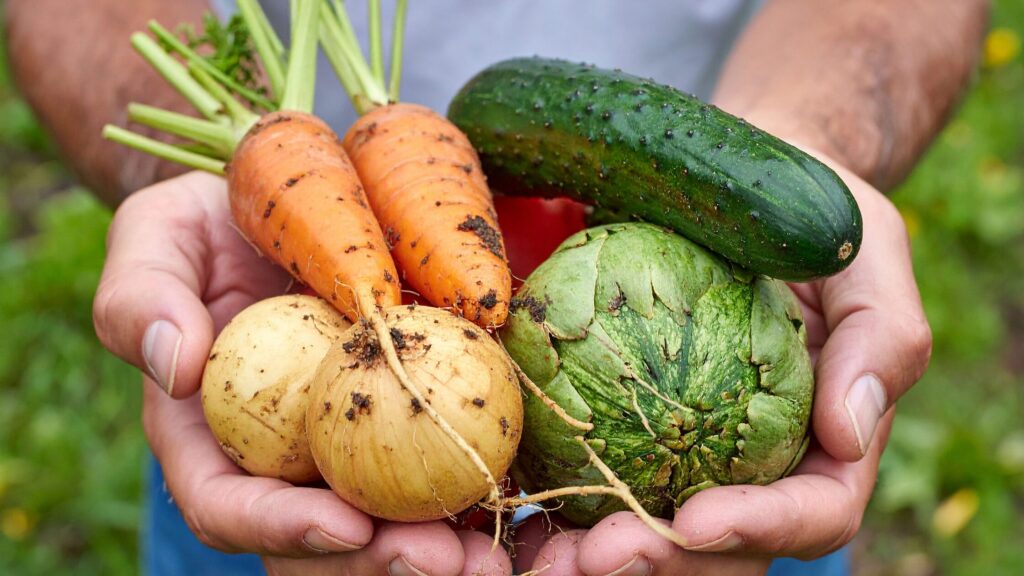
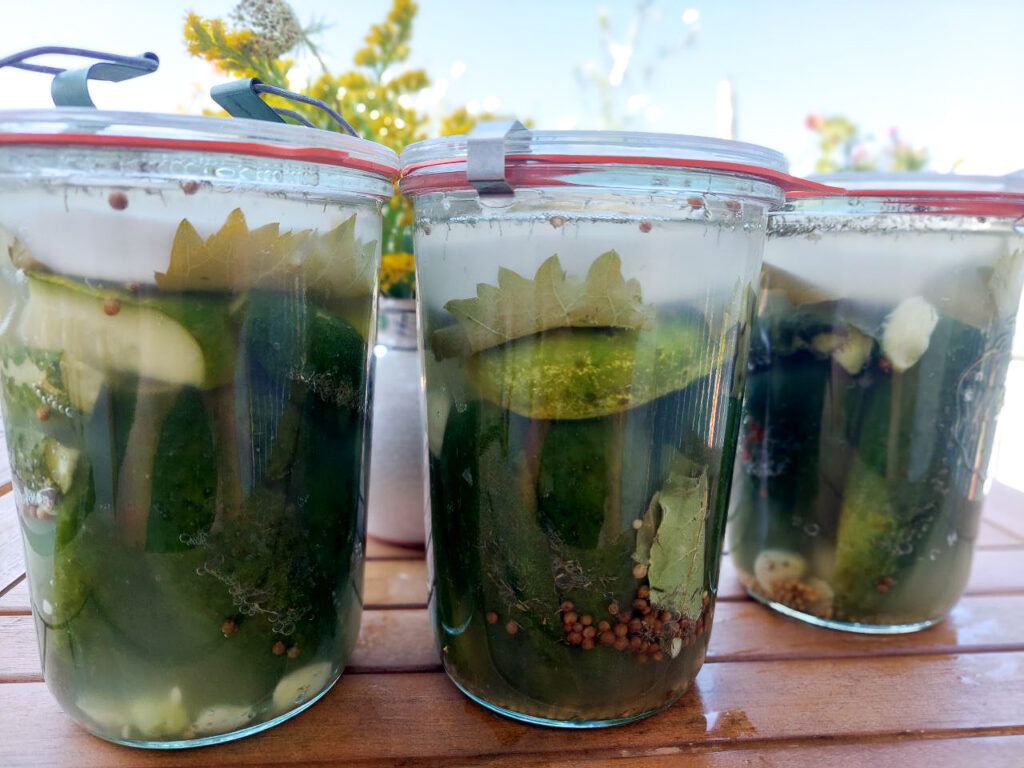
The garden is producing generously, piling up enough fruits, vegetables and herbs to preserve for winter. We’re almost as busy in the kitchen as in the garden, what with fermenting gherkins, freezing excess broccoli, cauliflower and beans and cooking tomato sauce. Blackberries and blueberries have superseded gooseberries and raspberries, waiting not-so-patiently to be cooked into jams. Herbs are either hanging from the ceiling, drying quietly, lying in oil to flavour it or being transformed into pesto.
It’s still hot during the days, and when we’re not busy preserving our harvest, we try to escape the heat.
And yet, we can feel a subtle shift in August: the days are perceptibly shorter, the evenings can already be cool enough to make us wear a cardigan, and on some mornings, mist meanders across the meadows, telling us that autumn sends its regards.
👉 In these August reflections, we’ll explore seasonal living in August — from the garden and kitchen to simple ways of making the most of late summer.
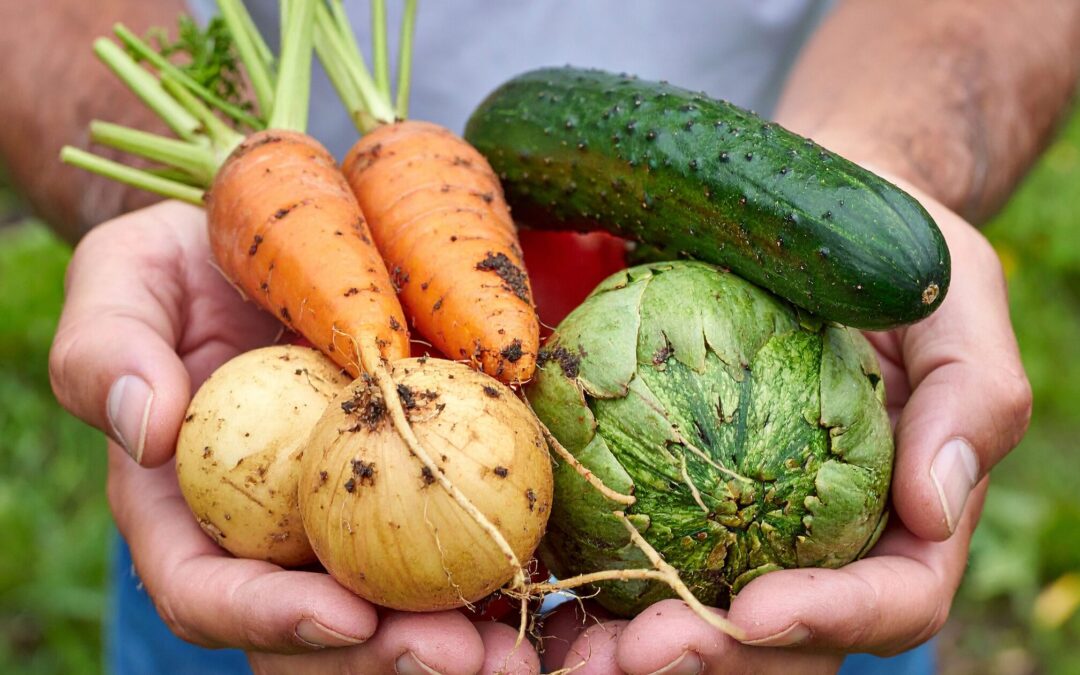
August asks us to embrace abundance. The harvest is generous, the days are still long, and there is plenty to gather, preserve and enjoy before autumn quietly begins its approach.
As I work in a school, I have most of August off and can celebrate summer to the fullest during these hot weeks. Whenever the weather allows it, I’m either in the garden, going for a stroll through the meadows and woods where I pick wild herbs and flowers, or at the banks of the river Lech to cool down.
In the evenings I enjoy sitting on the balcony with family and friends, sharing simple summer snacks and cold drinks, playing games, talking and laughing. While we could sit outside late into the nights in July, it gets dark earlier now and with darkness often comes a chill in the air. It’s not really cold yet, but cool enough to fetch a sweater or a blanket.
We often light candles outside now and sometimes even torches. We do have solar lights, but the natural flicker of the flames adds a different level of that special feeling we Bavarians call Gemütlichkeit – warmth, comfort and togetherness – to the whole late summer night atmosphere, don’t you think?
These are the endless summer evenings we remember from childhood—the ones that seemed as though they’d never end.
August at a Glance
🌞 Season: Late summer
🌱 Garden focus: harvest, preservation, planting for autumn
🏡 Home rhythms: linen, decorations with grain, wild herbs and flowers
🧘 Seasonal rituals: picnics, swimming in the sea, a lake or river, eating outdoors
Nature in August
While in July, the farmers were beginning to harvest grains, they’re finished now. In some fields, the straw is still lying on the fields, waiting to be pressed into bales and brought into the barn for winter. My dad always aimed to have all grains harvested by mid-August so that he (and thus: we) had a short time of rest before potato harvest started. It always depends on the weather, of course, but most years, he managed it, and we had one or even two weeks, where we would enjoy the lull by doing what children do: seemingly nothing and yet everything.
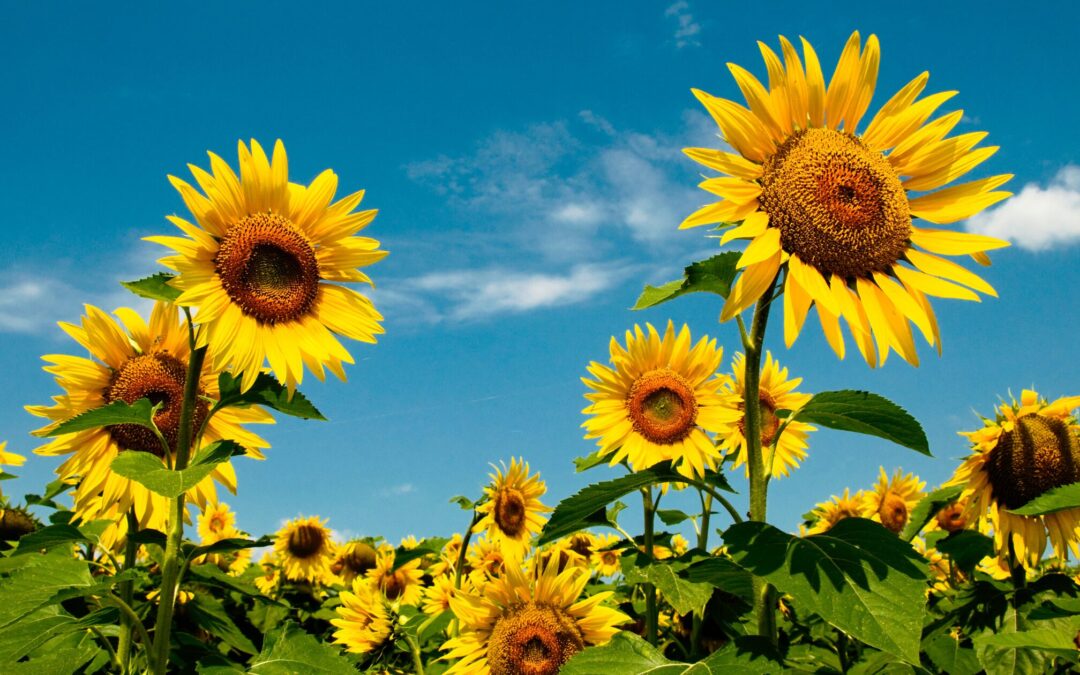
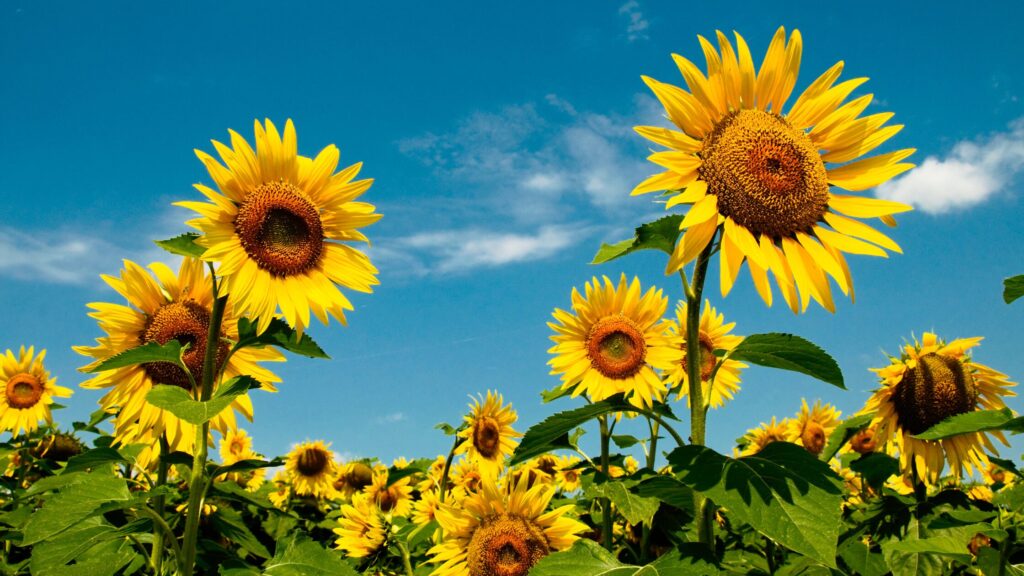
Wild herbs like Saint John’s Wort, yarrow and tansy can be found on field edges, fallows, and light woods now, while the sunflowers in the gardens tell everybody what season it is.
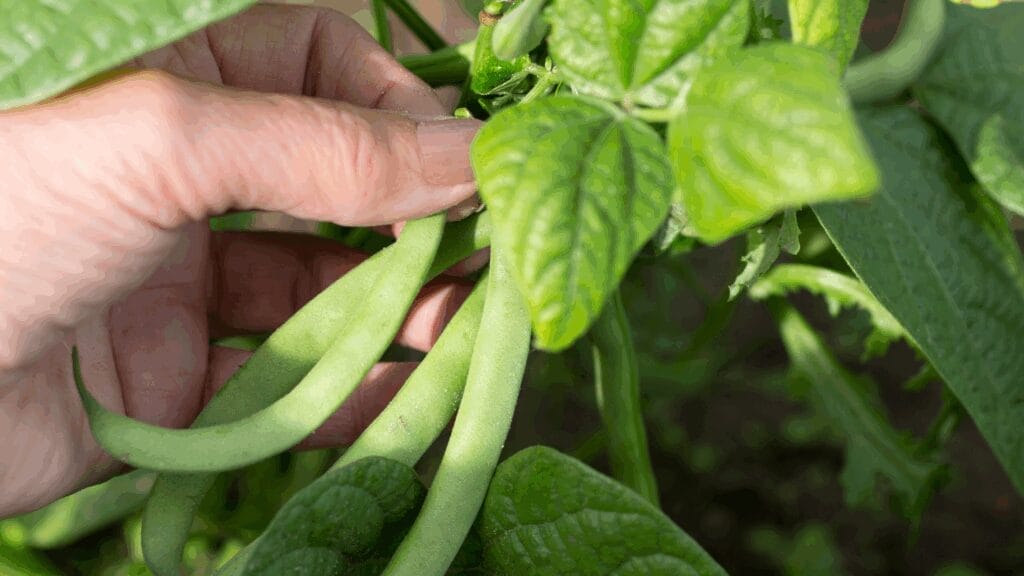
In the vegetable garden, beans, broccoli and cauliflower are ready to be harvested now, and we certainly have no shortage of choice about what to eat every day. What’s too much, I freeze, can or ferment.
August Garden Tasks
Depending on the weather, the most time-consuming garden task in August will be watering. August is usually a hot and dry month (although we have had exceptions), and our primary goal now must be to keep alive what cannot be harvested yet. I usually check my garden’s soil daily and water deeply every 2 – 3 days during dry spells. That sounds easier than it is, because I don’t have a water connection in my garden, but depend on collected rainwater, or, if that’s not enough, on driving water canisters to the garden.
Some vegetables that stay long in the patch, like pumpkins or cabbages, get a last dose of fertiliser by the end of August. Nutrients, especially nitrogen, that are fed after that time would only lead to excess leaf growth instead of flavourful cabbage heads or pumpkins.
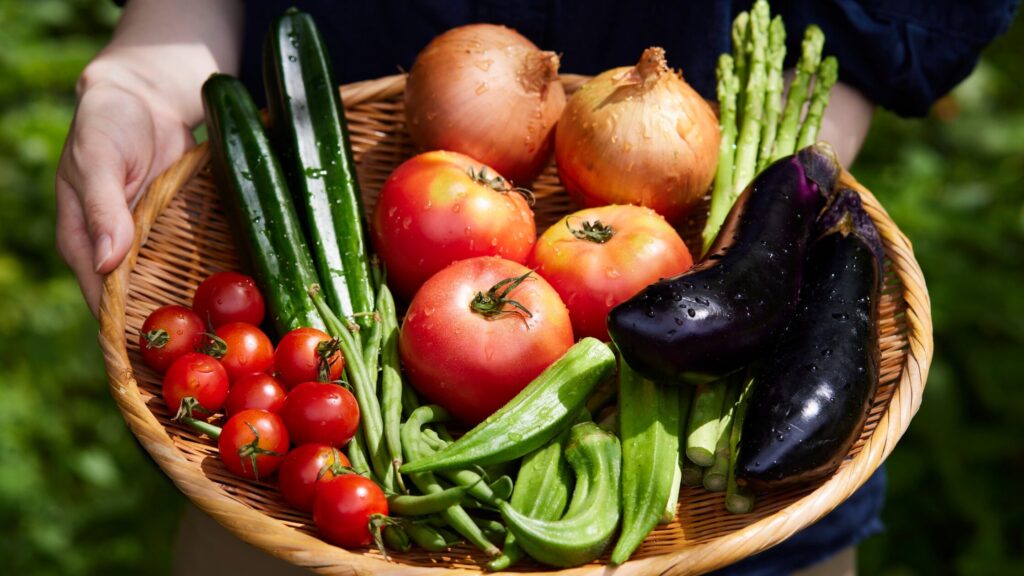
The most rewarding August garden task, though, is harvesting! Cucumbers, tomatoes, peppers, zucchini, beans, cauliflower, broccoli, all seem to be ripe at once and at the same time. The time of abundant harvest we dreamed about in winter? That’s now.
The garden has done its work. Now it’s the kitchen’s turn.
Seasonal Living in August: Kitchen and Home
Like in July, it’s still peak preserving time. Brambles and blueberries have replaced raspberries and gooseberries, and wait to be frozen, fermented or cooked into jams. One harvest quietly hands over to the next, and without noticing it we’re already preparing for autumn.
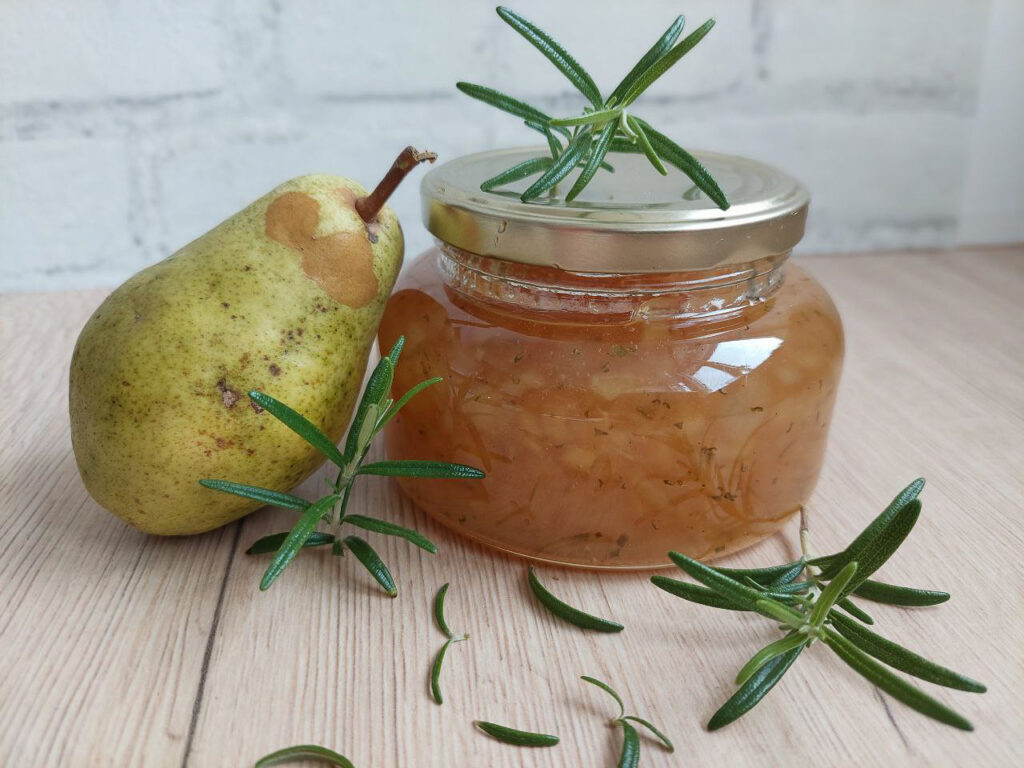
Additionally, early pears can be harvested now, and either be eaten on the spot (which I must confess I often do until my belly hurts), baked into pies, canned or transformed into jam. If you’ve never made pear jam (or simply want to look it up again), here’s a basic recipe for a wonderfully smooth and flavourful pear jam. If you want to try some new flavour combinations, have a look at these pear jam variations.
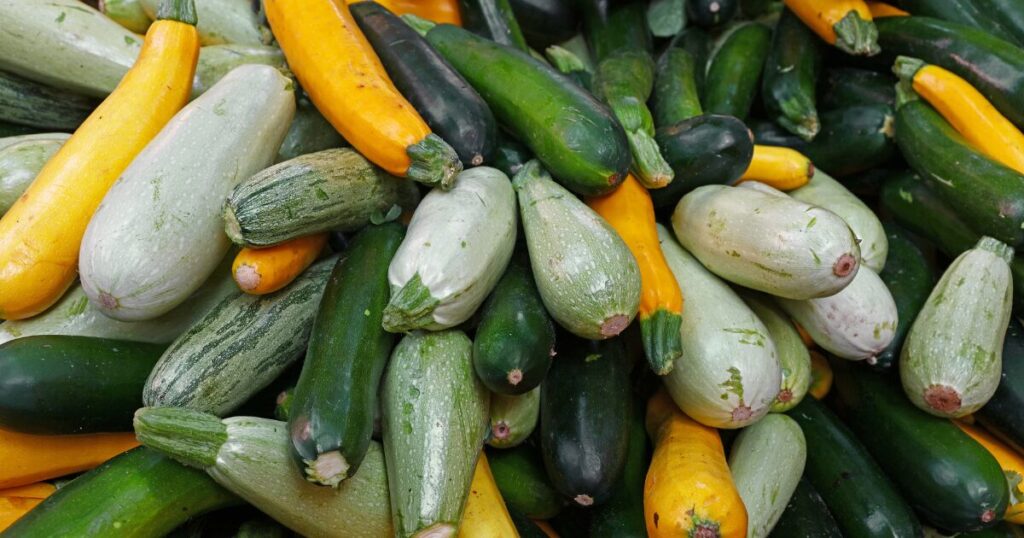
Beans are still in high season, and you can easily freeze, can or ferment them for winter. The same goes for zucchini: whenever I’ve averted my gaze from them, they have grown again. Massively. If your zucchinis are the same, preserve them as zucchini pickles, zucchini bread or grate and freeze them.
With all the gardening and preserving, I don’t want to add anything else to my to-do list. Whenever I come across another “August bucket list”, therefore, I instantly click away.
After all, August is the time we craved during those long, dark winter months, the endless days of just being and enjoying we remember from our childhood. I don’t want to overload that time with another list of boxes to tick. We still have plenty to do, what with gardening, preserving, eating, and breathing. Let’s take the speed out of August and allow ourselves some room to breathe, shall we?
Self-Care for Body…
Whenever the weather – and the garden – allow, I’m outside, taking in as much sunlight and fresh air as I can get. I enjoy going for a jog in the mornings, when it’s still temperate or at least not too hot yet. I was a bit negligent regarding sports during the heat wave in July, and I’m happy to be back at it. Jogging makes my head free – all thoughts come up at one time, spin around in the circle of thoughts that lives in my mind and bow out silently. When I come home, sweaty and tired, I still feel exhilarated and able to tackle what the day will bring.
Another great way to get some exercise now is swimming. The river Lech is a 10-minute drive away from my home, and I often just grab a towel, something to drink, and my car keys and head out for a short break at the river banks. The Lech is always cold enough to be refreshing, and a short nap afterwards under the trees helps me re-energise.
I love making ice cream in August, partly because my eldest celebrates his birthday in mid-August and almost always likes to have ice cream with his cakes. All that energy that got burned off during swimming and running must be replaced…
… For Mind…
August also gives me time to return to slower hobbies that require patience.
After all the busyness at the end of the school year that each July brings, I’m happy to have enough time now to do what I had to postpone earlier. Knit that scarf, for example, that I want to wear on chilly evenings. I’m not very experienced with knitting, and a project like this requires a lot of time, focus, and mental energy on my side. August is just the perfect time to do it.
I also love listening to and studying music I want to get to know better. This year, I’ve chosen to get better acquainted with Handel’s “Messiah”, an oratorio I’ve listened to several times, but which I haven’t grasped fully yet. The score’s already here, and I’m looking forward to immersing myself in this beautiful music.
When in July my mind was full of tasks that still needed to be done and things to think about, working with my hands calmed me down. This month, provided I’ve done my gardening and kitchen work, I allow myself to do only what I like to do and without driving myself into exhaustion.
…And Soul
Sunlight and fresh air are not only good for the body but also for the soul. So go outside every minute you can.
The sun’s rising later now, so that’s a good opportunity to get up early and watch a sunrise. Or walk somewhere new and watch a sunset, alone or with friends and family. Put your phone away and just look at the sun, witness it slowly setting and changing the light until it has finally disappeared.
Another simple idea is trying a phone-free day. Instead of doom-scrolling (yes, guilty here) and only witnessing your life through the lens of a smartphone, watch your surroundings closely, try to notice everything that’s happening. It doesn’t matter if you’re out alone on a stroll through quiet woods or sitting in a café on a busy street, looking at the buildings around you and watching people. Just be and see and don’t let yourself be disturbed by a digital device.
If you feel adventurous now, explore somewhere you’ve never been before. You needn’t go on vacation or drive far to do that. I’m sure there are museums, neighbourhoods, restaurants and cafés in your hometown that you haven’t discovered yet or have wanted to visit for some time.
A deep breath before autumn
To me, August feels like a caesura in the symphony of the year—a brief pause before autumn begins its next movement. Maybe because I have the time off or maybe because August feels slower in general, it feels like a break to me. A slower time that invites us to become slower ourselves.
And I usually accept that invitation and let myself take a short mental break from all the hustle and bustle of the months before. Now is a good time to look back at the year and ask ourselves what we’ve learned and what we’re grateful for. And maybe we even have some intentions for how we want the next months to be.
Let’s soak up every minute of this glorious late summer month, get outside as often as we can, and be grateful for beautiful, endless summer days. Autumn has already packed its belongings and is about to get on its way. Let’s take this small summer break and recharge our batteries so that we can be fully focused again when autumn knocks on the door.
If you’d like to walk through the seasons with me, I’d love to welcome you to the Seasonal Simple Life newsletter. Every few weeks I share new seasonal inspiration, recipes, gardening tips and simple ways to slow down and enjoy the time of year we’re in.
Come along, and let’s celebrate each season together.
Join the Seasonal Simple Life Community!
Seasonal inspiration for your garden, kitchen, and home—delivered with care every week.
If you’d like to keep walking through the seasons, you’ll find the rest of the Seasonal Reflections series below.
August brings us an abundance of harvest. Tomatoes, cucumbers, peppers, beans, cauliflower, broccoli and many fruits are ripe now and not only want to be harvested but also preserved for the cold winter months. With all the garden tasks we have to do in August and the work in the kitchen, we can easily forget that what we sow and plant in August lays the foundation for our winter harvest. Preserved food is great, but having fresh produce even when the earth is covered in snow is even better!
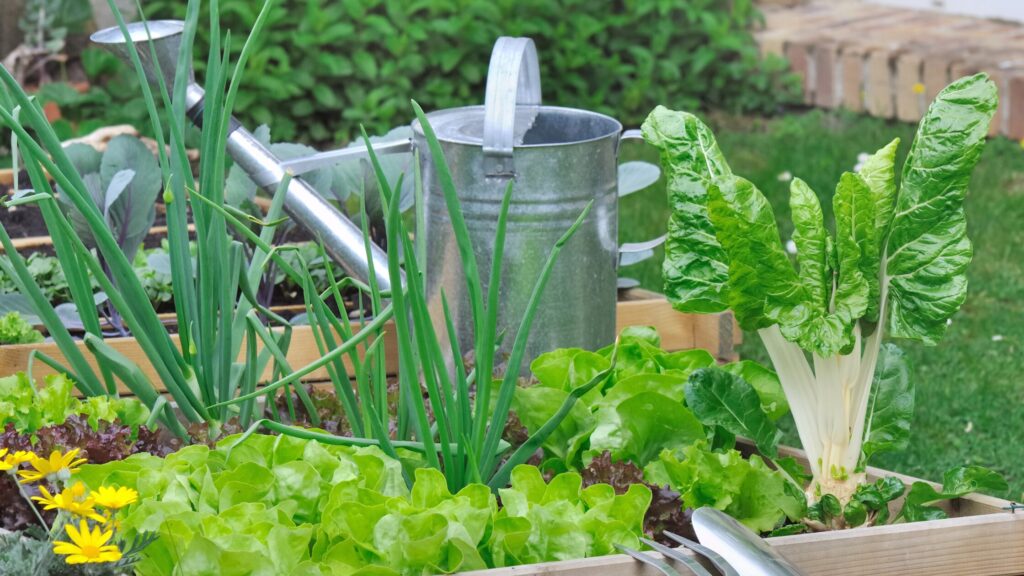
What we began in July, we can continue in August: late summer sowing and planting a mixture of cool-season and fast-growing varieties that keep our garden patches covered and are the preparation for a productive garden even in autumn and winter.
While February and March are all about seed-starting indoors, August marks a turning point in the gardening year. By now, most vegetables are best sown directly into the soil, while the seedlings we started in July are ready to move into their final place in the garden.
Quick Reference: What to Sow and Plant in August
Here’s a cheat sheet of what you can sow and plant in August:
Direct-sow outdoors
Plant outdoors
Lamb’s lettuce
Broccoli
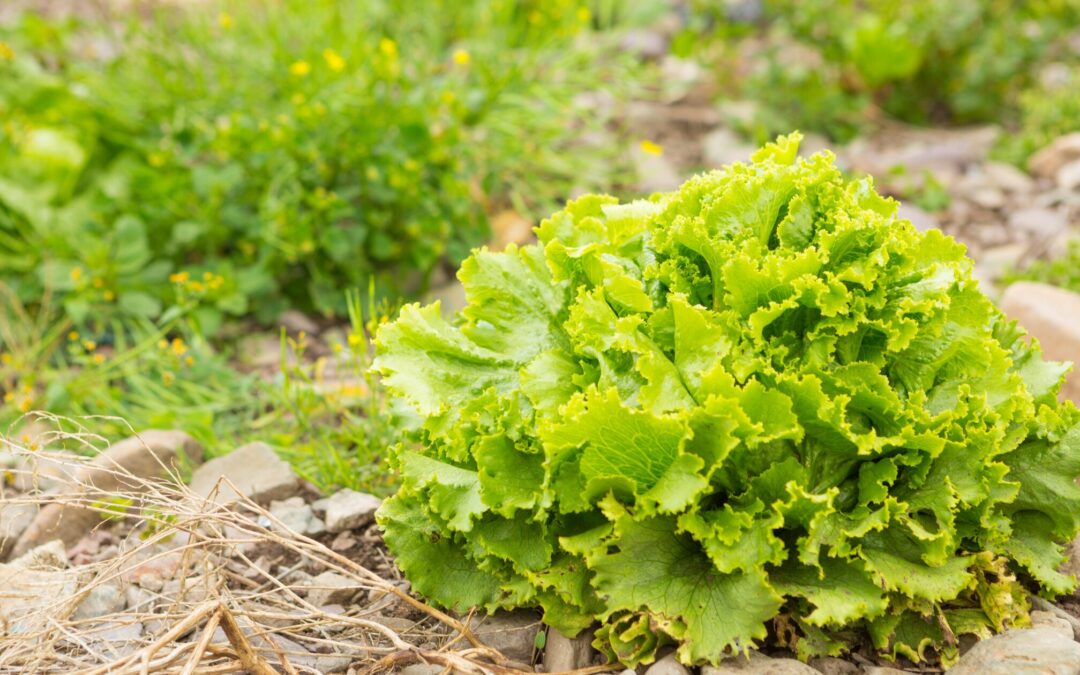
Winter lettuce
Kale
Spinach
Fennel
Radishes
Kohlrabi
Rocket lettuce
Spring onions
Purslane
Broad beans
Green manure, e.g. phacelia, buckwheat, winter peas and others
🌱 Prefer a printable version?
Download the printable August Garden Checklist & Planting Guide to keep beside you while you’re working outdoors.
Vegetables to sow in August directly outdoors
Broad Beans
While it’s too late in August to sow bush and runner beans (they need 8 – 10 weeks to mature), it’s the perfect time to sow broad beans. In fact, sowing them now will give them a head start, and we can harvest them earlier next year.
Prepare the garden patch by weeding it thoroughly and raking it smooth. Then sow the broad beans with a distance of 8 – 10 cm (3 – 4 inches) between plants and about 60 cm (2 feet) between rows. This may sound like a lot, but next May you can sow corn between the broad bean rows, like I did this season. The broad beans had largely finished by then, giving the young corn plenty of light and space.
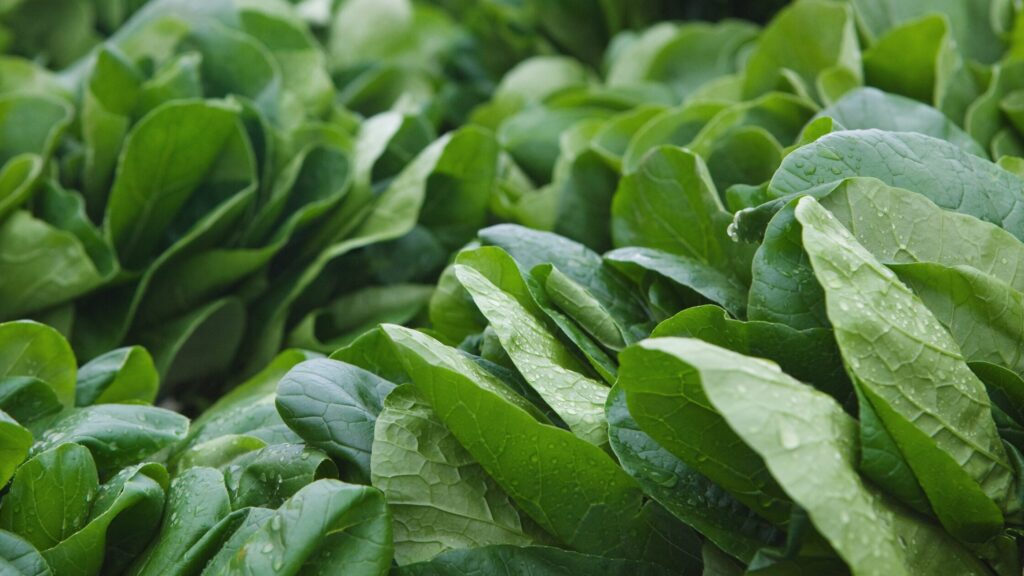
Spinach
Spinach is always a good gap filler. It grows relatively fast, and it tastes delicious. That said, sow spinach now either in rows or broadcast and harvest as much as you can before the first frost. Spinach germinates best once temperatures begin to cool, making late August one of the best sowing times of the year.
Rocket salad
Now is the last chance this season to sow rocket salad. It’ll grow quickly and doesn’t require much. Just sow it, watch it grow quickly, harvest the leaves and – if it’s still time – let a few plants flower if you’d like it to self-seed naturally. That way, it will spread across your garden.
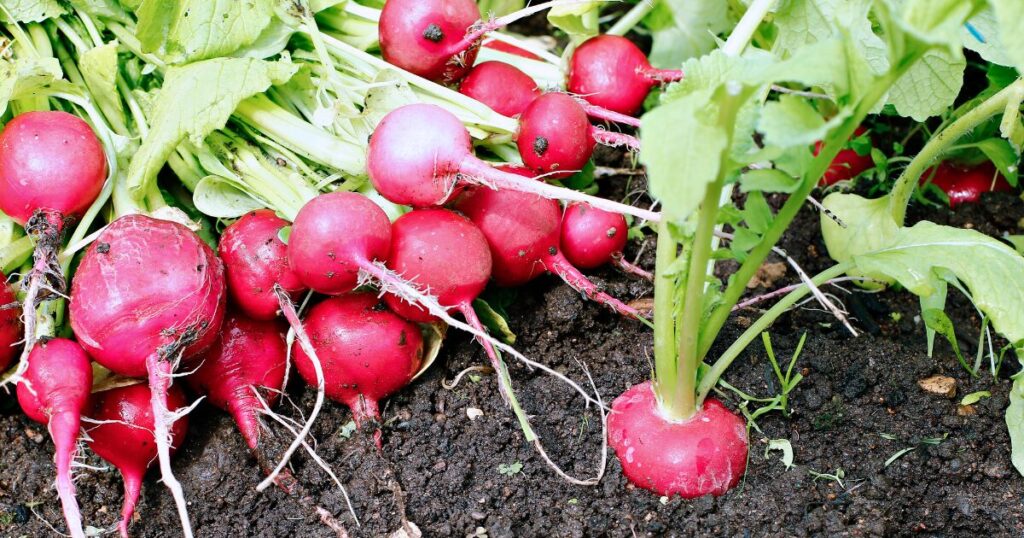
Radishes
Radishes are one of the quickest vegetables, as they need only about 30 days from sowing to harvest. It’s still advisable to choose bolt-resistant varieties now. August may be late summer, but it can still be hot.
Radishes are great for filling empty spaces in the vegetable patch quickly, and they’re a wonderful addition to a salad or make a great staple as fermented radishes.
If I had to choose only one vegetable for winter harvest, I’d take lamb’s lettuce. It’s my favourite winter salad. The rich green leaves, their velvety texture and the wonderful taste of nuts make for a perfect winter side or even main dish.
As lamb’s lettuce belongs to the valerian family, so it fits easily into almost any crop rotation.
Sow lamb’s lettuce in late August when temperatures have dropped. Either sow it in rows or just broadcast wherever there’s a gap in the patches, and look forward to all those delicious bowls of winter salad!
Cold-hardy lettuce
Lamb’s lettuce isn’t the only lettuce we can sow now. In fact, all cold-hardy varieties like romana, winter head lettuce or radicchio can be sown now. With a bit of planning, we can feast on fresh salad throughout the whole winter.
One of my favourite varieties that I sow every year is “Rouge d’Hiver”, but I also like “Bacquieu”.
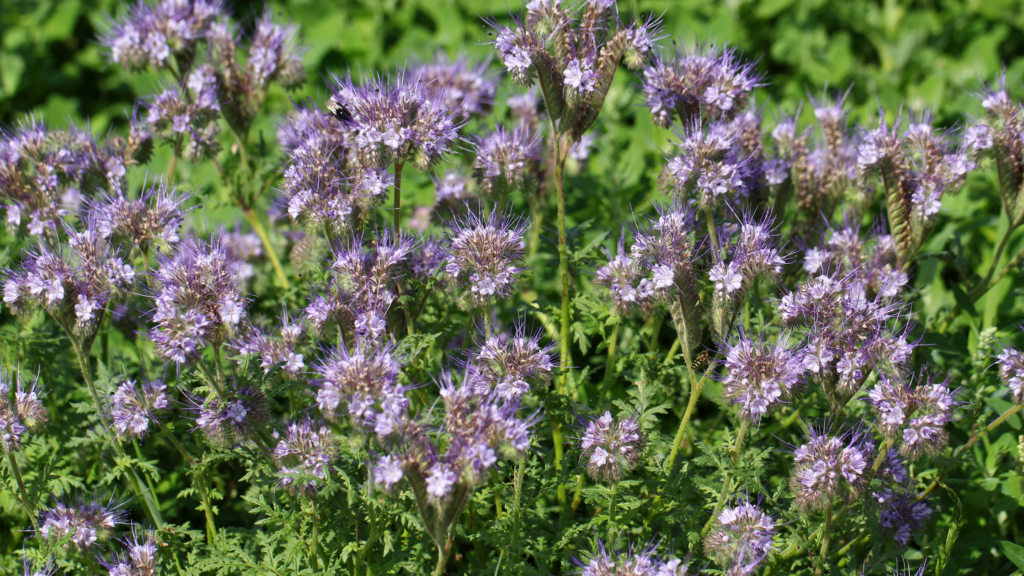
Green manure
My garden is about 100 square metres (1076 square feet), 130 (1400) if I count the greenhouse as well. I don’t want to cultivate vegetables on the whole area during winter. Yet, I want the soil covered. Partly, I layer it thickly with mulch, and partly I cover it with green manure.
There are different plants you can use as cover crops now, for example, phacelia, buckwheat or winter peas. The plants will reach a good height before the first frost strikes, and sometimes even flower, but, fortunately, won’t have enough time to produce seeds. That way, you won’t have to worry about green manure plants self-sowing in your garden the next season.
Vegetables to Plant Outdoors in August
All vegetables we seed-started indoors or in the greenhouse in July should be planted out now. Remember to harden off the seedlings before transplanting them. For that purpose, put them outside for 2 – 3 hours a day and gradually increase the time over the course of a week. That way, they get used to the conditions outside and get well prepared for your garden.
Brassica
Brassica seedlings we started indoors earlier, such as broccoli, kale, or kohlrabi, should now be planted outdoors in August.
Just make sure you have them properly hardened off, and transplant them on a cloudy day so they don’t get too stressed.
Fennel
Last chance in August to plant the fennel you may have seed-started earlier in July. It should have a good height by now and isn’t prone to as many pests and diseases as spring-started plants. I don’t speak from experience here, as I haven’t had any luck with fennel so far. This year, though, I’ve tried planting it in autumn (that is: in August). I’ll keep you updated on the progress.
Spring onions
If you’ve grown spring onions from seeds (or bought a bunch at the nursery), August is the perfect time to plant them. In spring (as the name indicates), we can harvest the fresh green leaves and chop them into salads, soups or stews.
What Not to Sow in August
Although August is surprisingly productive, some vegetables simply don’t have enough time left to mature before autumn.
Avoid sowing:
Bush beans
Runner beans
Sweet corn
Pumpkins
Winter squash
Zucchini
Cucumbers
Melons
Tomatoes
Peppers
Eggplants
Most of these warm-season vegetables need eight to twelve weeks of warm weather. By the time they begin flowering, temperatures and daylight are already declining.
If you’d still like to use the empty space, sow spinach, lamb’s lettuce, rocket or green manure instead.
Frequently Asked Questions
Can I still sow carrots in August?
Yes, but you must choose a late variety that can stand frost.
Can I grow vegetables in August if I missed spring sowing?
Yes, but as it’s already late in the season, choose cold-hardy vegetables like winter lettuce, spinach and radishes. August is a good month to plant and sow for winter harvest.
Should I seed-start indoors in August?
No, it’s too late by now. The plants wouldn’t ripen. Instead, sow directly into the patches or plant what you’ve seed-started earlier.
How late can I sow spinach?
Spinach can usually be sown until early September in mild climates. Late sowings often overwinter and produce an early spring harvest.
Can I sow lettuce in August?
Yes. Choose cold-hardy varieties that tolerate cool temperatures, such as winter lettuce or romaine types.
Which vegetables can survive winter?
Lamb’s lettuce, spinach, kale and many winter lettuces tolerate frost well and continue growing whenever temperatures rise above freezing.
Should I fertilise vegetables planted in August?
Usually not heavily. Too much nitrogen encourages soft growth that is more susceptible to frost. Well-prepared soil and mature compost are usually enough.
Can I still plant herbs in August?
Many perennial herbs can still be planted early in the month, but annual herbs like basil are nearing the end of their season.
Water your plants deeply during dry spells. Although August borders on autumn, it can still be rather hot, at least here in Bavaria. If it hasn’t rained for some time, check the garden soil and water your plants if necessary. It’s better to water once a week deeply, instead of daily, but only on the surface.
Add another layer of mulch to your beds, either with grass clippings, straw or shredded leaves. Mulch keeps the soil cooler, reduces evaporation and suppresses weeds during hot weather.
Plant new strawberries or blueberries. They have time to settle and grow stable roots so they can produce already in the next season.
Harvest whatever is ready in your garden. August is still a great time to harvest and dry herbs for later use. If you know what else you can do with herbs, read this article on six ways to preserve herbs.
Although August is still quite busy in the garden and kitchen, it also has this air of timelessness and endless days we often remember from our childhood. It’s easy to get lost in thought while picking berries, weeding or just stopping to watch the clouds rolling by and imagining seeing all sorts of things in them. I used to try putting myself back on track whenever I caught myself wool-gathering. Nowadays I just smile and try to grasp that last thought I had before falling out of them and into reality. Sometimes it’s prettier in cloud cuckoo land.
If you feel stressed by all you “must” do, you have my permission to relax. This is the summer we waited for all winter. Grab it and enjoy every minute of it. That doesn’t mean doing nothing, but you could try doing every task intentionally and with all your focus. And if you lose yourself in thoughts while weeding or preparing your vegetables for a cold summer lunch, all the better!
If you’d like to read more about the slower and more reflective side of this season, you may also enjoy my August reflections.
🌿Enjoy slow seasonal gardening?
Join my newsletter for monthly garden guidance aligned with nature’s rhythm.
Still not enough garden talk? Then these posts may interest you:
While August is still warm and often hot, the days have already become noticeably shorter. I notice that, especially in the evenings, when it’s already getting dark by around 10 p.m., if I want to sit outdoors, I have either to accept the dark or light candles and torches.
My vegetable garden seems to produce like mad now, and I’m elbow-deep in harvesting, preserving and maintenance. The gaps that arise when something’s harvested must be closed soon with new seedlings or by sowing fast-growing vegetables. Let’s see what garden tasks August has in store.
August Garden Checklist: Essential Tasks at a Glance
If you only have time for a few things, focus on these essential August garden tasks:
Harvest and preserve regularly
Feed heavy-feeding crops
Sow vegetables for autumn harvest
Water deeply during dry spells
Mulch beds to conserve moisture
Prune and cut back tomatoes
Here’s a quick overview of the most important garden tasks to tackle in August:
Garden task
Best Time in August
Priority
Checking for pests and diseases
Every second day
High
Fertilising
Every 2 – 3 weeks
High
Harvesting
When plants are ripe
High
Preserving harvest
After harvesting
High
Sowing and planting
After gaps form due to harvest
High
Pruning and cutting back tomatoes
When suckers form
Medium
Mulching
When plants are about 10 cm (4 in) high
Medium
Weeding
Twice a week
Medium
Watering
When soil is dry
Medium
Keeping track of all these tasks can be tricky. Download the free August Garden Checklist and take it with you into the garden.
If you’re transitioning from early summer, you might also want to revisit the tasks from July. Many jobs started last month continue now — especially fertilising and mulching. → Continue from last month with my July Garden Tasks checklist.
What to Sow and Plant in August
August is still a good time to sow vegetables directly outdoors to prepare the autumn harvest.
Direct sow outdoors
Good vegetables to sow in August include:
Lamb’s lettuce
Autumn lettuce varieties
Asia salad
Spinach
Radishes
Winter purslane
Broad beans
Green manure
Transplant outdoors
You can also plant cabbage plants like broccoli, kohlrabi and kale, as well as fennel and spring onions.
→ For a complete overview, read my full guide on what to sow and plant in August.
Now let’s look at the most important August gardening jobs that will keep your vegetable garden productive through late summer:
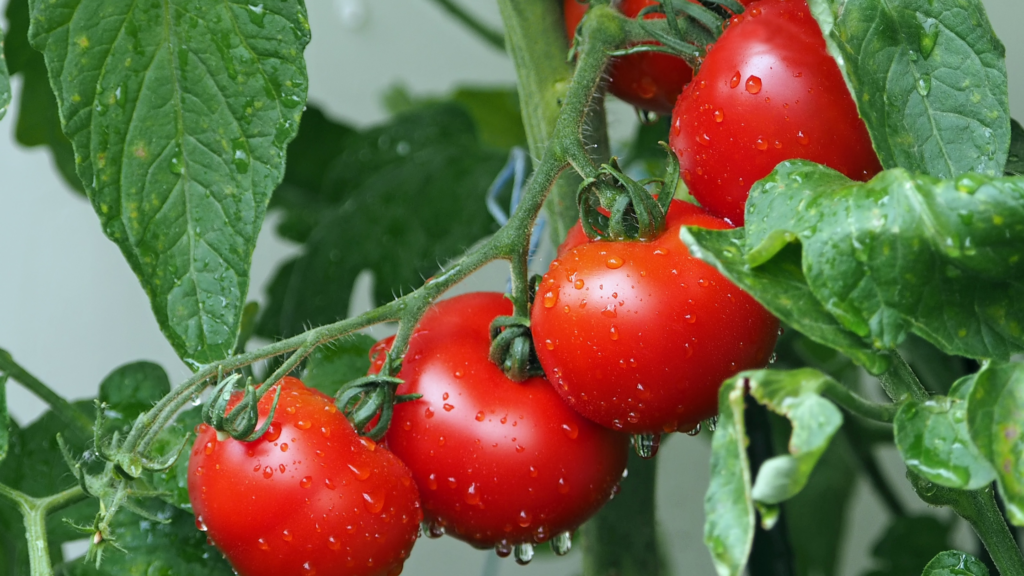
1. Pruning and cutting tomatoes
✔️ Why it matters: Pruning helps tomatoes form more fruit and stay healthy; cutting off the tips lets the plant direct its energy to fruit building.
Our tomato plants are at their peak now and produce leaves, fruits and shoots like crazy. They seem to have almost endless energy.
As sensible gardeners, however, we know that the colder nights are not far away. When temperatures drop below 15 °C, tomatoes slow down growth considerably, and the same goes for ripening. Not all the fruits they produce now will ripen before temperatures drop.
When we cut off the growing tips now, they redirect their energy to producing larger fruit that can actually ripen in time.
Also, remove diseased leaves near the ground. That way, they won’t get in touch with wet soil, which could lead to blight.
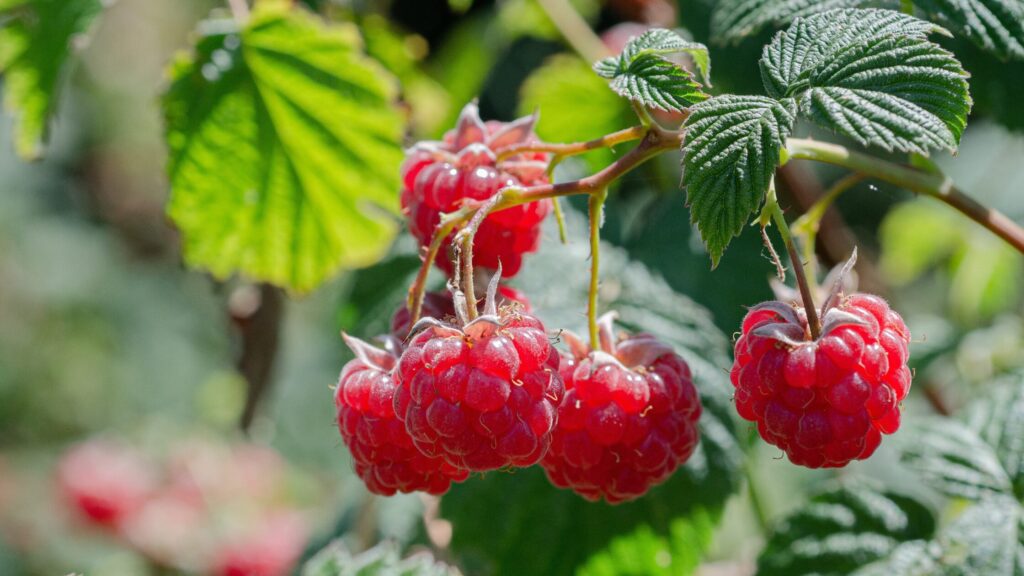
✔️ Why it matters: The one-year-old shoots of summer raspberries must be cut back every year to prevent the spreading of pests and diseases and to induce new growth next season.
August is the perfect time to cut back all one-year-old shoots of raspberries that bear their fruit in summer. Don’t cut raspberries that fruit in autumn or you’ll lose the harvest of this and next year.
Cutting the canes also makes sure to get rid of raspberry maggots that otherwise would now get into the soil where they’d transform into a beetle, which would in turn lay new eggs.
Diseases like spur blight can also be prevented or got rid of by cutting off the shoots of summer raspberries.
I’d always discard the canes in the household bins, never on the compost. If your raspberries were infected by pests or diseases, they’d spread like wildfire.
Leave around 6–8 healthy young canes per metre (or 8–10 per row) for next year’s harvest.
By the way: did you know you can make wonderfully versatile jam with raspberries? In this post I’ve compiled several unusual recipes for raspberry jam.
🌿 Gardener’s Tip: Only cut back summer raspberries
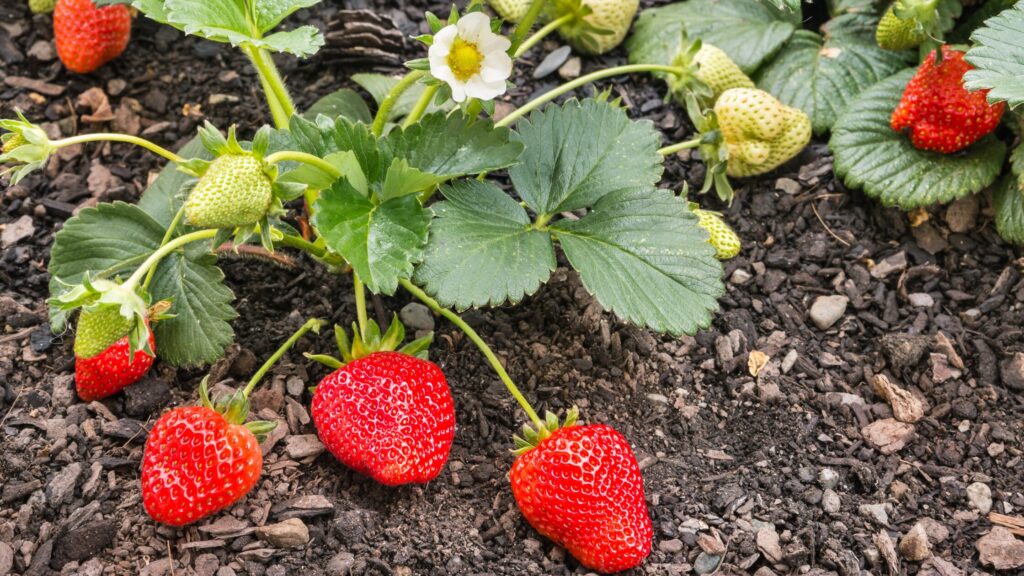
3. Create a New Strawberry Patch
✔️ Why it matters: Strawberries can now root well in a new patch and will produce an abundant harvest next summer.
If you’ve pondered cultivating strawberries in your garden, August is the perfect time to plant them.
Make sure the new bed is weed-free and feed it with mature compost that you roughly rake in. Then plant strawberries at a distance of 25 cm (10 inches) and 50 cm (20 inches) between rows. That way, they’ll get enough sun next season to produce larger, sweet berries. At the same time, leaves can dry off quicker, which makes it harder for mould to develop.
🌿 Gardener’s Tip: When planting strawberries, make sure to keep the crowns at soil level.
4. Water thoughtfully
✔️ Why it matters: All plants need water to survive and thrive.
It can be very hot and dry in August, and some years it’s comparatively cool and moist. Depending on the weather, it can be necessary to water our plants, not only to keep them alive but thriving.
It’s proven to be better when we water once to twice a week thoroughly instead of watering every day just a little bit. That way, the plant’s roots grow deep where they get access to water from even deeper regions. Which, in the end, will help us water less.
If you cultivate vegetables in raised beds or containers, this rule doesn’t apply, though! They can’t grow out of their pots and need regular watering.
Water your raised beds at least every other day and your containers at least once a day. If it’s really hot and dry, even more often.
🌿Gardener’s tip: The best time for watering is in the morning, as the water can soak into the soil before the midday heat. It also helps leaves to dry quickly, reducing the risk of fungal diseases
5. Mulching
✔️ Why it matters: Mulching keeps the soil moist and suppresses weeds
As I’ve been mulching the whole season, my garden beds are pretty well covered by now. We mustn’t forget, though, that all that mulch degrades over time and becomes thinner. For that reason, it’s important to upholster the mulch by adding another layer.
Whenever I scythe around my vegetable garden, for example, I let the grass dry for 1 – 2 days (depending on the heat) and then use it to cover the soil around my plants. Nothing goes to waste; the grass transformed from a nuisance to valuable mulch, and I, the veggies, and the soil organisms are happy 😊. It’s a win-win-win situation.
🌿 Gardener’s Tip: Keep mulch a few centimetres away from plant stems to prevent rot.
6. Weeding
✔️ Why it matters: Weeds compete for nutrients.
I don’t know about your garden, but mine shows a lull regarding weed production in August. Maybe it’s that by constantly weeding since early spring, no weed seeds could germinate or that they finally get it that they’ll never stand a chance against Weed-Inator Me. I usually don’t have as many weeds in August in my garden as in spring.
Nevertheless, check for weeds regularly and either eat them (in this article I describe how to make pesto from wild plants) or make food for your plants( Read here how to make nettle manure.
🌿 Gardener’s Tip: Rip weeds out as soon as they occur.
7. Fertilise with measure
✔️ Why it matters: Heavy feeders need a lot of nutrients to produce an abundant harvest.
Talking of plant food: our heavy-feeders like tomatoes, pumpkins, zucchini, cucumbers, peppers and cabbages need a healthy dose of fertiliser every 2 – 3 weeks. For medium-feeders, a fertilisation schedule of 3 – 4 weeks is sufficient. By the end of August, however, I’d slow that rhythm down. With too many nutrients, the plants would produce more fruits. Seeing as autumn is already ante portas, even though we can’t see it yet, those fruits wouldn’t ripen before temperatures drop.
Reducing nitrogen fertiliser towards the end of August encourages plants to ripen existing fruits instead of producing excessive leafy growth.
✔️ Why it matters: Vegetables harvested at the right time taste better, stay tender, and encourage plants to remain productive.
August is a very productive month in the vegetable garden. In fact, I can harvest tomatoes, cucumbers, zucchini, lettuce, and much more almost daily. I know it can be tempting to let ripe fruits hang on the plants and simply enjoy the beautiful sight. After all, that’s what we’ve worked for so long, and people (and we) shall see it. But if you harvest too late, the flavour will become watery or even bitter, the plants get fibrous, too large (hello my zucchini-demons) or turn brown.
Harvesting regularly also induces the plant to grow more fruits, leaves or whatever we cultivate it for.
9. Preserving our harvest
✔️ Why it matters: Preserving makes our harvest last throughout the year
I’m a huge fan of eating as much fresh produce as we can during summer. In August, however, the garden usually produces more than we can eat. So, being the glutton I am, I now preserve all that doesn’t get snacked away by either me or the children.
When we open jars of jam, sauerkraut,pickled zucchini or fermented gherkins in winter, we remember the hot days of August when we picked those very same vegetables and made them last till the next season.
If you want to check your fermentation equipment, here’s a list of what you really need (hint: it’s less than you may think and definitely nothing fancy).
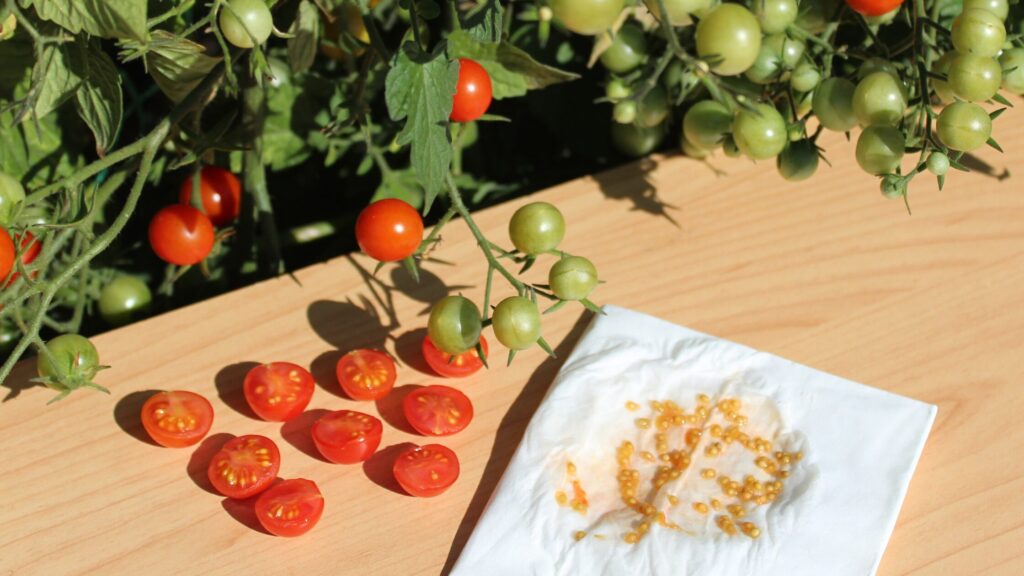
You thought you harvested every bean, but then you detect some of them hidden under some leaves? Don’t worry. Let them hang on the plant until the pod becomes dry and the beans rattle when you shake the pod. Peel them out of the pod, let them dry and store them in a paper bag in a cool and dark place. Congratulations! You’ve successfully grown next year’s harvest!
Harvesting seeds from plants that already grew in your garden not only makes you independent from seed companies but also eventually develops plants that are better adapted to your garden’s microclimate.
11. Sowing and planting
✔️ Why it matters: Sowing and planting in August prepare our autumn and winter harvest.
With all that harvesting, we suddenly have a few gaps in our vegetable garden beds. But if you think August is too late to sow and plant anything, think again. Now is the perfect time to lay the foundation for our autumn and winter harvest. So let’s fill up all the gaps with seeds or seedlings. For a quick overview of what to sow now, check the list above or read this comprehensive list of vegetables we can sow and plant in August in our garden beds.
🌿 Gardener’s Tip: Always close gaps in the beds to keep the soil covered and harvest continually.
Sow broad beans
Broad beans are often sown in early spring, but this year, I’ll try sowing them already in August. They’re said to develop plants of 10 – 20 cm (4 – 8 inches) before the frost strikes, overwinter on the patch and produce a considerably earlier harvest the next season. I haven’t any experience with sowing broad beans in August yet, but stay tuned; I’ll keep you updated.
Sow green manure
If you’ve already sown and planted whatever you wanted for a later harvest but still have gaps or even whole patches lying empty, sowing green manure is a good solution. Not only will it cover the soil and keep it from eroding or leaching out, but it’ll also enrich the soil with nutrients, usually nitrogen. In fact, green manure plants like clover or phacelia, for example, build Rhizobiaceae at their roots, where they store nitrogen. When the plant dies in winter, the nitrogen stays in the soil, attached to the roots and is slowly released when it gets warm again in spring.
Frequently Asked Questions About Gardening in August
What vegetables can I still plant in August?
Many fast-growing vegetables can still be sown in August, including Swiss chard, radishes and rocket salad. August is also ideal for succession sowing to extend harvests into autumn.
Can I still start a vegetable garden in August?
Yes. While spring is the traditional planting season, many fast-growing vegetables such as radishes, Asian greens, spinach and Swiss chard can still be sown in August. You can also plant lamb’s ear and other late lettuce varieties like chicory, winter purslane and radicchio.
Should I keep fertilising tomatoes in August?
Continue feeding while the plants are actively producing fruit, but gradually reduce nitrogen-rich fertilisers towards the end of the month so the plant focuses on ripening existing tomatoes.
Should I prune tomato leaves in August?
Yes, remove yellow or diseased leaves and improve airflow around the plants. Avoid removing too many healthy leaves at once since they still feed developing fruit.
How often should I water my garden in August?
Water deeply whenever the soil becomes dry rather than giving plants small amounts every day. Containers and raised beds usually need watering much more frequently.
Can I plant strawberries in August?
Yes. August is one of the best planting times because the plants establish strong roots before winter and often produce an excellent crop the following year.
Should I remove old vegetable plants after harvest?
Yes. Once crops have finished producing, remove diseased plants promptly and compost healthy material. Replant the space with autumn vegetables or green manure whenever possible.
Common August Gardening Mistakes
Mistakes can happen, even when you’re an experienced gardener. To help you prevent them, I’ve listed the most common mistakes:
1. Watering little and often
Frequent shallow watering encourages shallow roots, making plants less drought-tolerant.
2. Forgetting to harvest regularly
Overripe beans, cucumbers and zucchini slow further production.
3. Leaving empty beds bare
Bare soil quickly dries out, and weeds move in.
Always sow another crop or green manure.
4. Continuing heavy fertilising into autumn
Too much nitrogen late in the season encourages leafy growth instead of ripening fruit.
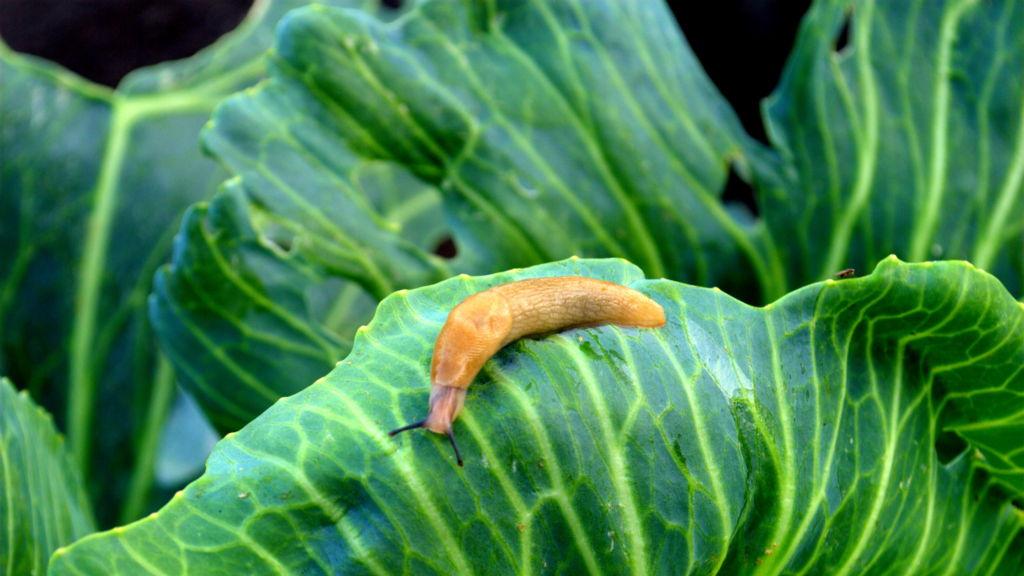
5. Ignoring pests because the season is nearly over
Aphids, powdery mildew, tomato blight and cabbage pests remain active well into late summer.
6. Forgetting to preserve surplus harvest
August abundance disappears surprisingly quickly.
Freeze, ferment, dry or preserve fruits and vegetables while they’re at their peak.
7. Letting weeds go to seed
One neglected week in August can mean thousands of weed seeds for next year.
🌿 August Gardening Checklist: Quick Summary
Focus on:
– Watering, mulching and fertilising actively growing plants
– Harvesting and preserving what’s in season
– Closing gaps in the beds by sowing and planting autumn veggies
Why Gardening in August Matters
Gardening in August is essentially based on three pillars:
Harvesting and preserving what’s ready now
Tending for what needs a bit more time
Setting the foundation for our autumn and winter harvest.
Sometimes it may feel like doing a mad dance between watering, checking for pests, harvesting loadfuls of fresh fruit and preserving them at night in the kitchen. All while it’s still hot outside, but already sensing autumn around the corner.
August is a month of abundance. Learn which garden tasks to prioritise now—from harvesting and preserving to sowing autumn vegetables—so your garden stays productive well into the next season.
It’s busy for us gardeners now, I won’t deny it. But it’s also very rewarding. Not only can we eat fresh produce for every meal if we like, but we can also watch our pantry stock up. Every jar of jam, pickle or ferment, every package of frozen vegetables, every dried bunch of herbs provides for our and our families‘ well-being while at the same time linking us to all those generations before us who did exactly the same.
🌿Enjoy slow seasonal gardening?
Join my newsletter for monthly garden guidance aligned with nature’s rhythm.
Seasonal inspiration for your garden, kitchen, and home—delivered with care every week.
Can’t get enough of gardening? These articles may also interest you:
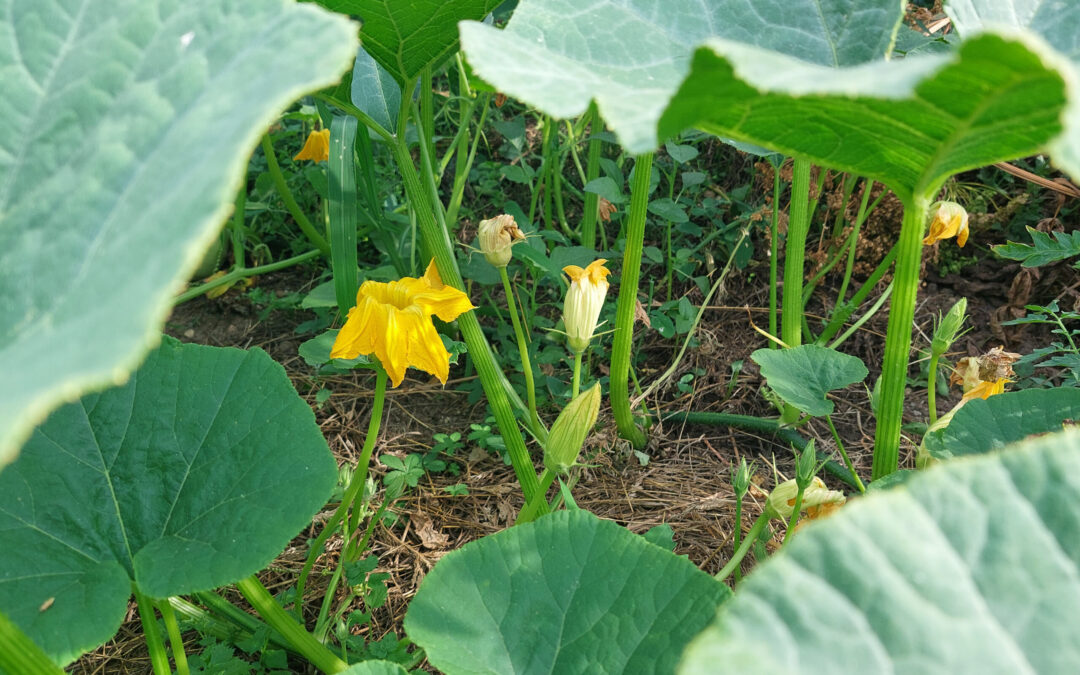
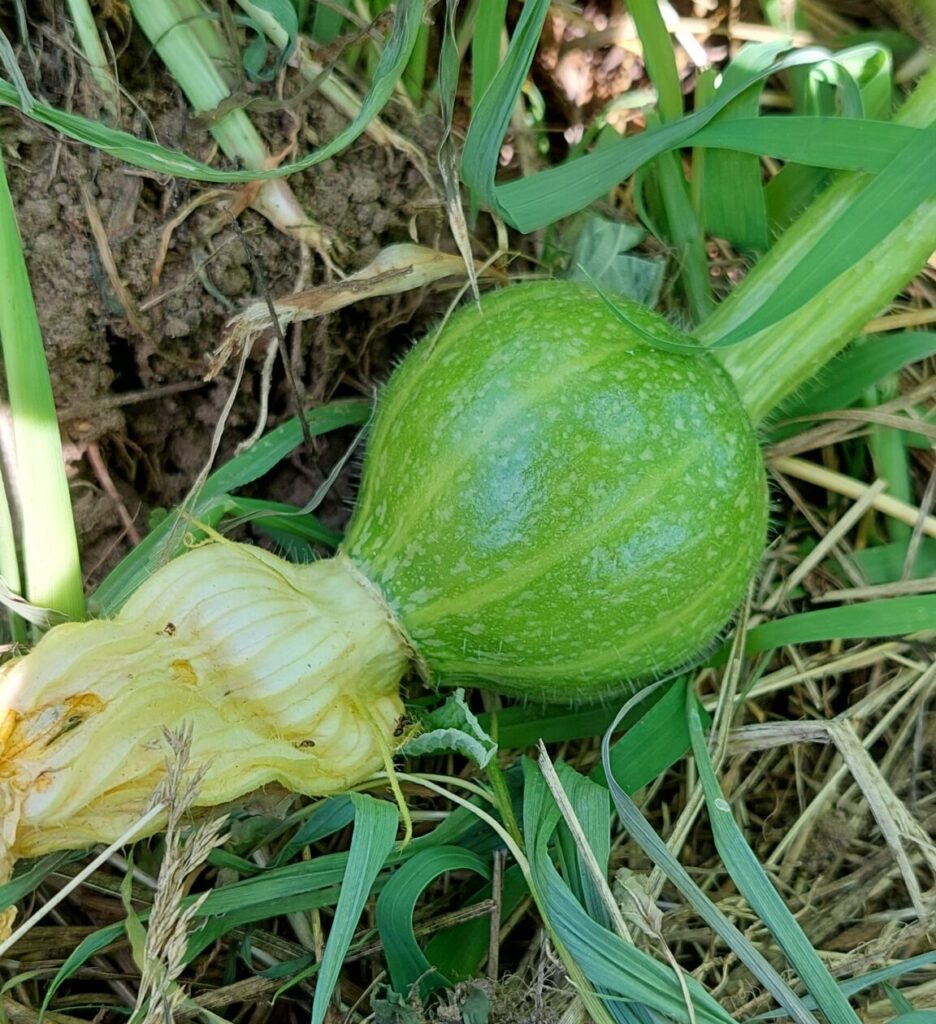
I was just visiting my garden and checking on the veggies. When I looked after my pumpkins, I realised that some of them are already bearing fruit, while others only show male flowers but no pumpkins.
If your pumpkin plant has plenty of flowers but still isn’t producing pumpkins, there are several possible reasons. In this article, we’ll look at one of the most common: plants that produce only male flowers. I’ll explain why it happens and what you can do about it.
Normally, male flowers develop earlier so that their pollen is ready for pollination as soon as the female flowers open.
Sometimes, though, a pumpkin plant keeps producing only male flowers and no female flowers. Without female flowers, there can be no pumpkins. In this article, I’ll explain why that happens and what you can do about it.
Why do some pumpkins have only male flowers?
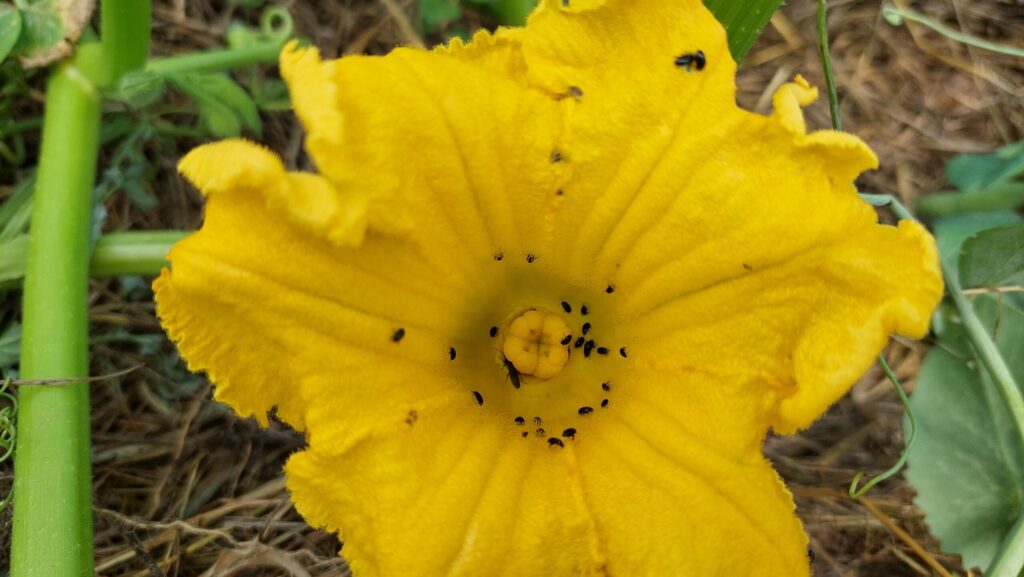
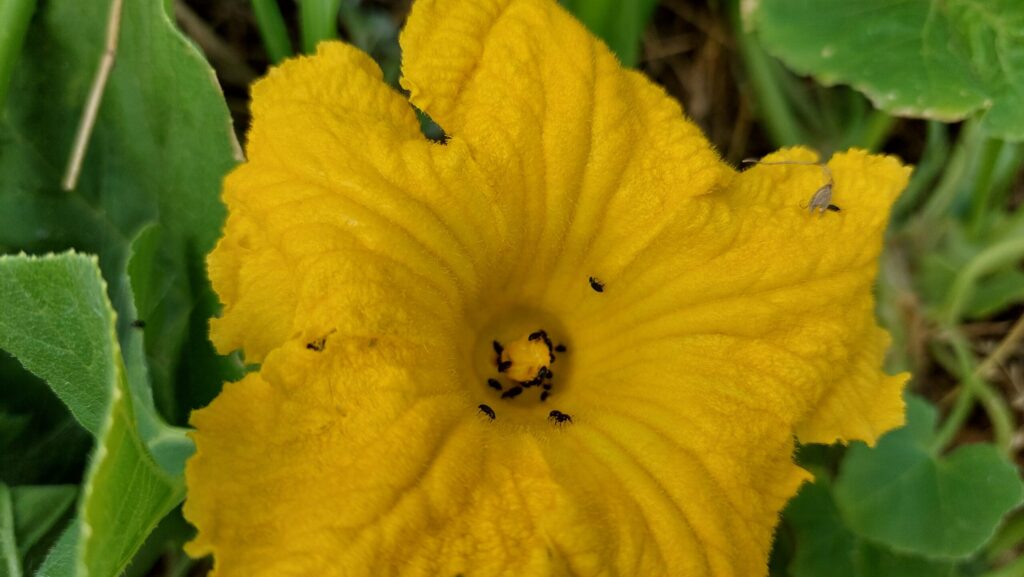
Pumpkin plants produce both male and female flowers.
You can distinguish them by the characteristic ovary under the female flowers that looks like a mini pumpkin. In the middle of the flower, there’s a so-called stigma which looks a bit like a small crater.
Male flowers, on the other hand, grow just on a long stem (no mini fruit here). Inside the flower are several pollen-covered stamens. It’s normal for a pumpkin plant to produce more male than female flowers. What’s not normal is when a pumpkin plant does not produce any female flowers at all. There are several reasons for that phenomenon:
Don’t panic – Male flowers develop first
Young pumpkin plants naturally begin by producing male flowers. In fact, 2 – 3 weeks before the first female flowers show, there are already male flowers on the plant, so they’re ready to pollinate the first female flowers when they open.
So don’t panic when your plant has just started to show flowers. As long as the plant is growing vigorously and looks healthy, patience is often all that’s needed.
Variety
Some vigorous pumpkin varieties produce lots of male flowers before switching. If you’ve chosen one of those varieties, you may want to wait another few weeks.
Too little nutrition
When a pumpkin doesn’t show any female flowers, the plant could have a nutrient deficiency. When the soil hasn’t had many nutrients to begin with or just doesn’t have the right kind of nutrients, a pumpkin plant can’t produce female flowers.
Too much nitrogen
On the other hand, too much fertilisation—especially with nitrogen—can also prevent pumpkins from producing female flowers. Too much nitrogen encourages leafy growth instead of flowering and fruit production.
Wrong place
Pumpkins originally come from warm regions, and they still love the sun. When planning your vegetable garden, choose a place where they get at least 6 – 8 hours of sunlight. In a shady spot, therefore, they don’t grow well.
Wrong watering
When pumpkins aren’t watered properly while they’re in bloom, the harvest will suffer.
In normal weather, pumpkins usually benefit from one deep watering each week. During hot, dry spells, they may need watering every day. Very cold water straight from the hose can stress the plants, especially during hot weather. If possible, let the water warm up a little first. In fact, it’s best to store the water during the day in an outdoor container so that it adopts the temperature of its surroundings.
Another point we must observe when watering pumpkins is to avoid spraying the part of the stem that grows out from the soil. When this root stem becomes wet, the plant can rot.
Temperature
Although pumpkins are sun-lovers, they suffer from very high temperatures. Heat waves with temperatures above about 32 °C (92 °F) can delay the production of female flowers.
Too little distance between plants
Truth be told, I’ve been guilty of that. In May, when we can finally transplant our pumpkins into the garden beds, it’s tempting to ignore the recommended distance between plants of about one metre (3 feet). The pumpkin plants are still relatively small, and although I know they’ll become immense, I pretend I couldn’t imagine it and “use the space better”.
Plants that grow too tightly together get less light and compete for nutrients. And as we’ve learned earlier in that article: no nutrients, no female flowers.
Too many leaves and shoots
When the plant produces too many leaves and shoots, that’s often a symptom of too much nitrogen. The plant goes full into “green mode”, growing leaves and shoots like mad and then doesn’t have any energy left for building flowers and fruits.
How to Help Your Pumpkin Produce Female Flowers
Let me show you what we can do if our pumpkins only show male flowers:
Fertilise correctly
Pumpkins are heavy feeders and must be fed enough nutrients.
About a week before transplanting, add compost to the patch where you want to grow the pumpkins. When I finally plant the pumpkins, I usually put some well-rotted, moist manure into the planting hole. That way, the plant has enough nutrients and moisture to grow well at the beginning.
When the plant has produced its first 4 – 5 real leaves, we must fertilise it for the first time. For heavy feeders like pumpkins, tomatoes or cucumbers, I mostly use my homemade nettle manure, but horn shavings are equally good.
During the growing season, from mid-summer until August, I fertilise my pumpkins every 2 weeks, alternating between the nitrogen-rich nettle manure and some phosphorus-containing fertiliser for fruit-building.
The right location
As we learned before, pumpkins are sun-lovers and need a place with at least 6 – 8 hours of sunlight per day. They can grow in the shade, but not well, and they’ll definitely produce fewer and smaller fruits there – if any at all.
The best place to grow pumpkins is a sunny bed near a compost heap where they get enough nutrients, light and water.
Watering correctly
It’s essential for the development of healthy pumpkin plants that they get enough water on a regular basis. Usually, it’s enough to water them once a week, but thoroughly so that the soil is well soaked.
During dry and hot summers, however, it may be necessary to water them daily.
Let the water warm up before, at best, by storing it in a rainwater barrel or another container during the day so that it can adopt the temperature of its surroundings.
The best times to water plants are the mornings and evenings. Just make sure to water where the roots grow (avoiding watering the root stem) and not hit the leaves.
Sufficient planting distance
Make sure to keep enough distance between pumpkin plants (remember, they’ll get massive!).
When they compete for nutrients and water, they can’t grow optimally, and they don’t get enough light and sunshine.
Want healthier vegetables all season long?
From pumpkins and tomatoes to cucumbers and beans, successful gardening is all about knowing what your plants need at the right time. Join my newsletter for practical gardening tips, traditional techniques and seasonal inspiration straight from my garden to yours.
Sign up here:
Pollinate pumpkins by hand 🎃
Once female flowers show, you can pollinate them by hand. Hand pollination should be carried out in the morning on the day when a female flower opens.
Choose a male flower for pollination and check by brushing with a finger over the stamen and look if you’ve got pollen on it. If so, remove the petals so that the style is exposed.
Carefully hold back the female flower’s petals and brush the pollen-covered stamens of the male flower against the stigma in the centre of the female flower.
Hand pollination is a good method to make sure that a pumpkin plant produces fruit.
Frequently Asked Questions
Should I remove male pumpkin flowers?
No. Leave them where they are, because they’re necessary for pollination.
Are pumpkin flowers edible?
All pumpkin flowers are edible, except those of ornamental pumpkins. They can be filled with ricotta and baked in a pan and have a slightly nut-like flavour.
How long do pumpkin flowers stay open?
Every pumpkin flower opens only for one day. If the female flower isn’t pollinated during that day, it withers and falls off.
How do I know if a pumpkin flower is pollinated?
The only way to be sure is by pollinating the female flower by hand.
Why do my baby pumpkins turn yellow and fall off?
That’s usually due to incomplete pollination. The pumpkins that turn yellow are just the ovaries at the bottom of the flower. When they have not been pollinated, they will fall off.
How many pumpkins grow on one plant?
A pumpkin plant can produce between one and 10 pumpkins, with small varieties up to 15.
Where can I learn more about cultivating pumpkins?
This is a good reminder that even experienced gardeners sometimes need to play detective. Remember when I told you at the beginning that two of my pumpkin plants showed only male flowers?
Rather than assuming something is wrong with the plant itself, it’s often worth looking around it. In my case, I suspect the neighbouring kohlrabi are shading the pumpkins more than I’d realised.
The plants I’m referring to grow under the corn in a three-sister bed. (For those of you who don’t know: this is a combination of corn, pumpkin and beans; read more about it in this guide on companion planting.)
However, south of them, blocking the sun, still grow some soon-to-be-harvested kohlrabi. I think the problem the pumpkins have is too little sunlight. As I’m going to pick the kohlrabi anytime soon, I’m optimistic that the pumpkins will enjoy the newfound sunlight and celebrate by producing lots of female flowers.
I’m so looking forward to my pumpkin harvest this autumn—and I hope you’ll be harvesting plenty of pumpkins, too. If you’re wondering what to do with them all, here’s my favourite sweet-and-sour pumpkin recipe.
Looking for more practical gardening tips? Browse my Gardening Hub, where you’ll find step-by-step guides, seasonal advice and tried-and-tested solutions to help your garden thrive.
In July, the vegetable garden is at its peak. Raised beds and vegetable patches are overflowing with ripe produce, and every day brings something new to harvest. While we’re busy watering, harvesting and preserving the summer abundance, it’s easy to overlook one important fact: July is one of the best months to start vegetables for autumn and winter.
Now we can maximise our growing season with strategic planting. In fact, July presents ideal conditions for both cool-season succession plantings and fast-growing vegetables that still have plenty of warm weeks left to mature.
The key idea here is succession planting. After all, we don’t want to have an overwhelming harvest once, only to find our patches empty for the rest of the season. Smart planning this month sets the foundation for a productive garden that bridges the gap between summer’s abundance and winter harvest.
Instead of leaving empty spaces after harvesting early crops, we immediately replace them with new plants. That way, every square metre continues producing food well into autumn.
Quick Reference: What to Sow and Plant in July
Here’s a cheatsheet of what you can sow and plant in July:
Sow indoors
Direct-sow outdoors
Plant outdoors
Kohlrabi
Spinach
Brassicas
Chinese cabbage
Beans
Zucchini
Brussels sprouts
Rocket salad
Lettuce
Autumn lettuce, like Radicchio
Radishes
Leek
Fennel
Swiss chard
Welsh Onions
🌱 Prefer a printable version?
Download the free July Garden Checklist & Planting Guide — a calm, practical companion for what to sow, plant, and harvest this month.
Vegetables to Seed-Start Indoors in July
If you’re new to seed-starting, you may want to learn more in my beginner’s guide to seed starting. I’ve gone back to seed-starting indoors again because the greenhouse is already fully covered with vegetables. If you have room there, however, the greenhouse is a wonderful place to seed-start the following veggies:
Brassicas
July is the last chance to seed-start Brussels sprouts, Chinese cabbage and a second batch of kohlrabi indoors. That way, whenever there’s a gap in a patch, you can fill it up with these plants.
Lettuce
As you’ll know by now, I’m a strong advocate for regularly seed-starting lettuce. A four-week rhythm has worked well in my own garden. By seed-starting lettuce every four weeks, I have a continuous supply of plants and never run out of fresh lettuce during the growing season.
In July, it’s time to think about autumn and winter harvest. We can now seed-start lettuce varieties like radicchio, romana and bolt-resistant oak leaf lettuce.
🌿 Gardener’s Tip
Keep a few seed trays going throughout July.
Succession planting becomes much easier when young seedlings are always ready to fill empty gaps.
Fennel
I have to admit that fennel has never been one of my gardening successes. Every attempt so far has failed. Many experienced gardeners recommend sowing it in July instead of spring, though, so that’s exactly what I’m trying this year. I’ll let you know how it goes.
Welsh onions (Winterheckenzwiebeln)
Welsh onions, also known as bunching onions, can be sown in July to prepare a harvest for the following year. These hardy perennial onions tolerate frost well and can remain in the garden for many years.
Vegetables to sow directly outdoors in July
Beans
Both bush and runner beans can still be sown in July, either as a gap filler when some other vegetables are harvested or between heavy feeders like cabbages, cucumbers or tomatoes. This is the last chance to sow them, though, (at least in my zone) as they need 8 – 10 weeks to produce.
Spinach, Swiss chard
Both vegetables are wonderful gap fillers that grow fast and thus cover the ground. Additionally, they taste delicious and – mostly in the case of the Swiss chard – are a very pretty sight.
Sow little and often every two or three weeks rather than all at once.
Rocket salad
Sow it, watch it grow quickly, harvest the leaves and let it bloom. That way, it will spread across your garden.
Radishes
Like in June, choose bolt-resistant varieties of radishes and sow them directly into the soil. As radishes need only about 30 days from sowing to harvest, they’re great for filling empty spaces in the vegetable patch quickly. And they’re a wonderful addition for a lunch salad, a cool supper or as fermented radishes for storage.
All seed-started vegetables, whether you grew them in your house or the greenhouse, must be hardened off before they can be transplanted outdoors. Start by putting your plants outside for 2 – 3 hours at first and gradually increase that time over a week. That way, you make sure that your veggies will cope with being outside.
🌿 Gardener’s Tip:
Grow a few extra seedlings in pots.
When an early crop finishes or a plant fails, you can quickly fill empty spaces and keep your garden productive.
Brassica
Brassica seedlings we started earlier indoors, like broccoli, Savoy cabbage, Brussels sprouts and cauliflower, can still be planted outdoors in July.
Just make sure you have them properly hardened off and transplant them on a cloudy day so that they don’t get stressed too much.
Lettuce
As in the weeks before, our monthly batch of lettuce wants to be planted outside.
Zucchini
Depending on the weather, zucchini in the garden may have developed diseases like powdery mildew or downy mildew by July. It comes in handy, then, if you have seed-started another batch of zucchini a few weeks earlier. Instead of trying to keep the infected plants alive, remove them completely and discard them and any leaves or remains of fruits in the household garbage. Never throw them in the compost, where the disease would spread the next year!
Fill the gaps where the zucchini were with any plants or seeds I mentioned earlier, and transplant the young zucchini plants into another patch.
That way, you’ll have a continuous harvest of healthy zucchini right until the first frost.
Leek
If you still have some winter leek plants left, now’s the last chance to plant them outdoors. Great companions for leeks are carrots or parsnips, as they both keep each other’s pests away.
Water leek thoroughly after transplanting.
What Not to Sow in July
Some cool-season vegetables struggle in July heat and tend to bolt quickly, especially in warmer climates. Avoid sowing:
early spinach varieties
spring radishes
peas
lamb’s lettuce (Wait until temperatures begin to cool again in late August or September.)
Instead, wait until late summer or early autumn.
Frequently Asked Questions
Can I still sow carrots in July?
Yes, but you must choose a late variety that can stand frost.
Can I grow vegetables in July if I missed spring sowing?
Absolutely. In fact, July is the perfect month to prepare for autumn and winter harvest.
Which vegetables grow fastest from a July sowing?
Radishes, rocket salad, lettuce, spinach and Swiss chard grow fast.
Should I seed-start indoors in July?
Yes. Many brassicas and lettuces benefit from indoor seed-starting in July, especially for autumn and winter harvests.
Fertilise all heavy-feeders like tomatoes, cucumbers, zucchini, pumpkins and cabbage plants regularly. That way, they get all the nutrients they need to produce healthy fruits. At the same time, they stay strong and sturdy and can better fight off diseases and pests.
Water your plants deeply during dry spells. Here in Bavaria, July can get pretty hot and dry, but we also know temperate and humid Julys. When it’s too dry for too long, though, check the garden soil and water your plants thoroughly. It’s better to water them once a week deeply instead of daily, but only on the surface.
If you haven’t already, mulch your beds with grass clippings, straw or shredded leaves. Mulch keeps the soil cooler, reduces evaporation and suppresses weeds during hot weather.
Harvest whatever is ready in your garden. July is still a great time to harvest and dry herbs for later use. If you know what else you can do with herbs, read this article on six ways to preserve herbs.
July is quite a busy month in the garden with sowing, planting and harvesting almost constantly.
It’s the circle of life in fast motion.
Don’t forget to pause intentionally from time to time and just admire what Nature – with your support – produces for us each year. Isn’t it marvellous to step into the greenhouse and snack on some fresh tomatoes? The plants we started and tended earlier, and transplanted eight weeks ago, are now bursting with fruits of the best flavour you can imagine. It’s a miracle every year!
If you’d like to explore the slower and more reflective side of this season, you may also enjoy my July reflections.
Everything we harvest now makes room for new seedlings, and every gap in the patch becomes another opportunity to extend the season. Good planning now is the basis for a good autumn harvest.
🌿Enjoy slow seasonal gardening?
Join my newsletter for monthly garden guidance aligned with nature’s rhythm.
Still not enough garden talk? Then these posts may interest you:
It’s summer at last! Everything we’ve wished for during those dark, cold winter months comes true now: seemingly endless days, sunshine, bird song, and more than all, blooming flowers and fertile vegetables. In July, our main goal is to keep the garden healthy, productive and under control. Now we’ve got to make sure that our gardens stay on top. It may seem overwhelming to check our plants regularly and give them whatever they need right now, but we’re also rewarded with huge harvests. And don’t worry: small, consistent tasks, maybe in the early morning or late evenings when it’s gotten cooler, are usually all our garden needs right now.
Think of your garden as an athlete in peak season. After all the growth of spring, plants are now putting enormous energy into producing flowers, fruits and seeds. A little extra care now pays off with bigger harvests later.
In July, we’ve reached the middle of summer, and regularity is what our garden needs right now. While in spring I only went to my garden every few days, now I’m checking on it constantly. I’ll go there in the early mornings before work, open the windows to the greenhouse (if I have closed them at all) and do a quick check on pests or diseases I need to tackle. In the evenings, when it has finally cooled down a little, I spend my time on weeding, watering, mulching and – yeah! – harvesting.
Let’s see what other gardening jobs we’ve got to do in July:
July Garden Checklist: Essential Tasks at a Glance
If you only have time for a few things, focus on these essential July garden tasks:
Feed heavy-feeding crops
Stake and support fruiting plants
Water deeply during dry spells
Sow vegetables for autumn harvests
Mulch beds to conserve moisture
Harvest and preserve regularly
Here’s a quick overview of the most important garden tasks to tackle in July:
Garden task
Best Time in July
Priority
Staking plants
When plants bear fruits
High
Pruning tomatoes and cucumbers
When suckers form
Medium
Checking for pests and diseases
Every second day
High
Watering
When soil is dry
Medium
Mulching
When plants are about 10 cm (4 in) high
Medium
Weeding
Twice a week
Medium
Fertilising
Every 2 - 3 weeks
High
Harvesting
When plants are ripe
High
Preserving harvest
After harvesting
High
Sowing and planting
After gaps form due to harvest
High
Want a printable version?
Download the free July Garden Checklist and keep it with you in the garden.
If you’re transitioning from early summer, you might also want to revisit the tasks from June. Many jobs started last month continue now — especially fertilising and mulching. → Continue from last month with my June Garden Tasks checklist.
What to Sow and Plant in July
July is still a good time to sow vegetables directly outdoors to prepare the autumn harvest.
Direct sow outdoors
Good vegetables to sow in July include:
Swiss chard
Bush beans
Pole beans
Spinach
Radishes
Rocket salad
Fennel
Cabbages
Transplant outdoors
You can also plant cabbage plants like cauliflower, Brussels sprouts, broccoli and kohlrabi, as well as zucchini and leek.
Now that we’ve covered that, let’s see what garden tasks are important in July:
1. Staking plants
✔️ Why it matters: Staking supports fruit-bearing plants
If you haven’t already done so, it’s high time now to stake fruit-bearing plants like tomatoes, peppers, cucumbers and zucchini. Otherwise, they’ll collapse under the weight of their fruits and leaves. For peppers and zucchini, I always use wood rods that I stick into the earth next to them. Then I bind the plants with a string around the rod to keep them upright.
For tomatoes that grow outdoors or in pots, I either have long wood rods or metal spiralling rods. You could also build a cage with rods and wire or use ready-made cages. In the greenhouse, I fix a string at the base of the tomato plant and lead it upwards to the ceiling.
No matter which way you choose, make sure that with increasing weight, your plants are securely fixed to the stake.
2. Pruning tomatoes
✔️ Why it matters: Pruning helps tomatoes form more fruits and stay healthy.
Every time we turn our backs on our gardens, even if it’s only for a second, our tomatoes seem to shoot out new suckers from their leaf axils. If you want to induce the plant to produce many fruits instead of leaves, you must remove these suckers before they get too large. Over here, you’ll find a detailed guide on how to grow tomatoes.
3. Remove side shoots from greenhouse cucumbers
✔️ Why it matters: If you let them, greenhouse cucumbers will produce many side shoots to strengthen their build and help them grow as broad as they can. We, however, want them to produce more fruit. When we cut off the side vines, the cucumber plants can put all their energy into building more fruits instead of forming new vines and leaves.
🌿 Gardener’s Tip: Leave only one to two cucumber stems
4. Check regularly for pests and diseases
✔️ Why it matters: Pests and diseases can destroy your plants, sometimes overnight.
An important garden task in July is checking our vegetables regularly (at best daily) for pests and diseases. Nothing’s more devastating than finding a plant that we’ve started from seed and nurtured, wilted and dead because we didn’t pay attention. We haven’t invested all that time and energy to see our babies be either eaten off overnight or die from some disease. The earlier we detect possible harm, the better the chances of protection.
🌿 Gardener’s Tip: Check regularly for pests and diseases
5. Water thoughtfully
✔️ Why it matters: All plants need water to survive and thrive.
Although some summers can be quite rainy, it’s usually hot and dry in July. To keep our plants not only alive but thriving, we need to water them – but thoughtfully.
Instead of watering every day a little bit, it’s better to water once or maybe twice a week thoroughly. The water must really go down to the roots and moisten the deeper layers of the soil instead of only the surface. That way, the plants’ roots grow deep and gather water from even deeper regions – which means we have to water less.
This is not valid for plants in containers and raised beds, though. Due to the smaller space and soil amount, they can dry out a lot faster. Water your raised beds at least every other day and your containers at least once a day. If it’s really hot and dry, even more often.
🌿Gardener’s tip: The best time for watering is in the morning.
When we protect the soil, though, we don’t need so much water.
6. Mulching
✔️ Why it matters: Mulching keeps the soil moist and suppresses weeds
As soon as my plants are about 10 – 15 cm (4 – 6 inches) high, I cover the soil between them with mulch. I either use (dry!) grass clippings, (old) hay, straw or leaves. Other good mulch material is wood chips that have the additional advantage of being avoided by snails and slugs.
🌿 Gardener’s Tip: Add dry grass clippings, hay, straw or leaves as mulch.
7. Weeding
✔️ Why it matters: Weeds compete for nutrients.
Mulch is a good way to suppress weeds, but sometimes it’s not enough, and we have to weed regularly before dandelion, couch grass, and nettles get the upper hand. As plenty of weeds are edible, you should consider making a pesto from them (for more, see this article). From nettle, dandelions and horsetail (and some more), you can make liquid manure as a fertiliser for your plants. Read here how to make nettle manure.
🌿 Gardener’s Tip: Rip weeds out as soon as they occur.
8. Fertilise heavy feeders
✔️ Why it matters: Heavy-feeders need a lot of nutrients to produce an abundant harvest.
With the long days, sunshine and warmth, our vegetables now have optimum conditions for growing, but especially the heavy feeders like cabbage, tomatoes, peppers, cucumbers, zucchini and pumpkins need food. In fact, picture them as a bunch of ravenous teenagers that can eat almost 24/7. The good news is that you don’t have to provide “food” that often. In fact, the best schedule is to fertilise them every 3 – 4 weeks, and medium-feeders every 4 – 5 weeks.
While we’ve added some long-term fertiliser when we planted them out in spring, now they need some easily accessible food. For that reason, liquid fertiliser is best as the plant can use the nutrients almost immediately. A quick and easy way to prepare liquid fertiliser at no cost is this homemade nettle manure.
✔️ Why it matters: Vegetables harvested at the right time taste better, stay tender, and encourage plants to remain productive.
Some gardeners, especially beginners, tend to harvest their vegetables too late. The result: kohlrabi and radishes, for example, become fibrous, lettuce and spinach bolt and cauliflower turns brown.
Harvesting regularly also induces the plant to grow more fruits, leaves or whatever we cultivate it for.
10. Harvesting seeds
✔️ Why it matters: Saving seeds saves money and preserves heirloom varieties.
Some vegetables like early lettuce, spinach or last year’s leek will bolt in the summer heat and form blossoms. You could rip those plants off, of course, but why not let them flower and harvest their seeds for the next year? It’s actually a very easy way to get lots of seeds from plants that have already proven to be adapted to your garden’s microclimate and conditions. And it makes us (at least partly) independent from large seed companies.
To harvest the seeds, let the plants flower and wait until the seeds that form after pollination are dry and rustle in their hulls. Carefully harvest them and, if necessary, dry them at home. When the seeds are completely dry, you can store them in paper bags or small jars in a cool and dark place. Remember to label them!
🌿 Gardener’s Tip: Save seeds on a dry day.
11. Harvest onions and garlic
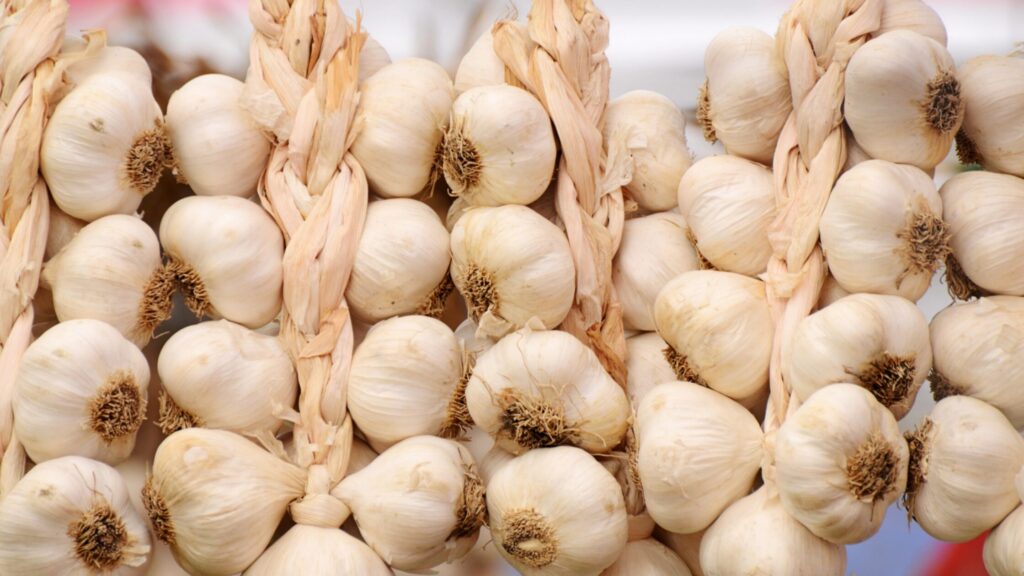
✔️ Why it matters: Onions and garlic are now ready to be harvested. When about half to two-thirds of the leaves have yellowed and fallen over, you can take them out of the ground. Harvest onions and garlic on a dry and sunny day to keep them as dry as you can. In fact, we’ve got to cure them for a few weeks after harvesting to make sure they’re dry enough for storage. After all, the goal is to store onions and garlic until the next harvest.
To cure onions and garlic, I usually bind 5 – 10 of them together at the stems and hang them in the greenhouse for a few weeks. You can also hang them somewhere indoors or under a dry roof overhang without direct sunlight, or you can cure them by laying them on racks. When your onions and garlic are completely dry, you can twine the stems into braids and store them in a cool, dark place, for example, your basement.
When your garlic has formed flowers, you can take the bulbils at the blossom to grow further garlic. It’ll take two years, though, instead of one.
✔️ Why it matters: Herbs are now at the peak of their flavour.
It’s so easy to become self-sufficient with herbs. Even if you don’t have a garden, patio or balcony, you can cultivate herbs. A windowsill on a sunny window is enough. It’s a satisfying feeling to have all the herbs you need all year round from your own patch – even if that patch is just a pot on your kitchen sill.
The best time to harvest herbs is in the late mornings when the dew has evaporated, and the essential oil concentration is highest, but honestly, if you can only harvest them in the evenings, that’s okay, too. It’s better to harvest them at all, instead of waiting for the perfect moment and having no harvest at all.
✔️ Why it matters: Preserving makes our harvest last throughout the year
Usually, by now we can harvest so much that we can’t eat it all immediately. Now, my friends, it’s time to preserve what we’ve grown for the winter months (*gleefully rubbing my hands*).
If you want to check your fermentation equipment, here’s a list of what you really need (hint: it’s less than you may think and definitely nothing fancy).
14. Assess your pantry
✔️ Why it matters: Check how much you need of each preserve
Before we start preserving, take a moment to review your pantry and look at what’s still in there from last year. Maybe you (like me) still have some jars of fermented gherkins left, which shows you that you may not need as many as you made last year. Or you’ve been out of tomato sauce since February, and that means you definitely need more of it.
Write these insights down for your next garden plan.
15. Cook jam from fruits and ferment vegetables
✔️ Why it matters: Preserve fruits and vegetables for the winter months
In my eyes, there’s nothing more rewarding than a homemade jar of strawberry jam or a crock of sauerkraut made from vegetables you’ve grown yourself! And now’s the time to do so. Get your gear ready, sterilise your jars and stir the pots or – in case of fermentation – get your weights and salt ready.
If it’s too much to tackle now, freezing is also a good option. Just bear in mind that while you can still make jam from frozen berries, you can’t ferment anything from once-frozen vegetables.
16. Prepare your garden for YOUR vacation
✔️ Why it matters: Make sure your garden survives when you take time off.
If you plan to go on vacation in July, make sure your garden survives. Now, the best solution is a fellow gardener who tends to your garden as thoroughly as you would, but let’s be honest: the larger your garden, the fewer volunteers you’ll get.
So, before you leave, harvest anything ready now and, if you can, preserve it for later. Water your garden deeply so that the soil contains as much moisture as it can. Mulch the patches to keep the soil from drying out, and implement a watering system that keeps your plants alive until you’re back.
17. Sowing and planting
✔️ Why it matters: Sowing and planting in July prepare our autumn and winter harvest.
What we sow and plant in July, we can harvest in autumn. So, wherever there’s a gap in the patch where we’ve harvested something, let’s fill it up with seeds or seed-started plants.
That way, we cannot only harvest continually but also keep the soil covered. This will suppress weeds and keep the soil moist. For a quick overview of what to sow now, check the list above or read this comprehensive list of vegetables we can sow and plant in July in our garden beds.
🌿 Gardener’s Tip: Keep seed-starting indoors so that you have ready plants when gaps arise.
Frequently Asked Questions About Gardening in July
What vegetables can I still plant in July?
Many fast-growing vegetables can still be sown in July, including Swiss chard, bush and pole beans, radishes and rocket salad. July is also ideal for succession sowing to extend harvests into autumn.
Can I still start a vegetable garden in July?
Yes. While spring is the traditional planting season, many fast-growing vegetables such as radishes, rocket, spinach and Swiss chard can still be sown in July. You can also plant young brassicas and leeks for autumn harvests.
Why are my cucumbers flowering but not producing fruit?
Poor pollination, heat stress, inconsistent watering or nutrient imbalances can reduce fruit production. Greenhouse cucumbers may also require pruning to direct more energy into fruiting.
Should I prune tomatoes in July?
Most indeterminate tomato varieties benefit from regular pruning. Removing suckers improves airflow, reduces disease risk and helps plants focus on producing fruit rather than excessive foliage.
What can I harvest in July?
Depending on your climate, July harvests may include lettuce, spinach, peas, beans, zucchini, cucumbers, onions, garlic, herbs, berries and the first tomatoes.
Is it too late to fertilise vegetables in July?
No. July is one of the most important months for feeding hungry crops. Tomatoes, cucumbers, squash and cabbage continue to need nutrients while producing flowers and fruits.
Common July Gardening Mistakes
Mistakes can happen, even when you’re an experienced gardener. To help you prevent them, I’ve listed the most common mistakes:
Forgetting to harvest regularly
Many vegetables become tough, fibrous or overripe if left too long. Frequent harvesting keeps plants productive and improves flavour.
Letting greenhouse temperatures soar
Greenhouses can become dangerously hot in July. Ventilate daily and provide shading if necessary to prevent heat stress.
Leaving soil exposed
Bare soil dries out quickly during summer. Mulch helps retain moisture, suppresses weeds and protects soil organisms.
Skipping pest inspections
July is peak season for aphids, caterpillars, spider mites and fungal diseases. A quick daily inspection can prevent major problems.
Neglecting succession sowing
Many gardeners stop sowing once summer arrives. However, July is an excellent month for planting crops that will provide autumn harvests.
Preserving too late
Summer harvests arrive quickly. Waiting until produce piles up can lead to waste. Preserve little and often to stay ahead of the harvest.
🌿 July Gardening Summary
In July, focus on:
Watering, mulching and fertilising actively growing plants
Harvesting and preserving what’s in season
Monitoring for pests and diseases
Closing gaps in the beds by sowing and planting autumn veggies
Each month builds on the previous one in the garden, and following seasonal rhythms makes gardening simpler and more productive year after year.
Why July Garden Tasks Matter
Now it’s all about providing enough food and water for our vegetables so that they can thrive and produce an abundant harvest throughout summer. The next step lies in preparing our harvest for autumn by sowing and planting as soon as we get gaps in the patches. But although this may be a busy time for us gardeners, we are also well rewarded by everything that we can harvest – and hopefully preserve – in July. Whether it’s a bunch of herbs, a bowl full of fruits and berries or a basket of lettuce, broccoli, tomatoes, zucchini and cucumbers: every humble plant we can put into our mouth gives us gratitude for what grows on our beautiful earth and the satisfaction that we are a part of it, too.
🌿 Enjoy slow seasonal gardening?
Join my newsletter for monthly garden guidance aligned with nature’s rhythm.
Can’t get enough of gardening? These articles may also interest you: