Most of us have heard of elderflower cordial or syrup, but have you ever tasted elderflower jelly? Let me show you how you can make this simple yet wonderfully floral preserve, which captures the scent of early summer.
For centuries, people have used elderflowers to flavour milk, cream, vinegar, honey, and later syrups and cordials. Elderflower jelly is another delicious way to preserve that fleeting fragrance and enjoy it long after the blossoms have faded.
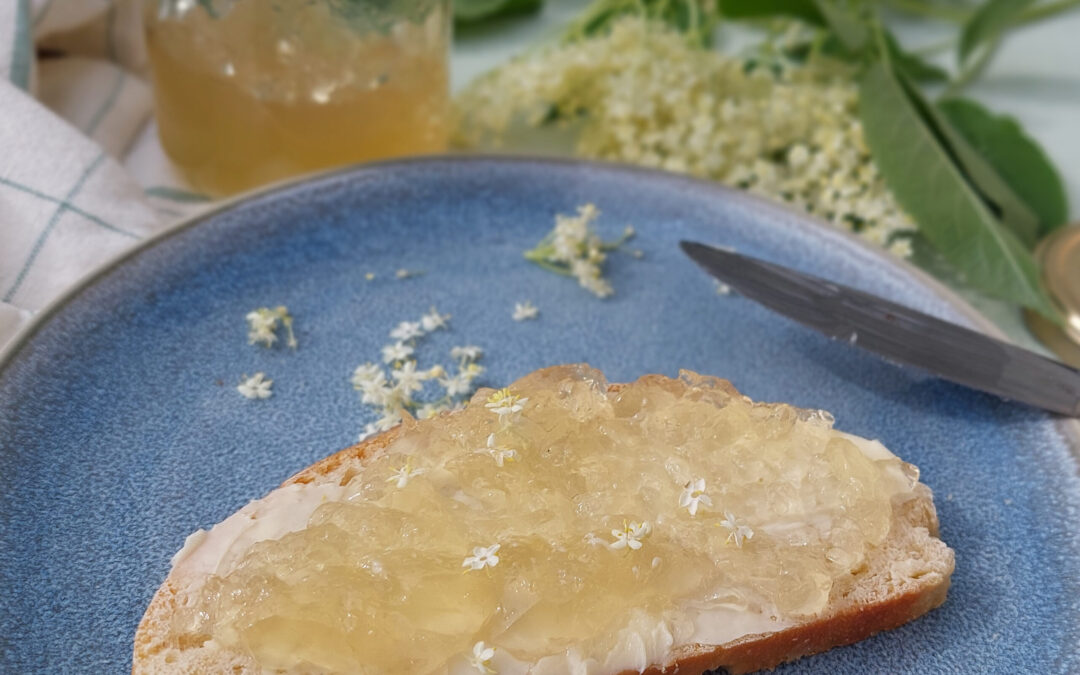
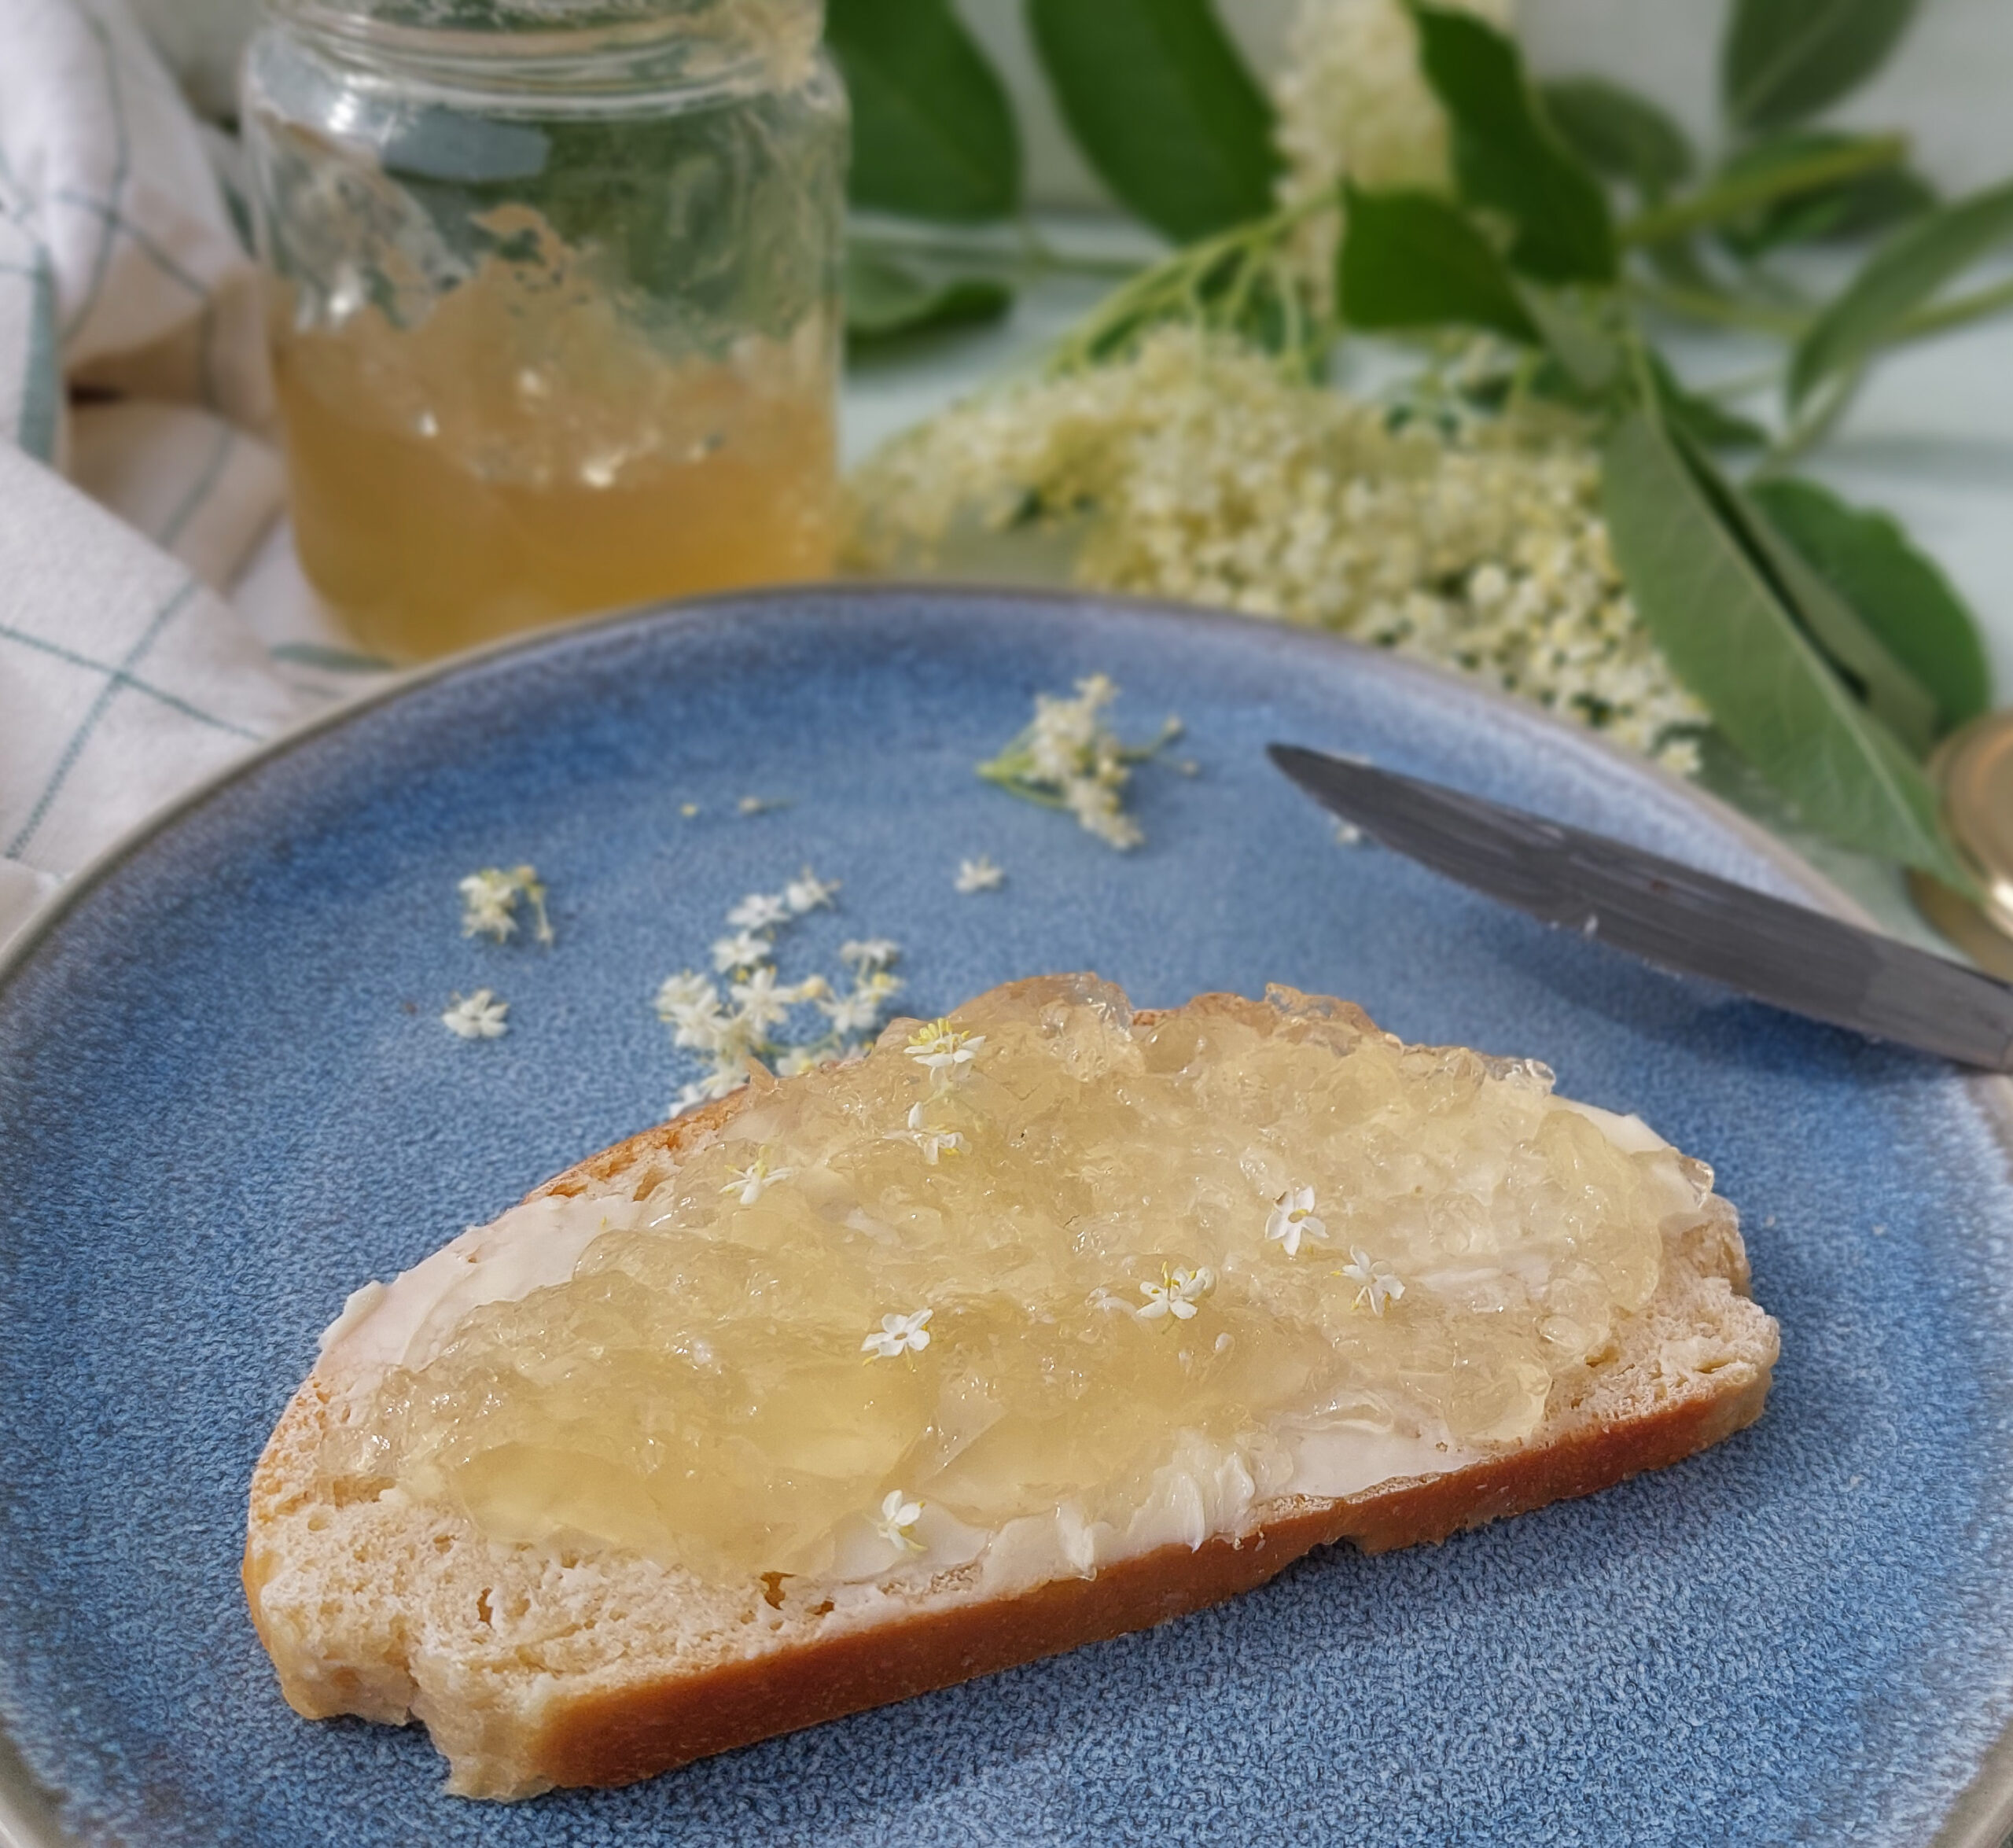
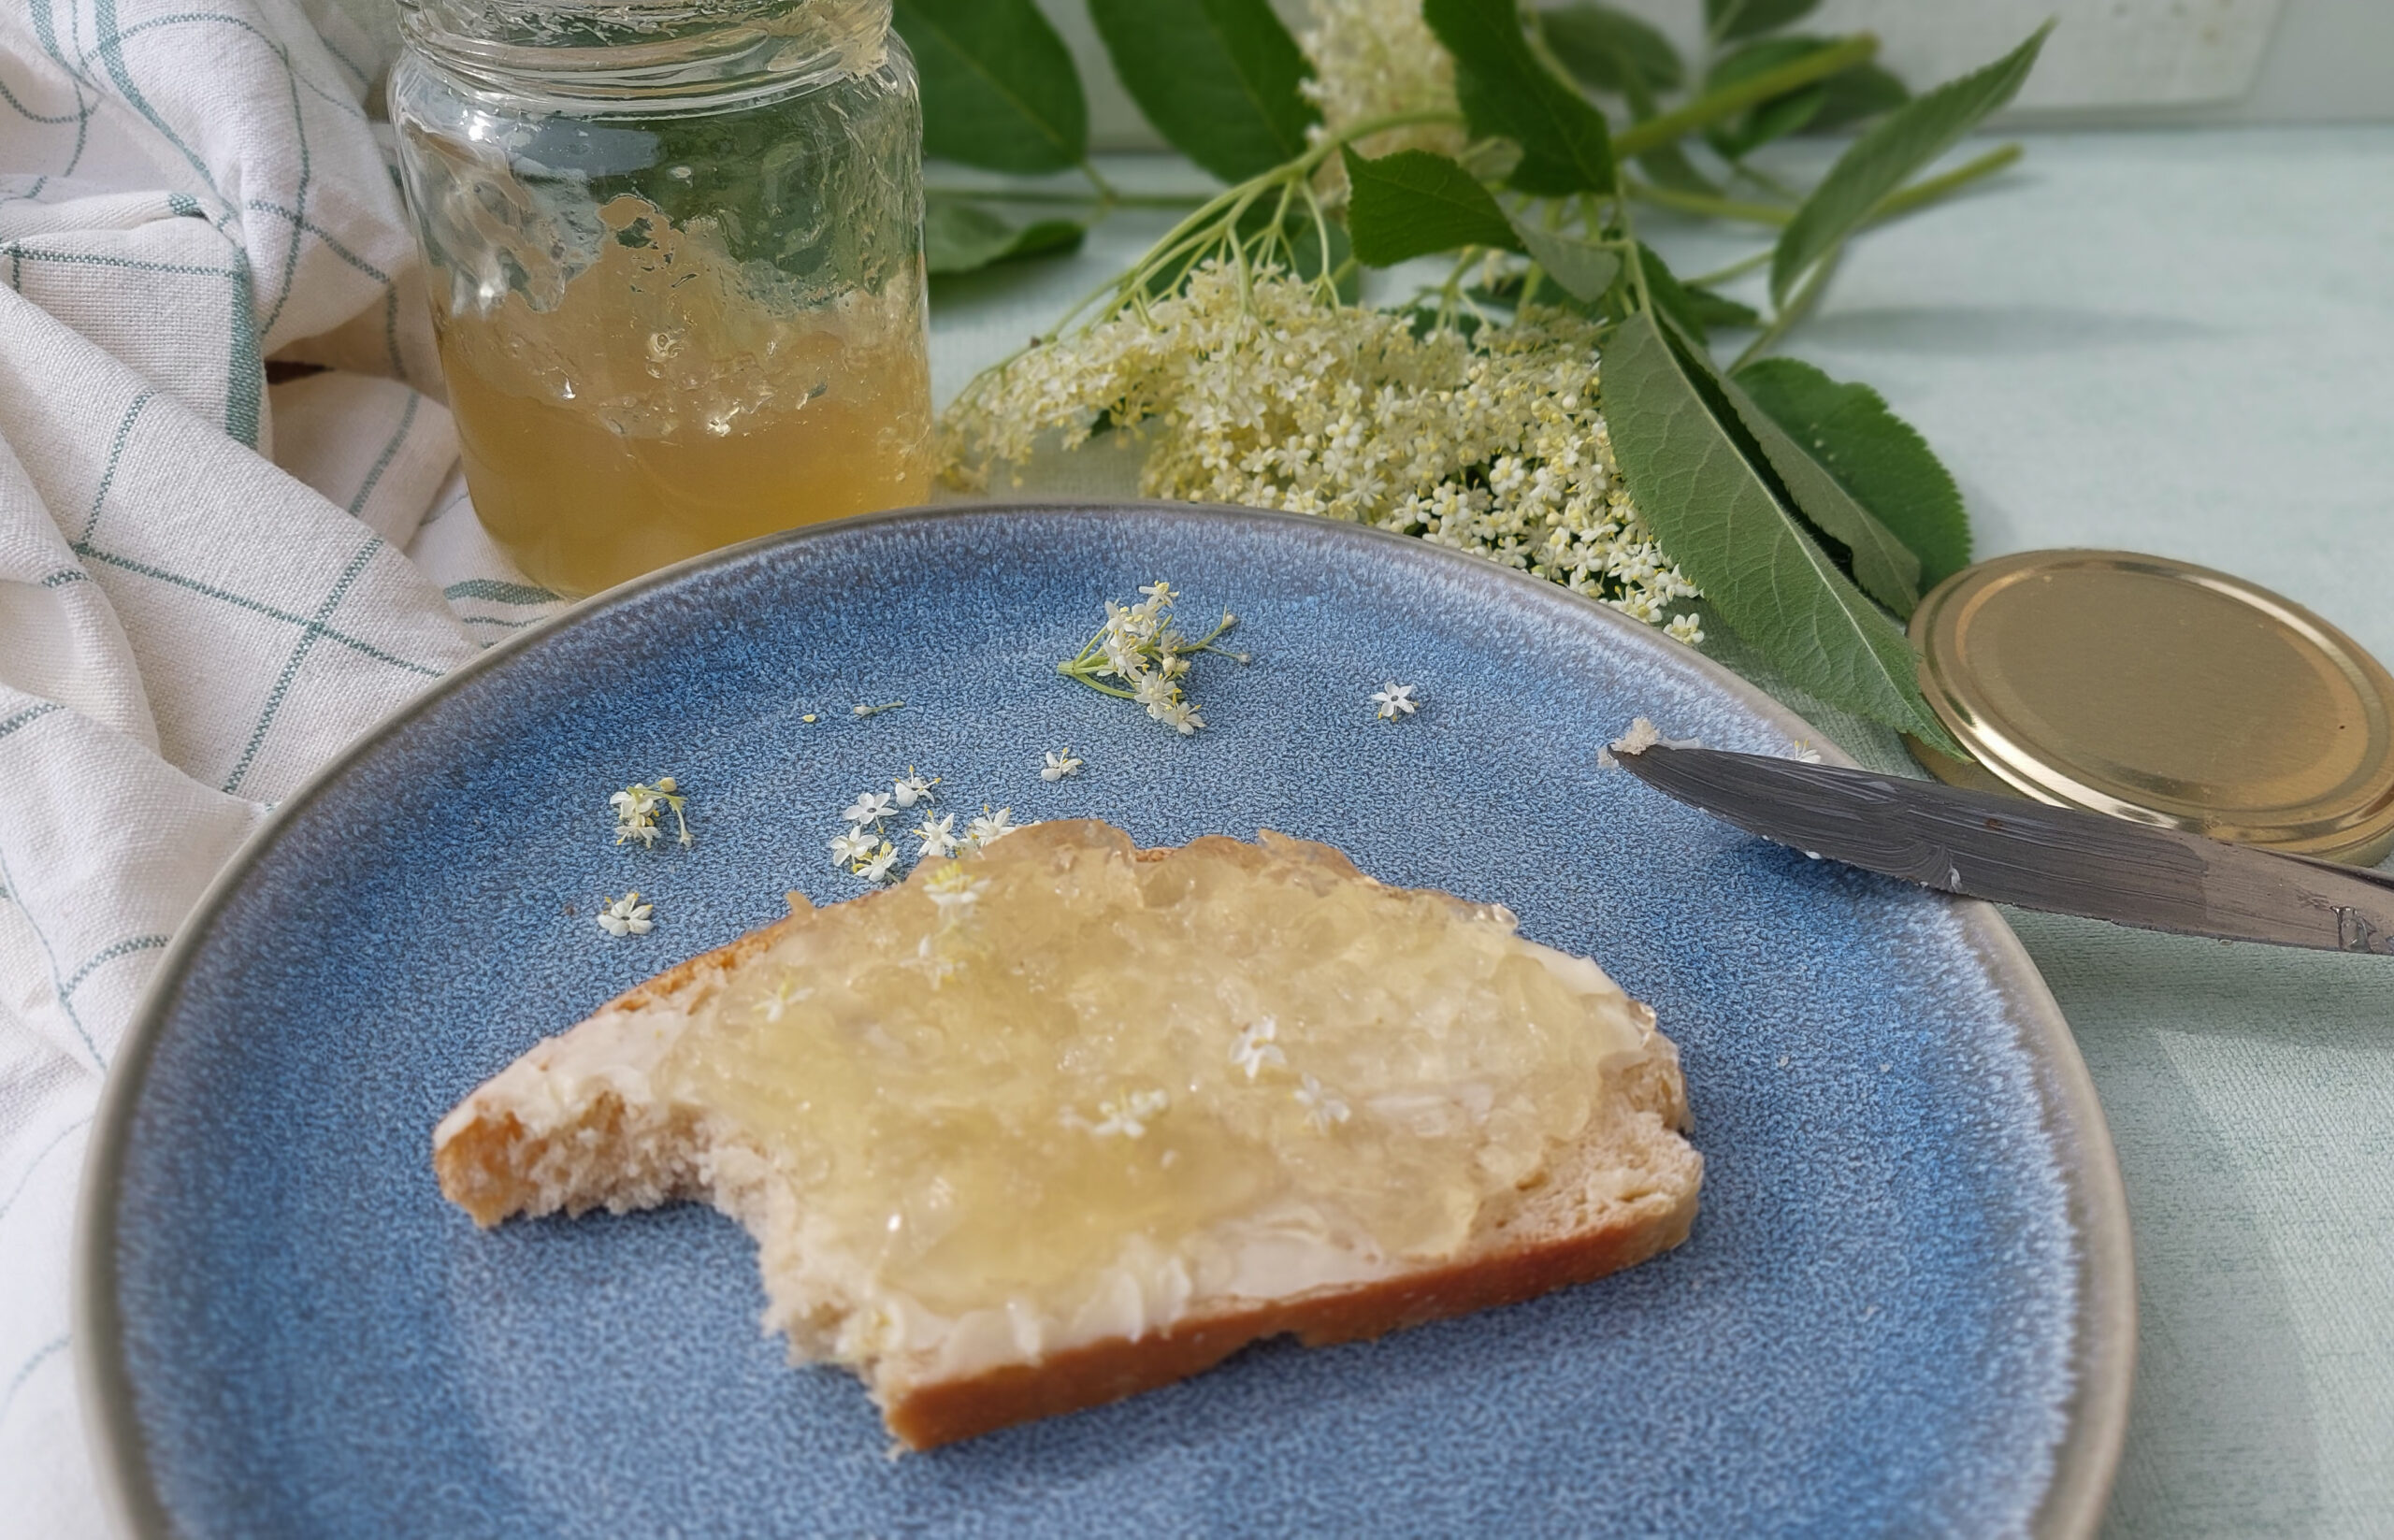
Here, I want to show you a quick recipe for elderflower jelly that captures the essence of early summer in a jar. It not only tastes delicious on toast, scones and pancakes but is also an unusual but very tasty addition to a cheese board.
If you’ve never tasted elderflower before, imagine a combination of honey, pear, citrus blossom, and summer sunshine.
Now, elderflower jelly tastes floral but not perfumed and has a honey-like sweetness. At the same time, it has subtle citrus notes that are a zesty counterpart to the sweetness.
All in all, elderflower jelly tastes very light and elegant compared to berry jams, for example.
Harvesting Elderflowers for Jelly
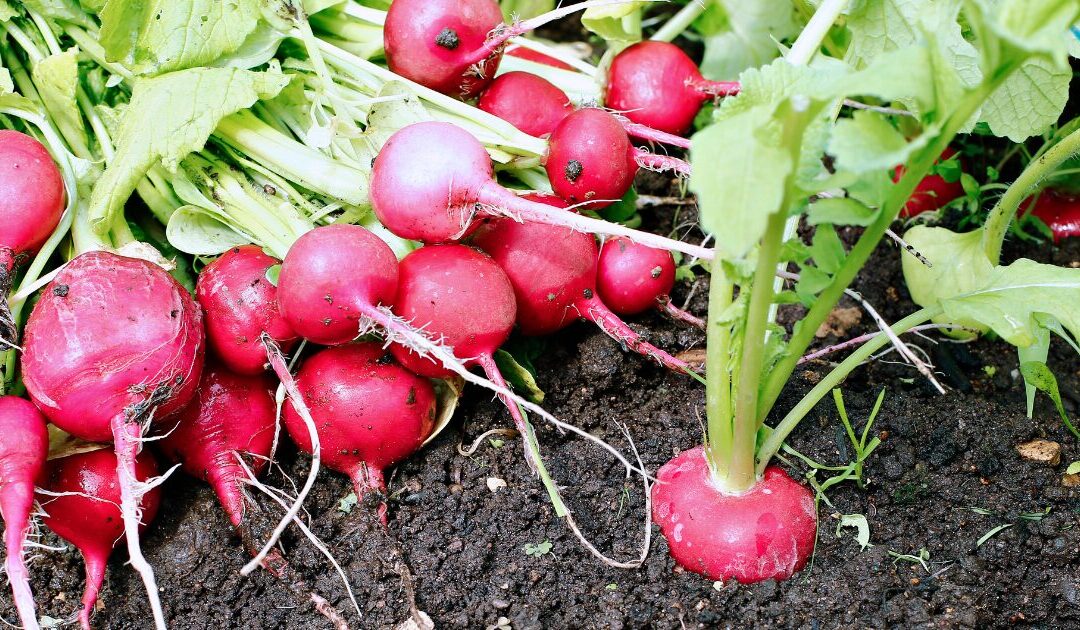
Elderflowers have creamy white flower heads that grow in an umbrella-like form with diameters of up to 30 centimetres (12 inches).
The numerous tiny single flowers form the panicles, and each of these flowers consists of five petals and yellow stamens.
When you spot them, take a basket and garden shears and head out to forage them.
Only gather umbels that grow far away from streets, at the edge of the woods, on field paths or in gardens. At those places, you can be sure that they are not polluted by exhaust fumes or other environmental toxins.
Always cut the elderflower umbels with garden shears or scissors. That way, you won’t shake the flowers too much and lose their valuable pollen and flavour.
Make sure to forage only elderflowers that are in full bloom and still fresh, meaning that the little flowers don’t fall off when shaking them. The best time for harvesting is the late morning of a sunny day. Ideally, it has been sunny for several days because that’s when the fragrance is strongest, and there are hardly any insects in the flowers.
A basket is best for carrying the harvested elderflowers home, because they lie lightly and airily without being pressed too much together.
One important request: don’t overpick! Never take more than a third of umbels per bush to leave enough for bees and birds! And to come back in autumn and harvest the elderberries 😉
Do not wash the elderflowers! Their flavour lies in the pollen, and if you wash them, the pollen – and with it the flavour – would be rinsed off. Instead, simply shake them gently to remove any insects.
Elderflower Jelly Recipe
This simple recipe for elderflower jelly requires few ingredients, and you’ll probably already have all the necessary equipment at home. See the recipe card below for exact quantities.
Elderflower Jelly
This delicate floral jelly captures the fragrance of early summer and tastes wonderful on toast, scones, pancakes, or served with soft cheeses.
Shake the elderflower umbels carefully to remove insects. If you want to be absolutely sure that no insects are left, leave the flowers outside in a dry and shady place for about 20 minutes. That way, the insects can wander off.Do not wash the elderflowers! Their flavour lies in the pollen, and if you wash them, the pollen – and with it the flavour – would be rinsed off.Once the elderflowers are clean, cut off the thick stems.
Put the elderflowers in a bowl. Boil the water and pour it over the elderflowers and let them steep for about 24 hours.
Step 2: Strain the Liquid
Lay a cheesecloth into a strainer. Now put the strainer into a pot and carefully strain the liquid through it into the pot. Squeeze the elderflowers out.
Step 3: Cook the Jelly
Add the lemon juice and preserving sugar to the infused liquid and stir it until the sugar has dissolved.
Bring it to a rolling boil and let it cook for 4 minutes.
Step 4: Test for Setting Point
To check if the jelly is ready, pour a few drops onto a chilled plate. Now tilt the plate: when the jelly is still running, let it cook for another 1 - 2 minutes; when it thickens, it's ready.
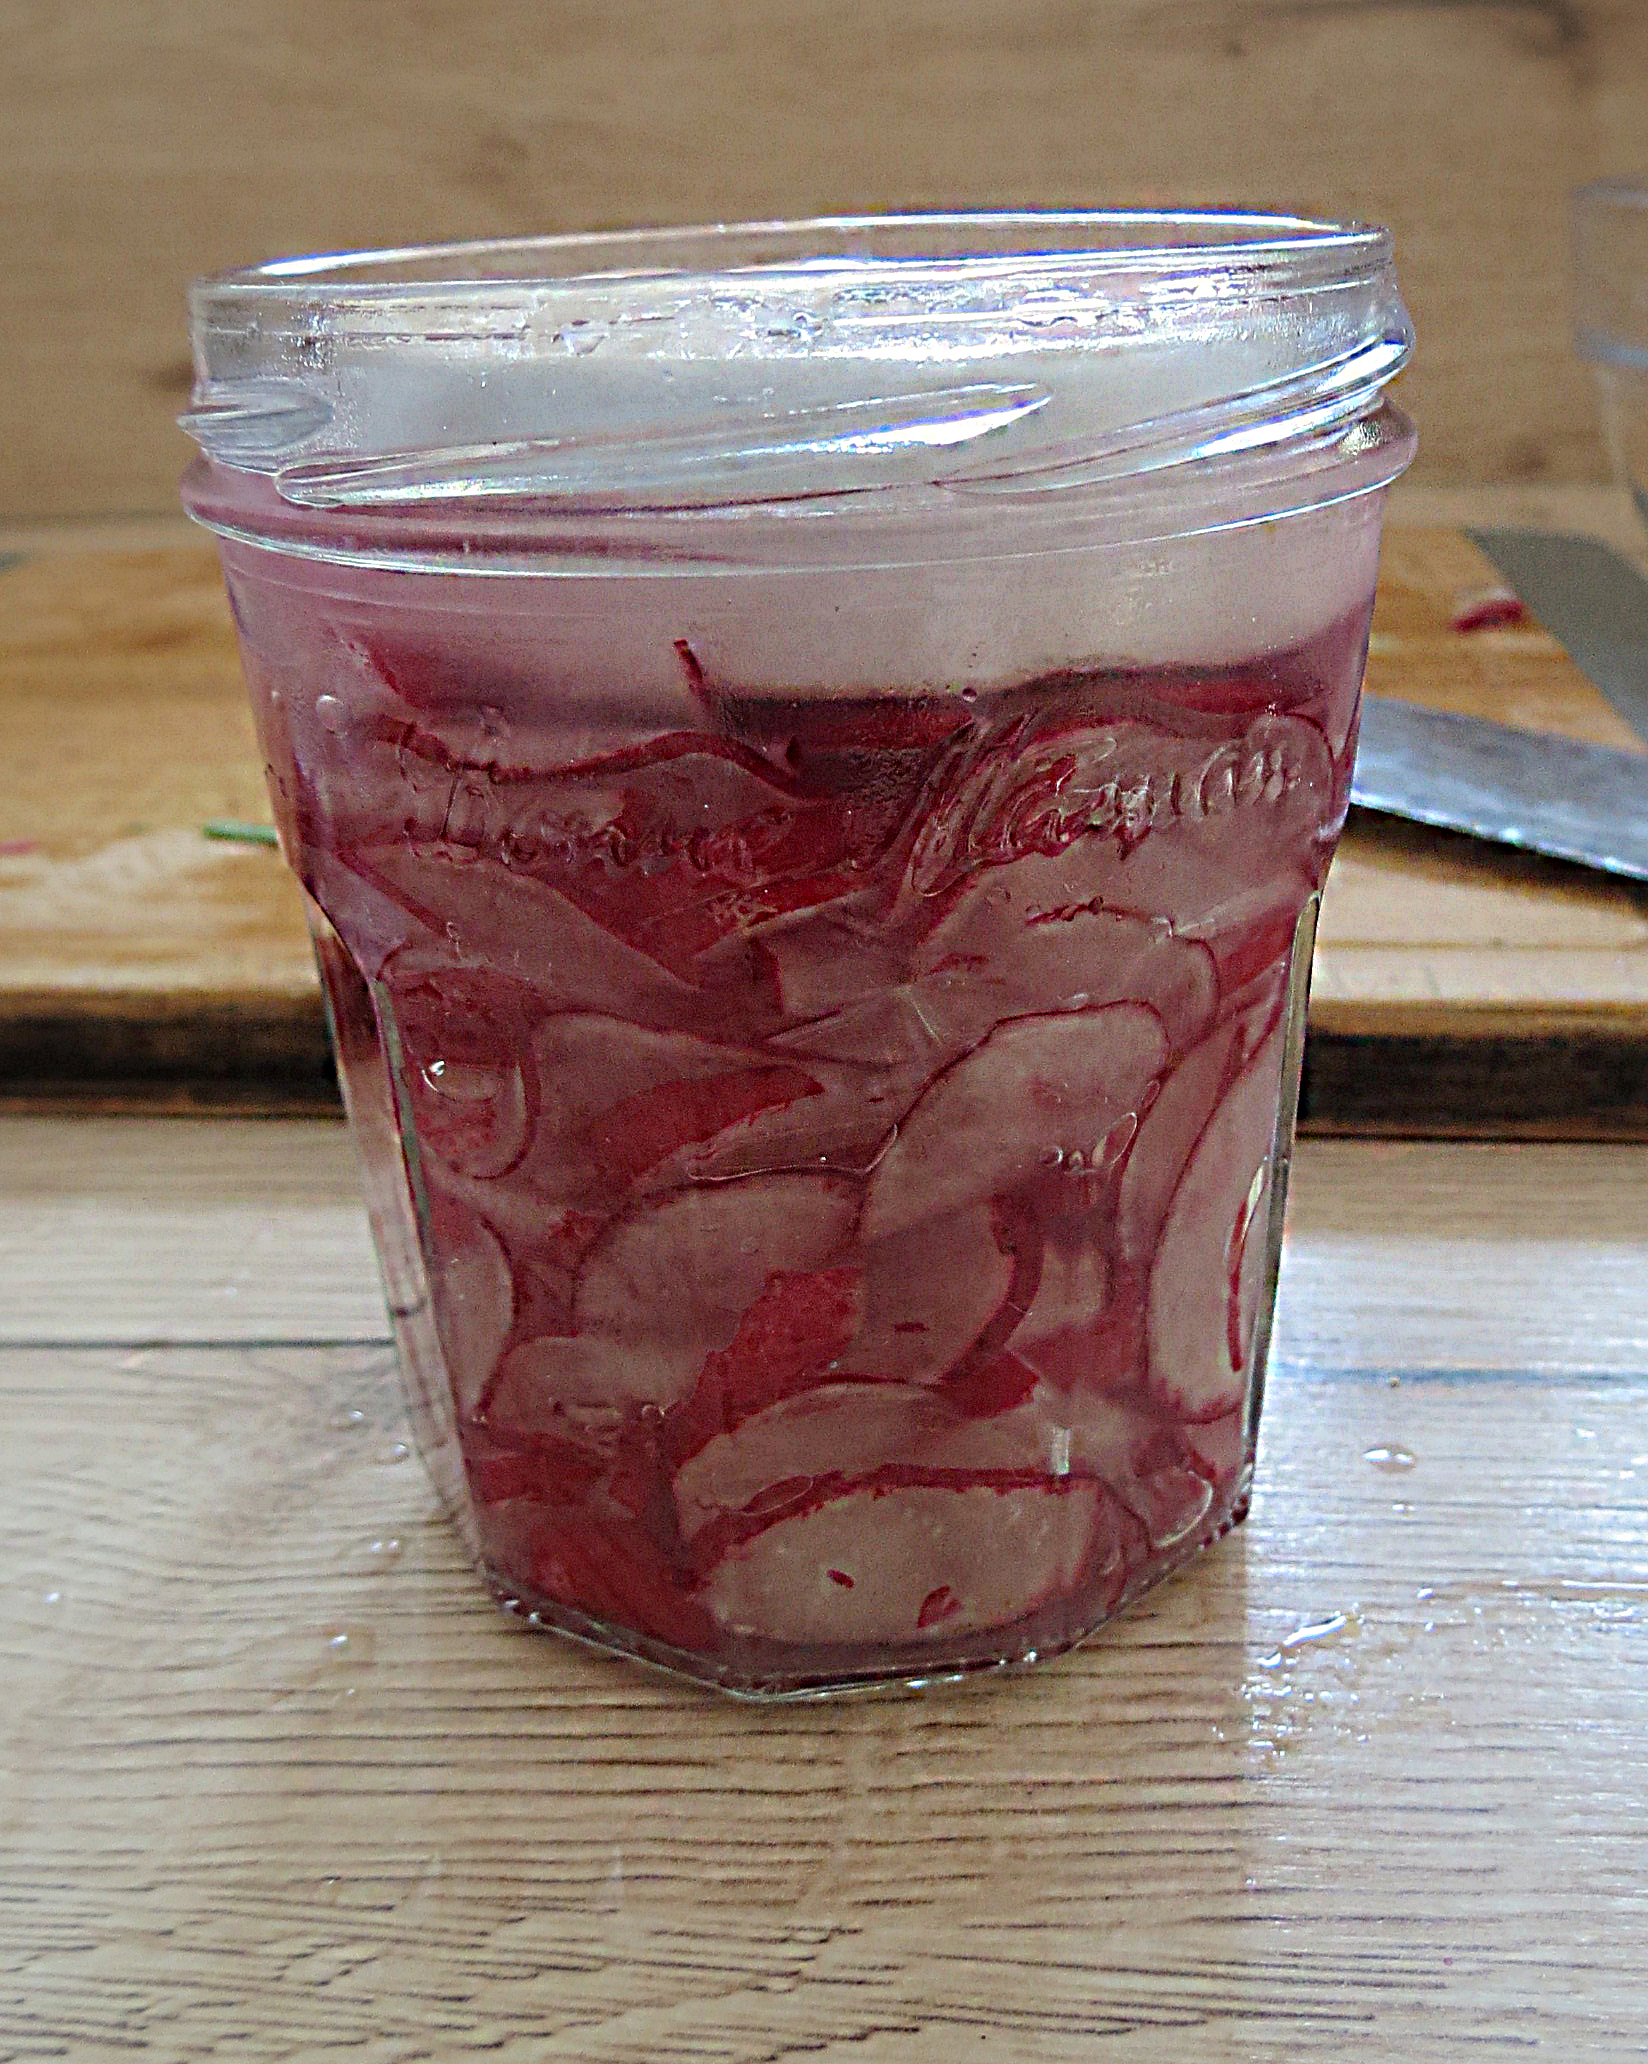
Step 5: Fill the Jars
Pour the jelly into sterilised jars and immediately seal them with the lid.
Put the filled and sealed jars upside down onto a kitchen towel for about 15 minutes. Flip them back and let them cool down.
Love Preserving Seasonal Flavours?
Variations
Instead of just making pure elderflower jelly, as I described in the recipe, you can mix it with other flavours:
Simply follow the pectin manufacturer’s instructions for the amount required.
Elderflower and Lemon Jelly
If you like it more tangy, use 200 ml of freshly squeezed lemon juice and reduce the amount of water to 800 ml. Additionally, add lemon zest to the liquid before boiling.
When you’ve filled the jelly into jars and sealed them, flip the jars every 10 – 15 minutes. That way, the zest distributes more evenly in the jelly before it sets.
Elderflowers and gooseberries make a great flavour team! Mix 500 g pureed gooseberries with 500 ml infused elderflower water or syrup, add sugar (in case of the infused water) and make a tasty jam!
How to Use Elderflower Jelly
The classic use for elderflower jelly is, of course, to spread it thickly on toast and bread and enjoy it for a lovely breakfast. But it’s much more versatile than just that!
You can enjoy it on
freshly-baked scones
crunchy croissants
in or on your pancakes
in a yoghurt
as a cheesecake glaze
with soft cheeses
with roast pork or chicken
Storage
Sealed tightly and stored in a dark place at room temperature, elderflower jelly can be stored for up to one year.
Once a jar is opened, store it in the fridge and consume it within two weeks.
Always use a clean spoon to get it out of the jar. That way, bacteria won’t contaminate the jelly, which would lead to fast spoilage.
Common Problems and Solutions
My Jelly Didn’t Set
This can be due to too little pectin or boiling it too shortly. Add some more pectin and boil it for another 2 minutes, and test again if it sets by pouring a few drops on a chilled plate.
My Jelly Is Cloudy
That’s normal because some of the pollen remains in the liquid.
My Jelly Is Too Sweet
That’s probably due to using jam or preserving sugar 1:1 instead. Next time, use a 2:1 sugar and add more lemon juice.
Frequently Asked Questions
Can I Freeze Elderflower Jelly?
Yes, you can freeze elderflower jelly, but it’s not necessary. Proper boiling and hot sealing in jars is enough.
Can I Use Dried Elderflowers?
Yes, you can use dried elderflowers, but fresh ones make a better flavour.
Can I Make Elderflower Jelly Without Preserving Sugar?
Yes, that’s possible, but then you must add pectin separately.
How Long Does Elderflower Jelly Last?
Up to a year when properly sealed.
What is the difference between elderflower jelly and elderflower syrup?
Elderflower syrup or cordial is a liquid concentrate used for drinks, desserts, and baking, whereas elderflower jelly is a spreadable preserve that can be served on bread, scones, or alongside cheese.
Early Summer Flowers in a Jar
Elderflower season lasts only a few short weeks, but a few jars of homemade elderflower jelly allow you to preserve its delicate fragrance for months to come. Whether spread on warm toast or served alongside a cheese board, this simple recipe is a lovely way to bring a little taste of early summer into your kitchen.
Want more recipes for homemade jams and preserves? Look at these:
You wanna start fermenting and dread what you have to buy for it? No worries! The cool thing about fermentation is that you don’t need any fancy fermentation equipment. After all, people have been fermenting food for thousands of years using very simple tools.
Do You Need Special Equipment to Ferment Food?
When we look at how people in the olden days fermented vegetables, they had only very simple tools. And that means that we can, too.
Don’t get me wrong: Good equipment makes fermentation easier and more reliable. If you’re beginning, though, you can start with surprisingly little.
You can successfully ferment vegetables with:
A jar
Salt
Water
A weight
A lid
Everything else is optional.
Common Fermentation Problems and the Equipment That Prevents Them
Problem
Helpful Equipment
Vegetables floating
Fermentation Weight
Mould on surface
Weight + proper lid
Brine overflow
Larger jar
Inconsistent results
Kitchen scale
Too much oxygen
Airlock or proper lid
Ready to start your first ferment?
Download my free Fermentation Starter Checklist and make sure you have everything you need before you begin. It includes essential equipment, basic ingredients, hygiene tips, and key steps for successful vegetable ferments.
Quick overview of fermentation equipment
In this chart, I’ll show you all the tools for fermentation and whether they’re absolutely necessary or just a nice-to-have:
Equipment
Essential?
Beginner-Friendly?
Approx. Cost
Jar with lid
Yes
Yes
€
Weight
Yes
Yes
€
Airlock
No
Yes
€€
Crock
No
Later
€€
pH Meter
No
Advanced
€€€
Before we talk about jars, crocks, weights, and airlocks, however, there’s one thing that’s even more important than the equipment itself: cleanliness.
Hygiene Matters More Than Equipment
The good news is that vegetable fermentation doesn’t require the same level of sterilisation as canning. You don’t need to boil every utensil or work in laboratory conditions.
However, you should always:
Wash your hands thoroughly
Clean jars, lids, bowls, and utensils before use
Remove any damaged or mouldy parts from vegetables
Use fresh, good-quality ingredients
Good hygiene gives the beneficial microorganisms the best possible start and reduces the risk of spoilage.
Now that we’ve cleared that matter, let’s have a look at the basic fermentation equipment you need and some of the fancy stuff you might want to buy later.
Fermentation equipment
Containers
First of all, avoid metal containers and unknown or non-food-grade plastics for fermentation. Metal reacts with acid, which can lead to the dissolution of metals into the brine. This can affect both the safety and quality of your ferment.
The same applies to plastic: not all plastics are acid-resistant. The softer the material, the stronger it reacts to acid. If you use freezer bags as weights, make sure they don’t contain PVC or BPA.
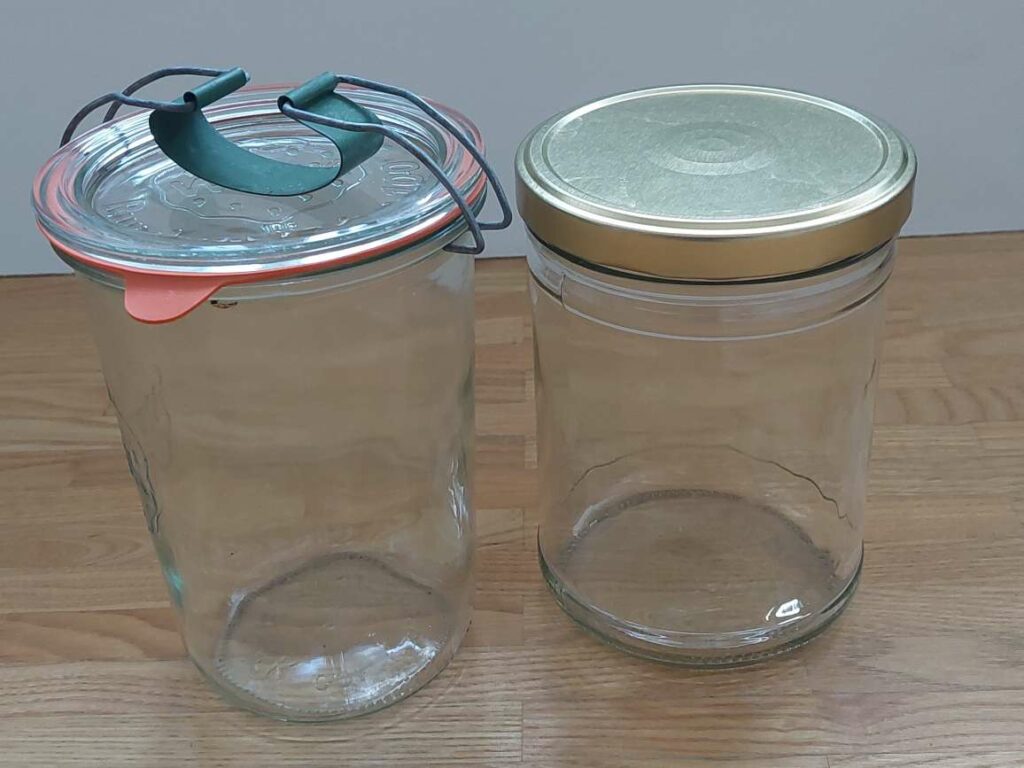
Glass jars and lids
I usually use twist-off or flip-top jars. They are cheaper than crocks, and you can ferment smaller portions. Additionally, you can see through the glass what’s going on inside. It doesn’t matter if you use Mason, Weck, Kilner or Fido jars; they’re equally good.
What’s more important, or rather what makes a jar a good fermentation jar, is
a wide opening: the best jars are the ones with a straight opening
easy cleaning: jars with a straight opening can be cleaned more easily than jars with indented openings
food-safe materials: glass jars are ideal because glass is non-reactive, easy to clean, and perfectly suited to acidic ferments
appropriate size: I usually use jars of 500 ml, 1 litre and a large crock pot of 3 litres, especially when I make a large batch of fermented gherkins.
Fermentation Weights
Vegetables must always stay submerged under the brine during fermentation, or else they would mould. To ensure that nothing pokes through the surface, we use weights.
Fermentation crocks usually come with suitable weights, but if you don’t have any, you can use a dish, for example.
You can also use stones, but depending on their lime content, they might react with the acid. You should at least boil them for 10 minutes before using them.
There are also great glass weights out there. I especially love that they can be so easily cleaned and sterilised. On the downside, they’re comparatively expensive.
DIY Weight options: Freezer bags
For beginners, I recommend using freezer bags. Fill them with brine or (clean) pebbles and put them onto the covering (e.g. a cabbage leaf) to keep the veggies under the brine. The reason I recommend filling them with brine is that in the (unlikely, yet possible) event that the bag gets damaged, it’s not water flowing into the glass and watering down the brine there.
My favourite DIY fermentation weight
After years of using freezer bags, I made my own glazed clay weights. They’re inexpensive, reusable, easy to clean, and fit my jars perfectly. They’ve become one of my most-used fermentation tools.
I cut out circles of a 1 cm thick slice of clay, making their diameter slightly less than the opening of my jars. Then I cut a hole in the middle and glazed and baked the clay weights.
During baking, they shrank a bit further, and now their size is perfect for my jars.
You can also make weights from hardwood that doesn’t secrete resin, like walnut. Keep in mind, though, that wood swells in brine! Saw a circle with a diameter of one centimetre less than the opening and drill a hole into the middle where the brine could get through. Put the wooden weight into water for one to two days and look how much it swells before you use it. I’ve never used them, as I find the clay weights perfect for my needs, but go ahead and try making wooden weights if you like.
Fermentation Lids and Airlocks
Lactic acid fermentation needs an anaerobic environment, that is, without oxygen. For that reason, we need to cover the jars so that no air gets into them. On the other hand, the bacteria and yeasts involved in the process produce carbon dioxide that needs to get out of the jar.
So, we need a system that lets carbon dioxide get out while at the same time prevents air from flowing in.
Standard lids: they’re cheap and easy to use, but can be too tight to let the carbon dioxide get out. Through experience, however, I’ve found out that when you screw the lid on, but not too tightly, the gases can get out from under the rim. Occasional burping, which is sometimes recommended, is not necessary.
Airlock Systems: An airlock lid looks a bit like a unicorn with its horn. Airlock systems grow in popularity because they make things a lot easier. With an airlock, you can leave the jars to themselves. Just make sure that you leave enough space from the top of the brine to the top of the glass jar, at least 2 – 3 fingerbreadths.
That said, airlocks are convenient, but not really necessary.
Note: I know that many people just use a clean cloth to cover their jars or open the jars every day during fermentation, but the risk of mould-forming is so much higher with these methods! I always use the lid and – in case of twist-off jars – secure it loosely or – in case of flip-top jars – secure it tightly. The gases can leak out either under the lid or the rubber ring, and you minimise the risk of mould-building.
Kitchen Scale
While I have nothing against measuring in cups and spoons, in the case of fermentation it’s more reliable to measure the weight, not the volume of the vegetables. When we’ve sliced or grated the vegetables we want to ferment, we weigh them first. This weight is the basis for our salt calculation. In this fermentation for beginners guide, I explain how you can calculate the amount of salt you’ll need for your fermentation. And you can download a cheat sheet there that shows examples for salt ratios. Just saying.
Salt
Strictly speaking, salt isn’t equipment but an ingredient. Since no fermentation setup is complete without it, though, it’s worth mentioning here.
Salt suppresses undesirable microorganisms and helps the vegetables to release water. Furthermore, it creates a favourable environment for lactic acid bacteria so they can thrive, and it contributes to the flavour and texture of the ferments.
The best salt types to use for fermentation are sea salt, special pickling salt or pure rock salt.
Don’t use salts that contain anti-caking agents or any strongly flavoured speciality salts.
Apart from the right containers and coverings, there are a few tools that are really helpful when you want to ferment.
Cutting devices
A sharp knife plus a wooden board or grater will do just fine for slicing the vegetables you want to ferment. But this list wouldn’t be complete if I didn’t mention the wonderful invention of a cabbage slicer. As the name indicates, it’s especially great for cabbage slicing (you can use it for any other veggies, though), and it’s one of my favourite tools for making my homemade sauerkraut.
If you’re just starting, however, you don’t need a slicer, as you can also do the job with a knife and a cutting board.
Note: I know that some people use the cutting or grating device of their kitchen machine. Go ahead if you like, but make sure that the slices are not too thin and mushy.
Large Mixing Bowl
When you want to make fermented vegetables, a large mixing bowl comes in handy. We usually slice or grate the veggies and mix them with salt, and that’s where the bowl comes in. You can use bowls made of glass, metal or plastic in which you gather all your sliced vegetables and mix them with salt.
Yes, I know, earlier I said that you should avoid metal or plastic containers, but that’s only for the actual fermentation process. For mixing the vegetables with salt and letting them sit for a while until brine forms, metal or plastic are just fine. After all, the time the salt is in there is too short to induce a reaction.
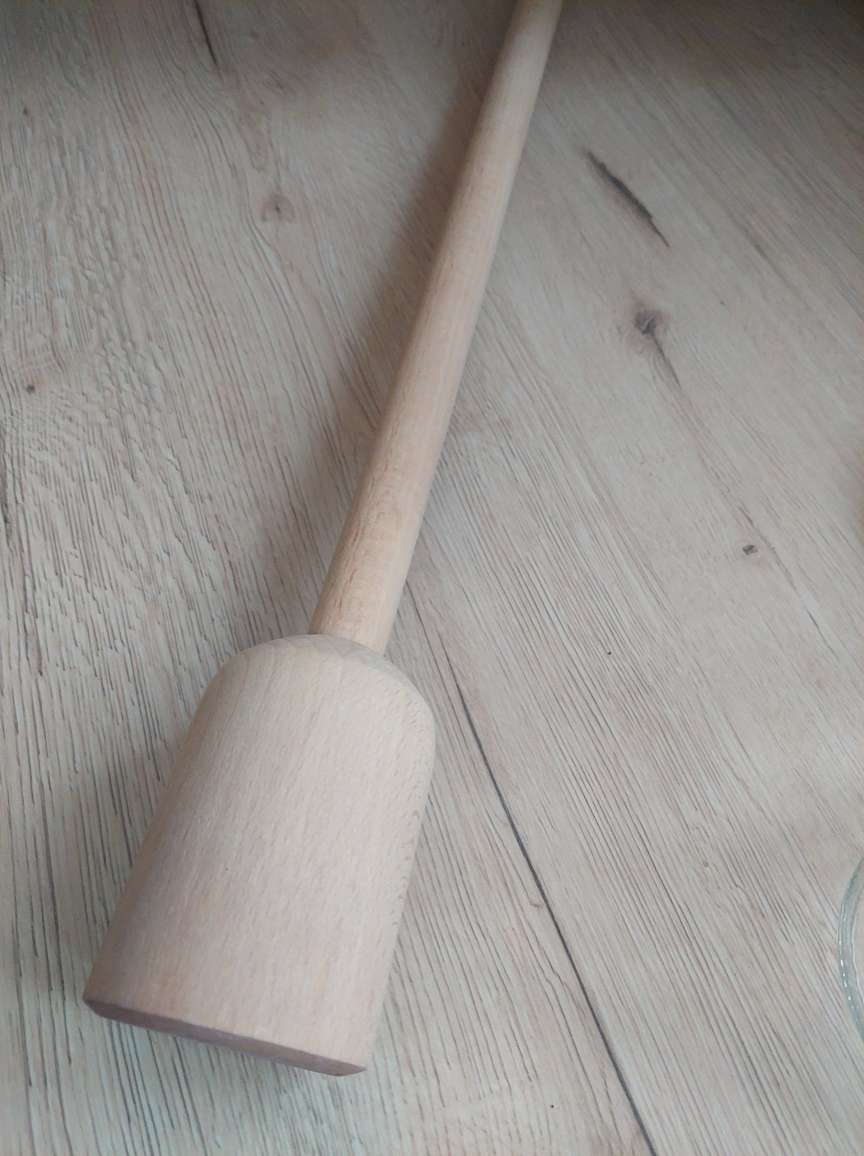
Vegetable Tamper or Pounder
This is a convenient tool for pressing the vegetables tightly into the jars. Especially a wooden cabbage tamper (yep, I got one) is a great help to squeeze the vegetables tightly into the jars. Cool as a tamper is, though, it’s not really necessary when you start fermenting. You can always use your hands or a (clean!) empty bottle to press the vegetables into your containers.
Funnel
I find it easier to get the vegetables into the jar with the help of a funnel. The only requirement is that the funnel has a wide opening.
Labels and Marker Pens
Labelling the jars is unfortunately often overlooked. And before you think I’m exaggerating, let me tell you the story when I wanted to cook sauerkraut and ended up with a pot full of fermented kohlrabi instead. Just because I thought I could distinguish them easily and couldn’t be bothered with putting labels on the jars.
Don’t make the same mistake and always write clearly what’s in the jar. You’ll thank yourself later.
If you like or want to compare different recipes, also add the start date, the salt percentage and batch notes.
Optional Equipment for Serious Fermenters
Once fermentation becomes a regular part of your kitchen routine, you may enjoy some specialised tools.
Fermentation crocks
Traditional fermentation crocks made of stoneware have proved their worth as they store the vegetables dark and cool. If you buy a new one, check out its net weight, as they are usually very heavy. Then add the weight of the vegetables and brine and check if you can lift it when it’s full.
Another great advantage of crocks is that they have a water-seal in the form of a trough around the rim. When the vegetables are packed into the crock, we put the lid on top, and it fits right into the trough. Next, we fill the trough with water. That way, the gases that form during the fermentation process can get out (and you’ll hear a cute blubber), while at the same time air can’t get in.
pH Meter
Fermentation needs specific pH ranges in which the bacteria and yeasts can do their work. Checking the pH level makes sure that we have just the right environment for the microorganisms to thrive. In acidic conditions, they’ll happily go about their work. When the pH gets too high, though, the risk of spoilage increases.
Checking pH can be useful for consistency and food safety, but most home fermenters (like me) never use a pH meter and rely on established recipes and proper salt concentrations.
Temperature Monitoring
To start the fermentation process, we need temperatures between 18 and 24 °C. Later, temperatures must be lower to slow down the process.
A simple room thermometer is often enough to show us where in the house the temperatures are ideal for the different stages of fermentation.
Dedicated Fermentation Fridge or Chamber
This is a device that I only recommend for enthusiasts. I have the incredible luck of having a relatively cool basement where I can store all my ferments safely. Temperatures are just within the right range to make sure that the fermentation process slows down considerably and thus that the ferments don’t get too sour.
Most people, however, don’t have that luxury. If you fall among that group and intend to make many, many ferments, a fridge for storing them may be a good investment.
If you – like me – want to make ferments like koji that require very specific temperatures and humidity, a fermentation chamber might come in handy. But that’s really advanced and nothing a beginner should be troubled with.
Equipment You Can Skip as a Beginner
If you’re like me, you’re trying to convince yourself now that you need everything I mentioned. Or that it’s too much of a bother to get all those tools before starting. But really, if you just want to dip your toe into the fermentation sea and see if it’s right for you or if you’ve been fermenting quite some time but on a small scale, you can easily do without the following things:
Expensive crocks: Glass jars with lids will do perfectly
pH meters: Most vegetable ferments can be assessed by following a trusted recipe and paying attention to their smell, appearance, and taste.
Fancy airlock systems: Just don’t screw the lid tightly and the gases can get out
Fermentation chambers: Too expensive, need too much space, too much bother
Start simple. In fact, starting simple is miles better than not starting at all just because you think you need something fancy. When later you’re hooked on fermentation (and I’m confident you will), you can always upgrade and invest in more specialised equipment.
My Recommended Beginner Fermentation Setup
For beginners, the following equipment is what I’d recommend:
1-litre jar
Weight
Bowl
Kitchen scale
Salt
Most likely, you’ll already have all that at home. And honestly, you can make a lot of ferments just with that basic equipment.
When you want to do more, you can eventually invest in some of the following tools:
More jars, maybe in different sizes
Airlocks
Glass weights
Crock
My Beginner Fermentation Shopping List
If you had to buy everything from scratch:
2 x 1-litre jars
glass or DIY weight
kitchen scale
sea salt
Total cost: roughly €15–25
Frequently Asked Questions
Can I ferment vegetables in ordinary jars?
Absolutely, as long as you’ve got the appropriate lid. In fact, ordinary jars are what most fermentistas have started with.
Are airlock lids necessary?
No. You can use twist-off or flip-top jars as well. As long as you don’t screw the lid too tightly, gases can get out, and air is prevented from getting in.
Do I need a fermentation crock?
No, glass jars will do nicely.
Are plastic containers safe for fermentation?
Avoid unknown or non-food-grade plastics. Food-grade HDPE fermentation buckets are commonly used and generally considered safe for fermentation.
How many jars should a beginner buy?
One is enough if you just want to give fermentation a try. You can always buy more later.
Do fermentation jars need to be airtight?
Not completely. Fermentation produces carbon dioxide, which must be able to escape. That’s why loosely fitted lids, flip-top jars, or airlock systems work well.
Final Thoughts
The most important thing with fermentation is to get started. Don’t let equipment stop you from making your first batch of sauerkraut or fermented gherkins! Or why not try out fermented radishes?
Simple tools that you probably have already at home are enough to make safe, delicious fermented foods. After all, our ancestors didn’t have fancy equipment when they fermented vegetables thousands of years ago. And you can always add the fancy things to your next birthday wish list 😏.
Focusing on understanding how fermentation works is much more essential than buying any fancy gadgets right now. So, get some vegetables, whip out the jar, bowl and weight and get started. Happy fermenting!
Wanna learn more about preserving? No problem: in my preserving hub you’ll find guides and recipes for fermentation, pickles, jams and more.
Fermentation may sound mysterious, but it’s one of the simplest and oldest ways to preserve food. With very little effort, you can create delicious, probiotic-rich foods right in your kitchen. In this beginner’s guide, I’ll show you exactly how fermentation works, how to do it safely, and which easy ferments to start with.
But what exactly is fermentation, and how can you ferment vegetables?
Question
Quick Answer
What is fermentation?
Preservation using beneficial microbes
Is it safe?
Yes, when basic rules are followed
How much salt?
Usually 2–3% by weight
How long does it take?
5 - 14 days
Best beginner ferment?
Sauerkraut
What Is Fermentation?
The (originally Latin) word „fermentation“ means „transformation of a substance“. This transformation is carried out by the smallest creatures called microorganisms or microbes, for example, bacteria and yeasts. Microorganisms transform organic substances, for example sugars, into alcohol and acids, depending on the kind of fermentation.
In simple terms, fermentation is a preservation method that uses beneficial microorganisms to transform and protect food.
Fermentation is NOT the same as pickling. In fact, those are two very different ways to preserve food.
Fermentation vs Pickling
While fermentation is carried out by live bacteria and takes time to develop, pickling relies on vinegar or another preserving medium to preserve food quickly. Harmful microorganisms are killed by briefly cooking the vegetables (or showering them with boiling water). Afterwards, the products are preserved in vinegar, salt brine, oil or alcohol. Pickled vegetables, therefore, have a sharper flavour, while the taste of fermented food is more complex.
Maybe you’ve heard the story of Captain Cook, who prevented scurvy by making his crew eat sauerkraut every day. We know today that scurvy is caused by a severe vitamin C deficiency due to a limited diet. We also know now that the vitamin C content of vegetables increases through fermenting, as well as the content of other vitamins and minerals. Fermented foods can contribute valuable nutrients and beneficial microbes to the diet.
Science has also found that the iron content in lacto-fermented vegetable juices is, to a certain extent, more soluble than that in raw juice.
Some fermented foods may contain small amounts of B vitamins, depending on the ingredients and fermentation process. As the only other sources for these nutrients are of animal origin, this is especially interesting for vegetarians and vegans.
While adding all this good stuff, at the same time, fermentation eliminates various toxins such as polyphenols and tannins.
But that’s not all.
Emerging research suggests that there is a connection between the ingestion of probiotics through fermented food and a reduction in blood pressure.
Some studies indicate that fermented food can also help regulate inflammation in the gut and boost anti-inflammatory cytokines.
And, last but not least, fermented goods are said to improve digestion.
So you see: the question should not be why we should eat fermented food but rather why not more often?
Improved flavour
Fermentation adds more depth and creates new nuances to the original product. As a ferment contains live microorganisms, the flavour keeps changing slightly over time.
Preserving seasonal harvests
Living seasonally has always included preserving abundance for leaner months, and fermentation is one way of doing that.
If you have a garden or a patio, a balcony or even just a south-facing windowsill, you can grow vegetables. Sometimes the harvest is more than we can eat, and that’s where preserving comes in. Why not cut that cabbage head into thin slices and make sauerkraut from it for the winter? Or let’s grate these carrots and parsnips and ferment them? Later in the year, when fresh vegetables are just a distant memory, this ferment will make a delicious and healthy side dish and provide us with all the good stuff I told you earlier about.
Reduced food waste
Despite all the amenities of modern life, such as freezers, fridges, and canners, one-third (!) of food is still thrown away, most of it in the Western world. According to studies, 90 kilograms of food are thrown away per capita in Western Europe.
Look, I’m guilty, too. That half head of broccoli, the two spears of leek that couldn’t fit into the soup any more or that bunch of radishes you harvested but no one wanted them that day, and then they had wilted and gone wizened – I had my share of vegetables I let go to waste.
Had I been a fermentista back then already, none of these presents from Mother Nature would have been thrown out. I’d definitely have them fermented.
Environmental benefits
Most fermentation processes don’t require electricity, neither in the making nor for storing. You don’t need a freezer, fridge (although it might come in handy) or a canner. All the energy you need is a bit of muscle to chop and slice the vegetables and press them into a jar.
At the same time, when you ferment vegetables that you have grown yourself or bought locally, you make sure to keep transportation routes short. That said, fermentation is the most sustainable way to preserve. Isn’t that cool? Fermentation is seasonal living in a jar!
Inexpensive
The fact that you neither need electricity nor fancy equipment (although I don’t say you couldn’t), makes fermentation a very low-budget way to preserve food. Even more so, when you cultivate the vegetables or fruits you use for fermentation by yourself.
I don’t know about you, but to me, fermentation sounds perfect: it provides nourishing, healthy food for the winter months, reduces food waste, is sustainable and doesn’t cost much. Above all, it’s a deeply satisfying, traditional preservation skill. So, where’s the flaw? You might ask. Let’s have a look at the question, most people ask themselves before starting to ferment anything:
Is Fermentation Safe?
The short answer is: Yes, BUT you must observe some basic rules
The golden rules of safe fermentation
Fermentation Safety Checklist:
✓ use clean equipment
✓ use correct salt ratios
✓ keep food submerged
✓ avoid contaminated ingredients
✓ trust smell + visual cues
✓ use tested methods
Use clean equipment: Thoroughly wash jars, lids and utensils with hot water and soap.
Use the correct salt ratios: You may think that all that salt in a ferment can’t be good for your health, and you’d rather take a smaller amount. That’s a sure way to a spoiled ferment! The salt is necessary to keep harmful bacteria out and create an acidic environment where only beneficial microorganisms can grow. Besides, we only use 2 – 5 % salt, which is less than, for example, in some sausages.
Keep the food submerged. When food swims on the surface, it can spoil and destroy the whole jar. As long as everything stays under the brine surface, all is fine.
Avoid contaminated ingredients: never use mouldy, rotten or otherwise contaminated products. You can only make something good from something good.
Trust your nose and eyes: Before you taste a ferment, check the smell and appearance. When it looks and smells fine (see the next point), it’s safe to eat.
Use tested methods: Fermentation hasn’t changed much over the course of millennia – not because people weren’t creative, but because tried and tested methods lead to great results.
Signs a ferment is going well
As I said before, the eyes and nose are good agents to check if a ferment is going well.
Within a few days, a new ferment should be bubbling; that’s a sure sign of microbial activity and exactly what we want.
Some days later, the brine will change and become cloudy. That’s perfectly normal and a sign of maturing.
Now, check the smell: it should smell, of course, sour and a bit tangy. It should NOT smell mouldy, fishy or rotten.
If everything’s fine, taste your ferment. The vegetables should have softened but still have some crunch. They should smell sour, tangy and a lot more complex than in their original state.
Signs something went wrong
Some indicators will tell you that, alas, something’s gone wrong with your ferment:
The first indicator is the appearance: when fuzzy mould, pink or orange slime or some black growth has formed on the surface, it’s a sure sign of spoilage. Throw the whole jar out.
Even when there are no visual clues, the smell usually gives away that there’s something rotten in the state of Denmark – or rather your jar: It should NOT smell mouldy, fishy or rotten.
Our senses will warn us when something’s off.
If you’ve never fermented anything before, don’t worry. Thousands of people successfully make their first ferment every year with nothing more than a jar, vegetables, salt, and a little patience.
Your First Ferment in 6 Steps
1. Prepare the vegetables
Whatever vegetable(s) you choose, wash them thoroughly to remove any dirt. If necessary, peel them and then either slice or grate them.
2. Salt correctly
Weigh the prepared vegetables in grams/kilograms or pounds. It doesn’t do to measure the volume in cups! When you’ve determined the weight, you can calculate the amount of salt you’ll need. Let me give you an example:
Let’s assume we’ve got 750 g of grated carrots and need a salt ratio of 2 %. Divide the weight by 100 to get one per cent and multiply it by 2. That makes
750 / 100 = 7.5
7.5 * 2: 15
For 750 g of carrots, we need 15 g of salt.
3. Knead in the salt
Mix the salt and vegetables thoroughly in a bowl and knead them strongly. Then let it rest for a few minutes so that the brine forms.
4. Pack tightly
Put the vegetables in a jar, handful by handful, and press them tightly so that all air is removed.
If necessary, fill the jar with brine so that everything is covered, and there’s about an inch between the brine surface and the jar rim.
5. Keep submerged
Now put a weight on top of the vegetables to keep them submerged. This is a critical point, as only under the brine, that is, in anaerobic conditions, can the beneficial bacteria do their work.
6. Ferment at room temperature
Close the lid slightly and put the jar in a place without direct sunlight and at room temperature. After 1 – 3 days, you should see the first bubbles, and the brine may even be pressed out from under the lid.
7. Taste and store
After about 7 days, when bubbling has visibly slowed down, it’s time to taste the ferment. When you’re satisfied, put the jar in a cooler place, for example, a cool basement or the fridge, to slow down the fermentation process.
If it’s not yet to your liking, let it ferment for another few days. Taste it daily to see if it’s ready.
Want to Start Fermenting With Confidence?
Get my free Fermentation Starter Checklist and avoid the most common beginner mistakes.
✓ Safe salt ratios ✓ Equipment checklist ✓ Fermentation timeline ✓ Signs of a healthy ferment ✓ Troubleshooting guide
5 Easy Ferments for Beginners
You know all the theory now, so let me show you some beginner-friendly ferments you can try your hand at.
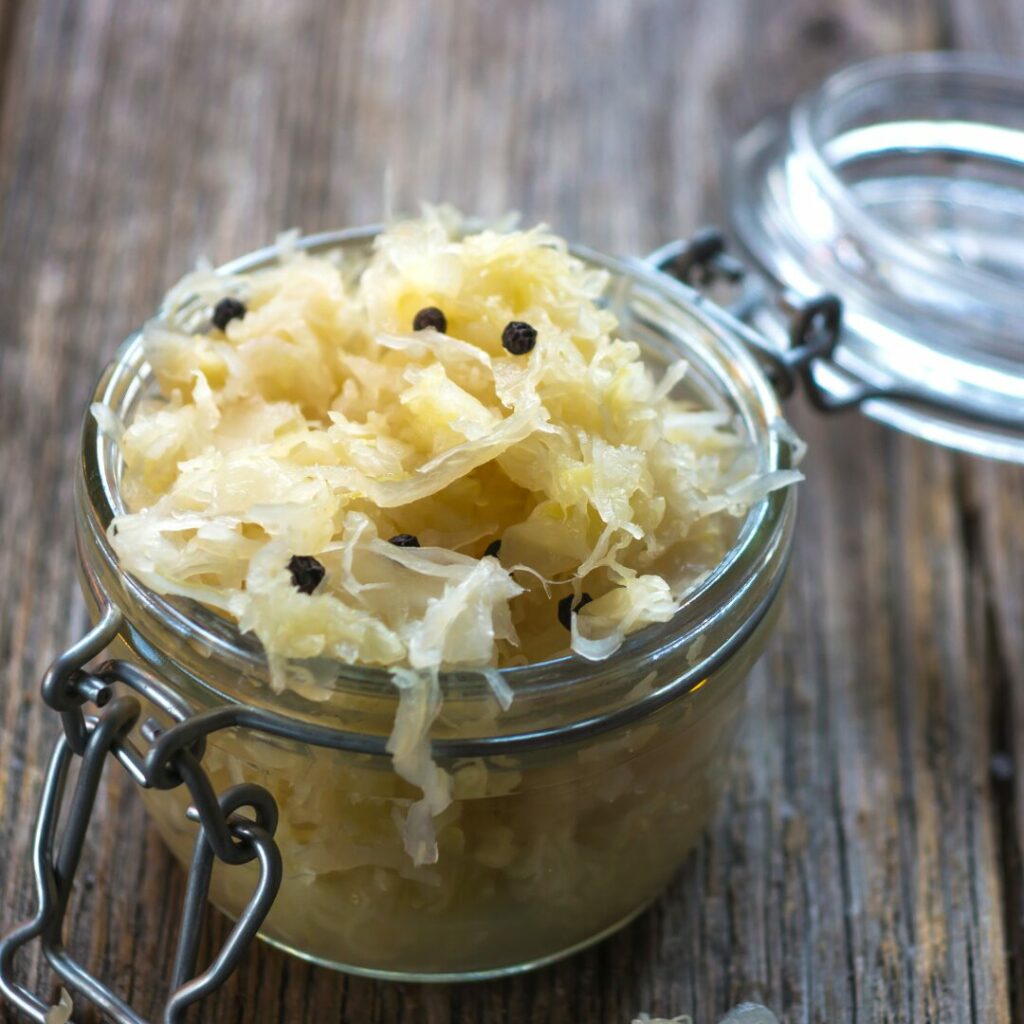
Easy Sauerkraut
Sauerkraut is the most widely known ferment in Europe and the US, and it’s very easy to make. A classic ferment that’s done in no time, yet tastes wonderful!
Fermented carrots can be eaten as a quick, ready-made salad or on a bagel with cream cheese.
Fermented Garlic Honey
A slightly different ferment, as it’s made with honey instead of salt. An epiphany for the taste buds!
Fermented Lemons
Wonderfully salty and tangy, fermented lemons are a must-have for oriental cuisine, but also add an interesting flavour to salads, couscous and rice dishes.
When you stick to the step-by-step description, nothing should go wrong. But as a beginner, you may come across several issues you’ll want to know about.
How Fermentation Works (Simple Science)
Fermentation describes the microbial or enzymatic transformation of organic substances into acids, gases or alcohol. We either ferment by adding bacteria, fungi or other microbial cultures or by adding enzymes. These microorganisms are partly already on the initial product, inducing a wild fermentation.
When it comes to fermentation, we need certain bacteria and must prevent others. In the case of lacto-acid fermentation, the most important of the beneficial bacteria we need is called Lactobacillus. Several species of lactic acid bacteria work together during fermentation, creating the acidic environment that preserves food.
Lactic acid bacteria are practically everywhere: on vegetables, on our skin, and in our house, which is great for wild fermentation. During this process, they transform carbs into lactic acid and carbon dioxide (CO2) and prevent harmful bacteria from growing.
Think of fermentation as creating the perfect home for good microbes while making life difficult for the bad ones.
There are two methods of lacto-fermentation
The brine method
Here, chopped or whole vegetables like carrots and cucumber sticks or cauliflower roses are put into a jar, which is then filled with brine until the vegetables are completely covered. Brine is essentially a water-salt solution with 25 – 50 g salt per litre of water, depending on the vegetables. Put the containers in a place without direct sunlight and temperatures between 13 and 24 °C, and let the contents ferment. If necessary, fill up with brine. The time of fermentation depends on the recipe.
The dry-salting method
Despite the name, this process is not dry. The vegetables are sliced as thin as possible and mixed with salt. Slicing breaks up the cell structure so that the salt can act more effectively and draw water out from the vegetables that gather as brine. Tightly press the vegetables into your containers and fill up with the remaining brine. Leave the containers in a place without direct sunlight at a temperature between 13 and 24 °C. The time of fermentation depends on the recipe.
Lacto-Fermentation for Beginners
Lacto-fermentation is not the only type of fermentation, though. Let me show you some other variants.
What are the different types of fermentation?
Here’s an overview of the most important types of fermentation:
In this guide, we’ll focus on lactic acid fermentation because it’s the easiest place for beginners to start.
Although we don’t need much to start our first ferment, there are some basic things we can’t do without.
Equipment You Need to Start Fermenting
The good news is that you can buy fancy equipment, but it’s not a must. In fact, if you just want to start, you probably have all you need already at home. I have written a comprehensive article on fermentation equipment, but let’s have a quick look at the basics :
Glass jars: Twist-off jars, mason jars, or Weck jars with rubbers and clips are equally fine
Weights: There are really cool fermentation weights you can buy, but to start, simple freezer bags filled with water will work just fine
Lids/airlocks: You need to cover the jars with lids, but you don’t necessarily need airlocks. The gases that form during fermentation will get out as long as you don’t twist the lids too tightly.
Digital kitchen scale
Non-iodised salt: Iodine will slow down or prevent fermentation
Cutting board
Knife
Apart from good starter products and equipment, there are a few conditions that fermentation needs to work.
Fermentation conditions
There are a few factors that are crucial for a successful fermentation:
Hygiene
Before you start fermenting, wash your hands thoroughly with warm water and soap. Don’t use antibacterial soap, as this could inhibit the fermentation process – especially if you knead the cabbage. Wash your vegetables just with cold (!) water and don’t sterilise your equipment as this could kill our lactic acid bacteria. Just warm water and a bit of soap are enough to clean your equipment.
Temperature
I recommend a temperature between 13 and 24 °C for fermentation, as this is the range where lactic acid bacteria thrive. It’s important to keep the temperature constant. The warmer it is, the faster acid is produced. If it’s too warm, however, the microorganisms can’t develop quickly enough, and the taste will suffer.
If it’s too cold (especially at the beginning), the lactic acid bacteria can’t increase fast enough, which may lead to spoilage.
Light
A dark place is ideal for fermentation. This doesn’t mean that you have to store your fermentation crock in a pitch-dark hole, but it should also not be in direct sunlight. A shadowy corner in your kitchen or pantry where you can keep an eye on it is great.
Oxygen
As talked about earlier, fermentation happens without oxygen, so we must make sure that the vegetables are always under the brine. With the brine technique, this can mean that we have to add brine after several days. When applying the dry-salting technique, we can make sure that our veggies are constantly covered with brine by putting a weight on them and pressing them down.
Time
So, how long does it take until the fermentation process is complete and you can eat your fermented veggies? That depends, mostly on the kind of vegetables, but also on other factors like temperature and season. Technically speaking, veggies are fermented when they have reached a pH of under 4.6 (a pH of 7 is neutral, and the lower the pH, the more acidic the medium). If you want to determine the pH, go ahead and put a pH test strip into the brine. But you can also just rely on your taste buds: try your fermented food and eat it when you like the taste.
Ready to get started? Here’s a list of beginner-friendly fermentation recipes.
Best Ferments for Complete Beginners
Difficulty
Ferment
Very Easy
Sauerkraut
Very Easy
Carrots
Easy
Radishes
Easy
Garlic
Medium
Fermented lemons
The role of salt in fermentation
Salt can preserve fresh vegetables, including all their vitamins, for months or even years. It removes water from the cells, which gathers as brine in the fermentation crock. Brine again is important as lactic acid bacteria live anaerobically, i.e. without oxygen, which lots of other microbes need. To prevent the growth of those unwanted microbes, fermentations happen under the exclusion of oxygen, that is: in brine.
Salt also improves the consistency of the vegetables. It hardens the cells’ pectin so that they stay more stable and thus “crunchy”.
It may come as a surprise, but salt makes things salty and thus adds to the taste.
It also helps to keep unwanted bacteria and yeasts in check that are more sensitive to a salty environment than lactic acid bacteria.
Without salt, there could be an increase of yeasts that transform sugar not into lactic acid but into alcohol.
The best salts for fermentation are rock salt, sea salt and kosher salt. Always make sure that the salt you use doesn’t contain iodine, as this substance may slow down or even prevent fermentation.
Where to store fermented food
Storing fermented foods in the fridge slows fermentation almost to a standstill and helps preserve the flavour you enjoy.
If you are lucky and have a cool (below 10 °C but above 0°C) basement or even a root cellar, this is a great storage place for your fermented food! In that case, I recommend fermenting in larger containers because the food lasts longer the larger the container is. It is no coincidence that people used large fermentation crocks in the past.
Alternatively, you may preserve your fermented food in a water bath. With this method, you must be aware that precious vitamins and nutrients may be destroyed by the heat.
My basement is luckily very cool, and I can store all my fermented food there. If your cellar is too warm for that, I recommend a second fridge.
Common Fermentation Problems & Fixes
Here’s a short overview of common problems. For more detailed explanations, read my guide about fermentation problems and what to do.
Why is my ferment cloudy?
It’s perfectly normal that in the course of fermentation, the brine gets cloudy. You can eat it.
Is kahm yeast safe?
Kahm yeast is a thin white film on the brine surface that gets destroyed when you stir it slightly. Although it looks a bit suspicious, it’s safe.
Why do no bubbles form?
The most likely reason is that it’s too cold. Fermentation is best carried out at room temperature.
Why is it too salty?
Either you’ve added too much salt (stick to the ratio indicated in the recipe), or it’s too early, and you need to let it ferment a bit longer.
Why is my ferment mushy?
When you add too little salt, the fermented vegetables get mushy. Another reason would be that the ferment is older than a year.
Why is mould forming?
Most likely because the vegetables are not completely covered by brine. Lactic acid fermentation must be anaerobic.
Fermentation FAQ
How long does fermentation take?
That depends on the product you want to make and the type of fermentation. Lactic acid fermentation, for example, takes 5 – 10 days, while maturing a vinegar can take years.
Can fermentation happen without salt?
Salt is only necessary for lactic acid fermentation. Other types of fermentation don’t need salt.
Can I use tap water?
Yes, as long as it’s clean and unchlorinated.
Do fermented foods contain alcohol?
Some do, for example, beer, cider, and wine, which are fermented by yeasts. Other ferments like sauerkraut, sourdough or koji don’t contain alcohol.
Can I ferment fruit?
Yes, but it takes way shorter and should be eaten within 2 weeks. Due to the high sugar content, it can produce more bubbles and even become alcoholic.
Should fermentation smell bad?
To some people, cheese or sauerkraut smells “bad”, so that’s a very subjective term. As a rule of thumb, when you don’t like the smell, don’t eat it.
Can I ferment in metal containers?
No, as salt and acid will react with the metal over time.
Enjoy Traditional Food Skills?
Join the Seasonal Simple Life newsletter for seasonal gardening tips, preserving recipes, fermentation projects, and simple ways to live closer to nature.
Let’s revive a wonderful traditional preservation method
Fermentation connects beautifully with seasonal living because it teaches patience, trust, and making the most of abundance.
And it’s easier than you might have thought!
Our ancestors did it without any modern equipment – and you can do it, too. The most important thing: Just start. Your first sauerkraut needn’t be perfect, but with every new project you’ll gain experience.
Fermentation is more than a preservation technique. It’s a way of slowing down, working with nature instead of against it, and turning seasonal abundance into nourishing food for months to come. Start with a simple jar of sauerkraut and see where the journey takes you.
Welcome to the world of fermentation!
Continue Your Fermentation Journey
If you’re ready to start fermenting, these beginner-friendly guides will help you take the next step:
Woodruff syrup — known as Waldmeistersirup in German — is a traditional Central European spring speciality. As the name indicates, it’s made from sweet woodruff (Galium odoratum), a woodland herb famous for its delicate scent of hay, vanilla, and almonds. In Germany, it’s known as Waldmeister and used for lemonade, desserts, and May wine. In this article, I’ll show you how to make it naturally at home — without artificial green colouring.
🌿 The Complete Guide to Woodruff
Modest in appearance, but impossible to ignore once it’s in bloom — let me introduce you to woodruff.
Why I Fell In Love With Woodruff
When I was a kid, woodruff sherbet powder was totally en vogue! Sometimes, when my friends and I were walking back from school, we went to the local store and bought some of it as a treat. There was also a “woodruff” jelly of an almost neon-green colour and overly sweet taste, but my mum refused to buy “this purely chemical sh…stuff” (she didn’t say “stuff”). So for a long time, the only reference I had about how Woodruff tasted was the sherbet powders.
Real woodruff, however, has a far more complex flavour than anything that was artificially produced.
One day, while taking a stroll through the woods with my boys, I found some lovely flowers growing in the half-shade. I picked some and brought them home, where I wanted to put them into a vase.
Which I forgot to do.
When I remembered the plants, they had already wilted – and were spreading the most wonderful scent of hay and vanilla (nothing chemical about that). We had accidentally found woodruff!
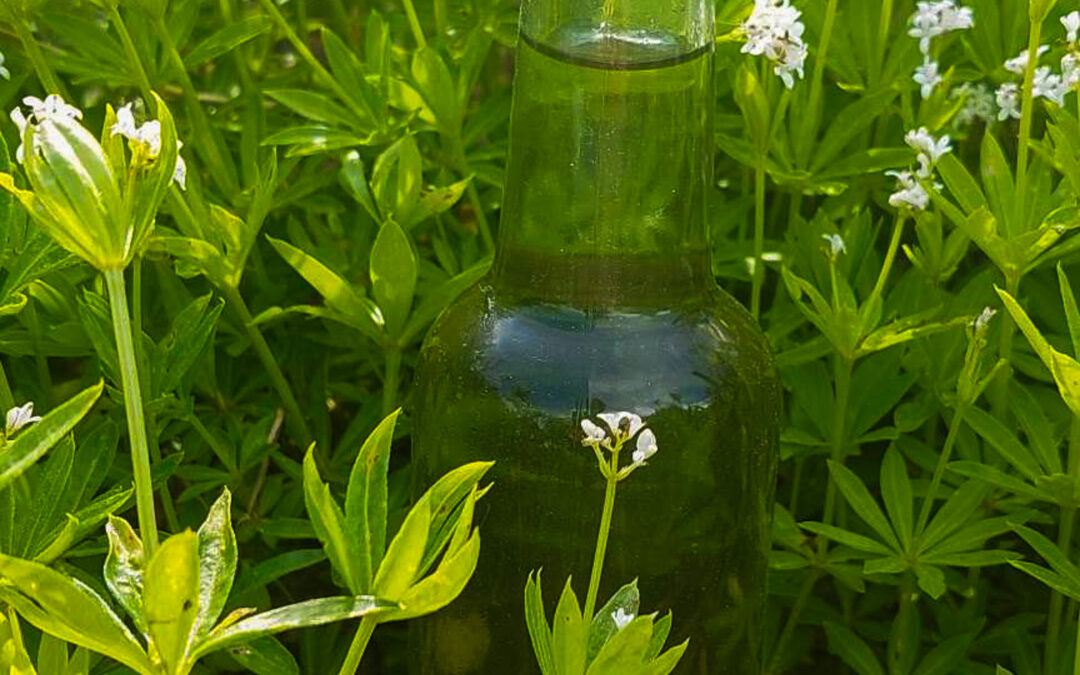
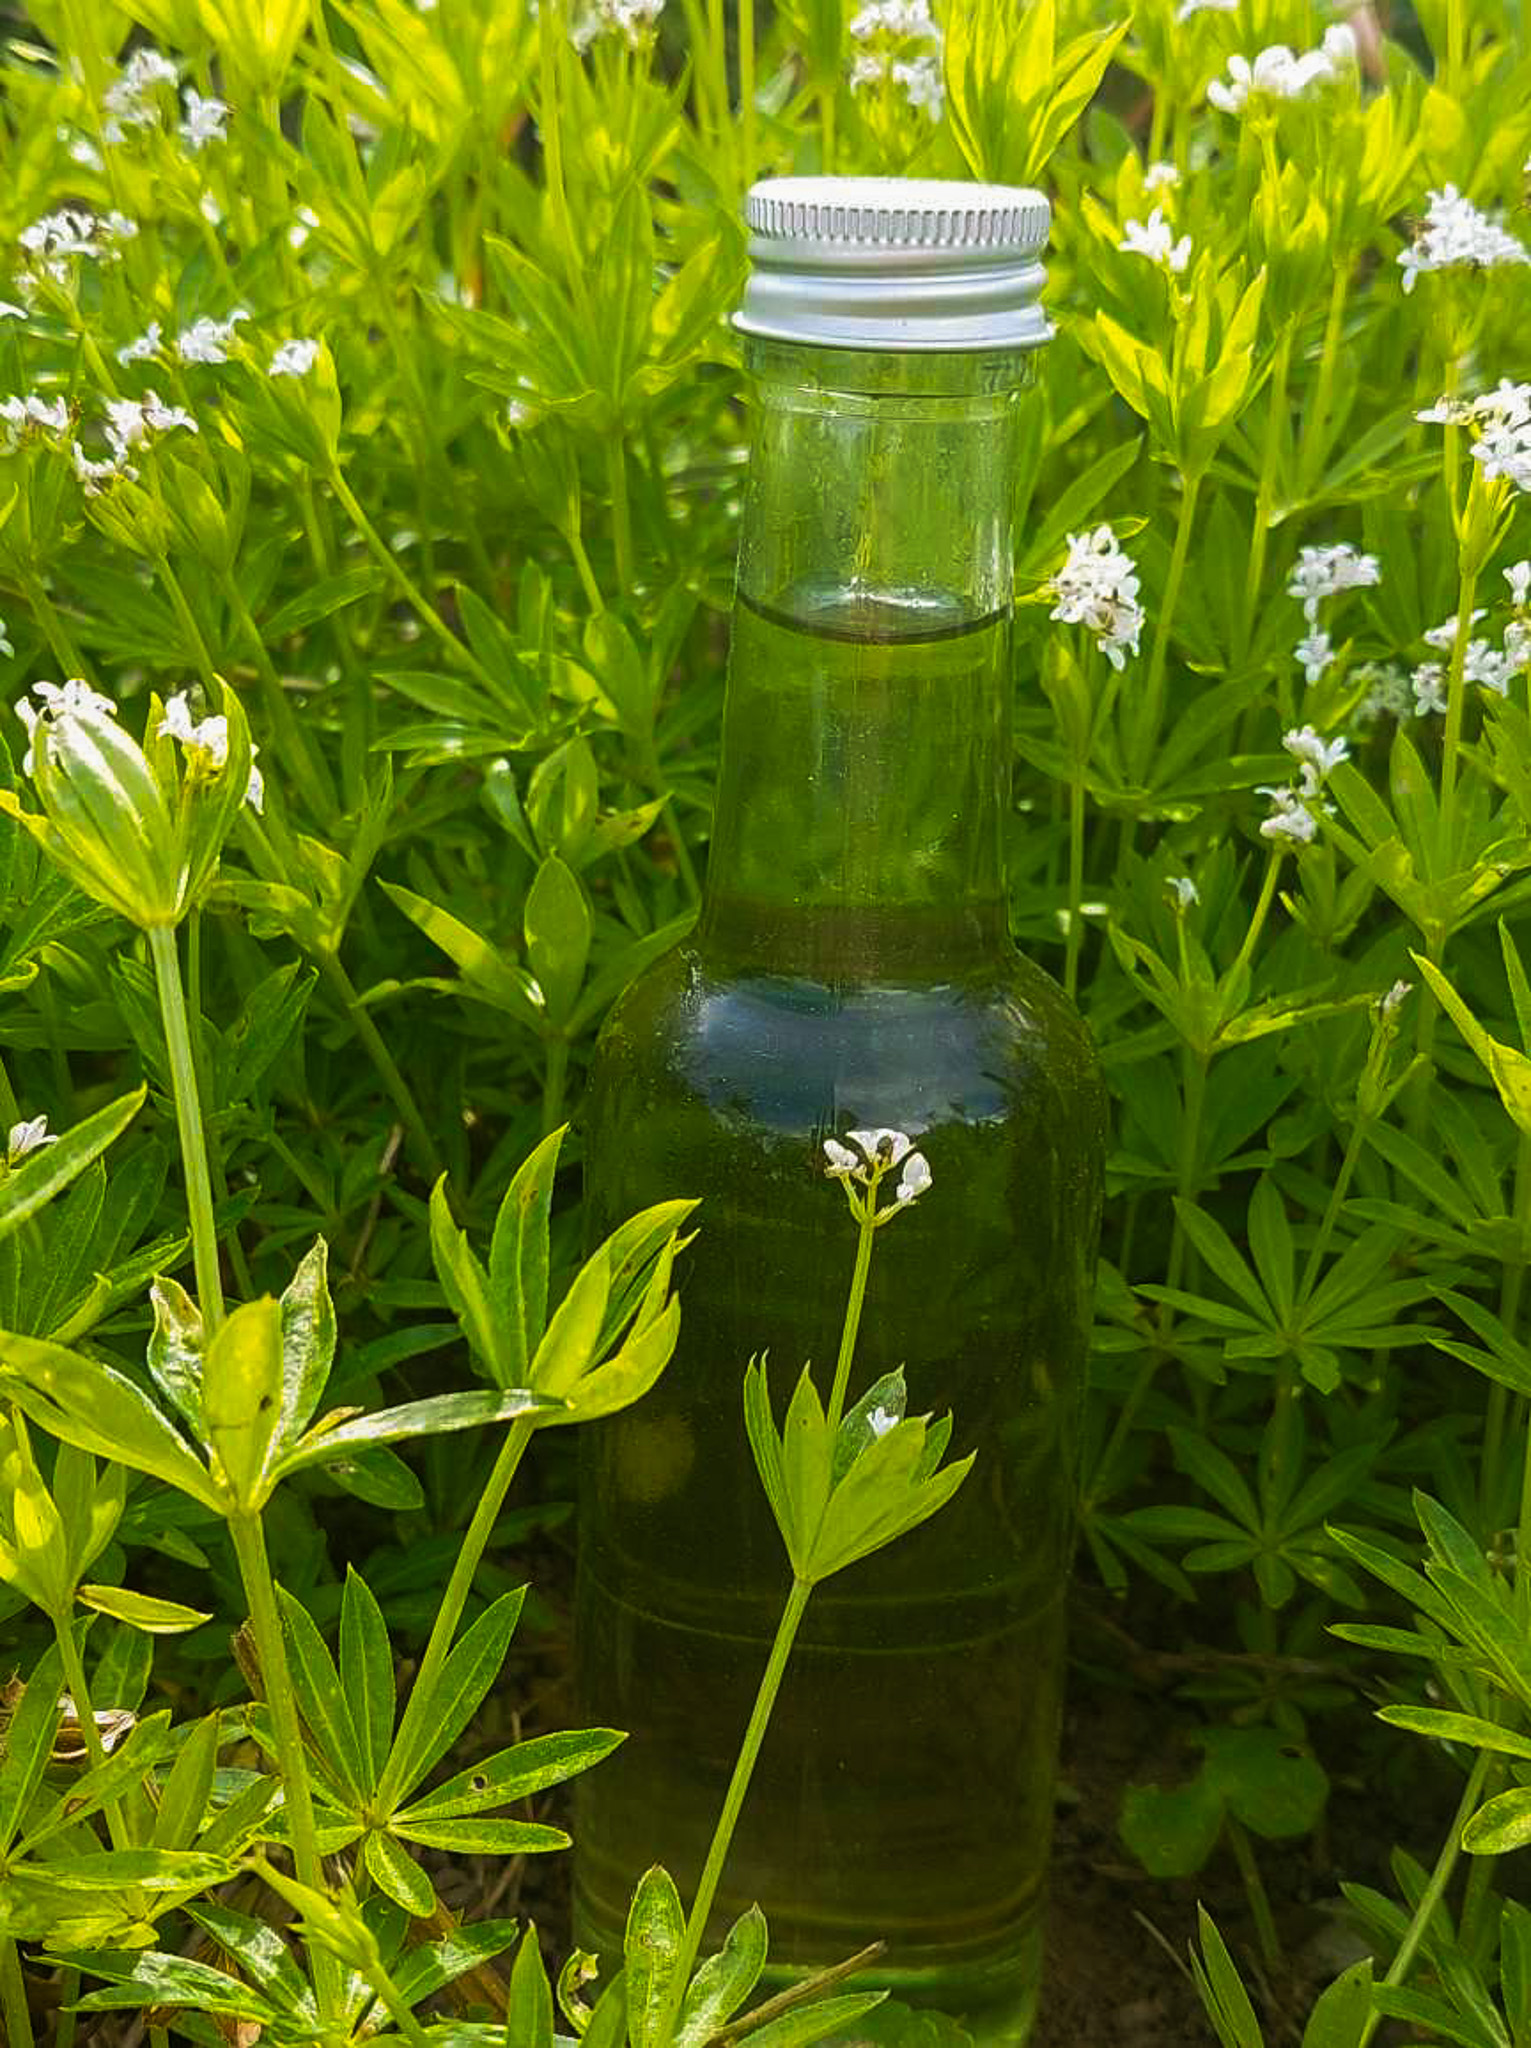
Today, I grow woodruff in my herb garden, and every spring I make woodruff syrup to preserve its extraordinary scent. No chemical taste, no green colour, just four simple ingredients for a wonderfully herbal syrup with notes of hay and vanilla.
If you enjoy seasonal recipes, garden harvests and simple homemade traditions, you might like my newsletter.
What is Woodruff (Waldmeister)?
Woodruff (Galium odoratum) is a herb of the cleaver family. It mainly grows in deciduous forests of the temperate regions in Europe and Asia. It’s not native to the US but grows there as a neophyte.
How To Identify Woodruff
Woodruff is a perennial wintergreen herb that grows to a height of 5-50 cm (2-20 inches). It has an unbranched, smooth stalk with lance-shaped leaves in whorls.
Depending on the location, woodruff blooms from April to May, sometimes June, with small, white, star-shaped flowers. It’s used as a medicinal and condiment plant, for example, in May wine and desserts.
An inexperienced forager may confuse woodruff with white cleaver, which is safe to consume as well. Some sites state that woodruff can also be mistaken for lily of the valley (which is poisonous), but honestly, that’s highly unlikely.
If unsure, check the scent: fresh woodruff doesn’t smell but develops its characteristic scent only after wilting.
What Does Woodruff Taste Like?
How do you describe the taste woodruff releases once it has wilted? The first comparison I find is hay. Whenever I dry woodruff in my home, it smells so strongly of hay that I sometimes invite people intentionally to share that scent with them.
But it isn’t hay alone — otherwise I could simply use hay. Woodruff’s fragrance also bears a strong undercurrent of vanilla and almond, which adds sweet and slightly bitter notes.
Mix that with the scent of freshly mowed grass, and you have the soft herbal sweetness of woodruff in a nutshell.
Why Is Woodruff Often Bright Green?
Well, it isn’t – at least not naturally. When you buy ready-made woodruff syrup or jelly, it’s always artificially flavoured and coloured.
Homemade woodruff syrup is colourless to pale yellow.
Is Woodruff Safe? (Coumarin Explained)
The small amount of woodruff used in this recipe stays well within safe traditional consumption levels. Enjoy woodruff syrup occasionally, just as it has been used in Central Europe for generations.
The most famous ingredient of woodruff is coumarin, the stuff that makes it smell so good when it’s wilting.
However, coumarin can be slightly toxic when consumed in abundance. The German Federal Institute for Risk Assessment (BfR) states a tolerable daily intake (TDI) of 0.1 mg of coumarin per kilogram of body weight.
What does that mean for our syrup?
Woodruff emits about 1 % coumarin from dry mass. The average weight of dry mass is about 14.5 % of fresh weight. For this recipe, we use 8 – 10 stalks of dried woodruff, which amount to about 3 – 3.5 grams. With that, the amount of coumarin will not exceed 5 mg/l and would be within the TDI the BfR recommends. Additionally, syrup is always diluted, which even minimises the coumarin amount.
In short: woodruff syrup is considered safe when consumed in normal culinary amounts. As always with aromatic herbs, moderation is key — woodruff syrup is meant to be enjoyed diluted and occasionally, not consumed in large quantities.
Can You Grow Woodruff At Home?
Absolutely, I’ve been doing so myself for years. Seeing as woodruff is a herb that grows in the forest, though, we must consider that it grows best in partial shade. When it has found the right place, though, it spreads readily. So, you can use it as a perennial groundcover if you like. It’s the perfect herb for woodland gardens.
When To Harvest Woodruff For Syrup?
The coumarin content in woodruff is the highest when the plant is in full bloom, which makes the best time to harvest woodruff shortly before the flowers burst into bloom. Here in Bavaria, that’s from mid-March to the end of April (in cold springs up to the beginning of May).
If you gather woodruff in full bloom, I recommend using it for other purposes, for example, as a decorative bouquet in fragrant sacs that you hang in your closet.
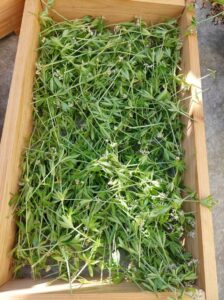
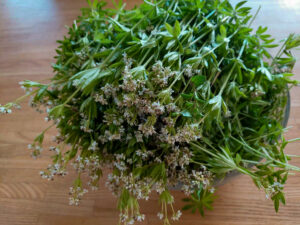
To harvest woodruff, cut it off directly above the soil, leaving the roots in the earth. From there, it will grow out again.
When you’ve harvested woodruff, you can’t use it immediately but must let it wilt first. I’ll show you why:
Why Woodruff Must Wilt Before Use
In fresh woodruff, the coumarin is bound to sugar and doesn’t smell of anything. Only when the cell walls are destroyed – by wilting, drying or freezing – an enzyme splits off the sugar and releases the now free coumarin. That’s when the typical flavour appears.
Fresh
Wilted
little aroma
full aroma
coumarin bound
coumarin released
Traditional Uses Of Woodruff
The best-known use for woodruff is as an ingredient in May wine (our German “Maibowle”), where wilted woodruff is used to infuse white wine and topped off with prosecco. This is a very traditional German spring drink.
Next in line comes our syrup, which is the basis not only for different drinks but also for cakes and desserts.
Further, woodruff is used in natural and folk medicine (although there’s no scientific evidence for its use) as an anti-inflammatory, anti-spasmodic, blood-cleansing and calming herb. However, it’s not advisable to use woodruff as a home remedy. The coumarin can damage the liver if consumed in high amounts.
I’m sure you know lavender sacs that you can put on your pillow, but did you know that you can also sew woodruff into sacs that you hang in the closet? They will slightly scent your clothes and even keep moths away.
Once the woodruff has wilted and released its fragrance, the rest of the process is beautifully simple.
Woodruff Syrup
A traditional spring syrup made from sweet woodruff, gently infused to capture its delicate aroma of hay, vanilla, and fresh herbs. This homemade woodruff syrup is perfect for lemonade, desserts, or sparkling wine and preserves the scent of early summer in a bottle. Simple to make with just a few ingredients and a little patience.
Pick the woodruff and let it wilt for at least 4 - 6 hours, better overnight, until you can clearly smell its scent.
Sterilise the bottles and caps and let them dry.
Combine the sugar and water in a saucepan and bring to a boil, stirring constantly until the sugar is fully dissolved.
Cut the lemon into slices and add them to the mixture.
Let the sugar syrup cool down. When it reaches room temperature, add the woodruff and leave it there for 2 - 3 days.
After that time, remove the lemon slices and the woodruff, bring the syrup to the boil. Fill the syrup into bottles while it's still hot and seal them immediately.
Notes
Woodruff syrup can be stored in a cool and dark place for up to one year.
Want more seasonal recipes like this? Sign up for my newsletter:
How Long Does Woodruff Syrup Last?
Store unopened bottles of woodruff syrup in a cool and dark place, and it’ll last for at least a year.
Once a bottle is opened, store it in the fridge and consume it within a few weeks.
If the syrup gets cloudy, develops mould or smells funny, it’s spoiled, and you must throw it away.
How To Use Woodruff Syrup
The first use, of course, is to dilute woodruff syrup (or any other syrup for that matter) with water and enjoy it as a drink. But there are so many more ways to enjoy it! Let me show you:
Can I Use Fresh Woodruff Instead Of Wilted Woodruff?
No. The scent only develops when the woodruff has wilted for at least several hours, and only then can you use it to infuse the syrup.
Can I Reduce The Sugar?
Yes, but just slightly. Sugar is a preservative and makes sure our syrup doesn’t spoil when stored. Instead of using 1 kg of sugar in 1 litre of water, you could reduce the amount to 800 grams.
What Does Woodruff Syrup Taste Like?
The taste is a mixture of hay, vanilla, almonds and freshly mowed grass.
Can I Freeze Woodruff?
Yes, freezing will also make it release its fragrance.
Why is commercial woodruff syrup green?
It’s an artificial colour added to the product.
Can I Dry Woodruff For Later Use?
Absolutely. Store the dried herb in a closed container and use it when you’re ready.
Ready to try Woodruff?
Woodruff syrup is one of those small spring rituals I look forward to every year — a way of bottling a moment before it disappears again for another twelve months. If you’ve never tasted real woodruff before, I hope this recipe surprises you as much as that forgotten bunch of wilted flowers once surprised me.
👉 While you wait for your syrup to infuse, enjoy more spring favourites:
Lacto-fermented radishes are among the easiest ferments to make, and now I’ll show you how it’s done.
Radishes are among the first rewards of the spring garden — if you’re wondering what else to start early, my guide to what to sow and plant in March might be helpful. With a cultivation time of just 3 – 4 weeks, they can be ready to eat by early to mid-April, if we sow them as early as March, in the greenhouse or a cold frame. If you’re planning your spring garden, have a look at what to sow and plant in March to make sure you don’t miss the first radish harvest of the year.
One of my greatest delights in spring is to make a large spring salad bowl and add the first radishes, freshly harvested from the greenhouse. But that’s not all…
Why ferment radishes at all?
Now, I don’t know about you, but I always seem to sow too many radishes. Or is it just that they all seem to ripen at once? Anyway, delicious as they are, I can only eat so many of them. To keep the surplus for later and thus prolong the season, I always make lacto-fermented radishes.
As you know, lacto-fermented vegetables not only taste wonderful but they’re also rich in probiotics, which is great for your gut health. So apart from preserving our harvest, we also make something really beneficial for our health.
Fermentation Safety Basics
If you’ve never fermented before, or if you just need a little reminder: fermentation is perfectly safe when you observe a few rules:
Wash the vegetables in cold water before processing them
Make sure that they stay under brine all the time.
When the brine smells tangy, that’s good. If your ferments have developed mould or get slimy, discard them.
Fermentation equipment
Good news: you don’t need special equipment.
A cutting board and a knife come in handy, and I think it’s safe to assume that you already have those in your kitchen.
If you have fermentation jars or pot with weights, that’s wonderful. But honestly, you don’t have to go all crazy with equipment when fermenting, especially if this is your first time. A large jar with a fitting lid will do nicely. As a weight, you can use a freezer bag filled with brine and closed tightly.
Wash the radishes and dry them. Cut off the root and the leaves.
On your cutting board, slice the radishes thinly.
Put the radish slices into a bowl and mix them with half the amount of salt. Rub the salt in well and taste the radishes: they should be salty but not too much. If necessary, add some salt. The radishes become wet and soft, and slowly a brine builds.
Now, put the radishes portion by portion into the fermentation container of your choice and press them tightly with your hands or a tamper into the jar to avoid air bubbles. There should be enough brine to cover the radishes.
Leave about 2 cm to the lid, put a weight onto the radishes so they stay under the brine, and close the container.
Put the bowl onto a tray and let the radishes ferment for 5 - 14 days in a cool place without direct sunlight. Make sure that there's always enough brine.
Taste the radishes after 5 days. If they are ready, store them in the fridge or another cool place; if not, leave them out to ferment further until you like the taste.
Notes
Fermented radishes can be stored in the fridge or in a cool basement for up to 6 months.
Whole fermented radishes
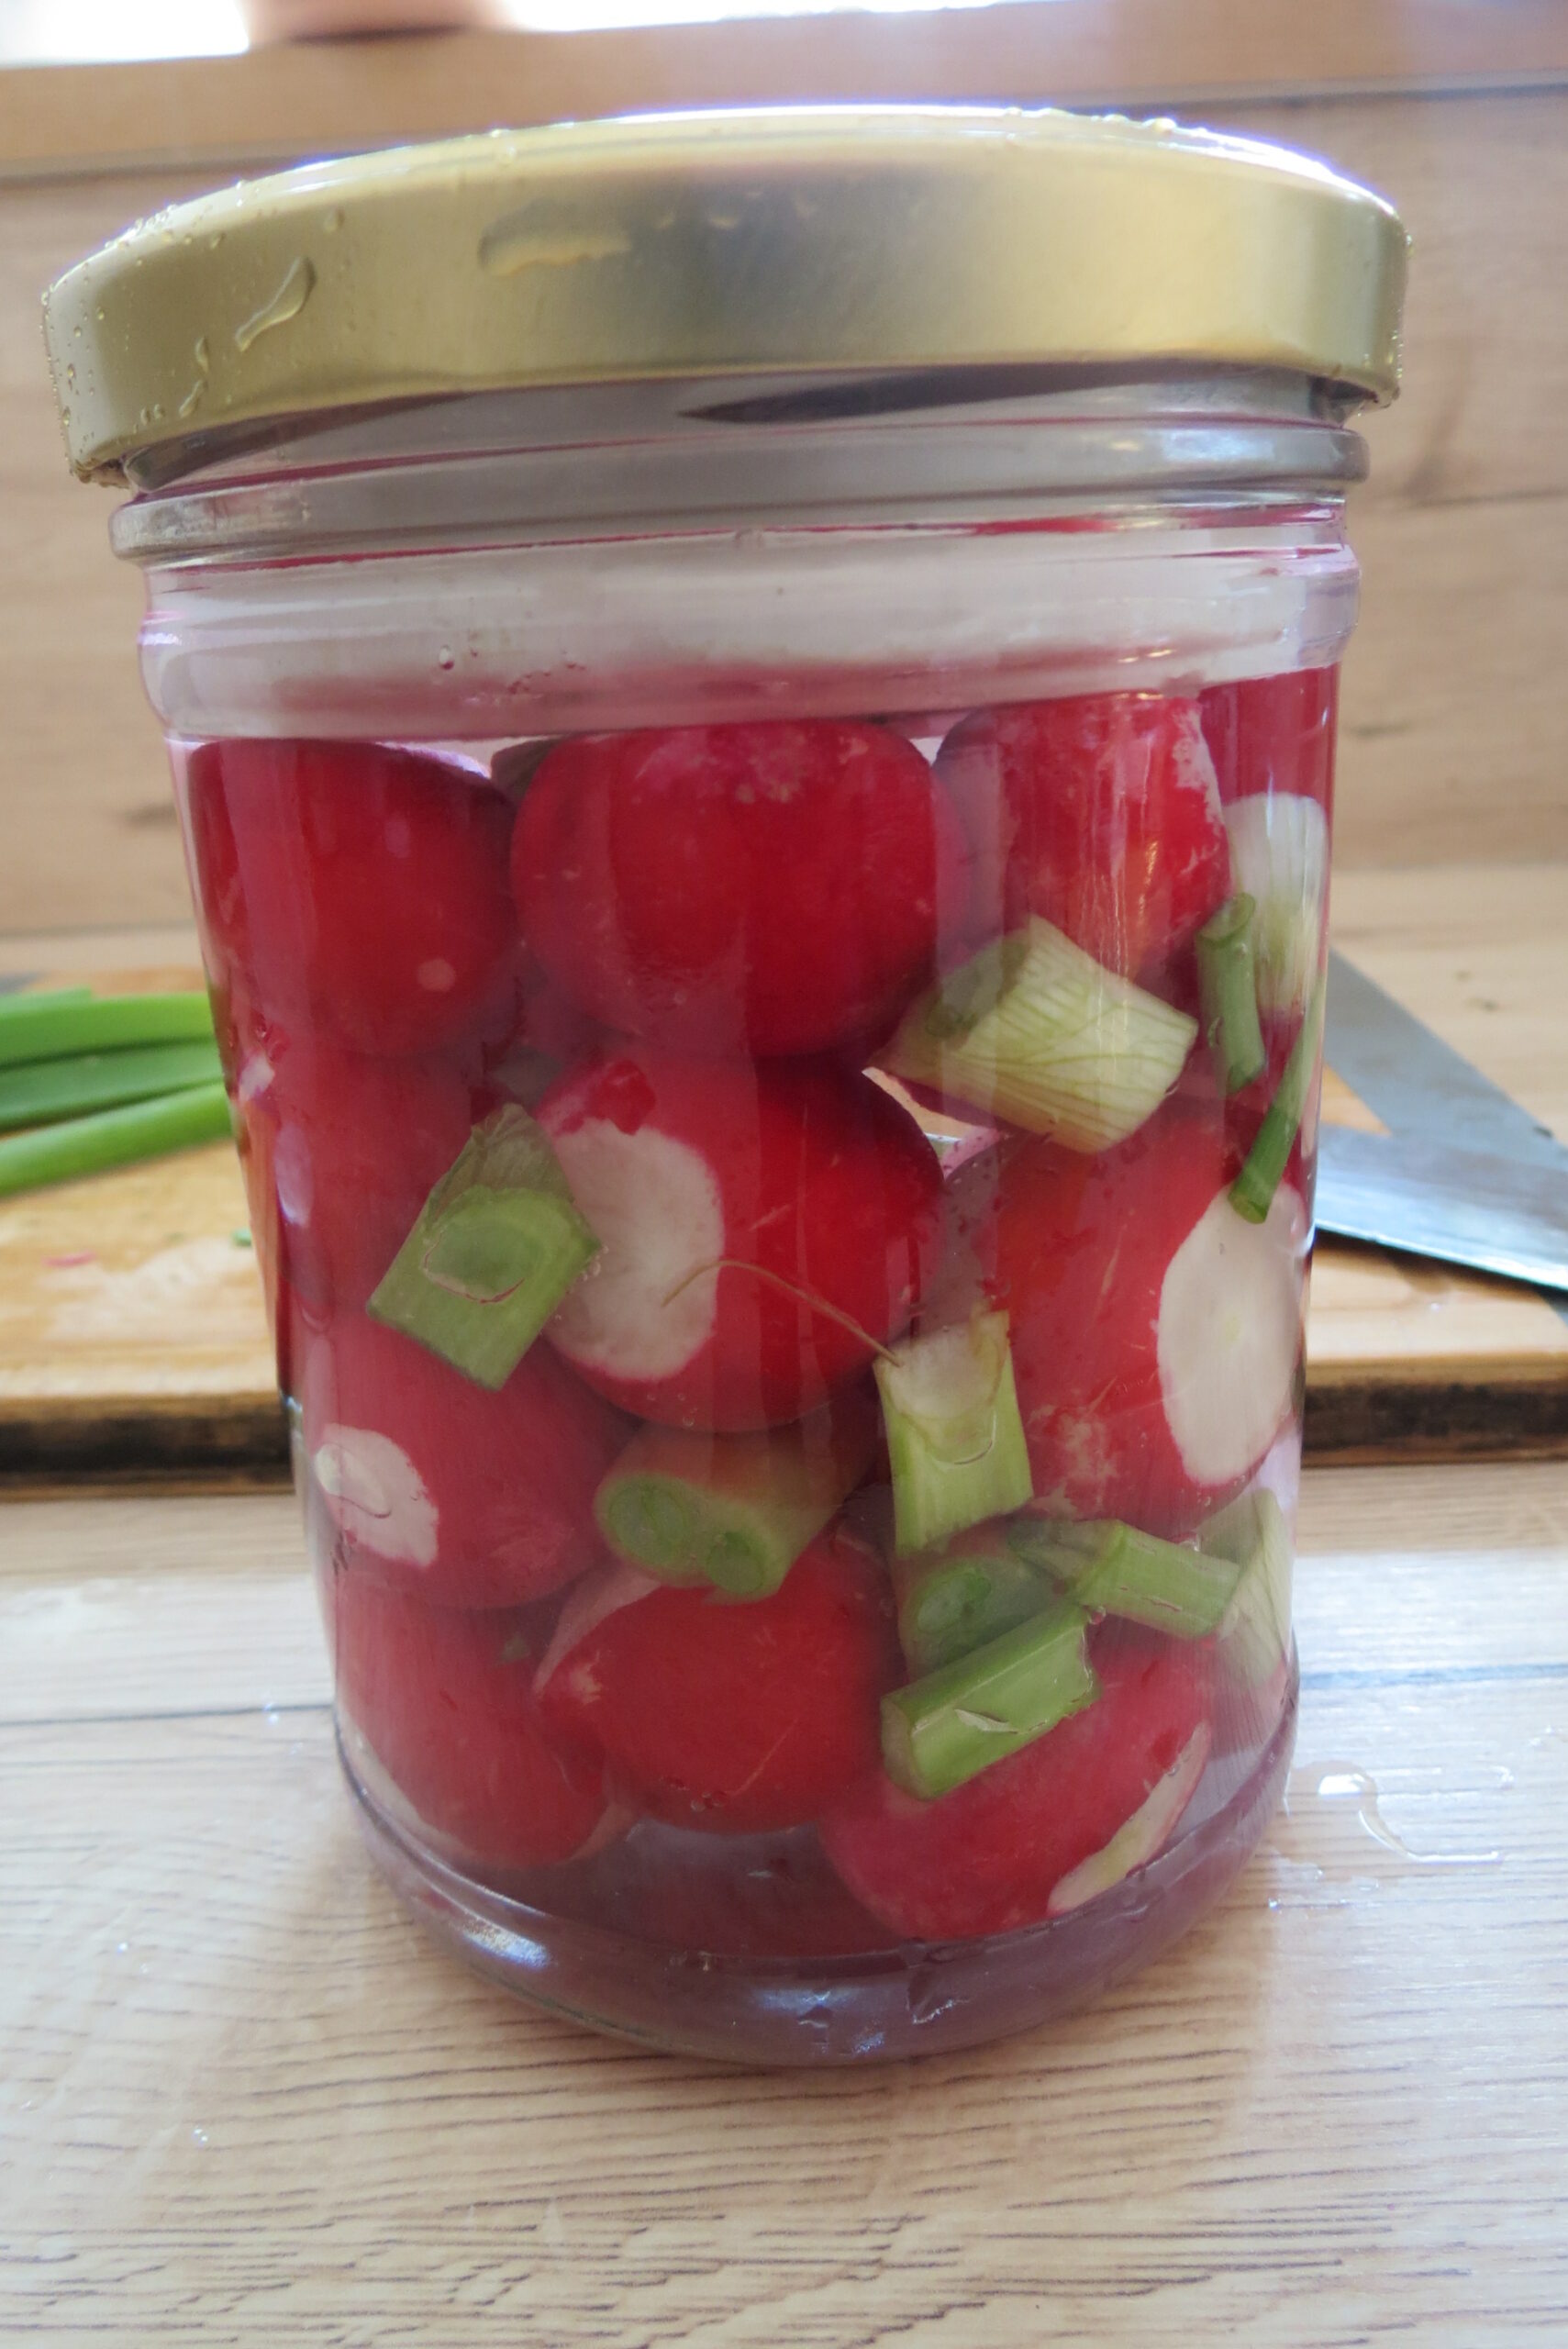
This recipe uses a different method. As the radishes are left whole, we make a brine of salt and water and cover them with it.
Fermented whole radishes
Ferment whole radishes with spring onions in a simple brine for a crisp, tangy preserve that keeps for up to six months.
Wash the radishes and spring onions in cold water and put them into the fermentation container of your choice. Make sure the vegetables are stacked tightly.
For the brine, dissolve the salt and sugar in the water and pour so much brine over the vegetables that they are fully covered.
Store the leftover brine (up to one week) in the fridge.
Secure the lid on the fermentation container.
Put the jar onto a tray and let the radishes ferment for 7 - 10 days in a cool place without direct sunlight.
If too much brine evaporates, fill up with the brine in your fridge.
After 7 days, taste the radishes. If you are satisfied with the taste, store the radishes in the fridge. If not, leave them out to ferment further until you like the taste.
Notes
You can store the fermented radishes in the fridge or a cool basement for up to 6 months.
Variations
Once you master the basic ferment, try these variations:
Add ground coriander for an exotic flavour
Minced garlic adds some sharpness
For more spiciness, add chilli flakes or grated ginger.
Slices of thick, organic lemon peel make the fermented radishes more tangy.
These are just a few additions for fermented radishes. But don’t let me stop you there. Get creative!
Serving Suggestions For Fermented Radishes
Now that your radishes are ready, here are some of my favourite ways to enjoy them:
Add fermented radishes to your grain or Buddha bowls
Use them as a side dish for meat or fish
Top your salads with them for an extra tangy kick
Fermented radishes make a wonderful crunchy side to Asian-inspired dishes
Eat them on homemade sourdough or rye bread with butter
Sneak some of them into your children’s lunch box 😁
Frequently Asked Questions
What radishes can I ferment?
You can make this recipe with any variety available, red, white and even daikon radishes. Red varieties, however, are particularly pretty.
Why did my fermented radishes lose their colour?
That’s totally normal. In the course of the fermentation process, the radishes will lose their colour, and the brine becomes opaque.
Why does my ferment smell strong?
If your brine smells tangy, salty and sharp, that’s perfectly normal. If it smells mouldy, however, (and if mould has formed), discard the ferment.
How long do fermented radishes take?
Radishes take between 5 and 14 days to ferment. It depends on the size of the radishes (whole ones will take longer to ferment than slices) and temperature. Taste your fermented radishes after 5 days, and if you like the taste, store them in the fridge or a cool basement.
How long can I store fermented radishes?
When you’re satisfied with the taste, store fermented radishes in the fridge or a cool basement for up to 6 months.
Bringing the Season into the Kitchen
Seasonal cooking and preserving doesn’t have to be complicated. Small habits — sowing a few seeds, harvesting what grows, preserving a little at a time — slowly shape a more seasonal rhythm in everyday life. That’s exactly what I explore here on Seasonal Simple Life.
Fermented radishes are a small spring miracle — made in minutes, enjoyed for months. I hope these two recipes inspire you to make the most of your harvest, however abundant it turns out to be. Have you tried fermenting radishes before? Or are you giving it a go for the first time? I’d love to hear how it goes.
Continue your seasonal journey. If you’re enjoying working with your spring harvest, here are a few more ideas to help you grow, preserve, and cook with the season:
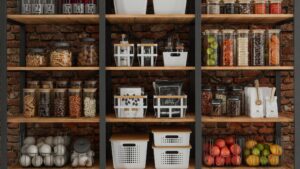
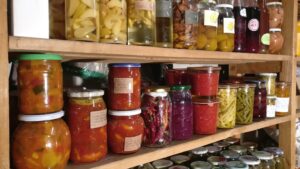
Shortly before one Christmas, I sent one of my boys down into the basement, where we store our preserves, and asked him to get a jar of sweet-and-sour pumpkin. It took him a while – men rarely find something on the first go. When he finally made it up again our three flights of stairs, he proudly presented me with a jar of something brown and sluggish in it. Hadn’t it borne a label with “sweet-sour pumpkin” on it, I would never have guessed the content. With a lot of guesswork, we figured out that it must have been from the year before we moved apartments, which was six entire years ago. My son had taken a jar from the very back of the shelf, showing me painfully why I needed to do a pantry audit at least once a year and that a clever rotation system prevents food from being spoiled.
Why a Pantry Audit Matters
Forgetting about food we already have doesn’t just cost money—it costs a lot of money. We buy duplicates of items already in our pantry while perfectly good food spoils at the back of the shelf.
This is not only a financial disaster, but it also has a significant impact on the environment: according to the Food and Agriculture Organisation of the United Nations (FAO), people in Germany discard 18 million tonnes of food per year. That’s roughly one-third of our total food consumption of 54.5 million tonnes. To put this in perspective: we throw out 313 kilograms of good food every second!
In terms of agricultural land, 2.6 million hectares of land are cultivated in vain each year, not to mention the greenhouse gas emissions.
A well-audited pantry, on the other hand, saves money and helps the environment while benefiting our health through fresher ingredients. While many foods remain safe past their ‘best by’ dates, fresher ingredients naturally offer better nutrition and flavour.
This doesn’t only apply to store-bought stock, but also to our lovingly made preserves. It’s heartbreaking when all the time and care we put into growing, harvesting and preserving our food simply goes to waste, just because we didn’t know what was sitting forgotten in our pantry.
When to Conduct a Pantry Audit
Optimally, we should conduct a pantry audit once every three months – or so “they” say (whoever “they” are).
I’ve found twice a year works perfectly for my household: once in May before harvest season begins—when I’m using up last year’s preserves to make room for the new season’s bounty—and again in early January after the holiday cooking frenzy.
A clear sign that it’s high time for a pantry audit is when you can’t find things you know you bought, discover duplicate items hiding in the back, or notice expired products.
The key is choosing a schedule that works for YOUR household and sticking to it. Whether it’s quarterly, twice yearly, or seasonally, having set dates means you’ll actually do it rather than putting it off indefinitely.
Preparing for Your Pantry Audit
Before we dive deep into the realm of our pantry, let’s gather a few things:
What you’ll need
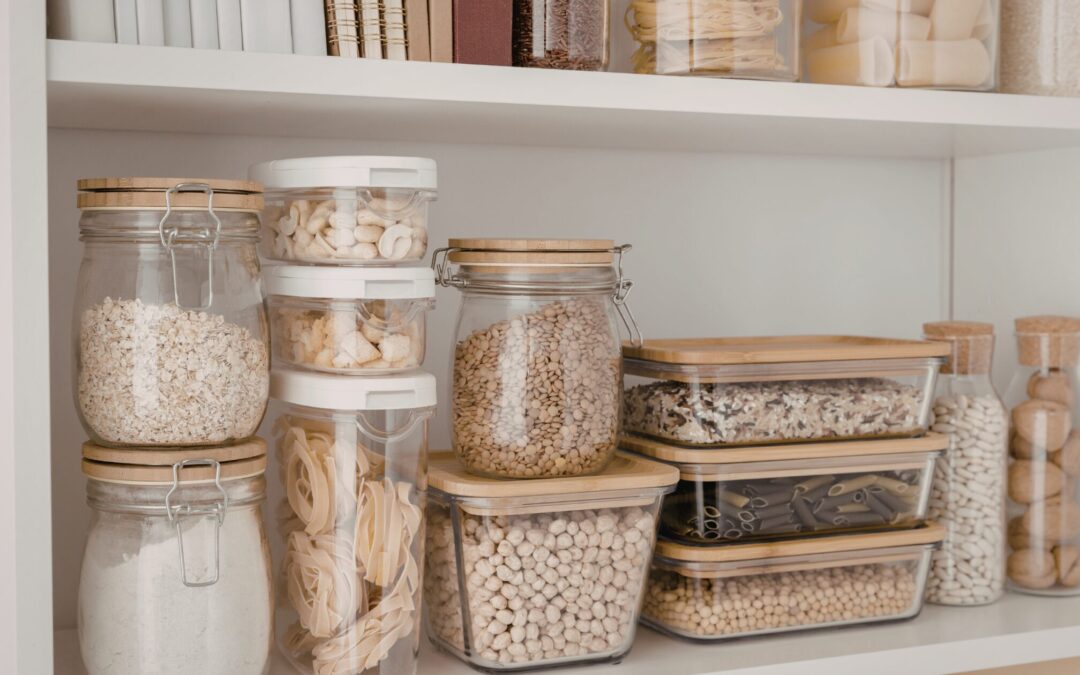
Containers of different sizes for storage If you have some already, great. If not, don’t buy them yet—wait until after your audit to see what you actually need! If you do need to buy containers, choose transparent ones with lids so you can see what’s inside at a glance. Also, look if you have some empty large jars with lids left. They are great for storing rice, grains or pasta in them. And when you don’t need them for storage, they can be used for canning.
Labels and markers These are essential for homemade preserves and freezer stock. Nothing more annoying than when the bag of “frozen red peppers” is actually rosehips you chopped for making jam! Yep, talking of experience here.
Inventory tracking tools A notebook works brilliantly for tracking what’s in your pantry. You could dedicate one page per shelf, or create a spreadsheet listing items and quantities. Whenever you use something, add it to your shopping list. There are also inventory apps available, though I haven’t tried them myself.
Cleaning supplies Since we’ll be emptying the shelves anyway, this is the perfect opportunity to clean them properly. Get your all-purpose cleaner and several cleaning rags ready.
Setting Up
Clear some workspace where you can temporarily place items as you empty the pantry. This can be a table, or the kitchen counter, or even the top of your freezer. Keep your containers and supplies within reach.
Now take a deep breath – let’s get started.
Step-by-Step Pantry Audit Process
Step 1: Empty Everything Out
Take everything off the shelves and place items on your workspace. If your pantry is large or your workspace is limited, work in sections—empty one category at a time (for example, all the pasta), then clear one shelf to make room as you continue.
Thoroughly check for any pests or moisture issues and vacuum the entire pantry, especially the corners.
Step 3: Check Expiration Dates
Now, check all your inventory and sort the items per group by expiration date.
Understanding date labels:
‘Best by’ or ‘Best before’: Quality dates, not safety dates. Food is typically still safe to eat after this date, though quality may decline. Use your judgment—if it looks, smells, and tastes fine, it’s usually okay.
‘Use by’: Found on perishable items. Take these more seriously, especially for dairy, meat, or refrigerated goods.
Canned goods: Often safe well beyond printed dates if the can is undamaged (no rust, dents, or bulging).
Food slightly past its ‘best by’ date is usually still fine—use your judgment based on how it looks, smells, and tastes. Items past their ‘use by’ date should be discarded for safety, especially perishables.
If your items have an expired “use by” date, however, they’ll not be safe for consumption any longer, and you should discard them.
When in doubt, trust your senses. If something smells off, looks mouldy, or has changed texture significantly, discard it.
For homemade preserves, always label jars with the preparation date (for example, ‘Tomato Sauce – September 2025’). This helps you track age and avoid surprises like my six-year-old pumpkin incident!
Step 4: Categorise Your Items
When you have all the items on your workspace, group them by category: grains, pasta, canned goods, baking supplies, spices, oils, condiments, snacks and home-preserved items.
This is also a good time to check for duplicates—do you really need four half-empty bags of flour?
Step 5: Take Inventory
It’s time to create your master list. Note down all the items you have and their quantities. That way, you can simultaneously identify gaps (items to add to your shopping list) and surpluses (ingredients you should prioritise using in upcoming meals).
I keep this list on the back of my pantry door, together with a pen on a string, so that I can adjust the quantity of items whenever I take something out.
Step 6: Reorganise Strategically
If your current pantry layout works well, keep it! But if you’re constantly searching for items or things feel chaotic, now’s the time to redesign.
Strategic placement principles
Heavy items low: Flour, canned goods, bottled items
Eye level = prime real estate: Items you use daily (in our pantry, that’s pasta, rice, and everyday spices)
Top shelves: Duplicates, rarely used items, or bulk backstock
Transfer bulk items like flour, rice, sugar, and oats into clear, airtight containers. Label EVERYTHING—and I mean everything with its content! I cannot stress this enough! You think you’ll remember what’s what, but trust me, in three months you won’t be able to tell your all-purpose flour from your bread flour. Also, add the expiration date (if not visible), and if there is none indicated on the package, note down the date you bought it.
Create designated zones for each category and consider labelling the shelves themselves if it helps your household stay organised. If you share your kitchen with others, clear labels on shelves help everyone maintain the system.
Now put all your items, organised by category, back onto the shelves. Place the oldest items at the front and the newer ones at the back.
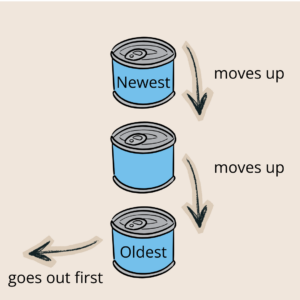
Understanding the FIFO Rotation System
Have you ever heard of FIFO? It stands for First In, First Out—a simple principle where you use the oldest items in your pantry before the newer ones. Simple as it is, FIFO is incredibly powerful for preventing food spoilage and waste, saving you money while ensuring you’re always eating the freshest ingredients possible.
The key is visual placement: older items at the front of the shelf, newer items behind them. When you reach for something, you’ll automatically grab the oldest item first—it’s that simple.
In the case of homemade preserves, the labelling system I mentioned earlier is invaluable, so you can see at a glance how old a jar is: Apart from the content, add the date of making, for example: “Sauerkraut – September 2025”. These jars are placed behind the jars of Sauerkraut that were made the previous year. (Though let’s be honest: I know that your homemade sourkraut tastes so good, there won’t be any year-old jars anyway!)
Upholding the system
Before each shopping trip, scan your pantry shelves. With the FIFO system, you can quickly see what’s running low or needs restocking – no more buying duplicates of items hiding in the back.
When you return from shopping, resist the temptation to stuff items wherever they fit. Instead, take an extra two minutes to place new items behind older ones in their designated categories. This small habit keeps your FIFO system running smoothly with minimal effort.
What to do if your pantry is tiny
In our last apartment, the pantry was incredibly small. So small, in fact, that we could only install 20 cm-deep shelves (8 inches), which made it impossible to stack our items front-to-back. What I did instead was mark the latest purchases with Post-it stickers. That way, I knew what food to use first, although the items were stacked side by side.
Common FIFO mistakes
Simple as it may seem, FIFO can present some pitfalls. Knowing them beforehand will help you to avoid them in the first place:
Skipping the labels
Once you transfer items into storage containers, it’s tempting to think you’ll remember what’s inside. You won’t. Always label containers with both the contents AND the best-by date. Your future self will thank you when you’re not playing guessing games at dinner time.
Inconsistent rotation
It’s easy to tell yourself you’ll organise purchases “later” when you’re tired from shopping. But later rarely comes, and skipping rotation even once creates chaos. The good news? It typically takes just 2-3 minutes to put new items in their proper spots behind older ones. Make it part of your grocery unloading routine—like putting away the milk—rather than a separate task you’ll do “eventually”.
Ignoring what’s up front
FIFO only works if you actually USE the items you’ve rotated to the front. Make it a habit to scan front-row items when meal planning—these are your ‘use soon’ ingredients. If something’s been sitting up front for weeks, either plan a meal around it or accept it might not be something your family enjoys (and don’t buy it again).
Buying more than you need
Even with perfect rotation, FIFO can’t help if you’re constantly overbuying. Before adding items to your cart, check your pantry first. Just because pasta is on sale doesn’t mean you need five boxes when you already have three at home. Buy what you’ll realistically use before it expires.
Making FIFO a lasting habit
Get the whole household on board
Every member of your household should not only be acquainted with the rules of FIFO but also be dedicated to maintaining it. Even small children understand the simple principle behind the system and can be encouraged to help maintain it. Ideally, every household member takes out the front item of what they want and notes on the grocery list what they’ve taken.
Make it a game for younger children—who can find the item with the earliest date? Reward consistent participation with a special treat. For teens, explain the financial benefits: every item that doesn’t go to waste is money saved for things they care about.
Audit regularly
FIFO isn’t a set-it-and-forget-it system—it needs regular attention to stay effective. The good news? A quick weekly scan of your pantry takes just 5-10 minutes. Pull older items forward, check for anything approaching its expiration date, and note what needs restocking.
This weekly check naturally becomes your grocery planning session: you’ll see exactly what’s running low and what ingredients you need to use up soon.
Connect FIFO to meal planning
The most effective way to maintain your rotation system is to tie it directly to meal planning. Each week when planning your meals, deliberately choose recipes that use ingredients sitting at the front of your pantry. This ensures nothing gets forgotten and naturally keeps your rotation moving.
Adapt to changes
Your pantry isn’t static—it evolves with your family’s tastes, dietary needs, and cooking habits. When you discover new recipes requiring unfamiliar ingredients, don’t just squeeze them in anywhere. Take a moment to decide: Is this a one-time purchase or a new staple? One-time ingredients can go in a designated ‘speciality items’ section, while new staples deserve their own spot in your regular rotation.
The same principle applies to seasonal products and bulk purchases. If you buy 10 kilos of potatoes in autumn, designate a specific storage area and rotate through them systematically. During preserving season, adjust your pantry layout to accommodate the influx of homemade jams, pickles, and sauces—then reorganise again in spring when those shelves empty out.
Time to take action
A well-organised pantry with a solid rotation system isn’t about perfection—it’s about progress. Whether you’re managing a tiny cupboard with Post-it notes or a spacious walk-in pantry with labelled zones, the goal remains the same: use what you have, waste less, and always know what’s hiding on your shelves.
Start small if the whole process feels overwhelming. Maybe this month you just tackle the canned goods, or focus solely on labelling your homemade preserves. Next month, you can expand to another category. The beauty of FIFO is that even partial implementation helps—every item you rotate to the front is one less jar destined to languish for six years like my unfortunate pumpkin.
Remember, your pantry should work for YOU, not the other way around. Adapt these strategies to fit your space, your family, and your lifestyle. Check in regularly, adjust as needed, and be patient with yourself as you build new habits.
Now go take a look at your pantry. What’s lurking in the back? What treasures have you forgotten about? Your pantry audit awaits—and I promise, it’s not as daunting as it seems. Your future self (and your wallet, and the planet) will thank you. Don’t forget to grab your free Pantry Inventory Template here to track everything easily!
Wanna learn more about preserving? These posts are for you: