Although our gardens are sleeping right now, that doesn’t mean that we gardeners have nothing to do! Garden tasks in January keep dedicated gardeners busy even during winter’s quiet months. Admittedly, it won’t be so many outdoor tasks like weeding and planting, but more indoor chores like maintenance and planning. However, these are not the only garden tasks in January. Below, I’ve listed 12 actionable tasks you should think about.
Note: My garden is in a USDA zone 7b, and these tasks are timed for zones 6-8. If you’re in a warmer or colder region, adjust timing accordingly based on your last frost date.
#1 Planning your garden in January
If you’re new to gardening and just starting, this may seem a bit overwhelming, but don’t worry, I’ve got you covered! Whether you have a large backyard you want to turn into a veggie paradise or just a patio or balcony with a few containers to cultivate in, planning is always the first step. This is also valid if you already have a garden or if you want to expand. Let’s dive in and start planning our dream garden step by step.
Drawing
Grab a piece of square paper and draw the patches you have or want to have. Just don’t get overambitious, but start small, especially as a beginner.
It’s best to start with one or two beds of about 1.2 x 1.2 metres (4 x 4 feet). Leave room for paths and future expansion.
Imagine what you’d want your garden to look like. Do you want a cottage garden with flower borders and herbs? Will you start with raised beds? Do you want to have a greenhouse and/or cold frames? Or is a permaculture garden what you’d like?
Dream big first – then adjust your ideas to your available space, budget, and time. Expansion is always possible later.
Creating your vegetable wishlist
The next step is to make a wish list of all the vegetables you’ll want to grow.
Focus on crops you and your family actually enjoy eating. It’s no use to grow spinach if you loathe it, but you should plant more of those radishes that your children are so fond of.
Add a few new varieties you’d like to experiment with. If you’ve already dipped your toe into gardening, you may want to try out new types of crops; put them on your list.
Adjust choices based on your space and experience level. If you’re a garden greenhorn, start with these easy vegetables for beginners. With more experience, you can try other, more complicated crops.
Ordering seeds in January
When you know which vegetables you want to grow, check the seeds you already have to see if they’re still germinable (see “2. Seed checking)”.
For new seeds, browse seed catalogues (my favourite garden task in January!) and order what you need and want.
January is an ideal time for ordering seeds, as widely popular varieties sell out later in the season.
If you want to learn more about starting a vegetable garden, this beginner’s guide will tell you everything you need to know on that topic.
#2 Check your seeds for germination
Among the most important January garden jobs is checking if your seeds are still able to grow.
If you have seeds left, especially when they are more than two years old, you’ll want to check if they are still capable of germination. Some plants, like parsnips and celery, can be a bit finicky when it comes to germinating.
To find out if they’re still good, put some seeds between moist kitchen paper and observe for a few days if they germinate. If two-thirds or more sprout, the seeds are good to use; if it’s less, order new seeds.
Testing old seeds now prevents disappointment later when trays stay empty.
#3 Create new patches
January is a good time to build new patches. Don’t worry, you won’t have to dig up your garden (which would be especially tedious with frozen ground).
My favourite method of building new patches only requires cardboard and good planting soil or compost.
Gather enough cardboard to cover the ground of your new garden bed.
Peel off any plastic from the cardboard and lay it flat on the ground where you want to have the patch.
Distribute well-rotted compost or planting soil about 10 – 15 cm (4 – 6 inches) on it.
Done! If you want a detailed step-by-step guide on how to make these easy no-dig garden beds, hop over to this article.
#4 Prepare your indoor growing station
Another January garden task is to clean trays, pots, and tools with hot water to remove pathogens and pests before sowing season begins.
Also, sterilise your growing soil by baking it at 150 °C (300 °F) for 30 minutes. This will kill, for example, fungus gnats but also pathogens that can be a real danger for seedlings.
If you don’t have any planting lights already, consider buying some. They’re a real game changer when it comes to indoor sowing, as the natural light usually isn’t sufficient to help develop healthy plants.
#5 Seed-starting
Toward the end of January, you can start sowing slow-growing crops indoors, especially in regions with long growing seasons. Remember: I’m talking about zones 6 – 8 here; if you live in a warmer or colder climate, adjust timing accordingly based on your last frost date.
Some vegetables, for example chillies and peppers, are real sloths when it comes to growth. To give them enough time to become large enough to plant them out eventually, sow them indoors at the end of January. Cabbage, cauliflower, leeks and onions can also be sown indoors at the end of the month. Want to read more about what vegetables you can seed-start in January? This complete guide to seed-starting in January contains a comprehensive list.
#6 Protect your plants
Whenever you’re out in winter, you’ll probably be covered up from head to toe to be protected from the harsh weather. Your plants need the same treatment.
One of our garden tasks in January, then, is covering them with frost protection fleece, which not only protects them from the cold but also from drying winds.
Still got any root crops in the ground? Cover them with an extra layer of mulch to protect them from the freezing weather.
You can also use the branches of your Christmas tree to cover your root crops or herbs, BUT ONLY if it hasn’t been treated with pesticides! We don’t want that in our gardens, do we? Always choose organic trees if you plan to use them in your garden.
#7 Harvesting
If you’ve ever harvested frozen vegetables in winter, you’ll know that, for example, lettuce becomes soft and slimy once it has thawed. The reason for that is that the plant you harvested can’t recover from the frost once its roots are cut off.
Rule of thumb: Never harvest frozen vegetables unless they are protected from frost or temperatures are above freezing.
#8 Watering
This may sound weird, but your plants can suffer from dryness even in winter, especially when it’s sunny and windy. This phenomenon is called frost drought.
When the ground is frozen, your plants can’t take up water, but they still evaporate moisture through their leaves, especially on sunny and/or windy days. Frost drought occurs when frozen soil prevents water uptake, but plants continue losing moisture through their leaves.
To protect your plants from drying out, you have to water them. This is best done in the mornings when temperatures will still rise, and the plants will get a chance to snatch up the water during the day.
#9 Pruning
January is an ideal time to prune:
Fruit trees
raspberries and blackberries
blueberries
currants and gooseberries
The best time to do that is while the plants are still dormant. If you haven’t done so earlier (ahem… yes: guilty), cut out any old growth from your fruit trees and berry shrubs to maintain their productivity in the upcoming season.
#10 Tool inventory and maintenance
Check if you’ve got everything ready for the upcoming season:
Frost protection and nets Do you have enough frost protection fleece? Winter may go on a bit longer, or frost may hit even after some warm days. In that case, you’ll want some spare fleece at hand.
Pest control supplies Stock up on pest protection nets for spring and summer if you don’t want to share your harvest with maggots. Also, if you have as many slugs in your garden as I have, make sure you have enough barriers like snail collars and snail fences to keep them off your vegetables.
By the way: Companion planting, which means planting vegetables together that support and protect each other, also helps to keep pests and diseases at bay. If you want to learn more about some foolproof pairs for your vegetable garden, you can explore proven companion planting combinations in this article.
Tool cleaning and repairs If you haven’t done it already, clean up your garden tools by scraping off the dirt and washing them thoroughly. Afterwards, it’s good to sharpen them, if necessary, and oil them. If something’s broken, repair it.
#11 Build what you need (and want)
The garden is still dormant, so why not head into your workshop and build what you’d like to have?
Whether it be a
trellis
raised beds
a scarecrow or
an insect hotel,
Now is a good time to put your designs into reality.
#12 Support the animals
Our feathery friends will be grateful for food, so hang up bird feeders and fill them with appropriate food for wild birds.
If you have squirrels in your garden, you can also hang a squirrel feeder with balanced squirrel food in one of your trees. Install the feeder far from the house and at least 2 metres (6.5 feet) above the ground.
Leave dead plant stems and fallen leaves on the ground as they offer hedgehogs and insects a great winter home. You can clean it all up later in spring when they’ve woken up from hibernation.
☐ Plan garden layout:- Vegetable Wishlist- Order Seeds- Create and Draw plan
☐ Check seeds for germination
☐ Prepare indoor growing station: ☐ Clean trays, pots and tools with hot water ☐ Sterilise growing soil by baking at 150 °C (300 °F) for 30 minutes ☐ Consider investing in planting lights
Frequently Asked Questions About January Garden Tasks
Can I really start seeds in January?
Yes! Cold-season crops like cabbage and cauliflower can be started indoors at the end of January. Peppers and chillies also need an early start due to their slow growth rate.
What if I live in a different climate zone?
These tasks are timed for USDA zones 6-8. Gardeners in warmer zones (9-11) can start earlier, while colder zones (3-5) should wait 2-4 weeks. Always check your last frost date.
Is it too cold to work in the garden in January?
Many January garden tasks can be done indoors (planning, seed starting, tool maintenance). Outdoor tasks like pruning should be done on milder days when plants are dormant.
Do I need to water my garden in winter?
Yes, plants can suffer from frost drought during sunny, windy winter days. Water in the morning when temperatures are rising so plants can absorb moisture before nightfall.
When should I order seeds for my garden?
January is ideal for seed ordering. Popular varieties often sell out by late winter, so ordering early ensures you get what you want.
A quiet month with a big impact
You see, even if almost nothing’s growing outside right now, there are still some garden tasks in January that we can do. And although the tasks seem different, they can be mostly summed up as: Preparation. Whether it’s planning new patches and crops, maintaining and repairing tools, building new things or seed-starting indoors, these are all steps that lead to the next season’s garden. Have fun and enjoy the (relative) calm. We’ll soon be digging in the soil again!
I’ll make a prediction: once you’ve tried this recipe for orange Christmas cookies, they’ll become your favourites! They’re soft and chewy and taste incredibly citrusy while looking elegant and festive enough to jazz up every cookie plate. And the secret to their incredible orange flavour? It’s actually two secrets: homemade candied orange peel and my homemade non-bitter orange marmalade.
Here’s everything you need to make these show-stopping cookies.
What You Need for Orange Christmas Cookies
Base Cookie Ingredients
Basically, this recipe is a shortcrust, so we need
Butter
It should be right out of the fridge and thus cold. The trick to making it pliable enough to mix the dough is to grate the butter block on a cheese grater. That way, the butter is broken up into small flakes while staying cold.
Flour
All-purpose flour is the flour of choice here.
Almonds
The recipe calls for ground almonds. Whether you use peeled or unpeeled almonds is up to you; the taste is the same, it’s more of an aesthetic decision: with unpeeled almonds, the dough becomes a bit “speckled” while it stays brightly yellow with peeled almonds.
Icing sugar
Granulated sugar doesn’t dissolve well enough in the dough, which is why this recipe calls for powdered (icing) sugar.
Egg
You need one medium-sized egg, if possible from free-range chicken.
Vanilla
The seed of one vanilla pod adds a warm, velvety flavour to the cookies, counterbalancing the tangy orange taste.
Orange Flavour Ingredients
Now for the (obvious) star ingredients for these orange Christmas cookies:
Fresh Oranges
Grate the peel of two oranges for this recipe and mix it into the dough. The fresh essential oils that evaporate from the peel when it’s freshly grated add tanginess to the cookie dough.
Grate the butter into a bowl, add the icing sugar and mix it in a food processor until the butter becomes soft and lighter.
Chop your homemade candied orange peel into tiny pieces.
Cut the vanilla pod lengthwise and scrape out the seeds.
Wash the oranges under hot water, dry them and grate their zest off.
Add the vanilla seeds, candied orange peel and orange zest to the butter and mix it all in.
Weigh the flour and almonds and add them to the butter mix.
Add the egg and knead it all together until you have a homogeneous dough. Work quickly here; you don’t want the dough to become too warm.
Wrap the dough in cling film and let it rest in the fridge for at least 3 hours, better overnight.
Preheat your oven to 160 °C (320°F) top and bottom heat or 140 °C (285°F) fan.
Roll out the dough about 3 mm thick and cut out round cookies with a diameter of about 3 cm.
Line a baking tray with baking paper and put the cookies onto it. Leave some room in between so that they won’t glue together.
Bake the cookies in the preheated oven for 15 – 20 minutes. They should be baked through and golden. Don’t let them brown.
Remove the cookies from the oven and let them cool down completely.
Carefully melt the chocolate and dip half of the cookies halfway into it. If you like, you can decorate the chocolate-dipped cookies with orange zest or candied orange peels.
Spread homemade non-bitter orange marmalade on the undipped cookies and set the chocolate ones on top.
Orange Christmas Cookies
These are the best orange Christmas cookies you'll ever taste! Soft, loaded with orange flavour and elegant.
Grate the butter into a bowl, add the icing sugar and mix it in a food processor until the butter becomes soft and lighter.
Chop your homemade candied orange peel into tiny pieces.
Cut the vanilla pod lengthwise and scrape out the seeds.
Wash the oranges under hot water, dry them and grate their zest off.
Add the vanilla seeds, candied orange peel and orange zest to the butter and mix it all in.
Weigh the flour and almonds and add them to the butter mix.
Add the egg and knead it all together until you have a homogeneous dough. Work fast here, you don't want the dough to become too warm.
Wrap the dough in cling film and let it rest in the fridge for at least 3 hours, better overnight.
Preheat your oven to 160 °C (320°F) top and bottom heat or 140 °C (285°F) fan.
Roll out the dough about 3 mm thick and cut out round cookies with a diameter of about 3 cm.
Line a baking tray with baking paper and put the cookies onto it. Leave some room in between so that they won't glue together.
Bake the cookies in the preheated oven for 15 - 20 minutes. They should be baked through and golden. Don't let them brown.
Remove the cookies from the oven and let them cool down completely.
Carefully melt the chocolate and dip half of the cookies halfway into it. If you like, you can decorate the chocolate-dipped cookies with orange zest or candied orange peels.
Spread homemade non-bitter orange marmalade on the undipped cookies and set the chocolate-decorated ones on top.
FAQs
Can I freeze these cookies?
Yes, but only the plain cookies without marmalade filling and decoration.
Let the cookies cool down completely before putting them into a freezer bag or an airtight container. If you use a container, put some baking paper between layers so that the cookies won’t stick together.
Baked cookies can be stored in the freezer for 3 months. Filled, decorated and stored in a tightly closed cookie box, these orange Christmas cookies will stay tasty for about 2 – 3 weeks. They won’t last that long, however, as they’re too yummy to resist.
If you want to keep them longer, store them plain, that is, without marmalade filling and chocolate decoration in the cookie box and assemble them later.
Can I make the dough ahead of time?
Yes. Wrap the dough in cling film and store it for up to one week in the fridge. Alternatively, you can freeze cookie dough for about 2 months. Before baking, let it defrost at room temperature.
Why does the dough need to rest for 3 hours (or overnight)?
Letting the dough rest in the fridge for at least 3 hours is an essential step in cookie baking and must not be skipped!
During that time, the dough cools down “to the marrow”, and that helps the cookies keep their shape when being baked. If the dough is too warm, the cookies will melt and become some unsightly puddles.
While you’re rolling out one batch of the dough, put the rest of it in the fridge.
Can I use store-bought candied peel/marmalade?
Yes, but the taste will not be as good as with homemade products 😏. If using store-bought, look for high-quality products without artificial flavouring.
Can I substitute the almonds?
If you’re allergic to nuts, leave out the almonds and add flour in the same amount. Note that the texture will be slightly different – the cookies may be a bit more crumbly without the almonds’ natural oils.
Can I skip the chocolate?
You could, but the (dark) chocolate pairs exceptionally well with the tangy orange flavour. As an alternative to the chocolate dip, mix a cup of icing sugar with 1 – 2 tablespoons of orange juice or orange liqueur (for example Grand Marnier) and brush it on the top cookie.
Why is my dough too crumbly/sticky?
Sometimes, the egg is too large or small and thus provides too little or too much moisture for the dough. So, if your dough is too sticky, add a bit of flour or almonds and knead the dough quickly.
If your dough is too sticky after adding flour, it might also be too warm – chill it for 30 minutes before continuing.
If your dough is too crumbly, add 1 – 2 tablespoons of (soft) butter. Again, let the dough rest in the fridge before rolling it out.
How thick should I spread the marmalade?
Put a small dollop of marmalade, about the size of a pea, in the middle of the cookie and stick the chocolate-dipped cookie on top of it. When you press them gently together, the marmalade will spread to the edges without spilling and making a mess.
Perfect Orange Christmas Cookies Every Time
These orange Christmas cookies have a way of disappearing quickly from cookie plates – their bright citrus flavour and soft texture make them irresistible. Whether you’re baking for a holiday gathering or simply treating yourself to something special, I hope they bring a little extra joy to your season. Happy baking!
Looking for practical zero-waste uses for orange peels? Here are 13 creative and eco-friendly ways to use orange peels in the kitchen, for cleaning, and even for skincare. Instead of tossing those peels in the trash, transform them into useful products that save money and reduce waste. Using organic peels, you can make everything from candied treats to homemade vinegar cleaners.
How I discovered different uses for orange peel
As you know – at least if you’ve read my About Me Page – I work at a school. There, we have a contract with a local grocery distributor who delivers organic fruit or vegetables once a week for the pupils in primary school. Depending on the produce and size, some moms come over and chop the fruit (or veggies) into smaller pieces so that nothing gets wasted.
Last week, we got oranges, and I rubbed my hands with glee. When the moms came to prepare the oranges, I asked them to put the peels aside for me and in the end, I got 2 large bags full. My office smelled like an orange farm! I was astonished, though, that they had never heard of the different uses for orange peel, and so I decided this topic was worth a blog post.
Important: Always use organic oranges for edible recipes. Conventional oranges are treated with chemicals that concentrate in the peel.
How to use orange peels in the kitchen
#1 Candied orange peel
For decades, I had loathed candied orange peel because I was only familiar with the store-bought version. It didn’t look or taste anything like orange at all, and even today I’m not sure if there is anything remotely orange in it (except, perhaps, some artificial orange colour). Whenever I made Christmas cookies, gingerbread, or other traditional baked Christmas goods that required candied orange peel, I either left it out completely or mixed it with fresh orange juice to form a paste, so I could incorporate some of the flavours. Yet, I was never satisfied until I tried some at a local market in Italy. It was heaven! Juicy and chewy and bursting with flavour. Back home, I researched recipes for making candied orange peel by myself, and you’ll be happy to know that it isn’t difficult at all!
Angela Braun
Candied orange peel
An easy recipe for the most yummy and flavourful candied orange peel!
If you want to dry them afterwards and use them as snacks, leave them like that. If you want to use them in cakes or cookies, cut them up into tiny squares.
Now, put them into a pot and fill up with water so that the peels are covered. Bring to the boil and let it boil for about 10 minutes. Pour the peels into a sieve and let them drain. Repeat the whole process twice and rinse the peels. This pre-cooking removes the bitter taste from the peels.
Cooking
Put 0.5 l water into the pot and add 1 kg sugar or multiply the amounts if you have lots of peel. Just stick to the ratio of one part water to two parts sugar.
Bring this mixture to the boil while constantly stirring until the sugar is dissolved. When the syrup is boiling add the orange peels and let it simmer for about 30 minutes until the peels are well cooked.
Now, you either take the peels out onto a wire rack and let them dry for 12 – 24 hours until they are almost dry and still a bit sticky.
Storage Option I
Put some sugar into a bowl, add the peels in portions and mix them through until the peels are well-covered in sugar. In the fridge, they will last for up to one week.
Storage Option II
The other option is to put the cooked orange peel cubes into a glass jar and add some of the orange syrup so that the peels are covered in it. Close the jars with lids and once cooled down put them into the fridge. They’ll last for up to one year.
#2: Orange syrup
Bonus tip from the candied peel recipe:
Don’t throw away the syrup from the candied orange peels. It’ll make an amazing flavour addition to water, cocktails, soda and more. You can even add it to some apple vinegar, pour about 20 cl in a glass and fill it up with sparkling water. This makes a wonderfully refreshing, non-alcoholic drink for summer.
Looking for more syrup recipes? Have a look at those:
For this recipe, you must remove the white part of the peel (the "pith"): If the orange is already peeled with the pith still on the peels, put the peels upside down on a wooden board and, with a sharp knife, scrape the pith off the orange peel.Or, if the orange is still intact, thinly cut off the peel from the fruit, leaving the pith on the orange.
Either way, cut the peels into pieces, mix them with sugar and put them into a blender. Mix until the sugar and peel are powdery.
Distribute the moist mixture on a baking tray and let it dry in the oven at low heat until it’s completely dry.
Let the orange sugar cool down and, if necessary, break it up.
Store the orange sugar in a tight container. Essentially, it’ll last indefinitely, but it’s best consumed within a year of its creation. With time, it'll lose flavour.
Notes
Use your homemade orange sugar in cakes or desserts, mix it in hot cocoa or just drizzle it over pancakes.
Either cut the peel off the orange thinly so that you leave the pith (the "white stuff" underneath the peel) on the fruit. Or, if you just have the peels, put them upside down onto a wooden board and, with a sharp knife, scrape the pith off the peels.
Put the peels on a baking tray and let them dry in the oven at low heat. Alternatively, dry them in a dehydrator.
Test if the peels are completely dry by breaking them in half. If they're still bendy, put them back in the oven. If they break with a snap, they're ready.
Let the dried peels cool down. Put them into a blender and grind them until they've become a powder.
Store the orange powder in a closed jar at a cool, dry and dark place.
Notes
Use orange powder wherever you need a bit of orange flavour, i.e. in cakes, salad dressings or savoury dishes.
Either cut the peel very thinly off the orange so that the pith (the "white stuff" underneath the peel) stays on the fruit. Or, remove the pith by putting the peel upside down on a wooden board, and, with a sharp knife, scraping it off the peel.
Cut the peels into very small pieces.
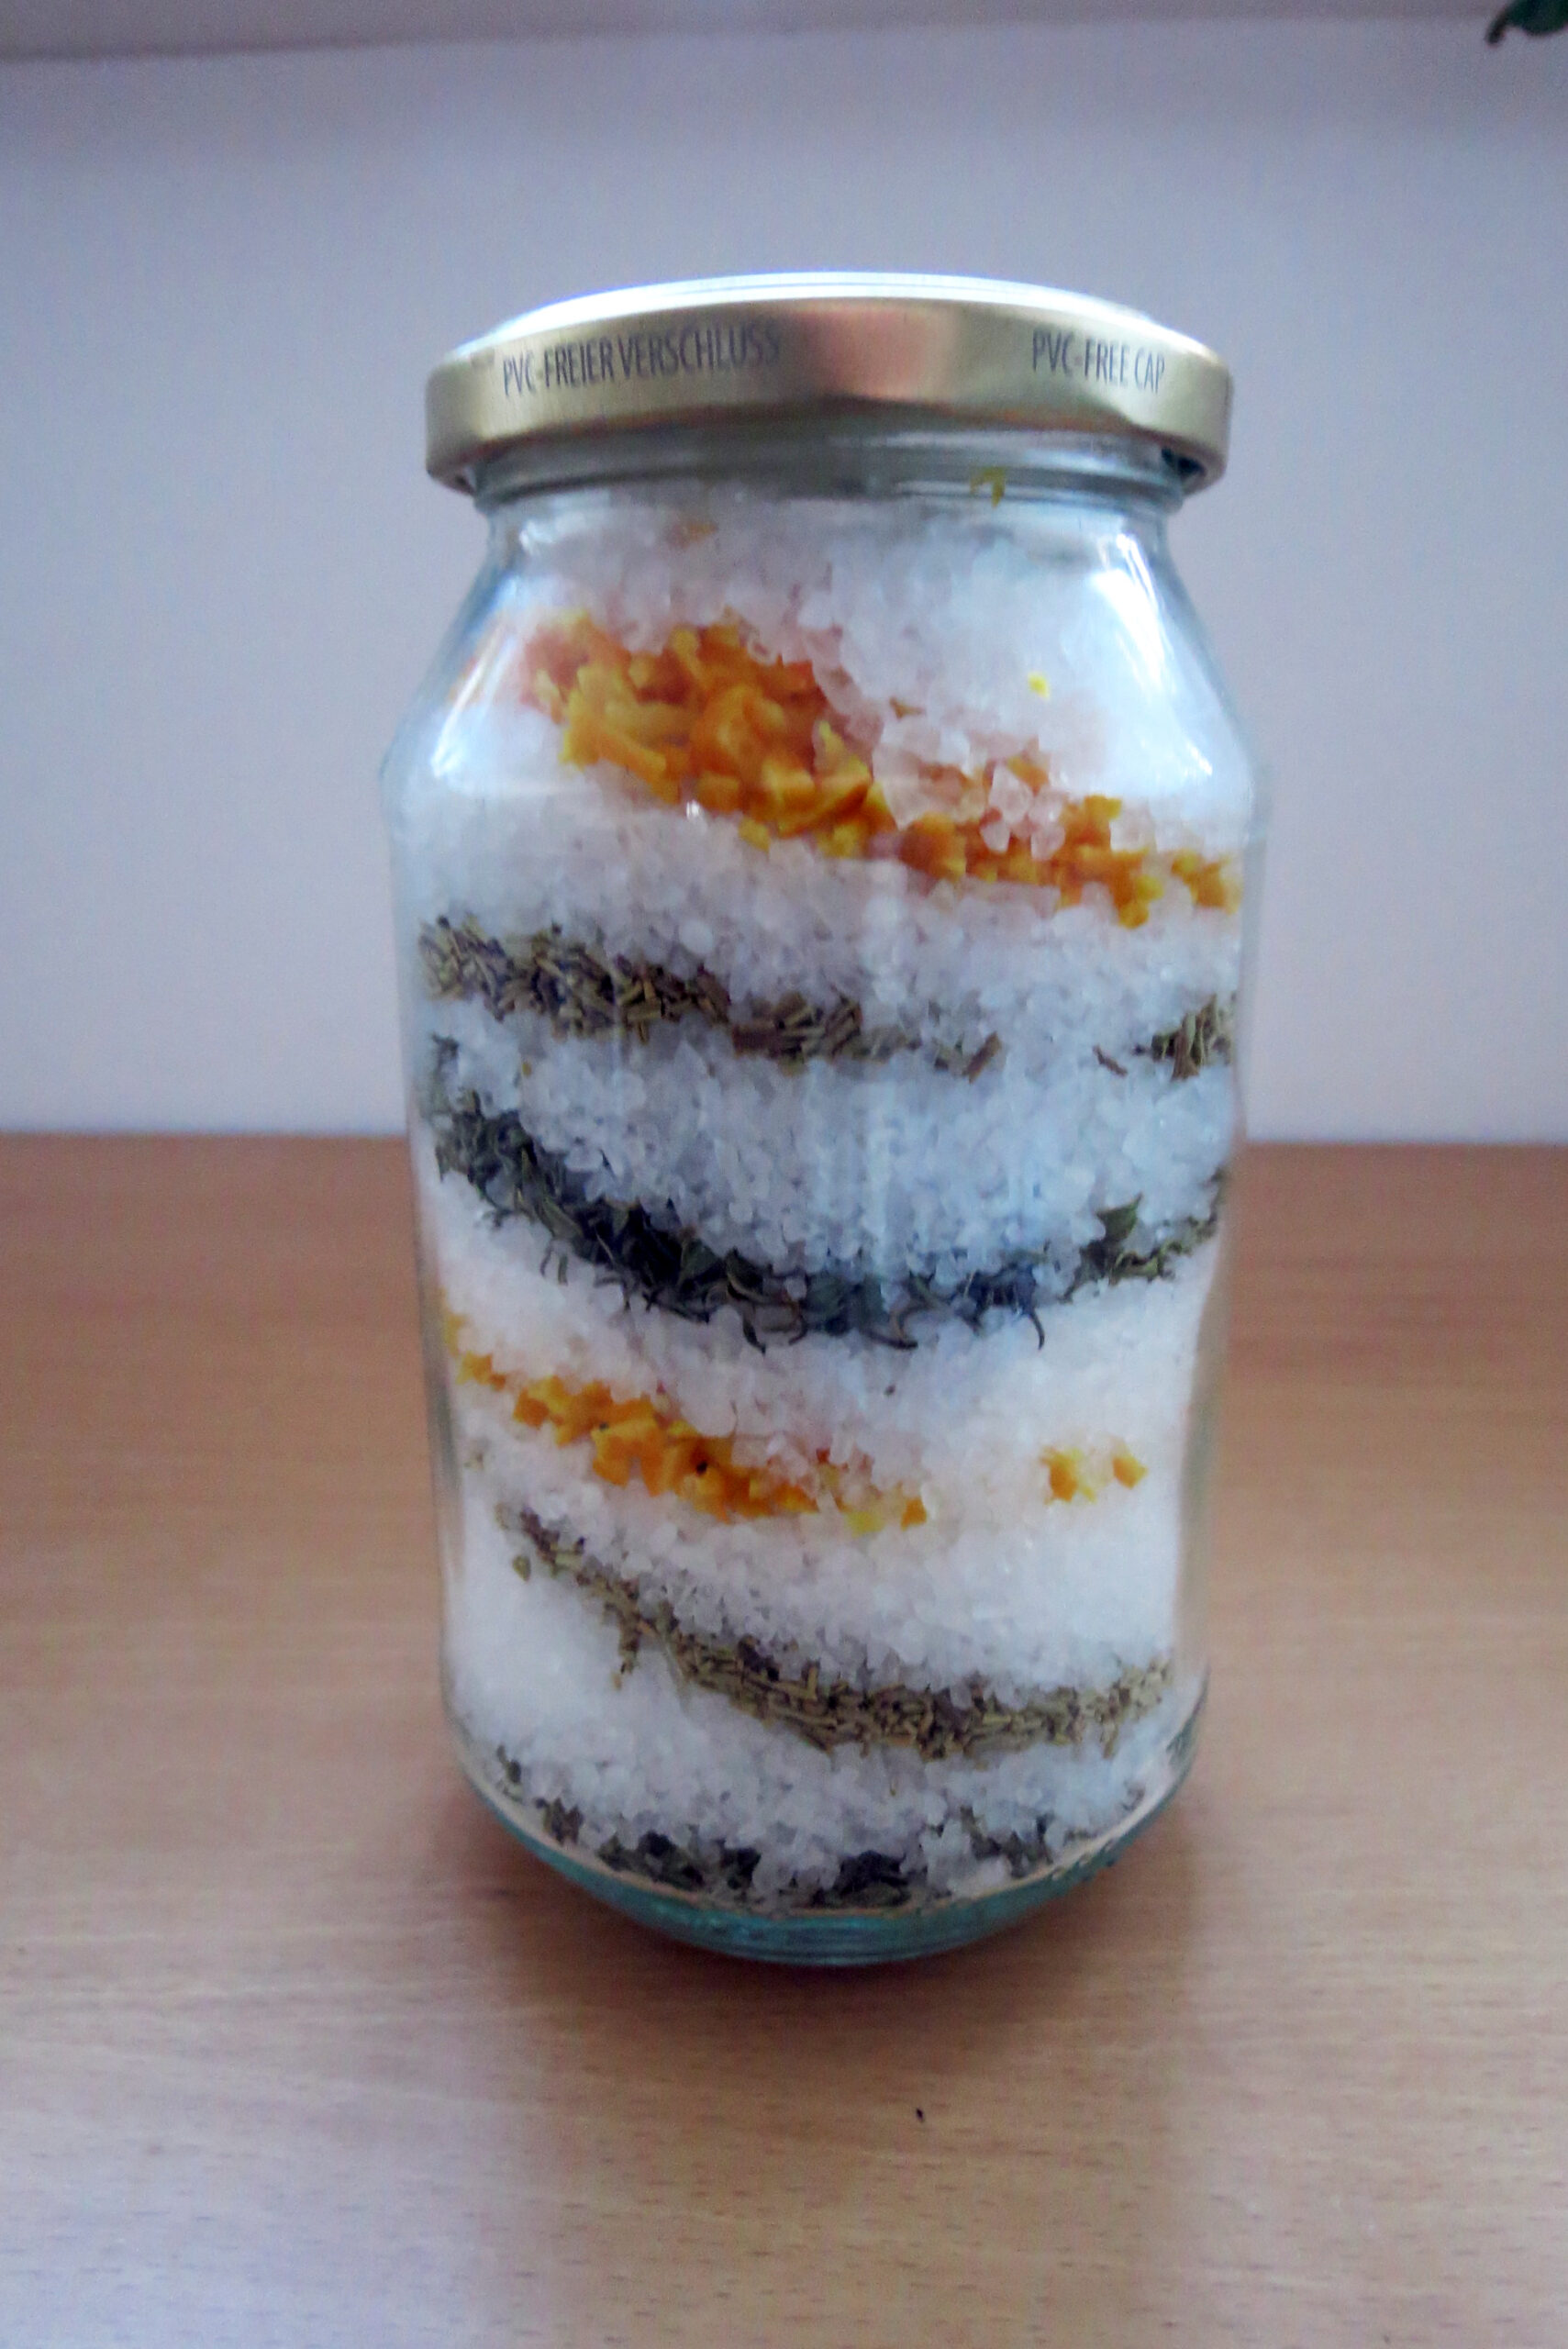
Wash the thyme and rosemary and dry them thoroughly.
Put the salt, the orange peels, thyme and rosemary in layers into a glass jar and close it with the lid. After two weeks, the salt has taken on the flavours. You can either let it be as it is (this will make for a beautiful gift) or put the mixture in a blender and mix it until it's powdery.
Notes
Use orange salt in soups, gravies, tartes and dressings or sprinkle it over oven-baked vegetables.
#6: Infused orange oil
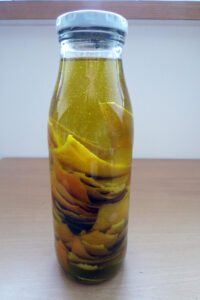
To make infused orange oil, remove the white part (“pith”) of the orange peels and put them into a glass bottle until it’s about half full. Fill the bottle up with very good olive oil and let it sit for two weeks. Afterwards, remove the peels. You now have some great orange-flavoured oil that you can use for salad dressings, pasta sauces or even on your pizza.
#7: Orange-flavoured honey
Cut the peel off one orange very thinly so that the pith stays on the fruit, or scrape off the pith from the peels.
Put the peels into a glass jar.
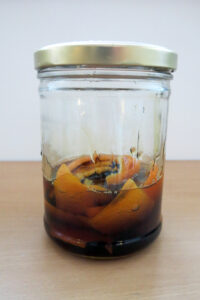
Add 250 grams of honey – either the real thing or one of your homemade herb kinds of honey, like this dandelion honey – and let it sit for 5 – 7 days.
The honey will get liquid during that time, but that’s fine.
Remove the peels and use your orange-flavoured honey in your tea or, instead of sugar, in pastry like this German yeast bun or “Martinsgänse”.
Either cut the peel very thinly off the orange so that the pith stays on the fruit. Or put the peels upside down on a wooden board, and, with a sharp knife, scrape the pith off.
Put the orange peels in a glass bottle so that it's about one-third full.
Fill the bottle up with clear alcohol. I prefer vodka because its taste is neutral.
Let the mixture sit for at least two weeks in a dark place. I usually put the bottle into my pantry.
There's no need to remove the peels. Just pour out as much extract as you need and, if necessary, fill the bottle up with vodka (or whatever you used) to keep the peels under the liquid.
Cut the peel very thinly off of the orange so that the pith (the "white stuff" underneath the peel) stays on the fruit. Or put the peels upside down on a wooden board and scrape the pith off with a sharp knife.
Cut the peels into tiny pieces.
If you want to add herbs, wash them and dry them thoroughly, then cut them into tiny pieces.
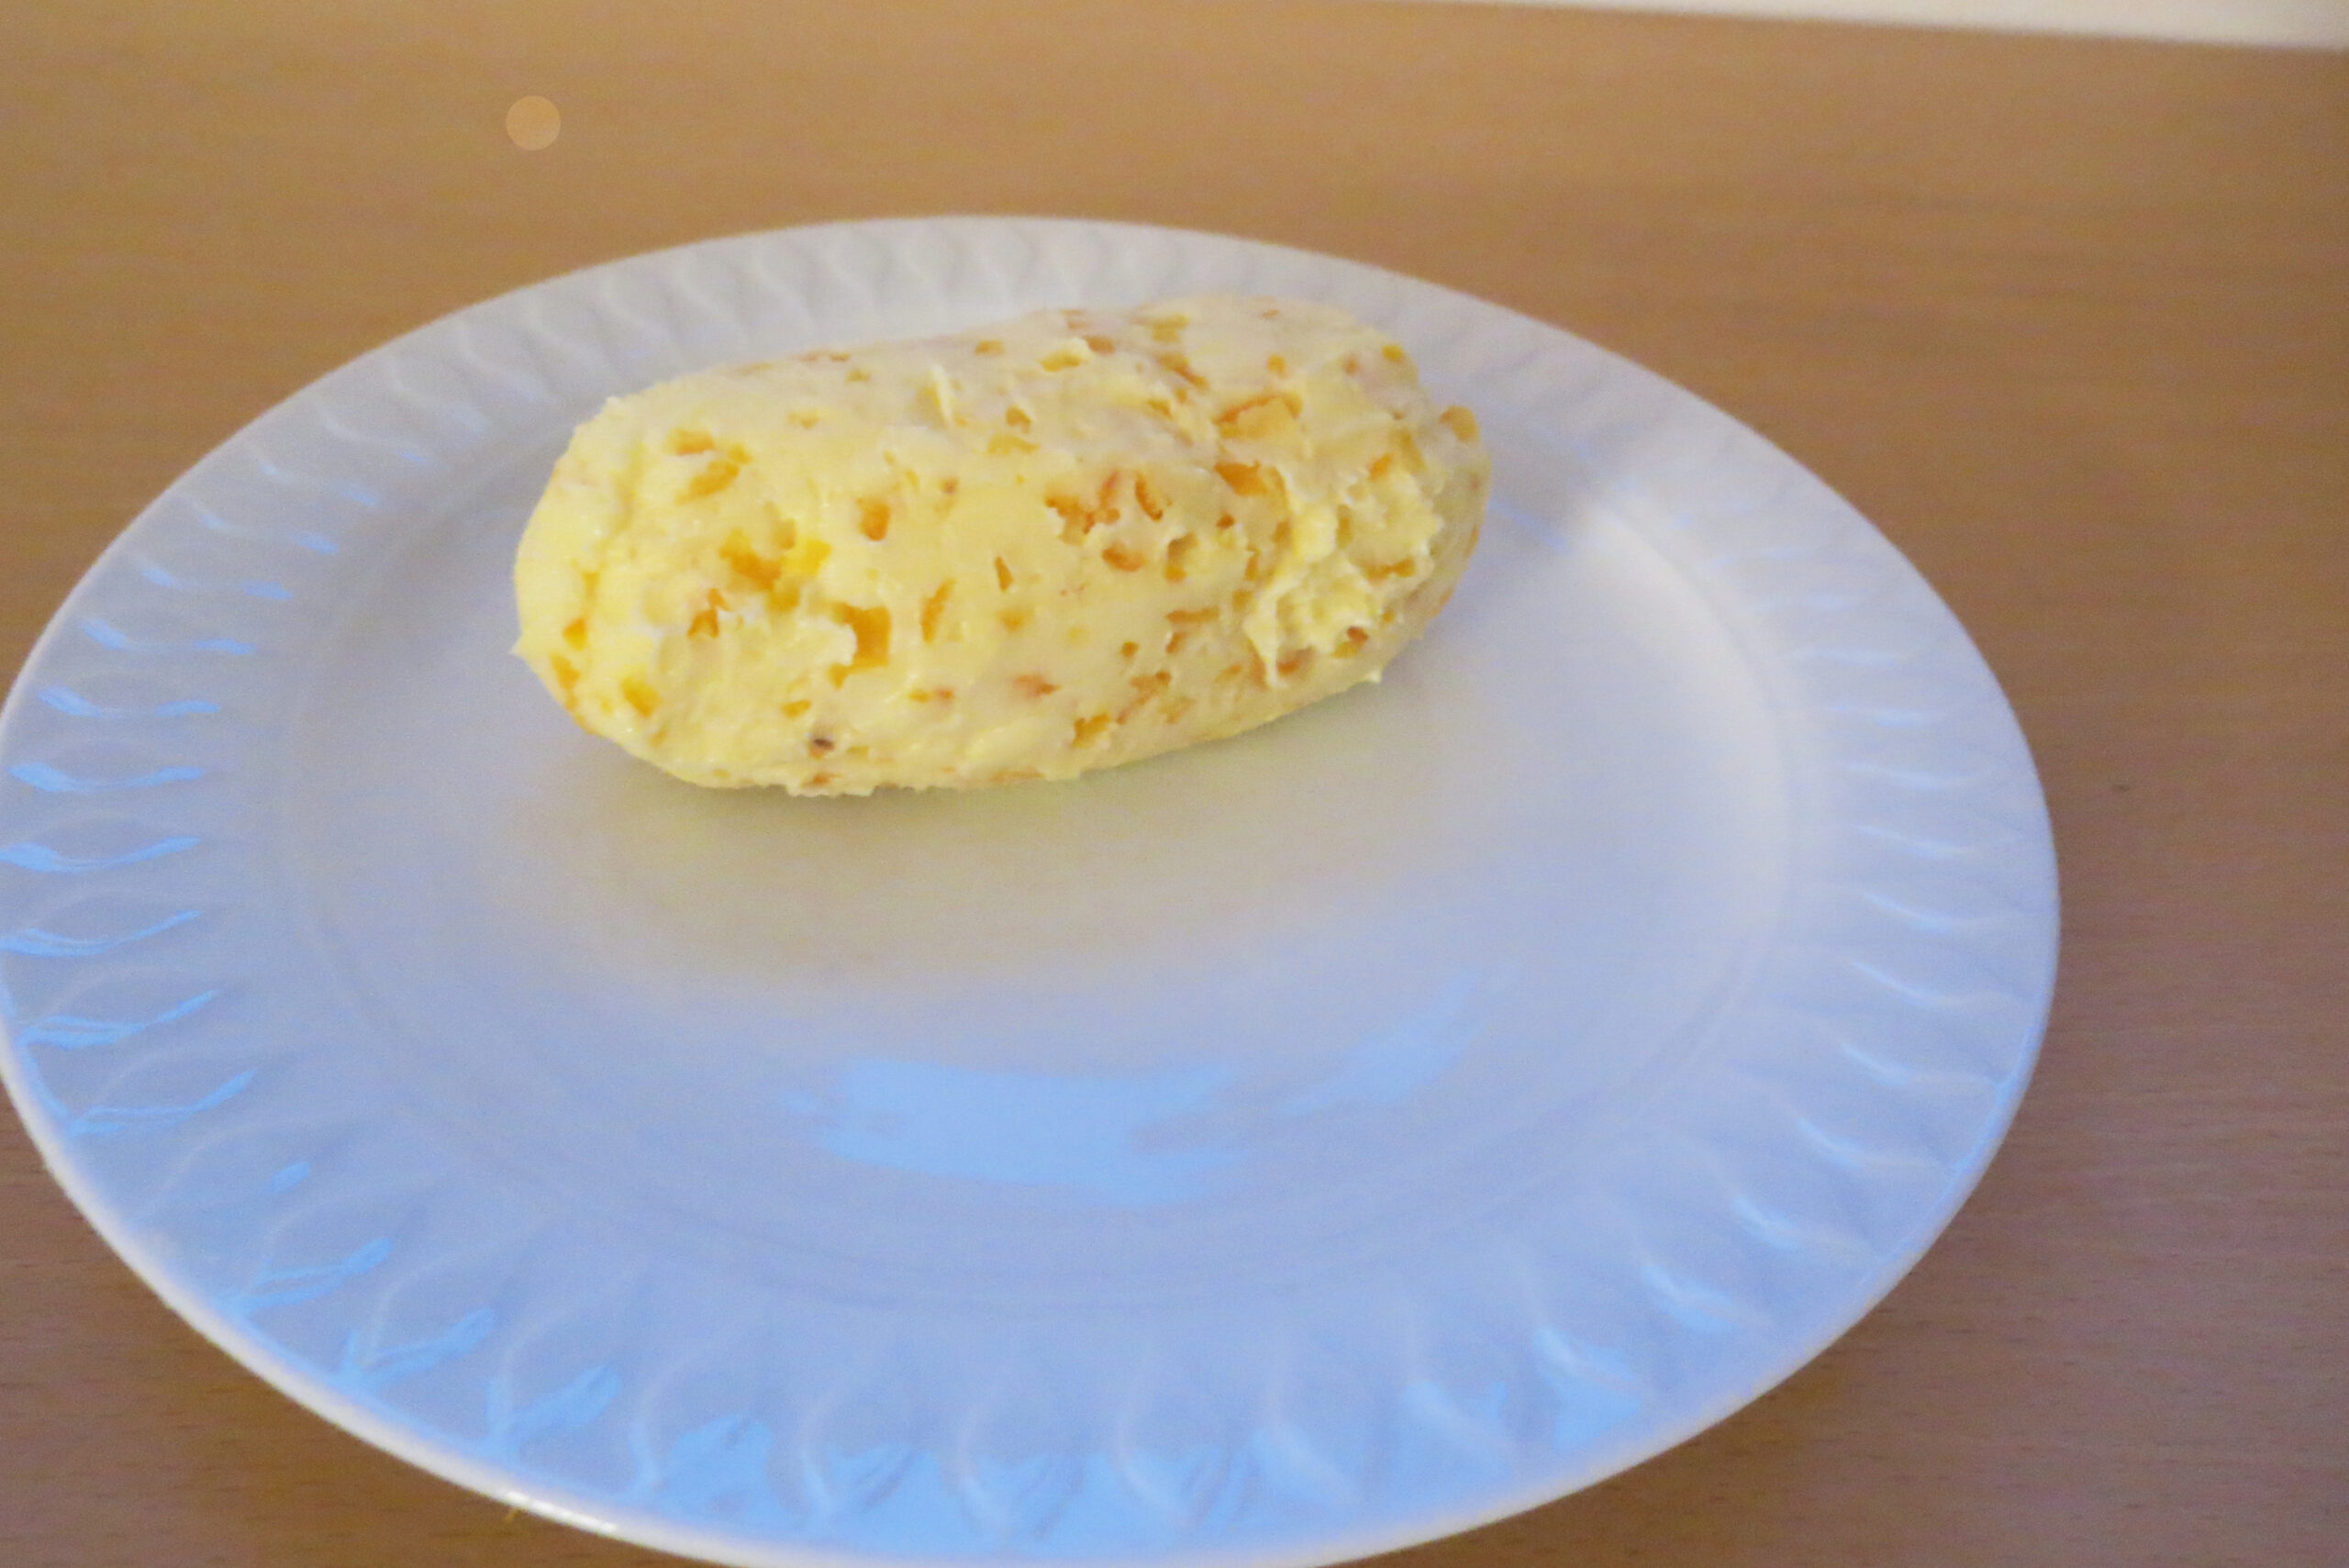
Stir the butter to soften it, and then add the tiny orange peels, some salt and (optionally) herbs. Alternatively, you can use homemade orange powder (see blog for recipe) instead of the fresh peels or homemade orange salt.
Mix it all well and form the butter into a roll. Wrap the roll in cling film or aluminium foil and put it into the fridge until it's firm. This takes at least 30 minutes.
Notes
Enjoy homemade orange butter on some homemade bread or with grilled meat. Store the butter in the fridge where it will keep fresh for about one week. You can also freeze the orange butter so that you’ll have it available when the BBQ season starts. It'll store well for about 6 months.
#10: Ice cubes
This is a simple one: remove the white part (pith) of the orange peels, cut them into small strips and put them into ice cube forms. Fill up the forms with water and put them into the freezer. I love these orange ice cubes for all kinds of drinks as they don’t water them down but give them a subtle orange flavour.
DIY Orange Peel Cleaners
Not for consumption!
#11: Orange peel cleaner
I love cleaning with this orange peel vinegar cleaner. Not only does it remove stains well, but it also smells really good – not at all like vinegar.
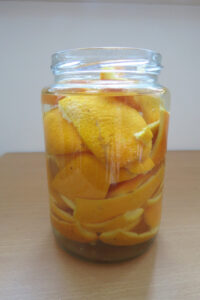
To make your own orange peel cleaner, put some orange peels (no need to remove the pith for this one) into a large jar until it’s about three-quarters full.
Fill the jar up with white vinegar or vinegar essence and let it sit for two weeks. Remove the peels and fill the cleaner in a spray bottle. If you used vinegar essence to make the citrus cleaner, you must dilute it. Fill about two-thirds of the bottle with it, and fill it up with water. Fill the bottle up with water.
You can use this cleaner against water stains in the bathroom or for cleaning your kitchen or pantry surfaces. In short, almost everywhere you can use vinegar for cleaning. Just avoid using it on porous stone surfaces, as the vinegar can etch
Orange peels for homemade body care products
#12: Orange body scrub
Orange Body Scrub
This is a fast, cheap and easy way to make a healthy body scrub with totally natural ingredients that will do your body nothing but good!
Thinly cut the peels from the orange so that the pith stays on the fruit. Or put the peels upside down on a wooden board and, with a sharp knife, scrape off the pith.
Cut the peels into tiny pieces.
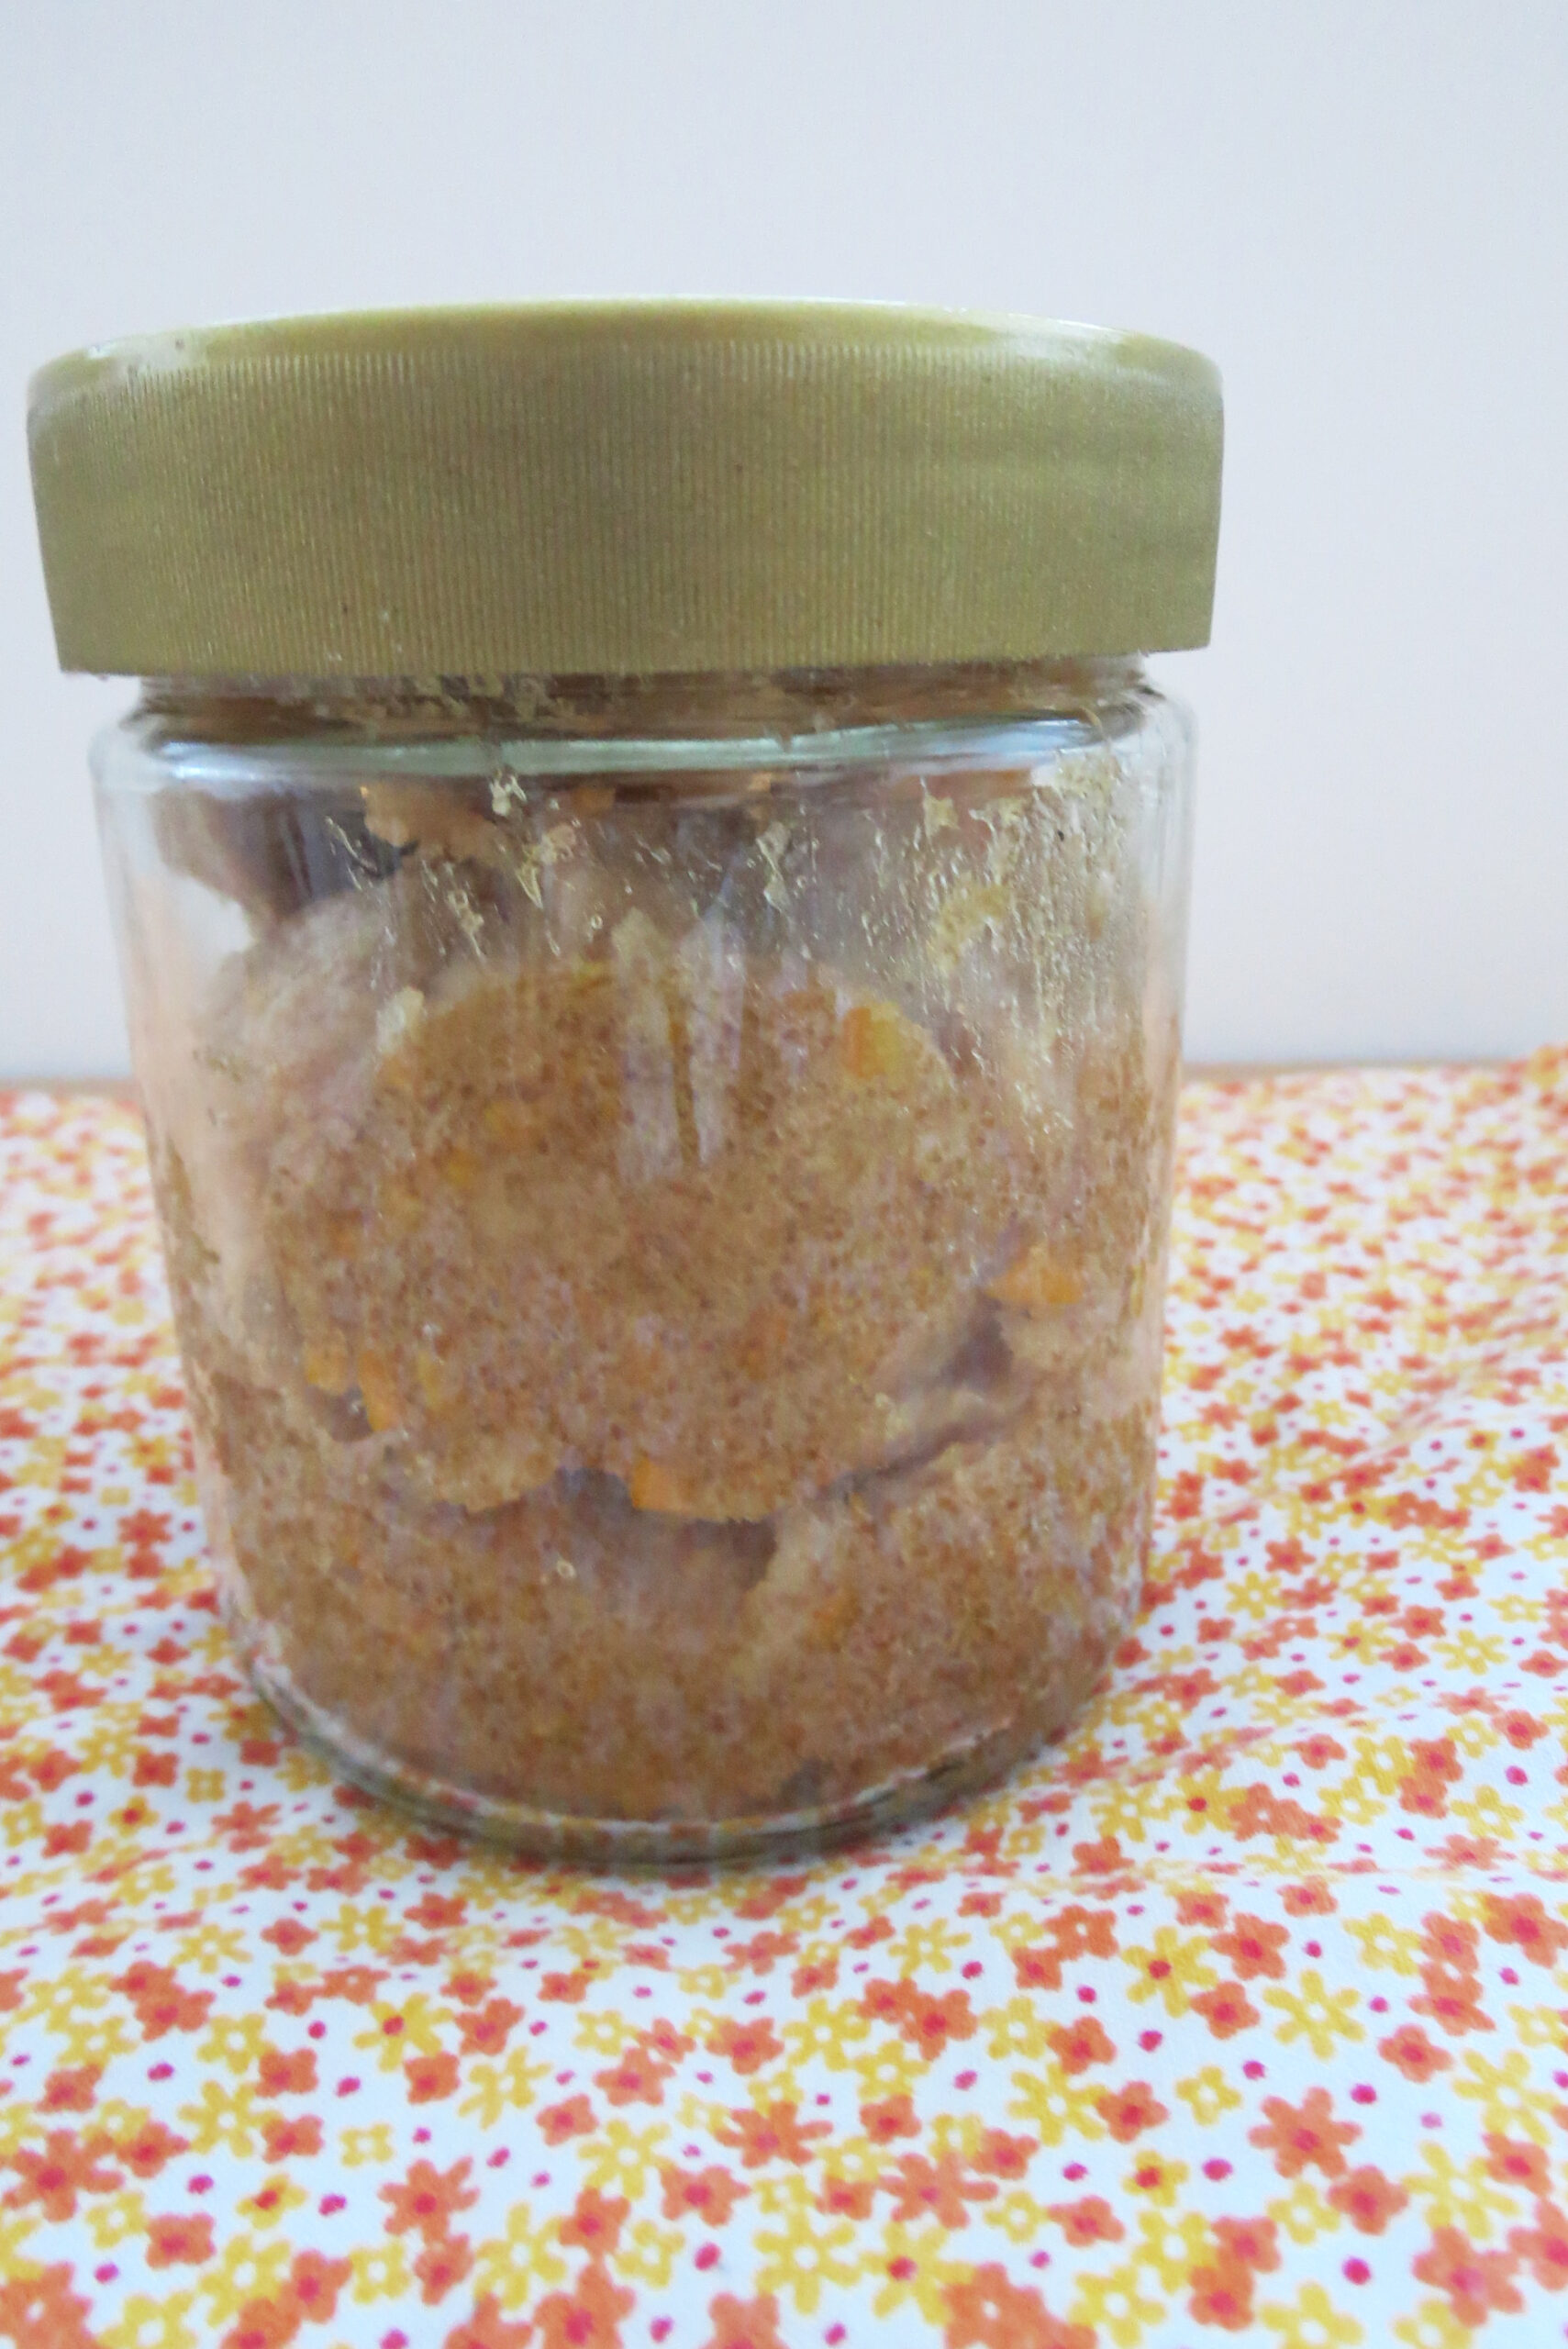
Mix the peels with the coconut oil, sugar and orange juice until everything is well combined.
Put the homemade orange body scrub into a glass and store it in the fridge for up to one week.
Notes
This also makes for a wonderful last-minute DIY gift!
Which oranges are best for making orange peel recipes?
Always go for organic and untreated oranges. That’s the single most important factor (especially for food or skin-related recipes).
Then, look out for oranges with a relatively thick and aromatic peel. A peel that’s not too thin helps when candying, infusing, drying or zesting: it gives more “substance” and oils.
Also, the bitterness and sweetness in the peel should be well-balanced. Some oranges have bitter pith, which can make peels unpleasant if not properly prepared; a less bitter variety helps.
Can you eat orange peels?
Yes, absolutely! As long as the oranges are organic, you can eat the peels. They’ve got a very intense flavour, and you can either eat them raw (straight from the fruit) or preserved like candied orange peel, orange sugar, etc.
Can I freeze orange peels?
Yes. Actually, I often freeze orange or lemon peels when I don’t have time to use them right away. When you want to use them, just take them out of the freezer and let them thaw before processing them.
How do you dry orange peels quickly?
Remove the pith from the peels or thinly cut the peel off. The smaller the peels, the quicker they’ll dry. If you’re in a hurry, cut the peel into tiny strips before dehydrating them in a dehydrator or the oven.
How long does homemade orange extract last?
Forever. Seriously, the alcohol keeps the extract fine indefinitely as long as the peels are under the liquid. However, when you take out some of the extract and fill the bottle up with vodka several times, you may want to consider removing the peels and adding fresh ones.
Stop Throwing Away Orange Peels!
Just like those moms at my school who were amazed by these ideas, I hope you’re now excited to transform your orange peels from trash to treasure.
From now on, you’ll never look at an orange peel the same way.
Whether you’re whipping up candied treats for the holidays, mixing natural cleaners for your home, or creating luxurious body scrubs, these peels are pure gold.
The best part? You’re saving money, avoiding chemicals, and keeping waste out of landfills – all while making your home smell amazing. So next time you eat an orange, save those peels. Your future self will thank you.
What’s your favourite way to use orange peels? Share your tips in the comments – I’d love to hear from you!
If you’ve been searching for a non-bitter orange marmalade recipe, you’ve come to the right place. Traditional marmalade can be a bit… much. That sharp, bitter bite from all the pith and peel? It’s not for everyone. And if you’ve always thought marmalade just wasn’t your thing, I completely understand.
But here’s the thing: it doesn’t have to be that way.
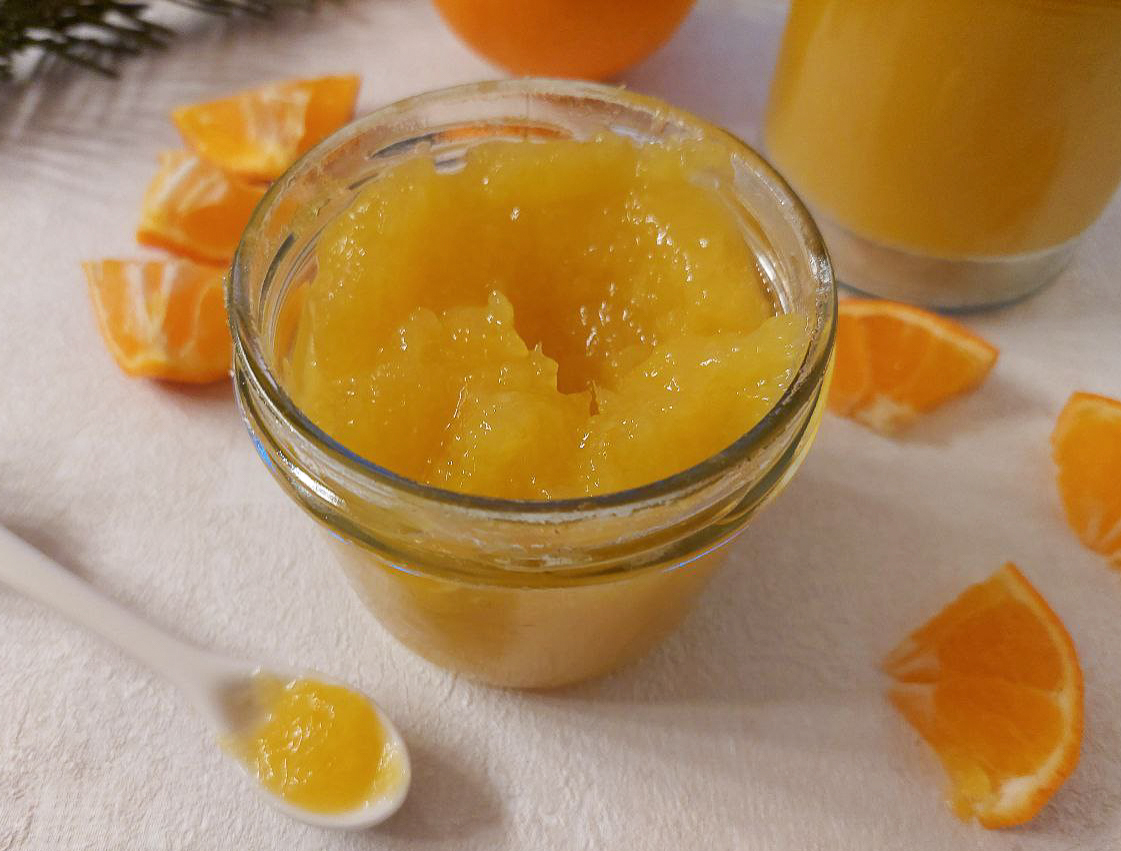
This easy orange marmalade recipe is ridiculously simple—just three ingredients, one pot, and about half an hour of your time. No boiling chunks of orange peel, no wrestling with bitter white pith, no complicated steps. Just fresh orange juice, a bit of finely grated zest, and sugar. That’s it.
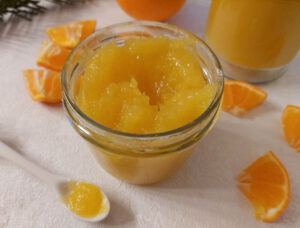
What you get is a bright, sunny marmalade that tastes purely of oranges—sweet, glossy, and absolutely wonderful on warm toast or swirled into yoghurt or dolloped on scones. Or use it to fill these wonderfully citrusy Orange Christmas Cookies!
If you’ve been put off by bitter marmalade in the past, this recipe is your fresh start. Let’s make something delicious together!
Ingredients
This non-bitter orange marmalade requires just three simple ingredients:
Oranges
You’ll need 10-15 oranges, depending on their size – enough to yield 900 ml (about 4 cups) of freshly pressed juice. It’s better to have a few extra than to come up short!
Choose organic oranges whenever possible, since we’re using the zest as well as the juice. The zest is where all that bright orange flavour lives, and organic means no wax or pesticide residue on the peel.
Sugar
Sugar serves two purposes in marmalade: it preserves the fruit and helps it set properly, ensuring your marmalade stays shelf-stable for months.
Although oranges have natural sweetness, we still need sugar for preservation. For this recipe, use a bit more than one-third the amount of sugar compared to juice (350g sugar for 900ml juice).
You have two options:
Household sugar + pectin: Use regular granulated sugar and add pectin separately
Jam sugar: This already contains pectin, making the process even simpler
Pectin
Pectin is what makes your marmalade gel and set properly. If you’re using regular household sugar (not jam sugar), you’ll need to add pectin separately.
Check the package instructions on your pectin brand for the exact amount—it varies by manufacturer. Most sachets are designed for specific fruit-to-sugar ratios, so look for one labelled for 2:1 or even better 3:1 (fruit to sugar).
Instructions
Making this non-bitter orange marmalade is so simple, you’ll wonder why you ever bought it from the store!
Step 1: Prepare the jars
Sterilise the jars and lids you want to store your marmalade in, by using one of the methods described in this article.
Step 2: Grate the zest
Wash ALL the oranges thoroughly under warm water to remove dirt and residues. Using a fine grater or microplane, finely grate off the zest of two oranges—just the bright orange outer layer, avoiding the white pith underneath, which adds bitterness. Gather the zest in the pot you’ll use for cooking.
Step 3: Press the juice
Now, cut the oranges crosswise in half (around the “equator”). Use a citrus juicer to squeeze each half and pour the juice into a measuring jug. Continue until you have 900 ml (about 4 cups) of freshly pressed orange juice.
Don’t throw away the orange peels! In this article, you’ll learn about 12 different uses for orange peel.
Step 4: Mix the ingredients
Pour the orange juice into the pot with the zest. Add the sugar and pectin (if necessary) and stir everything together until well combined.
Step 5: Cook the marmalade
Bring the mixture to a rolling boil. As soon as it bubbles, set your timer for 4 minutes and let the marmalade cook. Keep the heat at medium-high to maintain the rolling boil and regularly stir the marmalade to prevent it from burning or boiling over.
Step 6: Gel test
After 4 minutes, test if the marmalade thickens by putting some of the hot liquid onto a cold plate. Let it sit for about 15 – 20 seconds and slowly tilt the plate.
If the mixture thickens visibly and runs only slowly, or wrinkles slightly when you push it with your finger, the marmalade is ready to be ladled into the jars.
If it’s too runny, cook the marmalade for another 1 – 2 minutes.
Step 7: Pour the marmalade into jars
Once the marmalade is ready, fill it into the prepared jars with a ladle. Be careful: it’s literally boiling hot!
Fill each jar, leaving about 1cm (⅓ inch) headspace at the top. Then, close it tightly with the lid (again, be careful: it’s hot!), and put it upside down on a kitchen towel on your counter. Leave the jars inverted for 10 minutes, then flip them right-side up.
Let the marmalade cool down completely and listen for the satisfying ‘pop’ as the lids seal while cooling.
Non-bitter orange marmalade
This easy recipe uses fresh juice and zest for sweet, sunny marmalade in 30 minutes.
Sterilise the jars and lids as described in this article.
Wash the oranges.
Finely grate the zest of two oranges with a fine grater or microplane into a large pot. Just use the bright orange outer layer and avoid the white pith underneath.
Press the oranges until you have 900 ml of fresh juice. Put the juice in the pot to the orange zests.
Add the sugar and pectin (if necessary), and mix all the ingredients with a wooden spoon.
Bring the mixture to a rolling boil at medium-high heat and maintain the boil for 4 minutes
Test if the marmalade thickens as described in the blog post.
Ladle the hot marmalade into jars, tightly close them with lids, and put them upside down onto a kitchen towel on the counter.After 10 minutes, flip them back and let them cool down completely.
Notes
Orange marmalade can be stored in a cool and dry place for up to one year.This makes for 5 jars à 250 ml.
Your New Favourite Marmalade
And there you have it—non-bitter orange marmalade that’s actually a joy to make and eat. No complicated steps, no wrestling with pith, just three ingredients and half an hour of your time. If traditional marmalade has always been too much for you, this is your fresh start. And it makes for a great (last-minute) gift! Spread it generously, share it with friends, and enjoy every sunny, sweet spoonful!
Do you like jam and marmalade as much as I do? Then you’ll love these articles:
While I’m quite open to trying out new recipes when it comes to cookies, I won’t negotiate my favourite Christmas dessert: Christmas pudding. Today, I’m sharing my tried-and-tested homemade Christmas pudding recipe that I’ve refined for years.
This rich, chewy and flavourful mother of all Christmas desserts (at least in my opinion) is so much better than anything store-bought. It contains an array of dried fruit, and it’s bursting with the Christmassy flavours of warming spices, brandy and tangy citrus. Better yet, it’s also an impressive show-stopper that’ll awe your family and guests.
The only catch is that it needs at least 4 weeks to mature. So, what are you waiting for? Let’s make a Christmas pudding that’ll become your new family tradition!
The History of Christmas Pudding
First, let’s explore the tradition behind this beloved dessert, then I’ll break down the key ingredients.
Traditionally, Christmas pudding was made on Stir-up Sunday, the last Sunday before the start of Advent. That way, it leaves the pudding enough time to mature and develop its wonderful flavours.
Stir-up Sunday got its name from an Anglican prayer, recited in the churches on this day, asking God to “stir up” the hearts of the faithful. Over time, it became associated with the stirring of the Christmas pudding.
The tradition of making the Christmas pudding on Stir-up Sunday likely started in Victorian times. The family gathered in the kitchen and took turns to stir the pudding while making a wish for the upcoming year. This wasn’t only about cooking, it was about celebrating the start of the Christmas season and creating memories together.
Sometimes, a coin or a trinket was stirred into the pudding, predicting good luck in the New Year for the person who found it in their piece on Christmas Day. In my family, we refrain from adding anything other than edibles to the pudding. I don’t want to risk a broken tooth for anyone…
On Christmas Day, the pudding is decorated with a sprig of holly to represent Jesus’ thorn crown. Add a little bit of warm brandy and light the pudding before proudly carrying it to the family table.
Now that we know the tradition, let’s see what goes in a good Christmas pudding:
Key Ingredients for Traditional Christmas Pudding
Fruit mix
Traditional Christmas pudding contains loads of different dried fruit. I prefer the mixture I describe in the recipe, but you can alter the fruits and/or their amounts. Just make sure that in the end, you have the same overall amount of dried fruit. You’ll need 550 grams total of dried fruit (plus candied orange and lemon peels separately)
If you can’t get dried cherries, for example, you can easily swap them for dried cranberries. Or you leave out the dried apricots and try dried apples or pears instead.
Spices
Although you can juggle with the fruits if you want, don’t alter the spices. The blend of cinnamon, nutmeg, cloves, and ginger is what makes this recipe so unique and special. There’s nothing quite like this combination of warming Christmas spices that fills your kitchen with the most wonderful aroma while it steams.
Suet
Suet is beef or mutton fat from around the kidneys, which is usually sold shredded or in blocks. Here in Germany, I can get it at the butcher’s; I just need to call in advance and pre-order it. Sometimes you can find suet in the supermarket meat section, in speciality stores or even online.
There are many recipes that use butter, vegetable shortening or even oil for Christmas pudding. I strongly recommend, however, to always use suet, not butter or oil! Suet is in the recipe for a reason: it needs a relatively high temperature to melt. When the pudding gets steamed for hours in a hot water bath, the suet melts very slowly and distributes evenly throughout the pudding as it melts.
When you use butter, shortening or oil, it’ll pool at the bottom of the pudding bowl. When you serve the pudding on Christmas day, you’ll have a greasy top (which was the bowl bottom) and a dry remainder.
I agree that suet isn’t the best thing in the world to eat, but it’s only once a year and in a relatively small amount. And just in case you were wondering: no, it doesn’t taste of meat.
By the way: Suet can be frozen if you buy extra, making it easy to keep on hand for next year.
Booze
This recipe is not for teetotalers as it contains a fair amount (150 ml) of brandy, rum, sherry or similar spirit in which the dried fruits are soaked. Unfortunately, the alcohol doesn’t fully cook off, so this isn’t suitable for children either. If you want to make an alcohol-free version of Christmas pudding, use alcohol-free rum (yep, that’s a thing) instead.
The mould
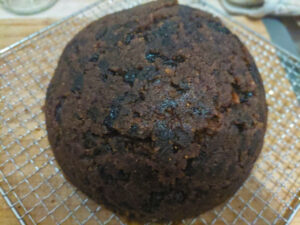
Apart from the usual equipment like mixing bowls, a spoon (wooden or metal), and a large pot to cook the pudding in, the most important equipment is the pudding mould. Don’t worry, there’s no need to rush out and buy a specific Christmas pudding mould or worse, refrain from making the pudding because you don’t have one! A simple metal bowl that’s large enough to hold the pudding dough and still has some space below the brim will do well. I use a 1.5-litre pudding basin and it’s perfect. If you have a pudding mould of whatever shape, though, feel free to use it. There’s no law that forbids Christmas pudding in any other form than the famous half-ball.
How to make Christmas Pudding
Day 1 – 4: Soaking the fruit
Christmas pudding needs some time to make, several days, in fact. But don’t worry, most of the time is spent letting the ingredients sit and soak.
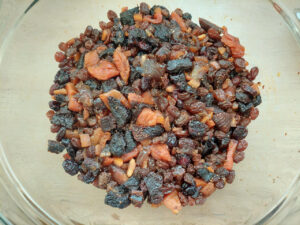
Start with the dried fruit: place the dates, raisins, sultanas, figs, plums, cherries, as well as the candied orange and lemon peel in a large bowl.
Add the rum or brandy, or whatever your favourite booze is.
Mix all these ingredients thoroughly, taking care not to crush the cherries. I recommend either using a wooden or metal spoon or just mixing everything with your hands. The ingredients are heavy – and will get even heavier as they soak up the booze as the days go on.
This fruit mix has been soaking in rum for a few days!
Once everything is thoroughly mixed, cover the bowl with clingfilm or aluminium foil and let it soak for four days. Every day during this time, take the cover off and mix the ingredients. The 150 ml of booze we used on Day 1 will usually be soaked up within two days. If the mixture looks a little dry, add more booze.
So, if you want to cook the pudding on a Sunday, for example, start soaking the fruits on Wednesday or even Tuesday evening.
Day 4
Everything’s prepared, now’s the time to bring our pudding together.
Making the pudding dough
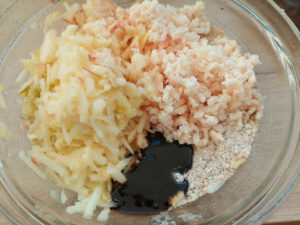
Place the flour, baking powder, brown sugar, the spice mixture (cinnamon, nutmeg, cloves, and ginger), salt and breadcrumbs into a large mixing bowl. Mix these dry ingredients well before adding the next one.
Now, coarsely grind the beef suet on a cheese grater and add it to the dry mixture.
Grate the apple as well and also add it to the mix.
The same goes for the treacle, the eggs and – you guessed it – the freshly grated orange and lemon peel.
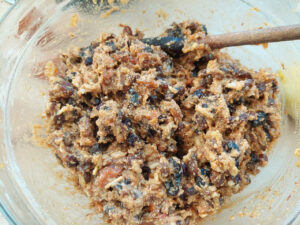
Mix everything really well, taking care not to crush the cherries if possible. When the pudding cooks, the suet melts, so it must be well distributed or else it will look clumpy. At this point, the mixture is very sticky and heavy.
Filling the mould
Grease whatever pudding mould you have with butter, so that the ready-cooked pudding will come out more easily. Gently press the sticky mixture into the bottom of the bowl or mould so that there are no holes or gaps. The bottom of the mould will later be the top of the pudding once it’s unmoulded.
If you want to stick to the old tradition of adding a penny or another token into the pudding, now is the right time. Tradition says that the person who finds the penny in his piece of pudding will get one year of good luck. Just remember to tell your guests in advance to watch out for the penny; otherwise, the new year would start with a broken tooth…
Fill the bowl or mould up to 1 cm (1/2 inch) under the brim. The pudding will expand a bit when cooked so it’s important to leave some room.
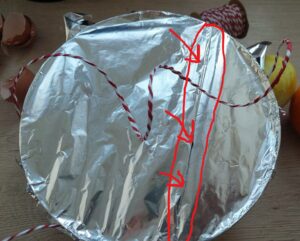
If you use a pudding mould, close and secure the lid. In case of a bowl, cover it with aluminium foil. I like to fold a pleat into the foil to give the pudding plenty of room if it likes to rise.
See the crease? That way, the pudding can rise without pushing off the foil
Seal the foil with rubber bands to prevent water from getting into the bowl while the pudding’s cooked in the water bath. Make sure you don’t get water in your pudding!
Cooking the Pudding
Now the pudding is ready to be cooked in a water bath. Fill a pot that’s large enough to hold the pudding bowl or mould. The water level should come up halfway to the edge of the pudding mould, so that water can’t get into it.
Put the mould into the water and bring the water to a boil.
Don’t put cold pudding moulds into boiling water, unless the bowl is of a tempered material. The bowl may crack from the drastic temperature change!
How long to steam Christmas Pudding
Let the pudding cook for 8 hours on low to medium heat. The water shouldn’t boil vigorously (boiling water could splash into the mould); keep it at a gentle simmer.
As the water will evaporate, you must check the pot every one – two hours and fill it up with boiling (!) water if necessary.
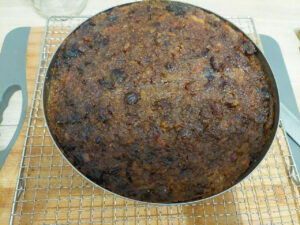
After eight hours, take the mould out of the water bath. Be careful handling it, it’s hot and it’ll take a while to cool down.
I usually let the steamed Christmas pudding sit for about 5 – 10 minutes on the counter to cool down before I try to unmould it. Then I place a cooling rack on top of it. Take the mould with one hand (wear an oven mitten!) and the rack with the other and flip it upside down. Usually, the pudding comes out beautifully.
Maturing
This is where the magic happens! As the pudding ages, it develops more flavour. Smell the traditional steamed Christmas pudding when it’s first cooked, and then smell the pudding on Christmas Day. You can smell and taste the difference in an aged Plum Pudding. There’s a reason for preparing homemade Christmas pudding about four weeks before Christmas and some people even start in early or mid October.
When the pudding is completely cool, sprinkle it with the booze you used to soak the fruit and cover it in aluminium foil and either store it in the fridge or a cool and dry basement for at least four weeks.
Once a week, take off the foil and sprinkle the pudding again with rum or brandy. Wrap it back up again (in the same foil) and put it back to rest. Keep up this weekly maintenance until Christmas.
Angela Braun
Christmas Pudding (aka Plum Pudding or Figgy Pudding)
Start four days before you want to steam the pudding:
Place the raisins, sultanas, figs, dates, prunes, apricots, cherries and the candied orange and lemon peel in a bowl.
Pour the brandy or rum over the dried fruit and stir to combine the mixture.
Once everything is mixed, cover the mixing bowl with cling film or a plastic wrap and let it soak for four days. Once a day, take the plastic wrap off and mix up the ingredients. If the mixture gets a little dry, add more brandy or rum.
After four days, place the breadcrumbs, flour, salt, baking powder, brown sugar and spices in a bowl and stir to combine.
Finely grate the suet.
Grate the apple.
Add the grated apple, treacle (or molasses), suet, lemon and orange zest and the eggs to the soaked dried fruit and stir to combine it.
Add the dry mixture to the fruit mixture and stir thoroughly to combine it. It'll become very thick and sticky.
Grease your pudding mould or bowl with butter and scoop the batter into the mould. Gently press the batter down and smooth the top.
Either close the lid on the form or cover it with aluminium foil that you secure with a string around the mould. Fold a pleat in the foil to allow room for expansion as the pudding cooks.
Fill a large pot with water and bring it to a low simmer.
Put the pudding mould into the water. The water level should come up halfway to the edge of the pudding mould.
Now, cook the pudding over low heat for about 8 hours. The water should not be boiling but just simmering. Check every 1 - 2 hours to make sure that there's enough water left in the pot. Add more (hot) water if necessary.
When the pudding is done steaming, carefully lift out the pudding mould and let it sit for about 5 - 10 minutes. Then, put the mould upside down and let the pudding slide out of it.
Put the pudding on a plate and let it cool completely.
When the pudding is cool, sprinkle it with brandy or rum and cover it with foil. Store the pudding in the fridge or a cool place, e.g. the basement.
Once a week take off the foil and sprinkle the pudding with brandy or rum. Then wrap it back up again and put it back in the fridge or basement.
On Christmas Day - or whenever you want to serve the pudding - unwrap the pudding and put it back into the mould it was steamed in. Recook it again on a low setting for one hour.
Flip the pudding onto a plate and light it on fire if you like (see blog post section on how to light a pudding).
Serve the Christmas pudding with vanilla sauce, whipped cream or ice cream.
How to serve Christmas Pudding
Reheating the Pudding
On Christmas Day (or whenever you want to serve your Christmas pudding), unwrap the pudding, place it back into its original mould and cover it with foil (or tighten the lid). Seal the foil with rubber bands and steam it again in a water bath on a low setting for one hour. This gentle reheating brings the pudding back to its perfect serving temperature and refreshes the texture.
Flaming (optional)
Now, you can serve your pudding traditionally with a holly sprig and a dusting of powdered sugar, or go for the spectacular flaming presentation!! It’s not necessary, of course, but it looks so spectacular, and it gives the pudding even more punch.
Safety first: This creates dramatic flames, so keep children and pets at a safe distance, tie back long hair, and have the lights dimmed for maximum effect.
Unmould the warm pudding onto a plate and make a cross-shaped indentation on top of the pudding with a wooden spoon handle – this creates channels for the flaming brandy to run down dramatically.
The trick is to use booze with more than 50% alcohol. I usually use “Strohrum” with 80 % alcohol content but any high-proof rum or brandy (50%+ alcohol) will work – the higher the proof, the better it flames.
To flame your brandy, it must be warm or even hot. Place about 50 ml of brandy in a pot and heat it until it starts to steam. Then pour the heated brandy over the pudding, letting it run down the sides of the pudding where you put the cross in.
For maximum dramatic effect, dim the lights. Then quickly light your homemade Christmas pudding with a lighter or a match. Be careful not to burn yourself! A blue flame will now cover the pudding where the brandy has run down. After a few seconds, the flame will go out.
How many servings does this Christmas Pudding make?
If Christmas pudding were a cake, I’d say you’d get out about six servings from this recipe. However, due to all the heavy ingredients like the dried fruit, suet and sugar, Christmas pudding is a relatively rich and satisfying dessert, so I recommend serving small slices. The pudding will be enough for 8 – 10 people.
Can I substitute the suet? / What can I use instead of suet?
As explained in the ingredients section, suet is essential for the best texture. However, if you absolutely can’t source it or if you’re looking for a vegetarian alternative, you can use butter or vegetarian suet. BUT: as suet has a higher melting point, it melts later during steaming and distributes evenly throughout the pudding. Butter melts a lot quicker and tends to pool at the bottom of the bowl, leaving a slightly soggy pudding top and a dry remainder.
Vegetarian suet is chemically similar to traditional suet and should work, though I haven’t tested it myself due to concerns about hydrogenated oils. If you prefer to avoid both animal suet and hydrogenated fats, butter is your best option—just expect a slightly different texture.
Can children eat Christmas Pudding?
The alcohol doesn’t fully cook off during steaming, so this recipe isn’t suitable for children. For a family-friendly version, substitute alcohol-free rum or brandy throughout the recipe, and skip the flaming presentation.
Does Christmas Pudding contain nuts?
As my son’s girlfriend is allergic to nuts, I’ve adapted this recipe to be nut-free. If you want to, however, you can add 100 g coarsely chopped hazelnuts, walnuts, almonds or other nuts of your liking to the dried fruit mix on Day 1 and let them soak alongside everything else.
How long does Christmas Pudding keep?
Christmas pudding keeps for at least 6 months when stored in a cool and dry place. If you sprinkle it with alcohol weekly, it won’t go bad and you can even store it longer, up to one year.
So, if you like to you can make Christmas pudding already in summer or early autumn, put it in the fridge and sprinkle it with alcohol once a week until Christmas. It’ll mature with time.
Can I store leftover Christmas Pudding?
Definitely! The sugar as well as the alcohol preserve it rather well. Wrap the leftover pudding tightly in foil or plastic wrap to prevent it from drying out. Then, put in the fridge, where it’ll keep for up to two weeks.
Can I freeze Christmas Pudding?
Yes, you can, but it’s best done when the pudding is already steamed. Once the pudding has cooled down completely, wrap it tightly in foil or clingfilm and put it in the freezer. It’ll last for up to one year.
To defrost, put the pudding out of the freezer, unwrap it and put it on a cake rack where you let it come to room temperature.
Can I make Christmas Pudding to be served right away?
Well, you still need to soak the dried fruit, even if it’s only for one hour. Then you could mix the pudding “dough” and steam it in the water bath, all on the same day. The pudding will taste delicious, just not as complex and deep as Christmas Pudding that had the time to mature.
So, while possible, I really recommend the 4-week maturation—the flavour difference is remarkable and truly worth the wait.
Ready to get started?
And there you have it—my tried-and-tested Christmas pudding recipe that’s been years in the making! Yes, it requires some advance planning and weekly attention (think of it as a delicious pet that only needs feeding once a week), but I promise the end result is worth every moment. There’s nothing quite like presenting a flaming Christmas pudding to your amazed guests, knowing you made it from scratch—and didn’t burn down the kitchen in the process! So don’t wait—start soaking those fruits today and make this Christmas truly special. If you have any questions along the way, leave a comment below. I’m always happy to help fellow pudding makers! Enjoy, and have a wonderful Christmas!
Looking for more Christmas recipes? These may interest you: