Sometimes in winter, when I don’t know what to cook, I go down into my basement to look at all my jars of homemade preserves. And I’ve always found an inspiration there! One of the most versatile staples there is sauerkraut. Have you ever tried it in pastry? Today, I’m going to share one of my favourite recipes: authentic Bavarian sauerkraut strudel.
As Bavarians, we often eat sauerkraut together with fried sausages, of course. But there are so many other ways to use it! This strudel will soon become one of your go-to recipes, too. The crispy dough, the juicy filling and the wonderful combination of flavours will leave your family and guests begging for more.
What is Bavarian Sauerkraut Strudel?
Strudel is a wonderful dish. Honestly, if we hadn’t already got it, somebody would have to invent it. You can put anything on strudel dough — apples, sauerkraut, potatoes, or fish — wrap it up, and bake it in the oven. In this case, we have crispy strudel dough with a savoury sauerkraut filling.
This sauerkraut strudel recipe makes for a perfect weekday winter dish. The rich, hearty filling makes it a down-to-earth, warming comfort food. And using homemade sauerkraut is the cherry on top!
In Bavaria, we eat this strudel as a main dish. You can serve it with a cream sauce and a fresh seasonal salad like lamb’s lettuce, beetroot or carrot salad.
Ingredients You’ll Need
For the dough
Strudel dough is easy to make. You just need
250 g flour: all-purpose flour is best, make sure it’s not self-raising
1 egg, free-range
1/8 l lukewarm water
2 tbsp vinegar and
1 tbsp oil or melted butter
a pinch of salt
Mix everything and let it rest for half an hour before you thinly stretch it out.
Instead of making the dough from scratch, you can buy a ready-made version, but make sure it’s a high-quality product. Honestly, making the dough is a matter of minutes, and while it rests, you can prepare the filling. There’s almost no time-gain in buying one.
For the filling
For the rich, savoury filling you need
750 g sauerkraut (that’s one large jar): use your homemade staple, if you have one or a good store-bought one. Quality matters!
1 large onion
200 g sour cream
200 g bacon ( you can leave the bacon out for a vegetarian dish)
salt, pepper, and
1 tbsp caraway seeds
Bavarian Sauerkraut Strudel Recipe: Step-by-Step
We start by preparing the dough, as it has to rest for about half an hour.
Making the strudel dough
Weigh the flour and put it into a bowl. Now add the egg, the salt, vinegar and oil or melted butter. Warm the water until it’s lukewarm and slowly pour it into the mix. Don’t add all the water in one go, but rather mix the dough and add water as necessary. Depending on the temperature and humidity in your kitchen, you need less or more water.
Mix the ingredients thoroughly and knead the dough
In this post, I describe in detail how to make strudel dough. If you prefer watching a video, look here:
You are currently viewing a placeholder content from Default. To access the actual content, click the button below. Please note that doing so will share data with third-party providers.
Now, the dough has to rest for about half an hour. Just put it back into the bowl and cover it with a second bowl so that it won’t dry out.
As I said before, you can also use store-bought dough, either strudel dough or puff pastry dough. Phyllo/filo dough is an alternative, as well; you just have to “glue” the sheets with oil on top of each other.
Preparing the Filling
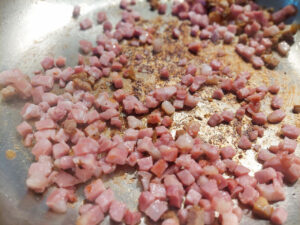
Finely chop the onion and cut the bacon into small squares or strips. Heat a skillet and cook the bacon until the fat is released. When the bacon has become bright and glassy, add the chopped onions and stir the mixture until the onions are glassy, as well.
When the bacon becomes glassy like that, add the onions
Let it all cool down and put the bacon-onion mix in a bowl.
If your sauerkraut has a lot of brine, drain it first. Mine is usually fine without draining since I ferment it with less liquid. Now, add the sauerkraut, the sour cream, pepper and caraway seeds to the bacon and onion mix and stir it together. Don’t add salt yet. Due to the sauerkraut and the bacon, it could be salty enough already. Taste the filling and add salt and pepper if necessary.
Assembling the Sauerkraut Strudel
Preheat the oven to 180 °C (355 °F) top/bottom heat or 160 °C (320 °F) fan oven.
Dust a kitchen towel with some flour and roll the dough out on it. Then stretch it out with your hands as shown in the video until it’s very thin.
Start pulling the dough carefully at the edges with your fingers.
Spread the filling evenly onto the dough, leaving about 1 inch from the edges free.
Fold in one inch of the dough on the short edges. Now start rolling the strudel by carefully lifting the kitchen towel and letting the dough roll more or less by itself.
Line a baking tray with baking paper and put the strudel onto it.
Bavarian sauerkraut strudel, ready for the oven. Larger than life – or rather larger than the tray. Had to bend the strudel to put it onto the baking tray.
Mix one egg with a bit of water in a bowl and brush the strudel with it. Alternatively, you can brush it with melted butter or oil.
Baking
Put the strudel into the preheated oven (remember? It’s 180 °C / 355 °F top/bottom heat or 160 °C/320 °F fan oven) and bake it for 40 – 45 minutes.
You know that it’s done when the surface is crisp and has turned into a beautiful golden brown. When the strudel becomes suspiciously dark before the end of the baking time, cover it with baking paper or aluminium foil. It’ll still bake but won’t get too dark.
When the strudel is done, take it out of the oven and let it rest for 2 minutes. This helps the filling settle and allows any juice that’s leaked out to be reabsorbed into the dough.
Sauerkraut strudel fresh from the oven
Serve the sauerkraut strudel while it’s still hot.
Traditional Bavarian Sauerkraut Strudel
Crispy strudel dough filled with tangy sauerkraut, bacon, and caraway seeds. This traditional Bavarian comfort food is perfect for cold winter evenings and makes a satisfying main dish.
Weigh the flour and put it into a bowl. Now add the egg, the salt, vinegar and oil or melted butter. Warm the water until it's lukewarm and slowly pour it into the mix. Don't add all the water in one go, but rather mix the dough and add water as necessary. Depending on the temperature and humidity in your kitchen, you need less or more water.
Now, the dough has to rest for about half an hour. Just put it back into the bowl and cover it with a second bowl so that it won't dry out.
In the meantime, finely chop the onion and cut the bacon into small squares or strips. Heat a skillet and cook the bacon until the fat is released. When the bacon has become bright and glassy, add the chopped onions and stir the mixture until the onions are glassy, as well.
Let it all cool down and put the bacon-onion mix in a bowl.
If your sauerkraut has a lot of brine, drain it first. Mine is usually fine without draining since I ferment it with less liquid. Now, add the sauerkraut, the sour cream, pepper and caraway seeds to the bacon and onion mix and stir it together. Don't add salt yet. Due to the sauerkraut and the bacon, it could be salty enough already. Taste the filling and add salt and pepper if necessary.
Preheat the oven to 180 °C (355 °F) top/bottom heat or 160 °C (320 °F) fan oven.
Dust a kitchen towel with some flour and roll the dough out on it. Then stretch it out with your hands as shown in the video until it's very thin.
Spread the filling evenly onto the dough, leaving about 1 inch from the edges free.
Fold in one inch of the dough on the short edges. Now start rolling the strudel by carefully lifting the kitchen towel and letting the dough roll more or less by itself.
Line a baking tray with baking paper and put the strudel onto it.
Mix one egg with a bit of water in a bowl and brush the strudel with it. Alternatively, you can brush it with melted butter or oil.
Put the strudel into the preheated oven and bake it for 40 - 45 minutes.
You know that it's done when the surface is crisp and has turned into a beautiful golden brown. When the strudel becomes suspiciously dark before the end of the baking time, cover it with baking paper or aluminium foil. It'll still bake but won't get too dark.
When the strudel is done, take it out of the oven and let it rest for 2 minutes. This helps the filling settle and allows any juice that's leaked out to be reabsorbed into the dough.
Serve the sauerkraut strudel while it's still hot.
Notes
Serve this traditional sauerkraut strudel as is or with a cream sauce and seasonal salad.
Variations
This recipe is the basic version of a traditional Bavarian sauerkraut strudel. However, there are several variations you may want to try.
Red cabbage strudel
A festive, slightly sweet variation perfect for holidays
Instead of sauerkraut, use 750 g fermented red cabbage for the filling. Leave out the bacon and add some roughly chopped cooked chestnuts instead. For a touch of fruit, either add some orange zest or add roughly chopped baked apples and a generous pinch of cinnamon.
Heartier version with vegetables
Makes the strudel more filling and hearty
Leave the filling as it is, but add 200 g of pre-cooked, peeled and roughly chopped potatoes or carrots. You can also put the carrots in raw, but finely grated.
Different meat options
Use up leftovers or add more protein.
Instead of bacon, add roughly chopped or whole raw frying sausages, ground pork or meat leftovers.
Mediterranean twist
For a Mediterranean version, leave out the caraway seeds and instead add 100 g dried tomatoes and thyme, oregano and ground paprika to taste.
Oriental version
If you prefer an oriental touch, add sesame, 1 -2 tsp of chilli powder, ground cumin and nutmeg.
Frequently Asked Questions
Can I use store-bought dough?
Absolutely. Look for strudel dough, puff pastry or phyllo leaves.
How do I store leftovers?
You can store leftovers in your kitchen at room temperature for one day or in the fridge for up to 3 days.
Can I freeze sauerkraut strudel?
Yes, you can freeze the strudel raw or baked. To defrost, put the strudel out of the freezer and let it sit at room temperature overnight. Heat it in the oven before eating.
What type of sauerkraut works best?
Homemade sauerkraut is always the best option, of course. If you want to use store-bought sauerkraut, look for a fermented, organic product.
Can I make it ahead?
Good idea! To make the strudel one day ahead, there are two options:
Fill, roll and bake the strudel, then let it cool down completely. Wrap it in cling film or put it in an airtight container and store it in the fridge overnight. Before serving, heat the sauerkraut strudel in the oven.
Fill and roll the strudel and put it on the baking tray. It’s important that the filling is not too moist. Brush the raw strudel with melted butter to prevent soaking through. Loosely cover the strudel with cling film and store it in the fridge overnight. Due to cooling, the dough becomes denser and needs some extra minutes to bake the next day.
Time To Bake Your Own Sauerkraut Strudel
Traditional Bavarian sauerkraut strudel is a wonderful winter dish that warms the belly and the soul. It grounds us with its down-to-earth, hearty flavours and transforms simple preserved cabbage into something truly special.
Whether you make the traditional version with bacon and caraway or experiment with one of the variations, this strudel is sure to become a cold-weather favourite. The crispy golden crust and tangy, savoury filling never fail to impress—and your kitchen will smell absolutely amazing while it bakes!
I’d love to hear how your sauerkraut strudel turns out! Which version did you try? Did you make the dough from scratch or use a store-bought option? Share your experience in the comments below, and don’t forget to check out my other traditional Bavarian recipes for more warming winter inspiration.
Happy baking, and enjoy every crispy, flavorful bite!
Love cooking as much as I do? You’ll like these recipes:
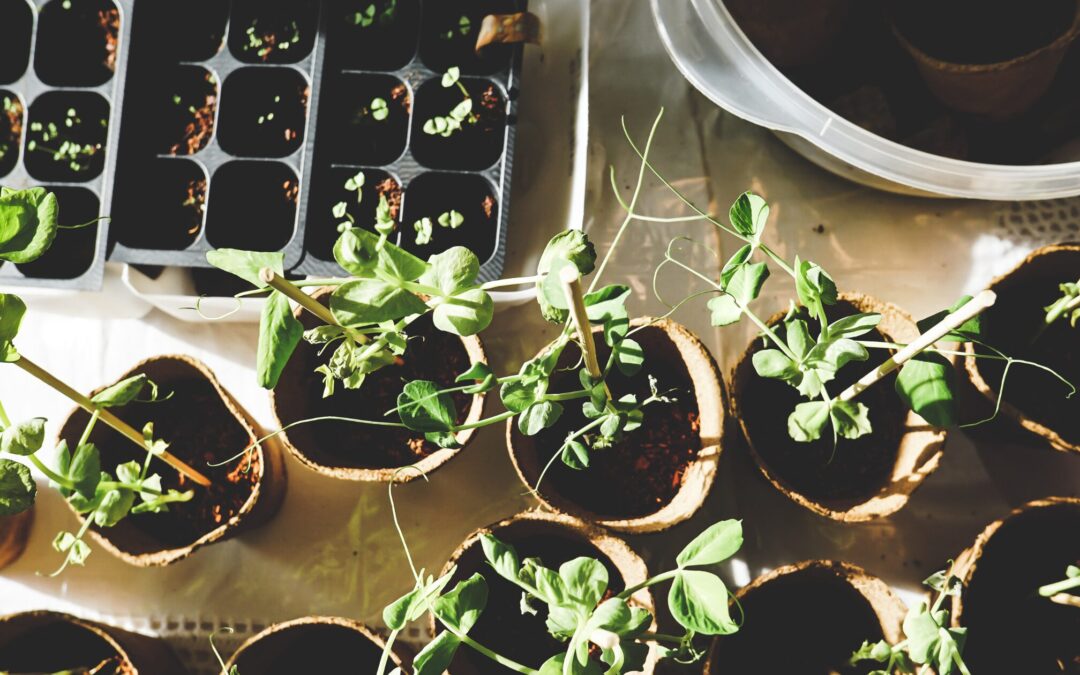
I don’t know about you but once the festive season is over and life starts again in January, my fingers itch to dig into some dirt! Although there are some outdoor garden tasks you should do in January, it’s too cold to get my fingers dirty outside. But I can always do some seed-starting in January and sow vegetables indoors! Of course, it’s way too early to seed-start tomatoes, for example, but there are some plants we can give a head-start by sowing them out in January. Let’s get growing!
Understanding Your Growing Zone and Its Impact on Seed Starting
As you probably know, there are 11 hardiness zones, each divided further into two half-zones. Hardiness zones are set worldwide and classified by the lowest temperatures reached in winter and last frost dates. If you want to know your hardiness zone, hop over to this site, insert your postal code and find out your zone.
The hardiness zone you live in determines to an extent what plants you can cultivate in your region. It also tells you when to plant and seed-start your vegetables which is largely determined by the dates of the last frost.
However, knowing your hardiness zone doesn’t take into consideration regional microclimates that mostly affect temperature and humidity. Also, soil quality contributes a lot to the microclimate. Sandy soils, for example, have a lower minimum and higher maximum temperature than loamy soils.
Apart from temperature, the last frost dates are what’s most important for us vegetable gardeners. When we know how long it takes for a plant to germinate and from sowing to harvest, we can calculate backwards and determine when to seed-start indoors.
Essential Indoor Seed Starting Equipment for January
The basic equipment consists of cultivation trays and/or small pots with transparent covers, alternatively cling film.
Then, you need cultivation soil specially for seed-starting. It contains fewer nutrients and is also good for planting herbs, which also need a few nutrients, in pots.
A small watering can or a plant sprayer helps you to water your seeds carefully without washing them out of the soil.
Plant sticks are great for noting the plants and varieties you sow and sticking them into the tray to mark your plant rows. Don’t think you can determine the plants later. Been there, done it, not successful!
A plant lamp is a true game-changer when it comes to indoor seed-starting as light intensity and light hours are usually not sufficient for healthy plant growth. When there is too little light for our seedlings, they become leggy and might even fall over as they try to reach for the light. A plant lamp can be programmed for how long it has to shine (12 – 14 hours/day) and it usually provides just the right light spectrum for plants.
Additionally, you may want to think about buying a heating mat for warmth-loving plants like peppers, tomatoes and eggplants. With a mat like that underneath the seedling trays you can ensure a consistently high temperature.
How to seed-start indoors
Seed-starting indoors is not rocket science but there are a few things to observe:
Rinse the tray or pots with hot water to eliminate bacteria and fungi.
Put the soil into the tray or pots, press it lightly and make small holes where you want the seeds. Put the seeds into the holes, cover them lightly with soil and press the soil gently. Now, water the seeds carefully with a fine-holed watering can.
Put the transparent covers onto the trays. This enhances the temperature and keeps the moisture in. Put the trays in a sunny place at the temperatures required for each plant. If you want to seed-start plants that need relatively high temperatures, like eggplants, peppers, physalis etc., you should consider using a heating mat that you can put under the trays and heat up to the appropriate temperature.
Once the plants grow, check them daily. Keep the cover off for a few minutes to enable ventilation and prevent fungi. Also, check for fungus gnats, those small black flies that come out of the soil and whose larvae eat your plants’ roots. Sometimes, we bring them into the house with the soil. Put glue traps into your propagation trays and if gnats stick to them, put nematodes, which eat gnat larvae, into water and water your plants with it. Maybe you have to repeat this procedure at a later time.
Vegetables to seed-start in January
#1 Peppers / Chillies
Peppers and chillies need some time to get started. If you sow them too late, they’ll have their fruits late, too, and you risk damaging them by cold temperatures—even if you cultivate them in your greenhouse.
Sow the seeds into a tray with cultivation soil and put it in a sunny and warm spot at 25 °C (77 °F). A bright south-facing window, a winter garden or a heatable greenhouse are good places.
#2 Physalis
Seed-start physalis in January by sowing several seeds into one pot. Put the pot in a warm and bright spot. Temperatures about 25 °C (77°F) are ideal. Physalis grow slowly at the beginning and must be kept moist. Separate the plants when they are about three weeks old and plant them in single pots. Either plant physalis out after the last night frosts or separate them again and put them into large pots that you put outside.
Physalis are perennials and can be kept indoors during winter.
#3 Winter lettuce
Seed-start winter lettuce like ‘Baqieu’ to plant it out later in a cold frame or unheated greenhouse. That way you’ll have an early lettuce harvest.
Sow the seeds into a tray with the appropriate soil and press it lightly. Lettuce only germinates in light so don’t cover the seeds with soil. Temperatures mustn’t be as high as for peppers or physalis. 16 – 18 °C (60 – 65 °F) are ideal. When the plants are large enough, separate them and set them into single pots.
#4 Sweet potatoes
Cut sweet potatoes in halves and let the cutting areas dry for a few hours. Then, put the halves with the cut end facing down into a pot or balcony box with soil. Place the pot or box in a warm and sunny place. After some time, shoots will grow out of the sweet potatoes which we’ll cut off later and put into water for building roots.
#5 Ginger / Turmeric
Ginger and turmeric build rhizomes instead of deep roots and thus are best grown in flat pots. Put a rhizome with “eyes” into a tray or pot and cover it with soil so that two-thirds of the ginger or turmeric is in the soil and one-third is still above.
#6 Eggplants
Like peppers and physalis, eggplants like it warm and thrive best at temperatures of 25 °C (77 °F). Seed-start eggplants at the end of January by sowing seeds into a tray. Later, when they are large enough transplant each plant into a single pot. Always make sure that they are in a warm and sunny place.
#7 Cabbage
Cabbage is usually harvested in autumn, but there are varieties for a summer harvest and those should be seed-started now. As usual, sow the seeds in a tray and separate them later when they’ve grown four seed leaves.
Cabbage doesn’t need high temperatures like peppers and eggplants. On the contrary, it’s perfectly content with temperatures of 16 – 18 °C (60 – 65 °F).
When we plant out these cabbage varieties after the last day frosts, we can harvest the plants already in July.
#8 Savoy cabbage
As with cabbage, there are summer varieties that should be seed-started at the end of January. Savoy cabbage germinates already at temperatures of only 3 °C (38 °F). Once they have four seed leaves, separate the young savoy cabbages and plant them into single pots. Now put them in a bright place at about 16 – 18 °C (60 – 65 °F) and plant them outdoors end of March/beginning of April.
Summer varieties of savoy cabbage can be harvested in July and August.
#9 Early cauliflower
Seed-start early cauliflower varieties in January by sowing them into trays and putting them in a place with 16 – 18 °C (60 – 65 °F). Separate them when they have grown four seed leaves and plant them into single pots. Plant them into an unheated greenhouse or a cold frame mid to end of March. If you have them in the greenhouse, you can plant tomatoes in between later. By the time they need more space, the cauliflower is already harvested.
#10 Kohlrabi
Kohlrabi can also be seed-started now for an early harvest in the cold frame or greenhouse. Indoors they need temperatures about 16 – 18 °C (60 – 65 °F) and should be separated once they’ve developed four seed leaves. Plant them out into the cold frame or greenhouse end of February/beginning of March for an early harvest.
#11 Onions
Sowing onions may be more time-consuming than planting the bulbs but it shows advantages like healthier growth, more varieties and better storage capability. And it’s cheaper. Seed-start onions in January to ensure that you can harvest them before the first frost in autumn. Put the seeds into a tray or small single pots and place them in a bright spot of about 16 – 18 °C (60 – 65 °F) or colder (not under 10 °C / 50 °F). At the end of March/beginning of April, you can plant them outdoors.
#11 Summer leek
Summer leek, that’s harvested in July / August must be seed-started in January. You can either sow the seeds in trays and separate them later or you sow them into small single pots. Plant the leek outdoors when it’s about as thick as a pencil. To protect it from night frosts, however, you should cover it then with a frost fleece.
Summary
Starting seeds in January sets you up for a productive growing season ahead. Remember to choose varieties suited to your zone and provide proper growing conditions for strong, healthy seedlings. When you observe the simple rules for seed-starting vegetables indoors (see above), you’ll give your plants a good head-start and have a great harvest later that season.
Ready to get growing? Grab your seed packets and let’s make this your best gardening year yet!
Here you’ll find further articles on seed-starting:
This guide is based on my own greenhouse, which I built and have used for four growing seasons.
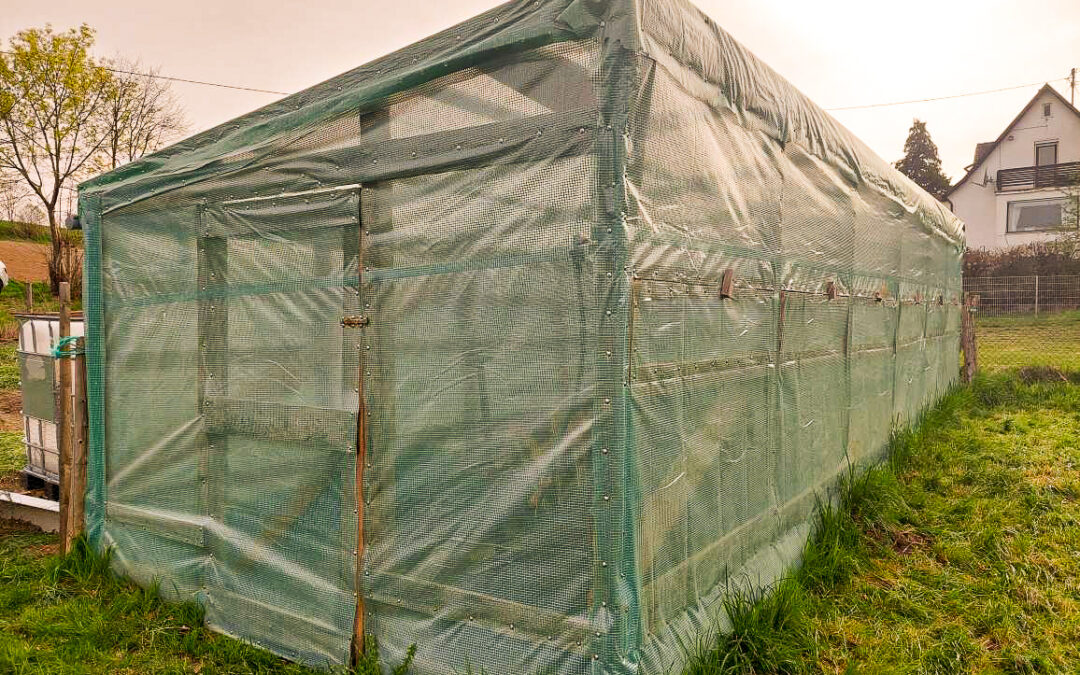
Standing in my vegetable garden on a rainy summer day, watching my tomato plants struggle under these humid conditions, I dreamed of a greenhouse—a warm sanctuary where peppers could ripen, tomatoes could climb to the ceiling, and the growing season wouldn’t end with the first frost.
What I didn’t realise was that this dream would lead me on a journey from browsing expensive catalogues to hammering in my own ground sleeves, learning how to build a DIY wooden greenhouse from scratch – something far better than anything I could have bought.
Here’s a quick summary of what building this greenhouse involved.
Quick Overview
Building a Greenhouse from Scratch
Greenhouse type:
DIY wooden greenhouse with plastic covering
Foundation:
Ground sleeves driven into soil (no concrete base)
Total cost:
~€1,300 in materials
Build time:
Several weekends, weather-dependent
Skill level:
Beginner-friendly with basic DIY skills
Best suited:
Gardeners wanting a low-cost, non-permanent greenhouse
Research
As I said, I first looked for ready-made options. There were, of course, several varieties of greenhouse kits, but a greenhouse of the size I wanted (about 10 x 3 metres) was nearly impossible to find, and when I finally found one, it was definitely not within my budget!
Another problem was that all these greenhouse kits had to be fixed onto a solid concrete base. As I do not own my garden but have rented it, I am neither allowed to plant deep-rooted bushes or trees nor set up anything permanent. Like a solid concrete base. But how to make sure that the greenhouse would be safely anchored without a base? So I googled DIY greenhouse construction without a permanent foundation.
There were, of course, greenhouse tunnels that had a frame made of curved PVC tubes that were stuck into the earth. However, as we have severe storms around here, especially during autumn, I was afraid that one of those would lift the greenhouse right out of the ground and send it flying through a neighbour’s window. So, a greenhouse tunnel with a frame of PVC tubes was certainly not an option either.
It was my dad, finally, who suggested building a greenhouse from scratch with wood and using ground sleeves as point foundations. I was sceptical at first–would simple ground sleeves really be enough to keep a greenhouse safely anchored? Four years later, I can tell you: this has worked reliably for me over four seasons!
Planning your greenhouse: What you need to build a greenhouse from scratch
But how to build a greenhouse without concrete foundations? I’m not all thumbs when it comes to handcrafting, but I haven’t had much experience either. Well, the first step is:
Drawing your greenhouse plan
By the way: Planning is an ideal task for winter, when there are only a few things to do in the garden (for more details, read on here about January garden tasks).
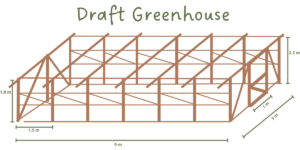
First, I drew a rough plan of the greenhouse and talked it over with my dad and an acquaintance who is an experienced carpenter. I had to adjust some things and refine the details, but in the end, I was good to go. Here is my draft. Feel free to use and adapt it if you’re planning your own greenhouse project.
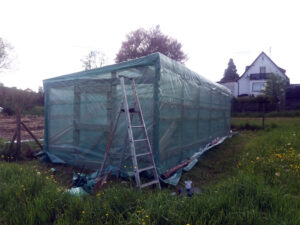
I set the greenhouse behind the vegetable garden, facing south for optimal light yield. The south side is 1,8 metres (3.3 feet) high and 9 metres (30 feet) long, and the north side has a height of 2,2 metres (6.5 feet). Those two long walls are 3 metres (10 feet) apart, so I have gained 27 square metres (300 square feet) of additional gardening space (9 x 3 metres / 30 x 10 feet).
Beginner note: You don’t need a perfectly scaled drawing or technical software. A hand-drawn sketch with measurements is enough—as long as you know where every beam and opening will go.
Advanced note: If you’re comfortable with it, sketching your plan to scale or using simple CAD software can help you pre-calculate angles and material lengths more precisely.
Choosing your location
When you’re planning a greenhouse in your garden, you’ll want to put it in direct sunlight while making sure that it doesn’t cast a shadow on already existing beds.
In my case, it was obvious that I wanted the greenhouse to go behind the vegetable garden, that is, at the north side. That way, it wouldn’t throw a shadow on the existing garden while at the same time protecting it from harsh north winds.
Before you start: What you need to know
Now that you have your design planned out, let’s talk about the practical side: what this will actually cost, how long it takes, and what you’ll need to get started.
How much will this cost? (And is it worth it?)
Before we dive into the details of building a greenhouse from scratch, let’s talk about costs. I’m sure you’re dying to know if the whole procedure is worth the trouble.
Well, the ready-made options I found online, in catalogues, and at hardware stores ranged from € 5,000 to € 23,000. Nothing I could or would remotely ever pay for a greenhouse. For that amount of money, I could buy organic vegetables for the rest of our lives. Of course, prices may vary in your region, but I doubt you’ll find something cheap.
The total cost to build this greenhouse was €1.310.
Here’s a list of everything I needed and what it cost:
Item
Details
Cost
Ground sleeves
16 sleeves, 90cm length, 7x7cm top
100 €
Wood
Beams, boards and battens, cut to size at the sawmill
500 €
Screws
Various sizes for construction
200 €
Hinges and hardware
24 window hinges, 3 door hinges, 1 door bolt
80 €
Heavy-duty tarp
Grid-reinforced greenhouse film
250 €
Gutter system
Brackets, tubes, end pieces
100 €
Water container
1000-liter capacity (secondhand)
80 €
Total
1.310 €
Ready to start planning your own greenhouse? Get my weekly gardening tips delivered to your inbox!
Join the Seasonal Simple Life Community!
Seasonal inspiration for your garden, kitchen, and home—delivered with care every week.
Depending on your region, these costs may vary as well, of course, but I’m pretty sure it’ll still be way less than a ready-made greenhouse.
For €1310 and several weekends of work, I gained 27 square metres of growing space that a comparable ready-made greenhouse would have cost at least € 5.500, plus installation—if I could even find one this size.
Beginner note: If this is your first large DIY project, expect it to take longer than planned—and that’s completely normal. Build in extra time so the process stays enjoyable.
Advanced note: With pre-cut lumber, power tools, and a second person, you could reduce the build time by several weekends.
How long does it take to build a greenhouse from scratch?
Bear in mind that I worked mostly alone and on weekends when the weather permitted. With a helper, you could cut this time significantly. The key is not to rush—take time to ensure everything is level and secure.
Description
Time frame
Planning and design
2 weeks
Gathering materials
1 week
Setting sleeves and frame
2 weekends
Installing windows and tarp
2 weekends
Finishing touches
1 weekend
Total
About 6 - 7 weekends, spread over two months
What tools do you need?
Must-have tools
Spirit level
Hammer or mallet
Electric drill with bits – you can borrow one if your site has electricity
Saw (hand saw works, electric is faster)
Measuring tape (at least 5 meters)
Folding rule
String and stakes for marking
Sharp knife
Nice-to-have tools
Screw clamps
Spade
Planer or drawknife
Beginner note: You don’t need professional-grade tools. I built most of this greenhouse with basic, borrowed equipment and hand tools.
Advanced note: Access to a table saw, impact driver, and laser level would speed things up considerably, but isn’t required.
Helpful skills
Basic measuring and levelling
Sawing in a straight line
Using a drill
Patience and problem-solving!
Don’t let this list intimidate you. I had never built anything this large before, and if I could learn as I went, so can you. The trick is just not give up.
When should you build?
I started building my greenhouse mid-March, but in hindsight, it would have been better to do it in the autumn of the preceding year.
Had I done so, I would have had more time to build the house–I got really stressed at one point, thinking that I’d never finish this project in time to really grow something in it that year.
Also, the soil I’d put into the greenhouse would have had time to settle before I put the plants in.
However, depending on your growth zone, your skills and experience with projects of this kind and if you have any help, late winter/early spring can be just fine to start building a greenhouse.
How to build a greenhouse from scratch
Step 1: Measuring and setting up a string frame
By the end of this step, you’ll have made a string frame for your DIY greenhouse.
First, I measured out the space behind the vegetable garden where I wanted to build my greenhouse and marked it with strings. I’m glad my dad helped me with that. If you (like me) have never done this before: don’t worry. Here’s a step-by-step guide on how to set up a string frame:
Marking your first corner
When you have decided where to put your greenhouse, you hammer a wooden (or metal) stake into the ground to mark a corner of your future greenhouse. Ensure the stake extends at least 20 cm (8 inches) above the ground for string attachment.
Creating the rectangle
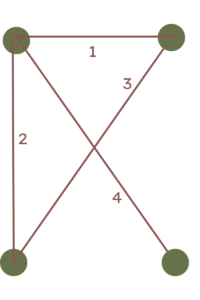
Next, you measure out the small side (in my case, 3 metres / 10 feet) and hammer in a second stake. Connect these two stakes with a string. You then measure out the long side from one of the two stakes (here: 9 metres / 30 feet) and hammer in a third stake. Again, connect this stake with the first one.
Ensuring perfect squares with the diagonal method
Beginner note: If this step feels confusing, take your time. Getting the base square makes everything else easier later—and fixing mistakes now is far simpler than correcting them later.
Advanced note: If your site isn’t perfectly flat, you can still square the frame—just focus on accurate horizontal measurements rather than ground level at this stage.
Now comes the coolest part: measure the diagonal length from the second to the third stake and make a note of the length. If, like in my case, you want to build a large greenhouse, you can do that with the help of a string that you attach to the second stake and pull it to the third one. Otherwise, you just use a folding rule. Mark the spot on the string where it touches the stake and measure it. Now you measure from the first stake to a (at that point imaginary) fourth stake until you have the same diagonal length as measured before between stakes two and three. Hammer in the stake and connect the last side with the string.
Step 2: Setting up the frame
By the end of this step, you’ll have
set the ground sleeves
pillar beams securely bolted
a stable base frame including windows and a door
Setting the ground sleeves
Beginner note: Ground sleeves are very forgiving. Small inaccuracies can be compensated for later when you attach the beams—don’t aim for perfection, aim for consistency.
Advanced note: In very loose or sandy soil, you may want to set sleeves slightly deeper or compact the soil around them with gravel for extra stability.
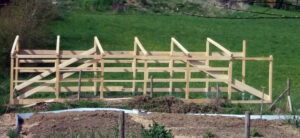
With the string frame in place, I started to hammer in the ground sleeves for greenhouse foundation, one on each corner and then one every 1,5 metres (3.5 feet) at the long sides. I used sleeves with a length of 90 cm (3 feet) and a 7×7 cm (2.75 x 2.75 inch) base on the top.
At the front of my future greenhouse, i.e. the short side facing east, I additionally added two sleeves where the doorframe would be. All in all, I used 16 ground sleeves (7 on each long side and two for the door frame).
All sleeves must be at exactly the same height. To ensure that, I used a plank, put it across two sleeves and measured with a spirit level. Since the area I built my greenhouse on isn’t level, I had to compensate. Some sleeves needed to be hammered deeper into the earth, while others stood higher—all carefully adjusted so the tops were perfectly level with each other.
I had to decide what my reference point for height was. Naturally, I took the deepest point in my greenhouse area where I let the sleeve stand out 20 cm (8 inches) above ground. The other sleeves were adjusted accordingly. That meant that while the reference sleeves stood out 20 cm (8 inches), some had to go 10 cm (4 inches) into the ground. There, I shovelled away the earth and hammered the sleeve into the right height. After every sleeve, check that it is level with the others.
Erecting the wooden beams
Beginner note: If planing beams by eye feels intimidating, remove small amounts of wood at a time and test the fit often—you can always take more off, but you can’t put it back.
Advanced note: A thickness planer or belt sander makes this step faster and ensures consistent beam dimensions.
At my dad’s workshop, I sawed 8×8 cm (3×3 inches) wooden beams to the right length, which I determined with good old Pythagoras. I added an extra 15 cm (6 inches), though, as I wanted the beams to protrude over the south edge.
This was necessary, as I intended to fix a gutter on this side. In the end, I had 7 beams with 1,8 metres / 6 feet (south side) and 7 with 2,2 metres / 7 feet (north side), all with an angle of 13 ° at the upper side. The two beams for the doorframe were adjusted later.
To fit the wooden beams into the sleeves, I had to plane 0.5 cm / 0.2 inches on each side of the lower 10 cm (4 inches) of the beams. Since my 8×8 cm (3×3 inches) beams were slightly larger than the 7×7 cm (2.5 x 2.5 inches) sleeves, I planed them by eye until they fit snugly.
After fitting the beams into the sleeves, I drilled holes into them through the pre-made holes in the sleeves and stuck 8 cm (3 inches) carriage bolts into them. Lastly, I screwed them tightly into the sleeves using the carriage bolts and nuts.
Constructing the wooden greenhouse frame
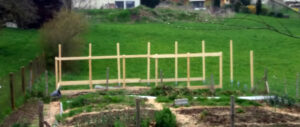
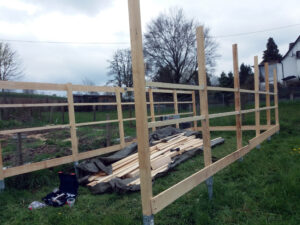
Once the pillars were set, I started to build the wooden greenhouse framework for which I used boards that were 2,5 cm (1 inch) thick, about 20 cm (8 inches) broad and 4 – 5 metres (12 – 15 feet) long. I fixed the first board with a screw clamp across the bottom of the front corner pillar, starting at the south side.
Then I marked where it hit the last pillar it could reach (in this case, the third), took it off and sawed along the mark. My garden plot has no electricity connection, so everything had to be done by hand—a workout I hadn’t quite anticipated when I started this project!
After fixing it again with two screw clamps, I screwed the board to the pillars. In that way, I did all the bottom boards around the greenhouse and afterwards started screwing boards to the upper side of the pillars. I just had to remember that no bottom board was needed where the door should be built.
Adding windows
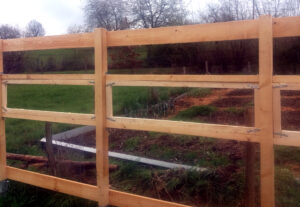
Next, I installed the frames for the windows that I wanted to build into the sections on the south and north sides. For this purpose, I took wooden battens (5 cm x 2,5 cm / 2 x 1 inches), measured the distance between two beams, sawed them to the measured length and screwed them in between the beams. For each window, I needed an upper and a bottom batten to complete the frame.
Window frames
Beginner note: Slight variations in window size are perfectly fine. What matters is that each window fits its own opening, not that all windows are identical.
Advanced note: If you want tighter seals, you can add weatherstripping or overlap battens once the tarp is installed.
Now the windows had to be built. This was the same as building the window frames, but with additional sidebars. I measured out every section and sawed the battens according to measurement. I’m no carpenter, so the measurements varied a bit from section to section, so it made more sense to measure each section individually and saw the battens accordingly.
When the windows were ready, I fixed them into the frames with hinges at the lower part, two on each window, making sure that they opened to the outside of the greenhouse. I can’t tell you the delight I felt when I opened my first (empty) window, and it worked! In the end, I had 12 windows, six on the south and six on the north side, and it was time to tackle the ceiling.
My first completed window frame—empty, but perfect!
Tip: Always double-check that the windows open outward fully to allow ventilation.
Ceiling beams
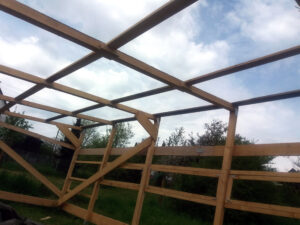
Next, I laid beams of 3,15 m (10.3 feet) across the upright beams in a north-south direction so that they ended at the north side at the edge of the pillars and overhung on the south side by approximately 10 cm (4 inches). I screwed the ceiling beams onto the pillars and additionally fastened them with metal angles.
All, except the last one on the front. I only laid this beam onto the pillars, inserted the remaining two beams into the sleeves where the doorframe would be, and marked the height at which I had to saw so they would fit. I didn’t want to take the risk of calculating the height (I was never good at maths), so that seemed the best and easiest way to do it.
As the framework needed stability, I screwed boards diagonally across the backside and the fields left and right of the door frame. I also installed diagonal boards from each pillar beam to the adjacent ceiling beam. That done, stability had improved A LOT!
Beginner note: Diagonal bracing may not look pretty, but it’s one of the most important elements for long-term stability—especially in windy regions.
Advanced note: Metal cross-bracing or tension cables can be used instead of wooden braces for a cleaner look.
Reinforcing the ceiling
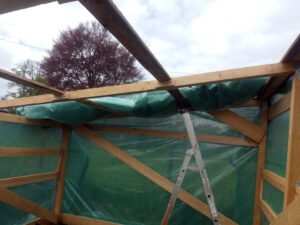
The wooden beams on top are adjusted in a north-south direction. To make sure the tarp wouldn’t hang loosely and form sags when it was raining, I inserted boards between the beams’ sections. I started with the highest, i.e. the north side and screwed the boards on with angles so that they levelled with the top of the beams.
I did three boards per section, one on the north side, one in the middle and one on the south side, ending with the beams’ edges.
Building the door
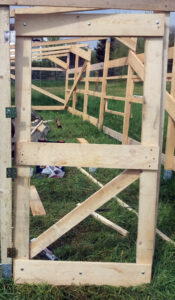
Now, I had to build the door: I made a frame out of boards and stabilised it with a horizontal board in the middle and diagonal boards on the upper and lower sections. I then fixed it to the left pillar with hinges that were larger and thus more stable than the window hinges.
When that door swung smoothly on its hinges for the first time, I may have done a little victory dance. (Okay, definitely did a victory dance.)
Step 3: Covering
At the end of this step, you’ll have
covered all sides of the greenhouse with tarp
closed the ceiling
secured the tarp in the soil
cut open all windows and the door
Research on greenhouse covering
The last step now was to cover the whole DIY greenhouse frame with greenhouse film. I had done a lot of research in advance, comparing different possibilities like plastic twin-wall sheets, plexiglass, real glass and different greenhouse films.
The twin-wall sheets and plexiglass I dismissed pretty soon, as they would have been too expensive. The same went for real glass, which had the additional disadvantage of heating the greenhouse too much, so that shading would have been necessary–which would have cost even more.
Film it was then. Here, too, there are multiple possibilities. In the end, I opted for this heavy-duty tarp, which, due to its grid, is very stable and also thick enough to last several years (the manufacturer guarantees 3 – 5 years, but I think it may last a good deal longer. Time will show.) Update (2025): After three years, the ceiling tarp developed holes in it, forcing me to replace it.
Covering the greenhouse sides
Beginner note: This step is much easier with two people. If you’re working alone, clamps are your best friend—use more than you think you’ll need.
Advanced note: For long-term durability, sandwich the tarp between wooden battens and the frame rather than relying on screws alone.
Adjusting the heavy-duty tarp was the hardest part of this whole project, as it lives up to its name and is very heavy. However, with the help of several clamps (and after a bit of swearing and sweating), the first edge was tightly screwed to the corner beam of the east side using plumbing screws.
How to fix the tarp
Plumbing screws are metal screws with a rubber seal washer. That means that they have a larger contact area than without the washer, making sure that the film doesn’t tear out.
Update (2025): Despite the plumbing screws, the tarp was partly torn out when I replaced it after three years. This time, I fixed the tarp with boards on the framework.
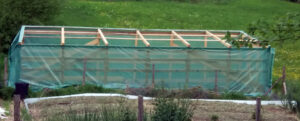
Now, I pulled it to the next pillar and screwed it on, making sure that it was tightly stretched. Additionally, I fixed screws along the upper and lower boards and around the window frames, clinging them firmly to the wood. I started at the back wall and worked my way around the entire house. I made sure that the film levelled up at the upper side of the greenhouse and overlapped at the lower side.
Opening up the door
To enter the greenhouse, I used a sharp knife to cut a slit between the door and the doorframe. Next, I screwed a door latch onto the door and its counterpart onto the frame—and just like that, I could open it! It was a great moment entering “my house” for the first time!
Covering the greenhouse ceiling
Beginner note: Wind stress adds up over time. Even if the tarp looks secure at first, reinforcing it now can save you from repairs later.
Advanced note: UV-resistant greenhouse film with reinforced edges lasts significantly longer than generic tarps, especially on roofs.
To get the ceiling covered, I first unfolded the tarp to its full size and then rolled it lengthwise. I then lifted it onto the ceiling and started to screw it onto the east beam. (Honestly, I don’t remember how I got that heavy foil onto the ceiling all by myself, but I’m pretty sure that some swearing was involved.)
I then unrolled the film inch by inch, using a lot of plumbing screws to screw it onto the beams and boards. I took a screw every 10 – 15 cm, in short: a lot! But I was (and still am a bit) scared that the wind would rip off the film and tear the whole greenhouse apart, and so I decided that in this case, more is more.
Update (2025): It turned out that my fears were justified– the tarp had ripped off the boards when I replaced it after three years. To prevent that, I additionally fixed the tarp with boards on the wooden framework.
Opening up the windows and digging in the tarp
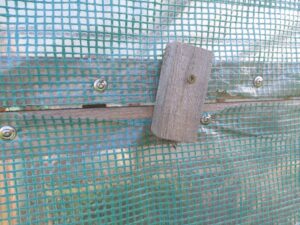
The whole house was covered now, and I opened the windows by cutting around between their edges and the frame with a knife, just like before when I opened the door. To keep the windows from falling open, I took some wooden scraps, leftover pieces from the battens I’d sawed earlier, and hammered them not too tightly onto the upper frame so that I could turn them and use them as a latch.
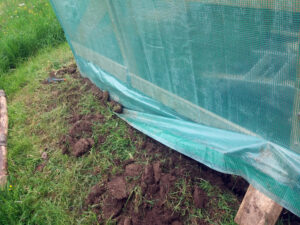
The last step on this building journey was to dig the overlapping tarp into the soil. I used a spade to dig slits into the earth, stretched the tarp and burrowed it tightly by firmly pressing the soil with my feet.
Step 4: Final touches
Fixing the gutter
As a last step, I fixed a gutter to the south side of the greenhouse to collect the rainwater from the roof. I had bought several gutter brackets that I screwed onto the upper boards of the greenhouse frame, one bracket per metre.
As you need a slight slope to one side to which the rainwater will be flowing, I fixed the brackets in a descending line from west to east. That means I started with the first bracket on the west side, screwed it almost at the top of the board and gradually lowered the brackets so that the last on the east side was about 10 cm lower.
Then I stuck the gutter tubes together and inserted them into the brackets. I closed both gutter sides with end pieces. About one metre from the east side, I inserted a tube into the gutter that leads the water downward into a 1000-litre water container that I bought from eBay. Finally, with the gutter in place, I could collect rainwater efficiently—an eco-friendly bonus!
Prepare for planting
Beginner note: Letting the soil settle for a few weeks before planting improves water retention and root stability.
Advanced note: Installing drip irrigation or soaker hoses before planting is much easier than retrofitting later.
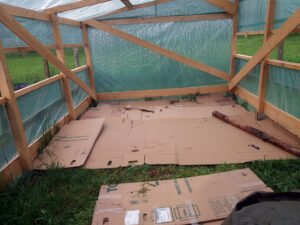
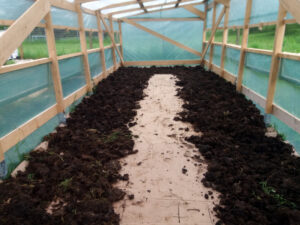
With the greenhouse complete, it was time to prepare the beds. For this, I used the same method as with my garden: I laid out cartons, put some leftover manure I still had from the previous year and ordered some good humus. To determine how much soil you need, measure your planting area (excluding paths) and multiply by 0.15 m (0.5 feet) to raise your beds 15 cm (6 inches) high.
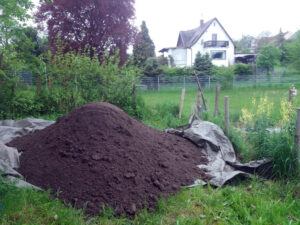
This is the soil for my greenhouse—it took me two hours to distribute it all!
This shows the massive pile I had to move.
Laying out cardboard for bed preparation
Distributing the manure evenly
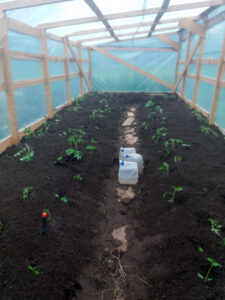
Ready for planting!
Finally, I was ready to plant my tomato, pepper and cucumber plants in the greenhouse, which had grown very large already!
What I’d do differently next time
Beginner & Advanced takeaway: If you only take one thing from this section, let it be this: start earlier than you think, secure the tarp better than you think necessary, and don’t hesitate to ask for help.
Start earlier
Well, to be honest, I totally underestimated the time it took for me, an inexperienced non-craftswoman, to build a greenhouse of that size. Naturally, I sometimes had to reflect on how to proceed and all in all, I wasn’t very quick.
Additionally, you’re dependent on the weather. Heavy rains will stop your work on a project like that. That said, if I were to build a greenhouse again, I’d start earlier in the season. It was ready for planting by the end of May, and that was a bit too late for all my warmth-loving plants like tomatoes, cucumbers and peppers.
Use boards to secure the tarp.
Next, I’d fix the tarp on top with wood boards. That means, I’d first roll the tarp across the ceiling, place boards on top of it where the beams are and secure it all in place with screws. That way, the tarp couldn’t get torn out when the wind gusted in and lifted it.
Invest in better materials.
Also, four years in now, I’d definitely invest in a more weather-resistant tarp. The one I bought initially guaranteed weather-resistance for 3 – 5 years, and last year (after three years), I had to exchange the ceiling tarp. This may also have to do with the insufficient fixing to the beams just with screws, but it had also become brittle when I took it off. A better tarp is more expensive, of course, but it’ll be worth it in the long run.
Reconsider measurements
For a greenhouse of this width, I learned that three instead of just two beds is better. They’re narrower, giving you better access to all plants.
Plan the door width more carefully—mine could be 20 cm wider for easier wheelbarrow access through the growing season.
Ask for help
Get help. I’m not good at asking for it, and I always want to know if I can do things on my own, but honestly, it wouldn’t have taken that long if I had asked the boys to help. I only admit this to you. Hope none of my family will ever read this section… (Don’t tell them I said so!)
Resume
Four years later, my low-cost greenhouse alternative has weathered autumn storms that would have demolished those flimsy PVC tunnels I first considered. Inside, tomatoes climb past my head, peppers ripen in abundance, and I’ve extended my growing season by months. Every time I step inside—even just to check on seedlings on a February morning—I feel proud. Not because it’s perfect (it’s definitely not!), but because I built it with my own hands.
If you’re dreaming of your own greenhouse, I hope this guide shows you that building a greenhouse from scratch is possible. You don’t need to be a carpenter or engineer. You just need patience (a lot!), basic tools (some), and the willingness to learn as you go (absolutely!).
Start with that string frame, take it one step at a time, and before you know it, you’ll be harvesting tomatoes in your very own DIY greenhouse.
Happy building—and even happier gardening!
Want to know more about gardening? These posts are for you:
Shortly before one Christmas, I sent one of my boys down into the basement, where we store our preserves, and asked him to get a jar of sweet-and-sour pumpkin. It took him a while – men rarely find something on the first go. When he finally made it up again our three flights of stairs, he proudly presented me with a jar of something brown and sluggish in it. Hadn’t it borne a label with “sweet-sour pumpkin” on it, I would never have guessed the content. With a lot of guesswork, we figured out that it must have been from the year before we moved apartments, which was six entire years ago. My son had taken a jar from the very back of the shelf, showing me painfully why I needed to do a pantry audit at least once a year and that a clever rotation system prevents food from being spoiled.
Why a Pantry Audit Matters
Forgetting about food we already have doesn’t just cost money—it costs a lot of money. We buy duplicates of items already in our pantry while perfectly good food spoils at the back of the shelf.
This is not only a financial disaster, but it also has a significant impact on the environment: according to the Food and Agriculture Organisation of the United Nations (FAO), people in Germany discard 18 million tonnes of food per year. That’s roughly one-third of our total food consumption of 54.5 million tonnes. To put this in perspective: we throw out 313 kilograms of good food every second!
In terms of agricultural land, 2.6 million hectares of land are cultivated in vain each year, not to mention the greenhouse gas emissions.
A well-audited pantry, on the other hand, saves money and helps the environment while benefiting our health through fresher ingredients. While many foods remain safe past their ‘best by’ dates, fresher ingredients naturally offer better nutrition and flavour.
This doesn’t only apply to store-bought stock, but also to our lovingly made preserves. It’s heartbreaking when all the time and care we put into growing, harvesting and preserving our food simply goes to waste, just because we didn’t know what was sitting forgotten in our pantry.
When to Conduct a Pantry Audit
Optimally, we should conduct a pantry audit once every three months – or so “they” say (whoever “they” are).
I’ve found twice a year works perfectly for my household: once in May before harvest season begins—when I’m using up last year’s preserves to make room for the new season’s bounty—and again in early January after the holiday cooking frenzy.
A clear sign that it’s high time for a pantry audit is when you can’t find things you know you bought, discover duplicate items hiding in the back, or notice expired products.
The key is choosing a schedule that works for YOUR household and sticking to it. Whether it’s quarterly, twice yearly, or seasonally, having set dates means you’ll actually do it rather than putting it off indefinitely.
Preparing for Your Pantry Audit
Before we dive deep into the realm of our pantry, let’s gather a few things:
What you’ll need
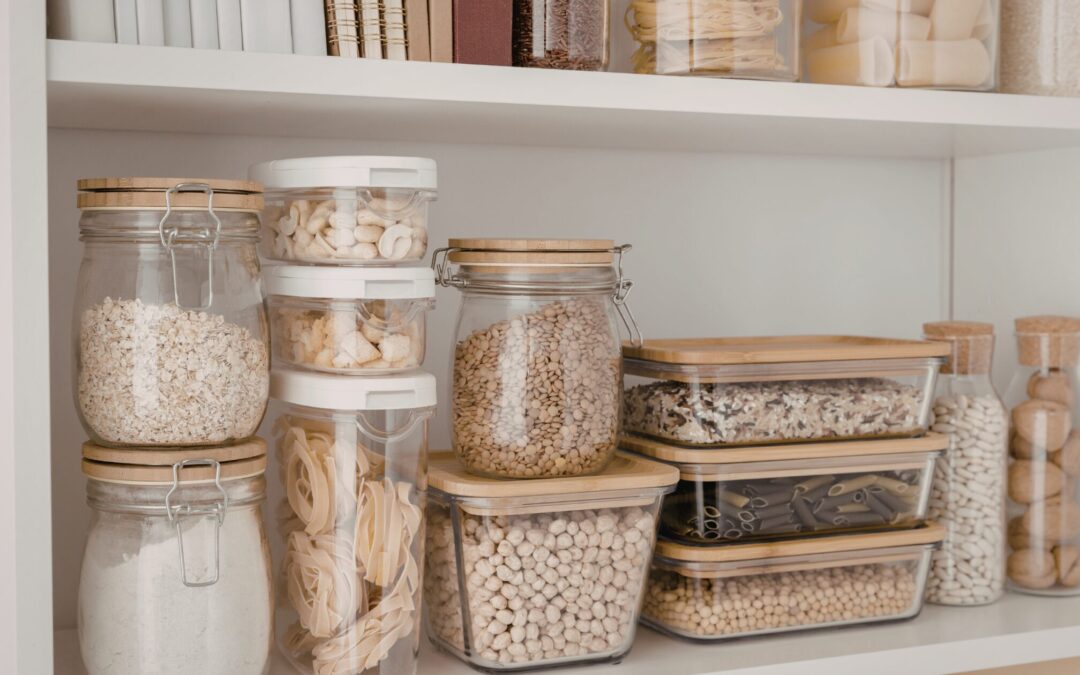
Containers of different sizes for storage If you have some already, great. If not, don’t buy them yet—wait until after your audit to see what you actually need! If you do need to buy containers, choose transparent ones with lids so you can see what’s inside at a glance. Also, look if you have some empty large jars with lids left. They are great for storing rice, grains or pasta in them. And when you don’t need them for storage, they can be used for canning.
Labels and markers These are essential for homemade preserves and freezer stock. Nothing more annoying than when the bag of “frozen red peppers” is actually rosehips you chopped for making jam! Yep, talking of experience here.
Inventory tracking tools A notebook works brilliantly for tracking what’s in your pantry. You could dedicate one page per shelf, or create a spreadsheet listing items and quantities. Whenever you use something, add it to your shopping list. There are also inventory apps available, though I haven’t tried them myself.
Cleaning supplies Since we’ll be emptying the shelves anyway, this is the perfect opportunity to clean them properly. Get your all-purpose cleaner and several cleaning rags ready.
Setting Up
Clear some workspace where you can temporarily place items as you empty the pantry. This can be a table, or the kitchen counter, or even the top of your freezer. Keep your containers and supplies within reach.
Now take a deep breath – let’s get started.
Step-by-Step Pantry Audit Process
Step 1: Empty Everything Out
Take everything off the shelves and place items on your workspace. If your pantry is large or your workspace is limited, work in sections—empty one category at a time (for example, all the pasta), then clear one shelf to make room as you continue.
Thoroughly check for any pests or moisture issues and vacuum the entire pantry, especially the corners.
Step 3: Check Expiration Dates
Now, check all your inventory and sort the items per group by expiration date.
Understanding date labels:
‘Best by’ or ‘Best before’: Quality dates, not safety dates. Food is typically still safe to eat after this date, though quality may decline. Use your judgment—if it looks, smells, and tastes fine, it’s usually okay.
‘Use by’: Found on perishable items. Take these more seriously, especially for dairy, meat, or refrigerated goods.
Canned goods: Often safe well beyond printed dates if the can is undamaged (no rust, dents, or bulging).
Food slightly past its ‘best by’ date is usually still fine—use your judgment based on how it looks, smells, and tastes. Items past their ‘use by’ date should be discarded for safety, especially perishables.
If your items have an expired “use by” date, however, they’ll not be safe for consumption any longer, and you should discard them.
When in doubt, trust your senses. If something smells off, looks mouldy, or has changed texture significantly, discard it.
For homemade preserves, always label jars with the preparation date (for example, ‘Tomato Sauce – September 2025’). This helps you track age and avoid surprises like my six-year-old pumpkin incident!
Step 4: Categorise Your Items
When you have all the items on your workspace, group them by category: grains, pasta, canned goods, baking supplies, spices, oils, condiments, snacks and home-preserved items.
This is also a good time to check for duplicates—do you really need four half-empty bags of flour?
Step 5: Take Inventory
It’s time to create your master list. Note down all the items you have and their quantities. That way, you can simultaneously identify gaps (items to add to your shopping list) and surpluses (ingredients you should prioritise using in upcoming meals).
I keep this list on the back of my pantry door, together with a pen on a string, so that I can adjust the quantity of items whenever I take something out.
Step 6: Reorganise Strategically
If your current pantry layout works well, keep it! But if you’re constantly searching for items or things feel chaotic, now’s the time to redesign.
Strategic placement principles
Heavy items low: Flour, canned goods, bottled items
Eye level = prime real estate: Items you use daily (in our pantry, that’s pasta, rice, and everyday spices)
Top shelves: Duplicates, rarely used items, or bulk backstock
Transfer bulk items like flour, rice, sugar, and oats into clear, airtight containers. Label EVERYTHING—and I mean everything with its content! I cannot stress this enough! You think you’ll remember what’s what, but trust me, in three months you won’t be able to tell your all-purpose flour from your bread flour. Also, add the expiration date (if not visible), and if there is none indicated on the package, note down the date you bought it.
Create designated zones for each category and consider labelling the shelves themselves if it helps your household stay organised. If you share your kitchen with others, clear labels on shelves help everyone maintain the system.
Now put all your items, organised by category, back onto the shelves. Place the oldest items at the front and the newer ones at the back.
Understanding the FIFO Rotation System
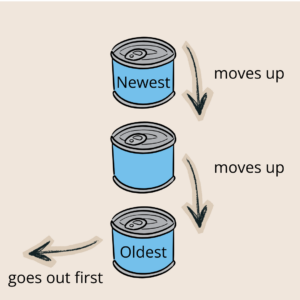
Have you ever heard of FIFO? It stands for First In, First Out—a simple principle where you use the oldest items in your pantry before the newer ones. Simple as it is, FIFO is incredibly powerful for preventing food spoilage and waste, saving you money while ensuring you’re always eating the freshest ingredients possible.
The key is visual placement: older items at the front of the shelf, newer items behind them. When you reach for something, you’ll automatically grab the oldest item first—it’s that simple.
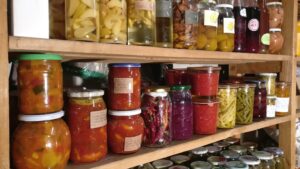
In the case of homemade preserves, the labelling system I mentioned earlier is invaluable, so you can see at a glance how old a jar is: Apart from the content, add the date of making, for example: “Sauerkraut – September 2025”. These jars are placed behind the jars of Sauerkraut that were made the previous year. (Though let’s be honest: I know that your homemade sourkraut tastes so good, there won’t be any year-old jars anyway!)
Upholding the system
Before each shopping trip, scan your pantry shelves. With the FIFO system, you can quickly see what’s running low or needs restocking – no more buying duplicates of items hiding in the back.
When you return from shopping, resist the temptation to stuff items wherever they fit. Instead, take an extra two minutes to place new items behind older ones in their designated categories. This small habit keeps your FIFO system running smoothly with minimal effort.
What to do if your pantry is tiny
In our last apartment, the pantry was incredibly small. So small, in fact, that we could only install 20 cm-deep shelves (8 inches), which made it impossible to stack our items front-to-back. What I did instead was mark the latest purchases with Post-it stickers. That way, I knew what food to use first, although the items were stacked side by side.
Common FIFO mistakes
Simple as it may seem, FIFO can present some pitfalls. Knowing them beforehand will help you to avoid them in the first place:
Skipping the labels
Once you transfer items into storage containers, it’s tempting to think you’ll remember what’s inside. You won’t. Always label containers with both the contents AND the best-by date. Your future self will thank you when you’re not playing guessing games at dinner time.
Inconsistent rotation
It’s easy to tell yourself you’ll organise purchases “later” when you’re tired from shopping. But later rarely comes, and skipping rotation even once creates chaos. The good news? It typically takes just 2-3 minutes to put new items in their proper spots behind older ones. Make it part of your grocery unloading routine—like putting away the milk—rather than a separate task you’ll do “eventually”.
Ignoring what’s up front
FIFO only works if you actually USE the items you’ve rotated to the front. Make it a habit to scan front-row items when meal planning—these are your ‘use soon’ ingredients. If something’s been sitting up front for weeks, either plan a meal around it or accept it might not be something your family enjoys (and don’t buy it again).
Buying more than you need
Even with perfect rotation, FIFO can’t help if you’re constantly overbuying. Before adding items to your cart, check your pantry first. Just because pasta is on sale doesn’t mean you need five boxes when you already have three at home. Buy what you’ll realistically use before it expires.
Making FIFO a lasting habit
Get the whole household on board
Every member of your household should not only be acquainted with the rules of FIFO but also be dedicated to maintaining it. Even small children understand the simple principle behind the system and can be encouraged to help maintain it. Ideally, every household member takes out the front item of what they want and notes on the grocery list what they’ve taken.
Make it a game for younger children—who can find the item with the earliest date? Reward consistent participation with a special treat. For teens, explain the financial benefits: every item that doesn’t go to waste is money saved for things they care about.
Audit regularly
FIFO isn’t a set-it-and-forget-it system—it needs regular attention to stay effective. The good news? A quick weekly scan of your pantry takes just 5-10 minutes. Pull older items forward, check for anything approaching its expiration date, and note what needs restocking.
This weekly check naturally becomes your grocery planning session: you’ll see exactly what’s running low and what ingredients you need to use up soon.
Connect FIFO to meal planning
The most effective way to maintain your rotation system is to tie it directly to meal planning. Each week when planning your meals, deliberately choose recipes that use ingredients sitting at the front of your pantry. This ensures nothing gets forgotten and naturally keeps your rotation moving.
Adapt to changes
Your pantry isn’t static—it evolves with your family’s tastes, dietary needs, and cooking habits. When you discover new recipes requiring unfamiliar ingredients, don’t just squeeze them in anywhere. Take a moment to decide: Is this a one-time purchase or a new staple? One-time ingredients can go in a designated ‘speciality items’ section, while new staples deserve their own spot in your regular rotation.
The same principle applies to seasonal products and bulk purchases. If you buy 10 kilos of potatoes in autumn, designate a specific storage area and rotate through them systematically. During preserving season, adjust your pantry layout to accommodate the influx of homemade jams, pickles, and sauces—then reorganise again in spring when those shelves empty out.
Time to take action
A well-organised pantry with a solid rotation system isn’t about perfection—it’s about progress. Whether you’re managing a tiny cupboard with Post-it notes or a spacious walk-in pantry with labelled zones, the goal remains the same: use what you have, waste less, and always know what’s hiding on your shelves.
Start small if the whole process feels overwhelming. Maybe this month you just tackle the canned goods, or focus solely on labelling your homemade preserves. Next month, you can expand to another category. The beauty of FIFO is that even partial implementation helps—every item you rotate to the front is one less jar destined to languish for six years like my unfortunate pumpkin.
Remember, your pantry should work for YOU, not the other way around. Adapt these strategies to fit your space, your family, and your lifestyle. Check in regularly, adjust as needed, and be patient with yourself as you build new habits.
Now go take a look at your pantry. What’s lurking in the back? What treasures have you forgotten about? Your pantry audit awaits—and I promise, it’s not as daunting as it seems. Your future self (and your wallet, and the planet) will thank you. Don’t forget to grab your free Pantry Inventory Template here to track everything easily!
Wanna learn more about preserving? These posts are for you:
These January reflections are part of a monthly practice of noticing what each season asks of us.
When I look outside my bedroom window on a typical January morning, I can see the nearby woods, sometimes covered in tiny snow hats. At least, that’s the case this January (so far) as snow has become increasingly rare around here in the alpine upland. A hundred kilometres to the south, snow is a certainty, but not here. That’s why I’m so happy that this year we are covered in white.
View from my bedroom window in January.
Temperatures hover steadily below 0 °C (32 °F), and a slight wind blows from the west. Going outside is a marvel – if you’re appropriately accessorised with a thick scarf, a woolly hat and mittens. The air smells crisp and clean with a hint of wood smoke. On my strolls through the snow-covered woods, there’s almost no sound. Everything seems muffled by the white blanket that buries all the plants, or at least considerably changes their appearance.
The sun rises late this time of the year, and sometimes we don’t see it at all (despite it being day) due to thick fog. On days like these, I light as many candles as I can to make our home cosy and light, despite the dullness outside. When the sun does come out, however, its light is reflected by zillions of snowflakes, making it almost blinding.
When I was a child, life had slowed down on our farm. Dad went to the woods to fell trees if necessary, but on the farm itself, beyond caring for the animals, we mainly did maintenance work. We organised the workshop and kept the machines and tools well-tended.
I love the slow pace of January.
Only a few things need, can and should be done. While others crowd gyms and plan overhauls, I prefer to hibernate as much as I possibly can. This resistance to January’s forced productivity isn’t just personal preference—it runs contrary to how humans historically understood the year.
I learned that it was Julius Caesar who determined the first of January as the start of the year, choosing the date because it was when the new consuls started their work. Later, Pope Gregory XIII reformed the Julian calendar but kept January 1 as the year’s start.
This was largely a political decision rather than a seasonal one. Before that, many cultures started the New Year at the spring equinox on March 20/21.
This makes so much more sense to me!
Nature starts reviving again, so it’s a lot more plausible to “start” anew then, instead of in the deepest winter. No wonder January can feel misaligned with our energy!
While the world rushes with resolutions, nature rests – and we should do the same. Instead of getting myself stressed out, I’d rather sit on my couch with hot cocoa, browsing through seed catalogues, or journaling by the Christmas tree (which we’ll keep until the end of January). No hectic for me, thank you very much. This is my January: dreaming, planning, organising – a quiet preparation for spring.
The Garden’s Deep Sleep
When I stroll through my garden in January, everything is dormant. It’s like watching a child sleeping peacefully, deep in dreams, undisturbed. Snow covers the garden, tucking the earth into winter’s rest.
The branches of the nearby trees and shrubs are bare, showing their form and unique structure clearly against the deep blue January sky. The beds in the vegetable garden are almost empty; only a few hardy leeks brave the cold.
At first glance, it might seem bleak, yet a garden in winter is incredibly beautiful in its bareness.
The necessity of dormancy
This dormancy is necessary for our garden to regain its strength for the upcoming growing season. Just like the child I mentioned earlier, our garden needs its rest after a long year.
Nevertheless, there’s work underneath that we can’t see: the roots of trees, shrubs, and perennials strengthen and store as much energy as possible, invisibly preparing for spring.
The garden as teacher
The garden quietly teaches us something important here: rest isn’t laziness; it’s necessary preparation. Just like nature – and we are part of nature – we live in cycles. There’s a time to work and a time to rest, daily and yearly. Trusting these cycles makes us stronger and more productive in the long run–not despite the rest, but because of it.
The garden asks very little of me right now.
There’s little to do in the garden right now. I clean my tools and repair them as needed. I also sketch out a planting plan for the vegetable garden, dream of new patches and order new seeds – remember the seed catalogues I mentioned earlier.
If you dream of adding a greenhouse, now is the perfect time to research and plan. When I built my greenhouse from scratch, I started planning it in January.
Let’s be honest: January is the darkest month of the year. Indeed, the days get longer again after the winter solstice at the end of December, yet the festive glamour of Christmas is over, and it can all look very bleak. Whenever I catch myself sinking into melancholy, I tell myself that January is meant to be dark and quiet. It’s nature’s permission to hibernate, and I try working with it instead of fighting it.
Winter Self-Care Practices
For body…
Just because it’s cold doesn’t mean we shouldn’t go outside. On the contrary, a walk in the snow gets us enough fresh air and movement to keep us fit and healthy during the cold months. And it’s mesmerising to see how our surroundings look so different when they’re covered in snow. No gym session offers quite the same nourishment.
After the walk, a long, hot bath, ideally with dried herbs from summer, is perfect. The hot water envelops us like a soft embrace and warms us up after our time in the cold.
It’s a small ritual, but it makes a difference.
To nourish my body, I love eating warm food, often made from root vegetables, but also meat with delicious gravy. These rouladen with Spaetzle, for example, are one of my favourite dishes in winter.
I’ve found out that in January, I often need more sleep than in any other month, and I’ve learned to give myself permission to go to bed early and get that extra sleep if I need it.
That, too, feels like winter care.
…Mind…
One of my favourite things in January is reading all the books that I saved for winter. Right now, for example, I’m reading a biography about Franz Schubert, which I’ve had for almost a year now. I couldn’t muster the energy for it during the busy growing season, but now is the perfect time to indulge in Schubert’s life and work.
I also tackle creative projects that I simply don’t have the time for the rest of the year. Knitting a shawl or fingerless gloves is on my list. As I’m not an avid knitter, I need time and muse to concentrate on a knitting pattern. Now is a wonderful time to just give it a go.
As an introvert who needs her alone time to recharge, I take winter as the perfect excuse to say no to as many obligations as I can. I’ve experienced that I’m much more outgoing and sociable in summer, but in winter, I love being at home, either alone or with my boys and not interacting with any other people if I can avoid it. If all else fails, there’s always the weather to blame for not being able to leave the house…
… and Soul
Whenever it’s dim and dusky in January, I light candles. Their natural, flickering light creates an atmosphere of enchantment and cosiness. It lifts my mood and touches my soul. Also, I light up the Christmas tree as long as we have it in our apartment. It has artificial candles, but the light banishes the darkness–and with it any chance of a dark mood.
What has also helped me a lot when my mood plummets is listing five things I’m grateful for. For that purpose, I keep a gratitude journal on my nightstand where I can reach it literally any time, day or night. I’ve found gratitude practice a powerful tool to boost my energy and mood.
I’m not good at meditation (my thoughts always wander elsewhere), but I love just sitting in a quiet environment. In my job, I almost constantly communicate with many different people, which sometimes can be overwhelming. That’s why I treasure some quiet time at home all the more.
Creating Cosy (Gemütlichkeit)
What Hygge is for Scandinavian folk is Gemütlichkeit for Bavarians. Both describe the same longing for warmth and shelter, the art of making your home a sanctuary. It doesn’t take much. Some candles, one or more thick blankets and some tea or hot chocolate can transform a home into a cosy nest.
Gemütlichkeit deepens when nothing needs to be rushed. When you are not obliged to be productive but permit yourself to live slowly, you’ve reached a new level of relaxation.
Pantry Gratitude
May I tell you a secret? Sometimes I go down to the basement just to look at all the jars of homemade preserves. I’m immensely grateful to my former self for having cooked, canned, fermented, and dried all the vegetables, fruits, and herbs that we can now consume. Having tomato sauce with our pasta, sprinkled with dried herbs, then a dessert made of frozen or canned berries, is like opening jars of preserved summer.
It’s also deeply satisfying to cook creatively with what we have and not run to the store and buy “fresh” ingredients from the other end of the world. Cooking from what we already have feels quietly abundant. Traditional winter recipes pave the way for a more sustainable life in harmony with the seasons. For me, re-learning to make do – and finding joy in it – is the best part of preserving.
Right now, I wish that January would never end. The slowness of the month and the cosiness I have created for us feel deeply relaxing. By month’s end, I know I’ll get restless, sensing daylight lengthen, but that’s weeks away. For now, I take my garden’s advice and allow myself to rest, relax, and contemplate my intentions, not resolutions, for the upcoming year.
I hope you, too, can embrace January’s slow energy! If you’re looking for permission to rest – you have it. It’s not a luxury – it’s essential. I’m making my home cosy, flowing with January’s energy, and caring for myself— I hope you’ll do the same.
I wonder if you feel this pull too—this permission to rest when January arrives. However you spend this month, may you find the rhythm that serves you best. Spring will come — but for now, winter is enough.
If you’re interested in more cooking and baking recipes, look here: Recipes – seasonalsimplelife.com Many (but not all) of the recipes there are authentically Bavarian.