When I started this overview of common pepper and chilli plant diseases, I felt slightly overwhelmed: there seem to be so many fungi, bacteria and viruses out there that pose a threat to our pepper babies.
Yep, that’s mom-mode kicking in.
The good news, though, is that peppers are quite robust, and only certain environmental conditions make them prone to disease.
By following some basic principles and keeping a close eye on our plants, however, we can prevent most diseases before they ever take hold.
And in the unlikely case our plants get infected, it’s good to determine the cause. The sooner we identify the culprit, the better we can get rid of it.
In this guide, I’ll walk you through the most common diseases that affect pepper and chilli plants, how to identify them, and what to do if they appear. You’ll also learn how to prevent serious infections in the first place — so your plants stay strong and productive throughout the season.
I’ll cover:
Identification: How to recognise each disease and the damage they cause
Prevention: Garden practices that reduce disease pressure
Treatment: Organic, as far as possible
For a better understanding, I’ve grouped the diseases by their cause, that is, whether they’re caused by fungi, viruses, or bacteria. Although they’re technically not diseases, I’ve even included physiological disorders.
Quick Overview: Diseases at a Glance
If you’re in a hurry, this table gives you a quick overview. Scroll down for detailed identification and treatment advice.
Disease
Type
Main Symptom
Quick Fix
Damping-off
Fungal
Seedlings collapse
Remove affected plants, improve air-flow
Fusarium
Fungal
Yellow leaves, root rot
Remove affected plants, crop rotation
Blossom end rot
Physiological
Dark spot on the fruit end
Water regularly, feed calcium
Mosaic virus
Viral
Mosaic leaf pattern
Remove affected plants, control aphids
Powdery mildew
Fungal
White powder on leaves
Remove affected plants, spray with baking soda or milk solution
Downy mildew
Fungal
Mycelium on leaves’ undersides
Remove affected plants
Bacterial Leaf Spot
Bacterial
Spots on leaves
Remove affected plants, spray with copper-based bactericide
Sunscald
Physiological
Tannish spots on leaves and fruits
Shade plants, water sufficiently
Anthracnose
Fungal
Watery to black lesions
Remove affected plants, spray with copper-based fungicide
Bacterial Canker
Bacterial
Brown lesions, discoloured veins
Remove affected plants, spray with copper-based bactericide
Grey mould
Fungal
Glassy, moist patches, brown spots
Remove affected plants, disinfect tools
Blossom drop
Physiological
Blossoms drop off
Adjust temperature and water regularly
Blight
Fungal
Brown to black patches on fruits, leaves and stems
Remove affected plants, disinfect tools, and exchange soil
Bacterial Soft Rot
Bacterial
Fruits rot
Remove affected plants
Frogeye Leaf Spot
Fungal
Brown spots with a dark ring on leaves
Remove affected plants, spray with copper-based fungicide
Root rot
Fungal
Roots die, withering leaves
Let soil dry, repot in fresh soil
But let’s see first what we can do to prevent diseases from infecting our plants.
General preventive measures against diseases
There are a few things we can do to make it hard for diseases to take root.
Crop rotation
This describes the concept of not growing the same plants or members of the same plant family in the same spot year after year.
By rotating them every season, we not only prevent the soil from leaching out but also make sure that pests and diseases can’t spread easily.
Before transplanting or buying young plants at a nursery, check their health:
Colour: The leaves are shiny and equally coloured
Leaf structure: Firm and elastic, no dry spots or discolourings
Growth: The plant grows regularly and evenly
Roots: Healthy root structure is firm and white
Blossoms: When plants bloom, their blossoms are fresh and firm
Hygiene
One of the most effective ways to prevent diseases from spreading is by washing your hands. Yes, just like in the kitchen.
Furthermore, when plants are already infected, it’s very advisable to disinfect all gardening tools.
Choose resistant varieties
Seed manufacturers advertise resistant varieties, so next time you browse the seed catalogues, look out for that characteristic.
When you’re buying plants in a nursery, ask them what varieties are particularly resistant.
Watering
Peppers and chillies want constantly moist (but not wet) soil. Water them regularly every few days or when necessary, and only in the mornings. That way, the leaves can dry off during the day. Dampness and moisture cause fungal diseases!
Only water the soil around the plant and avoid splashing the leaves.
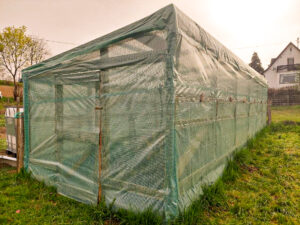
Especially in greenhouses, the climate can get very hot and humid on summer days. It’s essential, therefore, to guarantee good air circulation by opening the windows and maybe even the door.
The air not only cools down the temperature but also dries off the dew from the plants.
Spacing and pruning
Observe the right spacing between pepper plants and rows to ensure adequate air circulation.
When peppers and chillies become too dense, prune them to let the air flow freely within the plant.
Check for diseases
Regularly check for diseases. The sooner you spot an infection, the easier you can prevent it from spreading.
In my experience, early detection is far more effective than aggressive treatment.
But are our plants really suffering from a disease? Or is it more likely a pepper plant pest? I’ll show you.
How to Tell Diseases Apart from Pests
I know how it is: on your routine control, you discover a plant that’s obviously suffering from something, but how to know whether it’s from a pest or a disease?
Several signs will put us on the right track.
Signs it’s a disease (not pests)
No visible insects or slime trails
Spreading spots or patches
Wilting despite adequate water
Mould or powdery coatings
Rotting stems or fruits without an obvious cause
Signs it’s a pest (not disease)
Visible holes with clean edges
Insects visible on the plant
Sticky residue
Webbing
Slime trails
Here’s how to identify diseases and manage the most frequent problems.
How to identify diseases quickly
Sign
Likely disease
White powder on leaves
Powdery mildew
Grey mould on fruits
Grey mould (botrytis)
Dark spots on fruit’s bottom
Blossom end rot
Mosaic pattern on leaves
Mosaic virus
Seedlings collapsing
Damping-off
Yellow leaves and root rot
Fusarium, Verticillium Wilt, or Root Rot
Watery spots on leaves
Bacterial leaf spot or Anthracnose
Now that we know how to grow healthy plants and tell apart diseases from pests, let’s see which common diseases can affect peppers and chillies. It’s important to identify them as soon as possible so that we can quickly take measures against them.
Fungal Diseases Affecting Peppers and Chillies
Damping-Off
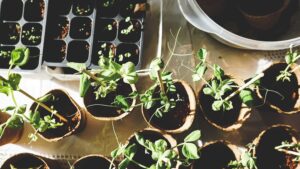
This fungal disease only affects seedlings and young plants. The stems look thin and water-soaked at the bottom, and sometimes white fluffy mould forms at the base. Eventually, the plants collapse at the soil line and die.
Damping-off often spreads very quickly and infects the entire seed tray.
How to prevent it:
Use sterile seed-starting soil.
Don’t overwater the seedlings and avoid splashing the seedlings.
Ensure good air circulation by opening the covering daily.
Avoid overcrowding seedlings.
Dust the soil surface with cinnamon powder (cinnamon is a natural antifungal)
How to get rid of it:
Destroy the infected plants as well as the substrate.
Fusarium
Fusarium is a fungal disease. Severely infected plants should not be consumed and should be removed promptly.
The leaves of Fusarium-infected plants are lighter or yellow and roll up before they wither and die. The roots rot, and white or pink mould forms.
How to prevent it:
Only transplant healthy and undamaged plants.
Choose resistant varieties
Observe crop rotation and leave two years before you plant peppers and chillies on the same patch.
How to get rid of it:
Immediately remove infected plants and dispose of them in household waste (not compost).
Unfortunately, there is no effective treatment once plants are infected. Prevention and resistant varieties are key.
Verticillium Wilt
Verticillium wilt is a disease that’s caused by fungi in the soil. It causes young shoots and leaves to die and fall off, and destroys the roots. Verticillium can survive for years in the soil.
How to prevent it:
Only use healthy plants
Observe the rules of crop rotation.
Don’t overwater or over-fertilise your plants.
Remove all plant debris.
How to get rid of it:
Remove infected plants and dispose of them properly.
In the greenhouse, exchange the soil.
Root rot
Root rot is a fungal disease that causes the roots to die. The symptoms are similar to those of Fusarium, that is, yellowing, withering leaves and root rot. Root rot is usually triggered by waterlogged, poorly drained soil.
How to prevent it:
Plant in well-draining soil.
Water regularly, but do not overwater.
Don’t plant too deeply.
How to get rid of it:
Let the soil dry before watering again. If you’re unsure, poke a finger in the ground and check if the soil is still moist.
Repot in fresh soil.
Powdery mildew
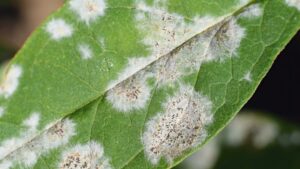
Powdery mildew is also a fungal disease which is primarily distributed through wind and water splashes. The spores get on the leaves and build a mycelium, much like a fungal highway. They penetrate the plant, suck out the sap and build a mycelium that’s white at first and brownish later.
Infected plants show a floury, whitish, removable coating on the surface of leaves and fresh shoots.
How to prevent it:
Choose resistant varieties
Keep the plants at an appropriate distance
Don’t overfeed them with nitrogen
Make sure not to spray the leaves when watering
Mulch the soil between the plants
Regularly check for infection
Strengthen the plants with plant manures, for example, from field horsetail
How to get rid of it:
Remove infected plant parts and dispose of them properly.
Spray the plants with a baking soda solution (dilute 1 tsp of baking soda in 1 litre of water)
Spray the plants with diluted milk spray (1 part milk with 10 parts water)
Spray the plants with potassium bicarbonate solution (1 part potassium bicarbonate to 40 parts of water)
Downy mildew
The fungal threads of downy mildew grow into the leaves and build a mycelium on the leaves‘ undersides. Downy mildew is specifically active when the weather is moist and cool, that is, in autumn and spring.
Infected plants show a whitish-grey to brownish mycelium on the underside of the leaves. (If it’s on the upper side, it’s most probably powdery mildew). The leaves show yellowish to brown patches, and infected parts die off eventually.
How to prevent it:
Keep leaves dry
Observe the right planting distance and only water the ground
Don’t overfeed the plants with nitrogen
Choose resistant and tolerant varieties
Spray preventively with garlic tea
How to get rid of it:
Remove infected plants and dispose of them properly.
In case of a strong infection, spray the leaves‘ undersides with a fungicide.
Anthracnose
Anthracnose is a group of different fungal diseases that not only affects vegetables but also fruits, trees and flowers and shows in similar ways: It forms round, watery lesions on the fruits, blossoms, shoots, leaves and stems, which sink in later and become black. Sometimes a white mycelium forms. Even the roots can be infected, which will eventually kill the plant.
How to prevent it:
Make sure the soil for your plants is well-drained.
Use healthy, resistant varieties.
Only water the ground around your plants, not the plant itself and definitely not the leaves.
Keep ripening fruits from touching the soil.
Remove all plant debris after harvesting, as the fungus can survive in plant parts for a long time.
Observe the rules of crop rotation.
How to get rid of it:
Remove infected plants and dispose of them properly.
Spray your plants with a copper-based fungicide according to label instructions. Be careful, though, not to overdo it, as copper may build up to toxic levels for microorganisms in the soil.
Wash your hands and disinfect garden tools.
Grey mould (Botrytis cinerea)
Grey mould is especially active when temperatures are mild (20 °C / 68 °F), and humidity is high. You can detect it from glassy, moist patches on pepper fruits, leaves and blossoms. Later on, brown spots of decay eventually get covered with a grey mycelium. The leaves and shoots wither and eventually die.
How to prevent it:
Air your greenhouse regularly to make sure that the leaves dry off quickly.
Water regularly but not excessively, and avoid splashing the leaves with water.
Observe the right planting distance between pepper and chilli plants.
Prune your peppers and chillies, paying special attention to removing superfluous leaves in the middle of the plant.
How to get rid of it:
Remove infected plants and dispose of them properly.
Disinfect your gardening tools and wash your hands after handling infected plants.
Pepper Blight (Phytophthora capsici)
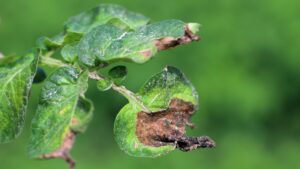
You may have encountered blight on tomatoes, but it can affect all members of the nightshade family, that is, potatoes, eggplants and peppers. It especially spreads under warm, humid conditions and shows brownish to black patches on the fruits. Eventually, the leaves, as well as the stems, become greyish. The leaves wither, despite the soil being moist, which shows that the roots have died off.
Sometimes, the stems turn brown or black, occasionally showing reddish discolouration before the roots begin to die. The pathogen can survive in the soil for more than a decade.
How to prevent it:
Only use healthy plants
Observe the rules of crop rotation
Make sure that the conditions in the greenhouse are as dry as possible.
Only water the soil around your plants and avoid splashing the leaves.
How to get rid of it:
Remove infected plants and dispose of them properly.
Disinfect gardening tools and your hands.
Solarise the soil by covering it for 4 – 6 weeks with a clear plastic sheet in the summer heat. The soil will heat up under the cover and kill fungi.
After the growing season, thoroughly disinfect the greenhouse.
Exchange the soil in your greenhouse.
Southern Blight (Sclerotium rolfsii)
Fungi living in the soil cause this disease, which we can detect from white fungal growth on the stems at the soil line. Later, sclerotia that look like mustard seeds form.
Southern blight is more common in warm climates. If your hardiness zone is below 8, it’s unlikely to be a problem in your garden.
How to prevent it:
Only use healthy plants
Observe the rules of crop rotation
Make sure that the conditions in the greenhouse are as dry as possible.
Only water the soil around your plants and avoid splashing the leaves.
How to get rid of it:
Remove the infected plants and the soil around them
Solarise the soil.
Disinfect gardening tools and your hands
After the growing season, thoroughly disinfect the greenhouse.
Frogeye Leaf Spot (Passalora capsicicola)
Source: Wikipedia
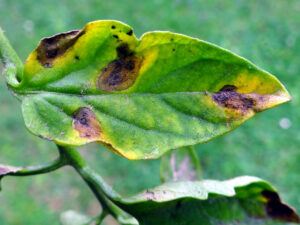
The leaves get round to oblong spots, which are watery first and later turn brown with a dark ring around them (like a frog’s eye). The leaves wither and eventually die.
Cercospora Leaf Spot, another disease, causes similar symptoms to frogeye leaf spot, but it’s caused by a different pathogen.
How to prevent it:
Choose resistant varieties
Only use healthy plants
Observe the rules of crop rotation
Only water the soil around the plant and make sure that you don’t splash on the leaves.
Observe the right planting distance between peppers and chillies.
How to get rid of it:
Remove infected plants and dispose of them properly.
You may spray with a copper-based fungicide, but avoid copper buildup in the soil
Bacterial Diseases Affecting Peppers and Chillies
Bacterial Leaf Spot (Xanthomonas campestris)
At first, the infection shows as watery, dark spots on the underside of the leaves. Gradually, these spots become larger and can spread to all parts of the plant. Bacterial leaf spot spreads particularly fast under warm and humid conditions.
How to prevent it:
Choose resistant varieties
Only use healthy plants
Observe the rules of crop rotation.
How to get rid of it:
Remove infected plants and dispose of them properly.
Spray the plants with a copper-based bactericide
Disinfect your tools
Bacterial Canker (Clavibacter michiganensis)
Source: Wikipedia
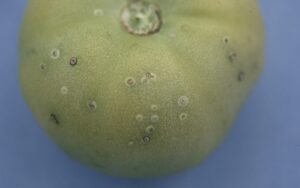
Bacterial canker infects the plant via its roots or injuries and causes gradual wilting. It shows through brown lesions on the leaves and discoloured veins. The fruits get crater-like spots. Bacterial canker often starts from the bottom leaves or from one side, gradually infecting the whole plant and can affect all members of the nightshade family.
How to prevent it:
Choose resistant varieties.
Only use healthy plants.
Observe the rules of crop rotation.
Only water the soil around the plants and avoid splashing the leaves.
How to get rid of it:
Remove infected plants and dispose of them properly.
You may spray with a copper-based bactericide, but avoid copper buildup in the soil.
Bacterial Soft Rot (Pectobacterium carotovorum)
Bacterial rot thrives under warm, humid conditions and lets the fruits rot quickly. The bacteria penetrate the fruit through microscopic wounds, causing the tissue to degrade, which eventually leads to rot.
How to prevent it:
Plant in well-drained soil.
Observe the rules of crop rotation.
Don’t overfertilise or overwater your plants.
How to get rid of it:
Remove infected plants and dispose of them properly.
Viral Diseases Affecting Peppers and Chillies
Mosaic Viruses
Source: Wikipedia
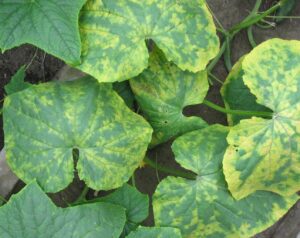
Mosaic viruses are a group of viruses, among them the tobacco mosaic virus (TMV), pepper mild mottle virus (PMMoV) and cucumber mosaic virus (CMV). As their various names suggest, mosaic viruses can also befall cucumbers, tomatoes, pumpkins and other vegetables. The pepper mild mottle virus is a highly infectious viral disease that occurs mostly on plants in greenhouses.
Its appearance depends on how old the plant is: sometimes it only shows as a yellowing of leaves, but often we can detect a pattern of dark and light mosaic-like patches on young leaves. The fruits are smaller and sometimes curled, and the overall growth is stunted.
There’s nothing to be afraid of, though. While mosaic viruses sound alarming, they’re manageable with proper hygiene and prevention.
How to prevent it:
Choose resistant pepper and chilli varieties
Viruses are passed on through plant sap. It’s important, therefore, to regularly clean and disinfect your garden tools.
Remove all plant debris at the end of the growing season. Viruses can survive in plant parts for months.
Observe the rules of crop rotation.
Control insects that spread the disease, especially aphids.
How to get rid of it:
Remove infected plants and dispose of them properly.
Disinfect garden tools after every use.
Closely monitor nearby plants.
Wash your hands after handling the plants.
Physiological Disorders (Not Diseases)
Not every problem is caused by a pathogen. Some issues are stress-related or nutritional imbalances.
Blossom end rot
Blossom end rot is not a disease but a deficiency symptom. It shows that our plants do not take up enough calcium. Now, this could be due to a lack of magnesium in the soil, but more often it’s caused by irregular watering.
Another (rarer) cause is damaged roots, which could be caused by pepper pests.
Blossom end rot is easily identified by a dark, sunken, leathery spot on the tip of the fruit.
Don’t worry, though: you can still eat the peppers and chillies, just cut off the brown end.
How to prevent it:
Water your pepper and chilli plants regularly and cover the soil with mulch to keep it moist.
Avoid over-fertilising the plants with nitrogen; this will weaken them and make them more prone to infections.
Fertilise with a well-balanced fertiliser that also contains secondary nutrients like calcium, magnesium and sulfur.
How to get rid of it:
Water regularly.
Add calcium by working crushed eggshells or bone meal into the soil.
Some gardeners also use diluted milk sprays, although consistent watering is usually more effective.
Sunscald
„Sunscald“ is pepper-language for sunburn, and yes, plants can be affected, too. They get tannish spots and, in severe cases, the fruits won’t develop properly.
How to prevent it:
Protect your peppers and chillies from the sun with a shade or – if you grow them in pots – provide temporary shade during extreme heat, especially in the afternoon.
How to get rid of it:
Remove the fruits that are severely damaged, as they won’t recover. Fruits that are only slightly damaged are still edible.
Prune your plants selectively to allow some leaf cover over the fruits
Increase watering during heat waves
Blossom drop
When peppers and chillies drop off buds and blossoms, the temperature is usually not right for them. When temperatures get over 32 °C (90 °F) or fall below 13 °C (55 °F), the plants get stressed and throw off all their blossoms.
Other reasons for blossom drop can be inconsistent watering or over-fertilisation, especially when you feed your plants too much nitrogen.
When you grow peppers and chillies in the greenhouse, make sure to keep the door and windows open when it’s sufficiently warm so that pollinators can get in. Blossoms also fall off when they’re not pollinated.
Frequently Asked Questions About Pepper Plant Diseases
✔️ How do I know if my pepper plant has a disease or a pest problem?
Diseases cause issues without visible culprits: yellowing leaves without bugs, wilting despite adequate water, mouldy or powdery coatings, spreading spots, or rotting stems.
Pests cause visible physical damage you can see: holes in leaves or fruits, visible insects (even tiny ones), sticky residue, webbing, or slime trails.
Quick test: If you see actual bugs or bite marks, check my pepper plant pests guide. If plants look sick without visible insects, you’re dealing with a disease (this article).
✔️ Can I eat peppers from a plant with blossom end rot?
Yes, absolutely! Simply cut off the brown, leathery part at the bottom and use the rest normally.
✔️ My seedlings are collapsing at the soil line. What’s happening?
This is almost certainly damping-off, a fungal disease that affects seedlings. Remove them immediately, along with the soil they’re growing in, to prevent it from spreading to healthy seedlings.
✔️ Should I use chemical fungicides on peppers I’m going to eat?
Most pepper diseases respond well to organic and cultural methods when caught early. Chemical fungicides should be a last resort, and if you do use them, always follow label instructions carefully and observe the waiting period before harvest.
✔️ Can pepper plant diseases spread to my tomatoes?
Yes, many can. Peppers and tomatoes are both nightshades (Solanaceae family) and share many of the same diseases, for example, blight, fusarium, mosaic virus and others.
✔️ My pepper leaves are turning yellow. Is it a disease?
It depends on the pattern:
Lower leaves only: Usually normal ageing OR nitrogen deficiency—not a disease. Feed with balanced fertiliser.
Yellow between veins (veins stay green): Magnesium deficiency. Add Epsom salt solution (1 tablespoon per 4 litres of water).
Yellowing + wilting + root problems: Could be Fusarium, Verticillium, or root rot—these ARE diseases requiring removal of infected plants.
Yellowing + mosaic patterns: Likely a viral infection (mosaic virus).
Yellowing + visible insects: Check for aphids or whiteflies—see my pest guide instead.
Start by ruling out nutrient deficiencies and watering issues before assuming disease.
✔️ I think my plant has a fungal disease. Can I save it?
It depends on how far the infection has spread. In the early stages, removing infected plant parts and applying further methods can be enough. If the disease has spread too far, however, recovery is nearly impossible.
The Three Keys to Disease-Free Peppers
Growing peppers and chillies doesn’t mean you’ll never encounter a disease.
But you can stack the odds heavily in your favour by following three core principles:
#1 Start with Healthy Plants
Everything starts with good care from the beginning: well-draining soil, proper spacing, consistent watering, and balanced fertilisation.
Healthy, vigorous plants have natural defences that protect them from diseases.
Most of the diseases in this guide prey on weakness. Don’t give them an easy target.
#2 Stay Vigilant
Check your plants regularly — every few days during the growing season. Look at both sides of the leaves, inspect the fruits, and watch for early warning signs. A small yellowing spot caught today is far easier to manage than a widespread infection discovered next week.
Now, this isn’t paranoia; it’s good gardening.
#3 Act Swiftly
When you spot a problem, don’t wait to see if it magically goes away. Because it won’t.
Remove infected plant parts immediately. Dispose of them properly—never in the compost. Disinfect your tools.
The faster you respond, the more plants you’ll save and the less the disease can spread.
These three principles appear again and again throughout this guide.
Because they work.
They’re not complicated or expensive. They’re simply habits that separate gardeners who occasionally lose plants from gardeners who consistently harvest abundantly.
Diseases will happen. But with these practices in place, they’ll remain minor setbacks rather than season-ending disasters.
A healthy garden isn’t one without problems.
It’s one where the gardener knows what to look for — and what to do next.
And now, so do you.
Want more pepper-growing guidance? Check out these related articles:
Few things are more frustrating than discovering holes in your beautiful pepper leaves or watching your chilli plants weaken for no obvious reason. If you’ve ever wondered what’s eating your peppers — and how to stop it — you’re not alone.
Even experienced gardeners run into pest problems from time to time. I certainly have.
One summer’s evening, I took a last stroll through my vegetable garden and enjoyed the view over my vast green paradise. Everything was fine and growing happily towards an abundant harvest.
Or so I thought.
When I came back two days later, some of my peppers had large chunks ripped out of their leaves, and the fruits bore large holes.
It turned out that slugs had found my precious plants and feasted on them, wreaking havoc in just two days. I felt sick looking at the damage.
That day, I learned two important lessons: First, pests can strike faster than you think. Second, knowing what to look for—and how to respond quickly—makes all the difference between losing a plant and saving your harvest.
In this guide, I’ll walk you through the most common pests that affect peppers and chillies, how to identify them, and what to do if they appear. You’ll also learn how to prevent serious infestations in the first place — so your plants stay strong and productive throughout the season.
I’ll cover:
Identification: How to recognise each pest and the damage they cause
Prevention: Garden practices that reduce pest pressure
Treatment: Organic and conventional options that actually work
Irregular holes in leaves and fruits, or even bare leaf veins
Night
Handpicking
Corn borers
Holes or tunnels in stems, wilting plants
All day
Neem solution
Corn earworms
Holes in fruits
All day
Remove infested fruits
Cucumber beetles
Large, irregular holes in leaves, buds, blossoms and fruits
Day
Neem oil
Cutworms
Cut-through stems, dying plants
Night
Handpicking
Flea Beetles
Tiny holes in leaves
Day
Keep soil moist
Hornworms
Large, irregular holes, de-leaved stems
Night
Handpicking
Pepper Maggots
Fruits turn brown
Day
Remove infested fruits
Pepper Weevils
Holes in fruits, fruits turn brown
Day
Remove infested fruits, handpicking
Red Spider
Withering leaves with light to brownish speckles
Day
Spray off with water or neem solution
Slugs
Holes in leaves, silvery slime trace
Night
Handpicking
Spider mites
White webs on plants, leaves wither and die
Day
Spray off with water or soft soap solution
Thrips
Silvery-white patches on leaves
Day
Neem, olive oil or rapeseed oil emulsion
White Flies
Flies flying up when plant is shaken
Day
Spray off with soft soap solution
But let’s see first what we can do to prevent pests from getting the upper hand.
General preventive measures against pests
There are a few things we can do to make it hard for pests to thrive there.
Healthy plants
I’m not saying that pests don’t attack healthy plants; when there are enough of them, they stop at nothing. But they go for the tiny and weak ones first (the cowards!), multiply and then head over to the sturdier plants.
By strengthening our peppers and chillies, we can make it a bit harder for pests.
But how do we do that?
First of all, by meeting all the requirements our plant babies have for thriving:
Peppers and chillies need sandy-loamy soil with good drainage and a large amount of organic matter.
Only transplant your peppers and chillies outdoors when night temperatures don’t fall below 17 °C (63 °F).
Water them regularly and deeply without waterlogging them. Poke your finger about 2 inches into the ground and check for moisture. If the soil feels dry, water the plants.
Add a long-term fertiliser when planting peppers and chillies out in the garden, greenhouse or pots. Every four weeks, you can add 10 % nettle manure to the water.
When buds show, choose a fertiliser containing potassium and phosphorus to promote the building of blossoms and fruits.
Attracting predators
When we create habitats for beneficial insects and predators, they’ll balance out pests.
Build an insect hotel and plant herbs, flowers and even wild plants that attract them. I especially recommend
Fennel, dill, basil and coriander
Calendula and tagetes
Nettles (at the edge of the garden)
Yarrow
Build a birdhouse to make nesting for birds attractive in your garden. Leave them enough nesting material and install a bird bath. Put some flat stones in it so that insects and bees can also stop by and drink.
Collect some deadwood in a quiet corner of your garden. Different insects, hedgehogs, toads and even lizards will move in eventually.
Check for pests
Regularly check for pests. After the slug incident, I made it a habit whenever I go into my garden, to take a stroll and “visit” every plant before starting to work there. The sooner you spot pests, the easier you can get rid of them.
In my experience, early detection is far more effective than aggressive treatment.
Here’s how to identify pests and manage the most frequent problems.
When you read this guide, you’ll soon realise that I don’t recommend any pesticides that can harm beneficial insects.
While it might seem tempting to go for “the quick solution”, it would create problems in the long run. Better to stick with homemade remedies and get the balance in your garden right again.
Here are my go-to methods that you’ll encounter later on:
Soft Soap Solution
Mix one tablespoon of soft soap and one litre of water.
Neem oil Emulsion
Mix one tablespoon of neem oil and one litre of water. ⚠️ Never use neem oil on flowers, as it will stay there and may harm pollinators. If your plant is flowering, use soft soap solution instead.
Garlic tea
Boil one litre of water with 2 cloves of garlic. Let the mixture cool down and rest for two hours. Use undiluted.
Nettle manure solution
Mix one part of nettle manure with 9 parts of water (for example: 100 ml nettle manure with 900 ml water).
Rapeseed oil (or olive oil) emulsion
Mix 3 parts oil with 7 parts water (for example: 300 ml of rapeseed oil with 700 ml of water).
Beneficial nematodes
Buy them online and stir them in water as instructed on the package. Water your plants with them.
Bacillus thuringiensis (Bt)
You can buy them online. Dilute 1 – 2 tablespoons per 4 litres of water.
Now that we know how to grow healthy plants and attract beneficial insects and predators, let’s see which common pests affect peppers and chillies. It’s important to identify them as soon as possible so that we can quickly take measures against them.
Common Pepper Plant Pests (A – Z)
Aphids ( Myzus persicae)
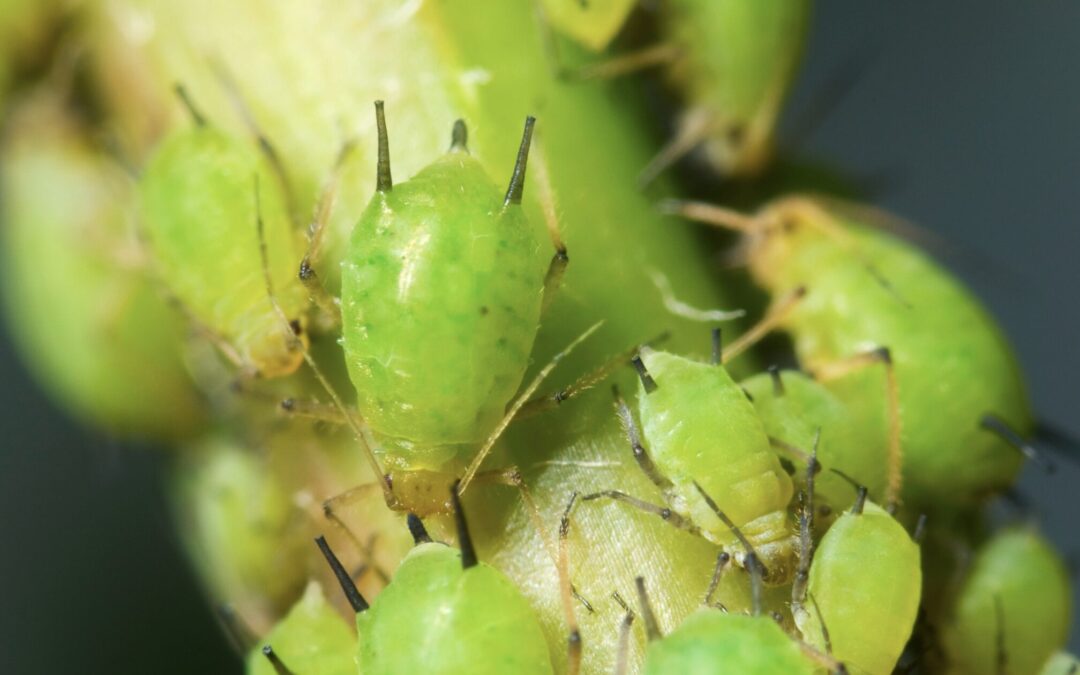
Besides snails and slugs, aphids are the most common pest in our gardens. They’re just a few millimetres large and either green, reddish brown or black-brown, depending on the variety. They come in zillions, pierce plant cells with their mouthparts, and suck out plant sap. Additionally, they defecate a sweet, sticky coating (the “honeydew”), on which fungi can easily settle.
Aphids spread especially widely in warm summers. They can easily be detected by their large numbers and the sticky coat they leave on the plants.
How to prevent them:
Observe companion planting and don’t plant the same kind of vegetables in the same spot
Strengthen the plants by watering and fertilising them
Don’t feed your plants too much nitrogen; it makes the plant cells weak and vulnerable.
Create sufficient nesting opportunities for beneficial insects like lacewings, ladybugs, and ichneumon flies.
How to get rid of them:
If the infestation is not too large, you can spray the aphids off with a strong jet of water.
Spray the plants, especially the leaves’ undersides, with soft soap solution.
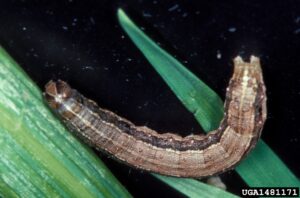
Armyworms, particularly the beet armyworm and fall armyworm, can cause significant damage to pepper plants by feeding on buds and young leaves, leading to reduced fruit production. Armyworms are caterpillars. Depending on their variety, they’re either green with light stripes, dark with yellow stripes or green/brown with a V-shaped mark on their head.
Sure signs of infestation are skeletal leaves where only the veins remain, holes in the leaves or fruits, and small, dark droppings on the leaves and on the ground around the plants.
If undetected, they can defoliate your peppers and chillies very quickly, sometimes overnight!
How to prevent them:
Grow plants that attract beneficial insects who feed on caterpillars, their eggs and larvae. Good attractor plants are cilantro, dill, basil and thyme.
Make your garden bird-friendly and, if you’re thinking of buying or building a greenhouse, make sure it has large windows through which the birds can get in.
Dust the ground around your peppers and chillies, as well as their lower leaves, with diatomaceous earth. It forms a natural barrier for the caterpillars so that they can’t lay their eggs in the soil. At the same time, it penetrates the armyworms’ skin and dehydrates them.
Install physical barriers like fine-meshed nettings, which you install before the adult moths lay their eggs
How to get rid of them:
If you suspect armyworms are eating your peppers and chillies, take a nightly stroll through the garden and check the leaves’ underside, the soil around the plants, as well as young leaves and developing fruits for the caterpillars. Pick the armyworms and throw them in a bucket with a soap solution. Get out there every night until you can’t detect any new damage. This is the best and most direct approach for small gardens.
Beneficial nematodes combat armyworms while they’re a pupa in the ground. To bring the nematodes into the ground, moisten the soil, then dilute the nematodes with water according to the instructions on the package and water your plants with them.
Bacillus thuringiensis (Bt) is an organic control for armyworms. Once eaten by the armyworms, Bacillus thuringiensis messes with their digestive tract, causing them to stop eating and die. The great thing about Bt is that it’s only toxic for armyworms but not for humans, pets or beneficial insects.
Spray your peppers and chillies with a solution of neem oil and soft soap. For that purpose, mix 1 tablespoon of pure neem oil with 1 tablespoon of soft soap and 1 litre of water and spray every inch of your plants’ surface. Neem oil not only repels pests (not only armyworms) but also kills their eggs and larvae.
Corn Borers (Ostrinia nubilalis)
Source: Wikipedia
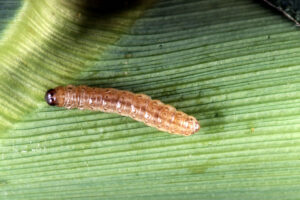
Corn borers are beetles. Despite the name, they also attack peppers and chillies. Their larvae bore into the fruits and even the stems of our plants, where they hide, which makes it difficult to spot them.
Common signs of borer infestation are wilting leaves, holes or even tunnels in the stems and stunted growth. Sometimes you can discover frass that looks like sawdust near the entry holes.
How to prevent them:
Observe crop rotation and don’t plant peppers in the same spot year after year.
Keep the soil covered with mulch.
Tend to your plants so that they stay healthy.
How to get rid of them:
Use beneficial nematodes, which are natural enemies of corn borer eggs.
Spray the plants, especially the leaves’ undersides, but also the soil around them, with neem oil emulsion.
Spray the plants with garlic tea.
Corn Earworms (Helicoverpa zea)
Corn Earworms mostly show as green or brown caterpillars that enter the fruits of our tomatoes, peppers and chillies and eat them from within.
How to prevent them:
Strengthen your plants by watering and feeding them properly.
Protect your plants with row covers like fine-mesh insect netting before corn earworm moths fly and lay their eggs on leaves and fruits.
How to get rid of them:
Remove the infested fruits and put them in the garbage bin, not in the compost.
Cut infected parts back and put them in the garbage bin.
Cucumber beetles (Diabrotica)
Source: Wikipedia
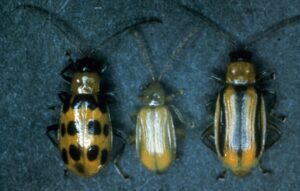
As their name indicates, cucumber beetles primarily target cucurbits like cucumbers and squash, but they can also feed on peppers. They are yellowish-green with either black spots or stripes and lay orange eggs near the plant roots. When the larvae emerge, they feed on the roots until they pupate.
The adult beetles feed on pepper and chilli leaves as well as the blossoms and fruits. What’s more, they transmit bacterial wilt, which can weaken and sometimes even kill pepper and chilli plants.
An infestation with cucumber beetles can often be detected by holes in the leaves. These holes are larger and more irregular than those of flea beetles.
How to prevent them:
Observe crop rotation and don’t plant peppers where they or members of the cucurbit family, like cucumbers, pumpkins or zucchini, have grown the year before.
In spring, add compost to your vegetable patches to improve the soil and thus plant health.
Install row covers as a natural barrier.
Plant good companions to your peppers and chillies, like dill, fennel, cilantro, nasturtium and calendula.
How to get rid of them:
Spray the plants with neem oil emulsion or garlic tea.
Dust the soil around the plants as well as the lower leaves with diatomaceous earth.
Yellow sticky traps can catch the beetles as they’re focused on the colour yellow.
You can make a DIY trap by mashing 100 g (about 1/2 cup) of mashed cucumber or zucchini with 1 tablespoon of soft soap and diluting that in 4 litres of water. Put that mixture in yellow containers and place them around your garden, about 3 metres (10 feet) from your pepper plants. Empty the traps every other day and replace the mixture.
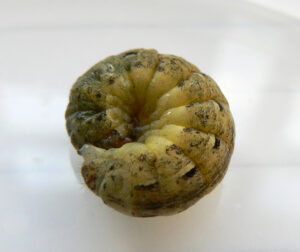
These are the green, brown or grey larvae of a moth. As their name indicates, they can cut through pepper stems at ground level and thus kill the plant, especially when it’s young.
How to prevent them:
Create healthy soil by adding compost and mulching.
Practice companion planting
Seed-start peppers and chillies indoors early, that is in January or February. When you transplant them outdoors, they’re large and sturdy enough to withstand cutworms.
How to get rid of them:
Grab a flashlight and look for cutworms in the evenings when they’re active. Handpick them and drown them in a bucket with soap water.
Cover your plants with fine-mesh insect nettings, creating a barrier.
Buy beneficial nematodes and add them to the water you use to water your peppers and chillies with.
Bacillus thuringiensis (Bt) can kill cutworms without being a danger to humans, pets or beneficial insects.
Flea beetles (Chrysomelidae)
Flea beetles are small jumping beetles that usually infest young plants.
You can easily detect an infestation by the many tiny holes in the leaves.
How to prevent them:
Flea beetles love dry soil, so the easiest way to prevent them is by keeping the soil around your peppers and chillies moist.
Also, remove all weeds well before planting so that the beetles have nothing to feast upon.
How to get rid of them:
Same as above: water the plants regularly and keep the soil around them moist. Cover the soil with mulch.
Hornworms (Manduca)
Source: Wikipedia
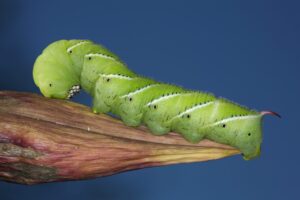
Although hornworms are quite large (10 cm/4 inches), they blend perfectly with the leaves of our peppers and are therefore often overlooked. They feed on leaves, stem and even the fruit and can kill our pepper and chilli plants literally overnight.
When your plants show large, irregular holes or only the bare stems, and you find dark droppings lying around the plants, your garden is probably infested with hornworms.
How to prevent them:
As so often, a well-planted mix of companion planting repels pests like hornworms and attracts beneficial insects.
The most effective companions for peppers and chillies are basil, dill, nasturtium, calendula and borage.
How to get rid of them:
The fastest way to get rid of hornworms is handpicking. Get out in the evenings, when they start to get active and thoroughly search your pepper and chilli plants, especially on the leaves’ undersides.
Bacillus thuringiensis (Bt) is an organic control for hornworms on peppers and chillies. Spray your plants with that dilution, at best in the evening. When the worms eat the sprayed leaves, Bt messes with their digestive tract and eventually kills them.
Create physical barriers like protective fine-meshed insect nettings that you put around the plants before the moths lay their eggs.
Spray your peppers and chillies with a solution of neem oil and soft soap.
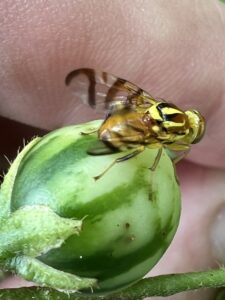
Pepper maggots (Zonosemata electa)
Source: Wikipedia
Pepper maggots are moths with brown striped wings that get 2 – 3 inches long. They lay their eggs on the pepper and chilli fruits near the stem. When the larvae hatch, they eat their way first into the fruit, feeding there and then out of it again. It falls on the ground, digs itself into the soil and pupates there.
When your peppers and chillies don’t get ripe but turn a brownish red and get squishy or fall off, cut them open and look if you can find the culprit.
How to prevent them:
Observe crop rotation and leave at least 2, better 3 years after you plant peppers and chillies in the same spot again.
How to get rid of them:
Dust the soil around your peppers and chillies and the lower leaves with diatomaceous earth.
Remove infected fruits and throw them in the garbage bin.
Pepper weevils (Anthonomus eugenii)
Pepper weevils are 2 – 3 mm long insects that look like little bugs. Adult weevils feed on buds, flowers and fruits, and they lay their eggs in the fruits where the larvae, once they’ve hatched, feed on them.
How to prevent them:
Observe crop rotation and don’t plant peppers and chillies where they’ve grown the year before.
Remove fallen fruit, leaves or other plant debris where weevils and their larvae can hide.
How to get rid of them:
Handpicking is the most effective way to get rid of pepper weevils or at least decimate them considerably.
Red Spider (Panonychus ulmi)
Source: Wikipedia
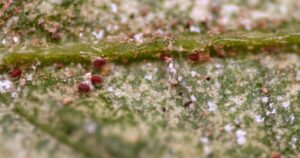
The red spider is red, tiny (0.6 mm /0.02 inches) and technically a red variety of spider mite. You can hardly see it without a magnifier, but the leaves will show broad strips of light to brownish speckles. The shoots are distorted and stunted, and leaves wither while the fruits stay small.
How to prevent them:
Attract beneficial insects like robber mites, ladybugs and lacewings with a natural garden where you don’t use artificial pesticides.
Strengthen your peppers and chillies by giving them enough water and nutrients.
How to get rid of them:
Spray off red spiders from the plants with a strong water ray.
Spray the plants with a solution of potassium and soap, rapeseed oil or a concoction from nettles, wormwood, tansy or mugwort.
Slugs
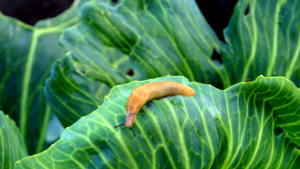
While many snails are beneficial, certain slug species can be very destructive in gardens. The large brown or orange slugs are typically the culprits.
An infection with slugs is easily detectable by their feeding traces. The leaves are eaten from the edges, and often only the veins remain. Additionally, slugs leave a silvery slime trace.
How to prevent them:
Let’s be honest here: there is no way to prevent slugs completely. There are, however, a few things we can do to make life harder for them.
Regularly hoe the soil
Don’t dig your garden in autumn, as the slugs lay their eggs in the holes
Add compost to the soil and rake it in.
Remove the mulch early in spring and compost it quickly, if necessary, with a compost accelerator. There are often slug eggs in the mulch.
Water the garden only in the mornings so that the soil can dry until evening when the slugs get active.
Install slug barriers around the plants
How to get rid of them:
In a small garden, you can collect the slugs by hand and bring them somewhere else
Mulch with tomato or fern leaves and green pine needles
Build slug fences around your garden
Attract benefectors like hedgehogs and toads by creating hideouts for them,
Get chickens and ducks who can patrol around your vegetable garden. They love eating slugs.
Spider mites (Tetranychus urticae)
Source: Wikipedia
Spider mites are about 0.5 mm (0.2 inches) small and suck on the leaf cells. Their toxic saliva can infect the plants with viruses. Spider mites love dry air and warmth.
Like red spiders, spider mites are hardly detectable by eye alone. What we can see are their fine, white webs. Infected leaves show white, yellow, light green, greyish or brown patches; they wither and die.
How to prevent them:
Regularly check plants for infestation
Enhance air humidity by regular spraying
Thoroughly clean stakes after an infection
Keep the soil around the plants covered with mulch to keep it moist
Observe crop rotation and don’t plant peppers and chillies in the same patch in succession.
How to get rid of them:
Spray off the spider mites with a strong water ray. Repeat regularly every other day until they’re gone
Spray the plants with a soap solution of 15 – 20 ml of potassium soap, 15 – 20 ml of spirit and one litre of water. Repeat every 5 days.
When the plants are large and sturdy, spray them with rapeseed oil emulsion, which covers the mites‘ respiratory organs, and they die.
Spray the plants with a mixture of tea tree oil and water or garlic tea.
Thrips (Thysanoptera)
Thrips are tiny insects with wings. Like other insects, they suck the plant sap, gradually killing your peppers and chillies. As they are so small, we usually discover them by secondary signs of an infestation like silvery or white patches on the leaves, tiny droppings on the plant and stunted growth.
How to prevent them:
Avoid waterlogging as it weakens the plant and makes it more prone to infestation.
Thrips don’t like high humidity but love dryness. Water regularly and keep the soil covered with mulch.
How to get rid of them:
Spray the plants, especially the leaves’ undersides, with neem, olive oil or rapeseed oil emulsion or a soft soap solution. Also, spray the soil around the plants as thrips lay their eggs in the soil.
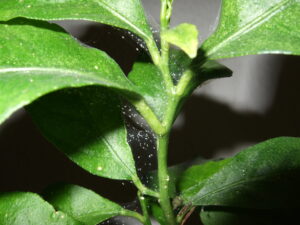
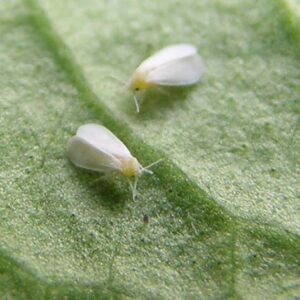
White flies (Trialeurodes vaporariorum)
Source: Wikipedia
White flies are a very common pest on peppers, especially in greenhouses.
Technically, they’re moths, but look like tiny (1,5 mm) white flies, hence the name. The female white flies lay their eggs on the underside of pepper and chilli (and many other) plants. When the “nymphs”, as they’re called, hatch, they suck the plant sap and produce a sticky cover, the honeydew, where fungal diseases like sooty mould or other black fungi grow easily.
White flies are large enough to be seen. When we shake the plant, the flies fly up like a white cloud, but later settle again.
How to prevent them:
Plants with a strong odour distract or repel white flies, so it’s a great idea to plant thyme, basil, lavender, nasturtium or even celery/celeriac near or between peppers and chillies.
Other plants, like calendula, tagetes and corn flowers, attract ichneumon flies, the natural enemies of white flies.
How to get rid of them:
When you detect the white flies early, wash them off the plants, especially the leaves’ undersides, with a sharp beam of water or a soft soap solution.
After the plants have dried off, you can spray them either with rapeseed oil emulsion, diluted nettle manure or garlic tea.
Cut off infested plant parts and throw them in the garbage bin – not in the compost.
Frequently Asked Questions About Pepper Plant Pests
✔️ Why are my pepper leaves full of holes?
They may be infested with Armyworms, slugs, cucumber beetles, hornworms, slugs or – if the holes are tiny – flea beetles.
✔️ What is the white sticky stuff on my pepper plants?
It’s called honeydew and is a sign of aphids or white flies.
✔️I see fine webbing on my pepper leaves. What is it?
This is spider mites – tiny arachnids that suck plant juices.
✔️ Can I use neem oil on peppers during flowering?
No. Neem oil will stay in the flower and may harm pollinators. If your plant is flowering, use soft soap solution instead.
✔️ Can I use chemical pesticides on pepper plants I’m going to eat?
Yes, but I strongly recommend trying organic methods first.
✔️ Are pepper pests dangerous to humans?
No.
✔️ How often should I check my plants?
I recommend checking them at least every third day, better every day.
You Can Do This
In an ideal world, we would just transplant our veggie babies outdoors, feed and water them and someday have a huge harvest. But we are not the only ones who love the taste of peppers and chillies. Some pests also find them good enough to eat.
Therefore, we must be watchful and check our plants regularly for infestations. The earlier you identify a problem, the simpler the solution usually is.
Don’t be afraid of pests, though. A garden is an ecosystem, and a small number of pests is good as they attract beneficial insects and natural predators. Our goal is not perfection but to help keep the balance.
Not by eliminating pests, but by managing them, because a healthy, well-observed garden rarely suffers catastrophic damage.
Healthy pepper plants are not pest-free plants. They are plants that grow in balance — and a gardener who knows what to look for.
Peppers and chillies are among the most rewarding vegetables to grow in your garden. With the right care and timing, even complete beginners can harvest an abundant, colourful crop bursting with flavour, that puts store-bought peppers to shame.
Last week, a friend waved away my suggestion to grow peppers this year, “Ah, peppers are too much trouble! I’ve given up on them; they never grew well in my garden.” I couldn’t agree less. That would be such a pity! Yes, peppers and chillies have a reputation for being fussy, but with a few key techniques, everybody—even those who have tried and failed before—can grow them successfully.
She laughed and said she’d be willing to give it another try this year if I showed her how to grow peppers and chillies from seed.
Well, if that’s the only obstacle, I’m happy to remove it! In this guide, I’ll show you everything I know about growing peppers and chillies — from starting seeds and creating the right growing conditions to harvesting an abundant, colourful crop.
Nitrogen and potassium; phosphorus when blossoms form
Every 3 – 4 weeks
Harvest
When fully coloured
Late summer to early autumn
🌱 Stage 1: Understanding Peppers
Why Grow Peppers & Chillies?
So, why should we grow peppers and chillies in our gardens when we can easily buy them at the store?
Variety
There are more than 2,000 pepper varieties worldwide – and this list is growing. When you look at the selection in your local grocery shop, it looks meagre: there are usually red, yellow and green (sometimes even orange, if they’re hip) bell peppers and a green and a red variety of chillies.
But there is so much more out there! It’s a bit like with tomatoes: once you realise how many colours, sizes, forms and flavours of just THIS ONE vegetable there are, you can’t help wanting to try them. Or at least some.
Flavour
Peppers and chillies from the store already have a long journey behind them. They’re harvested only half-ripe, packed and shipped, driven to the store by train and truck until they finally land on the shelf.
Naturally, their flavour will never reach its full potential.
But bite into a freshly harvested, ripe pepper, and you’ll get quite a different experience. It bursts with flavour and its rich, fruity, tangy taste is nothing like that of its sad cousin from the store.
Sweet vs hot – you choose
My eldest son loves to add hot chilli flakes to many of his dishes (I once stole a forkful from his plate, and boy, it nearly blew my tongue out!), and he begs me every year to cultivate “some hotter chilli”.
You may have guessed that I’m more of a sweet-and-fruity pepper kind of person.
Nevertheless, I want some marginally hot peppers for making kimchi and other stuff.
And that’s the cool part about cultivating peppers and chillies in your garden: you can choose what flavours you want and grow multiple varieties to cover all your family’s preferences.
But before we dive into seed-starting, let’s first understand what we’re actually growing.
Pepper Basics — Understanding the Plants
What are Peppers?
Peppers are botanically fruits, but we use them as vegetables. They are all forms of the Capsicum genus and include both sweet (bell peppers) and hot (chilli peppers) varieties. Vegetable peppers have nothing to do with peppercorns. In fact, it was Columbus who made that mistake: thinking he was in India, he thought the hot and spicy plant he found was pepper.
Heat levels
When I was growing up, I only knew bell peppers in different colours that we used in salads, snacks, and dishes. When I accidentally bought a pepper seedling from the nursery, and I nearly ignited when I tasted one of its fruits, I learned about the Scoville Heat Unit Scale (SHU).
This scale rates how spicy peppers are. It goes from 0 to 16 million, with 0 indicating no spiciness (that would be bell peppers) and 16 million extreme pain. Although 16 million is only a value that exists on paper, at least up to now. The spiciest pepper to date is the variety “Pepper X” with an official SHU of 2.69 million.
Common pepper types
Here are the basic pepper groups from mild to insanely hot:
Sweet peppers
As the name indicates, sweet peppers are sweet with either no or just a tiny hint of heat. Bell peppers belong to that group, as well as banana and pimento peppers.
Mild to Medium Heat Peppers
These peppers have a clearly discernible spiciness and range from mild chillies like Poblano and Anaheim to hotter varieties like Jalapeño.
Hot Peppers
Hot peppers are clearly hot and range from Serranos, which are often used for spicy salsas, to Cayenne peppers and Thai chillies. Whenever you work with these peppers, wear gloves and avoid touching your face, eyes, or nose. It burns intensely!
Super Hot Varieties
When (or rather: if!) you eat super hot pepper varieties, you’ll pay at least with profuse sweating. Habaneros, for example, show between 100,000 and 600,000 Scoville. Bhut Jolokia, or “ghost peppers” as they are also called, even reach 1,000000 Scoville. Untrained chilli eaters were known to require medical treatment from ghost peppers. “Carolina Reaper”, the elder brother of “Pepper X”, can show up to 2.7 million SHU.
These peppers are not for beginners or the faint of heart! Even in handling the plant, you need to wear protective equipment such as gloves, a mask and safety goggles.
Peppers and chillies need at least 6 hours of sunlight per day, better 8 or more. Choose a spot in your vegetable garden that lies in full sun and is protected from harsh winds.
My garden, for example, is facing southwards and has no houses or trees on the east and west sides that could cast a shadow on the vegetable patches.
Normally, that would expose the garden to the west winds that usually blow here, but it lies in a slight hollow, which creates a microclimate that’s slightly warmer than the surroundings.
Water
Naturally, peppers and chillies need water to survive and thrive. Their roots are sensitive, rather shallow and fine, though, which is why the soil in which they grow shouldn’t be too wet.
While we water tomatoes sparsely but thoroughly, peppers and chillies must be watered more regularly but in smaller amounts.
Outside in the garden, I usually water them twice a week or, when it’s really hot and dry, every other day. To check if they need water, I poke a hole of about 2 -3 cm (1 inch) in the soil with my finger. If it’s still moist under the surface, I don’t do anything, but if it’s dry, I get the watering can.
In the greenhouse, where temperatures are usually higher, I water them every day or at least every other day.
In pots, watering daily is a must, especially when it’s hot outside.
No matter where you grow your peppers and chillies, though, it’s always better to water them in the mornings rather than in the evenings and avoid splashing water onto the leaves to prevent fungal diseases.
Garden vs containers
You can cultivate peppers and chillies outside in a garden patch, indoors in a greenhouse or even in containers on a balcony or patio.
I’ve tried all three methods and learned the following:
Peppers can grow well outside in a patch in your vegetable garden, but only if the summer is warm and dry. Unfortunately, last summer was quite rainy, and sometimes temperatures dropped below 20 °C (68 °F), which didn’t suit the peppers. They grew reluctantly and produced less fruit than in the year before, when the summer was very hot and dry.
For that reason, I like to grow some peppers and especially chillies in the greenhouse as well (chillies like it even hotter than peppers). There, I’m in control of watering, and temperatures are always a bit higher than outside. It’s important, however, to keep the greenhouse properly ventilated so that temperatures don’t climb too high.
Lastly, I also grew some peppers and chillies in containers on my balcony. I chose pots with about 10 L volume, which turned out to be ok. Ensure the seedlings get enough light while being protected from rain. When it gets too cold or moist outside, you can easily carry them in and pamper them there until the weather’s right again.
Soil
Peppers and chillies need nutritious, well-draining soil that’s slightly acidic to neutral (pH 6.0–6.8). To prepare your garden or greenhouse before planting, distribute compost on the patch and rake it roughly in.
Before you plant pepper and chilli seedlings, make sure the soil is warm, between 15 – 18 °C (60 – 65 °F). Otherwise, they’ll stop growing for quite some time.
If you grow peppers and chillies in containers, fill them with mature compost, mixed with rock flour, nettles and well-rotted manure or sheep wool. The nutrients in these components will slowly release into the soil, where they can be absorbed by the plants.
Spacing
As pepper and chilli plants grow, they become broader. It’s important, therefore, that we plant them with enough space between them and also between the rows so that they have enough space.
If we plant them too closely, they’ll not only produce less fruit but will also be prone to diseases and pests.
In the patch, the right spacing between pepper and chilli plants is 50 – 60 cm (20 – 25 inches) and 80 – 100 cm between rows (2 – 3 feet).
In the greenhouse, there’s usually not enough space for rows, and we have to plan a bit differently. It’s a tried-and-tested method to plant peppers (or tomatoes, for that matter) diagonally instead of in rows, making the most of the limited space.
That means, we plant one pepper at the front and diagonally offset at a distance of 50 cm (20 inches) at the back, then again, one plant diagonally offset at the front and so on.
In containers, logically, we put only one pepper or chilli plant. When they grow larger, we can easily pull the pots apart, creating enough space for our plant babies.
Now that we know the growing conditions for peppers and chillies, let’s start growing them from seeds!
🌱 Stage 3: Starting Peppers from Seed
Seed Starting Peppers and Chillies— The What, When & How
When to start pepper and chilli seeds indoors
Many guides tell you to count back 8 – 10 weeks from your last expected frost date to seed-start peppers and chillies. In Bavaria, the last frost is expected in mid-May, so that would allow a time window of beginning to mid-March for seed-starting.
In my opinion, however, that’s too late. While peppers can be started 8-10 weeks before the last frost, they’ll only begin producing heavily much later in the season — potentially not until September or October when cooler weather slows them down again.
Let me show you my calculation:
Peppers and chillies take about 7 months to grow from seed to harvest; some very hot varieties need even longer. For that reason, we have to start them indoors a good deal earlier than March.
If you missed that window, you can, of course, start peppers and chillies until the beginning of March. Harvest will be in September then, and – depending on your climate – could be less than peppers that have been started earlier. In that case, I’d recommend growing them either in a greenhouse or in pots on the balcony or patio. When it gets too cold outside, you can easily put the pots indoors and still get a good harvest.
If starting in March, focus on faster-maturing sweet peppers rather than super-hot varieties, which need the full growing season.
Preparing to Sow
Planting is a bit like cooking – only quality ingredients lead to great results. Make sure, then, to select high-quality seeds for the peppers and chillies you’re going to grow.
Heirloom seeds
Heirloom pepper and chilli varieties offer a huge diversity in shape, colour, size and flavour, and their origins sometimes go back hundreds of years!
They often have a very unique visual appearance, and can be as large as a forearm or as tiny as cherries.
Seeds from heirloom varieties can be harvested and used for the next season.
My favourite varieties are “Roter Augsburger” (pointed pepper), “California Wonder” (bell pepper), Yellow stuffer (tomato pepper), “Anaheim” (mild chilli) and “Joe’s Long” (peperoni)
F1-Hybrids
Hybrid varieties, indicated by the addition F1, are selected by plant breeders in a complex method. They also come in all sizes, forms and colours and produce great fruits. Unlike heirloom varieties, however, their seeds are not of pure origin and produce different varieties than the parent plant.
F1 hybrids are often more disease-resistant and produce more uniform harvests, making them reliable for beginners.
Widely used F1 hybrids are “Kostas” (pointed pepper), “Paladio” (bell pepper) and “Estino” (chilli)
Sowing Process
When you’ve chosen which varieties you want to grow, the next step is to get your equipment ready.
Containers
There are, of course, those mini greenhouses for seed-starting, which come with a transparent lid to create a protected micro-environment. They’re wonderful for growing seedlings of any kind. I have some of them myself and use them every year.
If you’re new to gardening, however, and don’t want to invest too much money, you can use almost any container:
Cut open empty milk or juice cartons (lengthwise or crosswise), clean them and fill them with soil.
Recycle old planting pots that are not too deep.
Glass jars (without lids) you’d otherwise throw out can also be of use
Egg cartons are a wonderfully recyclable way to start any vegetables
Make four cuts of about 2 cm (1 inch) in empty toilet paper rolls, fold the cuts inwards and fill the roll with planting soil.
To grow a large-ish amount of plants, you can use flat plastic boxes with lids.
Just look around your house, and you’ll find plenty of containers you can use for seed-starting peppers and chillies.
One word on water-logging: many guides tell you to poke holes in the containers to prevent it, and by all means, do that if it makes you feel safer. I don’t do it because, let’s be honest, it can be a real mess when water drains out of the holes. Once, I had to paint my living room wall anew because the (dirty) water ran across the windowsill and down the wall, where it left nasty smudges.
I, therefore, use the containers as they are and try to be careful not to water too much.
Soil mix
The best soil for seed-starting peppers and chilli is either store-bought cultivation soil or well-rotted compost. Seeds have all the nutrients they need for germination in themselves. A rich, nutrient-dense soil would only lead to spindly and weak seedlings.
Put the soil in the containers you want to use and make sure to distribute it well to the edges. Press it slightly flat and fill up more soil if necessary. There should be a gap of about 1 cm (0.4 inches) from the soil to the edge of the container.
Soaking (optional)
Some people swear by pre-soaking pepper and chilli seeds in warm water or tea for 12 – 24 hours. I’ve tried it and couldn’t see any difference in germination between unsoaked seeds. But that’s just my experience. Go ahead and try it for yourself.
Seed-depth and spacing
When the containers are prepared, I poke holes of 0.5 – 1 cm (0.2 – 0.4 inches) in them where the seeds go in. If I use containers where only one seed will go in, for example, small pots, egg cartons, or toilet paper rolls, I (naturally) make only one hole in the middle of the pot.
With larger containers like mini-greenhouses, empty milk cartons or larger plastic containers, I first draw several rows with my finger and then poke holes along these lines. The seeds should be about 2 cm (0.8 inches) apart. Later, when the first pair of seed leaves shows, they’ll be thinned out and planted in larger pots.
When all seeds are in the pots, water them carefully and cover them either with a transparent lid (if part of a kit) or just wrap them with cling film. That way, we create a greenhouse-like atmosphere that holds the warmth and moisture at a constant level.
It’s important to open the covering daily to allow airflow and prevent fungal diseases.
Temperature
Peppers and chillies are heat-lovers, and that shows already at seed-starting. To germinate, pepper and chilli seeds need a soil temperature between 25 and 28 °C (77 – 82 °F). That’s a temperature that cannot be reached with normal room temperature. Instead, you’ll need a heating mat or just a (not too) hot water bottle that you put under the pots.
If you don’t have a heating mat and prefer to use your hot water bottle for yourself, you could place the containers on a windowsill above a radiator.
With constant temperatures in this range, the pepper and chilli seeds will sprout in 10 – 15 days.
Light for Seedlings
When the seedlings show, you can remove the heating mat and put them at slightly lower temperatures, but you must ensure that the seedlings get enough light. Here, too, normal daylight isn’t enough, especially when we seed-start in winter. A plant lamp is a great solution. It shines on the plants with just the right light frequency that they need, and we can adjust the “light hours” with a timer.
Peppers and chillies need 8 – 10 hours of light. When they get less than that, or it’s too dark, they’ll become “leggy”. That means, they grow long, thin stems that reach toward the light but are too weak to hold themselves. Leggy seedlings eventually fall over.
Putting the seeds in the soil is one thing. Now we must tend to our plant babies.
Growing Strong Seedlings
Watering & Feeding Seedlings Indoors
Throughout the whole growing process, we must verify that the soil in which our seedlings grow is always moist. Now “moist” doesn’t mean “wet”. If you’re not sure, carefully feel the soil or even poke your finger in a little bit. If it’s moist to the touch, leave it as it is. If it feels dry, water it with measure.
When watering, only moisten the soil and check that water doesn’t splash on the leaves.
From water alone, however, plants can’t live. When the first true leaves are fully open, I mix a bit of fertiliser into the water. You can either use a ready-mixed tomato fertiliser, or you can use diluted home-made nettle manure, at best mixed with comfrey. As peppers and chillies are cultivated for their fruit, they not only need nitrogen and potassium but also phosphorus for fruit development.
Thinning Peppers and Chillies
When the seedlings have developed their first pair of true leaves (the seed leaves don’t count), it’s time to thin them out by transplanting them into larger pots. This not only provides them with more space for developing roots but also with more light and nutrients.
For thinning, I always get the new pots, which should have a diameter of 8 – 10 cm /3 – 4 inches, ready. Then, I fill them with compost and press the soil slightly. Next, I carefully loosen the seedlings in the tray or pot with the pointed end of a dibber. Holding the seedling by its stem with one hand, and helping with the dibber in the other hand, I meticulously remove the plant from the soil. Sometimes the roots get entangled with those from the neighbouring plant. Here also, the pointy end of the dibber comes in handy for cautiously “combing” them out of each other.
Now, I poke a hole with the round end of the dibber in the soil of the new pots and put the seedling in there. I always ensure that the seedling sits as deep as before.
Pruning & Shaping
Strictly speaking, pruning peppers and chillies is not necessary to produce fruits, but careful and regular pruning can bring even more harvest.
Why prune peppers and chillies?
Pruning encourages the plant to form new twigs and grow sturdier. A sturdy plant can bear more or larger fruits without collapsing.
With fewer leaves, the air can flow better through the twigs, drying off faster any moisture due to watering/rain or condensation faster. This reduces the risk of fungal diseases.
It also induces the plant to form more blossoms (more blossoms = more fruits) over a longer period of time (longer time = longer harvest).
At the same time, the sun can reach the whole plant, which induces the pepper and chilli fruits to become larger and sweeter.
How and when to prune peppers and chillies?
When the plant is about 15 – 20 cm (6 – 8 inches) high, cut off the tip of the main stem. Use a pair of clean gardening scissors and cut directly above a pair of leaves.
This first pruning makes the plant form more side twigs, leading to sturdy growth and more fruits.
When there are too many side shoots and leaves, thin them by thoughtfully cutting some of them off. Don’t remove too many leaves, though. The plants need them for photosynthesis.
This thinning improves the airflow and decreases the risk of fungal diseases, and the plants can also absorb more sunlight.
Always cut off shoots near ground level, little shoots that sprout out of the stem very near or even under the ground. They’re just side stems and only cost the plant energy.
King blossom
Many guides advise breaking out the king blossom, the first flower that appears at the Y-junction where the stem splits. I’ve tried doing just that, and I can’t say I saw any difference in yield, so I leave it on the plant. There’s one exception, however: when the king blossom forms on a seedling in the pot, it’s better to break it out, as it would cost the plant too much energy at that stage.
If the plants bear many but small fruits, I remove some of them. That way, the plants have more energy for the remaining fruits, which then grow larger and, in my opinion, yummier.
In addition to pruning, it’s always a good idea to support the plants by poking a stick into the soil and binding the stem loosely to it.
Hardening Off
Before we can release the seedlings into the wild outdoors, we have to harden them off. Start about a week before transplanting and put the seedlings outside for a couple of hours.
It’s important to monitor the temperature, as peppers and chillies are very, very fussy. Make sure it’s a warm day and put the seedling tray or pots in the shade so they don’t get too hot or even sunburnt.
Each day, prolong the time the plants stay outdoors, and after 3 days, you can start placing them in the sunlight (not around noon, that would be too much).
To make them accustomed to the wind, gently brush them with your hand, simulating wind movement.
After one week of hardening off, the peppers and chillies are ready for transplanting.
🌿 Stage 4: Transplanting & Early Care
Transplanting to the Garden or Containers
When the nights finally stay warm, it’s time to get our peppers and chillies outside.
I always transplant my seedlings on a cloudy day or in the late hours of the afternoon to reduce the risk of plant shock.
First, I lay the pots or carefully uprooted plants out on the patch so that I can adjust the distance between them. Remember: it’s 50 – 60 cm (20 – 25 inches) between plants and 80 – 100 cm between rows (2 – 3 feet). If you plant in large pots, you can skip that step, of course, as it’s only one plant per pot.
In each planting hole, I put a small shovel full of moistened, well-rotted manure and half a handful of rock flour as a long-term fertiliser. This provides my peppers and chillies with some quickly available nutrients (manure) and a long-term fertiliser (rock flour). More on fertilising in “Daily Care and Maintenance”.
Then I put the plants in slightly deeper than they were in the pots. I cover the hole with the soil I removed earlier and carefully press it down around the roots.
I water the seedlings properly after planting so that the soil settles around the roots, leaving no air holes.
When all my peppers and chillies are in the ground, I cover the soil between them with mulch. This could be hay, straw, pulled weeds, leaves, sheep wool, or wood shavings. If you plant in pots, mulch as well. Mulch helps reduce water evaporation, so you don’t have to water too often. It also reduces the growth of weeds, which I appreciate because weeding is not my favourite task.
If you live in a cooler climate and don’t have a greenhouse, you may want to consider foil tunnels around the plant rows. I wouldn’t use covers as they are too heavy and could eventually break the plants off.
🌶 Stage 5: Caring for Mature Plants
Daily Care & Maintenance for Garden Plants
Watering Routines
To check if my peppers and chillies need watering, I test the soil by touching the surface and even poking my finger into the ground. If it feels dry, it’s time to water.
I water the plants thoroughly, but ensure I don’t overwater them. With good drainage, either in the patch or the pot, that’s no problem.
Unlike tomatoes, which have deep roots, peppers and chillies grow shallower roots. For that reason, they need to be watered more often as they can’t get water from deep down.
Fertilising
Once your plants are thriving, the next step is to support them with the right nutrients.
Peppers and chillies are heavy feeders, which means they need a lot of nutrients. I prepare the patches in spring by adding compost and raking it in.
After the first fertilisation during transplanting (see above), I don’t feed the plants until the first buds show. Now they need phosphorus and potassium, and we can feed them with a tomato fertiliser.
Every 3 – 4 weeks, I add some nettle manure to the water and water my peppers and chillies with it. When the fruits start to change their colour, I don’t fertilise them anymore; it would only lead to watery, bland fruit.
After harvesting, however, another dose of fertiliser can be good for the plant, especially when it’s still early enough to expect a second (smaller) harvest.
Temperature control
We can’t control the temperature outside, of course, but we can monitor it in a greenhouse. I also had times when I forgot to open the windows of my greenhouse and only got there around noon or even later. Especially on sunny summer days, temperatures get high very fast in a greenhouse, and although peppers and chillies need it warm, hot is too hot and temperatures above 35 °C (95 °F) can stress plants and cause blossoms to drop.
The same goes for colder temperatures. Below 13 °C (55 °F), peppers and chillies will stop growing. When low temperatures are forecast, we just protect our babies with a foil tunnel or by closing the greenhouse windows.
If you cultivate peppers and chillies in pots, put them indoors when it’s too cold outside. If it gets warmer, you can always put them back out.
Pollination of Peppers and Chillies (For More Experienced Gardeners)
The blossoms of peppers and chillies have both male and female parts, which means they’re self-pollinating, helped by movement through wind or insects.
It’s never guaranteed, though, that the blossoms are pollinated, especially when you grow peppers and chillies in pots on a balcony. Pollination can also be an issue in small greenhouses where insects don’t get in easily. (My greenhouse is quite large and has huge windows, so pollination is not a problem.) Here’s how we can help the plants:
The right time for pollinating peppers and chillies is when the blossoms open in the morning. The high humidity and cooler temperatures make the pollen moist and sticky, which makes pollination easier.
Either use a soft paint brush or your finger to transfer the pollen. Gently brush over the open blossom to get the pollen stuck where it should, and repeat that action after three days.
Another, easier method is to tap the blossom a few times with your finger to make it self-pollinate or just to carefully (!) shake the plants. The movement will brush the pollen onto the female parts of the blossom.
Although pollination is mostly an issue with plants on balconies or in a greenhouse, it can be useful to help pollination with plants in the garden, especially when you want to harvest the seeds for the next season. By pollinating by hand, we remove the risk of cross-pollination. There won’t be any unforeseen cross-breeds, which could have negative effects on the peppers’ characteristics.
Companion Planting with Peppers and Chillies
The right companions can protect plants from pests and enhance growth, while wrong companions compete, for example, for space or nutrients.
Good companions for peppers and chillies help repel pests, attract beneficial insects, or have complementary growing habits:
Basil: Repels pests, attracts pollinators and promotes growth
Dill: Attracts pollinators
Cucumbers: Similar light and water requirements
Nasturtium: Attracts aphids away from peppers (trap crop)
Garlic: Protects from fungal diseases and aphids
Onions: Repel pests like white fly
Carrots: Loosen the soil
Parsley: Attracts pollinators
Calendula: Repels nematodes
Lettuce: Keeps the soil moist
Spinach: Keeps the soil moist
Avoid planting peppers near these crops, as they compete for nutrients or share diseases:
Potatoes: Same plant family, i.e. similar requirements and susceptibility to diseases
Tomatoes: Same plant family, i.e. similar requirements and susceptibility to diseases
Eggplants: Same plant family, i.e. similar requirements and susceptibility to diseases
Peas: Attracts aphids without drawing them away from peppers
Fennel: Inhibits the growth of peppers and chillies
Celery/Celeriac: Heavy-feeder
Protecting Your Peppers from Pests and Diseases
While peppers are relatively hardy plants, they can encounter a few common issues. The most frequent problems include aphids, spider mites, and blossom end rot (dark spots on fruit bottoms caused by irregular watering).
The best prevention? Healthy plants! Follow the care guidelines in this article—consistent watering, proper spacing, good air circulation, and companion planting—and you’ll avoid most problems.
But how do we know when peppers and chillies are ready to harvest? And how to harvest them properly? I’ll show you.
🍅 Stage 6: Harvesting & Storing
Harvesting Peppers and Chillies — When & How
Knowing When Peppers and Chillies are Ready to Harvest
Timing
As a rule of thumb, most varieties need 60 – 80 days from flowering to full ripeness. Depending on whether they grow in a greenhouse or outdoors, this is between mid-July and mid-August. Outdoors, it takes longer and larger fruit also take longer to get ripe than smaller ones.
Colour, firmness and size
Peppers and chillies are ready to harvest when they’ve developed their variety-specific colour. Ripe peppers and chillies feel firm and have a slightly glossy appearance. They have reached their expected full size (which you can check on the seed package), and the colour should be deep and uniform, not pale or patchy.
Green peppers are unripe, but can, of course, also be eaten. Their taste may not be fully developed, though, and they might taste less sweet and more bitter than ripe ones.
Harvesting green peppers can be sensible when there are (too) many fruits on one plant, increasing the risk of collapse. In fact, harvesting the first pepper, the so-called “king pepper”, when it’s still green, is often done to encourage the plant to form more fruit.
How to Harvest Peppers and Chillies Properly
Cutting technique
To harvest peppers and chillies, cut them off with a sharp knife or garden scissors. If you try to rip the fruits off the branch, you usually either rip off the branch or part of the fruit. I know this all too well, because there always comes that day, when I’m too lazy to grab my garden scissors, and I either damage the plant or the fruit in the attempt to tear it off. And just in case you think „I’ll just twist the pepper until it comes off“: Nope, that doesn’t work either.
The fruit stem, or at least part of it, should always remain at the fruit so that it stays closed. This is especially important when you want to store the fruit.
Harvesting frequency
I usually check my plants every 2 – 3 days during peak season and regularly harvest the ripe fruits. This encourages the plant to produce even more fruits. When you leave overripe fruits on the plant, that signals it to stop producing.
Hot Pepper Safety
When harvesting hot peppers and chillies, we MUST wear gloves. For some super-hot varieties, you should also wear safety goggles and a mask, as the capsaicin that causes burning is so strong that it can irritate your eyes and respiratory system.
After handling hot peppers and chillies, avoid touching your face, especially your eyes. Wash your hands thoroughly, even if you’ve worn gloves.
The hotter the pepper or chilli, the more irritating it can be.
Ripening indoors
When nighttime temperatures drop below 17°C (63°F), peppers will stop ripening on the plant. What should you do then when your plants are full of green peppers or chillies, but cold weather is coming?
You can either protect the plants with a fleece, but there’s always the risk that twigs or fruits break off.
Alternatively, harvest the unripe peppers or chillies and let them ripen on a sunny windowsill indoors.
Some guides recommend putting an apple or a tomato next to the unripe peppers on the sill. Both fruits emit ethylene, a gas that induces ripening in some fruits. With peppers and chillies, however, that doesn’t work.
Some gardeners even pull up the whole plants and hang them upside down indoors to let the remaining fruits ripen. I haven’t tried that, but go ahead if you have the space.
How to Store Peppers and Chillies
Short Storage of Peppers and Chillies
Fresh peppers and chillies should always be stored in a dry and cool place, optimally at 7-10°C (45-50°F). If your fridge has a vegetable crisper drawer, that’s ideal. Here, they stay fresh for up to one week, green fruits even longer.
Long Storage of Peppers and Chillies
There are several ways to store peppers and chillies long-term, from freezing to drying, fermenting and pickling. The longer we store the product, however, the worse its quality gets. It’s best, therefore, to use up stored peppers and chillies within one year.
Freezing peppers and chillies
We can either freeze peppers and chillies whole or cut in strips or squares. Wash the peppers and dry them thoroughly. Then put them whole or cut up on a baking tray or wooden board with parchment or baking paper, and put them in the freezer. It’s important to freeze peppers and chillies separately first, to prevent them from sticking together and getting damaged when we take them out of the freezer.
When the fruits are completely frozen, put them in a freezer bag, press out the air and label it. Labelling is important, even when you think you can always see what’s inside the bag. Let me tell you, as someone who wanted to add red pepper to a hearty stew. Turned out what I put (frozen) in the stew wasn’t peppers, and I ended up eating fruity rosebud soup instead!
Drying peppers and chillies
A different method of preserving peppers and chillies is drying, which is ideal to keep their full taste.
We can either dry them by cutting them into rings (or leaving them whole when they’re small), threading them on a string and hanging them in an airy, warm place for 2 – 4 weeks, depending on the humidity. It’s quicker, though, to dry them in a dehydrator or in the oven at 60-70°C (140-160°F) for 6-12 hours.
Store dried peppers and chillies in tightly closed jars or containers. Before doing so, you can also grind them finely.
Pickling chillies
Pickling chillies is less common than freezing or drying them, but no less yummy!
Make a brine from water, vinegar, salt, sugar and optionally herbs and spices to your taste. Boil that mixture until the salt and sugar dissolve. Pack the whole or cut up chillies in a jar, pour the hot brine in so that they’re all covered and immediately close the lid tightly.
Normally, they need about 24 hours to absorb the flavours of the vinegar brine, but I’d suggest letting them rest for 1 – 2 weeks before opening a jar. That way, the aroma is even more intense.
Store pickled chillies in the refrigerator for up to 3 months, or process in a water bath for long-term shelf storage.
Fermenting peppers and chillies
If you’d like to go one step further, chillies can easily be lacto-fermented. Wash them and dry them thoroughly, and cut them into pieces (I usually cut them into fine strips). Make a 3% brine from 30 g salt and 1 litre of water.
Pack the chillies in a jar and pour the brine in so that all chillies are under it. Now, cover it with a fermenting weight of any kind and loosely close the lid. Let the jar sit at room temperature but away from direct sunlight for 7 – 10 days. When bubbling decreases, store the jar in a cool, dark and dry place like a cool basement or the fridge.
Don’t throw away the seeds from your homegrown peppers and chillies. With the right plants and technique, you can save them for the next season.
🌱 Stage 7: Saving Seeds & Overwintering
Saving Seeds From Peppers and Chillies
What plants can be used?
Saving seeds from our own pepper and chilli plants is a simple method to preserve our favourite plants after harvest. It’s important, though, that we know what we’re doing: Only seeds from open-pollinated or heirloom plants can be used for saving. Seeds from F1-hybrids are not suitable, as their offspring will not be the same as the parent plant.
It’s equally important to make sure that the fruits from which we want to save the seeds have not cross-pollinated with other pepper and chilli varieties from our (or our neighbour’s) garden.
It’s easiest to hand-pollinate the blossoms when they’re not fully open. Break them open, pollinate them with your finger or a brush and – if you want to be 100 % sure – fix a finely-meshed cloth around the blossom with a rubber band or string. The resulting fruit is true-to-type. This is mainly necessary if you’re growing multiple varieties close together.
Always check that the fruits you take for seed saving are healthy.
How to save seeds from peppers and chillies
Take a fruit that’s a bit riper than those you’d normally harvest for eating. It should show its characteristic end colour and smell ripe. (Be careful, though, to check the smell of hot or even super-hot varieties as they can irritate the respiratory system. With them, you have to rely on colour and firmness as indicators for ripeness.
Cut the pepper or chilli open and cautiously remove the seeds without squeezing them.
Put the seeds loosely on a kitchen towel or plate and put them in a dark and dry place (not above a radiator) with adequate airflow.
Dry the seeds until they’re hard and rustle when you handle them.
Put them in a paper bag, label it and store the seeds in a dark and dry place.
That way, you can start peppers and chillies from seeds again next year without buying new seeds.
Properly stored pepper seeds remain viable for 2-4 years, though germination rates decline over time.
In my hardiness zone, I can harvest peppers and chillies until around the beginning to mid-October. After that, it gets too cold, even in the greenhouse. When the plants are in pots, you can put them indoors and prolong the harvest time until November.
Experimental – My Experience So Far
Strictly speaking, peppers and chillies are perennials, not annuals. Last year, I dug up some pepper and chilli plants from the greenhouse, planted them in pots and brought them indoors to overwinter. Unfortunately, they were infested by aphids and lost all their leaves. Two plants have survived so far (at least I think they’re still alive).
My first overwintering attempt taught me that overwintering peppers indoors is possible, but challenging — pests and low light are the main obstacles. I’m still experimenting with this and will share what I learn.
You’ve harvested a basket full of colourful peppers and chillies, more than you can eat right now. Some you might want to eat within the next few days, but the others you can preserve for winter.
🔧 Stage 8: Common Problems & Solutions
Troubleshooting
Why aren’t my pepper seeds germinating?
The Problem: The seeds have been in the soil for 3+ weeks, but haven’t sprouted yet.
Common Causes & Solutions
Temperature is too low – Pepper seeds need 25-28°C (77-82°F) to germinate. Use a heating mat or a hot water bottle to increase the temperature.
The seeds are too old – Pepper seeds lose their viability after 2-4 years. Always check the date and do a germination test with a few seeds on a damp paper towel first.
The seeds are planted too deep – Seeds should be only 0.5-1 cm (0.2-0.4 inches) deep. Deeper than this, and they won’t reach the surface.
The soil is either too wet or too dry – Keep the soil consistently moist, but not waterlogged. Check daily and mist if needed.
My seedlings are tall, thin, and falling over. What’s wrong?
The Problem: The seedlings are leggy and weak and can’t support themselves.
The Cause: Is always insufficient light. Pepper seedlings need 8-10 hours of bright light per day, especially when they’ve been started in winter.
Solutions:
Add a grow light immediately and place it 10-15 cm (4-6 inches) above the seedlings
Move to the brightest window you have (south-facing is best)
When transplanting, bury the leggy stem deeper to provide support
Going forward, start seeds later (February instead of January) when the natural light is stronger, OR invest in proper lighting from the start
Why are my pepper plants flowering but not producing fruit?
The Problem: Your plants produce lots of beautiful flowers, but they drop off without forming peppers.
Common Causes & Solutions:
Temperature issues – Peppers drop their blossoms when it’s too hot (above 35°C/95°F) or too cold (below 13°C/55°F). Provide shade in extreme heat and protect your plants from cold nights with fleece or bring the pots indoors.
Lack of pollination – Especially in greenhouses or on balconies without wind/insects. Hand-pollinate by gently tapping flowers or using a soft brush to transfer the pollen between blooms.
Inconsistent watering – Stress from drought causes blossoms to drop. Water regularly (every 2-3 days) and mulch to retain moisture.
Too much nitrogen – Overfertilizing with nitrogen-rich fertilisers produces lots of leaves and flowers but no fruit. Switch to a balanced or phosphorus-rich fertiliser instead (tomato fertiliser works well).
The leaves on my pepper plants are turning yellow. Is my plant dying?
The Problem: Yellowing leaves, starting from the bottom or throughout the plant.
Diagnosis depends on the pattern:
Lower leaves yellowing – Usually normal ageing OR nitrogen deficiency. Feed with a balanced fertiliser or nettle manure.
Yellowing between veins (leaves stay green along veins) – Magnesium deficiency. Add Epsom salt solution (1 tablespoon per 4 litres of water).
All-over yellowing + wilting – Overwatering or root rot. Let the soil dry out between waterings; ensure good drainage.
Yellowing + curling + stunted growth – Could be pests (check for aphids, spider mites) or a viral disease. See the pest and disease guide [link].
My peppers have dark, sunken spots on the bottom. Can I still eat them?
The Problem: Blossom end rot – dark, leathery patches on the blossom end (bottom) of fruits.
The Cause: Calcium deficiency, usually triggered by inconsistent watering rather than a lack of calcium in the soil.
Solutions:
Water consistently – This is the #1 fix. Water deeply every 2-3 days rather than lightly every day.
Mulch heavily to maintain even soil moisture
Remove affected fruits – They won’t recover, and removing them lets the plant focus energy on new, healthy fruit
Add calcium – Work crushed eggshells or bone meal into the soil for long-term prevention
Reduce nitrogen fertiliser – Too much nitrogen interferes with calcium uptake
The good news: Blossom end rot isn’t a disease and won’t spread. New fruits will be fine once you fix the watering.
How long does it take to get peppers after transplanting?
The Problem: Impatience! “I transplanted 3 weeks ago and still no peppers!”
The Reality: After transplanting outdoors in mid-May, expect:
First flowers: 3-4 weeks
First small fruits: 6-8 weeks
First ripe, harvest-ready peppers: 10-14 weeks (mid-July to August)
Bell peppers and larger varieties take longer than small chillies. Hot varieties often mature faster than sweet peppers.
Be patient! Peppers spend the first weeks after transplanting establishing roots and adjusting to outdoor conditions. Once they start producing, they’ll continue until frost.
Can I grow peppers successfully if I missed the January/February seed-starting window?
The Problem: It’s March or even April, and you want to grow peppers, but you feel it’s too late.
The Answer: Yes, but adjust your expectations and strategy.
Options:
Buy seedlings – Most garden centres sell pepper seedlings in April/May. You’ll skip the seed-starting challenge and still get a harvest.
Start seeds in March – You can still start seeds, but harvest will come in September, instead of July/August. Grow in pots or a greenhouse so you can extend the season by bringing plants indoors when it gets cold.
Choose fast-maturing varieties – Look for varieties that mature in 60-70 days rather than 80-90 days. Small chillies generally mature faster than large bell peppers.
Plan for next year – Mark your calendar to start seeds in January or February for best results.
Late-started peppers can still produce well, especially if you give them extra care and protection as autumn approaches!
FAQs – Questions and Quick Answers
✓ When should I start pepper seeds indoors?
In most temperate climates, January to mid-February.
✓ Why are my pepper seedlings leggy?
They got too little light. Put them under a plant lamp immediately.
✓ How often should I water pepper plants?
Check the soil and water when it feels dry. Outdoors, water regularly and deeply every 2 – 4 days.
✓ How long do peppers take to ripen?
This varies depending on the variety and may take between 6 and 10 weeks.
✓ Why are my pepper flowers falling off?
Temperatures are either too high (> 35 °C/95 °F) or too low (< 13 °C / 56 °F).
✓ Can I grow peppers in containers?
Absolutely, just make sure they are large enough (at least 10 litres).
✓ How hot is a jalapeño on the Scoville scale?
Between 2,500 and 8,500 SHU, depending on ripeness and growing conditions.
Why are my peppers not turning red?
It’s either too cold, they need more time, or your variety has a different end colour, like yellow or orange.
When should I transplant peppers outdoors?
After the last night frost, in zone 7b, that’s mid-May.
Wrap-Up & Seasonal Tips
Growing peppers and chillies from seed is absolutely manageable – even for complete beginners. The key is to start early, in January/February already, and keep them warm enough to sprout. When they’ve grown their first real pair of leaves, thin them and plant them in single pots.
Before transplanting them outdoors, harden them off properly and wait until temperatures are warm enough, even at night.
Consistent watering and proper feeding help them stay strong and healthy and produce an abundance of those peppers and chillies you like.
Start small if you’re new to this. Try 2-3 plants of an easy variety like ‘California Wonder’ or ‘Anaheim’, learn what works in your specific garden conditions, and expand from there.
I’ve been growing peppers for years, and I’m still learning new tricks every season. That’s what makes gardening so rewarding—there’s always something new to discover.
And my friend who “gave up” on peppers? She has already ordered new seeds and sown them in a container that’s now happily sitting on a warm windowsill.
Ready to get started as well? Your pepper-growing adventure begins now! 🌶️
Want more gardening guides? Check out these related articles:
When the days get longer in February, my fingers start to itch and I yearn to get them into the dirt. Alas, it’s still way too early to sow and plant outdoors. BUT: we can prepare for spring by seed-starting some of our vegetables indoors in February.
If you’re new to vegetable gardening, seed-starting may seem a bit daunting. After all, you can always buy seedlings at a nursery and plant those out in your garden at the right time. Seed-starting has, however, several advantages compared to buying plants.
Benefits of Starting Seeds Indoors
First of all, it’s cheaper. A seed package of tomatoes containing 10 seeds costs about 3 € now. A tomato seedling, ready for planting will cost at least 4 – 5 € per plant. Last year, I cultivated about 40 tomato plants, which would have amounted to 160 – 200 €! Just for the tomatoes! My inner Ebenezer cringes at the thought…
Another advantage of seed-starting is the variety selection. Most of the tomatoes I cultivated last year wouldn’t have been available as seedlings. I love tomatoes and what’s more, I love to try different varieties. Every season, I buy 4 – 5 new tomato varieties that I haven’t cultivated before and seed-start them together with my favourite varieties. You won’t get that range in a nursery.
Last but not least, seed-starting gives you a head-start for spring as the vegetables (and varieties) you like are ready for transplanting when the time and temperature are right, shortening the time until harvest by several weeks.
February seed-starting: What to grow
Although the list is not as long as in March, there are some vegetables you can seed-start now. Let’s start with warm-season crops:
Tomatoes
Seed-starting tomatoes in February is discussed controversially. As usual, it depends on your climate zone and where you intend to transplant the tomatoes. Wanna plant them outside in the open but can’t do so before May? Then, February is too early to seed-start tomatoes. They would only become too long and leggy and would be too weak to hold themselves up by the time you can transplant them. Tomatoes for the outdoors shouldn’t be seed-started before mid-March.
However, if you have a greenhouse, things are looking different. As you can plant tomatoes in the greenhouse in April already, now is a good time to seed-start them indoors.
I’ve talked about those two already in the January post, but if you haven’t found the time yet to seed-start them in January, you can still do so now in February.
Physalis
If you didn’t start physalis in January, February is your last chance. Sow several seeds into one pot and put it in a warm and bright spot. Temperatures about 25 °C (77°F) are ideal. Physalis grow slowly at the beginning and must be kept moist. Separate the plants when they are about three weeks old and plant them in single pots. Either plant physalis out after the last night frost or separate them again and put them into large pots that you put outside.
Physalis are perennials and can be kept indoors during winter.
Eggplants
Eggplants also need some time to grow and mature, so the end of January / beginning of February is a good time to sow them into small pots. When they’ve grown four leaves, transplant them separately into pots.
Artichokes
Put two to three artichoke seeds into a pot and repot them into separate pots when they’ve reached a good height. Artichokes usually build blossoms (that’s what we eat) in their second year, with a bit of luck and a good head start, even in their first year.
Sweet potatoes
Cut sweet potatoes in half or quarters and let the cutting areas dry for a few hours. Then, put the pieces with the cut end facing down into a pot or balcony box with soil so that only a centimetre (1/3 inch) looks out. Place the pot or box in a warm and sunny place. After some time, shoots will grow out of the sweet potatoes, which we’ll cut off later and put into water for building roots.
Fennel
I must admit that I’m not good at cultivating fennel. I either get no or only a minuscule harvest. Nevertheless, I’ll try it again this year, and although I’m not an expert with this vegetable, I know that seed-starting fennel will make the plants healthier and sturdier before we transplant them outside in April / May.
All these warm-season crops need a temperature of about 25 °C (77 °F) to grow well. A sunny window and maybe a heating mat will help them to thrive.
The following vegetables are all cool-season crops that grow best at a temperature of 18 – 20 °C (65 – 68 °F).
Early brassicas
Brassica is the name for the cabbage family. In February, seed-starting may contain early varieties of
Broccoli
Cauliflower
Savoy cabbage
Red and White cabbage
Kohlrabi.
I usually sow one to two rows of seeds into a large plastic container filled with earth and transplant them later into single pots. Remember to label the rows with some kind of marker where you note the kind of vegetable and its variety. Yes, that’s absolutely necessary because no, you won’t be able to remember what’s where or deduce it from the leaf shape. Been there, done it, definitely not recommendable.
Leafy greens
If not already done, seed-start leafy greens like
Winter lettuce
Iceberg lettuce
Swiss Chard
Arugula.
Sow the seeds into pots and separate the plants later by repotting them.
Onion family
Onions
We’re talking of sowing onions here, not putting bulbs into the soil. Sowing onions may be more time-consuming than planting the bulbs, but it shows advantages like healthier growth, more varieties and better storage capability. And it’s cheaper.
Sow the seeds into a tray or small single pots and place them in a bright spot at about 16 – 18 °C (60 – 65 °F) or colder (not below 10 °C / 50 °F).
Summer leak
Summer leek, that’s harvested in July / August, must be seed-started at the end of January / beginning of February. You can either sow the seeds in trays and transplant them later, or you can sow them into small single pots. Plant the leek outdoors when it’s about as thick as a pencil.
Root vegetables
Celery
Celery needs a long time to grow those thick, bulbous roots and therefore profits from being seed-started in February. Keep in mind that celery only germinates in light, which is why you shouldn’t cover the seeds with soil but only press them down lightly. Water the seeds very carefully and make sure that they aren’t washed off the soil.
Beetroot
Beetroot is normally best sown directly into the patch, but if you want to get a very early harvest and intend to put the plants out into a cold frame or a greenhouse, seed-starting now is a good idea.
Herbs
You can seed-start the following herbs indoors:
Basil
Parsley
Thyme
Sage
Garlic chive
Plant them outdoors after the last night frost; parsley and garlic chive can be transplanted in April already.
Common February Seed Starting Challenges
There are a few challenges every gardener who seed-starts his vegetables indoors will know.
In February, the days are already longer, but the natural light is still not enough for seedlings. For that reason, I always use a plant lamp which not only delivers enough light but also the “right” light.
Also, the air indoors is usually dry due to heating. To counter that, you can put bowls with water on the window sills. In the course of time, and depending on your indoor temperature, the water will evaporate and moisten the air. Additionally, make sure that your seedlings get enough water.
No matter how you heat your rooms, there is a natural temperature fluctuation indoors due to lower night temperatures and alternating day temperatures, especially when the sun is shining and heating up the temperature indoors.
To keep the soil and seedlings moist, it’s best to cover them with a plastic lid, which usually comes with seed-starting trays. If you use other pots, you can also use cling film or any plastic cover, actually, that is transparent enough to let the light through. It’s important, however, to open the door and check on your plants, making sure that the air can circulate and preventing the formation of mould or other fungal diseases.
Summary
As your seedlings thrive under grow lights, it’s time to look ahead to the bustling spring season. Your careful attention to indoor seed starting has given your garden a strong foundation, but the journey is just beginning. Keep monitoring your seedlings daily and adjusting care as they grow.
It’s so satisfying to see those first February seedlings transform into robust plants ready for the garden. That makes all the careful attention worthwhile! As spring approaches, you’ll be the envy of your neighbourhood with all those healthy, vigorous plants. And when later in summer you bite into your first homegrown tomato, you can say nonchalantly, “I knew them when they were just seeds!”
February is not my favourite month. It’s still cold outside, and some days it’s so foggy and gloomy that one could think Spring will never come. On the other hand, however, we can witness how the days become longer in February. Sometimes, temperatures are above zero, and although the melting water leaves the paths and patches muddy, the smell of thawing earth bears the promise of warmer days. That’s when I can feel the itch in my fingers to dig into soil! While we may not be able to plant outdoors yet, there are still plenty of garden tasks we should tackle in February.
Once spring has arrived, it seems that everything must be done right then and there, and we could easily get overwhelmed. Doing some of these tasks now can add 2 – 3 weeks to our growing season!
So, roll up your sleeves and let’s get started!
Overview of garden tasks in February 2026
Here’s a quick overview of all tasks and when to tackle them:
Task
Time
Turn compost heap
Any dry day
Soil preparation
When soil is no longer frozen and dry
Refresh container soil
When soil is no longer frozen
Check seeds
Anytime this month
Organise seeds
Anytime this month
Review and plan improvements
Anytime this month
Build garden elements
Anytime this month
Refresh your garden paths
Any dry day
Fruit tree and berry bush pruning
Before buds swell
Cleaning the greenhouse
Early February
Seed-start
Mid-to-late February
#1 Turn your compost heap
If you’re like me and have forgotten to cover your compost heap in late autumn, it’ll be a bit on the wet side by now. That’s why now, depending on your climate, can be a good time to turn up your compost heap. That way, dry and wet parts are mixed, the heap is aired, and microorganisms, as well as soil organisms, can start working again as soon as it becomes warmer.
When the soil– and thus your compost heap– is no longer frozen, turn everything out with a fork. Either you put it in a new compost heap or box right away, or you make a heap beside your initial compost heap.
If the compost is very wet, mix dry parts into it, for example, hay, leaves or even scraps of cardboard. In the unlikely case that your compost is too dry, water it after you’ve mixed it through and made a new heap.
When you’ve turned over the compost heap, remember to cover it so that nutrients won’t be washed out.
#2 Soil preparation
During winter, the soil in your garden has become dense, and we must loosen it up to prepare it for the first sowings.
As you may know by now, I don’t dig up my garden soil but rather loosen it with the help of a garden fork. When the soil is no longer frozen and has dried somewhat, prick the fork into the soil and jiggle it forward and backwards. That way, the soil will loosen, and air will get into the deeper soil layers. This air will help warm the soil up faster and transport oxygen to the deeper layers of our garden soil.
#3 Refreshing container soil
Garden tasks in February not only include preparing the soil in the patches, but also refreshing used soil for pot planting.
Soil that has been left in balcony trays or pots is pretty much leached out. Dump all this soil into a big container or bucket, add a bit (not too much!) of organic and mineral fertiliser (compost, horn shavings, rock powder, etc.). Now add one part of fresh soil to three parts of used soil. For example, if you have three buckets of spent soil in your mixing container, add one bucket of fresh soil to it.
Mix all the ingredients really well together, and you can use this refreshed soil for your planting pots again. By treating it that way, you not only add the nutrients necessary for healthy plant growth, but by mixing and adding new soil, you also bypass the necessity of crop rotation.
Crop rotation: An agricultural practice to cultivate crops from different plant families in the same place to improve soil health, repel pests and enhance nutrient levels. Click here for a detailed guide to crop rotation.
#4 Check your seeds
By now, you’ll certainly have a planting plan and know what seeds you’ll need. Check the seeds you may have bought or harvested from last year, and buy or trade seeds on local exchange platforms. That way, you’ll not only become a little bit more independent, but you’ll also get seeds that are perfectly adapted to your climate.
#5 Organise your seeds
For years, I bought seeds I already had, just because I had overlooked them in my chaos called the seed box. That only changed when I took the time to organise that box. I took a shoe box and divided it with cardboard into sections. Each section is dedicated to a plant or plant group, for example, tomatoes, lettuce, cabbage, spinach, etc. I put my seed packages in the appropriate section, and that way I can see at a glance what seeds I have and what I need.
#6 Review last year’s garden journal and plan improvements
Before long, we’ll be in the midst of seed-starting, planting, maintaining and harvesting again. Now is the short time frame where we have the opportunity to enhance our knowledge on gardening, review what went well last year and what didn’t.
For example, look what varieties performed poorly and find better alternatives.
Or maybe you realised that one of your patches is shadowed early in the afternoon by a big bush.
February is still a month of reflection and planning, and that’s why now is the perfect time to learn from our experience from the last season and plan improvements based on the lessons we’ve learned.
Here are resources for common issues you might be planning to address:
Have you longed for a cold frame? Now’s the time to build one. The same goes for insect hotels, trellises, raised beds and decorative articles you may want to have for your garden but haven’t found the muse to build.
These are perfect projects for rainy or cold days: Head to your workshop, grab your saw, screwdriver and screws and start building.
#8 Refresh your garden paths
I use wood shavings and chips on my garden paths and at the end of winter (that is: now), I add a fresh coat of them. It not only suppresses weeds but also prevents the earth from the beds from falling onto the path, as long as the layer of wood chips is as high as the soil in your beds.
Alternatively, build frames around your beds, either with planks, round timber, fences made from willow twigs, stone and so on. There are no limits to your imagination. Think it – build it.
#9 Fruit tree and berry bush pruning
Another important garden task in February is pruning. If you haven’t pruned your fruit trees and berry bushes yet, now is more or less your last chance. Here in Germany, we must be done pruning by March 1. After that date, it’s forbidden to cut back any trees or bushes so that the birds won’t be disturbed when they build new nests. Check your local regulations on that matter.
By pruning, we thin the tree crowns and bushes so that they become lighter and airier, and the fruits have more room to grow and ripen.
You can cut the twigs and branches with a wood chopper and use that material for your garden paths or as a mulch for your beds. Leave some sturdy branches and use them as a trellis for peas that you can sow later in spring.
#10 Clean your greenhouse
Over the winter, algae and dirt have collected on the greenhouse sides and windows. Like with every good spring cleaning, this must be removed so that your plants inside will get enough light to grow healthily.
Get a bucket of hot water and some soft soap, and clean the windows and walls from inside by brushing the dirt off with a brush or a sponge. Rinse off with clean water and marvel at how light it has suddenly become in your greenhouse.
Yes, I know, it’s still winter, but spring is already lurking around the corner, and we can do a lot of garden tasks in February to give our garden a head start for the upcoming season.
Don’t wait until March – by then, you’ll have missed the window for several of these tasks. Imagine stepping into your garden in late spring, when others are just starting to prep, and you’re already harvesting.
Remember that itch to get busy in the garden? Now channel that energy into these tasks – your garden is waiting.
Can’t wait to work in your garden?
Browse my complete gardening library for step-by-step guides on every aspect of vegetable growing, from planning to harvest.
These February reflections are part of a monthly practice of noticing what each season asks of us.
What does February ask of us?
In this article, I share how February urges us to slow down, find joy in simple tasks, embrace the garden’s quiet stirrings, and care for body, mind, and soul as we prepare for spring.
In January, I still experience the aftermath of Christmas with its festivity and enjoy the peace and tranquillity of the beginning of the New Year. But February? February makes me restless and sometimes a bit depressed. I yearn to go outside again without several layers of thick clothing – to walk in warm sunshine again. Instead, here in Bavaria, it’s wet, foggy and bleak outside, and it feels as if winter will never end. February is not my favourite month.
I feel a bit like a seed that’s been buried in the soil. The seedling has just broken through the hard outer shell of the seed in search of light and life – only to discover that it’s still surrounded by darkness. That isn’t quite true, of course – there is light up there, and it’s just a little way to reach it.
When I feel my mood drop in February, and the late-winter blues try to kick in, I take a look at the calendar: Candlemas, which we celebrate on February 2nd, marks the midpoint between winter solstice and spring equinox. That means winter is officially half over! Although it’s still some way to go, spring is near.
So, why not embrace that short time before we can go out again and dig in our garden soil without wearing a down jacket by finishing “winter work” and preparing for spring?
The garden is dormant.
But wait – is the garden truly dormant?
The garden in February has many faces. One day, it can be buried under a thick blanket of snow, sleeping deeply and peacefully.
Practically overnight, however, all that ice and snow can melt, leaving a mud bath. And sometimes, the sun comes out, and we hope that spring has finally arrived – only to discover the next morning that it has snowed again.
While it may still be too early to dig in the dirt yet, there are still some things we can do in our gardens, like pruning or building a bird feeder.
Also, it’s time to sow some vegetables indoors for the upcoming season. It’s not the same as actually working outside, but still a wonderful way to give our garden a good head-start. If you want to learn what vegetables you can seed-start now, check out my complete February seed-starting guide.
No matter the weather, we can still take strolls through nature and watch out for those tiny indicators of change. There is one place in the woods near where I live where snowdrops grow. Once a week, I check to see if they’ve emerged yet. And, oh, how gorgeous they are and so strong! Braving the winds, snow and rain and still blooming happily, whispering about the promises of Spring.
If bravery were a flower…
Later in February, we may even discover crocuses, which add colourful dots to the otherwise still colourless garden. It’s a bit like nature wants to contribute to Carnival season.
February Traditions, Celebrations & Seasonal Joy
But February is a month of transition and shows us that it holds both stillness and celebration at once.
It’s high-carnival season in February, with balls, parades and parties of all kinds. As an introvert, these events have always been too loud, crowded and chaotic for me, and I never liked being part of them. What I do like, however, are the yummy treats like Krapfen and Küchle that we eat during that time. It’s one of the few February traditions that I love to keep up!
And then, there’s Valentine’s Day. Even if you’re not into that whole hearts-and-flowers extravaganza, you can still have a nice evening with people you love. Who says Valentine’s Day is only for couples? Invite some friends over and have a good time.
Which you can do at any given time, by the way. You don’t need a special occasion to meet with people. After my retreat in January, where I took my alone-time to recharge my batteries, I can feel myself becoming more social again in February. If you’re feeling the same way, just get out there or invite some friends over; it’s always good to be surrounded by loved ones.
Spring Cleaning, Decluttering & Seasonal Reset in February
The word “February” comes from the Roman “Februum”, which means “purification”. While the Romans had their own purification rituals in mind, the concept appeals to me in a different way. Tidying up, throwing out things that no longer feel part of me and thus creating space for something new is just what I need right now.
By February 2nd, all Christmas decor has to be gone. Although I like our flat to be festively decorated, I now enjoy the minimalist, clean look without dry fir needles, golden baubles and paper stars.
The pantry is an example of what I usually tackle at the beginning of the year. I take everything out, wipe the shelves and sort it back in. That way, I can make sure that all my food is within its best-before date, and I don’t forget anything I ever bought and stashed away hurriedly. Here’s my complete guide to pantry organisation and rotation.
I also finish up craft projects like that shawl I started to knit shortly after Christmas, and which sadly lies in one corner of the couch right now, looking at me with reproachful stitches. I want to finish it before the end of the month, when I know I’ll be busy outdoors.
Self-Care in February: Winter Mindfulness, Movement & Nourishment
Before diving into specific practices, there’s one crucial mindset shift that makes everything else possible: accepting winter.
There comes a time, usually around the beginning of February, when I become restless and frustrated that it’s still cold and unwelcoming outside, and it still gets dark too soon, and everything just feels grey and stagnant.
However, when I reach the point where I can accept that winter will last a little while longer, I start feeling more peaceful again. Like the little seedling that’s still buried in the soil, I also need to go on to eventually break through and see the sun again.
Stillness doesn’t mean stagnation.
Although we can’t see a shoot yet, the roots are growing. Self-care now builds a base for our strength in spring.
So I try using the time in my favour, not against it.
February Self-Care for Body…
Spring cleaning is not only meant for our houses. While in January I enjoyed staying at home in “Gemütlichkeit”, I feel the need to move again in February. The walks I take get longer, and I also start doing light workouts again, which are not too exhausting but let me break a sweat. Sometimes I do Yoga and boy, have I gotten stiff!
After training, I enjoy treating my body with a homemade peeling or scrubbing it with this chestnut peeling soap, for example. A thick slather of shea butter and almond oil keeps my now stronger (ha!) and more flexible (well, a little more flexible at least!) body smooth and moisturised.
Like the seedling needs nutrients, I love nourishing my body by eating warming food in February, like roasted root vegetables, potato soup, or a hearty stew. Also, citrus fruits are in season now, and besides being delicious, they add a lovely brightness to the kitchen.
…for Mind…
Although the days get longer by the, well, day, it still gets dark rather early, and sometimes it seems to be one long, dull night due to fog and mist. On those days, I love to cuddle into my blanket on the couch, get myself a hot chocolate with homemade elderflower syrup and a good book. Right at the moment, I have several books on my nightstand and the coffee table. Depending on my mood, I grab either the cosy crime, the romance novel or some gardening book to beat the winter blues.
To keep my mind entertained, I now love to learn and do something new. Whether it’s trying a new recipe, learning about gardening concepts or reading up on Franz Schubert’s “Winterreise” doesn’t really matter. The main point is to use the little grey cells and create something new, or, to stick to the seedling metaphor, turn towards the light, even on grey days.
… and for Soul
February bears the energy of renewal. So, while it was too early in January to go all New Year’s Resolutions, now is a good time to plan the next few months. I try setting myself mindful intentions and goals without going all busy about them. It’s still time for planning. The transition will take place next month.
While January was all about me-time and wintering, I increasingly enjoy being with people again. I love to have people over, be it for a cup of coffee (and cake of course!), a late Sunday morning breakfast or a home-cooked dinner.
Gathering with loved ones nourishes all three: food for the body, interesting conversation for the mind, and love and appreciation for the soul.
The beauty of February
February, with all its facets – quiet melancholy, flickers of hope, growing frustration – returns every year. But instead of seeing it as an obstacle, let’s accept it for what it is: a deep breath before we dive into the hustle and bustle of spring.
Even though we don’t see growth, the seedling has already broken its shell and is growing roots. Soon enough, we’ll be able to watch it break through the soil, stretching for the light.
Every winter eventually comes to an end, and the sooner we realise that, the more peaceful we can transition into spring.
For me, reading, walking, snuggling up on cold nights, but also tidying, organising and preparing are great ways to integrate both the stillness of winter and the restlessness of the upcoming spring.
What better way to let winter end on its own terms, knowing that spring, with the promise of movement and emergence, lies just ahead?
If you’re interested in more cooking and baking recipes, look here: Recipes – seasonalsimplelife.com Many (but not all) of the recipes there are authentically Bavarian.