
.
Hey there future garden guru! Are you excited to try your hand at vegetable gardening, but feeling a bit nervous about where to start? Don’t worry – you’re in the right place!
Whether you have a large garden you want to start cultivating or just a small patio, in this ultimate guide I’ll show you how to create your own veggie paradise. From picking the perfect spot to choosing plants that practically grow themselves, we’ll turn you into a gardening whiz before you can say “carrot”.
So, are you ready for an adventure that will be equally rewarding for body and soul? Grab your gardening gloves and we’ll dig right in! With this step-by-step guide (and some foolproof tips), you’ll be soon eating your first homegrown tomatoes (even if they look a bit wonky).
Step 1: Choose the right spot for a vegetable garden
The first step on our journey is selecting the right spot for your vegetable garden-to-be.
Location
If you can, set up your vegetable garden near your house. That way, you can just step out and grab some lettuce and herbs for your lunch or some veggies for cooking dinner. A patio or balcony is also a good possibility to create a garden (think containers and raised beds).
If you don’t have a space, that’s not necessarily an obstacle. I, for example, live in a rented apartment on the second floor and created a vegetable garden on the outskirts of my village.
Watch out for seemingly unused land and ask the proprietor if you can establish a garden there.
Rent an allotment garden.
Ask a farmer if he can spare a row of a crop field that you can use.
Sometimes people with a huge garden that they cannot cultivate (any longer) will be happy to rent it out to you for either a small fee or a share of your harvest.
Get creative. You’ll find your perfect spot.
Light

When choosing where you want to set up your garden, the spot must be sunny, at best facing south/south-west and protected from winds. It should also be level, although a slight south-facing slope wouldn’t hurt. And there shouldn’t be any large trees or houses that could throw shadows on the patches.
Next, consider your available sunlight. 6 hours per day is a minimum. Most vegetables are sun worshippers and need long sunny days to thrive, although some like beetroots and spinach will also grow in a place with less sunlight.
Soil
Another important point to consider is soil quality. At least, if you want to plant directly into the ground. To get a feel for the soil, take a handful and press it together. Can you form a small sausage or does it run through your fingers? Is it soft and pliable or hard as a brick? To learn more about the different soil types, how to determine them and what you can do to improve them, read this post.
If you want to be sure about what soil type dominates your garden, take a few samples from different areas of the space and send them to a lab for testing.
Sounds too complicated? I understand perfectly. In step 3 I’ll show you my favourite (and the easiest) method to create your patches without worrying about the soil quality. Keep on reading!
Step 2: Determine the ideal size for your vegetable garden
Most beginners start with a garden that’s way too large for them, soon get overwhelmed and ultimately give up, thinking that they are “just not cut out for it”. That’s simply not true!
If you want to succeed, start small. 4 – 9 square meters (45 – 100 square feet) will be enough if you have never before cultivated a garden. You must be able to cope with watering, weeding and tending the garden without getting overwhelmed. When you’ve gained more experience, you can enlarge your garden by adding more patches.
If you only have limited outdoor space, don’t get discouraged. As I said before, you could look out for renting gardening space. Or you can try out alternative gardening techniques, such as square-foot gardening, or vertical growing systems. With these methods, you can use your space more efficiently to grow quite a large amount of produce.
Step 3: Create patches for your vegetable garden
There are different methods of creating patches for a vegetable garden.
Flat beds
Dig
The most common idea people have when creating a new patch is to grab a spade, spit into their hands and dig up the soil. Well, that can be a good method, especially when reviving a neglected vegetable garden and digging in some manure or compost to enhance your soil’s nutrient content. But that’s the only occasion I’d recommend digging for. If you want, of course, you can do that and show your determination and muscle to your neighbours. But why put in so much effort when you can have the same—or even a better—result a lot easier? Watch out for the next method.
No-dig (my favourite!)
I try to keep the amount of hard manual labour in the garden as low as possible. That’s why I love to make these compost patches. They don’t require any digging and can be made with minimum effort regarding time, muscle and money! All you need is cardboard boxes (which you can often get for free in bike shops and humus/compost. If you want to go really crazy, get some logs to border the patch but that’s not necessary. Cover the ground with cardboard, make a border for the patch with logs (optional) and fill up with humus and/or compost. That’s it! Easy, fast and so rewarding.
Raised beds
Common raised beds
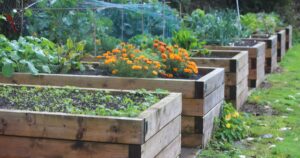
But what to do, when the place you have picked is a gravely, sandy or stone-hard area? Don’t worry! Even if you only have a concrete backyard or a balcony you can still plant vegetables there. Not in the ground, of course, but in raised beds that you can either build from scratch or buy as a simple DIY set.
Besides the possibility of controlling your soil quality, raised beds have many more advantages: weeds grow sparsely, pests can be controlled easily and working in a standing position guarantees minimal back strain. So even when you have good garden soil, you can still build raised beds, create a lovely sight and spare your back.
Mound beds
Have you ever heard of “Hügelkultur” or mound beds? It’s a widespread concept in Eastern Europe and Germany and a great way to get rid of loads of garden waste and create a patch that’s self-fertilising for years to come.
The edges of the meadow where I have my current garden were (and in parts still are) overgrown with shrubbery and even small trees. To make entering possible, I had to severely cut back the wild bushes and even hack out several small trees. Although the majority of my newly designed patches were made according to the no-dig method with cardboard boxes and humus, I decided to add two “Hügelbeete” (mound beds) where I could discard all that garden waste. They hadn’t required fertilising during the first three years and although I had built them about 80 cm / 32 in high, now, in my fourth year, they have fallen to the same level as the other beds.
Step 4: Creating a garden layout
Let me share a pro tip here that I learned the hard way: graph paper is your best friend when planning a garden layout. Each square can for example represent one square foot or ¼ square metre which makes it super easy to plan. Take your time here: 30 minutes of planning your layout can save you hours of frustration later.
When planning your patches it’s ideal to make them no broader than 1,2 m / 4 ft. That way, you can reach every part of them without contorting yourself. Theoretically, the patch length doesn’t matter, but practical experience shows that 2 m /6.5 ft is ideal.
Leave at least 50 cm / 2ft between rows for walking paths that you can cover with wooden boards or planks, wood chips or even grass.
You’ll also have to consider access to water sources when planning your garden layout. You won’t want to drag a heavy hose across your yard every time you need to water your plants.
Make it as easy for you as possible!
Step 5: What vegetables do you want to grow?
Now that you have your garden layout you’ll want to consider what vegetables to plant.
This is where I see most beginners go wrong- they want to grow everything at once! When I started gardening, I made this mistake and ended up with way too many zucchini and not enough of the stuff we actually eat.
Here’s my tried-and-true method for choosing vegetables:
Preferences
Make a list of what your family likes and really eats. What are your favourites and what don’t you like at all? There’s no sense in growing kale if you loathe it.
Hardiness zone
When you know what you’d like to plant, check your hardiness zone.
If you live in the States or Canada just Google “hardiness zone + your zip code”, if you live in any other part of the world, search for “hardiness zone + your country”.
Knowing your hardiness zone is important for knowing what plants grow well in your climate and which of them may need additional support (like a greenhouse for example).
Vertical space
Have you thought of integrating poles and trellises into your garden plan? Believe me, using vertical space can make a huge difference. Even if you have a large garden, elements of vertical gardening can be a game-changer! Not only can you grow more on less space but it also makes harvesting much easier. Great plants for vertical gardening are for example peas, climbing beans, tomatoes and summer squash.
Beginner-friendly vegetables
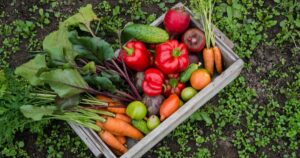
Based on my experience (and that of a lot of gardeners 😊) some vegetables are easy to grow and for that reason perfect for beginners:
- Leaf lettuce
- Onions / Garlic
- Zucchini/summer squash
- Carrots
- Spinach
- Cherry tomatoes
- Bush beans
Yet, don’t choose too many different veggies. As with the garden size, start small and expand.
Step 6: Make a planting plan
Alright, by now you not only know where to establish your vegetable garden and what beds to put in but you’ve also decided what vegetables to grow. Time to plant? Not yet. There’s one tiny – but important – step before and that’s: creating a planting plan. So grab your garden layout plan and let’s get started.
Basics
There are some basic things you should consider like planting large vegetables on the north side of your garden so that they won’t shadow smaller plants.
Another tried and tested tip is to group plants with similar water needs together.
However, that’s not all. When you want to make the most of your garden, you have to consider companion planting.
Companion planting
Remember that time in school when the teacher randomly divided the class into teams? You so wanted to be with your best friend in a group but instead, you ended up with that kid you loathed. Friendships and aversions also happen with plants. Some grow really well in each other’s company, others have a negative influence on each other. That’s what companion planting is all about: pairing “best buddy” veggies and avoiding planting arch enemies together.
Here are some examples of plants that work well together:
– Tomatoes + Basil (keeps pests away and improves flavour)
– Carrots + Onions (onion scent confuses carrot flies)
– Beans + Corn (beans add nitrogen that corn needs)
– Cucumbers + Radishes (radishes deter cucumber beetles)
Making a planting plan may take some time but it’s worth every minute. A good plan is essential for healthy plants and a good harvest. Remember, your first garden plan isn’t set in stone. Think of it as a rough draft that you’ll keep tweaking as you learn what works best in your specific situation. That’s the beauty of gardening – there’s always room to grow and improve!
Step 7: Starting from seeds or buying plants?
Some plants thrive better when you sow them directly where they shall grow. Carrots are a good example. They don’t want to be transplanted as they build long roots but grow better when directly sown into the bed.

Other plants get a headstart when you sow them indoors and plant them out after the last night frosts. Cabbages, for example, which usually have a long cultivation time, profit from being sown indoors in February or March (depending on your climate zone) and transplanted into the garden mid to late April.
Another example of plants that should be sown indoors is tomatoes and peppers. As they like it really warm, you can only plant them outside after the last night’s frosts. In my zone (7b), that’s mid-May. If I started to sow them out then, their fruits would never ripen.

Starting plants from seeds indoors is also a great way for succession planting. For example: when you’ve harvested your spinach in late spring, you can plant cauliflower seedlings into the free row.
Although starting from seeds has its advantages, it also requires some knowledge about what the plants need and the right timing for each vegetable. As a beginner, it can be overwhelming to start from seeds, so it’s totally okay to work with plants from a nursery if possible. That way you can feel your way around gardening first and gradually gather more experience.
Later on, you sure will want to try to grow your vegetables “from scratch”, i.e. from seeds. You’ll have a larger variety with seeds and as I said it’s way cheaper. Also, there are some plants that you’ll always have to sow. Carrots for example (and other root vegetables) are sowed directly into the patch.
Later on, you’ll certainly want to try to grow your vegetables “from scratch”, i.e. from seeds. You’ll have a larger variety with seeds and it’s way cheaper.
Step 8: Sowing and planting
The time has come! You’re about to sow your first seeds and plant your first seedlings. Don’t worry: if you observe a few tips, everything will be fine.
Preparing the patch
Before you start to put something INTO the patch, you have to put OUT what doesn’t belong there. You guessed it: get started weeding. This step can be omitted, of course, if you have created a new patch or raised bed. In all other cases, make sure that your vegetable patch is weed-free.
After weeding, loosen the soil with a hoe and break up any soil clumps. Rake your patch to create an even surface to sow into.
Direct sowing
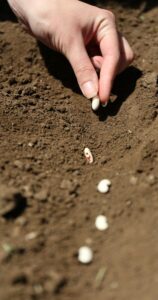
The exact time for sowing your seeds depends on the hardiness zone you live in. However, I recommend having a close look at your seed packets. They usually indicate the right sowing time together with the right spacing.
When you sow directly, draw a straight line with the handle of your rake. Using a string may help you to get straight rows. Then put the seeds into that line observing the right spacing. When the row is finished, carefully cover the seeds with soil and press it slightly either with your hands or with the back of your rake.
Carefully water the seed line so that it’s fully soaked through but not water-logged.
If you have large seeds like pumpkin or squash, you can make individual holes in the right spacing. Covering with soil and watering are carried out similarly.
Labelling
I must admit I’ve often “forgotten” (read: was too lazy) to label my seed rows and I don’t want to know how many seedlings I’ve ripped out, taking them for weeds. So do yourself a favour, write the plant name on a label and stick that at the end of the row. You can get labels made from plastic, wood, clay and even slate.
Seedlings
You’ve bought vegetable seedlings or a friendly neighbour gave you some spare ones and now you’re ready to plant. Prepare the soil as described above and then… don’t plant yet. You’ve got to harden the seedlings first.
Hardening off
The very first time I planted vegetables, I learned the hard way to harden off my seedlings. I was so excited about all the (store-bought) tomato seedlings, that I planted them straight from their warm and comfortable indoor spot right into the garden. This turned out to be a big mistake. Nearly half of them withered away from sunburn within a few days, and the rest looked like they were hanging on by a thread.
Seedlings can be compared to little children who have never been outside. You can’t shoo them out just like that but have to ease them into it. Some 7 – 10 days before transplanting, I start putting out the seedlings at a sheltered spot for just 2 – 3 hours.
Each day after that, I increase their outdoor time by about an hour and gradually move them into more direct sunlight. After that, they are ready to plant outside
Planting
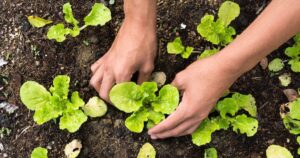
I recommend laying your seedlings out on the patch before planting. That way you can still adjust the spacing between plants. Then dig up a whole that’s slightly larger than the root bale and fill in some ripe compost or well-rotted manure. Carefully remove the plant from its container (make sure that the stem doesn’t break!), put it into the hole and fill the space between root bale and the hole edge with the soil you dug out earlier. Carefully press the soil around the plants and water them generously so that the soil there will be no air holes and the roots are well soaked.
Planting depth
A rule of thumb when it comes to how deep you should set your veggies is that they should be planted at the same depth they were growing in their containers. That way you usually can’t go wrong.
An exception to this rule, however, is tomatoes. I plant them super deep, which means I bury about 2/3 of the plant after having removed the lower leaves. That way those little fuzzy hairs on the stem turn into roots and thus make your plants super sturdy.
Planting width
When you start veggies from seeds, take a look at the seed package. Usually, the spacing between plants and rows is indicated there.
When you have seedlings to plant, here are some general widths to go with:
– Tomatoes: 70 – 100 cm / 24-36 inches apart (believe me, they need it)
– Peppers: 30 – 40 cm / 12-16 inches apart
– Cucumbers: 30 cm / 12 inches apart along a trellis
– Broccoli and cauliflower: 40 – 45 cm / 16 – 18 inches apart
Watering
After the initial watering directly after sowing and planting, cover the soil with mulch (for example dry grass clippings) to prevent it from drying out. During the first week, you best check the soil moisture daily by sticking a finger about 3 cm / 1 inch deep into the ground. If you have to water, it’s best to do so in the morning. This makes sure that the leaves can dry before the evening which helps prevent fungal diseases.
Remember, every garden is different, and what works in my Zone 7b might need tweaking in your area. But these basic principles of hardening off, proper spacing and careful watering have served me well through many growing seasons. The key is paying attention to your plants – they’ll let you know if they’re happy or struggling if you learn to read their signs.
Step 9: Maintenance
The garden patches are made, the vegetables are planted, and now you can relax and wait for the harvest? Wrong! Think of your vegetables as your babies: you have to make sure that they have everything they need to grow into healthy adults:
Watering
As I said before, watering the right way is especially important at the beginning when you’ve just planted your vegetables. Unfortunately, most beginners tend to overwater their plants. Except for the first week after planting, it’s much better to let your plants “sit dry” for a while before watering them. That way they will grow deep and strong roots that will not only provide them with water but also make them sturdier.
Mulching
I’m a huge fan of mulching! After sowing and planting, cover the soil with mulch to prevent it from drying out and protect it from weeds. If you have sowed, distribute a very thin mulch layer, for example, dried grass clippings so that the seeds get enough water and light to grow. When the plants are larger the mulch layer can be thicker. Just make sure that the mulch material is dry, otherwise it may mould and spread fungal diseases.
You may have to weed despite mulching but only sparsely and those weeds will come out very easily.
Fertilising
Like humans, plants need to eat. And just like humans, it’s not healthy for them to let them have fast food only. Nutrients are key to a healthy life! Get informed on your plants’ needs and feed them accordingly with fertiliser (from plants or animal origin). For beginners, it’s best to buy a well-balanced fertiliser but you can also make some organic fertiliser at home. Be careful, however: “Much helps much” is not valid in the garden! When “overfeeding” your plants they will become mushy and prone to diseases. It’s best to feed your plants organically throughout the season.
Step 10: Pests and diseases in the vegetable garden

Truth bomb: you will at some time have pests and diseases in your vegetable garden. Hopefully not often and not to a large extent but that’s how nature works. It’s got nothing against us (I hope) but seeks balance by eliminating weak or ill plants through pests and diseases. The good news is that you are not powerless.
Companion planting (again)
First of all, by doing companion planting you’ve already done a great thing to hold pests and diseases at bay. Take the classic couple of carrots and onions for example: while carrots keep the onion fly away, onions hold off the carrot fly. If you know that and plant accordingly, you’ve already taken a huge step toward a healthy vegetable garden.
Physical protection and collecting
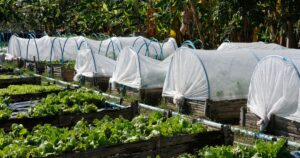
Another thing you can do is use physical protection like vegetable mesh. If you protect your cabbage plants with a mesh when the cabbage fly is around, trying to lay its eggs on your fondly raised plants, it’ll lose out.
However, when you already have pests in your garden, especially caterpillars and snails, it’s effective to collect them and discard them somewhere else, far away from your garden. For hunting snails, early mornings and evenings are best, as they’ll then come out of their hiding places. Caterpillars are best collected during the day.
Eco-system
Taking the alleged easy way by using chemical pest control has no room in my garden world. After all, you should always bear in mind that pests and diseases in your garden are a sign of imbalance. Make sure to establish a healthy eco-system with enough room for beneficial insects, birds and small mammals that’ll help you keep pests at bay. Care for your garden soil by fertilising it wisely with organic material, discarding infected plant parts and mulching. That way your garden will stay healthy.
Step 11: Harvest and enjoy
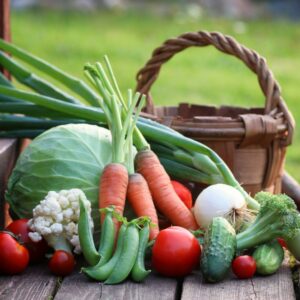
Let me tell you about my first attempt at harvesting broccoli- I waited so long for those heads to get “grocery store big”… and ended up with tough, flowering stems that were practically inedible. Now I know better – Harvest when florets are tight and dark green
Harvest timing
Here’s a quick cheat sheet for common veggies I’ve learned through experience:
Beans: pick when they’re about as thick as a pencil but before you can see the beans inside
- Tomatoes: Pick when colourful. but firm
- Cucumbers: 6-8 inches is perfect
- Zucchini: Check daily or prepare to find baseball bats hiding under the leaves
- Bell peppers: wait until they reach full size and desired colour
Oh, and use actual garden tools instead of wrestling with your plants. Using clean, sharp scissors or pruners makes all the difference.
Preserving
The real challenge hits when everything starts ripening at once. I remember standing in my kitchen one August, surrounded by mountains of tomatoes and thinking “What in the world am I gonna do with all these?”
Let me give you a quick rundown on preserving methods:
Freezing is my go-to for most vegetables as it’s fast and easy. Just remember to label everything you pop into the freezer – playing “freezer surprise” in January isn’t as funny as it sounds!
Canning is not as scary as it might look (although a pressure canner sends off those mad scientist vibes). I do water bath canning for tomatoes and pickles, and pressure can green beans and other low-acid veggies. Just remember to always follow tested recipes and processing times!
Dehydrating has become another favourite preserving method as dried vegetables take up way less storage space than canned or frozen ones. Just make sure everything is completely dry before storing, or you might end up with mouldy surprises later (don’t ask…).
Step 12: Build your soil
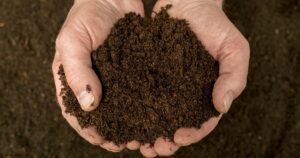
Ok, strictly speaking, this step is a preparation for your NEXT gardening year. But, as I’m absolutely sure that you’re hooked by now and on your best way to becoming a gardening addict, this step is crucial for a further great harvest in the upcoming season.
After harvesting, the garden season isn’t over. On the contrary: you have to make sure that your soil is well nourished and protected so that your vegetables will grow as well (or even better) in the next season.
Mulching
Make sure your soil is always well-covered during winter. You can either put half-rotted compost on your patches or cover them with dried grass, leaves, or wood chips. The soil beneath the mulch is usually a bit warmer and that way mulch protects the soil organisms.
Soil building
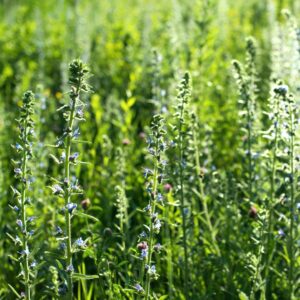
To build your soil, you can for example sow green manure like phacelia. Not only do they cover the soil and protect it from washing off but they also collect nitrogen from the air, thereby forming the basis for plant nutrition. Additionally, they build a mulch layer when they die in winter, covering and protecting the soil. In spring, you can cut them off and dig the remnants in.
Get Growing and Enjoy the Rewards!
Okay, let’s quickly recap the key steps to get a new vegetable garden up and running:
- Choose a sunny spot with well-draining soil near your house (if possible)
- Decide what to plant based on your climate and preferences
- Build garden patches or raised beds
- Buy seedlings, start them indoors or directly sow seeds outdoors
- Properly plant and space your veggies
- Water, weed, and care for your garden regularly
Growing your own veggies is incredibly rewarding! You’ll get fresh, flavourful and nutritious food and it’s a satisfying and eco-friendly task.
Even with limited space, you can have an amazing little garden.
Ready to get started? I’m excited to hear about your gardening journey. Reach out if you have any other questions. Happy growing!
0 Comments