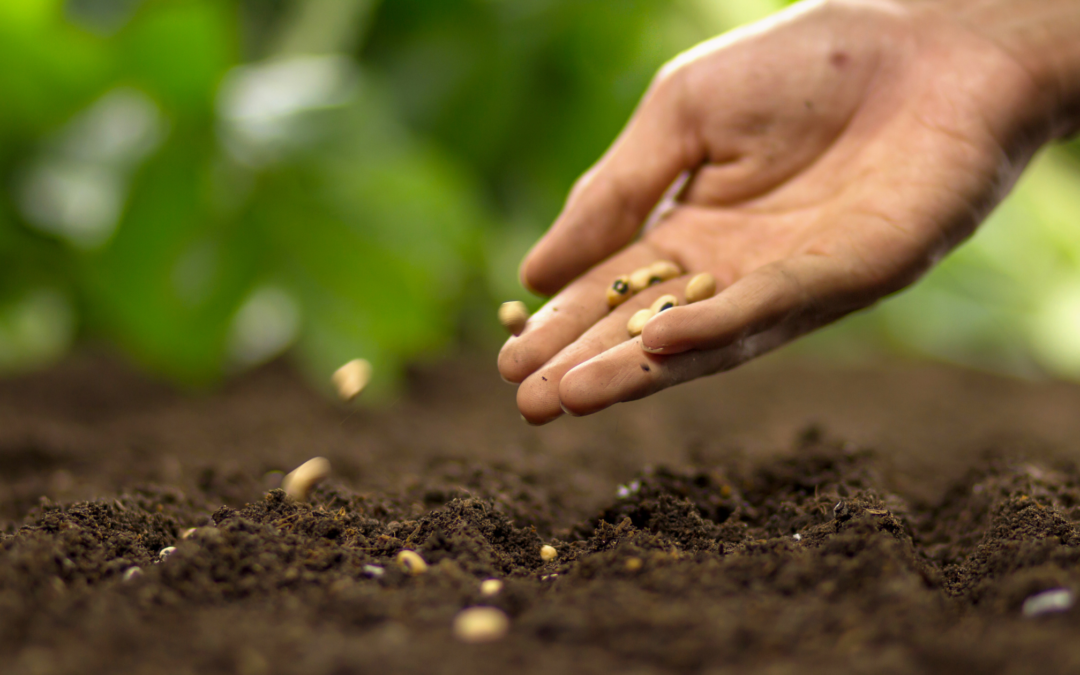
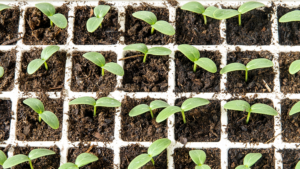
April is one of the most important months in the vegetable garden. As soil temperatures rise and frost risk slowly decreases, it’s the perfect time to sow seeds, plant seedlings, and kickstart the growing season.
With longer days and warming temperatures, April is prime time for both direct sowing and transplanting a wide variety of vegetables. Whether you’re a seasoned gardener or trying your hand at growing food for the first time, this month’s activities will set the stage for months of fresh, homegrown produce.
Let’s explore what vegetables you can sow and plant in April in your garden and how to give them the best start for a successful growing season.
Please note that timing may vary depending on your climate and hardiness zone.
What to Sow and Plant in April (Quick Overview)
Here’s a cheatsheet of what you can sow and plant in April:
Sow winter leek indoors now. I either sow 2 – 3 seeds per small pot, or I take a larger container and sow them in rows that I will be thinning later.
Brassicas
Although we can plant the first batch of brassicas like broccoli, kohlrabi, cauliflower, white and red cabbage outdoors now, we should still sow a second batch indoors. That way, we can transplant them outdoors several weeks from now and have a continuous harvest of brassicas instead of one overwhelming flood of harvest.
I’ve found that, as those second batches will be outside in the summer, we may have to choose late instead of early varieties.
Lettuce
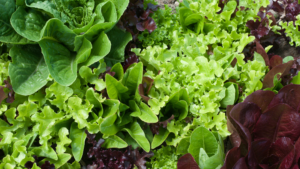
Like with cabbage, the second round of lettuce-starting has begun! Now, however, we want to choose varieties that like warmer weather, like, for example, iceberg and oak leaf lettuce.
Tomatoes
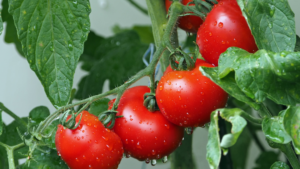
If you haven’t seed-started tomatoes for outdoor planting already, mid-April is the latest time to do so. Sow several seeds per pot and thin them later.
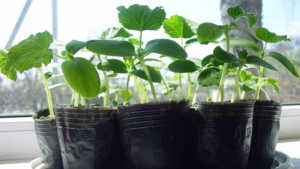
The cucurbit family consists of cucumbers, zucchini, melons and pumpkins, and they can all be seed-started indoors in April. None of them, however, takes thinning very well and therefore they all need to be seed-started in separate pots.
🌱 Want gentle monthly reminders of what to sow and plant in the garden? Join here:
Vegetables to Sow Outdoors in April
These early sowings reward you with the first fresh harvests of late spring. In fact, over the years, I’ve noticed that early April sowings often outperform later ones because spring moisture supports germination naturally.
Broad beans
The beginning of April is the latest time to sow broad beans. They are very tolerant of low temperatures and can even withstand light frosts, which is why they don’t need protection against the cold.
Peas / Sugar peas
There are early varieties that can be sown outdoors mid to end of March. Just remember that peas are climbers and therefore install a trellis or net between the rows.
Carrots
Again, we’re talking early varieties here. If you planted onion bulbs in autumn, sow the carrots in the rows between the onions. That way, carrots and onions will protect one another from harmful pests.
Radishes
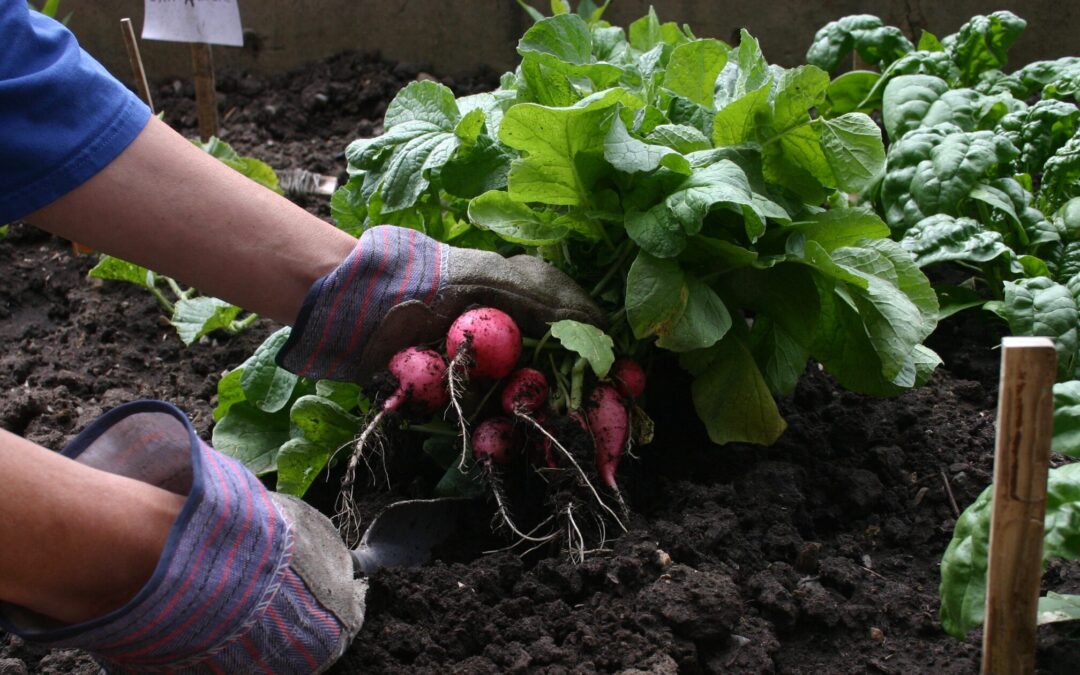
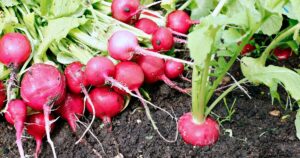
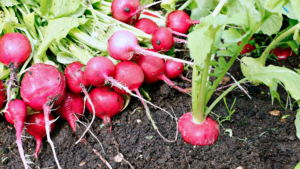
Carrots need quite some time to germinate, and it’s difficult, therefore, to weed the rows. A trick to still see where the carrots have been sown is to mix radish seeds between the carrot seeds. Radishes need only a few days to germinate and then not only show us the row but are a yummy vegetable for salads or preserve them by fermenting radishes.
Lettuce
Contrary to the varieties we start indoors now, lettuce we sow outdoors in April has to be very tolerant of cold temperatures, like Asian lettuce. If we mix the early varieties we sow now and the later varieties we seed-start indoors, we can continually harvest different kinds of leafy greens. This method of sowing vegetables every 3 – 4 weeks is called succession planting, which not only ensures a continuous harvest but also that the soil in our patches is always covered.
All lettuce varieties germinate in light only. Do not cover them with soil!
Rocket salad
Rocket salad is one of the easiest crops to grow! Sow it, harvest the leaves, and when you let it bloom, it will spread itself.
Spinach
Spinach is almost a no-brainer: I sow it every April, cover it with winter protection fleece, and just let it grow. It’s usually quite tolerant of the cold and will grow well under protective cover.
Beetroot
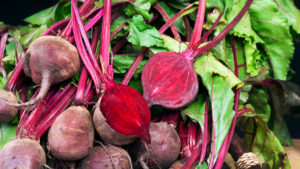
Although you can seed-start beetroot indoors, that’s only advisable when you have a small garden or want to grow just some of them. In our family, we need plenty of beetroot for salads, pickles, fermented or cooked, and that’s why I sow them directly in April.
Salsify
Salsifies need a deep, loose soil to grow long, straight roots. A patch where potatoes grew the year before would therefore be ideal.
Vegetables to Plant Outdoors in April
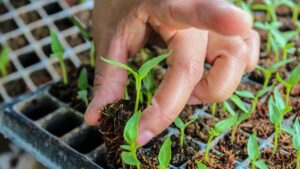
Before we plant anything outdoors, it’s important to harden the seedlings off by gradually exposing them to outdoor temperatures. Start by putting your plants outside or in the greenhouse for 2 – 3 hours at first and prolong that time over a week before transplanting.
Lettuce
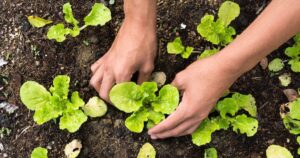
The lettuce that we started in February or March is now ready for transplanting outside. Make sure that the seedlings are not planted too deeply, or they may rot. As a rule of thumb, put them into the soil as deep as they were in the pot.
Brassicas
All early brassica seedlings like kohlrabi, early Savoy cabbage and cauliflower, as well as white and red cabbage, can be planted outdoors in April. Leave plenty of space between the seedlings so that you can plant celery in between later. Cabbage and celery are great companions in the patch and repel each other’s pests.
Leek
Plant leeks between the cabbage rows. That way, you not only make the best use of space here, seeing that cabbage grows on the ground and leeks on the “first floor”, but they also deter pests from one another. For the best protection, however, cover them with a pest protection net.
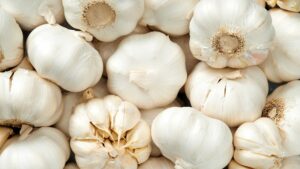
Like garlic, onions and shallots can be planted now. Either plant small bulbs you can buy at the nursery or the seedlings you’ve started earlier that year indoors.
Potatoes
In my hardiness zone 7b, I don’t plant potatoes before the end of April. Considering that our last night frosts can happen until mid-May, the end of April is perfect for putting the pre-sprouted potatoes in the ground. When the shoots start looking out of the soil, the worst weather will be over.
Frequently Asked Questions About Planting in April
Planting in April raises many questions, especially about timing and frost protection. Here are the most common ones:
Can I plant tomatoes outside in April?
If your hardiness zone is 9 and above, you can plant tomatoes outside in April; in all other zones, it’s too early.
What vegetables grow fastest from April sowing?
Radishes are one of the fastest-growing vegetables; they only need about 30 days from sowing to harvest.
Is April too late to start a vegetable garden?
Absolutely not. On the contrary, April is a good month to start a vegetable garden as the growing season is just starting.
What if frost returns?
Check the weather forecast, and if frost is predicted, cover your crops with a garden fleece.
What vegetables can I plant in April?
Lettuce
Brassicas
Leek
Garlic
Onions / Shallots
Potatoes
When does frost danger end?
That depends on your hardiness zone. In my zone 7b, for example, the last frosts are expected by mid-May.
April Planting Summary
April is the perfect month to begin sowing hardy crops outdoors, start warm-season vegetables indoors, and transplant early seedlings. With proper timing and frost protection, your vegetable garden will quickly gain momentum for the growing season ahead.
The gardening season has officially started! Time to dig in the dirt!
Not enough garden talk? You may like these articles:
April is one of the busiest months in the vegetable garden, with sowing, planting, protecting seedlings, and preparing beds for the growing season.
In this guide, therefore, I’ll show you:
what to sow outdoors
how to protect seedlings from frost
how to prevent pests
essential maintenance tasks
Let’s break down garden tasks we can do in April:
April Garden Checklist (Quick Overview)
Every April I feel the real gardening season finally begins. If you only have time for a few things, focus on these essential April garden tasks:
Weed garden beds early
Harden off seedlings
Sow vegetables outdoors
Fertilise plants
Protect seedlings from frost
Prevent pests
Plant tomatoes in greenhouse
Plant strawberries
Support pollinators
Here’s a quick overview of the most important garden tasks to tackle in April.
Garden Task
Best Time in April
Priority
Weed patches
After rain when soil is loose
High
Harden-off seedlings
One week before planting
High
Sow and Plant
In warm weather
Medium
Protect seedlings from cold
When temperatures fall below 5 °C (40 °F)
High
Fertilise plants
When planting and after seedlings develop real leaves
Medium
Protect seedlings from pests
As soon as planted
High
Plant tomatoes in greenhouse
End of April
Medium
Plant strawberries
In warm weather
Low
Attract pollinators
When planting vegetables
Medium
Protect leeks and onions
When weather gets warm
Medium
Weed Garden Beds Early
✔️ Why it matters: Weeds compete for nutrients
Earlier in March, we removed the mulch from the patches so the sun could warm the soil. With rising temperatures, however, weeds will also find their way towards the light. To be honest, I underestimate every year how fast they actually grow once it’s a bit warmer…
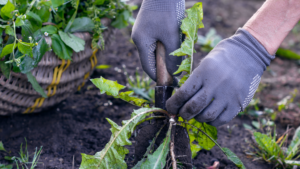
Now, when they’re still small, is the right time to pull them out and keep the patches free for our vegetables.
Quick tip: Weed after rain when the soil is loose.
Harden off Seedlings Before Planting
✔️ Why it matters: Plants must get used to outdoor conditions
Some of the vegetables we have seed-started indoors during the last weeks can be planted outdoors in April. Before we do that, we must harden them off so they won’t get a shock when they move from that cosy, protected atmosphere indoors to the outside garden, where temperatures are colder and the wind can blow harshly.
Imagine you were plonked from your cosy, warm couch and dropped into an ice bath. You wouldn’t like that, would you? Unless you’re regularly taking ice baths. In that case, forget this comparison, you freak, but harden off your seedlings anyway.
To harden off our seedlings, we put them outside in the shade. At first, for a few hours and each day longer. After about a week, they can be planted outside in our April vegetable garden.
✔️ Why it matters: Plants need nutrients to grow optimally.
Our vegetables have outgrown the baby and toddler stage and are now teenagers. Ravenous teenagers! Which means they need plenty of food, or in that case, fertiliser. Gardening in April, therefore, involves fertilising our vegetables.
After planting our seedlings outdoors, they’ll be grateful for a healthy dose of organic liquid fertiliser to push their growth.
✔️ Why it matters: Young plants can freeze to death when it gets too cold.
Sowing and planting outdoors brings so much fun, but remember that it can still get cold, especially during the nights. In my hardiness zone 7b, the danger of frosts won’t be over before mid-May! Thus, the April vegetable garden still needs some protection against harsh weather conditions.
Check out your hardiness zone to learn when the last frosts can be expected.
To protect our sensitive seeds and baby vegetables from harsh weather, we must cover them with a fleece. Although that won’t seem much, it will be enough to keep the air and soil underneath well above freezing.
Quick tip: Watch the weather forecast and cover your seedlings with a garden fleece when temperatures drop below 5 °C (40 °F).
Protect cabbage and leeks from pests
✔️ Why it matters: Pests can destroy your harvest.
Cabbage and leeks that we can plant outdoors now are especially prone to pests like the cabbage white butterfly and the leek fly. To protect them, we can cover them with a protective net, which is much lighter than a fleece. It won’t keep off the cold, only the pests. Most often, you can buy protective nets as a set with half-arches that you can stick across the vegetables and put the net on top. That way, our plants have plenty of room to grow while being safe from pests. Just make sure that you fix the net thoroughly into the ground.
By the way, celery is a good companion for cabbage. In the unlikely event that a cabbage fly finds its way under the net, it may find itself repelled by the celery smell.
Quick tip: Protect your plants from the beginning to keep pests out.
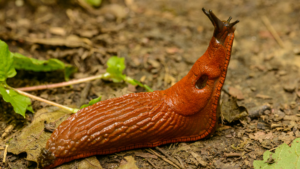
Protect your seedlings from snails and slugs
✔️ Why it matters: Slugs feast on seedlings.
Are there any pests more dreaded than snails and slugs? I don’t think so. They are practically everywhere and, especially in spring, eat all they can find. Our seedlings are kind of a huge buffet to them, and if we want to harvest some vegetables for ourselves, we must make sure that snails and slugs won’t get near them!
A good way to keep those little suckers off our seedlings is to put snail collars around them, which they can’t overcome. Or you get out in the wee hours of the morning or in the evening with a bucket and collect them. Choose your way, but I prefer the collars.
Quick tip: Snail fences and collars keep snails off your seedlings.
Plant tomatoes in the greenhouse
✔️ Why it matters: Conditions are warmer in a greenhouse, and your tomatoes will get a head start.
By the end of April, you can plant your tomato seedlings in the greenhouse. It’s still a good deal too early for outdoors, but in the protected atmosphere of a greenhouse – and if there’s no forecast of severe frosts – planting them in the greenhouse is okay.
Quick tip: When night temps in your greenhouse don’t fall below 10 °C (50 °F), you can plant the tomatoes.
Plant strawberries in April
✔️ Why it matters: Now’s the best time for planting berries.
Another garden task in April is planting new strawberries and protecting them with a garden fleece if necessary. If you have strawberries in your garden already, remove all wilted leaves now, as they may be infected with diseases. If you want to make strawberry jam this year, plant the berries now!
Quick tip: Prepare the new strawberry bed by loosening the soil and working in some compost.
Attract Pollinators
✔️ Why it matters: Pollinators increase our harvest.
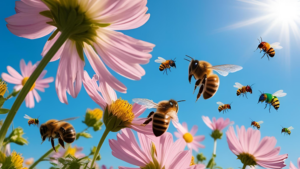
All fruit-bearing vegetables, as well as fruit trees and bushes, need pollinators to produce their fruits. We can help attract all those bees and insects by sowing flower strips as insect pastures, either on the borders of our vegetable garden or in the patches between the plants. Calendula, for example, is not only a great attractor for pollinating insects but can be used for teas as well as an ingredient in many homemade body care products like soap and oil.
It depends on the hardiness zone. In zone 9 – 11, you may plant tomatoes out in April but in zone 7b, for example, where I live, it’s too early. Instead, I plant my tomatoes into the greenhouse at the end of April when temperatures don’t fall below 10 °C (50 °F) at night.
Do seedlings need frost protection in April?
Yes, nighttime temperatures can still drop below freezing in many regions.
When should seedlings be hardened off?
Start hardening off your seedlings about one week before you intend to plant them out.
Is frost still a risk in April?
Yes, in most hardiness zones it is. Protect your seeds and seedlings with a gardening fleece when temperatures fall below 5 °C (40 °F) at night.
Why April Garden Tasks Matter
After the relatively quiet winter months, April can seem a bit overwhelming. But don’t let the list of tasks discourage you. You don’t have to do everything at once. It’s rather a question of timing and consistency.
Prepare the garden by weeding the patches, sowing and planting your hardened-off seedlings, and then it’s our job to protect the plants from harsh weather and pests and support beneficial insects.
All these tasks will pay off in a few weeks, when we can harvest the first vegetables.
The gardening season has started! Let’s get out and green the world.
Can’t get enough? These articles may also interest you:
These March reflections are part of a monthly practice of noticing what each season asks of us — and March asks quite a lot.
After months of rest and quiet preparation, transition is finally here: the snow retreating, the first crocuses pushing through, the days growing noticeably longer. In this article, I share how the sights, sounds, and feel of early spring — birdsong returning, sunlight warming your face, squirrels stirring — signal that it’s time to wake up alongside the garden.
The snow has (mostly) disappeared and been replaced by rain, and the first spring flowers like crocuses and snowflakes (the flowers, not the actual thing) begin to appear. The light is shifting, and finally, the days become perceptibly longer.
A promise of spring lies in the air.
I notice all of this before most people are awake since I start working pretty early, at 6 o’clock to be precise. Last week, I heard a bird singing before I went into the office, and I realised only then that I hadn’t heard birdsong for months! When the birds sing again, spring has stepped onto the stage.
Now is a wonderful time to go outside, even when it’s raining and the wind is blowing harshly. Yet there’s so much change out there that we can witness almost daily. Early blooms push through the soil, and squirrels look for their long-forgotten storage chambers.
This winter was particularly cold and long, but March has started with warm temperatures and sunshine, and I swear I’m a new person altogether. Just because those little beams of sunlight hit me, and the warmth makes me pull off my thick down jacket and replace it with a lighter version.
That shift isn’t just in me — step outside, and you can see it everywhere.
The Garden Awakens
With longer days and shifting light, the garden stirs back to life — slowly, almost shyly at first.
The soil may be wet and even still frozen on the surface, and it can be hard to see any change at all. But temperatures are slowly rising, and underneath, things are moving. Spring is advancing while winter still lingers.
On dry, sunny days, it’s worth pulling back the mulch from your garden beds and letting the soil soak up some warmth. Watch the buds on your trees and shrubs — they’re swelling, quietly promising to burst open, although the nights are still cold and even frosty. The garden is responding to both seasons at once. If you haven’t pruned yet, early March is often your last chance before new growth begins.
In ancient times, the Spring equinox was celebrated as the beginning of a New Year, which, in my opinion, makes much more sense than beginning a new year in the depths of winter. I’ve written about that in detail in my January reflections.
I can feel the energy of new beginnings and making plans. Yet, sometimes it’s necessary to remove some of the old stuff and make room for the new. While winter slowly leaves the stage, we prepare the space for spring. That’s why March is such a great month to declutter, organise and clean your home.
Declutter A Small Space
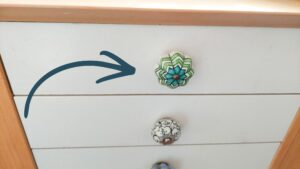
I know – I feel overwhelmed, too, when I hear the word declutter. The good news is, you can start small. Choose a drawer, for example. You know which one I mean: the one every household has where all the knick-knacks and stuff land that you don’t know where else to put, and where packets of hankies, dried-out pens and tiny plastic toys from the Kinder Egg wait to be rediscovered.
This is our drawer of doom. Posh on the outside, but chaotic within.
I like to spread everything out on the kitchen table, then sort through the stuff and throw away everything that’s broken or I don’t need anymore. Put the remaining stuff where it belongs, and only put back in the drawer what you really want to be there.
Spring Cleaning
I’m sorry to admit that I’m not a huge fan of cleaning. It feels tedious and pointless because dust and dirt will always find a way. On the other hand, I like my home to be clean. Contradictory, I know. But as the Dowager Countess in Downton Abbey once said, women are perfectly entitled to be contrary — and she was rarely wrong about anything.
If you’re in for a good spring cleaning, grab a bucket of hot water and a cleaning cloth and get started. If it helps, listen to an audiobook while working on your new dust-free home (I love a good cosy crime, for example) or play some music, whatever helps you do the job. The reward of a deep-clean house and sparkling windows is waiting for you.
Prepare for the Garden Season
I can think best in a clean environment. Maybe that makes me a little like Monk, but that’s how my mind works. A good spring cleaning not only satisfies my eyes but also sets my creative motor in motion.
When the weather suddenly turns cold and wintry again after a few warm, sunny days, I sometimes feel like howling in misery! It sometimes feels like handing a child a bar of chocolate and then telling them they can’t have it.
In those moments of despair (yeah, sometimes I’m a real drama queen), I remind myself that March is a month of transition. It’s not clicking a button and voilà: spring is here all of a sudden.
March feels more like a dance between winter and spring. One day, spring has a solo and shows us all it has to offer; the next day, winter takes over the stage, putting on one last performance.
While spring gains strength, winter slowly loses its power. The times “on stage” diminish until the last farewell before it retreats completely until the end of the year.
This dance can feel surprisingly long, but we know that spring will stay in the end and take over again. In the meantime, let’s see what we can do for ourselves to keep our balance.
March Self-Care for Body…
I’ve started jogging again, and between jogging and long walks, I enjoy being outdoors no matter the weather.
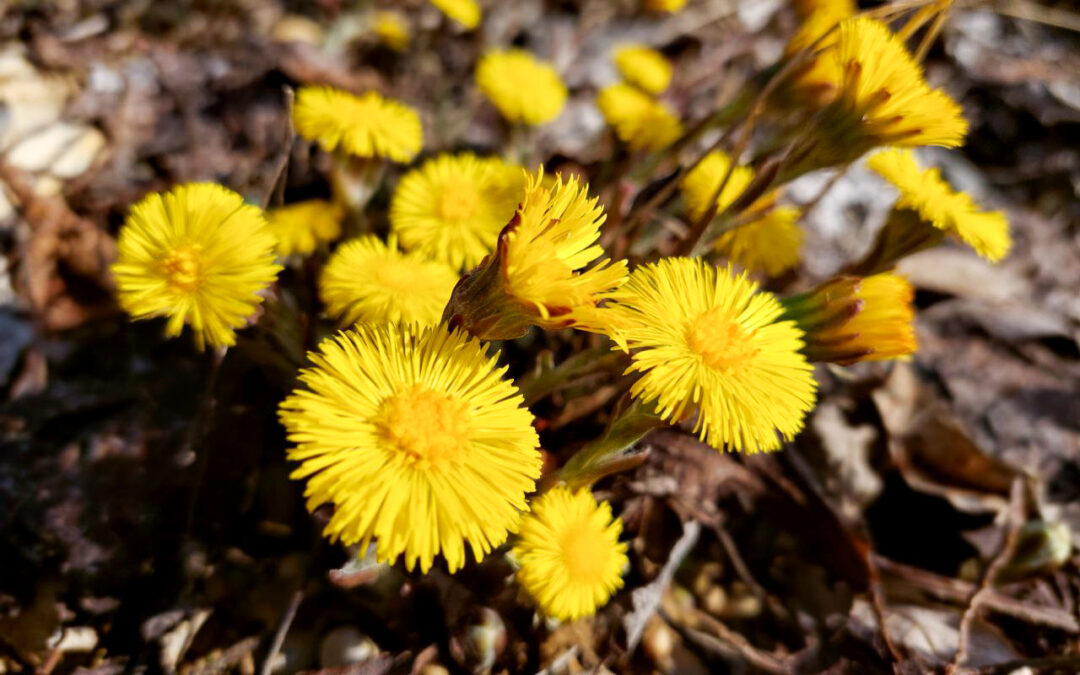
Even if you don’t like jogging, spend some time outdoors. I particularly enjoy watching how nature awakens again. Crocuses and coltsfoot suddenly push through the soil, birds are singing, and the buds of trees and bushes start to swell. The progress is slow, but it is unmistakable.
In the evenings, however, I sometimes feel quite exhausted. Whether it’s the exercise, the shifting temperatures or simply spring fever, I couldn’t say. But no matter the reason, it’s important to be kind to oneself and learn to move with the season’s rhythm. Take a break when you need one, have a nap or simply go to bed early.
Learn from nature and don’t overdo it. Your strength will return soon enough, and the tiredness will be forgotten.
… For Mind…
March is a time when organising and planning become important to me. I love to have a clear vision of what I want to do in the garden, what new recipes to try with our vegetables and how to preserve my harvest. Many of these aspects are routine, of course, but I want to try out some new things every year, be it new vegetables or varieties, new recipes or even new preserving methods. While the garden is only beginning to wake, our ideas are already stepping forward.
March is also a good time to start new creative projects. Have you ever tried soapmaking, for example? In my section about Home & Body, you’ll find several easy soap recipes and instructions. It’s a wonderful beginner project if you enjoy working with natural ingredients.
In the evenings, though, I love retreating with a good book, especially when I feel I have been productive during the day. Let’s not forget the relaxing power of experiencing other lives through a well-written story.
… and Soul
For me, March is the perfect month for inviting people over. Where I was too self-absorbed in January, and I know I’ll become too outdoors-focused as soon as the outdoor gardening season begins in April, I now have both the energy and time to prepare luscious cakes for a tea party or cook a wonderful meal for an evening dinner with friends.
For these gatherings, I often decorate our home with flowers as a sign that spring is entering the house. It doesn’t matter that they’re store-bought; they bring a touch of spring into our home and our spirits.
If you want to invite guests over, why not do so on the Spring equinox, the moment when day and night are perfectly balanced? You could celebrate the ancient New Year and even start a new tradition. Or simply light a candle for yourself and the new season with all its promises.
While March brings the promise of spring and new beginnings, it can sometimes feel harsh and cold. Just remember that it’s a time of transition where winter and spring find themselves in a dance. One day, spring leads, the next winter takes over.
If nothing else, March teaches us patience. We know that winter will retreat eventually and spring will take its place. Let’s observe nature’s rhythm and take it as our model. Learning to move with that rhythm is part of seasonal living.
In the meantime, let us enjoy every new flower that blooms, birdsong in the early morning, or tea with friends. These are signs that spring is slowly taking the lead.
Where February still represents winter with a hint of spring as the days get longer, March is quite the opposite: spring with a hint of winter. There’s something magical about that transition from winter’s quiet to spring’s promise that gets my – still too clean – fingers itching and making me want to dig in the dirt. With rising temperatures in March, the list of vegetables to sow and plant grows as well.
While we can seed-start cold-sensitive veggies indoors, there are a few robust vegetables that can already be sowed and planted outdoors. Read on to learn what to sow and plant in March.
Loofahs belong to the cucumber family. As they like it very warm, they can only be cultivated in the greenhouse in my zone (7b). If you also want to include loofahs in your garden, now is the time to start them indoors. In my experience, it helps germination when we roughen up the seeds by grinding their edges on sandpaper and afterwards soaking them in lukewarm water for 24 hours before putting them into the soil.
Loofahs – like cucumbers – don’t like being transplanted, so I take larger pots and put in one seed per pot. That way, their roots won’t get meddled with, and we only have to disturb them once when we plant them outside.
Tomatoes
Mid-March is the right time to start all those tomato varieties indoors that you want to cultivate outdoors. Tomatoes for the greenhouse can already be started in February, but if you have missed it then, it’s not too late to start them now.
Usually, eggplants, chillies and peppers are started in February or even January because they need quite a long time to grow. You can still start them now, however! They may be a bit behind their time, but it’s not too late to grow them.
Greenhouse cucumbers
It’s too early to start cucumbers for the great outdoors, but if you want to cultivate them in the greenhouse, now is the time to start them. As with loofahs, cucumbers do not like to be transplanted, so take a large enough pot and put only one seed into it. That way, they need not be thinned and can later be planted in the greenhouse without having their roots disturbed.
Sow winter leek and – if you haven’t already – onions. I either sow 2 – 3 seeds per small pot, or I take a larger container and sow them in rows that I will be thinning later.
Onions I usually sow in small pots with three seeds per pot. When I transplant them later, I leave those small bundles of three together.
Lettuce
It’s best to sow lettuce every 3 – 4 weeks to ensure a continuous supply. There are some varieties that we can sow outdoors in March, while at the same time, seed-starting later varieties indoors. When it gets warmer, we can replace the harvested lettuce with those pre-grown plants and at the same time sow lettuce in different varieties directly into the beds.
Herbs
Parsley needs a really long time to germinate, and if you haven’t started it already in February, now is the time to do so.
Herbs, like basil, savoury, chervil, cress and others can now be pre-cultivated indoors, as well. Either sow several seeds in large pots (and thin them later if necessary) or take small seed trays and put one seed per tray.
Cabbages
We have already seed-started different members of the cabbage family in February, but we can still sow (again)
Red and white cabbage
Kohlrabi
Broccoli
Cauliflower and
Savoy cabbage
Remember to label the pots and note meticulously the kind of vegetable you’ve sown and its variety! You won’t be able to deduce it from the seedlings later. Believe me, I’ve been there, and you won’t want to make the same mistake.
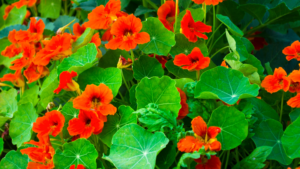
Nasturtium
Nasturtium is a great companion for cucumbers. It attracts insects that are harmful to cucumbers, like aphids, white flies and squash bugs and thus acts like a life trap to keep them away from the sensitive cucumbers. At the same time, it confuses and deters cucumber beetles and nematodes.
If all that wouldn’t be enough reason to plant nasturtium, it’s also a pretty sight in the garden with its beautiful flowers, and the whole plant (flowers, leaves and seeds) is edible.
Enough reasons to grow nasturtium? Grab your seed package and seed-start it now!
Potatoes
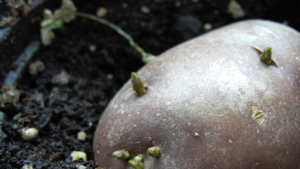
Sprouting your potatoes in March will give them a headstart for when you plant them in April. To sprout potatoes, lay them out on a surface and expose them to the light, for example, on a windowsill. I usually use egg cartons in which I put the potatoes. After a few days, we can see small sprouts growing out of the potatoes.
What to sow and plant outdoors in March
Depending on your hardiness zone, it may still be too early to sow anything outdoors, but in zone 7b, where I live, it’s ok to do so – IF we cover the seeds with protective covers or sow in the cold frame.
There are early varieties that can be sown outside mid to end of March. Just remember that peas are climbers and therefore install a trellis or net between the rows.
Carrots
Again, we’re talking early varieties here. If you have planted onion bulbs in autumn, sow the carrots in the rows between the onions. That way, carrots and onions will protect one another from harmful pests.
Broad beans
You can either sow broad beans outside in late autumn or now in March. It’s also possible to seed-start them indoors in January and plant them out now.
Broad beans are very tolerant of low temperatures and can even stand light frosts, which is why they don’t need protection against the cold. I usually cover them with fleece anyway, if not for their sake then at least for my peace of mind…
Lettuce
We’re talking about varieties here that are very tolerant of cold temperatures, like Asian lettuce and winter purslane. If we sow those outdoors now in March and later in April, plant the varieties we have seed-started indoors now, we can continually harvest different kinds of leafy greens. This method of sowing vegetables every 3 – 4 weeks is called succession planting, which not only ensures a continuous harvest but also that our beds are always covered.
Radishes
Radishes can be sown in a cold frame, a greenhouse or outdoors with protective fleece. As they have an exceptionally short maturity time, sow them every 2 – 3 weeks to have a continuous harvest.
Spinach
Spinach is almost a no-brainer: sow it, cover it with winter protection fleece and just let it grow. It’s usually quite tolerant of the cold and will grow well under protective cover.
Planting outdoors
Before we plant anything outdoors, it’s important to harden the seedlings off by gradually exposing them to outdoor temperatures. Start by putting your plants outside or in the greenhouse for 2 – 3 hours at first and prolong that time over the course of a week before transplanting.
Lettuce
Lettuce that we have started in February is now ready for transplanting outside. Make sure that the seedlings are not planted too deeply, or they may rot. As a rule of thumb, put them into the soil as deep as they were in the pot.
Strawberries
Plant strawberries in March, at best, different varieties that will ensure a long harvest, and cover them with protective mesh.
Spinach
If you have started spinach indoors, now is the time to transplant it, or you can sow it now directly into the patch (see above). No matter which way you take to get spinach into your garden, it will still need a protective cover against too-cold temperatures.
In March, we still have night frosts (and even some day frosts), but that doesn’t mean that there is nothing to do in the garden. Quite the opposite! There are plenty of garden tasks in March that will set your garden up for success. From preparing raised beds to sowing early vegetables, this March gardening checklist will help you make the most of the season.
Overview of garden tasks in March 2026
Here’s a quick overview of the most important garden tasks in March, including when to do them and whether frost protection is needed.
Garden Task
Best Time in March
Frost protection needed?
Priority
Seed-starting indoors
Any day this month
Yes - indoors only
High
Remove fir branches
Any dry day
No
Low
Remove mulch
Any warm day
No
High
Sprout potatoes
Anytime this month
Yes - indoors only
High
Force rhubarb (cover with bucket)
End of March
Yes
Optional
Air cold frames/greenhouse
On warm and sunny days
No
High
Fill up raised beds
When soil is no longer frozen and dry
No
Optional
Create new beds
When soil is no longer frozen and dry
No
Optional
Weeding
When soil is no longer frozen and dry
No
High
Plant strawberries
When soil is no longer frozen and dry
Yes
Optional
Sow/plant outdoors
When soil is no longer frozen and dry
Yes
High
Let’s go through each of these garden tasks in March in detail so you know exactly what to do and when.
#1 Fill up raised beds
Raised beds are not only filled with soil but also layered with organic materials like twigs, leaves, and plant stems. When that material decomposes, it is reduced in volume, which makes it sink down.
Now that your raised beds are empty, it’s a good time to fill them up with humus and compost. Fill more than the surface level, ideally forming a little mound, as the soil will sink again during the next weeks.
#2 Create new beds
If you want to enlarge your garden space, now is a good time to create new beds. I love this method of creating new patches as it doesn’t require digging or other heavy work, is very quickly done and wonderfully effective.
#3 Sprout potatoes for a head start
It’s still too early to plant potatoes, but you can give them a headstart by sprouting them. Lay them out flatly on a surface where they get lots of light. I usually put the potatoes into egg cartons that I place on the windowsill. After some time, they grow little green sprouts.
#4 Airing cold frames and greenhouses
With more sun hours, temperatures rise quickly in cold frames and greenhouses. Increased temperatures lead to increased condensation, which can make our plants rot. Air your cold frames and greenhouse regularly to let the moisture get out.
If you had protected plants with fir branches against the cold, it’s now time to remove them. While they were great in winter, we now need lighter materials for coverage, like straw or a winter protection veil that lets the light through. Fir branches at this stage of the season are too dense and can even impair growth.
#6 Remove mulch
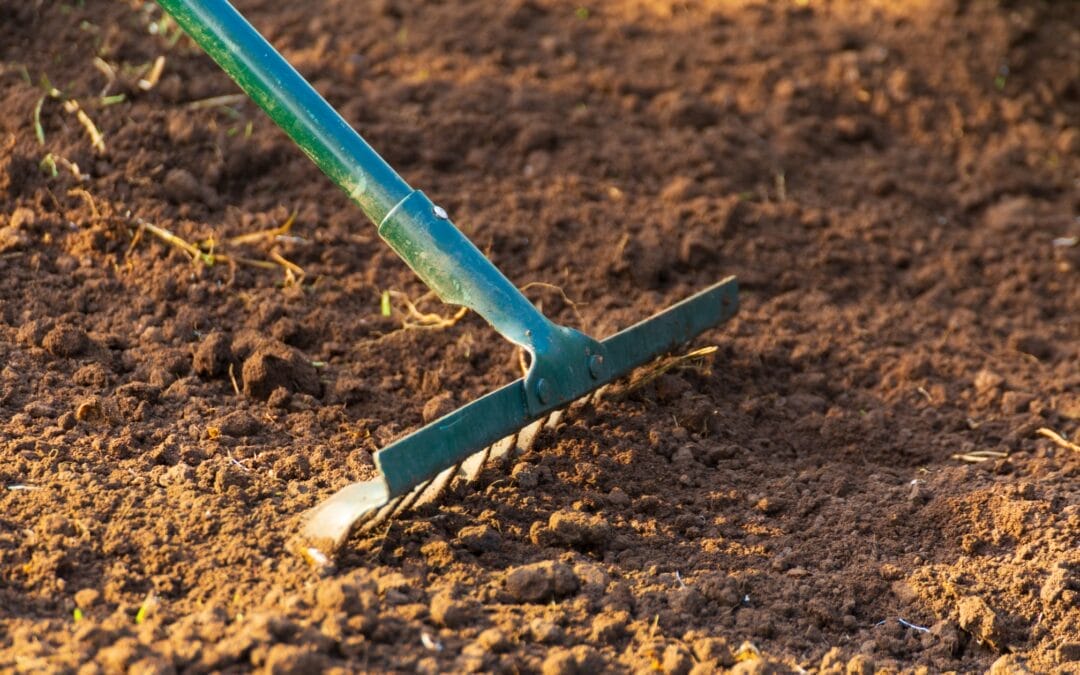
Mulch is not only a good protection against weeds, but it’s also a good insulator. On the downside, that means that it keeps the cold in the soil for longer than we want to. For that reason, it’s an important garden job in early spring to remove the mulch from our beds by raking it to the edges. That way, the soil can warm up quicker.
#7 Weeding
Even though we’ve covered the beds with mulch, there will still be some weeds. When we remove the mulch, it’s best to pull out the weeds that have grown underneath. Thankfully, they’ll come off easily.
Additionally, when the soil is bare and warms up, weeds will also start to grow. Pull them out soon before they get too large.
#8 Plant Strawberries
You can plant new strawberries now and protect them with a veil. If you have strawberries in your garden already, remove all wilted leaves now. They may be infected with diseases, and by removing them, you can prevent those from spreading.
#9 Force Rhubarb
Another garden task you can do in March is to put a bucket over your rhubarb to help it grow faster. The principle is that the early spring sun warms up the air and the soil underneath the bucket, which makes the rhubarb sprout faster. The lack of light doesn’t hamper that, but makes sure that the stalks become especially tender. With this method, rhubarb can be harvested about 4 – 6 weeks after covering.
At the same time, check the seedlings that you’ve started earlier in the year daily. Make sure the plants have enough water and are aired regularly so that excessive condensed moisture will not cause rotting.
#11 Sowing / planting outdoors
Admittedly, there are not many plants you can sow outdoors in March, but still, there are some. Here is an overview of vegetables that can be sown and planted outdoors now:
You’ll find more details about which varieties to use and how to protect those early seedlings in this post about what to sow and plant in March.
Transplanted vegetables not only need protection against the cold but also against pests like snails and slugs, which are very hungry now. A slug fence or collar is a good physical barrier against our slimy fellow lodgers and hopefully will keep them at bay.
Be grateful for every little helper 😊.
For the last few months, we were reduced to dreaming up our vegetable gardens. Now is the time to take action! And although it may still be cold outside, we can start doing these garden tasks in March. Grab your gardening gloves, hop outside and get gardening!
Imagine walking into a nursery in May and seeing healthy tomato transplants for €4 each. That’s exactly why starting seeds indoors is one of the best skills a vegetable gardener can learn — a whole packet of ten tomato seeds costs the same €4, meaning you could grow all ten plants for the price of one. Last year, I grew 40 tomato plants that way and saved 144 euros. Not bad for a bit of soil and some windowsill space.
Saving money is only one part of the story, though. Starting seeds indoors gives your plants a 6-8 week head start on the season.
But do you know what’s the best part of seed starting? The satisfaction and pride when you have coaxed those tiny seeds into sturdy, healthy, and yummy vegetables!
Now, I’ll be honest with you: it does take some effort and a bit of know-how. Sow your tomatoes too early, for instance, and by transplanting time, you’ll have a leggy, floppy mess that can barely hold itself upright, let alone produce a decent harvest. (I know what I’m talking about here.) Get the timing, light and soil right, though, and the results will make you wonder why you ever bought a seedling in your life.
This guide covers everything: which supplies you actually need (and which you can skip), when to start what, and how to nurse your seedlings from first sprout to garden-ready transplant — including how to fix the most common problems along the way.
Not sure if you can manage seed starting? Let me show you:
Is seed starting for me?
When do I start?
It depends on what vegetables you want to start from seed, but as a rule of thumb, start 6 – 8 weeks before your last frost date.
What should I start?
As a beginner, I recommend starting small with lettuce, cabbage, tomatoes and zucchini because they sprout effortlessly and fast.
Do I need lots of stuff?
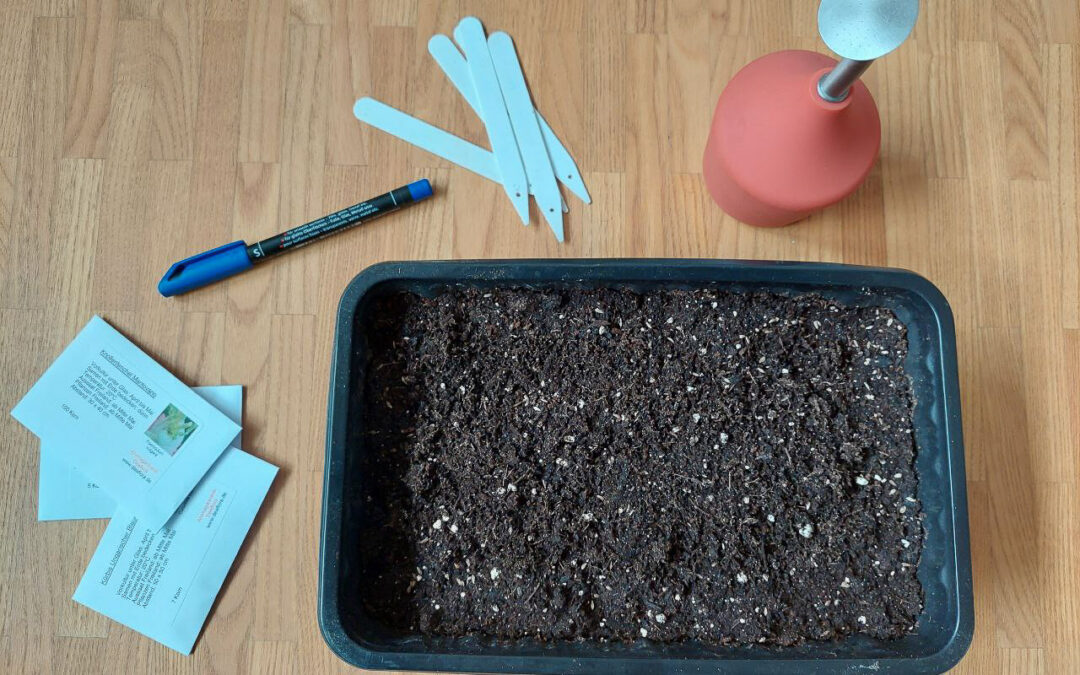
No, you’ll probably already have most of what you need to seed-start: pots (any form of container will do, e.g. empty milk jugs or egg cartons), cultivation soil, seeds of course, and plant labels.
What’s the biggest mistake?
Getting impatient and starting too early 😏.
How long does this take?
Most seeds germinate within a week; some (like peppers and chillies, for example) take longer. The seedlings will stay several weeks indoors before transplanting.
Can I actually do this?
Absolutely! You’ll make mistakes along the road, as we all have done (and still do), but this guide will show you exactly what to do and what to avoid.
Now that we’ve clarified that you can successfully start vegetables from seed, let’s see why it’s absolutely worth it.
Why seed starting?
Many gardeners shy away from seed starting. Too much work, too little space, too tedious. But that’s not true!
Look, I won’t sugar-coat it: you do have to spend some time starting vegetables (or flowers for that matter) from seed and tending to the seedlings, but it’s worth every minute!
Let me show you why:
Saving costs
Seed starting will save you an enormous amount of money. Don’t believe me? Let me show you a small calculation:
As I said earlier, one seed package of tomatoes, containing 10 seeds, costs about 4 €, that is 40 cents per plant. One tomato plant at the nursery costs at least 4 €, sometimes even more, depending on the variety.
That’s ten times the amount you pay for seeds.
Seeing as I grew about 40 tomato plants last year, that’s a saving of 144 € or a saving of 90 %!
Even if you have just a small garden or even only pots for your vegetables, your savings will still be considerable.
Variety
When you buy seedlings from a nursery, you usually can’t choose the variety of vegetables you want to plant. Or – if you can choose – they only have very few of the most common types.
BUT: when you decide to start your own vegetables and browse your first seed catalogue, you’ll find a whole new world of seed varieties. It’ll be almost as if suddenly you’ve discovered the door to Narnia!
You can choose from varieties that are perfect for your climate, heirloom varieties, old varieties and even varieties that have become almost extinct! By supporting this diversity, you not only get healthier plants that are better adapted to your climate, but you also contribute actively to preserving the diversity of varieties.
Headstart
We all love tomatoes, eggplants, chillis and peppers, but they need a long time to mature. If we were to sow them only when it’s warm enough outside (in my zone 7b, that’s mid-May), they would never have enough time to ripen, and they’d only get to produce some green fruit before autumn frosts fall.
By starting them from seed, we fool those plants a bit by pretending that it’s warmer and sunnier than it actually is, inducing them to germinate. By the time we can transplant them, they’ll have grown into healthy and sturdy young plants already.
That way, we give your plants a headstart of 6 – 8 weeks.
Indoors, your seedlings are safe from hungry pests—snails, cabbage flies, and voles can’t reach them.
They’re also protected from harsh weather. Rain, wind, and intense sun can damage young seedlings before they’re strong enough to handle it.
By starting them indoors, we can pamper our veggie babies until they become strong enough to face the outside world.
Efficient use of garden space
Seed starting is not only a task for spring, though. By continually starting lettuce, for example, we always have plants ready to be planted outdoors and fill the gaps we get by harvesting earlier vegetables.
When your beds are fully planted in early summer, start autumn vegetables indoors. When you harvest a vegetable variety, you can already plant the next batch, ensuring there won’t be a gap for too long.
Now that you know WHY seed starting is worth your time, let’s talk about WHEN to begin.
When to Start Seeds Indoors
Every vegetable has its own special requirements regarding the time of sowing, and we gardeners must stick to that time frame as if our veggies’ lives depended on it.
Which they do.
I know how tempting it can be to sow tomatoes in January already, but believe me, you’ll regret it. Yep, speaking of experience here. By the time you can finally plant your tomatoes outside, they’ll be too long and weak to bear their own weight, let alone bear lots of fruit.
The right timing is a decisive factor for healthy and fruitful plants. It mostly depends on the last frost dates in your hardiness zone.
Some vegetables must be started early from seeds, while others have a longer time frame. If you want to harvest continually (and who doesn’t?), one-time sowing is not enough. That’s why we sow vegetables like spinach, radishes, lettuce and carrots several times a season. This principle of staggered sowing and planting is called succession planting and is a total game-changer in the vegetable garden!
Your zone tells you when the last frost will likely fall and when to expect the first frost. These are important for calculating when to start vegetables indoors.
Which vegetables to start indoors vs direct sow
Basically, there are three groups of vegetables:
– those that MUST be seed-started to get a chance of harvest
– those that CAN be seed-started but needn’t necessarily be, and lastly
– those that NEED NOT be seed-started.
The sloths amongst our vegetables are cucumbers, tomatoes, eggplants, peppers, chillis and physalis. They need a long time to mature, and for that reason, must be sown indoors between January and March already. Later would be too late.
Then we have the “sensitive souls” like lettuce and all cabbages. Theoretically, you can sow them directly outside, but they are prone to being devoured by slugs while still young and their chances of surviving an attack of the pests are meagre.
Starting them indoors, however, and not transplanting them before they have become healthy, sturdy seedlings, makes them stronger and less vulnerable to pests.
The third group are those vegetables that can’t cope with transplanting, among them almost all root vegetables, for example, carrots and turnips. Think about it: their goal is to develop long and big roots, so they don’t like being removed from the soil (even for a short time) to be transplanted again. Root vegetables are best sown directly into the bed, except for knob celery.
When in doubt, look at the back of your seed packages: most of them have a recommendation as well as the appropriate sowing and planting times there.
Best seeds to start indoors for beginners
Some vegetables are almost no-brainers when it comes to starting them from seed, and some we could use some experience before we try them.
Beginner-friendly
For a beginner, tomatoes are the best first choice when it comes to seed-starting. They germinate and grow quite fast, are resilient, and the savings are large. One of my favourite beginner tomato varieties is “Sunviva”, a cocktail tomato that you can even cultivate in a pot.
Zucchini and pumpkins are also an excellent choice for beginners, because you just sow one seed per pot and can skip the thinning process entirely. For zucchini, I recommend the variety “Black Beauty”, and one of my favourite pumpkin varieties is “Amish Pie”.
Lettuce and other salad leaves are fast, satisfying and also very tolerant of beginner mistakes.
Confident beginners
Basil is quite easy to grow from seed, but it needs warmth and a little more attention. You also must observe not to cover it with soil, as basil needs the light to germinate.
Cabbages of all sorts and kohlrabi are good choices for confident beginners. They’re best started indoors to protect them from slugs. If you want to cultivate white cabbage in your garden, try “Brunswijk”; the best kohlrabi variety I know (because it doesn’t become “woody”) is “Superschmelz”.
Once you understand that cucumbers need it hot to germinate, you can try these as well. A wonderful salad cucumber is “Telegraph Improved”, and for pickling cucumbers, I recommend “Boston Pickling”.
Advanced
Slow-growing crops like peppers, chillies and eggplants have special needs — consistent heat being the main one — and they can be frustrating in a first season. But don’t let that put you off starting those veggies from seed eventually. My favourite variety for sweet peppers is “Roter Augsburger”. Just saying.
Essential Supplies for Seed Starting
Don’t worry, you don’t need to order fancy equipment to start plants from seed. In fact, you’ll have most of the must-haves already at your house. There are a few nice-to-have items, though, that’ll make seed starting easier, but if you’re just starting, there’s no need to order any of this yet.
When you’re hooked, which I’m sure you’ll be, you can think about buying some of the advanced stuff.
Must-have supplies
Now these are the non-negotiable items, but you can easily find alternatives for some of them.
Planting pots
Basically, we can use all sorts of planting pots and trays as long as they are not too high (which would require too much soil) and have good drainage.
You can reuse plastic pots from former plants, special cultivation trays and even plastic fruit boxes.
There are ready-made biodegradable pots that you can plant out.
Alternatively, you can make paper pots that you fill with soil by yourself, or you can use egg cartons or even eggshells.
Cut open empty milk or juice cartons (lengthwise or crosswise or use glass jars.
There’s almost no limit to the variety of pots you can use. Just look around your house, and you’ll find plenty of containers you can use for seed-starting.
No matter what containers you use, you should have a kind of transparent hood you can put onto them to create a greenhouse atmosphere that creates warm temperatures and relatively high humidity. If you don’t have a hood, you can also use glass covers or even cling film.
Make sure that you lift it several times a day to prevent mould or other fungi from growing. Once the seedlings are large enough to be separated, you can leave them without this protection.
Wash the containers thoroughly with hot water before using them for seedling cultivation. That way, you can destroy germs and fungi before they can wreak havoc.
Cultivation soil
No matter the outer appearance of your pots or trays, their “inner value” – aka cultivation soil – is what counts! A good cultivation soil is crumbly and low in nutrients. “Normal” potting soil is not suitable for seed-starting as it contains too many nutrients. Seedlings don’t need nutrients yet. If the soil contains too many nutrients, the seedlings grow too fast, become leggy, and the roots may be damaged.
You can either buy ready-made cultivation soil or use a mixture of equal parts garden soil, well-rotted plant compost and sand. Manure compost is not suitable as it contains too many nutrients.
If you use homemade soil, you’ll want to bake it at 150 °C (300 °F) for 20 minutes to kill weed seeds and diseases.
Seeds
For me, seed catalogues are a bit like Santa’s grotto. I can spend hours – days even – browsing through them and noting down every plant I’d like to grow, although I don’t buy all of those seeds in the end. But still plenty. Well, other women buy shoes…
Anyway, with newly bought seeds, you can be sure that they’ll germinate, but often there are more seeds in a package than you’ll need in one season. Likely, you’ll have seeds from last year – or even the year before. As seeds can germinate, you’ll have to check if they still germinate with this simple trick:
Fold two paper kitchen towels in half and moisten them with water. Put 10 seeds from one seed package onto one towel and cover them with the second one. Keep it all moist and wait until the seeds start to germinate. When at least 8 out of the 10 seeds start growing (that’s 80 %), this package is still ok to use.
Plant labels
There was a time when I passed labelling my plants because I knew I’d recognise them once they had germinated simply by looking at their leaves… Ok, I was just too lazy to label.
Long story short: I didn’t know which plant was which, and my garden became a huge Surprise Egg. It was a bit like buying a truckload of tins, scraping off the banderoles, mixing them up and playing food roulette.
An easy way to label your plants is with ice sticks. Write the name of the vegetable and variety with a pencil on the stick and put it into the pot. For outdoors, plastic or slate labels are better suited to endure weathering.
Watering
For watering the seeds and later the tiny seedlings, a watering ball or a spray bottle is better than a watering can. They don’t produce a hard jet of water, which could either water off the seeds to the corners of the pot or make the sensitive seedlings bend.
Nice-to-have equipment
Plant lamps
Light is an important factor when it comes to seedling cultivation. I have a rather large south window that’s occupied with seedlings from February to summer, and that’s good. Nevertheless, when the seedlings develop a certain stage of maturity, I put them in the (cooler) guest toilet and install a plant lamp. These lamps not only have the ideal light range for plants (which is why they have a very nasty violet shade for our eyes), but they can also be timed to shine for 12 – 16 hours, depending on the plants’ needs. You’ll never get this amount of light time, not even at a sunny window.
As a beginner, however, a sunny south-facing window where there’s enough room for the seedlings even when they require more space, will do for a start.
Heating mat
I’ve seed started for years without a heating mat, and it worked just fine. Well, at least as long as I dispensed with my hot water bottle that was busy warming the seeds.
Last year, I decided that I deserved some warmth, too, and I bought a heating mat for my warmth-loving plants. And it’s a real game-changer, because now I can snuggle up with my hot water bottle and get cosy in the evening without freezing my toes off.
And the plants are growing great, as well.
For warmth-loving plants such as tomatoes, eggplants, physalis, peppers and chillies, you may want to use a heating mat on which you can put the containers. These mats work like a hot water bottle and warm up the soil, inducing the seeds to germinate.
Dibber
A dibber is used for thinning the seedlings, that is, for putting them out of their initial seed-starting tray and repotting them into a larger container. For starting out, though, you can easily use a pencil.
Advanced supplies
Plant shelves
There are these shelves you can use for cultivating seedlings that come with a tent covering the whole shelf. That way, you don’t have any of this weird eye-hurting light from the plant lamps that are installed on the underside of each shelf board coming out. At the same time, it saves so much space when you can stack the seed trays above one another, instead of putting them side by side.
Soil blocker
A soil blocker is a device that makes square blocks from soil. Sow one seed per block and, instead of uprooting the seedlings and replanting them in a larger pot, you simply pull the blocks apart and repot them. This is especially good for vegetables that don’t like their roots to be messed with, like cucumbers, zucchini or pumpkins.
Ideal place for seedling cultivation
Seedling cultivation will occupy some space indoors for quite a long time. So, where to put all those plants? The most important factor to consider when choosing a place is temperature.
It shouldn’t be too warm. A cool stairwell, a non-heated guest toilet or even the basement are great. Although some vegetables like tomatoes, peppers and eggplants need it warm to germinate, once they are large enough to be separately planted into larger pots, they are happy with cooler temperatures.
You’ve got your supplies sorted—now let’s walk through the actual process, step by step.
Seed starting timeline: what happens after sowing
Below is a typical indoor seed-starting timeline. Use it as a framework — exact timing varies by crop, temperature, and light conditions.
Sow
Germinate
Thinning
Harden off
Transplant
Usually, 6 – 8 weeks before transplanting, sometimes before
5 – 20 days
When the first pair of real leaves shows
One week before transplanting
Depending on plant and zone, between end of March and mid-May
Think of this timeline as plant-stage guidance rather than strict dates. Some seeds germinate in a few days, while others take weeks. When in doubt, follow your seed packet first and use this timeline as orientation.
The most important milestone is the appearance of true leaves — this signals when seedlings are ready for the next step.
Seed Starting Process step-by-step
Got everything you need for seedling cultivation? Great! Let’s get started.
#1 Sowing
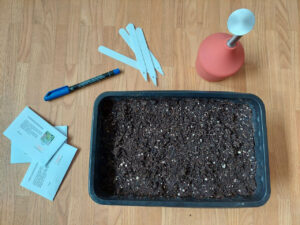
Put the soil into your containers and moisten it. Sow the seeds as deep as they need to be sown (look for that information on the back of the seed packages), lightly press the soil so that the seeds are pressed down and water it all with a spray bottle or a watering ball.
Oh, and remember to label your plants 😉
Some plants, like lettuce or basil, mustn’t be covered with soil but need the light to germinate.
#2 Temperatures
Some vegetables need relatively high temperatures (24 °C / 75 °F and above) to germinate, while others like it cooler. You can usually find this information on the back of the seed package.
As a rule of thumb, veggies that like it hot outside usually like it hot indoors. These veggies are, for example, cucumbers, tomatoes, peppers and chillies, pumpkins, zucchini and eggplants.
All other vegetables germinate at slightly lower temperatures between 18 and 22 °C (64 – 72 °F).
Giving your seeds the right temperature is vital for germination, so make sure to hit it right off. At this early stage, the right temperature is even more important than light. So, regularly check the temp, keep the soil moist and wait.
#3 Germination
The first green tips are showing out of the soil. Hurray! In case of warmth-loving plants, it’s now time to move the seedling trays to a slightly cooler environment, ideally with plant lamps installed.
#4 Care
When your plants have their first growth spurt, you needn’t do much. Just water the seedlings regularly to keep the soil moist. Yet, while before you could water from above, right onto the soil, now I recommend watering either from the side or into the saucers your trays stand in and let the soil absorb the moisture. That way, the leaves won’t get wet, which could cause diseases.
#5 Thinning
When the seedlings have developed their first pair of real leaves (the seed leaves don’t count), it’s time to thin them out by transplanting them into larger pots. This not only provides them with more space for developing roots but also with more light and nutrients.
For thinning, I carefully loosen the seedlings in the tray or pot with the pointed end of a dibber or a pencil. Holding the seedling by its stem with one hand, and helping with the dibber in the other hand, I meticulously remove the plant from the soil. Sometimes the roots get entangled with those from the neighbouring plant. Here also, the pointy end of the dibber or pencil comes in handy for cautiously “combing” them out of each other.
Now, I poke a hole in the soil of the new pots and put the seedling in there.
Make sure you plant the seedlings as deep as they were before. Tomatoes are an exception: plant them deeper than before because they can grow new roots on their stem which makes them grow sturdier.
If you are intimidated by thinning, why not start with vegetables like pumpkin, summer squash or sunflowers? You can sow one seed per pot and needn’t thin them out.
#6 Growth
Repotted, put your seedlings back in the cultivation station. Make sure the soil is kept moist and lightly fertilise cabbages and tomatoes.
It’s important to check your plants every day, water them when needed and make sure they don’t develop any diseases.
#7 Hardening off
Before we can release the seedlings into the wild outdoors, we have to harden them off.
Start about a week before transplanting and put the seedlings outside in the shade for a couple of hours.
Each day, prolong the time and after 3 days, even put them into the sunlight (not around noon, that would be too much).
To make them accustomed to the wind, gently brush them with your hand, simulating wind movement.
#8 Transplanting
You’ve grown healthy, sturdy plants that have already hardened off. Now it’s ready to plant them outside. Transplant your seedlings on a cloudy day or in the evening to reduce the risk of plant shock. Make sure you plant them at the right distance from one another (again: check your seed package).
Water the seedlings properly after planting so that the soil washes around the roots, leaving no air holes. If necessary, cover the seedlings with nets to protect them from the weather and/or pests.
Seed starting mistakes beginners make
Even with perfect conditions, problems can arise. Here’s how to troubleshoot the most common issues.
Now these mistakes are mostly made by beginners, but experienced gardeners sometimes get them wrong, as well.
Timing
Sowing too early is a classic. Remember when I started those tomatoes way too early, and they became all leggy and weak? Yes, I’ve also made that mistake. And more than once.
Sowing too late, however, is equally common, especially with slow-growing veggies like peppers and eggplants.
A further timing mistake beginners often make is to sow everything at once rather than in stages for succession planting.
Temperature and light
Temperature and light errors trip up a lot of people. Not providing enough light is probably the single most common reason for leggy, weak seedlings. Keeping seedlings too warm once they’ve germinated is another frequent mistake — people assume warmer is always better, but most seedlings actually prefer cooler temperatures after sprouting.
Soil
A common mistake I’ve seen beginners make (ahem… and myself for that matter) is using regular potting soil instead of a seed starting mix. Potting soil has too many nutrients, “burning” the seeds or making the seedlings weak.
Watering
Overwatering is much more common than underwatering with beginners. Let’s not drown the seeds, please!
Once the seedlings have emerged, they should only be watered from the side or in the tray their pots stand in.
Skipping key steps
One of the important steps that’s often rushed or even skipped is hardening off the seedlings before transplanting them. That’s a sure way to devastate an otherwise healthy batch of seedlings!
Another step that’s not paid too much attention to is thinning out as soon as the first pair of real leaves show. When you leave the seedlings too long together in their starting tray, they become overcrowded and compete for light and nutrients, which makes them weak.
Oh, and always remember to label the seeds right after sowing them. Otherwise, you’ll get a surprise garden like me that one year.
Giving up too soon
Look, we all have had bad seasons where nothing seemed to go right. I, too, have lost batches of vegetables I started indoors – and not in my first year of seed starting. Don’t abandon seed starting just because it didn’t work the first time!
Sometimes, beginners also start with crops that are known to be difficult to grow from seed, like celery or celeriac. Choose more forgiving vegetables instead, like tomatoes, pumpkins/zucchini or lettuce.
Common Problems and Solutions
There are a few common problems that may show when seed-starting vegetables:
Mould/fungal diseases
Fungal diseases spread best in damp and relatively cool environments. If you have mould or other diseases in your trays or on your seedlings, you probably haven’t ventilated the trays enough.
Solution: Open the hood more frequently and for a longer time. Also, make sure that the soil is only moist but not wet.
Leggy seedlings
When your seedlings grow very long (“leggy) and have rather light-green leaves, they usually don’t get enough light and try to compensate by spindly growing towards the light.
Other reasons for leggy growth are too high temperatures or too many nutrients in the soil.
Solution: Install plant lamps Move the seedlings to a cooler place. Repot the seedlings into nutrient-low soil.
Nutrient deficiencies
If your seedlings stagnate or even get yellow leaves, they may need nutrients. Hungry plants like tomatoes and cabbage need their first gift of fertiliser already about two weeks after germination.
Solution: Add some diluted liquid vegetable fertiliser
Pests
Obviously, we’re not talking about snails or voles here. Yet, there is the risk, for example, of fungus gnats in the soil. Last year, I had an invasion of those blighters and didn’t realise it until the little black flies were everywhere and my seedlings started to wilt.
Solution: Fungus gnats can be fought off with neem oil, for example, nematodes or other predatory mites, which you can buy (online) and add to the water. For more information about how to get rid of fungus gnats, look at this article.
Watering issues
Overwatering can cause root damage, while underwatering causes wilting. Both will eventually kill your seedlings.
Control your seedlings every day and adjust your watering routine to their needs.
Solution: Water until the soil is moist but not wet. Check your trays regularly.
Frequently Asked Questions About Seed Starting
How early should I start seeds indoors?
Most vegetables need 6-8 weeks indoors before transplanting. Tomatoes and peppers need 8-10 weeks. Check your seed packet for specific timing.
Do I need grow lights to start seeds?
A bright south-facing window can work, but grow lights produce sturdier seedlings by providing 12-16 hours of consistent light. If your seedlings get leggy, you need more light.
Can I use regular potting soil for seed starting?
No. Regular potting soil is too rich in nutrients for seeds. Use a seed starting mix, which is lighter, sterile, and prevents seedlings from growing too fast.
Which seeds are easiest to start indoors?
Tomatoes are very forgiving, as are zucchini, pumpkins and lettuce.
What temperature do seeds need to germinate?
Most seeds germinate at 65-75°F (18-24°C). Heat-loving plants like tomatoes and peppers prefer 75-85°F (24-29°C). Check your seed packet for specifics.
How do I prevent leggy seedlings?
Provide adequate light (12-16 hours under grow lights), maintain proper temperature (cooler after germination), and use a low-nutrient seed starting mix.
Ready to Start Your Seeds?
You now know what seed starting really takes — not perfection, but the right timing, enough light, and a little daily attention.
And the best part? You don’t need to start big.
A few pots on a windowsill are enough to experience that quiet magic of watching the first green tips emerge, and realising you grew them yourself.
You’re no longer just planting vegetables. You’re growing them from the very beginning.
Seed starting is one of those gardening skills that looks complicated from the outside but quickly becomes second nature once you begin. And every season, you’ll learn a little more.
If you ever feel unsure, come back to this guide and follow the steps one by one.