
.
I don’t know about you but once the festive season is over and life starts again in January, my fingers itch to dig into some dirt! Although there are some outdoor garden tasks you should do in January, it’s too cold to get my fingers dirty outside. But I can always do some seed-starting in January and sow vegetables indoors! Of course, it’s way too early to seed-start tomatoes, for example, but there are some plants we can give a head-start by sowing them out in January. Let’s get growing!
Understanding Your Growing Zone and Its Impact on Seed Starting
As you probably know, there are 11 hardiness zones, each divided further into two half-zones. Hardiness zones are set worldwide and classified by the lowest temperatures reached in winter and last frost dates. If you want to know your hardiness zone, hop over to this site, insert your postal code and find out your zone.
The hardiness zone you live in determines to an extent what plants you can cultivate in your region. It also tells you when to plant and seed-start your vegetables which is largely determined by the dates of the last frost.
However, knowing your hardiness zone doesn’t take into consideration regional microclimates that mostly affect temperature and humidity. Also, soil quality contributes a lot to the microclimate. Sandy soils, for example, have a lower minimum and higher maximum temperature than loamy soils.
Apart from temperature, the last frost dates are what’s most important for us vegetable gardeners. When we know how long it takes for a plant to germinate and from sowing to harvest, we can calculate backwards and determine when to seed-start indoors.
Essential Indoor Seed Starting Equipment for January
The basic equipment consists of cultivation trays and/or small pots with transparent covers, alternatively cling film.
Then, you need cultivation soil specially for seed-starting. It contains fewer nutrients and is also good for planting herbs, which also need a few nutrients, in pots.
A small watering can or a plant sprayer helps you to water your seeds carefully without washing them out of the soil.
Plant sticks are great for noting the plants and varieties you sow and sticking them into the tray to mark your plant rows. Don’t think you can determine the plants later. Been there, done it, not successful!
A plant lamp is a true game-changer when it comes to indoor seed-starting as light intensity and light hours are usually not sufficient for healthy plant growth. When there is too little light for our seedlings, they become leggy and might even fall over as they try to reach for the light. A plant lamp can be programmed for how long it has to shine (12 – 14 hours/day) and it usually provides just the right light spectrum for plants.
Additionally, you may want to think about buying a heating mat for warmth-loving plants like peppers, tomatoes and eggplants. With a mat like that underneath the seedling trays you can ensure a consistently high temperature.
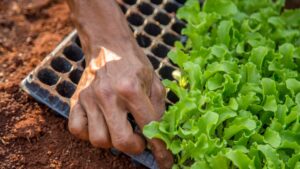
How to seed-start indoors
Seed-starting indoors is not rocket science but there are a few things to observe:
Rinse the tray or pots with hot water to eliminate bacteria and fungi.
Put the soil into the tray or pots, press it lightly and make small holes where you want the seeds. Put the seeds into the holes, cover them lightly with soil and press the soil gently. Now, water the seeds carefully with a fine-holed watering can.
Put the transparent covers onto the trays. This enhances the temperature and keeps the moisture in. Put the trays in a sunny place at the temperatures required for each plant. If you want to seed-start plants that need relatively high temperatures, like eggplants, peppers, physalis etc., you should consider using a heating mat that you can put under the trays and heat up to the appropriate temperature.
Once the plants grow, check them daily. Keep the cover off for a few minutes to enable ventilation and prevent fungi. Also, check for fungus gnats, those small black flies that come out of the soil and whose larvae eat your plants’ roots. Sometimes, we bring them into the house with the soil. Put glue traps into your propagation trays and if gnats stick to them, put nematodes, which eat gnat larvae, into water and water your plants with it. Maybe you have to repeat this procedure at a later time.
Vegetables to seed-start in January
#1 Peppers / Chillies

Peppers and chillies need some time to get started. If you sow them too late, they’ll have their fruits late, too, and you risk damaging them by cold temperatures—even if you cultivate them in your greenhouse.
Sow the seeds into a tray with cultivation soil and put it in a sunny and warm spot at 25 °C (77 °F). A bright south-facing window, a winter garden or a heatable greenhouse are good places.
#2 Physalis
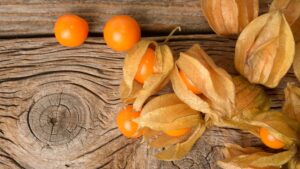
Seed-start physalis in January by sowing several seeds into one pot. Put the pot in a warm and bright spot. Temperatures about 25 °C (77°F) are ideal. Physalis grow slowly at the beginning and must be kept moist. Separate the plants when they are about three weeks old and plant them in single pots. Either plant physalis out after the last night frosts or separate them again and put them into large pots that you put outside.
Physalis are perennials and can be kept indoors during winter.
#3 Winter lettuce
Seed-start winter lettuce like ‘Baqieu’ to plant it out later in a cold frame or unheated greenhouse. That way you’ll have an early lettuce harvest.
Sow the seeds into a tray with the appropriate soil and press it lightly. Lettuce only germinates in light so don’t cover the seeds with soil. Temperatures mustn’t be as high as for peppers or physalis. 16 – 18 °C (60 – 65 °F) are ideal. When the plants are large enough, separate them and set them into single pots.
#4 Sweet potatoes

Cut sweet potatoes in halves and let the cutting areas dry for a few hours. Then, put the halves with the cut end facing down into a pot or balcony box with soil. Place the pot or box in a warm and sunny place. After some time, shoots will grow out of the sweet potatoes which we’ll cut off later and put into water for building roots.
#5 Ginger / Turmeric
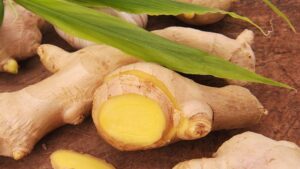
Ginger and turmeric build rhizomes instead of deep roots and thus are best grown in flat pots. Put a rhizome with “eyes” into a tray or pot and cover it with soil so that two-thirds of the ginger or turmeric is in the soil and one-third is still above.
#6 Eggplants
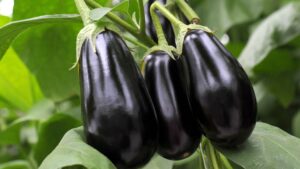
Like peppers and physalis, eggplants like it warm and thrive best at temperatures of 25 °C (77 °F). Seed-start eggplants at the end of January by sowing seeds into a tray. Later, when they are large enough transplant each plant into a single pot. Always make sure that they are in a warm and sunny place.
#7 Cabbage
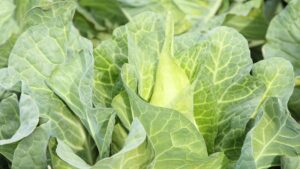
Cabbage is usually harvested in autumn, but there are varieties for a summer harvest and those should be seed-started now. As usual, sow the seeds in a tray and separate them later when they’ve grown four seed leaves.
Cabbage doesn’t need high temperatures like peppers and eggplants. On the contrary, it’s perfectly content with temperatures of 16 – 18 °C (60 – 65 °F).
When we plant out these cabbage varieties after the last day frosts, we can harvest the plants already in July.
#8 Savoy cabbage
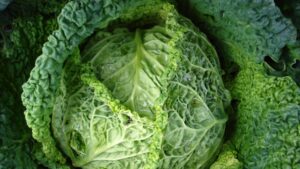
As with cabbage, there are summer varieties that should be seed-started at the end of January. Savoy cabbage germinates already at temperatures of only 3 °C (38 °F). Once they have four seed leaves, separate the young savoy cabbages and plant them into single pots. Now put them in a bright place at about 16 – 18 °C (60 – 65 °F) and plant them outdoors end of March/beginning of April.
Summer varieties of savoy cabbage can be harvested in July and August.
#9 Early cauliflower
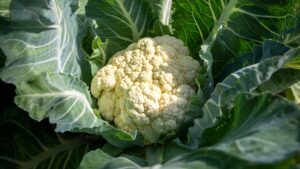
Seed-start early cauliflower varieties in January by sowing them into trays and putting them in a place with 16 – 18 °C (60 – 65 °F). Separate them when they have grown four seed leaves and plant them into single pots. Plant them into an unheated greenhouse or a cold frame mid to end of March. If you have them in the greenhouse, you can plant tomatoes in between later. By the time they need more space, the cauliflower is already harvested.
#10 Kohlrabi
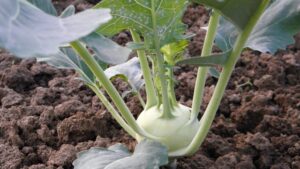
Kohlrabi can also be seed-started now for an early harvest in the cold frame or greenhouse. Indoors they need temperatures about 16 – 18 °C (60 – 65 °F) and should be separated once they’ve developed four seed leaves. Plant them out into the cold frame or greenhouse end of February/beginning of March for an early harvest.
#11 Onions
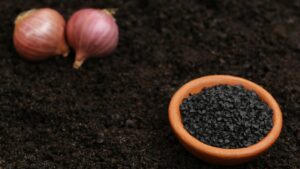
Sowing onions may be more time-consuming than planting the bulbs but it shows advantages like healthier growth, more varieties and better storage capability. And it’s cheaper. Seed-start onions in January to ensure that you can harvest them before the first frost in autumn. Put the seeds into a tray or small single pots and place them in a bright spot of about 16 – 18 °C (60 – 65 °F) or colder (not under 10 °C / 50 °F). At the end of March/beginning of April, you can plant them outdoors.
#11 Summer leek
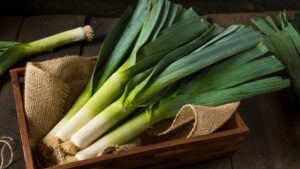
Summer leek, that’s harvested in July / August must be seed-started in January. You can either sow the seeds in trays and separate them later or you sow them into small single pots. Plant the leek outdoors when it’s about as thick as a pencil. To protect it from night frosts, however, you should cover it then with a frost fleece.
Summary
Starting seeds in January sets you up for a productive growing season ahead. Remember to choose varieties suited to your zone and provide proper growing conditions for strong, healthy seedlings. When you observe the simple rules for seed-starting vegetables indoors (see above), you’ll give your plants a good head-start and have a great harvest later that season.
Ready to get growing? Grab your seed packets and let’s make this your best gardening year yet!
Here you’ll find further articles on seed-starting:
Seed-starting cucumbers: how to get healthy seedlings
The Complete Pumpkin Grower’s Guide: From Seed Selection to Harvest
How to plant, grow and harvest tomatoes in 14 steps
New to gardening or want to dive in deeper? Here are all posts related to gardening: Gardening – seasonalsimplelife.com
0 Comments