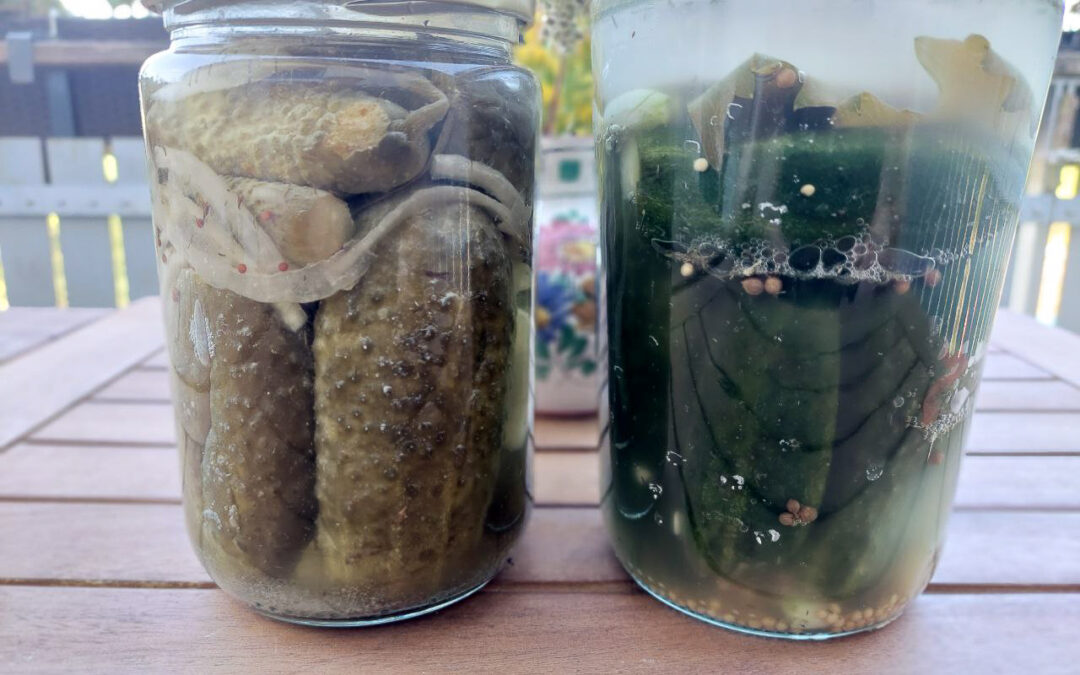
Look at the title picture of the two jars of preserved gherkins. Apart from the herbs, can you see any difference? I dare say no. Same green cucumbers, same briny liquid—so what gives? The answer is that the gherkins in the left jar are preserved with vinegar, and the ones in the jar on the right are fermented. While they appear to be alike – and are often generally referred to as “pickles” – there is a difference between fermentation and pickling.
First of all, they differ in taste. The pickled gherkins taste bright and acidic, while the fermented ones have a tangy and more complex flavour. Additionally, they contain numerous beneficial probiotics, which have a positive impact on health.
Let’s have a closer look at pickling and fermentation and compare them.
Quick Overview
Fermentation
Pickling
Process
Living, biological process
Chemical method
Timeline
1 – 4 (+) weeks
0 – 5 days
Nutrition
Probiotics, enhanced nutrients
Almost no nutritional changes
Flavour
Complex, tangy
Bright, acidic
Storage
Cool (fridge) after the initial fermentation
Shelf-stable when properly canned
Fermentation
Fermentation is a biological process where beneficial bacteria convert sugar and starch in the food into lactic acid. This happens naturally when vegetables are submerged in salt water or when salt is added directly to them.
To start fermentation, we make a salt brine or add salt to the goods we want to ferment. The salt creates an environment where the good bacteria (for example, lactobacilli) thrive while harmful ones can’t survive.
After a few days, we can watch little bubbles in the jar. The lactobacilli have started converting carbs (sugar and starch) into lactic acid and carbon dioxide (CO2). The latter displaces oxygen from the jar by pressing it out of the jar (sometimes even together with some brine). That’s great because lacto-fermentation needs an anaerobic environment (that is, an environment without oxygen) to work properly.
The fermentation process needs temperatures between 18 and 22 °C (64 – 72 °F). Not only does it form lactic acid and thus preserve the food, but it also increases the content of vitamins and micronutrients and creates probiotics, which have a positive effect on gut health.
After 1 – 4 weeks, depending on the food and the taste we like to acquire, we transfer the ferment to a cool place, for example, the fridge to stop – or rather, slow down – fermentation.
Fermented vegetables have a salty-fresh, complex, tangy flavour.
Examples of fermented goods are sauerkraut and kimchi, sourdough, kombucha and yoghurt.
Pickling, on the other hand, is a chemical process where food is preserved in an acidic solution, usually vinegar. The acid (here: acetic acid) creates an environment that’s too harsh for harmful bacteria to survive.
To pickle vegetables, we make a brine from water, vinegar, salt (and sometimes sugar), heat it and pour it over the vegetables in a jar. During cooling, the jar forms a vacuum, which is an environment with low oxygen. That and the acid from the vinegar and the salt kill any harmful bacteria.
Unlike fermentation, pickling doesn’t affect vitamin levels or create probiotics.
Pickles are ready to eat within a very short time, usually a few hours to a few days. They are usually kept in a cool, dry place (usually the fridge), unless you preserve them additionally in a water bath canner. The canning makes the low-oxygen environment in the jar into a no-oxygen (that is, anaerobic) environment. That way, you can store it at room temperature for up to 2 years.
Pickled vegetables have a bright, sharp, fresh flavour.
Understanding these basic differences leads us to a crucial component in both processes: salt.
Salt plays multiple crucial roles in fermentation, but also in pickling, working through several different mechanisms:
Preservation Through Osmosis
Salt not only draws water out of the vegetables, but also any pathogens that may be present. This dehydration effect concentrates the remaining liquid into a high-sodium environment where most spoilage bacteria cannot survive. The salt essentially “pickles” the gherkins at a cellular level, creating an inhospitable environment for decomposition.
Selective Bacterial Environment
While salt kills bad bacteria, it also encourages beneficial bacteria, which are more salt-tolerant than pathogens. The right salt ratio (typically 2 – 5 % by weight) is therefore essential to create a selective environment where only the bacteria we want can thrive and produce lactic acid.
Texture Preservation Through Cell Structure
Apart from its preserving benefits, salt also firms the vegetable texture by drawing moisture from cell walls and then allowing them to reabsorb the salty brine. This process replaces the vegetable’s natural water content with salt water, which helps maintain the crispy texture of the cell walls. The salt also breaks down pectin enzymes that would otherwise soften the vegetables over time.
During fermentation, this happens automatically when the vegetables are covered with brine, but we also use this effect to keep gherkins crisp when pickled. This is why many pickle recipes call for pre-salting (brining) the vegetables for several hours before the final pickling – it jump-starts this firming process and results in crunchier final pickles.
Concentration Matters
Too little salt won’t provide adequate preservation or firming, while too much can make pickles inedibly salty and overly firm. The optimal range depends on your method – quick pickles typically use less salt since vinegar provides the primary preservation, while fermented pickles rely more heavily on salt concentration for both safety and texture.
This dual action of preservation and texture enhancement makes salt the cornerstone ingredient that separates successful pickles from mushy, spoiled failures.
Acidity levels and food safety
Acidity levels are absolutely critical for safe pickle making – they’re the primary defence against dangerous pathogens, particularly botulism:
The pH Safety Zone
For safe home pickling, your final product must have a pH of 4.6 or lower. This acidic environment prevents Clostridium botulinum (the bacteria that cause botulism) from growing and producing toxins. Botulism is especially dangerous because it can be fatal, and the bacteria can survive in low-oxygen environments like sealed jars.
Understanding Acetic Acid Percentages
What we can do, now, to ensure the right pH of the finished product is to use a vinegar with the right amount of acid. Most pickling recipes call for vinegar with at least 5% acetic acid. This isn’t arbitrary – it’s the minimum concentration you need to reliably acidify your brine so that it’s safe when combined with water and vegetables. Using weaker vinegar can create unsafe conditions.
When you want to modify recipes, use different vinegar types or work with vegetables with varying natural acidity levels, you may want to test the pH level of your pickles. Testing strips or digital meters can give you a definitive confirmation of the pH.
Proper Brine Ratios
The standard safe ratio for vinegar and water is typically 1:1, which means one part of vinegar to one part of water. This can vary, however, based on other ingredients like salt and sugar. Never reduce the vinegar content in tested recipes without understanding the pH implications. Adding too much water, vegetables with high pH, or alkaline ingredients can push your pickle into the danger zone above pH 4.6.
Summary
While both are preserving methods, fermentation and pickling differ in the way they approach preservation: fermentation is a biological process that uses salt to create an environment ideal for beneficial bacteria, usually lactobacilli that convert carbs into lactic acid.
Pickling, on the other hand, is a purely chemical process that uses acidity, typically from vinegar, to also create an environment where harmful bacteria can’t survive.
Fermentation takes longer (usually several weeks) and enhances vitamins and creates probiotics, while pickles can be eaten almost immediately but have no altered nutritional content.
Also, the flavours differ: ferments have a more complex and tangy flavour while pickles taste more bright and acidic.
Neither is better than the other, though, both methods produce delicious results! They are just two different ways to preserve food. I happily use both, fermentation and pickling, to make our food last through winter, and I recommend the same for you!
Every summer, when the gherkins start coming in faster than we can eat them fresh, one preserving session is guaranteed to happen in my kitchen: homemade gherkin pickles. The whole house smells of vinegar and dill, jars line the worktop, and I already know that opening the first one in autumn will be worth every minute. That satisfying crunch when I bite into a perfectly pickled gherkin can hardly be topped.
Gherkin pickles are extremely versatile: they make a wonderful addition to a cold lunch and sandwiches and are an essential ingredient for burgers, hot dogs and traditional German rouladen. Or you just snack on them between meals right out of the jar. It’s a healthy alternative to that bar of chocolate, and you can eat them straight from the jar. I certainly won’t judge you. 😉
I used to think that pickling cucumbers (or gherkins, as we now know) was complicated and only for an experienced chef, but it’s actually pretty easy, and you only need a few ingredients. And the best thing: it tastes so much better than the store-bought stuff! Are you ready to learn how to make homemade gherkin pickles? Let’s dive in.
Quick Overview
✓ Ready in: about 30 minutes (+ overnight soaking)
✓ Difficulty: Easy
✓ Shelf life: • Fridge: 2–4 months • Water bath canned: about 1 year
✓ Best vinegar for classic pickles: White wine vinegar or distilled white vinegar (5% acidity)
Looking for more ways to preserve your harvest? Read on in my preserving section.
Understanding Gherkins
What Are Gherkins?
Contrary to what many may think, gherkins are not just regular baby cucumbers but specific cultivars or even an entirely different species, like Mexican sour gherkins.
Gherkins are typically harvested small (3 – 8 cm/1 – 3 inches), and even if you’d let them grow (which you wouldn’t unless you want to harvest the seeds), they hardly exceed 15 cm (6 inches). Cucumbers, on the other hand, grow larger and are harvested when they are 15 – 20 cm (6 – 8 inches) long, some even longer.
As gherkins are picked small, they contain fewer seeds and less water, which makes their texture firmer and crunchier than that of regular cucumbers. Due to their high water content, cucumbers are only partially suitable for pickling as they tend to become mushy.
Gherkin skin is also thicker and bumpier, which helps it hold up better during the pickling process. At the same time, gherkin skin is also more porous, allowing the brine to penetrate more effectively.
As gherkins maintain their shape and crispiness much better during the pickling process than regular cucumbers, they are the preferred choice for homemade and commercial cucumber pickles. You can use cucumbers for a quick pickle, as well, but when it comes to long-term storage, they won’t hold up.
When to harvest gherkins
Once your gherkin plants start to flower, check them daily. Like zucchini, gherkins can grow from tiny to enormous in (almost) seconds.
Gherkins should be hard when you squeeze them gently; their skin should be glossy and the bumps well-defined.
During peak growing season, you’ll want to harvest gherkins every 1 – 2 days to catch them at the right stage. Gherkins are best harvested in the mornings when they are still hydrated from the overnight moisture.
Good harvesting sizes are
Cornichons: 3 – 4 cm (1 – 1.5 inches) for the smallest, most premium pickles
Small gherkins: 4 – 6 cm (1.5 – 2.5 inches) for classic pickle size
Medium gherkins: 6 – 8 cm (2.5 – 3 inches); don’t let them grow larger or they’ll become too seedy
If you don’t grow gherkins in your garden, check out local farmers’ markets or speciality stores for fresh produce.
How to pickle gherkins
Equipment Needed
There’s some general equipment you’ll need for pickling, which is:
Glass jars
You can either use Mason jars or twist-off jars. It’s best to pick a jar size that’s not too large, as the pickles don’t last long once the jar’s open. It’s usually better to use smaller jars, as the pickles don’t keep as long once opened.
Bowl
in which you can let the gherkins soak in salt brine overnight.
Pot
Use a non-reactive pot in which you can prepare the brine.
Measuring tools and scales
You’ll need a measuring cup for the liquids, scales for weighing the sugar and a tablespoon for measuring the salt and spices.
Core Ingredients
Now we come to the ingredients. You’ll need
Gherkins
Well, obviously. They’re best when freshly picked, of course, but it’s also fine to use them after they’ve been harvested a day or two. Just make sure they don’t shrivel or become soft.
Also, check whether the skin is hard and unmarred. Discard any gherkins with blemishes and spots.
Salt
It’s best to use pickling salt as it doesn’t contain any additives like iodine or anti-caking agents, which can make the brine cloudy. It’s also finely grained so that it’ll dissolve quickly and completely in the brine.
An alternative to pickling salt is high-quality sea salt, but make sure you take one without additives.
Kosher salt is also acceptable, but as it’s less dense than other salts, measurements must be adjusted: you’ll need about 25 % more salt to make the brine equally saline. Also, kosher salt is rather coarse and takes longer to dissolve.
Best Vinegars for Pickling
There’s a variety of vinegars you can try for your pickles! Here are my favourites:
White distilled vinegar
This is the most common choice for most pickle recipes. It has a clear, sharp taste that doesn’t compete with your pickles and spices. Also, it makes a clear brine and has a long shelf-life when used in pickles.
Apple cider vinegar
It has a milder and mellower taste and adds a bit of sweetness to your brine. As its colour is a light brown, it’ll tint your brine a bit, but in exchange, it add more complex flavours. Raw, unfiltered versions are the best, and you can use your homemade apple cider vinegar! Just make sure that it contains at least 5 % acetic acid.
White wine vinegar
This is the premium version for pickles, as it tastes cleaner than apple cider vinegar but more complex than white distilled vinegar. It costs a bit more, but it creates really elegant pickles.
Rice vinegar
If you want to try out Asian inspired pickles, rice vinegar is your preferred choice. Its taste is gentler and less aggressive, and it works wonderfully with ginger, garlic and sesame flavours.
Champagne vinegar
Now, this is the luxury version of vinegar, which you can see reflected in its price. However, it has a very delicate and refined taste and is ideal for special occasion pickles.
Pro tip: Blend vinegars for custom flavour profiles. Try a mixture of 2/3 of white wine vinegar and 1/3 apple cider vinegar, for example. Just make sure that the acidity is at least 5 %.
Vinegars to avoid
Some vinegars are just not suitable for pickling:
Balsamico vinegar
It’s too sweet and would overpower the pickles’ taste. Also, it would make the brine dark and cloudy.
Flavoured vinegars
Rather, add the flavours you want with your selection of herbs and spices
Vinegars with an acidity below 5%
5 % of acidity is necessary to keep the food safely in the sour zone where certain (dangerous) bacteria can’t grow.
Water
I use our tap water for pickling, and it works just fine. However, if you live in a region where your tap water is highly chlorinated, or the house you live in has old (rusty) pipes that could leak iron, it’s best to carbon-filter your tap water before using it for pickling (or drinking or cooking for that matter).
If in doubt, taste your tap water. Smelling and tasting good? Then go on and use it for pickling. If it’s got a metallic or chlorine taste, filter it first.
Distilled water is NOT a good alternative, as – due to the lack of minerals – it tastes very bland and lets the pickles go mushy.
Flavour Enhancers and Spices
You can, of course, make pickles just with the above ingredients, and they’d taste good, but to enhance the flavour and transform your gherkins into a truly marvellous preserve, add spices and herbs.
The traditional herbs and spices for pickled gherkins are dill, peppercorns and mustard seeds, but try adding onions, garlic, bay leaves and tarragon.
Thyme and oregano are other herbs you can use.
If you want to experiment even more, include chilli flakes, juniper berries and/or fennel seeds.
Homemade Gherkin Pickles – Step by Step
Let’s dive in and make those yummy gherkin pickles!
Here are the ingredients you need for 3 – 4 jars of 500 ml:
1 kg gherkins 1 bunch of dill (including the flowers) 5 small laurel bay leaves 2 stems of savoury 2 stems of tarragon 1 tbsp peppercorns 1 tbsp mustard seeds 1 onion 800 ml water 400 ml white wine vinegar 50 g + 2 tbsp salt 250 g brown sugar
1. Sterilise your jars and lids by washing them with boiling water. Let them cool on a rack and dry them out.
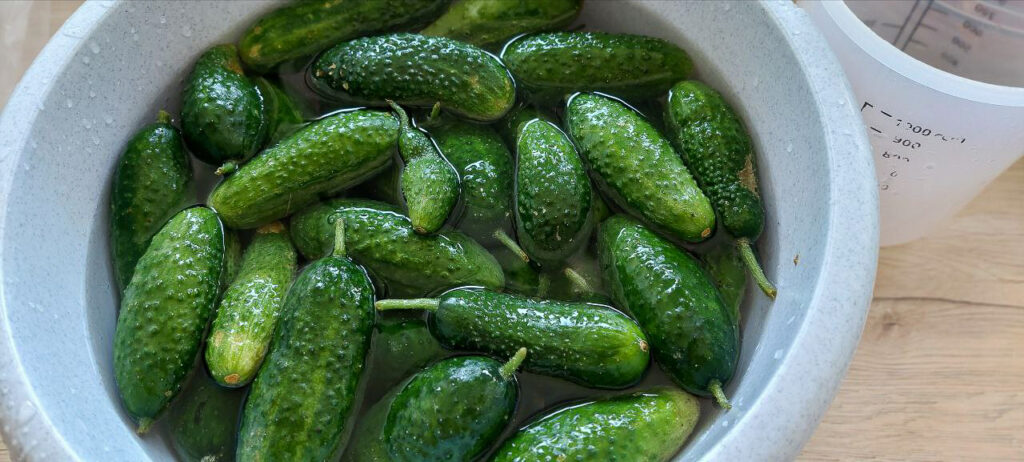
2. Wash the gherkins thoroughly. Put them into a bowl, mix 50 g salt with 1 litre of water and pour this brine over the gherkins. They should all be under the brine. Cover the bowl with a plate and let them rest for 8 – 12 hours, at best overnight.
This is an essential step. The salt will pull out water from the gherkins (i.e. dehydrate them) and thus help them stay crisp for a long time. Don’t skip this step!
3. The next day, pour off the brine and dry the gherkins with a cloth.
4. Now, cut off the blossom end (that’s the one where there’s no vine attached), because it contains certain enzymes that may lead to mushy gherkins. You can also cut off the stalk end, but that’s optional. I usually leave about 0.5 – 1 cm (0.2 – 0.4 in) of vine on the gherkins.
5. If the gherkins are very large, you may cut them into slices or sticks.
6. Wash and dry the dill and carefully remove the flower tips.
7. Wash and dry the savoury and tarragon.
8. Peel the onion and cut it into rings.
9. Layer the gherkins, herbs, onions and spices into the jars.
10. Put water, vinegar, 2 tbsp salt and sugar into a pot and bring the mixture to a boil. Stir until sugar and salt have dissolved.
11. Carefully pour the vinegar brine over the gherkins into the jars and close the lids immediately.
12. Let the jars cool down. Now you can either store them in the fridge for 2–4 months or preserve them in a water bath canner for 30 minutes at 90 °C. That way, the gherkins can be stored for at least a year.
Why this recipe stays crunchy
Freshly harvested gherkins give the crispest results.
Overnight salt soak removes excess water.
Removing the blossom end eliminates softening enzymes.
5% vinegar provides safe acidity.
How long before homemade pickles taste their best
Technically speaking, you can eat the pickles after 24 hours. However, they develop their best flavour after about 3 days. During this time, the herbs, spices and vinegar have enough time to penetrate the gherkins completely, giving them that typical sour, spicy flavour we love so much.
Angela Braun
Homemade Gherkin Pickles
Gherkin pickles are one of my favourite preserves and can be easily made at home. That satisfying crunch when you bite into a perfectly pickled gherkin can hardly be topped. And the best thing: you don't need many ingredients to make them. Just follow this simple, easy recipe.
Sterilise your jars and lids by washing them with boiling water. Let them cool on a rack and dry them out.
Wash the gherkins thoroughly. Put them into a bowl, mix 50 g salt with 1 litre of water and pour this brine over the gherkins. Let them soak in the brine for 8 – 12 hours, at best overnight.
The next day, pour off the brine and dry the gherkins with a cloth.
Now, cut off the blossom end. You can also cut off the stalk end, but that’s optional.
If the gherkins are very large, you may cut them into slices or sticks.
Wash and dry the dill and carefully remove the flower tips.
Wash and dry the savoury and tarragon.
Peel the onion and cut it into rings.
Layer the gherkins, herbs, onions and spices into the jars.
Put water, vinegar, 2 tbsp salt and sugar into a pot and bring the mixture to a boil. Stir until sugar and salt have dissolved.
Carefully pour the vinegar brine over the gherkins into the jars and close the lids immediately.
Let the jars cool down. Now you can either store them in the fridge for 2–4 months or preserve them in a water bath canner for 30 minutes at 90 °C. That way, the gherkins can be stored for at least a year.
How long do homemade pickles last?
Store your homemade pickles in the fridge for 2 – 4 months.
If you want to store them longer, put the jars in a water bath canner and can them for 30 minutes at 90 °C. That way, you can store them in the pantry or basement (no need for refrigeration) for up to one year. After that, they are still edible, but the taste will decline, and the gherkins will get mushy.
Once a jar is opened, put it in the fridge and consume it within two weeks.
Troubleshooting Common Issues
Sometimes, things go wrong, and your gherkins won’t taste the way you expected. Here are some common issues with gherkin pickles and how to fix them:
Texture Problems
Mushy pickles
One of the reasons for mushy pickles is that you likely skipped the dehydration step, where you let the gherkins sit in salt brine for several hours. This is an essential step; don’t skip it!
Another reason is that you used distilled water. As it doesn’t contain any minerals, it’s more likely that gherkins go mushy.
It’s also possible that you used too little salt. Or the pickles weren’t completely covered with brine. When they get air contact, the gherkins will become mushy
Flavour Issues
To maintain a good balance of acidic, sweet and salty, stick to the above ratio of vinegar, water, salt and sugar.
If you use too much vinegar, for example, you’ll get overly acidic pickles. Too little vinegar will result in a dull flavour and possible safety issues.
Too much salt will preserve the pickles well, but you won’t want to eat them due to their overly salty flavour. Too little salt, on the other hand, will leave the pickles bland.
Too much sugar and you’ll get gherkin sweets; too little and the taste will be very one-dimensional.
Safety and Storage Concerns
Watch out for any visual signs of spoilage like white scum on the surface, mouldy gherkins above the brine or a cloudy brine that has been clear before (although a little cloudiness can be normal). These pickles have gone bad, and you must throw them away.
Also, discard any pickled gherkins that have gone dark or slimy or if the jar lids are bulging.
If the gherkins’ texture has become mushy and slimy and they fall apart, you shouldn’t eat them anymore.
Also, watch out for any smell or taste that seems “wrong” or unpleasant.
Variations and Creative Recipes
There are (almost) endless variations for flavouring pickled gherkins.
Herbs
You can, for example, just use dill and onions for German-style dill gherkins, or you can add chillies or even jalapeños for hot pickles.
For French cornichons, add tarragon and pearl onions, and for an Asian variation, use rice vinegar and ginger.
Use caraway seeds, juniper berries and chervil for a Northern variation or Za’atar, sumac and preserved lemon for a Middle Eastern touch.
Vinegar
Experiment with different vinegars or even vinegar blends (see above).
You could even try out different vinegar strengths while maintaining the proper acidity for safety.
Sweetener
Replace the sugar with honey, maple syrup, agave or even molasses for different flavour notes.
Additional Vegetables
Who says that gherkins have to stay alone in the jar? Layer in onions, carrots, cauliflower or radishes with the gherkins.
Or add just fennel bulb slices. Or mix in green beans and asparagus. Get creative!
Liquids
Use part beer or white wine in the brine or, instead of water, use vegetable or herb-infused broth.
An interesting way to add more depth to the flavour is by including pickle juice from a previous batch.
Texture
Apart from mustard seeds, you could also add toasted sesame or other seeds for a bit of “pop”.
Also, experiment with different salt types like flavoured, smoked or sea salt. Just be careful that the salts don’t have any additives that may harm the brine.
Frequently Asked Questions
Can I pickle regular cucumbers instead of gherkins?
It’s possible, but the result won’t be the same. Cucumbers have a higher water content which makes them mushier and the flavour watered down. Additionally, cucumbers require a longer pickling time to develop their best flavour and level of crunchiness.
Why aren’t my homemade pickles crunchy?
There are different reasons:
You haven’t cut off the blossom end of the gherkins. They contain enzymes that make the pickles go mushy
You haven’t soaked the gherkins in salt water before pickling. This soaking process dehydrates the cucumbers slightly, making them stay crunchy for a prolonged time.
You used too little salt
You used distilled water instead of tap water.
Do I have to soak gherkins overnight?
Yes, if you want crunchy gherkin pickles. It won’t affect the flavour and storage time, though, if you skip that step.
Can I reduce the sugar?
You can reduce the sugar slightly, but don’t remove it completely. Sugar contributes to the flavour and helps balance the acidity of the vinegar. If you prefer less sweetness, reduce it gradually until you find your preferred balance.
Can I reuse pickle brine?
You can add the brine to a salad dressing (instead of pure vinegar), cocktail or barbecue sauces and even in drinks.
Do homemade pickles need to be refrigerated?
When they’ve been properly made and the lids are sealed, there’s no need to refrigerate your homemade pickles. Once a jar is opened, however, put it in the fridge and consume it within two weeks.
Why are my pickles floating?
That’s perfectly normal. As long as they’re covered by the brine and don’t show signs of spoilage, they’re safe to eat.
Join my newsletter for seasonal preserving recipes, fermentation guides and gardening tips.
Serving Suggestions and Uses
How can you use gherkin pickles now?
Well, apart from the classic pairing with sandwiches, burgers, or charcuterie boards, gherkin pickles add depth to a potato, egg or chicken salad.
Chop them into relishes, remoulade or aioli.
Gherkin pickles are an essential ingredient for German “rouladen” (beef rolls) and can be wonderfully included in stuffing for poultry or pork as the acidity cuts the richness.
You can even use the brine in cocktail sauces or barbecue sauces or as a vinegar replacement in salads. Or drink it straight as an electrolyte replacement or mix it with beer for a “pickleback” style drink.
Conclusion
Buying gherkin pickles is a fast solution when you’re pressed for time, but making them yourself not only gives you numerous flavouring possibilities but the certainty of knowing what’s inside the jar – and, more importantly, what’s not. Once you’ve found out that it’s actually quite easy to make gherkin pickles at home and how great they taste, I promise you’ll never touch the store-bought version ever again!
As long as you stick to the ratios of vinegar, salt, sugar and water, you can start experimenting with different flavours. From mild and deep to hot and spicy, everything is possible!
Just keep in mind to pickle only gherkins without any blemishes and harvested no longer than a few days ago.
The most important step to follow is soaking the clean gherkins overnight in a salt brine to slightly dehydrate them, making sure that they stay crunchy when preserved. Also, remove the blossom end of the gherkins (the end without the stem) as it contains an enzyme that lets the gherkins go soft and mushy.
Easy, right? So, what are you waiting for? Get along, grab some gherkins, jars and the few ingredients you like and start pickling your very first (or second, or third) batch of gherkins!
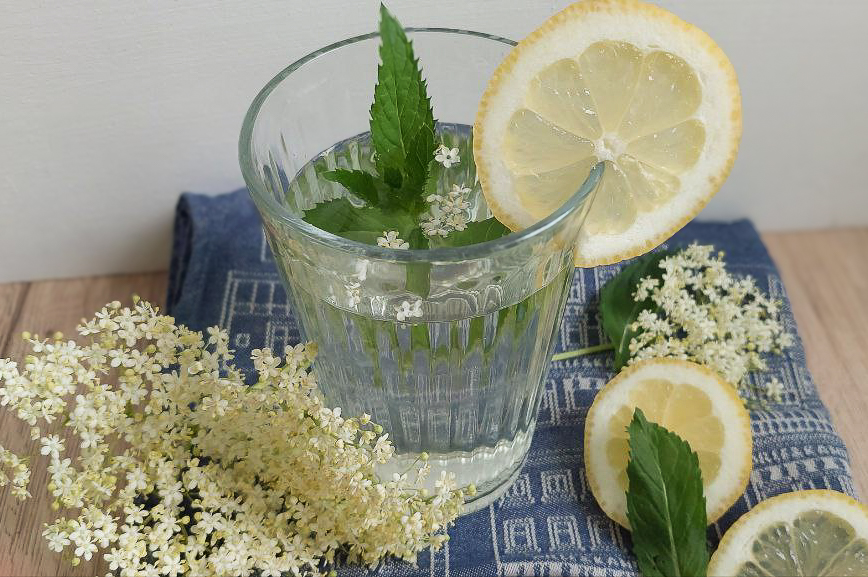
When it suddenly smells of summer at the end of May/beginning of June – sweet, flowery and a bit like childhood – then it’s elderflower time! And as this fragrance is too precious to enjoy just on a walk, I preserve it every year with my homemade elderflower syrup.
Elderflower syrup is not only a classic but also wonderfully versatile. Whether you add it to sparkling wine, use it as a lemonade, drizzle it over ice cream or scent your cake dough with it, this delicious syrup immediately lifts the mood of everyone tasting it. And the best thing about it is that you can make elderflower syrup very easily at home with this simple recipe.
What is elderflower syrup?
Elderflower syrup is a sweet floral syrup made by infusing fresh elderflowers in sugar syrup with lemon. It can be diluted with water for a refreshing drink or used in desserts, cocktails, baking, and homemade preserves.
Quick Overview
Harvest time: Late May–June
Difficulty: Easy
Infusion time: 2–3 days
Storage life: Up to 1 year
Best for: Lemonade, cocktails, desserts, baking
Is Elderflower Syrup the Same as Elderflower Cordial?
What British people call elderflower cordial is usually called elderflower syrup (Holunderblütensirup) in Germany.
A cordial often contains citric acid, is thinner and is specifically intended as a drink concentrate, while a syrup may be cooked longer and therefore can be slightly thicker. Apart from drinks, it’s sometimes intended for desserts, cocktails, pancakes or baking.
But honestly, that’s hairsplitting, and in practice both recipes are nearly identical.
Let’s have a closer look at the basic product:
How to recognise elderflowers
The flowers of the black elder (Sambucus nigra), also known as elderberry, mark the beginning of early summer and appear from late May to June. During that time, the prominent flower heads unfold. Look for the following characteristics:
🌿Form and colour: Elderflowers have creamy white flower heads that grow in an umbrella-like form with diameters of up to 30 centimetres (12 inches).
🌿Structure: Numerous tiny single flowers form the panicles, and each of these flowers consists of five petals and yellow stamens
🌿Fragrance: The flowers release a gentle, slightly lemony fragrance.
When and how to forage elderflowers
Depending on where you live, elderflowers bloom between mid-May and mid-June. When you spot them, take a basket and garden shears and head out to forage them.
Only gather umbels that grow far away from streets, at the edge of the woods, on field paths or in gardens. At those places, you can be sure that they are not polluted by exhaust fumes or other environmental toxins.
Elderflowers are quite easy to identify, but I strongly recommend you don’t pick anything if you are not 100% sure what it is. If in doubt, consult a good book on plant identification or ask somebody with experience.
Always cut the elderflower umbels with garden shears or scissors. That way, you won’t shake the flowers too much and lose their valuable pollen and flavour.
Make sure to forage only elderflowers that are in full bloom and still fresh, meaning that the little flowers don’t fall off when shaking them. The best time for harvesting is the late morning of a sunny day. Ideally, it has been sunny for several days because that’s when the fragrance is strongest, and there are hardly any insects in the flowers.
A basket is best for carrying the harvested elderflowers home, because they lie lightly and airily without being pressed too much together.
One important request: don’t overpick! Never take more than a third of umbels per bush to leave enough for bees and birds! And to come back in autumn and harvest the elderberries 😉.
Essential Equipment and Ingredients for Making Elderflower Syrup
This recipe is simple, not only because you don’t need many ingredients, but also because you certainly already have all the equipment.
Basic Equipment
You need
A pot
A large bowl (optional; you can also add the flowers to the liquid in the pot)
A fine-mesh strainer or a cheese cloth to filter the syrup
Bottles with matching lids, sterilised
Funnel
Ingredient list
Making elderflower syrup was never easier! You just need these ingredients:
8 – 10 fresh elderflower heads in full bloom
500 g sugar
2 untreated lemons
600 ml of water
Citric acid (purely optional; I don’t like its tangy taste and don’t use it)
Elderflower Syrup: Step-by-Step Making Process
Step 1
When you’ve brought the umbels home, just shake them carefully to remove insects. If you want to be absolutely sure that no insects are left, leave the flowers outside in a dry and shady place for about 20 minutes. That way, the insects can wander off.
Do not wash the elderflowers! Their flavour lies in the pollen, and if you wash them, the pollen – and with it the flavour – would be rinsed off.
Once the elderflowers are clean, cut off the thick stems.
Step 2
Wash the lemons with hot water, dry them and cut them into slices.
Step 3
Mix the water and sugar in a pot and slowly bring the mixture to the boil while constantly stirring until the sugar has dissolved. Fill the sugar syrup into a bowl.
Step 4
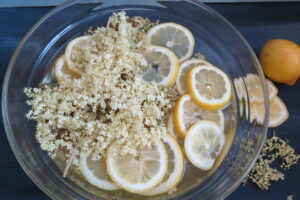
Add the elderflowers and the lemon slices to the syrup and cover it with a cloth or lid. Let the mixture rest for 2 – 3 days and stir occasionally.
Step 5
Sterilise the bottles by rinsing them with hot water. Remove the elderflowers and lemon slices from the syrup and filter it through a fine mesh strainer. Alternatively, you can filter the syrup through a cloth and wring it out to get the last drops of elderflower syrup. If you press the flowers, the syrup may become a bit more opaque, but that’s ok.
Step 6
Fill the elderflower syrup into a pot and bring it to the boil. Fill the hot liquid into the sterilised bottles and tightly close the lids.
Angela Braun
Elderflower syrup
Elderflower syrup is not only a classic but also wonderfully versatile. Whether you add it to sparkling wine, use it as a lemonade, drizzle it over ice cream or scent your cake dough with it, this delicious syrup immediately lifts the mood of everyone tasting it.
Citric acidpurely optional; I don’t like its tangy taste and don’t use it
Equipment
1 pot
1 large bowl (optional, you can also add teh flowers to the liquid in the pot)
1 fine-mesh strainer or cheesecloth to filter the syrup
bottles with matching lids sterilised
1 funnel
Method
When you’ve brought the umbels home, just shake them carefully to remove insects. If you want to be absolutely sure that no insects are left, leave the flowers outside in a dry and shady place for about 20 minutes. That way, the insects can wander off.Do not wash the elderflowers! Their flavour lies in the pollen, and if you wash them, the pollen – and with it the flavour – would be rinsed off.
Once the elderflowers are clean, cut off the thick stems.
Wash the lemons with hot water, dry them and cut them into slices.
Mix the water and sugar in a pot and slowly bring the mixture to the boil while constantly stirring until the sugar has dissolved. Fill the sugar syrup into a bowl.
Add the elderflowers and the lemon slices to the syrup and cover it with a cloth or lid. Let the mixture rest for 2 – 3 days and stir occasionally.
Sterilise the bottles by rinsing them with hot water. Remove the elderflowers and lemon slices from the syrup and filter it through a fine mesh strainer. Alternatively, you can filter the syrup through a cloth and wring it out to get the last drops of elderflower syrup. If you press the flowers, the syrup may become a bit more opaque, but that’s ok.
Fill the elderflower syrup in a pot and bring it to the boil. Fill the hot liquid into the sterilised bottles and tightly close the lids.
Notes
Elderflower syrup can be stored in a cool and dry place (e.g. the basement) for up to one year.
How Long Can You Store Elderflower Syrup?
You can either consume the elderflower syrup as soon as it’s ready (after 2 – 3 days). Kept in the fridge, it’ll last for about 10 days.
Alternatively, you can boil the filtered syrup and fill the hot liquid into bottles. Stored in a cool and shady place (your basement, for example), it lasts up to one year.
Another way to store elderflower syrup is to put it in the freezer, where it will also last up to one year.
Flavour Variations and Enhancements
The classic elderflower syrup, as described above, is a treat in itself. However, if you want to get creative, you can vary and enhance the flavours by adding other ingredients:
Add the slices of an orange to the sugar infusion
Instead of lemons, use limes
Add a stem of mint and/or lemon verbena to the syrup
Put 3 – 5 slices of ginger into the mixture and let it steep for 2 – 3 days
You can even adjust the level of sweetness to your taste. However, the less sugar you use, the shorter the storage time of the syrup, even when it’s boiled.
Creative Uses and Serving Suggestions for Elderflower Syrup
Elderflower syrup is incredibly versatile. Here are some ideas on how to use it:
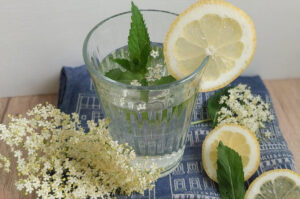
Fill it up with cold (sparkling) water, and you’ve got a refreshing lemonade. Additionally, you might add several mint leaves and cucumber slices.
Mixed with prosecco, elderflower syrup makes a wonderful summer cocktail.
Speaking of cocktails: elderflower syrup is also a great additive for gin and tonics and mojitos. Just saying…
Next time you serve a fruit salad, yoghurt or ice cream, drizzle some elderflower syrup over it to give it that extra taste of summer.
Elderflower syrup can be wonderfully made into a sorbet or ice cream
Have you ever tried flavouring your pancake dough with elderflower syrup? Well, you should!
A bottle of elderflower syrup is a great homemade gift that everybody likes.
Troubleshooting Common Issues
Making elderflower syrup is very simple. However, there are some issues that you may face. Here’s what you can do about them:
The syrup is too sweet or not sweet enough
If it’s too sweet, you have used too much sugar; if it’s not sweet enough, too little.
In the first case, I’d recommend making a second batch of elderflower syrup with a little less sugar than indicated (e.g. 300 g) and mixing both batches to adjust the sweetness.
If the syrup is not sweet enough, don’t just add sugar to it, because it won’t dissolve properly. Instead, add sugar to about a third of the syrup and heat it up while constantly stirring until the sugar has completely dissolved. Add this to the remaining syrup and preserve it as described in the recipe.
The syrup’s cloudy
A certain opaqueness is normal, especially when you squeeze out the elderflowers into the syrup when filtering it off. That’s the pollen that carries the flavour, and it’s not harmful.
However, if the syrup shows white (or – heaven forbid – black) streaks and smells sour, alcoholic or vinegary, pour it away. It may have fermented spontaneously (see below).
The flavour is too weak.
Usually, if your elderflower syrup has only a weak flavour, you’ve used too few elderflowers. If the umbels are very small, you may have to add some more. Filter the syrup, add some fresh elderflowers and let the mixture steep for 24 hours before filtering.
Another reason for a weak flavour is that the elderflowers you used were too old. They should be freshly opened when you gather them from the tree, and not lose their tiny flowers when shaking them or even have already gone brown. That’s a clear sign of over-mature flowers. Pick fresh ones instead, and if there aren’t any left, make sure you harvest them earlier next year 😉.
However, if you can’t lay your hands on more elderflowers, a weak-tasting elderflower syrup needn’t be thrown away. Add some mint leaves and, if you like, some slices of lemon, and let it steep for 24 hours. That way, you get a lemon-mint syrup with a hint of elderflowers.
The syrup ferments
If you have used no other ingredients than the ones mentioned in the recipe and the elderflower syrup forms bubbles and smells sour, alcoholic or vinegary, I’m sorry to say you’ll have to throw it away. It has fermented spontaneously. This happens when natural yeasts on the elderflowers begin fermenting the sugar in your syrup, creating alcohol. The risk increases if you infuse the flowers for too long – beyond 3-4 days can trigger spontaneous fermentation.
Another fermentation issue may be the growth of mould, which is also due to the uncontrolled growth of undesired bacteria.
All these issues can be prevented by the following factors:
Timing control: don’t let the infusion steep for more than 2 -3 days. I know there are recipes out there suggesting up to one week of infusion, but with every day, the risk of fermentation increases.
Acidity: Adding lemon slices, juice, or citric acid helps to keep the “bad” bacteria at bay and thus prevents spontaneous fermentation.
Hygiene: Sterilise all your equipment and pick flowers only from unpolluted areas
Temperature: Pasteurising the elderflower syrup before filling it into bottles kills most of the yeast and bacteria in it. After opening a bottle, keep it in the fridge and consume it within a week.
Frequently Asked Questions
Can you freeze elderflower syrup?
Yes. I recommend freezing it in an ice cube tray; that way you can better take out portions.
How long does homemade elderflower syrup last?
Properly bottled elderflower syrup keeps for about one year in a cool, dark place. Once opened, store it in the refrigerator and use it within 1–2 weeks.
Can I make elderflower syrup without citric acid?
You could, but apart from affecting the taste, it will also not be as stable as with citric acid.
Why is my elderflower syrup cloudy?
A light opaqueness is normal due to the pollen, but when the cordial shows streaks, it’s probably spoiled.
Can elderflower syrup ferment?
Yes, wild yeasts can cause a spontaneous fermentation. To avoid that, we boil the syrup shortly before filling it into bottles.
Elderflower syrup is Summer to Drink!
Elderflower season lasts only a few short weeks each year, but a few bottles of homemade syrup allow you to capture its delicate fragrance long after the blossoms have faded. Whether stirred into sparkling water, drizzled over desserts, or shared with friends, elderflower syrup is one of the simplest ways to preserve the taste of early summer.
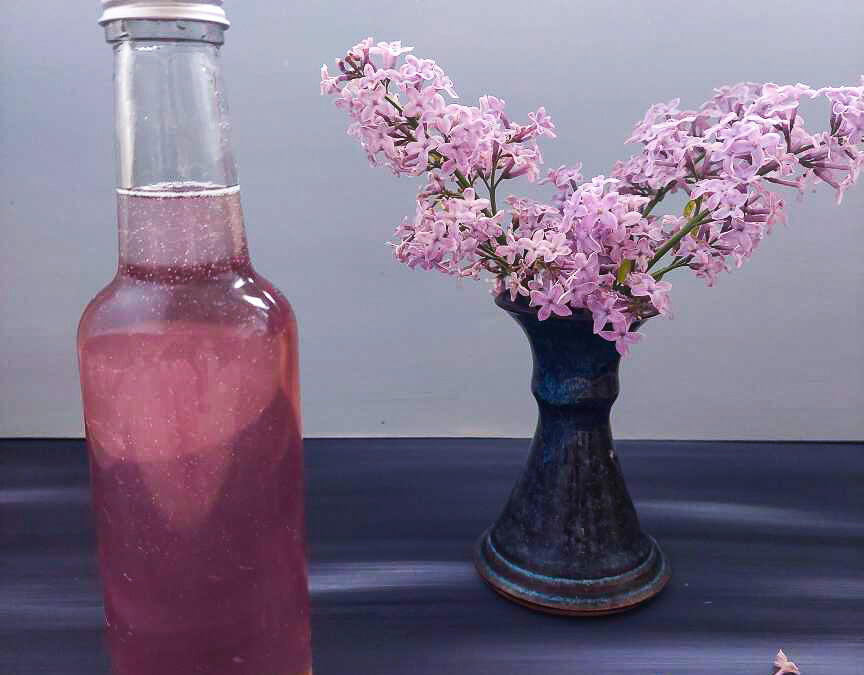
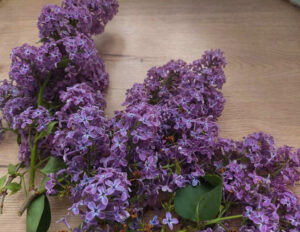
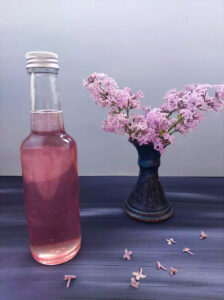
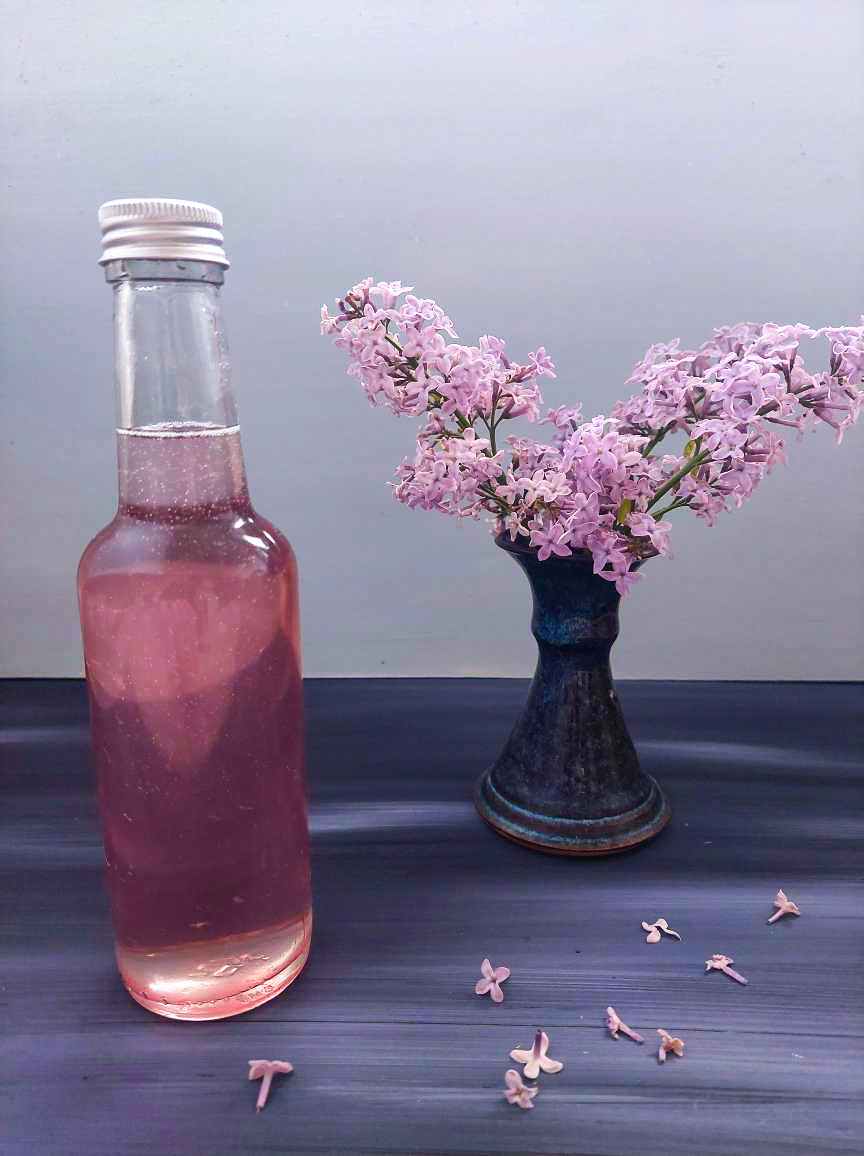
Every year, I can’t wait for the lilac to bloom, and every year, I’m sad when it fades again a few weeks later. That’s why I try to preserve those beautiful flowers as best as I can and thus prolong their season. Contrary to popular opinion, lilac flowers are not toxic. In fact, any variety of lilacs (Syringa spp.) is edible. One of my favourite recipes is this homemade lilac syrup. Its colour is stunning, and lilac syrup in a lemonade or on top of ice cream adds an extravagant touch!
For the colour, however, we must use a trick, as it does not come from the lilac itself. Nevertheless, it’s totally natural and organic. I’ll show you how to do it.
Lilac syrup
Yield: 500 ml
Ingredients
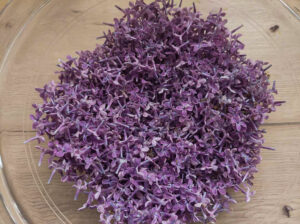
a bowl full of lilac flowers: make sure to use unsprayed lilac; also, do not use lilac from a roadside where it gets polluted by exhaust fumes and dust
250 ml water
250 g sugar
3 – 4 blueberries for the colour
1 tbsp lemon juice
Instructions
1. Carefully pluck the flowers off the stems. Make sure that nothing green gets into the bowl, only the flowers. The green parts of the flowers would make the syrup bitter.
2. Carefully wash the flowers with cold water.
3. Put the water and sugar into a pot and boil the solution while constantly stirring it. The sugar must be dissolved completely.
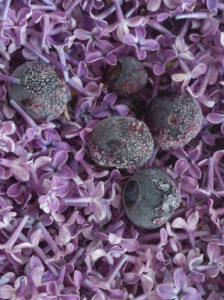
4. Remove the pot from the heat and add the blueberries and lemon juice. Stir slightly until the liquid has the colour you like.
Blueberries give our lilac syrup that wonderfully light lavender hue.
5. Let the syrup cool down to room temperature. Now, add the lilac flowers and stir them slightly in.
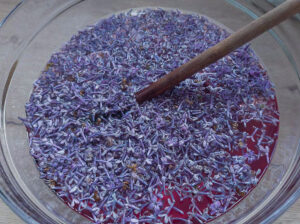
Cover the pot and let it all rest for about 18 – 24 hours.
The lilac syrup is ready to rest for about 18 – 24 hours
6. Strain the mixture through a fine strainer into another pot. Gently press the last syrup out of the lilac flowers.
7. The mixture is ready for use now, but it will only last 2 – 3 days in the fridge.
If you want to preserve it for longer, bring the syrup to a short boil once more and pour the hot liquid into glass bottles. Close them immediately with lids. Preserved that way, lilac syrup can be stored up to 18 months. Once you open a bottle, consume the syrup within 2 – 3 days.
Alternatively, you can freeze the lilac syrup.
Angela Braun
Lilac Syrup
This elegant syrup adds a touch of botanical sophistication to cocktails, lemonades, and iced teas. Drizzle it over pancakes or waffles, stir into yoghurt, or use as a finishing touch for cakes and pastries.
Carefully plug the flowers off the stems. Make sure that nothing green gets into the bowl, only the flowers.
Wash the flowers with cold water.
Put the water and sugar into a pot and boil it while constantly stirring. The sugar must be dissolved completely.
Remove the pot from the heat and add the blueberries and lemon juice. Stir slightly until the liquid has the colour you like.
Let the syrup cool down to room temperature, add the lilac flowers, cover the pot and let it all rest for about 18 - 24 hours.
Pour the mixture through a fine sieve into another pot. Gently press the last syrup out of the lilac flowers.
The mixture is ready for use now but will only last 2 - 3 days in the fridge. If you want to preserve it for longer, bring the syrup to a boil once more and the boiling liquid into glass bottles. Alternatively, you can freeze the lilac syrup.
Notes
Add lilac syrup to cocktails, lemonades and iced teas. Mix it with sparkling wine and you have an extravagant aperitif. However, lilac syrup is not only for drinks. Get creative and drizzle it over pancakes or waffles, stir it into yoghurt, or use it as a finishing touch for cakes and pastries.
How to use lilac syrup
Beverages
Stir a tablespoon into a glass of iced tea for a floral afternoon refreshment
Swirl into plain yoghurt with fresh berries and granola
Blend into smoothie bowls
Stir into overnight oats with sliced almonds and blueberries
Brush onto warm scones fresh from the oven
Desserts
Brush onto cake layers before frosting for added moisture and flavour
Drizzle over vanilla ice cream
Mix into whipped cream for a floral topping on desserts
Use as a sweetener in homemade popsicles with berries
Capture Spring in Every Sip
Lilac blooms are fleeting, but with this simple lilac syrup you can bottle their delicate fragrance and flavour to enjoy long after the blossoms fade. Whether swirled into sparkling lemonade, stirred into cocktails, drizzled over pancakes, or mixed into yoghurt and desserts, this floral syrup brings a touch of springtime elegance to everything it touches. A little patience while steeping the blossoms rewards you with a beautiful, aromatic syrup that truly makes the most of lilac season — a seasonal treat worth preserving and sharing.
If you want to make more syrups, try out these recipes
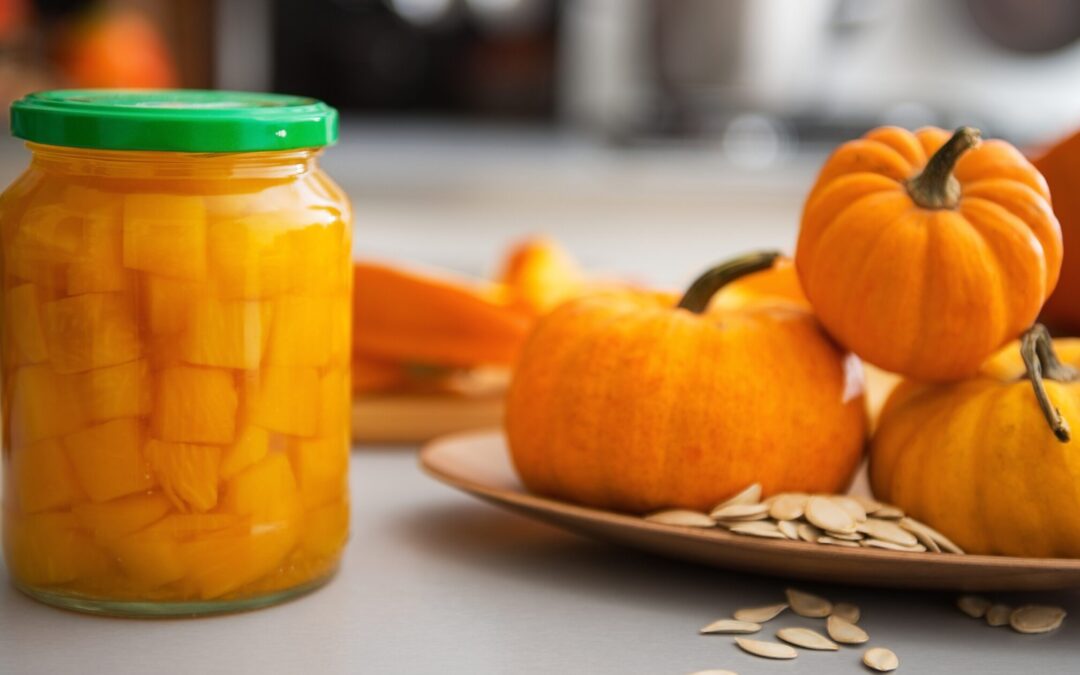
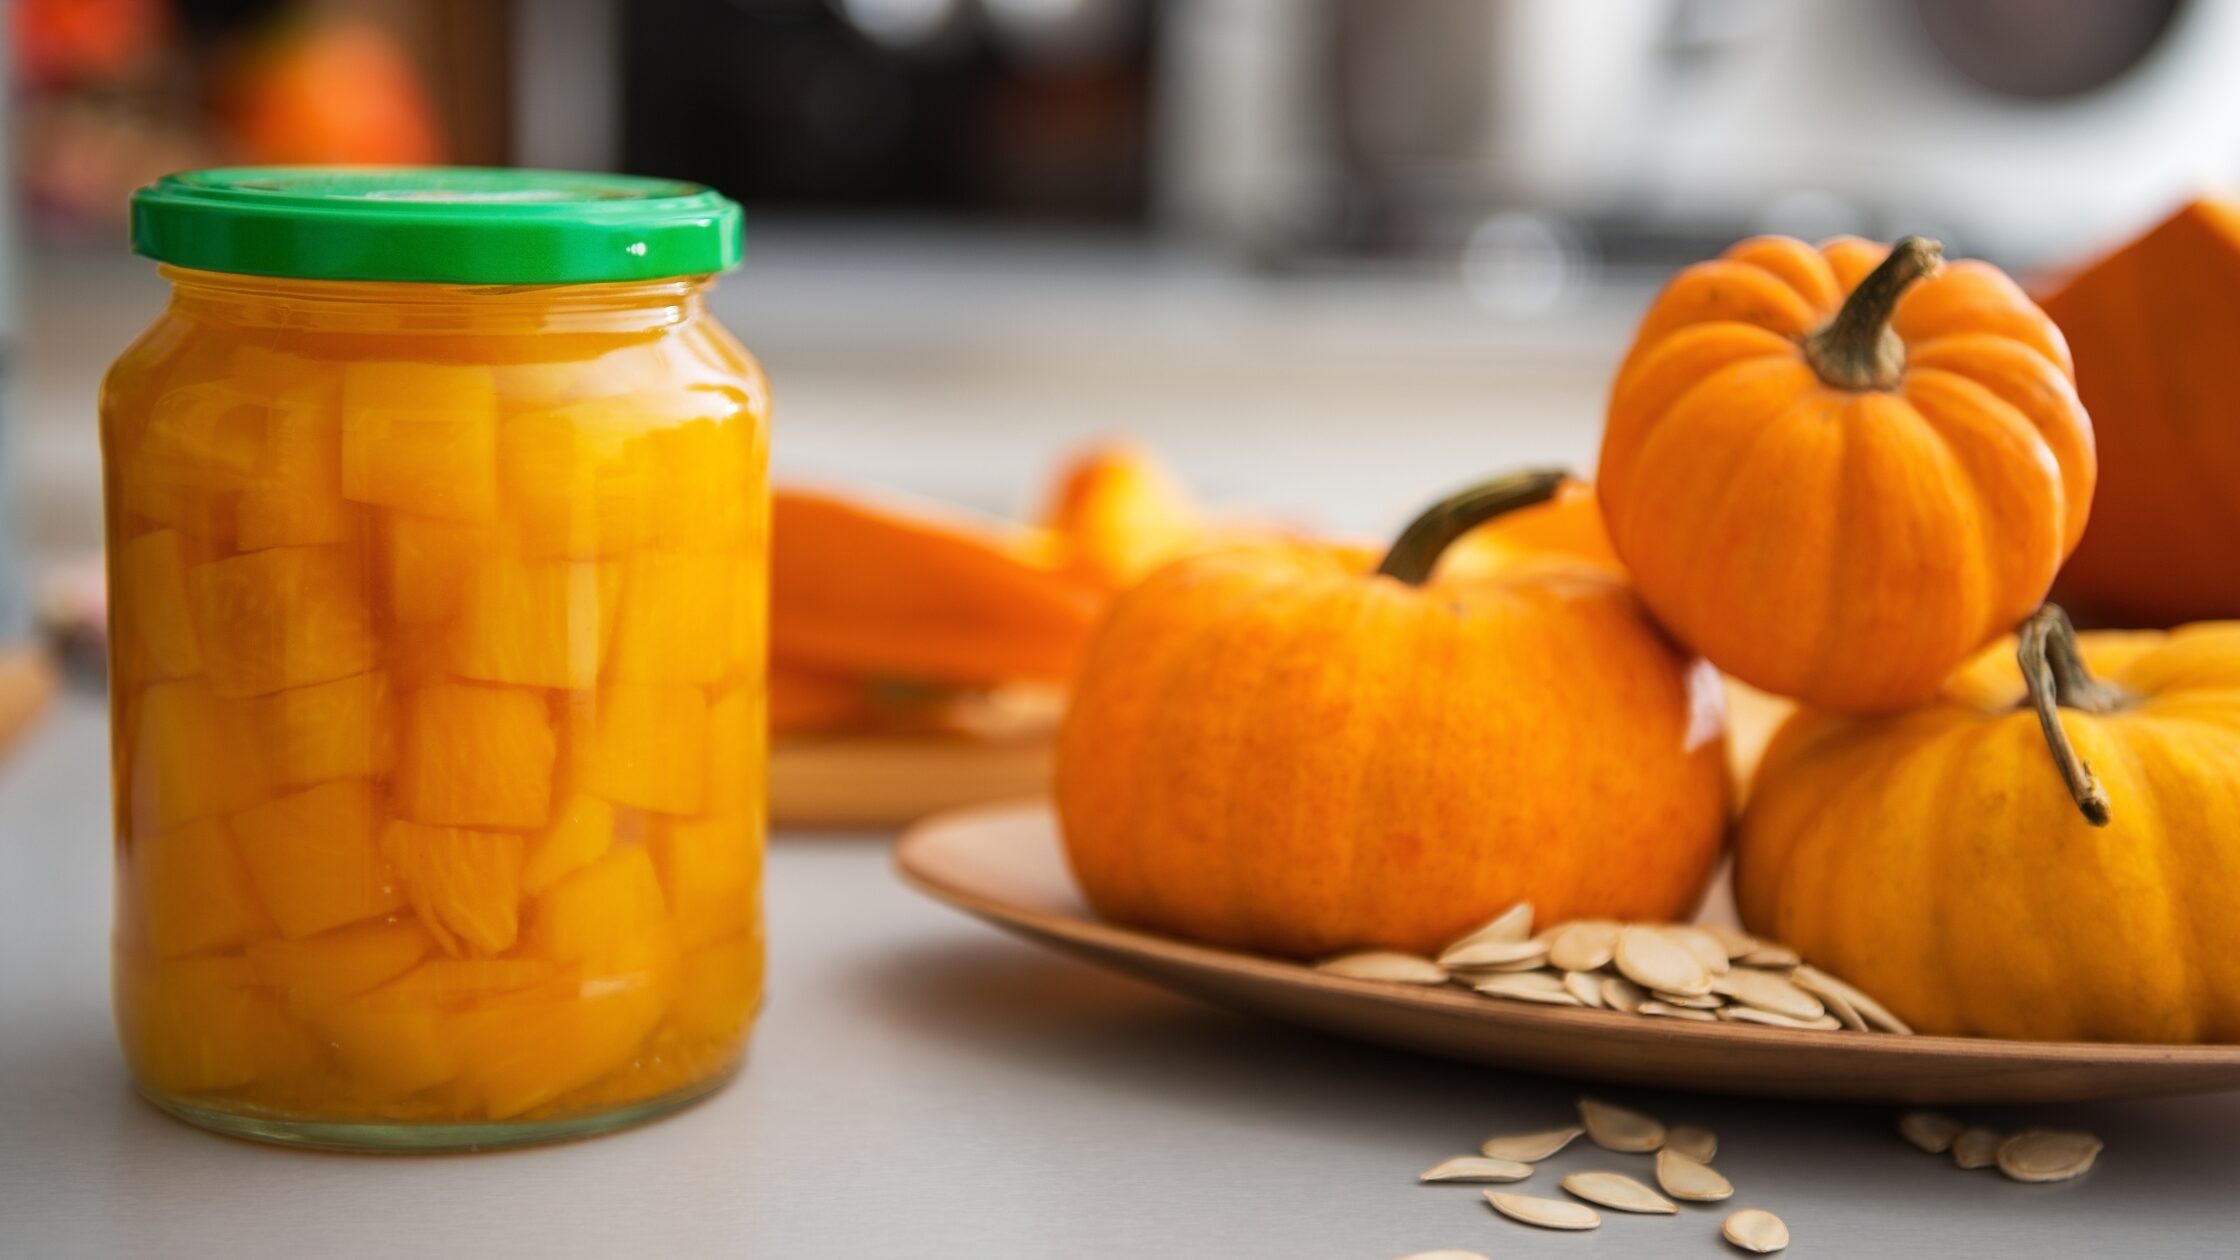
Let’s be honest: there comes a point every autumn when we hit “peak pumpkin spice”. You know, when even your neighbour’s cat seems to wear a pumpkin spice collar. But wait: before you swear off anything pumpkin for the rest of your life, let me introduce you to this recipe for sweet-sour pumpkin.
In this form, pumpkin proves it is more than just soup or pie. This German-inspired dish (we call it “Kürbis süß-sauer” – try to say that three times fast!) balances the pumpkin’s natural sweetness with a tangy vinegar-based sauce.
I grew up with this heavenly dish. My mom still makes it usually around mid-November and the smell of the sweet vinegar and spices in combination with misty days, tell me that we’re nearing Christmas time.
The best thing about this dish is that it’s so versatile: What I love most about this dish is its chameleon-like quality – serve it warm alongside your Thanksgiving turkey, at room temperature on a holiday appetizer board, or chilled as a unique addition to winter salads. The sweet-sour preparation also means it keeps beautifully in the fridge, making it perfect for busy weeknight meals or advance holiday preparations.
Serve it warm, and it’s comfort food. Serve it cold, and it suddenly becomes fancy antipasto. Leave it in the fridge, and it gets even better. Whether you grew your own pumpkins this year or picked some up from the local farmers’ market, this recipe offers a delicious way to preserve the yellow berries well into winter.
So if you’re ready to rescue a pumpkin from its pie-destined fate and transform it into something that’ll make your taste buds do a happy dance, stick around. This recipe is about to become your new fall flex – because nobody needs to know it’s actually super easy to make. (That’ll be our little secret!)
1. Chop the firm flesh of ripe but not overripe pumpkins into cubes of about 1,5 cm (3/4 inch).
2. Put vinegar, sugar, lemon peel and spices into a pot and bring it to a boil.
3. Cook the pumpkin cubes in several portions until they are glassy through and through. This takes some time, about 20 – 30 minutes, depending on the size of the cubes. Make sure they are really cooked through, otherwise the preserve won’t last.
4. When the pumpkins are well cooked, put them out with a slotted spoon and put them into the jars.
5. Let the liquid boil for 5 minutes. Remove the lemon peel and pour the boiling-hot juice into the jars so that the pumpkin cubes are under the brim. Immediately tight-seal the lids.
6. Stored in a cool and dark place, sweet-sour pumpkin will last at least for one year.
Sweet-sour pumpkins
The best thing about sweet-sour pumpkin is that it’s so versatile: What I love most about this dish is its chameleon-like quality – serve it warm alongside your Thanksgiving turkey, at room temperature on a holiday appetizer board, or chilled as a unique addition to winter salads. The sweet-sour preparation also means it keeps beautifully in the fridge, making it perfect for busy weeknight meals or advance holiday preparations.
Chop the firm flesh of ripe but not overripe pumpkins into cubes of a 1.5 cm (3/4 inch)
Put vinegar, sugar, lemon peel and spices into a pot and bring it to a boil.
Cook the pumpkin cubes in several portions until they are glassy through and through. This takes some time, about 20 – 30 minutes, depending on the size of the cubes. Make sure they are really cooked through, otherwise the preserve won’t last.
When the pumpkins are well cooked, put them out with a slotted spoon and put them into the jars.
Let the liquid boil for 5 minutes. Remove the lemon peel and pour the boiling-hot juice into the jars so that the pumpkin cubes are under the brim. Immediately tight-seal the lids.
Stored in a cool and dark place, sweet-sour pumpkin will last at least for one year.
Now, if that’s not proof enough that pumpkins can break free from their spice-laden destiny, I don’t know what is! This recipe has turned more pumpkin sceptics into believers than a fairy godmother turning pumpkins into carriages (although, unlike Cinderella’s ride, these sweet-sour pumpkins won’t turn back into regular pumpkins at midnight).
So, if you’re looking for a pumpkin recipe other than pie, this one’s your new best friend. Your taste buds will thank you and your dinner guests will be impressed. And if anyone asks where you got this recipe, just wink mysteriously and say it’s an old family secret. Or you know, share the link to this blog – I’m good either way! 😉
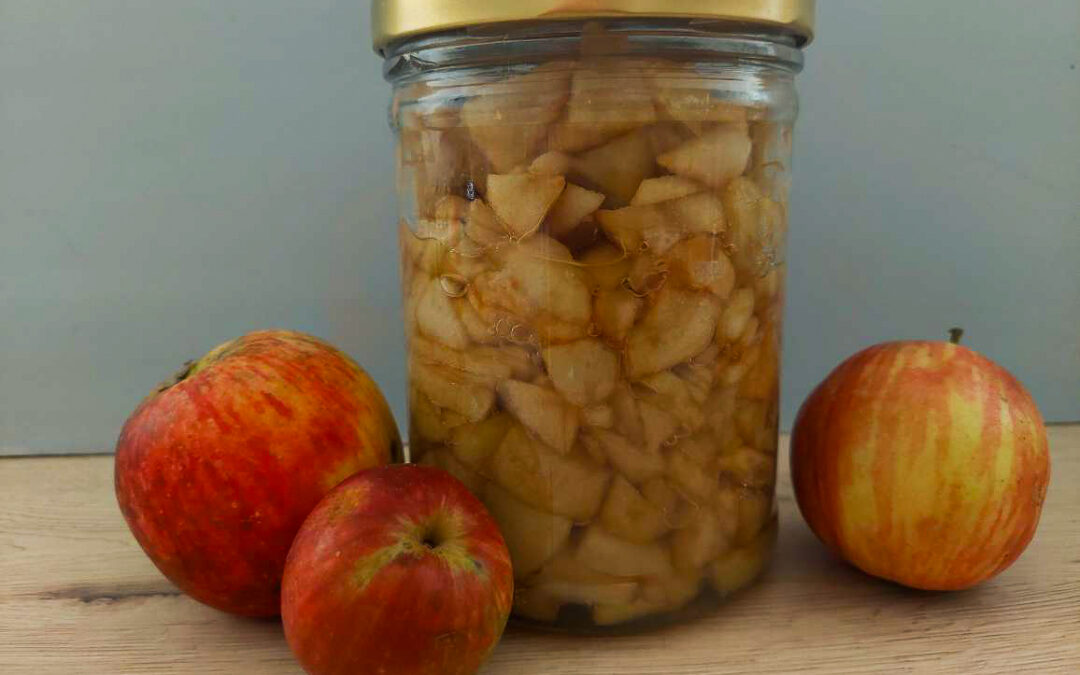
Usually, when we preserve fruits or vegetables by canning, we add some liquid (usually water) to fill up the jars. But did you know that you can also preserve apples by dry-canning them? These dry-canned apples are the basis for a quick apple strudel or the filling for an apple cake. You can even use it for a crumble.
All you need is a water-bath canner, jars with lids and some apples. I recommend at least one kilogram, but the more the better.
Preparation
Prepare your jars by washing them and the lids in hot water or the dishwasher. Put the jar lids and rings or the rubber bands in a pot and cover them with water. Bring the water to a boil and let it all cook for five minutes. Remove the lids, rings and/or rubber bands from the boiling water and put them onto a clean dish towel on the kitchen counter. Let them dry.
Instructions
Rinse the apples in your sink to wash off any dirt. Also, remove any leaves, grass or other residues. Then peel them, cut out the cores and any rotten parts and quarter them. You can use the apple scraps for making apple vinegar. For that purpose, it’s great to have three bowls at hand: one for the apple quarters, one for the “good” scraps for making apple vinegar and one for the rotten parts and wormy cores to discard.
Half the quarters lengthwise and chop the apples into slices of about 3 millimetres. When you’ve chopped all the apples, fill them tightly into the prepared jars. Make sure that there’s as little room left in between the slices as possible. Leave about one inch of headspace. Before closing the lids, make sure that the rim of the jar is clean. That’s best ensured by dipping a clean cloth (for example a towel) into some vinegar and wiping the rims clean. Seal the jars with the lids.
Dry-canning apples
Fill the water bath canner with as much (cold to lukewarm!) water as indicated in the instructions. Put the jars into the canner, ensuring enough space so they don’t touch. Heat the canner to 100 °C. Once it has reached that temperature, let it simmer for 40 minutes. When time’s up, remove the jars with a glass lifter from the water bath canner and put them onto a dishcloth on the counter. Let the glasses cool down slowly.
Stored in a cool, dry place, dry-canned apples have a shelf life of at least two years.
Dry-canned apples
Did you know that you can preserve apples by dry-canning them? These dry-canned apples are the basis for a quick apple strudel or the filling for an apple cake and even crumble.All you need is a water-bath canner, jars with lids and some apples. I recommend at least one kilogram, but the more the better.
Prepare your jars by washing them and the lids in hot water or the dishwasher. Put the jar lids and rings or the rubber bands in a pot and cover them with water. Bring the water to a boil and let it all cook for five minutes. Remove the lids, rings and/or rubber bands from the boiling water and put them onto a clean dish towel on the kitchen counter. Let them dry.
Rinse the apples in your sink to wash off any dirt. Also, remove any leaves, grass or other residues.
Then peel the apples, cut out the cores and any rotten parts and quarter them. You can use the apple scraps for making apple vinegar.
Half the quarters lengthwise and chop the apples into slices of about 3 millimetres. When you’ve chopped all the apples, fill them tightly into the prepared jars. Make sure that there’s as little room left in between the slices as possible. Leave about one inch of headspace. Before closing the lids, make sure that the rim of the jar is clean. That's best ensured by dipping a clean cloth (for example a towel) into some vinegar and wiping the rims clean. Seal the jars with the lids.
Fill the water bath canner with as much (cold to lukewarm!) water as indicated in the instructions. Put the jars into the canner, ensuring enough space so they don’t touch. Heat the canner to 100 °C. Once it has reached that temperature, let it simmer for 40 minutes. When time’s up, remove the jars with a glass lifter from the water bath canner and put them onto a dishcloth on the counter. Let the glasses cool down slowly.
Stored in a cool, dry place, dry-canned apples have a shelf life of at least two years.