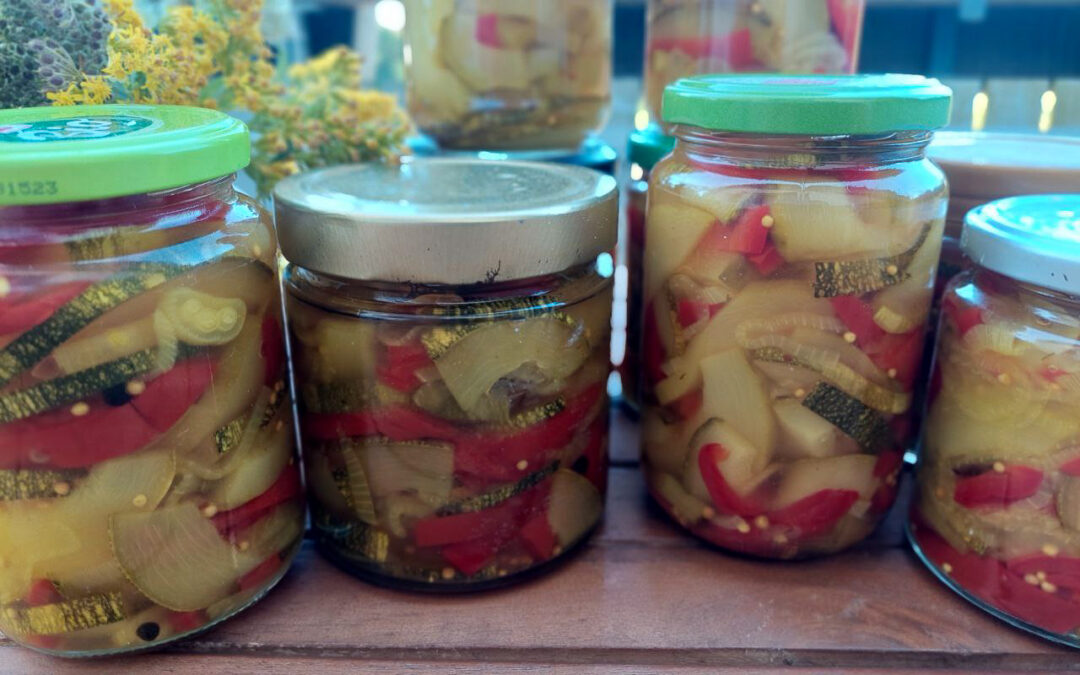
If you grow your own vegetables, you can certainly relate: we carry the first zucchini of the season into the house like a trophy and celebrate cooking it with obsessive care. Zucchini No. 5 is watched with growing unease, and by the tenth, the family becomes mutinous, and we are torn between the urge to just let them grow out of control and the regret of letting them go to waste.
But here’s the solution, for I have the best recipe for pickled zucchini that will solve your zucchini overflow problem! With this recipe, you not only preserve an abundance of the green, yellow or striped varieties before they become baseball bats, but you’ll also create a flavour-packed treasure for the cold winter months.
Pickled zucchini
Yield: 6 jars of 1/4 l
Ingredients
2 kg zucchini of any size 1 kg bell peppers of any colour 0.5 kg onions, cut into rings 3/4 l apple cider vinegar (store-bought or homemade) 1 l of water 0.5 l apple juice 200 g sugar 4 tbsp salt 2 tbsp curry powder 1 tbsp dill 1 tbsp mustard seeds 1 tbsp peppercorns juice of one lemon
Instructions
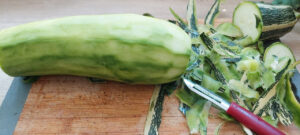
One of the many great advantages of this recipe is that you can use zucchini of any size.
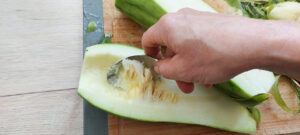
If they have really grown into baseball bats, you can peel them, cut them lengthwise into quarters and remove the mushy, seed-containing core with a spoon.
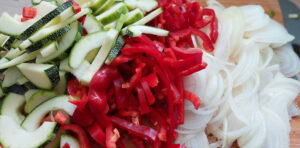
Cut the zucchini, bell peppers and onions into slices of 2 – 3 mm (1/10 inch). This recipe requires no salting before pickling.
Mix the vegetables in a bowl so that they are evenly distributed.
Put the vinegar, water and apple juice in a pot and bring it to a rolling boil.
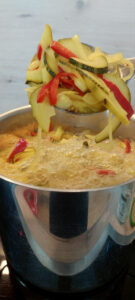
Add the vegetables and spices, and let it boil for one minute. If your pot is too small to handle all the vegetables at once, you can boil them in portions and layer each batch in the jars after cooking.
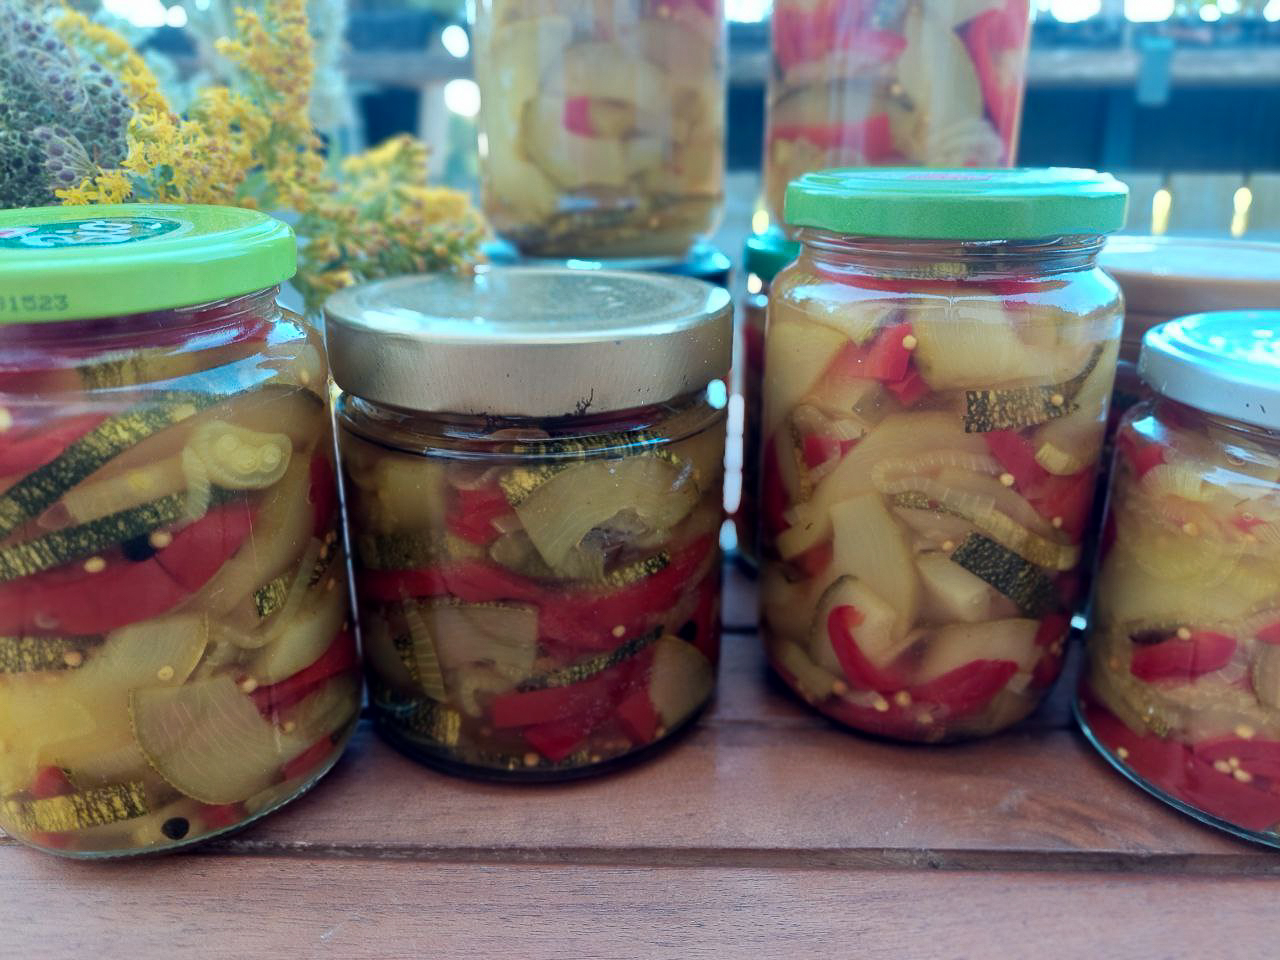
Fill everything in jars, fill up with brine, leaving a headspace of about an inch. Then close the lids tightly.
Once they’ve cooled down, you can eat the pickled zucchini right away. However, I like them best when they have had a resting time of 2 – 3 days.
After cooling down, you can store the pickled zucchini in a cool place (a cool basement works fine; alternatively, put them in the fridge) for up to one year.
Once a jar is open, you must store it in the fridge and consume it within 7 days.
How to use pickled zucchini
Pickled zucchini make a great side dish for a charcuterie or cheese assortment or as an ingredient in sandwiches and wraps. We also like it chopped up and mixed in potato mash to add a complex, salty and vinegary flavour. Or you mix it into an egg salad together with (pickled, fermented or raw) onions and mayonnaise.
Angela Braun
Pickled zucchini
A quick and easy recipe to deal with the surplus of zucchini from your garden!
One of the many great advantages of this recipe is that you can use zucchini of any size. If they have really grown into baseball bats, you can peel them, cut them lengthwise into quarters and remove the mushy, seed-containing core with a spoon.
Cut the zucchini, bell peppers and onions into slices of 2 - 3 mm (1/10 inch). This recipe requires no salting before pickling.
Put the vinegar, water and apple juice in a pot and bring it to a rolling boil.
Add the vegetables and spices and let it boil for one minute. If your pot is too small to handle all the vegetables at once, you can boil them in portions and layer each batch in the jars after cooking.
Fill everything in jars, fill up with brine, leaving a headspace of about an inch. Then close the lids tightly.
Once they've cooled down, you can eat the pickled zucchini right away. However, I like them best when they have had a resting time of 2 - 3 days.
After cooling down, you can store the pickled zucchini in a cool place (a cool basement works fine; alternatively, put them in the fridge) for up to one year.
Once a jar is open, you must store it in the fridge and consume it within 7 days.
Notes
Pickled zucchini make a great side dish for a charcuterie or cheese assortment or as an ingredient in sandwiches and wraps. We also like it chopped up and mixed in potato mash to add a complex salty and vinegary flavour. Or you mix it into an egg salad together with (pickled, fermented or raw) onions and mayonnaise.
Your zucchini problem? Solved!
This recipe transforms your “zucchini problem” from overwhelming to solved. It’s incredibly simple: no salting, and any zucchini size works.
Imagine those jars of pickled zucchini lined up in your pantry, waiting to be opened on a cold winter day when garden-fresh zucchini are only a dim memory. There’s hardly anything more rewarding!
So, harvest your zucchini now while they’re still abundant (and before they become baseball bats) and make these delicious pickles. Your future self will thank you.
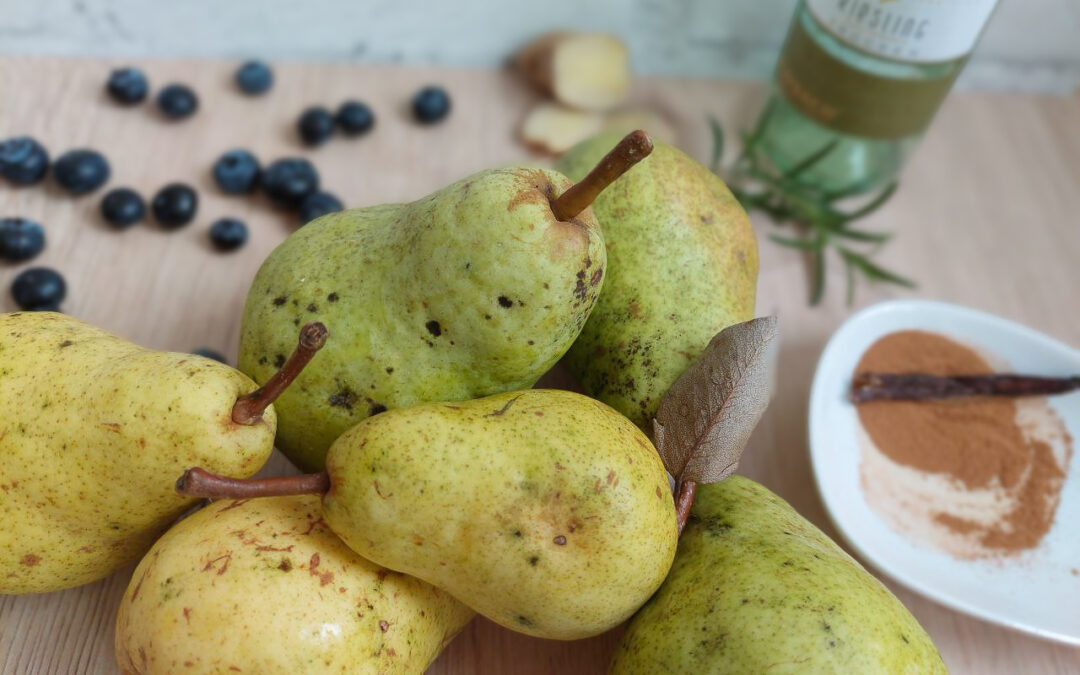
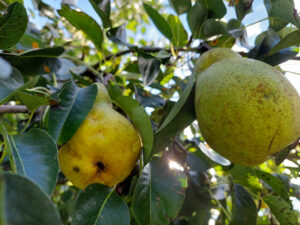
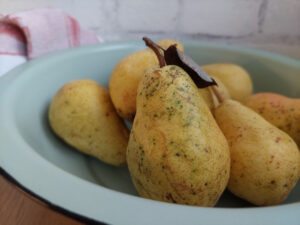
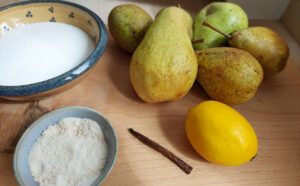
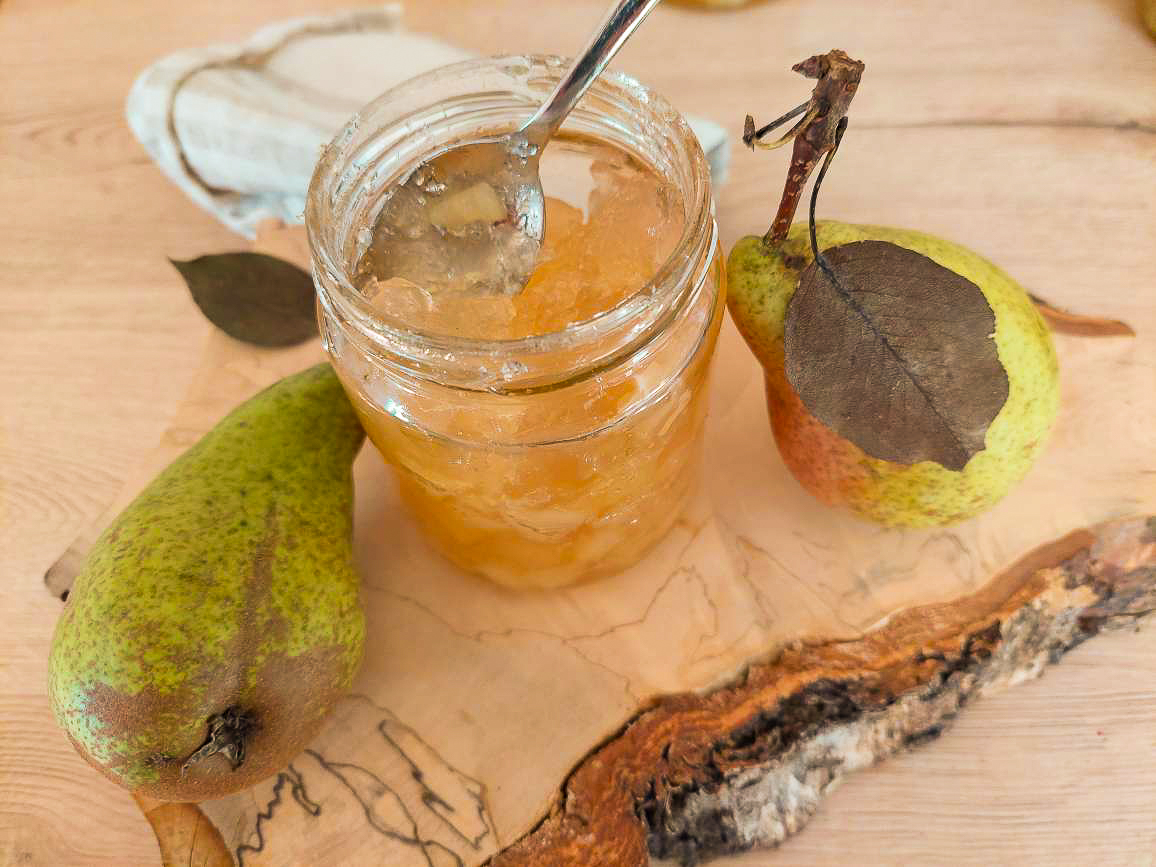
Although it’s still August – well, the end of August to be exact – we can already see the first signs of autumn around here: early morning mists, slightly shorter days and the first pears that are ready to be harvested! A few days ago, my dear colleague Bernadette came round and brought two buckets full of pears. Some of them were picked and unblemished – they will last a bit. But the others have fallen from the tree and have bruises. Those had to be processed as soon as possible. I chose to make jam from them, and although I love the classic pear jam, I didn’t want to make a large batch of just that one type. So, I got creative and paired the pears with different ingredients for warm and spicy as well as fresh and bright variations. They all turned out great!
But I don’t want to keep these heavenly recipes all to myself😊. Read on for my pear jam variations.
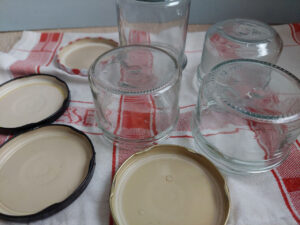
Note: Before you start, sterilise your jars and lids properly to prevent your jam from spoiling. In this guide, you can see how it’s done.
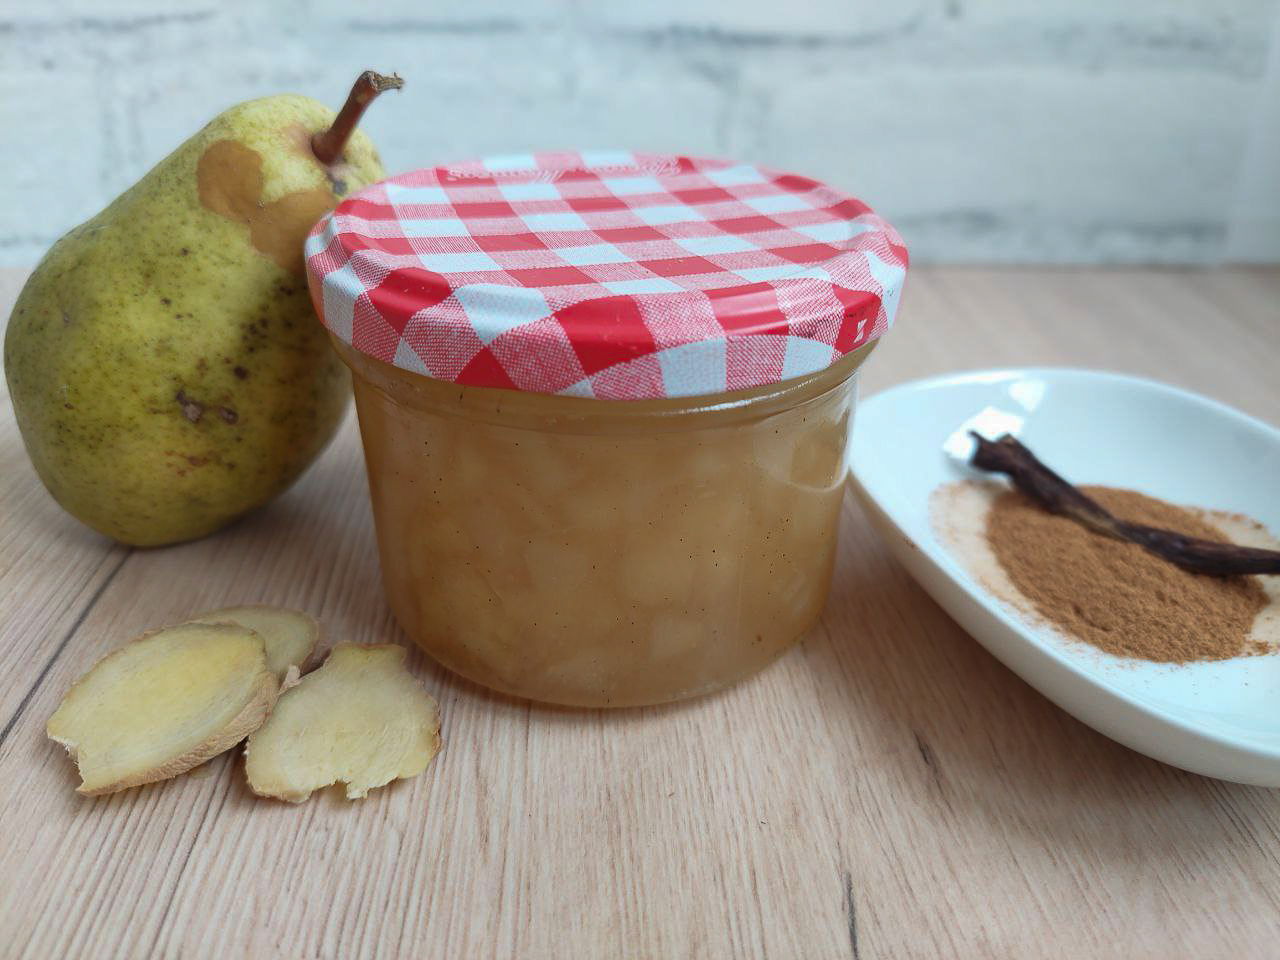
Pear Jam with Spices
This recipe makes for a wonderfully soft and velvety pear jam. The combination of vanilla, ginger and cardamom adds a warm, yet zesty flavour. A great spread for an autumn breakfast.
1sachetpectinonly if you use normal sugar; leave out if you use jam sugar
2lemons
1/2vanilla pod
1/4tspground cardamom
1/2tspdried ground ginger
Method
Prepare your jars by washing them and the lids with hot water and let them cool on a towel or drying rack.
Wash the pears, peel them and cut them into quarters. Then weigh them.
Cut the pear quarters lengthwise into 2 - 3 slices and chop them finely.
Put the chopped pears in a pot, mix them with sugar and add the cardamom and ginger.
Slice open the vanilla pod and scrape the seeds out. Put the seeds as well as the pod into the pot with the pears.
Squeeze the lemons.
Mix the pears with the sugar, lemon juice and spices and let it all rest for at least 3 hours (you can also let it rest overnight). During that time, juice will form.
Heat the mixture while constantly stirring to prevent it from burning.
When the pears have come to a rolling boil, let it all cook rapidly for 4 minutes.
Pour the jam in jars and immediately close the lids tightly.
Once it's cool, the jam is ready for consumption.
Notes
This is a recipe for a soft pear jam with warm spices and can be stored for up to one year.
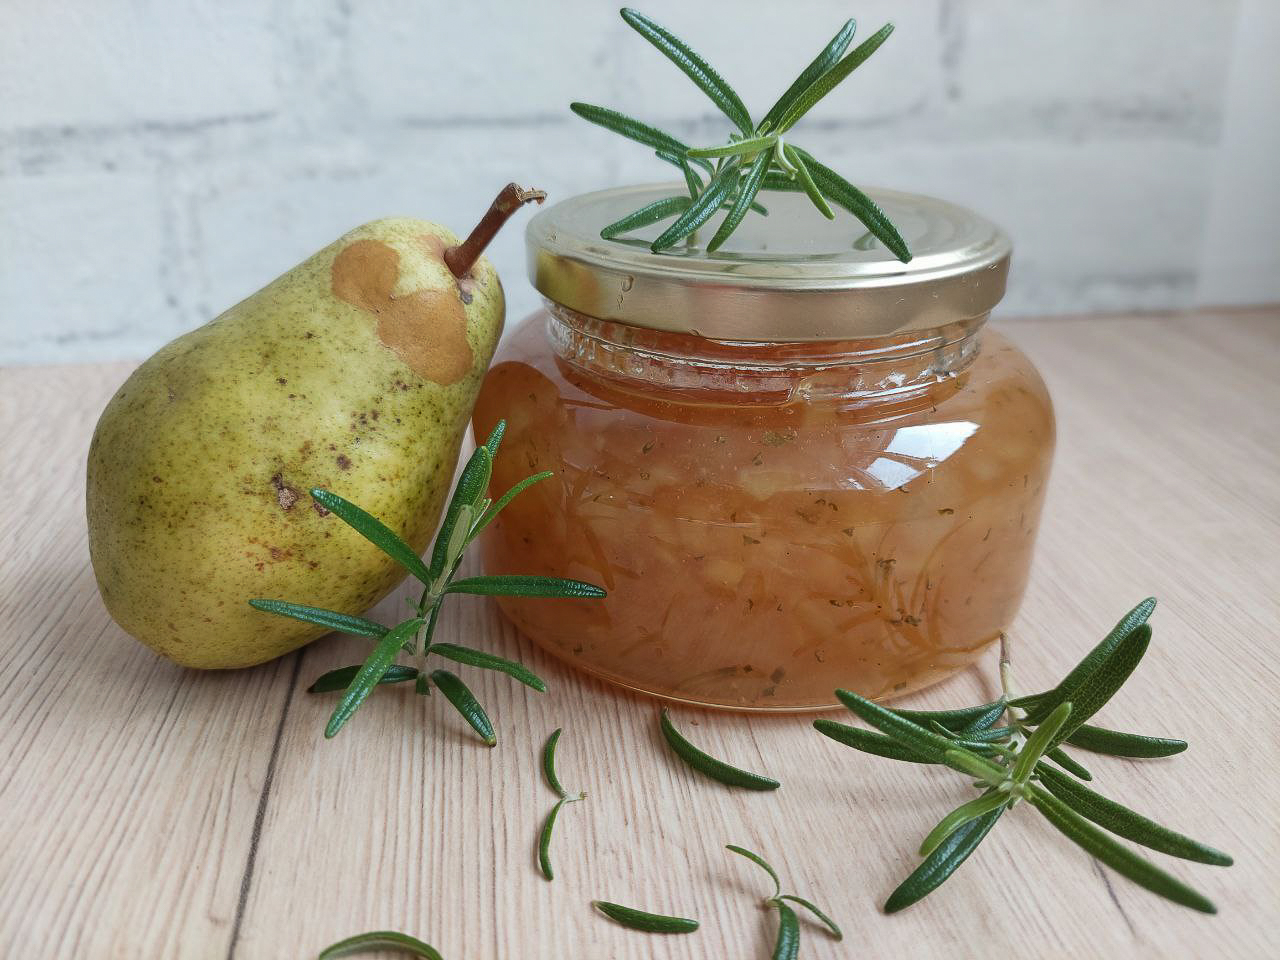
Pear Jam with Rosemary
If you like tarte flambée with goat cheese, pears and rosemary, you’ll love this recipe! The combination with pears and rosemary works wonderfully and doesn’t taste too “herbally”. It has a flavour that brings back summer, and as with the tarte flambée, pear jam with rosemary is a great addition to a cheese board.
Angela Braun
Pear Jam with Rosemary
A fresh pear jam variation that brings back summer with the unique rosemary pairing.
1sachetpectinonly if you use normal sugar; leave out if you use jam sugar
2lemons
3 tbspfinely cut rosemary
Method
Prepare your jars by washing them and the lids with hot water, let them cool on a towel or drying rack.
Wash the pears, peel and core them and cut them into quarters. Then weigh them.
Cut he pear quarters lengthwise into 2 - 3 slices and chop them finely.
Squeeze the lemons.
Finely chop the rosemary.
Put the chopped pears in a pot, mix them with sugar, lemon juice and rosemary and let the mixture rest for at least 3 hours (you can also let it rest overnight).
After resting, heat the mixture up and stir constantly to prevent it from burning.
When it all boils, let it cook rapidly for 4 minutes.
Pour the jam in jars and immediately close the lids tightly.
Pear Jam with Riesling
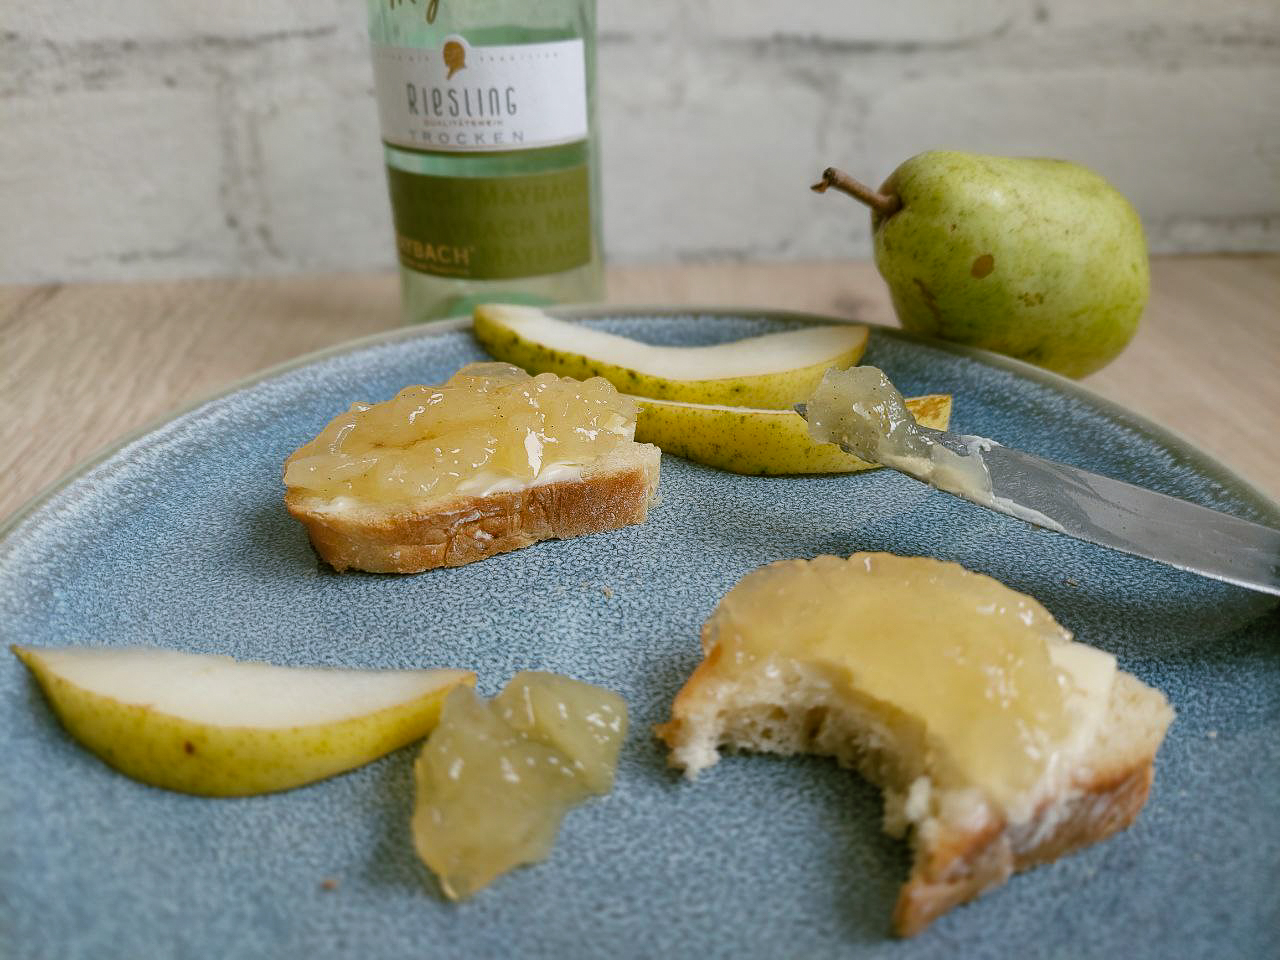
With this pear jam variation, you’ll certainly impress everyone! Pears go very well with white wine, which adds a subtle fruitiness and depth. For this recipe, I’ve chosen a dry Riesling. You can, of course, use any other white wine as long as it’s dry. It will alter the taste, though.
A word of warning: This is not for children! Part of the alcohol in this recipe will evaporate during cooking, but maybe not all.
Angela Braun
Pear Jam with Riesling
The Riesling adds a subtle fruitiness and depth to this pear jam.
1sachetpectinonly if you use normal sugar; if you use jam sugar leave the pectin off
Method
Prepare your jars by washing them and the lids with hot water and let them cool on a towel or drying rack.
Wash the pears, peel and core them and cut them into quarters. Then weigh them.
Cut the pear quarters lengthwise into 2 - 3 slices and chop them finely.
Put the chopped pears in a pot, mix them with the sugar, pectin (if needed) and the Riesling.
Mix it all and let it rest for at least 3 hours (you can also let it rest overnight).
Heat the mixture up while constantly stirring to prevent it from burning.
When the mixture has come to a rolling boil, set your timer and let it all cook rapidly for 4 minutes.
Pour the jam in jars and immediately close the lids tightly.
Once it's cool, the jam is ready for consumption.
Notes
This is not a recipe for children! Part of the alcohol in this recipe will evaporate during cooking, but maybe not all.
Pear-Blueberry Jam with Cinnamon
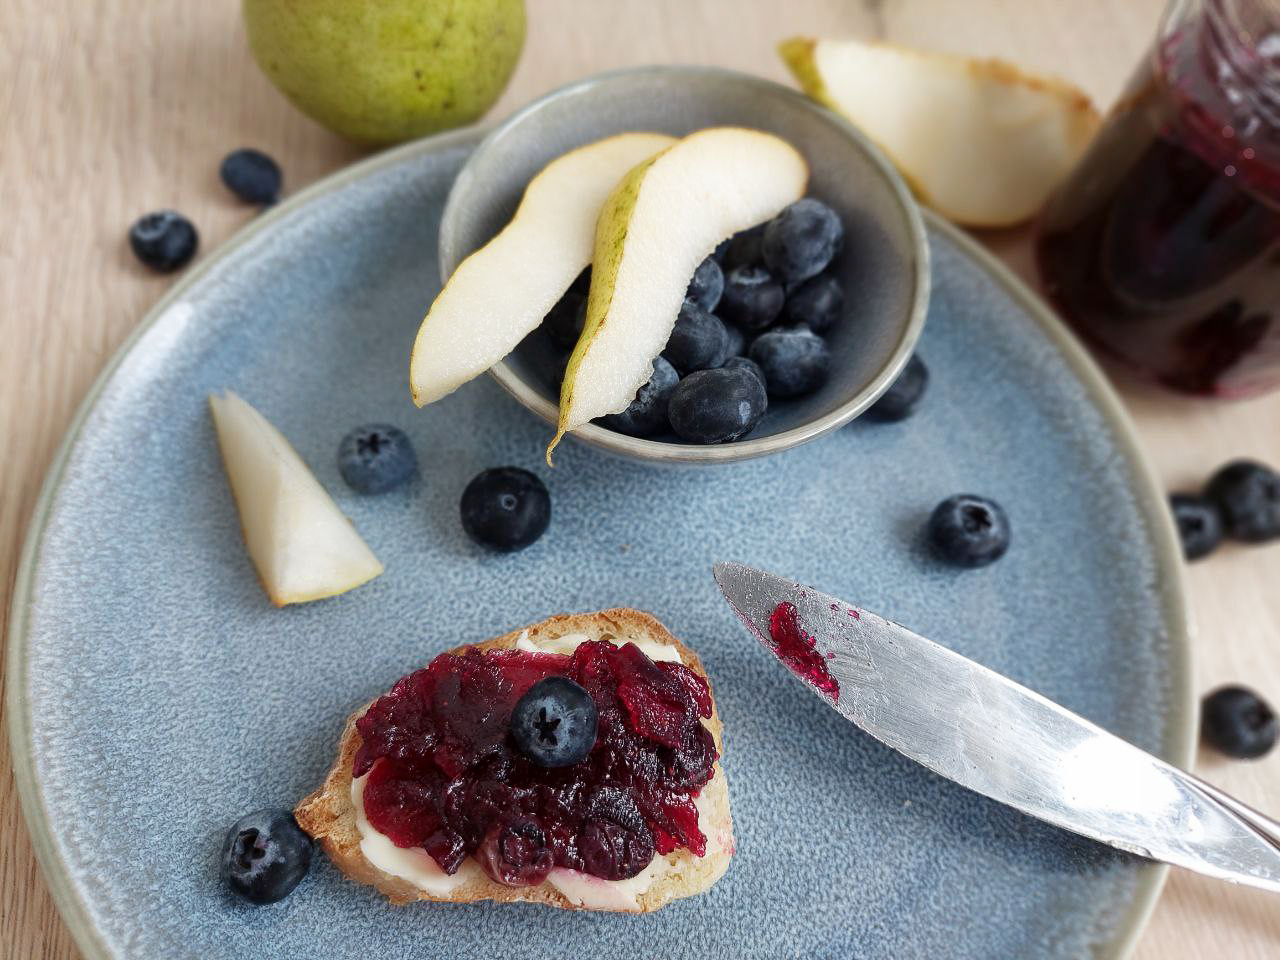
Now this pear jam variation is definitely (but not only) for children! If you had to keep your offspring away from the Riesling jam, offer them this pear-blueberry jam with cinnamon instead. They’ll love it. And with the (late) summer blueberries, the autumn pears and wintery cinnamon, we combine three seasons in one jar.
Angela Braun
Pear-Blueberry Jam with Cinnamon
Three seasons in a jar that will not only delight children!
1 sachetpectinonly if you use normal sugar; if you use jam sugar, leave the pectin off
1tbspground cinnamon
2lemons
Method
Prepare the jars by washing them and the lids with hot water and let them cool on a towel or drying rack.
Wash the pears, peel and core them, and cut them into quarters. Then weigh them.
Cut the pear quarters lengthwise into 2 - 3 slices and chop them finely.
Wash the blueberries.
Squeeze out the lemons.
Put the chopped pears and the blueberries in a pot and mix them with the sugar, pectin (if needed), lemon juice and cinnamon.
Let it all rest for at least 3 hours (you can also let it rest overnight).
Heat the mixture up and stir it all constantly to prevent it from burning.
When the fruits have come to a rolling boil, let it all cook rapidly for 4 minutes.
Pour the jam in jars and immediately close the lids tightly.
Once it's cool, the jam is ready for consumption.
Notes
This is not only a great addition to your breakfast table but also makes a good spread for a quick Victoria sponge roll.
All of the above recipes make 6 jars à 1/4 l and are shelf-stable for up to 1 year. If your family is anything like mine, however, none of these pear jam variations will last that long 😄.
Now it’s your turn! Which of these pear jam variations are you most excited to try? I’d love to know if you lean toward the warm spices of autumn, the sophisticated Riesling version, or the herbaceous rosemary combination. And if you create your own variation, please share—I’m always looking for new flavour inspiration!
Want more jam-making inspiration? Check out this post:
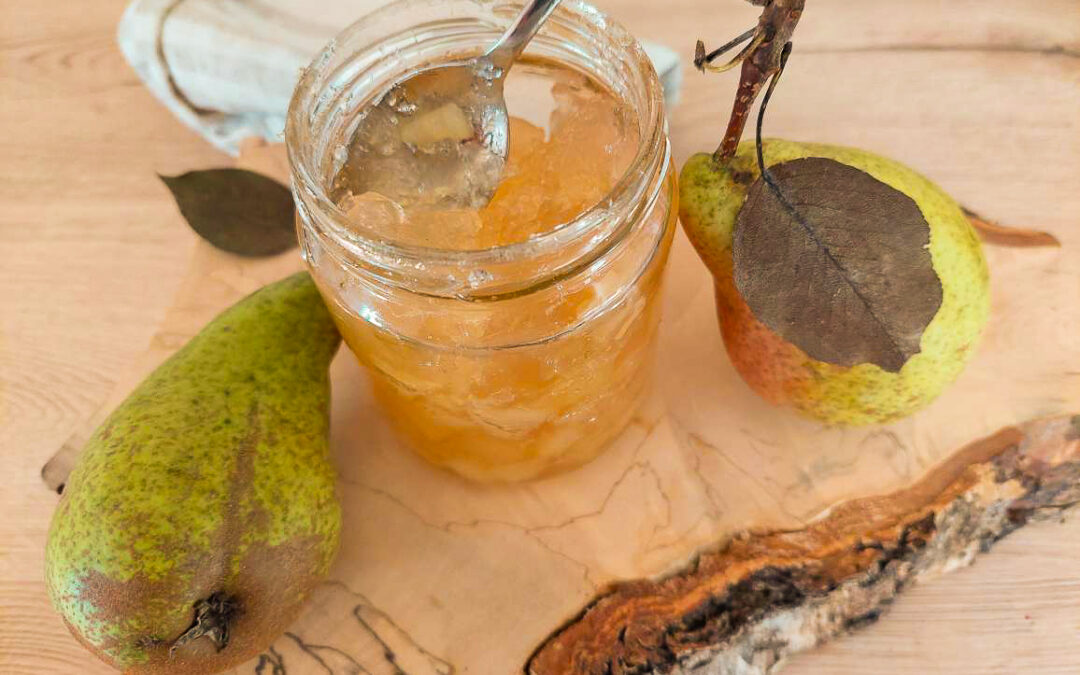
When the first pears are ready to be harvested, we know autumn has arrived – no matter how warm the weather still feels. The first pears are ready for picking in August, while late-season varieties can hang on the tree until the end of October. But here’s the dilemma: you can only eat so many fresh pears before they start to turn. That’s where the magic of pear jam comes in.
Unlike juicy berries, pears are comparatively dry fruits, which means making thick, spreadable jam requires a few key techniques. Today, I’ll walk you through my step-by-step method for creating a wonderfully velvety, sweet pear jam that captures all the golden abundance of autumn.
Choosing your pears
Varieties
You can use virtually any pear variety, except the small, sour cider pears. Excellent choices in my area include Williams Christ, Clapp’s Liebling, Gellert’s Butterbirne and Conférence. With over 1500 pear varieties worldwide, use whatever grows well in your area.
Ripeness is crucial
Test ripeness by gently pressing the fruit with your fingers. If the pear is rock hard, it needs more time on the tree to develop its full flavour. When the flesh feels soft to the touch, the pear is ready for jam-making. Process harvested pears within a few days – they quickly transition from perfect to overripe.
Essential Equipment and Ingredients
Equipment You’ll Need
To make pear jam, you will need a sharp knife and a cutting board to peel and chop the pears.
For “storing” them between quartering and chopping, you need a large bowl.
Then you need a heavy-bottomed pot for cooking the jam and a wooden spoon for stirring it to prevent it from burning.
Lastly, of course, you need suitable jam jars with lids. I prefer jars of 250 ml (0.4 pt / 9 oz), because they’re large enough to be practical, yet small enough to finish the jam before it spoils. You can choose smaller or larger jars, just as it suits you. I just wouldn’t recommend jars of more than 400 ml (0.7 pt / 14 oz).
Ingredients
Pears
Obviously, we need pears 😊! For 6 jars of 250 ml, we need 1 kg (2.2 lbs) of pears, net weight after peeling and coring.
You can upgrade or downgrade the amount, but I don’t attempt more than 2 kg of pears (plus sugar), because larger batches won’t set properly.
Sugar
Although pears are sweet already, we need sugar to preserve the jam. The classic choice is jam sugar, where the pectin is already included. Now, if you like your jam very sweet, use jam sugar 1:1, which means that you take the same amount of sugar as fruit. For 1 kg of pears, we need 1 kg of sugar.
As pears are very sweet already, however, jam sugar 2:1 is also a good choice. It means taking half the amount of sugar compared to fruit. For 1 kg of pears, now, we need 500 g of sugar.
I personally prefer using household sugar and adding pectin. There are sachets of pectin, which also come in ratios of 1:1 and 2:1 (even 3:1 for very sweet fruit). So, when I have 1 kg of pears, I use 500 g of household sugar and one sachet of pectin 2:1.
To sum it up, choose the type and the amount of sugar based on your sweetness preference:
Jam sugar 1:1 (that means equal weight of sugar and fruit) for a very sweet jam
Jam sugar 2:1 (half the amount of sugar compared to the amount of fruit) for moderately sweet jam
My preference: regular sugar (500 g per 1 kg pears) plus one sachet of pectin 2:1
Lemon juice
Raw pears have a wonderful aroma, but when they are made into jam, they can taste a bit one-dimensional. To balance the sweetness of the pears, we add the juice of one lemon. It doesn’t make the jam sour but adds a zesty nuance to the overall flavour.
Flavour enhancers (optional but highly recommended)
Strictly speaking, you don’t need to add anything to your pear jam, but some herbs and spices enhance the pears’ flavour even further:
Vanilla: Half a pod (or quarter if very fresh) transforms the jam
Warm spices: Cinnamon, cardamom, clove, or nutmeg
Fresh herbs: Rosemary, lemongrass, lemon balm, or thyme
Get creative with combinations! If you need some inspiration, look at this article where I have listed different pear jam variations.
Step-by-Step Instructions
Got everything you need? Wonderful! Let’s start then.
Sterilise Your Jars
We want our jam to be shelf-stable for as long as possible. In an anaerobic (that is, oxygen-free) environment, however, certain bacteria and germs can grow well, and thus we must sterilise our jars to make them germ-free. If you want to read up on how to sterilise your jars properly, have a look here.
Prepare the Pears (Without Browning)
Pears turn brown quickly once they’re peeled. Although this change of colour doesn’t alter the taste, we want our jam to be the typical beautiful cream colour. To prevent the pears from browning, we must ensure that they’re not exposed to air for too long. Additionally, we must use acid, either in the form of lemon juice or vinegar, for preventing colour change.
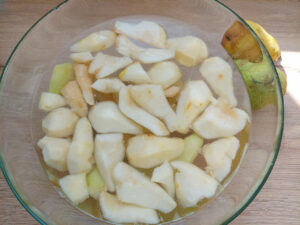
For that purpose, fill a large bowl with water and add either the juice of one lemon or a splash of vinegar.
Now, peel, quarter, and core the pears, and immediately put them into the bowl.
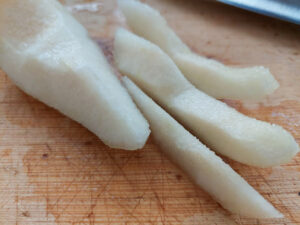
When all pears are prepared that way, we can remove the single quarters and slice them lengthwise into 3-4 pieces.
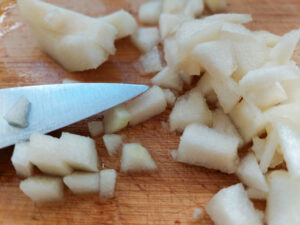
Now chop them finely crosswise. If necessary, cut the chops further. Be careful, though: we don’t want pear pulp but small, yet distinct pieces.
The Crucial Resting Period
If we cooked jam from pears immediately after chopping them, the jam would become relatively dry and compact. So, we must induce the pears to remove some of their juice, and that’s best done by mixing them with sugar and letting them rest for a few hours. This step makes all the difference between dry, compact jam and a perfectly textured preserve:
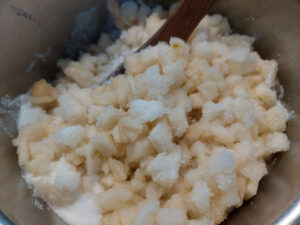
Put the pear chops in a pot and add the sugar, pectin (if necessary), lemon juice and spices.
Mix it all thoroughly and let it rest for at least 3 hours, or overnight if possible.
During that resting period, the pears release their juices while absorbing the sugar, thus creating the perfect base for jam.
Cook to Perfection
Now it’s time to cook the jam!
Bring the pear mixture to a rolling boil over medium-high heat.
Set your timer for 4 minutes and let it all boil for that time. Stir the mixture regularly to prevent it from burning.
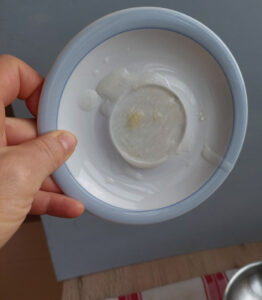
Test if the jam is done by dropping a spoonful of hot jam onto a cold plate. Now, tilt the plate and watch the jam: if it runs like water, it must be cooked for another minute. If it flows like thick honey, it’s ready!
Fill and Seal
Ladle hot jam into the sterilised jars. To make sure you don’t spill jam on the rims, a funnel comes in handy.
Clean the jar rims if necessary, and immediately seal the jars with tight lids.
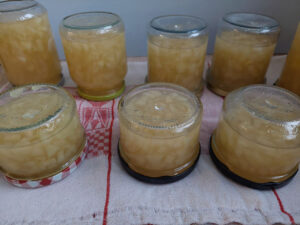
Flip the jars upside down onto a clean kitchen towel and leave them like that for about 10 minutes to create a vacuum seal.
Turn the jars right-side up and let them cool completely.
Listen for the satisfying “pop” as vacuum seals form. When the jars are completely cooled off, press the centre of each lid: is it firm? Wonderful, everything’s fine! If it moves, the lid’s not properly sealed. Put that jar in the fridge and eat it within 1 – 2 weeks.
1sachetpectinonly if you use household sugar; if you use jam sugar you don't need pectin
1lemonjuice
1/4 - 1/2podvanilla(optional)
Equipment
Sharp knife
Cutting board
large bowl for prepped pears
Heavy-bottomed pot
Wooden spoon for stirring
Jam jars with lids (I prefer 250 ml /9 oz jars - large enough to be practical, small enough to finish before spoiling).
Method
Sterilise your jars
Fill a large bowl with water and add either the juice of one lemon or a splash of vinegar.
Peel, quarter, and core the pears and immediately put them into the bowl.
Remove the quarters one at a time and slice them lengthwise into 3 - 4 pieces.
Now chop them finely crosswise. If necessary, cut the chops further, but be careful: we don't want pulp but small, yet distinct pieces.
Put the pear chops in a pot and add the sugar, pectin (if necessary), lemon juice and spices.
Mix it all thoroughly and let it rest for at least 3 hours, or overnight if possible.
Bring the pear mixture to a rolling boil over medium-high heat
Set a timer for 4 minutes and maintain the boil. Stir regularly to prevent the mixture from burning.
Test for doneness by dropping a spoonful of hot jam onto a cold plate. Tilt the plate- if the jam flows like thick honey, it's ready
Ladle hot jam into sterilized jars (a funnel prevents messy rims)
Clean jar rims if needed and immediately seal with tight lids.
Flip jars upside down on a clean towel for 10 minutes to create a vacuum seal.
Turn the jars right-side up to cool completely.
Notes
Store sealed jars in a dark place at room temperature for up to 2 years. Once opened, refrigerate and enjoy within several weeks.
Storage
Like all jams, pear jam is best stored in a dark place at room temperature. Here, it is shelf-stable for up to 2 years. Once a jar is opened, keep it in the fridge and enjoy it within several weeks.
Your Gateway to Creative Jam-Making
Making pear jam is satisfying beyond words. Once you’ve mastered the basic technique, I guarantee you’ll soon find yourself experimenting with exciting flavour combinations.
But the best of all is that you’ll have a wonderful preserve for your pantry that brings the golden abundance of an autumn orchard onto your breakfast roll.
If you liked this jam, these posts may also interest you:
I love it when I can harvest cucumbers and gherkins because it means that it’s summer! And summer, for me as a school secretary, means holiday season, one of my favourite times of the year. While I could – and often do – eat cucumbers all summer long, gherkins are best preserved. Fermented gherkins (or salt gherkins) are a classic ferment. Crisp, tangy and naturally fermented, they have very little in common with the vinegar pickles you’ll find in most supermarkets.
In this guide, I’ll show you how to master fermented gherkins. Let’s dive in.
Quick overview
Fermentation time: 4–7 days
Salt concentration: 3.5%
Temperature: 15–18 °C (60–65 °F)
Difficulty: Easy
Ready after:
➡️ Half-sour: 4–5 days
➡️ Full-sour: 6–7 days
Storage: up to 1 year refrigerated
Before You Start: 4 Things That Make Fermented Gherkins Successful
As I said before, fermented gherkins are a classic example of lacto-acid fermentation, but there are a few aspects to consider.
Salt content
Fermented gherkins need a brine with a higher salt content. While a brine with 2% salt is usually enough, we use a concentration of 3.5% in this recipe. This is due to the relatively high water content of gherkins. The salt draws water from them and allows them to partly replace it with the salty brine. That way, they stay crunchy for a long time.
Tannic leaves
Additionally, I like to add leaves that contain tannin, which also help the gherkins stay crisp and crunchy. The tannins help strengthen the vegetable’s cell walls, which keeps the gherkins crisp. You can use the leaves of oak, wine, cherry, raspberry, blackberry, currant, bay and horseradish. If you can’t get any of those, you could also put a bag of black tea in the jar, but be prepared that it changes the gherkins’ colour.
Temperature
While I usually prefer fermenting other vegetables at temperatures around 20°C (68°F), I like to ferment gherkins at a lower temperature range between 15 and 18°C (60 – 65°F). That way, fermentation occurs a bit slower and won’t become too sour too soon. If you are up for a full-sour version, however, feel free to ferment at 20 °C / 68 °F.
Water
I use our tap water for fermenting, and it works just fine. However, if you live in a region where your tap water is highly chlorinated, or the house you live in has old (rusty) pipes that could leak iron, it’s best to run it through an activated carbon filter before using it for fermentation (or drinking or cooking, for that matter).
If in doubt, taste your tap water. Smelling and tasting good? Then go on and use it for fermentation. If it’s got a metallic or chlorine taste, filter it first.
Distilled water is NOT a good alternative, as – due to the lack of minerals – it tastes very bland and lets the gherkins go mushy.
Mastering fermented gherkins – Step by step
Probably the most difficult part of making fermented gherkins is getting the gherkins, unless you cultivate them in your garden. While all cucumber varieties can be fermented, gherkins are the best choice. They are uniformly small, usually up to 10 cm (4 inches). They have a thick skin that is thicker than cucumbers.
If you don’t grow your own gherkins, you can sometimes find them in the supermarket, but you need to check them carefully for freshness. Gherkins become flabby a few days after being harvested. If the ones you found show dull, wrinkled skin, they were picked too long ago. Yellow gherkins are also not suitable. They’ve been harvested overripe.
If you have a local farmers’ market in the vicinity, that’s a good place to buy freshly picked gherkins (or any fresh vegetables for that matter).
A word on bitterness
Sometimes, cucumbers and gherkins can get bitter, especially when the plant gets stressed by too much heat, too little water or great differences in temperature. Unfortunately, fermentation won’t remove existing bitterness. If you want to ensure that your gherkins are good to use, try one or two to check that everything’s all right.
Want to ferment with confidence? Download my free Fermentation Starter Checklist and get practical preserving tips, seasonal recipes and new fermentation guides delivered straight to your inbox.
Equipment
Good news: you’ll only need a few jars with lids and fermentation weights for each jar. If you’re not quite sure whether your jars are ok and what weights you can use, check out my fermentation equipment list.
Ingredients
Yield: one jar of 4 l or 6 jars of 3/4 l
about 20 gherkins 12 – 15 garlic cloves 2 fresh dill flowers (alternatively: 2 tbsp dill seeds) 2 tbsp peppercorns 2 tbsp mustard seeds 5 bay leaves 3 l water 105 g salt 5 – 10 tannic leaves (for example, from oak, wine, raspberry, currant or blackberry)
Instructions
Sterilise the jars and lids. In this guide, you’ll learn four simple methods to do so.
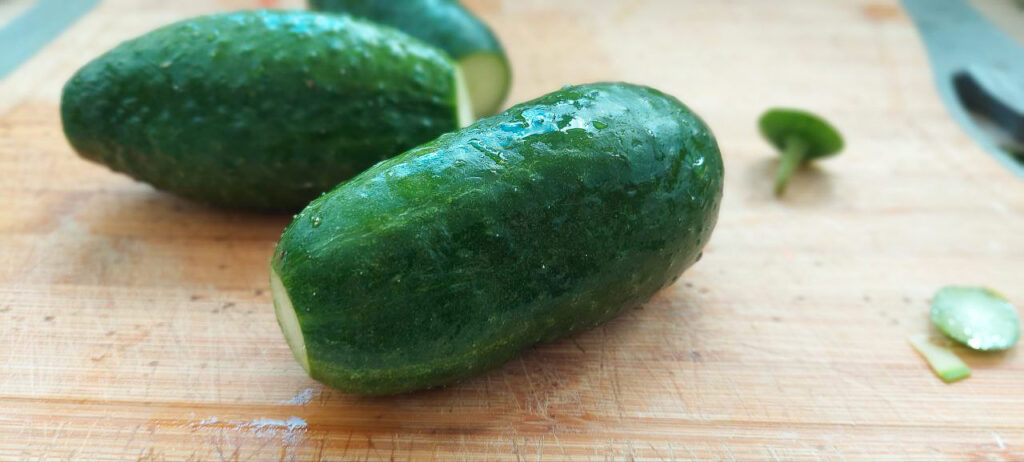
Thoroughly wash the gherkins and remove the vines and blossom ends. The blossom end contains enzymes that soften the gherkins during fermentation.
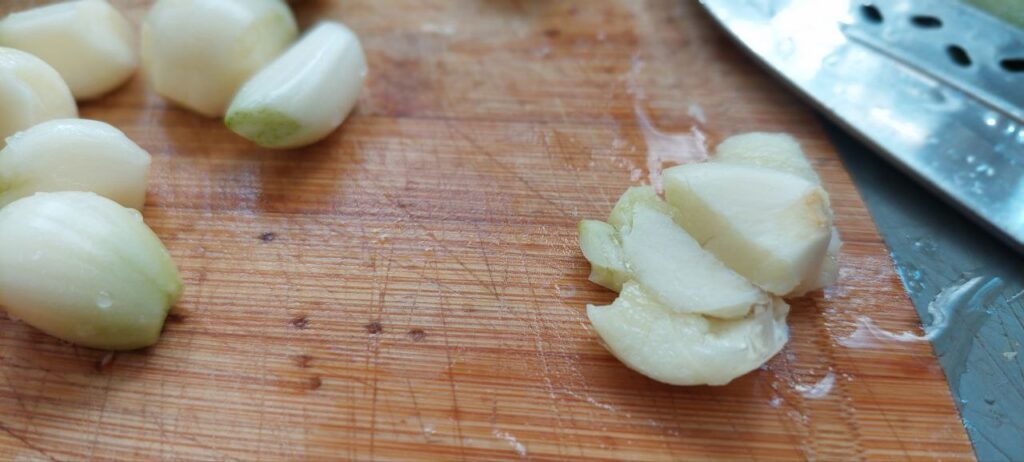
Peel the garlic cloves and either press them slightly with the blade of a knife or cut them in half.
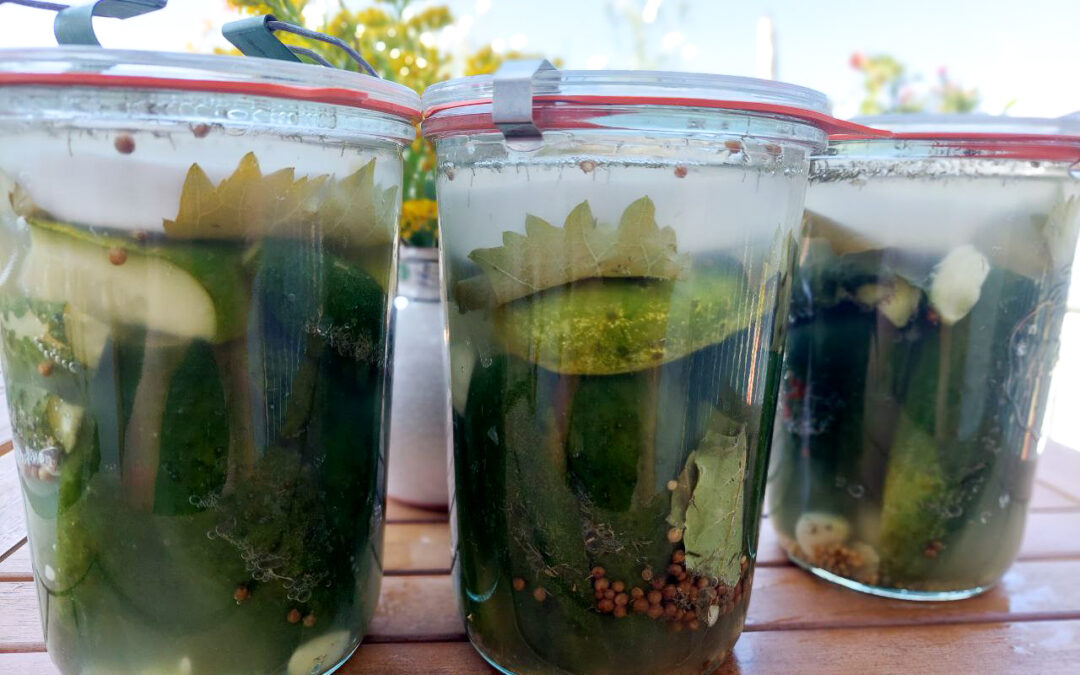
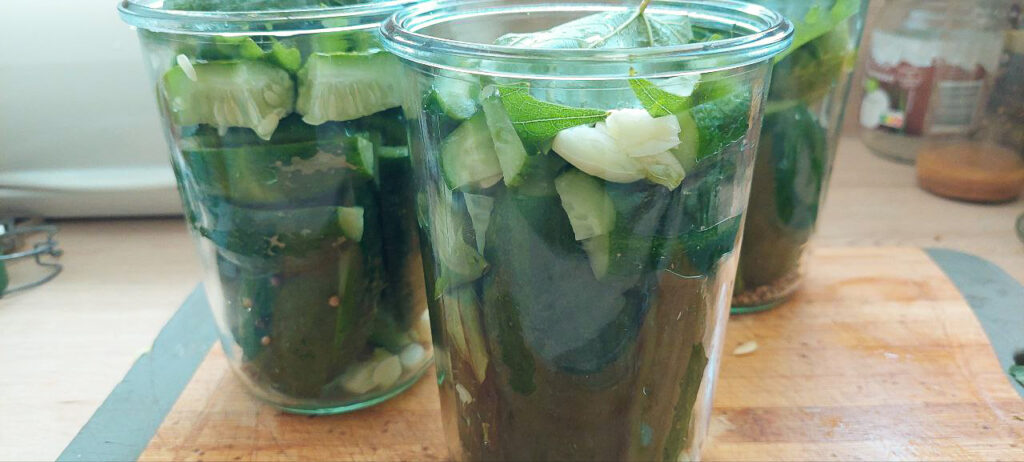
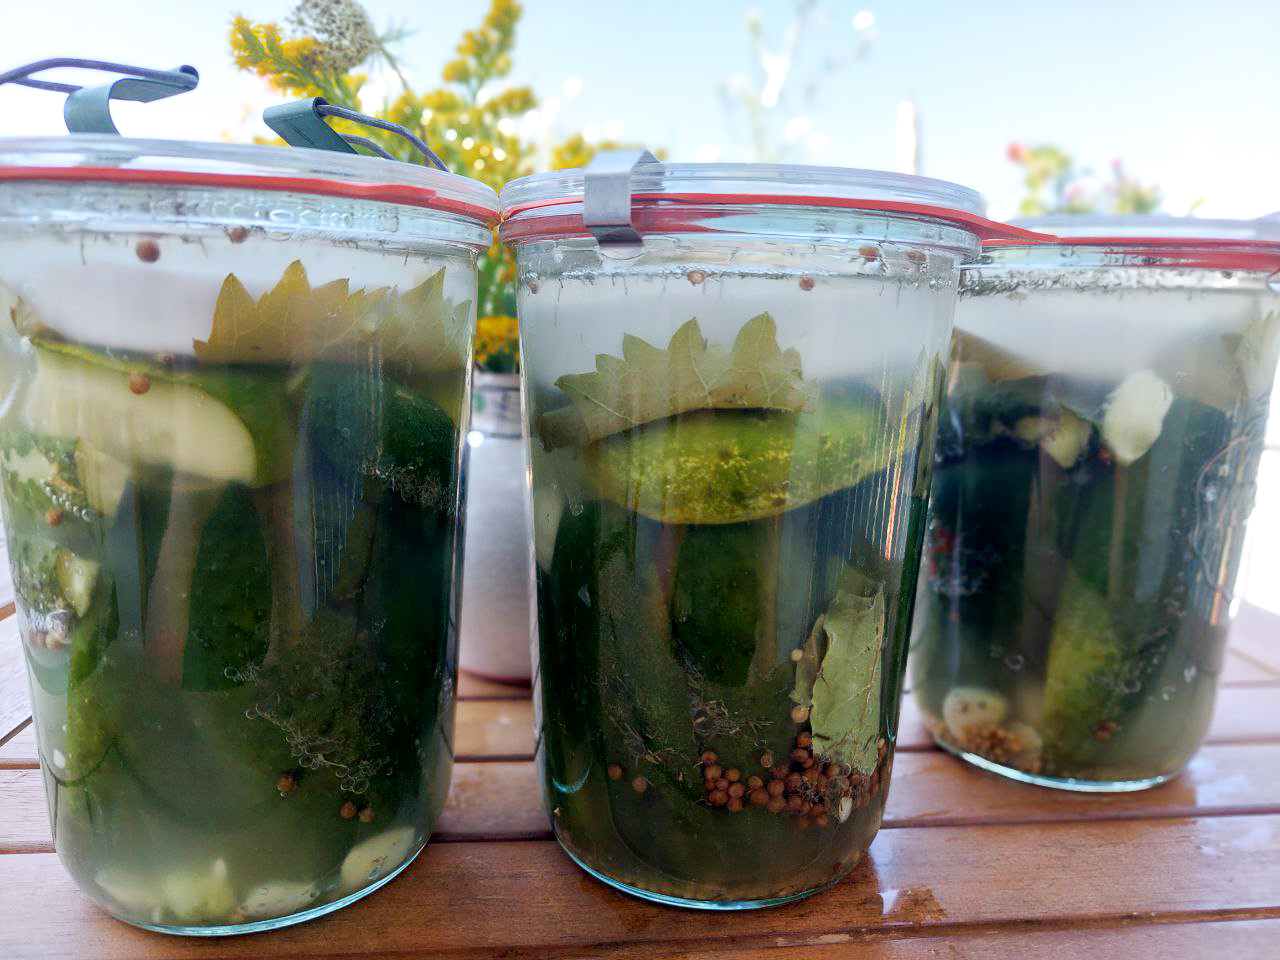
Now, layer the gherkins, the garlic cloves, bay leaves and spices in one large or several small jars. If the gherkins are too large for your jars, cut them into slices or sticks.
Prepare the brine by dissolving the salt in the water. Stir the mixture until the salt has completely dissolved.
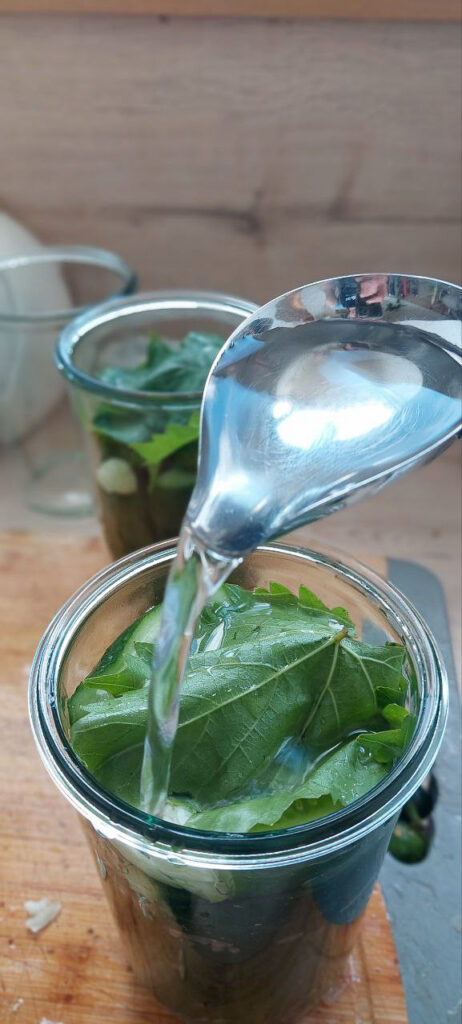
Pour as much brine over the gherkins so that they are covered by it. Store the residual brine in the fridge.
Cover the brine surface with the tannic leaves and put a weight on them to make sure that everything stays under the brine.
Put the jar or jars on a baking tray or something similar and let everything ferment at 15 – 18 °C (60 – 65°F) in a place without direct sunlight for 4 – 7 days.
You’ll usually notice bubbles within the first day or two, and the brine may become cloudy. Both are perfectly normal signs of active fermentation.
Keep an eye on the jars and pour in some of the brine from the fridge if, during fermentation, too much brine flows out of the jar.
After 4 – 5 days, the gherkins are half-sour; after 6 – 7 days, they’re full-sour. Taste them to test the flavour and either eat them right away or put them in a cool place (at best the fridge) to stop, or rather slow down, fermentation.
You can store the jars in the aforementioned cool place for up to 1 year. The flavour continues to develop slowly during storage, becoming more sour over time.
Angela Braun
Fermented gherkins
Small as they are, gherkins burst with flavour when fermented! Make this wonderful preserve with gherkins, a salt brine and a few herbs and spices.
5 - 10tannic leavesfor example from oak, wine, raspberry, currant or blackberry
Method
Thoroughly wash the gherkins and remove the vines and blossom ends.
Peel the garlic cloves and either press them slightly with the blade of a knife or cut them in half.
Now, layer the gherkins, the garlic cloves, bay leaves and spices in one large or several small jars. If the gherkins are too large for your jars, cut them into slices or sticks.
Prepare the brine by dissolving the salt in the water. Stir the mixture until the salt has completely dissolved.
Pour as much brine over the gherkins so that they are covered by it. Store the residual brine in the fridge.
Cover the brine surface with the tannic leaves and put a weight on them to make sure that everything stays under the brine.
Put the jar or jars on a baking tray or something similar and let everything ferment at 15 - 18 °C (60 - 65°F) in a place without direct sunlight for 4 - 7 days. Keep an eye on the jars and pour in some of the brine from the fridge if, during fermentation, too much brine flows out of the jar.
After 4 - 5 days, the gherkins are half-sour, after 6 - 7 days they're full-sour. Taste them to test the flavour and either eat them right away or put them in a cool place (at best the fridge) to stop or rather slow down fermentation.
You can store the jars in the aforementioned cool place for up to 1 year
Notes
As long as you stick to the salt ratio of 3.5 %, you can get creative with herbs and spices. Add, for example, coriander or dried chilli flakes or cut down the amount of garlic. You can also add onion rings.
Recipe alterations
If you want a less “garlicy” taste, cut down the amount of garlic cloves. Instead, add some onion rings. You can also get creative with the spices, for example by adding dried chillies or coriander.
Ready for your next ferment?
If you enjoyed making these fermented gherkins, you’ll probably love experimenting with other vegetables too.
Download my free Fermentation Starter Checklist and receive seasonal fermentation recipes, troubleshooting tips and preserving ideas throughout the year.
Troubleshooting
Although you think you’ve done everything right, some problems may occur:
Shrivelled gherkins
Either the gherkins were not fresh enough (that is, they were harvested longer than two days before you processed them) or your brine was too salty. Either way, they’ve lost too much water in the brine and have become shrivelled. Nevertheless, you can still eat them.
Hollow gherkins
Here again, the gherkins may not have been freshly harvested. Another reason for hollow gherkins is that the gherkins were too large. But like shrivelled gherkins, hollow ones are still edible.
Discolouration
During the fermentation process, it’s normal that the gherkins’ colour changes from a fresh, bright green to a dull olive green. However, if they get a different colour, there are several reasons for that.
Either the water you used for the brine was too hard or, more often, colouring spices like curcuma or vegetables like red onions caused the colour change. Discolourations, however, are harmless, and you can eat the gherkins.
Slimy gherkins
That’s a more serious problem that could have been caused by several mistakes:
either you used too little salt in your brine (i.e. a ratio below 3.5 %) or
fermentation temperatures were too high (15 – 18 °C / 60 – 65 °F are ideal) or
you didn’t cut off the blossom ends or
The gherkins were not fully covered with brine.
Unfortunately, slimy gherkins are not edible, and you must discard them.
White film on top
If the layer is thin, white and smooth, it’s usually kahm yeast rather than mould.
Kahm yeast is a layer of wild yeasts that forms on lacto-fermented goods. It always appears on the surface; that is exactly where the ferment has contact with oxygen.
In most cases, kahm yeast is harmless. But it can affect the ferment’s taste and make it slightly musty. Most importantly, it’s a sign that there’s oxygen in the ferment and that’s where mould can grow.
When you detect kahm yeast on your ferment, carefully remove it from the surface with a spoon, then wipe the jar and the fermentation weight clean.
Afterwards, smell the ferment: when it smells fresh and slightly sour, everything’s ok. If the smell is unpleasant or “weird”, discard it.
You either haven’t cut off the blossom ends, or they’ve fermented at a high temperature for too long. Another reason could be that the ferment is older than a year.
How salty should the brine be?
It’s difficult to go by taste, which is why you should always take the exact amount of salt and water indicated in the recipe.
Can I ferment whole cucumbers instead?
Yes. Use small, firm pickling cucumbers if possible. Larger slicing cucumbers contain more water and usually don’t stay as crisp during fermentation.
Why are my gherkins hollow?
Either they were not quite fresh when fermented, or they were too large. They’re still edible, though.
Can I reduce the salt?
No. The salt ratio is crucial for a safe ferment.
How long do fermented gherkins last?
Properly stored in a cool, dark place, they last for at least a year. You can store them longer, but notice that the flavour will gradually get more sour and the gherkins will eventually turn mushy.
Small pickles, big flavour
Every summer has its flavours. For me, fermented gherkins are one of them.
They’re easy to make, don’t require many ingredients and taste so good, you’ll never want to have a pantry without them! Once you’ve made a batch yourself, you’ll discover just how different naturally fermented gherkins are from the vinegar pickles most of us grew up with—and chances are they’ll become a permanent resident of your fridge, too.
If you want to get creative, try out different herbs and spices or cut down on the garlic. As long as you stick to the salt ratio and make sure that everything’s under the brine, you’ll be fine!
Can’t get enough of fermenting? Try these recipes:
Every summer, when the gherkins start coming in faster than we can eat them fresh, one preserving session is guaranteed to happen in my kitchen: homemade gherkin pickles. The whole house smells of vinegar and dill, jars line the worktop, and I already know that opening the first one in autumn will be worth every minute. That satisfying crunch when I bite into a perfectly pickled gherkin can hardly be topped.
Gherkin pickles are extremely versatile: they make a wonderful addition to a cold lunch and sandwiches and are an essential ingredient for burgers, hot dogs and traditional German rouladen. Or you just snack on them between meals right out of the jar. It’s a healthy alternative to that bar of chocolate, and you can eat them straight from the jar. I certainly won’t judge you. 😉
I used to think that pickling cucumbers (or gherkins, as we now know) was complicated and only for an experienced chef, but it’s actually pretty easy, and you only need a few ingredients. And the best thing: it tastes so much better than the store-bought stuff! Are you ready to learn how to make homemade gherkin pickles? Let’s dive in.
Quick Overview
✓ Ready in: about 30 minutes (+ overnight soaking)
✓ Difficulty: Easy
✓ Shelf life: • Fridge: 2–4 months • Water bath canned: about 1 year
✓ Best vinegar for classic pickles: White wine vinegar or distilled white vinegar (5% acidity)
Looking for more ways to preserve your harvest? Read on in my preserving section.
Understanding Gherkins
What Are Gherkins?
Contrary to what many may think, gherkins are not just regular baby cucumbers but specific cultivars or even an entirely different species, like Mexican sour gherkins.
Gherkins are typically harvested small (3 – 8 cm/1 – 3 inches), and even if you’d let them grow (which you wouldn’t unless you want to harvest the seeds), they hardly exceed 15 cm (6 inches). Cucumbers, on the other hand, grow larger and are harvested when they are 15 – 20 cm (6 – 8 inches) long, some even longer.
As gherkins are picked small, they contain fewer seeds and less water, which makes their texture firmer and crunchier than that of regular cucumbers. Due to their high water content, cucumbers are only partially suitable for pickling as they tend to become mushy.
Gherkin skin is also thicker and bumpier, which helps it hold up better during the pickling process. At the same time, gherkin skin is also more porous, allowing the brine to penetrate more effectively.
As gherkins maintain their shape and crispiness much better during the pickling process than regular cucumbers, they are the preferred choice for homemade and commercial cucumber pickles. You can use cucumbers for a quick pickle, as well, but when it comes to long-term storage, they won’t hold up.
When to harvest gherkins
Once your gherkin plants start to flower, check them daily. Like zucchini, gherkins can grow from tiny to enormous in (almost) seconds.
Gherkins should be hard when you squeeze them gently; their skin should be glossy and the bumps well-defined.
During peak growing season, you’ll want to harvest gherkins every 1 – 2 days to catch them at the right stage. Gherkins are best harvested in the mornings when they are still hydrated from the overnight moisture.
Good harvesting sizes are
Cornichons: 3 – 4 cm (1 – 1.5 inches) for the smallest, most premium pickles
Small gherkins: 4 – 6 cm (1.5 – 2.5 inches) for classic pickle size
Medium gherkins: 6 – 8 cm (2.5 – 3 inches); don’t let them grow larger or they’ll become too seedy
If you don’t grow gherkins in your garden, check out local farmers’ markets or speciality stores for fresh produce.
How to pickle gherkins
Equipment Needed
There’s some general equipment you’ll need for pickling, which is:
Glass jars
You can either use Mason jars or twist-off jars. It’s best to pick a jar size that’s not too large, as the pickles don’t last long once the jar’s open. It’s usually better to use smaller jars, as the pickles don’t keep as long once opened.
Bowl
in which you can let the gherkins soak in salt brine overnight.
Pot
Use a non-reactive pot in which you can prepare the brine.
Measuring tools and scales
You’ll need a measuring cup for the liquids, scales for weighing the sugar and a tablespoon for measuring the salt and spices.
Core Ingredients
Now we come to the ingredients. You’ll need
Gherkins
Well, obviously. They’re best when freshly picked, of course, but it’s also fine to use them after they’ve been harvested a day or two. Just make sure they don’t shrivel or become soft.
Also, check whether the skin is hard and unmarred. Discard any gherkins with blemishes and spots.
Salt
It’s best to use pickling salt as it doesn’t contain any additives like iodine or anti-caking agents, which can make the brine cloudy. It’s also finely grained so that it’ll dissolve quickly and completely in the brine.
An alternative to pickling salt is high-quality sea salt, but make sure you take one without additives.
Kosher salt is also acceptable, but as it’s less dense than other salts, measurements must be adjusted: you’ll need about 25 % more salt to make the brine equally saline. Also, kosher salt is rather coarse and takes longer to dissolve.
Best Vinegars for Pickling
There’s a variety of vinegars you can try for your pickles! Here are my favourites:
White distilled vinegar
This is the most common choice for most pickle recipes. It has a clear, sharp taste that doesn’t compete with your pickles and spices. Also, it makes a clear brine and has a long shelf-life when used in pickles.
Apple cider vinegar
It has a milder and mellower taste and adds a bit of sweetness to your brine. As its colour is a light brown, it’ll tint your brine a bit, but in exchange, it add more complex flavours. Raw, unfiltered versions are the best, and you can use your homemade apple cider vinegar! Just make sure that it contains at least 5 % acetic acid.
White wine vinegar
This is the premium version for pickles, as it tastes cleaner than apple cider vinegar but more complex than white distilled vinegar. It costs a bit more, but it creates really elegant pickles.
Rice vinegar
If you want to try out Asian inspired pickles, rice vinegar is your preferred choice. Its taste is gentler and less aggressive, and it works wonderfully with ginger, garlic and sesame flavours.
Champagne vinegar
Now, this is the luxury version of vinegar, which you can see reflected in its price. However, it has a very delicate and refined taste and is ideal for special occasion pickles.
Pro tip: Blend vinegars for custom flavour profiles. Try a mixture of 2/3 of white wine vinegar and 1/3 apple cider vinegar, for example. Just make sure that the acidity is at least 5 %.
Vinegars to avoid
Some vinegars are just not suitable for pickling:
Balsamico vinegar
It’s too sweet and would overpower the pickles’ taste. Also, it would make the brine dark and cloudy.
Flavoured vinegars
Rather, add the flavours you want with your selection of herbs and spices
Vinegars with an acidity below 5%
5 % of acidity is necessary to keep the food safely in the sour zone where certain (dangerous) bacteria can’t grow.
Water
I use our tap water for pickling, and it works just fine. However, if you live in a region where your tap water is highly chlorinated, or the house you live in has old (rusty) pipes that could leak iron, it’s best to carbon-filter your tap water before using it for pickling (or drinking or cooking for that matter).
If in doubt, taste your tap water. Smelling and tasting good? Then go on and use it for pickling. If it’s got a metallic or chlorine taste, filter it first.
Distilled water is NOT a good alternative, as – due to the lack of minerals – it tastes very bland and lets the pickles go mushy.
Flavour Enhancers and Spices
You can, of course, make pickles just with the above ingredients, and they’d taste good, but to enhance the flavour and transform your gherkins into a truly marvellous preserve, add spices and herbs.
The traditional herbs and spices for pickled gherkins are dill, peppercorns and mustard seeds, but try adding onions, garlic, bay leaves and tarragon.
Thyme and oregano are other herbs you can use.
If you want to experiment even more, include chilli flakes, juniper berries and/or fennel seeds.
Homemade Gherkin Pickles – Step by Step
Let’s dive in and make those yummy gherkin pickles!
Here are the ingredients you need for 3 – 4 jars of 500 ml:
1 kg gherkins 1 bunch of dill (including the flowers) 5 small laurel bay leaves 2 stems of savoury 2 stems of tarragon 1 tbsp peppercorns 1 tbsp mustard seeds 1 onion 800 ml water 400 ml white wine vinegar 50 g + 2 tbsp salt 250 g brown sugar
1. Sterilise your jars and lids by washing them with boiling water. Let them cool on a rack and dry them out.
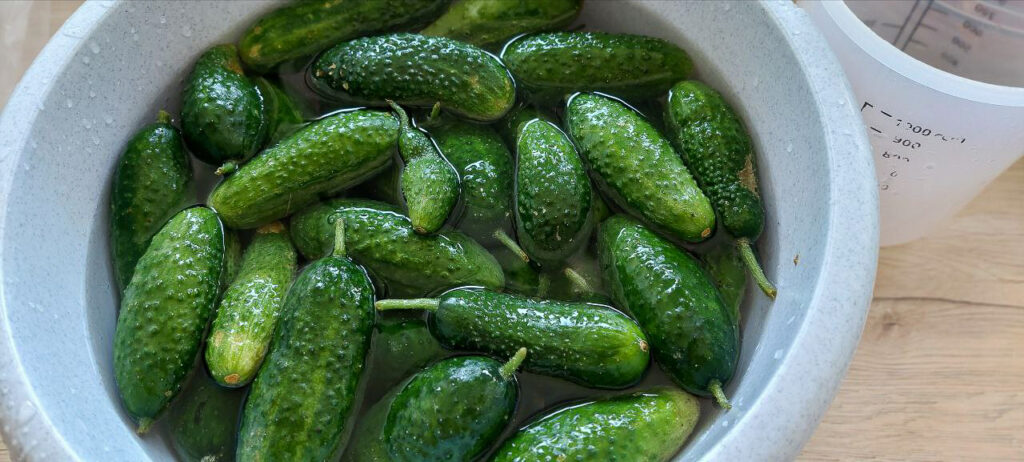
2. Wash the gherkins thoroughly. Put them into a bowl, mix 50 g salt with 1 litre of water and pour this brine over the gherkins. They should all be under the brine. Cover the bowl with a plate and let them rest for 8 – 12 hours, at best overnight.
This is an essential step. The salt will pull out water from the gherkins (i.e. dehydrate them) and thus help them stay crisp for a long time. Don’t skip this step!
3. The next day, pour off the brine and dry the gherkins with a cloth.
4. Now, cut off the blossom end (that’s the one where there’s no vine attached), because it contains certain enzymes that may lead to mushy gherkins. You can also cut off the stalk end, but that’s optional. I usually leave about 0.5 – 1 cm (0.2 – 0.4 in) of vine on the gherkins.
5. If the gherkins are very large, you may cut them into slices or sticks.
6. Wash and dry the dill and carefully remove the flower tips.
7. Wash and dry the savoury and tarragon.
8. Peel the onion and cut it into rings.
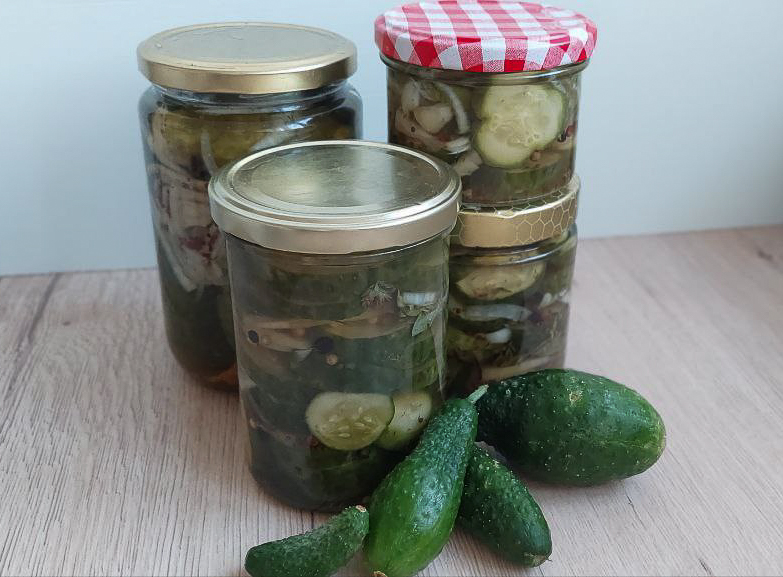
9. Layer the gherkins, herbs, onions and spices into the jars.
10. Put water, vinegar, 2 tbsp salt and sugar into a pot and bring the mixture to a boil. Stir until sugar and salt have dissolved.
11. Carefully pour the vinegar brine over the gherkins into the jars and close the lids immediately.
12. Let the jars cool down. Now you can either store them in the fridge for 2–4 months or preserve them in a water bath canner for 30 minutes at 90 °C. That way, the gherkins can be stored for at least a year.
Why this recipe stays crunchy
Freshly harvested gherkins give the crispest results.
Overnight salt soak removes excess water.
Removing the blossom end eliminates softening enzymes.
5% vinegar provides safe acidity.
How long before homemade pickles taste their best
Technically speaking, you can eat the pickles after 24 hours. However, they develop their best flavour after about 3 days. During this time, the herbs, spices and vinegar have enough time to penetrate the gherkins completely, giving them that typical sour, spicy flavour we love so much.
Angela Braun
Homemade Gherkin Pickles
Gherkin pickles are one of my favourite preserves and can be easily made at home. That satisfying crunch when you bite into a perfectly pickled gherkin can hardly be topped. And the best thing: you don't need many ingredients to make them. Just follow this simple, easy recipe.
Sterilise your jars and lids by washing them with boiling water. Let them cool on a rack and dry them out.
Wash the gherkins thoroughly. Put them into a bowl, mix 50 g salt with 1 litre of water and pour this brine over the gherkins. Let them soak in the brine for 8 – 12 hours, at best overnight.
The next day, pour off the brine and dry the gherkins with a cloth.
Now, cut off the blossom end. You can also cut off the stalk end, but that’s optional.
If the gherkins are very large, you may cut them into slices or sticks.
Wash and dry the dill and carefully remove the flower tips.
Wash and dry the savoury and tarragon.
Peel the onion and cut it into rings.
Layer the gherkins, herbs, onions and spices into the jars.
Put water, vinegar, 2 tbsp salt and sugar into a pot and bring the mixture to a boil. Stir until sugar and salt have dissolved.
Carefully pour the vinegar brine over the gherkins into the jars and close the lids immediately.
Let the jars cool down. Now you can either store them in the fridge for 2–4 months or preserve them in a water bath canner for 30 minutes at 90 °C. That way, the gherkins can be stored for at least a year.
How long do homemade pickles last?
Store your homemade pickles in the fridge for 2 – 4 months.
If you want to store them longer, put the jars in a water bath canner and can them for 30 minutes at 90 °C. That way, you can store them in the pantry or basement (no need for refrigeration) for up to one year. After that, they are still edible, but the taste will decline, and the gherkins will get mushy.
Once a jar is opened, put it in the fridge and consume it within two weeks.
Troubleshooting Common Issues
Sometimes, things go wrong, and your gherkins won’t taste the way you expected. Here are some common issues with gherkin pickles and how to fix them:
Texture Problems
Mushy pickles
One of the reasons for mushy pickles is that you likely skipped the dehydration step, where you let the gherkins sit in salt brine for several hours. This is an essential step; don’t skip it!
Another reason is that you used distilled water. As it doesn’t contain any minerals, it’s more likely that gherkins go mushy.
It’s also possible that you used too little salt. Or the pickles weren’t completely covered with brine. When they get air contact, the gherkins will become mushy
Flavour Issues
To maintain a good balance of acidic, sweet and salty, stick to the above ratio of vinegar, water, salt and sugar.
If you use too much vinegar, for example, you’ll get overly acidic pickles. Too little vinegar will result in a dull flavour and possible safety issues.
Too much salt will preserve the pickles well, but you won’t want to eat them due to their overly salty flavour. Too little salt, on the other hand, will leave the pickles bland.
Too much sugar and you’ll get gherkin sweets; too little and the taste will be very one-dimensional.
Safety and Storage Concerns
Watch out for any visual signs of spoilage like white scum on the surface, mouldy gherkins above the brine or a cloudy brine that has been clear before (although a little cloudiness can be normal). These pickles have gone bad, and you must throw them away.
Also, discard any pickled gherkins that have gone dark or slimy or if the jar lids are bulging.
If the gherkins’ texture has become mushy and slimy and they fall apart, you shouldn’t eat them anymore.
Also, watch out for any smell or taste that seems “wrong” or unpleasant.
Variations and Creative Recipes
There are (almost) endless variations for flavouring pickled gherkins.
Herbs
You can, for example, just use dill and onions for German-style dill gherkins, or you can add chillies or even jalapeños for hot pickles.
For French cornichons, add tarragon and pearl onions, and for an Asian variation, use rice vinegar and ginger.
Use caraway seeds, juniper berries and chervil for a Northern variation or Za’atar, sumac and preserved lemon for a Middle Eastern touch.
Vinegar
Experiment with different vinegars or even vinegar blends (see above).
You could even try out different vinegar strengths while maintaining the proper acidity for safety.
Sweetener
Replace the sugar with honey, maple syrup, agave or even molasses for different flavour notes.
Additional Vegetables
Who says that gherkins have to stay alone in the jar? Layer in onions, carrots, cauliflower or radishes with the gherkins.
Or add just fennel bulb slices. Or mix in green beans and asparagus. Get creative!
Liquids
Use part beer or white wine in the brine or, instead of water, use vegetable or herb-infused broth.
An interesting way to add more depth to the flavour is by including pickle juice from a previous batch.
Texture
Apart from mustard seeds, you could also add toasted sesame or other seeds for a bit of “pop”.
Also, experiment with different salt types like flavoured, smoked or sea salt. Just be careful that the salts don’t have any additives that may harm the brine.
Frequently Asked Questions
Can I pickle regular cucumbers instead of gherkins?
It’s possible, but the result won’t be the same. Cucumbers have a higher water content which makes them mushier and the flavour watered down. Additionally, cucumbers require a longer pickling time to develop their best flavour and level of crunchiness.
Why aren’t my homemade pickles crunchy?
There are different reasons:
You haven’t cut off the blossom end of the gherkins. They contain enzymes that make the pickles go mushy
You haven’t soaked the gherkins in salt water before pickling. This soaking process dehydrates the cucumbers slightly, making them stay crunchy for a prolonged time.
You used too little salt
You used distilled water instead of tap water.
Do I have to soak gherkins overnight?
Yes, if you want crunchy gherkin pickles. It won’t affect the flavour and storage time, though, if you skip that step.
Can I reduce the sugar?
You can reduce the sugar slightly, but don’t remove it completely. Sugar contributes to the flavour and helps balance the acidity of the vinegar. If you prefer less sweetness, reduce it gradually until you find your preferred balance.
Can I reuse pickle brine?
You can add the brine to a salad dressing (instead of pure vinegar), cocktail or barbecue sauces and even in drinks.
Do homemade pickles need to be refrigerated?
When they’ve been properly made and the lids are sealed, there’s no need to refrigerate your homemade pickles. Once a jar is opened, however, put it in the fridge and consume it within two weeks.
Why are my pickles floating?
That’s perfectly normal. As long as they’re covered by the brine and don’t show signs of spoilage, they’re safe to eat.
Join my newsletter for seasonal preserving recipes, fermentation guides and gardening tips.
Serving Suggestions and Uses
How can you use gherkin pickles now?
Well, apart from the classic pairing with sandwiches, burgers, or charcuterie boards, gherkin pickles add depth to a potato, egg or chicken salad.
Chop them into relishes, remoulade or aioli.
Gherkin pickles are an essential ingredient for German “rouladen” (beef rolls) and can be wonderfully included in stuffing for poultry or pork as the acidity cuts the richness.
You can even use the brine in cocktail sauces or barbecue sauces or as a vinegar replacement in salads. Or drink it straight as an electrolyte replacement or mix it with beer for a “pickleback” style drink.
Conclusion
Buying gherkin pickles is a fast solution when you’re pressed for time, but making them yourself not only gives you numerous flavouring possibilities but the certainty of knowing what’s inside the jar – and, more importantly, what’s not. Once you’ve found out that it’s actually quite easy to make gherkin pickles at home and how great they taste, I promise you’ll never touch the store-bought version ever again!
As long as you stick to the ratios of vinegar, salt, sugar and water, you can start experimenting with different flavours. From mild and deep to hot and spicy, everything is possible!
Just keep in mind to pickle only gherkins without any blemishes and harvested no longer than a few days ago.
The most important step to follow is soaking the clean gherkins overnight in a salt brine to slightly dehydrate them, making sure that they stay crunchy when preserved. Also, remove the blossom end of the gherkins (the end without the stem) as it contains an enzyme that lets the gherkins go soft and mushy.
Easy, right? So, what are you waiting for? Get along, grab some gherkins, jars and the few ingredients you like and start pickling your very first (or second, or third) batch of gherkins!