It’s summer at last! Everything we’ve wished for during those dark, cold winter months comes true now: seemingly endless days, sunshine, bird song, and more than all, blooming flowers and fertile vegetables. In July, our main goal is to keep the garden healthy, productive and under control. Now we’ve got to make sure that our gardens stay on top. It may seem overwhelming to check our plants regularly and give them whatever they need right now, but we’re also rewarded with huge harvests. And don’t worry: small, consistent tasks, maybe in the early morning or late evenings when it’s gotten cooler, are usually all our garden needs right now.
Think of your garden as an athlete in peak season. After all the growth of spring, plants are now putting enormous energy into producing flowers, fruits and seeds. A little extra care now pays off with bigger harvests later.
In July, we’ve reached the middle of summer, and regularity is what our garden needs right now. While in spring I only went to my garden every few days, now I’m checking on it constantly. I’ll go there in the early mornings before work, open the windows to the greenhouse (if I have closed them at all) and do a quick check on pests or diseases I need to tackle. In the evenings, when it has finally cooled down a little, I spend my time on weeding, watering, mulching and – yeah! – harvesting.
Let’s see what other gardening jobs we’ve got to do in July:
July Garden Checklist: Essential Tasks at a Glance
If you only have time for a few things, focus on these essential July garden tasks:
Feed heavy-feeding crops
Stake and support fruiting plants
Water deeply during dry spells
Sow vegetables for autumn harvests
Mulch beds to conserve moisture
Harvest and preserve regularly
Here’s a quick overview of the most important garden tasks to tackle in July:
Garden task
Best Time in July
Priority
Staking plants
When plants bear fruits
High
Pruning tomatoes and cucumbers
When suckers form
Medium
Checking for pests and diseases
Every second day
High
Watering
When soil is dry
Medium
Mulching
When plants are about 10 cm (4 in) high
Medium
Weeding
Twice a week
Medium
Fertilising
Every 2 - 3 weeks
High
Harvesting
When plants are ripe
High
Preserving harvest
After harvesting
High
Sowing and planting
After gaps form due to harvest
High
Want a printable version?
Download the free July Garden Checklist and keep it with you in the garden.
If you’re transitioning from early summer, you might also want to revisit the tasks from June. Many jobs started last month continue now — especially fertilising and mulching. → Continue from last month with my June Garden Tasks checklist.
What to Sow and Plant in July
July is still a good time to sow vegetables directly outdoors to prepare the autumn harvest.
Direct sow outdoors
Good vegetables to sow in July include:
Swiss chard
Bush beans
Pole beans
Spinach
Radishes
Rocket salad
Fennel
Cabbages
Transplant outdoors
You can also plant cabbage plants like cauliflower, Brussels sprouts, broccoli and kohlrabi, as well as zucchini and leek.
Now that we’ve covered that, let’s see what garden tasks are important in July:
1. Staking plants
✔️ Why it matters: Staking supports fruit-bearing plants
If you haven’t already done so, it’s high time now to stake fruit-bearing plants like tomatoes, peppers, cucumbers and zucchini. Otherwise, they’ll collapse under the weight of their fruits and leaves. For peppers and zucchini, I always use wood rods that I stick into the earth next to them. Then I bind the plants with a string around the rod to keep them upright.
For tomatoes that grow outdoors or in pots, I either have long wood rods or metal spiralling rods. You could also build a cage with rods and wire or use ready-made cages. In the greenhouse, I fix a string at the base of the tomato plant and lead it upwards to the ceiling.
No matter which way you choose, make sure that with increasing weight, your plants are securely fixed to the stake.
2. Pruning tomatoes
✔️ Why it matters: Pruning helps tomatoes form more fruits and stay healthy.
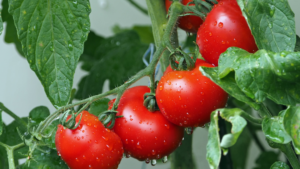
Every time we turn our backs on our gardens, even if it’s only for a second, our tomatoes seem to shoot out new suckers from their leaf axils. If you want to induce the plant to produce many fruits instead of leaves, you must remove these suckers before they get too large. Over here, you’ll find a detailed guide on how to grow tomatoes.
3. Remove side shoots from greenhouse cucumbers
✔️ Why it matters: If you let them, greenhouse cucumbers will produce many side shoots to strengthen their build and help them grow as broad as they can. We, however, want them to produce more fruit. When we cut off the side vines, the cucumber plants can put all their energy into building more fruits instead of forming new vines and leaves.
🌿 Gardener’s Tip: Leave only one to two cucumber stems
4. Check regularly for pests and diseases
✔️ Why it matters: Pests and diseases can destroy your plants, sometimes overnight.
An important garden task in July is checking our vegetables regularly (at best daily) for pests and diseases. Nothing’s more devastating than finding a plant that we’ve started from seed and nurtured, wilted and dead because we didn’t pay attention. We haven’t invested all that time and energy to see our babies be either eaten off overnight or die from some disease. The earlier we detect possible harm, the better the chances of protection.
🌿 Gardener’s Tip: Check regularly for pests and diseases
5. Water thoughtfully
✔️ Why it matters: All plants need water to survive and thrive.
Although some summers can be quite rainy, it’s usually hot and dry in July. To keep our plants not only alive but thriving, we need to water them – but thoughtfully.
Instead of watering every day a little bit, it’s better to water once or maybe twice a week thoroughly. The water must really go down to the roots and moisten the deeper layers of the soil instead of only the surface. That way, the plants’ roots grow deep and gather water from even deeper regions – which means we have to water less.
This is not valid for plants in containers and raised beds, though. Due to the smaller space and soil amount, they can dry out a lot faster. Water your raised beds at least every other day and your containers at least once a day. If it’s really hot and dry, even more often.
🌿Gardener’s tip: The best time for watering is in the morning.
When we protect the soil, though, we don’t need so much water.
6. Mulching
✔️ Why it matters: Mulching keeps the soil moist and suppresses weeds
As soon as my plants are about 10 – 15 cm (4 – 6 inches) high, I cover the soil between them with mulch. I either use (dry!) grass clippings, (old) hay, straw or leaves. Other good mulch material is wood chips that have the additional advantage of being avoided by snails and slugs.
🌿 Gardener’s Tip: Add dry grass clippings, hay, straw or leaves as mulch.
7. Weeding
✔️ Why it matters: Weeds compete for nutrients.
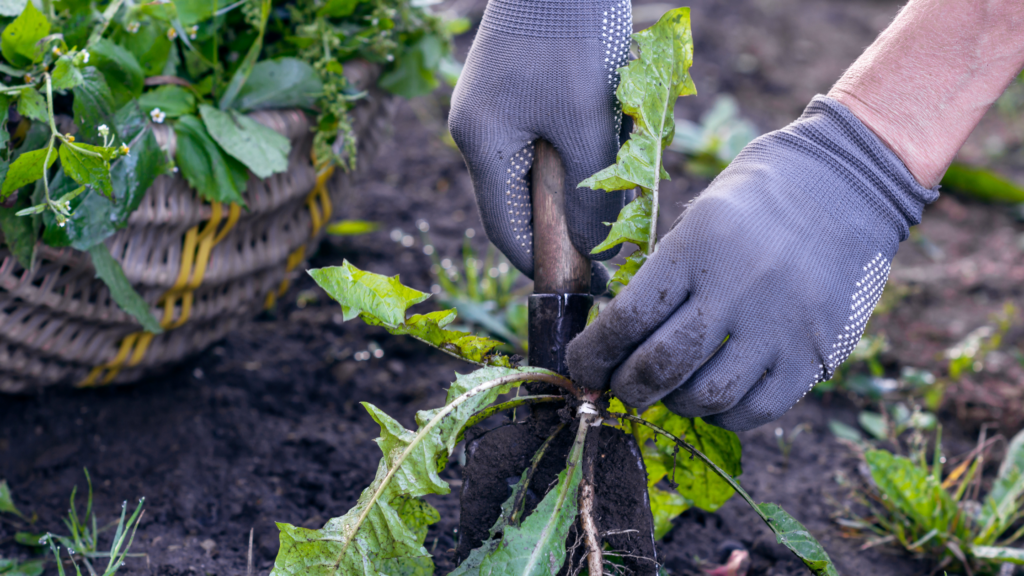
Mulch is a good way to suppress weeds, but sometimes it’s not enough, and we have to weed regularly before dandelion, couch grass, and nettles get the upper hand. As plenty of weeds are edible, you should consider making a pesto from them (for more, see this article). From nettle, dandelions and horsetail (and some more), you can make liquid manure as a fertiliser for your plants. Read here how to make nettle manure.
🌿 Gardener’s Tip: Rip weeds out as soon as they occur.
8. Fertilise heavy feeders
✔️ Why it matters: Heavy-feeders need a lot of nutrients to produce an abundant harvest.
With the long days, sunshine and warmth, our vegetables now have optimum conditions for growing, but especially the heavy feeders like cabbage, tomatoes, peppers, cucumbers, zucchini and pumpkins need food. In fact, picture them as a bunch of ravenous teenagers that can eat almost 24/7. The good news is that you don’t have to provide “food” that often. In fact, the best schedule is to fertilise them every 3 – 4 weeks, and medium-feeders every 4 – 5 weeks.
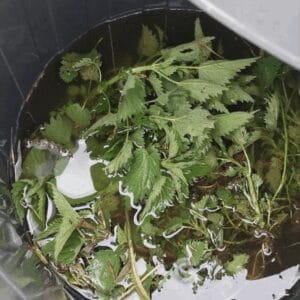
While we’ve added some long-term fertiliser when we planted them out in spring, now they need some easily accessible food. For that reason, liquid fertiliser is best as the plant can use the nutrients almost immediately. A quick and easy way to prepare liquid fertiliser at no cost is this homemade nettle manure.
✔️ Why it matters: Vegetables harvested at the right time taste better, stay tender, and encourage plants to remain productive.
Some gardeners, especially beginners, tend to harvest their vegetables too late. The result: kohlrabi and radishes, for example, become fibrous, lettuce and spinach bolt and cauliflower turns brown.
Harvesting regularly also induces the plant to grow more fruits, leaves or whatever we cultivate it for.
10. Harvesting seeds
✔️ Why it matters: Saving seeds saves money and preserves heirloom varieties.
Some vegetables like early lettuce, spinach or last year’s leek will bolt in the summer heat and form blossoms. You could rip those plants off, of course, but why not let them flower and harvest their seeds for the next year? It’s actually a very easy way to get lots of seeds from plants that have already proven to be adapted to your garden’s microclimate and conditions. And it makes us (at least partly) independent from large seed companies.
To harvest the seeds, let the plants flower and wait until the seeds that form after pollination are dry and rustle in their hulls. Carefully harvest them and, if necessary, dry them at home. When the seeds are completely dry, you can store them in paper bags or small jars in a cool and dark place. Remember to label them!
🌿 Gardener’s Tip: Save seeds on a dry day.
11. Harvest onions and garlic
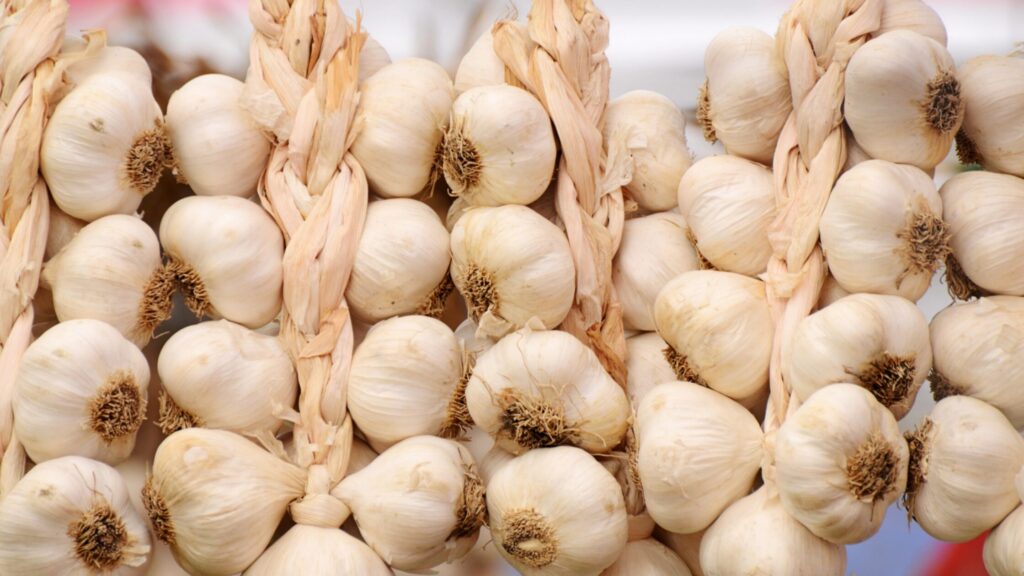
✔️ Why it matters: Onions and garlic are now ready to be harvested. When about half to two-thirds of the leaves have yellowed and fallen over, you can take them out of the ground. Harvest onions and garlic on a dry and sunny day to keep them as dry as you can. In fact, we’ve got to cure them for a few weeks after harvesting to make sure they’re dry enough for storage. After all, the goal is to store onions and garlic until the next harvest.
To cure onions and garlic, I usually bind 5 – 10 of them together at the stems and hang them in the greenhouse for a few weeks. You can also hang them somewhere indoors or under a dry roof overhang without direct sunlight, or you can cure them by laying them on racks. When your onions and garlic are completely dry, you can twine the stems into braids and store them in a cool, dark place, for example, your basement.
When your garlic has formed flowers, you can take the bulbils at the blossom to grow further garlic. It’ll take two years, though, instead of one.
✔️ Why it matters: Herbs are now at the peak of their flavour.
It’s so easy to become self-sufficient with herbs. Even if you don’t have a garden, patio or balcony, you can cultivate herbs. A windowsill on a sunny window is enough. It’s a satisfying feeling to have all the herbs you need all year round from your own patch – even if that patch is just a pot on your kitchen sill.
The best time to harvest herbs is in the late mornings when the dew has evaporated, and the essential oil concentration is highest, but honestly, if you can only harvest them in the evenings, that’s okay, too. It’s better to harvest them at all, instead of waiting for the perfect moment and having no harvest at all.
✔️ Why it matters: Preserving makes our harvest last throughout the year
Usually, by now we can harvest so much that we can’t eat it all immediately. Now, my friends, it’s time to preserve what we’ve grown for the winter months (*gleefully rubbing my hands*).
If you want to check your fermentation equipment, here’s a list of what you really need (hint: it’s less than you may think and definitely nothing fancy).
14. Assess your pantry
✔️ Why it matters: Check how much you need of each preserve
Before we start preserving, take a moment to review your pantry and look at what’s still in there from last year. Maybe you (like me) still have some jars of fermented gherkins left, which shows you that you may not need as many as you made last year. Or you’ve been out of tomato sauce since February, and that means you definitely need more of it.
Write these insights down for your next garden plan.
15. Cook jam from fruits and ferment vegetables
✔️ Why it matters: Preserve fruits and vegetables for the winter months
In my eyes, there’s nothing more rewarding than a homemade jar of strawberry jam or a crock of sauerkraut made from vegetables you’ve grown yourself! And now’s the time to do so. Get your gear ready, sterilise your jars and stir the pots or – in case of fermentation – get your weights and salt ready.
If it’s too much to tackle now, freezing is also a good option. Just bear in mind that while you can still make jam from frozen berries, you can’t ferment anything from once-frozen vegetables.
16. Prepare your garden for YOUR vacation
✔️ Why it matters: Make sure your garden survives when you take time off.
If you plan to go on vacation in July, make sure your garden survives. Now, the best solution is a fellow gardener who tends to your garden as thoroughly as you would, but let’s be honest: the larger your garden, the fewer volunteers you’ll get.
So, before you leave, harvest anything ready now and, if you can, preserve it for later. Water your garden deeply so that the soil contains as much moisture as it can. Mulch the patches to keep the soil from drying out, and implement a watering system that keeps your plants alive until you’re back.
17. Sowing and planting
✔️ Why it matters: Sowing and planting in July prepare our autumn and winter harvest.
What we sow and plant in July, we can harvest in autumn. So, wherever there’s a gap in the patch where we’ve harvested something, let’s fill it up with seeds or seed-started plants.
That way, we cannot only harvest continually but also keep the soil covered. This will suppress weeds and keep the soil moist. For a quick overview of what to sow now, check the list above or read this comprehensive list of vegetables we can sow and plant in July in our garden beds.
🌿 Gardener’s Tip: Keep seed-starting indoors so that you have ready plants when gaps arise.
Frequently Asked Questions About Gardening in July
What vegetables can I still plant in July?
Many fast-growing vegetables can still be sown in July, including Swiss chard, bush and pole beans, radishes and rocket salad. July is also ideal for succession sowing to extend harvests into autumn.
Can I still start a vegetable garden in July?
Yes. While spring is the traditional planting season, many fast-growing vegetables such as radishes, rocket, spinach and Swiss chard can still be sown in July. You can also plant young brassicas and leeks for autumn harvests.
Why are my cucumbers flowering but not producing fruit?
Poor pollination, heat stress, inconsistent watering or nutrient imbalances can reduce fruit production. Greenhouse cucumbers may also require pruning to direct more energy into fruiting.
Should I prune tomatoes in July?
Most indeterminate tomato varieties benefit from regular pruning. Removing suckers improves airflow, reduces disease risk and helps plants focus on producing fruit rather than excessive foliage.
What can I harvest in July?
Depending on your climate, July harvests may include lettuce, spinach, peas, beans, zucchini, cucumbers, onions, garlic, herbs, berries and the first tomatoes.
Is it too late to fertilise vegetables in July?
No. July is one of the most important months for feeding hungry crops. Tomatoes, cucumbers, squash and cabbage continue to need nutrients while producing flowers and fruits.
Common July Gardening Mistakes
Mistakes can happen, even when you’re an experienced gardener. To help you prevent them, I’ve listed the most common mistakes:
Forgetting to harvest regularly
Many vegetables become tough, fibrous or overripe if left too long. Frequent harvesting keeps plants productive and improves flavour.
Letting greenhouse temperatures soar
Greenhouses can become dangerously hot in July. Ventilate daily and provide shading if necessary to prevent heat stress.
Leaving soil exposed
Bare soil dries out quickly during summer. Mulch helps retain moisture, suppresses weeds and protects soil organisms.
Skipping pest inspections
July is peak season for aphids, caterpillars, spider mites and fungal diseases. A quick daily inspection can prevent major problems.
Neglecting succession sowing
Many gardeners stop sowing once summer arrives. However, July is an excellent month for planting crops that will provide autumn harvests.
Preserving too late
Summer harvests arrive quickly. Waiting until produce piles up can lead to waste. Preserve little and often to stay ahead of the harvest.
🌿 July Gardening Summary
In July, focus on:
Watering, mulching and fertilising actively growing plants
Harvesting and preserving what’s in season
Monitoring for pests and diseases
Closing gaps in the beds by sowing and planting autumn veggies
Each month builds on the previous one in the garden, and following seasonal rhythms makes gardening simpler and more productive year after year.
Why July Garden Tasks Matter
Now it’s all about providing enough food and water for our vegetables so that they can thrive and produce an abundant harvest throughout summer. The next step lies in preparing our harvest for autumn by sowing and planting as soon as we get gaps in the patches. But although this may be a busy time for us gardeners, we are also well rewarded by everything that we can harvest – and hopefully preserve – in July. Whether it’s a bunch of herbs, a bowl full of fruits and berries or a basket of lettuce, broccoli, tomatoes, zucchini and cucumbers: every humble plant we can put into our mouth gives us gratitude for what grows on our beautiful earth and the satisfaction that we are a part of it, too.
🌿 Enjoy slow seasonal gardening?
Join my newsletter for monthly garden guidance aligned with nature’s rhythm.
Can’t get enough of gardening? These articles may also interest you:
These July reflections are part of the Seasonal Reflections series — a year-long practice of living with the rhythm of nature.
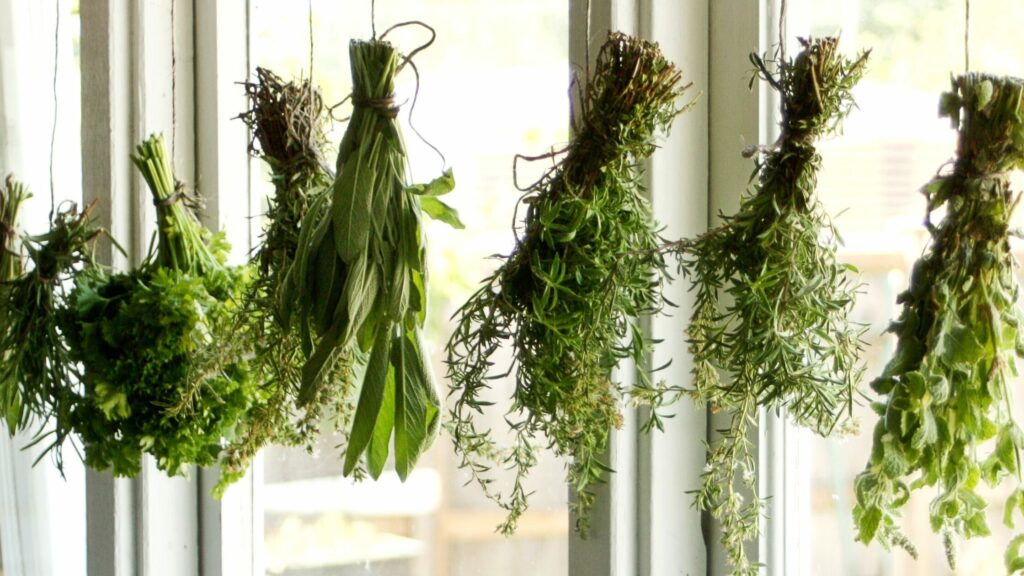
July means harvest. The first great wave of abundance brings us fresh food for the table—and enough to preserve for the months ahead. Fruits, vegetables and herbs pile up and wait to be processed. Herbs dry on racks or hang in bundles from the ceiling; bowls of currants, raspberries and gooseberries are ready to be cooked into jams, and the first tomatoes are patiently waiting to become tomato sauce for the winter months.
👉 In these July reflections, we’ll explore seasonal living in July — from the garden and kitchen to simple ways of making the most of early summer.
As much as we need to preserve July’s abundance, the garden is calling us back at every time of the day. We rarely go back inside, except to store our harvest, quickly check the time or seek shelter from a passing summer thunderstorm.
Our life now happens outdoors, in the vast green rooms of our gardens: at the campfire, on a patio, on a pond or paddling pool, in the vegetable garden or the orchard where we snack like mad on as many fruits as we can eat.
July is the month when the walls of the house seem to disappear. Meals move outside. Conversations move outside. Work moves outside. Even sleep sometimes moves outside. We only return indoors to preserve the harvest, escape a passing thunderstorm or fetch something before stepping back into the summer again.
Some nights I find myself with all the harvest treasures in the kitchen – the days are too precious to waste on kitchen work now. Then, I cook jam and ferment garlic or make pesto that I freeze in portions.
As a little girl, I dreamed of growing so many fruits and vegetables that I would have enough throughout the whole year. And now I’m living that dream. What a luxury!
🏡 Home rhythms: linen, roses, decorations with grain
🧘 Seasonal rituals: campfires, swimming in the sea, a lake or river, sleeping outdoors
Nature in July
The village I live in is surrounded by meadows and fields. In June, I could watch the farmers making hay, and now, in July, they’re beginning to harvest the first grains. Winter wheat and barley are ripe now, and all of a sudden, the harvesters are everywhere.
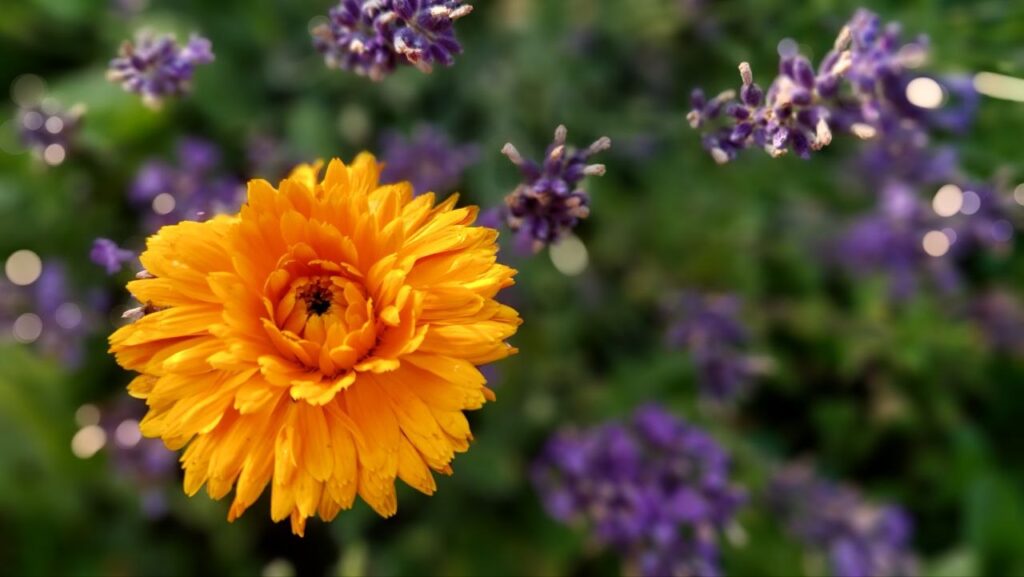
The edges of the fields and tracks are blooming with wild herbs like Saint John’s Wort, yarrow and mugwort and in the gardens, roses, delphinium and lavender paint the scenery.
In the vegetable garden, beans are ready to be harvested now. I make a bowl of salad for us every single day, and the first tomatoes and cucumbers are ripe as well.
It’s so satisfying to take a stroll through the greenhouse and snack on sun-ripened, warm tomatoes right from the plant.
Afterwards, I “check” the blueberries to see whether they’re ripe as well. They usually are.
To be fair, the salad bowl I mentioned is mostly for my boys, as I’m usually well-fed when I come home from the garden 😏.
July Garden Tasks
Apart from harvesting, which is a huge task now in July, watering and feeding come closely behind in second place. All the heavy feeders like cabbages, cucumbers, tomatoes, pumpkins, zucchini and peppers need plenty of nutrients now to produce fruit and thrive. For that reason, we must feed them every 2-3 weeks, at best, with some liquid fertiliser which provides readily available nutrients. Homemade comfrey or nettle manure are an inexpensive way to transform weeds (or wild herbs, if you prefer) into something useful.
There are, of course, rainy summer days, but usually we have quite a dry and hot summer here in Bavaria. That said, I check the soil in my garden daily and water deeply every 2 – 3 days during dry spells.
Talking of checking: pests and diseases are always on my watch list. The earlier we spot them, the higher our chances of defeating them. This is easier with pests, but also many diseases can be, if not cured, then at least contained so that they don’t spread.
Sometimes, after very hot and humid days, a thunderstorm forms. So let’s step inside, watch the spectacle from within and see what we can do indoors.
Seasonal Living in July: Kitchen and Home
Preserving season is in full gear in July. Raspberries, currants, blueberries and gooseberries are ripe now and crave to become jams. Herbs are at their most aromatic now and are perfect for harvesting before they begin to flower.
The classic way to preserve herbs is by drying them, but there’s a lot more: I make lots of pesto, for example. Other herbs, I mix with olive oil and freeze them in ice cubes to add later to sauces, soups or pasta. If you want to learn more about how to preserve herbs, this article will teach you six methods to do so.
The first beans are ready to be picked, and the harvest is usually larger than we can eat right away. Great ways to preserve them for winter are by canning them in jars or by blanching and freezing them.
Zucchini can now get the upper hand in our garden, and as soon as we turn our backs on them, they sprout more and larger fruits than before. I love to put all this abundance in a jar of zucchini pickles, mixed with homegrown peppers and onions. Check out the recipe for zucchini pickles here, it’s delicious!
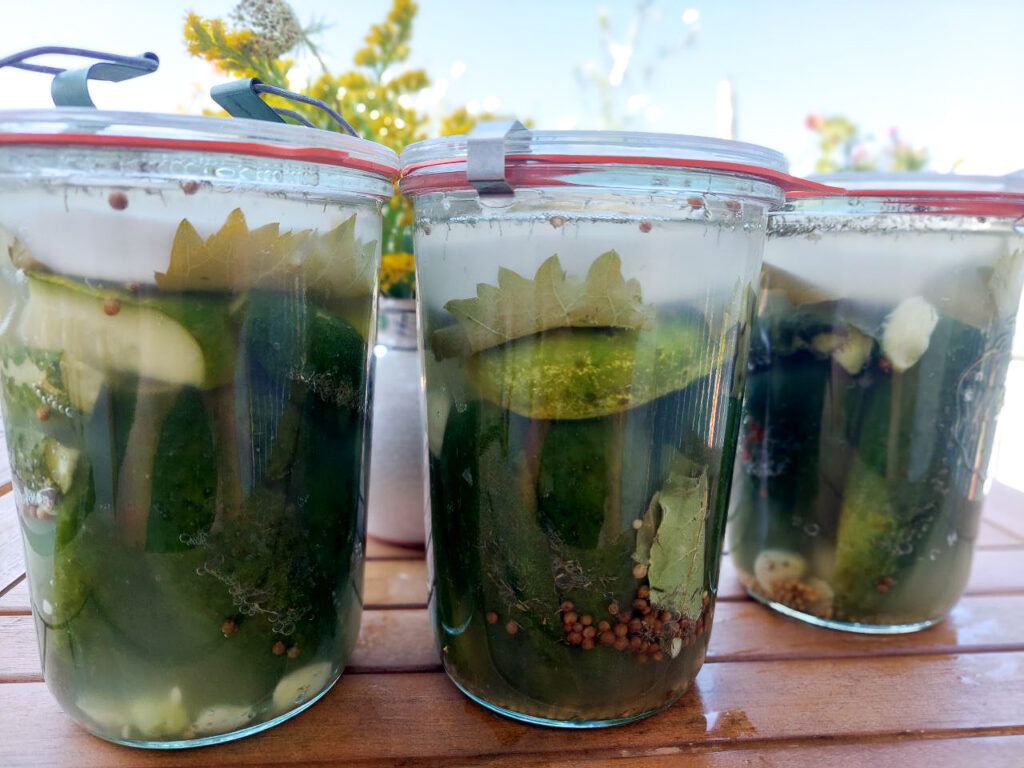
If you cultivate pickling gherkins in your garden, now’s the time to get them in. Gherkins are best harvested when they’ve not yet reached their full size. You can either pickle them in a vinegar brine or you ferment them. Find the recipe for pickled gherkins here and the one for fermented gherkins in this article.
July Self-Care Ideas
July is the peak of summer – and if we were to split a year in half, July is diametrically opposite to January. Remember that time? Like seeds, we had stored our energy tightly within ourselves, waiting for the right time to germinate and sprout again. Now, in July, we distribute that same energy outwards in bursts of productiveness, joy and pure summer “high”.
Although we feel more energised now than in January, we must make sure not to burn out – figuratively and literally.
Self-Care for Body…
It’s often a challenge in July to get a good night’s sleep. When temperatures have been high for several days, our houses not only absorb that heat but also keep it in. My family and I sleep with all the windows and doors open at night, but I know that’s not possible for everyone.
It’s all the more important then, to get some sleep during the day. And what better way to enjoy a nap than outdoors!
I often head to the river Lech right after work and jump into the water to cool down. Afterwards, I take a short nap in the shadows. There’s nothing more refreshing than sleeping outside, well cooled after a swim and drifting off to birdsong.
In the heat, it’s important to eat lightly, too. Salads, pasta dishes, pizza and quiches with lots of vegetables are now a good, light source of nutrition. And don’t forget to drink!
… For Mind…
Seeing as I’m working in a school, July is a very busy month for me, what with the school year coming to its end.
Apart from looking after my body and making sure I eat healthily and get enough sleep, I also need to calm my mind. Look, I’m kind of an overthinker, and my brain has at least 50 tabs open at the same time. On normal days. In July, it’s about 130. What helps me calm down mentally is working with my hands: weeding, watering the garden, chopping beans, fermenting gherkins, spinning wool I got from my garden neighbour and trying to make cords to bind my tomatoes.
It’s not about doing nothing. It’s about directing all that energy into my hands, letting my thoughts settle while the work gets done.
In the evenings, I love reading. It’s mostly light books now, cosy crimes (I’m a huge fan of the “Nosey Parker” series by Fiona Leitch, for example), but also non-fiction. I’ve recently started to re-read “The Golden Thread” by Kassia St. Claire, a wonderful book about how fabric changed the world.
And there are the open airs in July! Here in Augsburg, we have the “Fronhof Konzerte”, a series of concerts in the beautiful gardens near our cathedral. The cool thing about them is that you CAN buy a ticket and sit near the stage, but you don’t HAVE to. Because right behind the fence, there’s an open meadow where people sit on their picnic blankets (sometimes sharing a pizza and some wine) and listen to the wonderful classical music performed by the orchestra and singers. If you happen to be in Augsburg in July, attend these concerts!
…And Soul
Go outside every minute you can. If it’s really hot during the day, we can sit outdoors for a long time in the evenings and sometimes even at night. On very hot summer nights, I sometimes sleep on the balcony. It’s a marvel to watch the sun set and experience the lighter darkness outdoors, the sky illuminated by millions of stars.
In the morning, I get woken by bird song long before I can detect any sign of sunrise, but the birds with their fine radar know when it’s time to start singing. If you’ve never slept out in the open, give it a try. It’s one of those experiences that stays with you.
July is also a great time to invite friends over for a barbecue or garden party. Anything outdoors that lets us soak in the sun. To minimise the effort, ask everyone to bring something to eat, like a salad or a dessert. That way, no one gets overwhelmed or burned out, and everyone can enjoy the gathering with minimal effort of preparation.
July is what we waited for
Even though it can be demanding, July also invites us to enjoy it to the fullest. Now is the summer we dreamed of during those long, dark, cold winter months. All the energy that we had bottled up then can’t help but burst out into the open now!
We don’t just live in more light—we seem to become lighter ourselves.
The days may already be getting shorter, but we don’t notice it yet. This is the feeling of “endless summer” we crave so much throughout the year.
Let’s soak up every minute, get outside as often as we can, pause from time to time, look around and be grateful for a wonderful time. Autumn will come soon enough. Let’s make the most of these wonderful summer days while they last.
If you’d like to walk through the seasons with me, I’d love to welcome you to the Seasonal Simple Life newsletter. Every few weeks I share new seasonal inspiration, recipes, gardening tips and simple ways to slow down and enjoy the time of year we’re in.
Come along, and let’s celebrate each season together.
If you’d like to keep walking through the seasons, you’ll find the rest of the Seasonal Reflections series below.
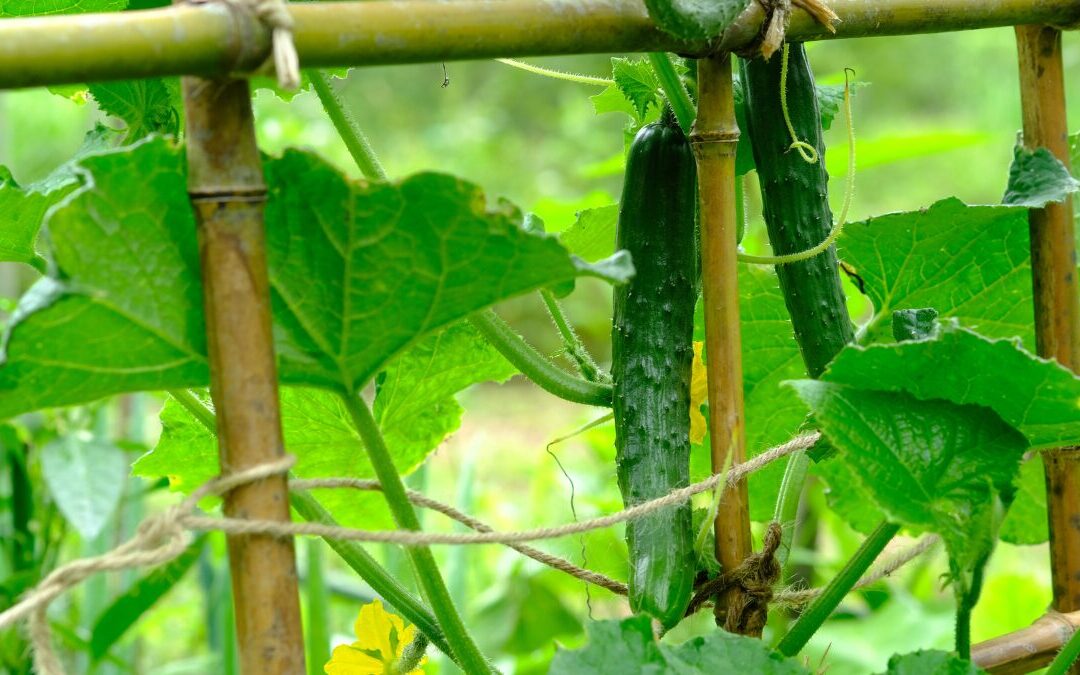
Cucumbers are popular veggies to grow in our gardens. They quickly develop an abundance of green leaves, then yellow flowers follow, and soon afterwards we can watch tiny cucumbers growing. When the plants are content, they produce fruit continuously. Until something bothers them. Then the harvest – as well as often the whole plant – goes south. Except when we discover soon enough when something’s wrong and help our plants quickly.
By following some basic principles and keeping a close eye on our plants, we can often prevent most diseases before they ever take hold.
And in the unlikely case our cucumbers get infected, it’s good to determine the cause. The sooner we identify the culprit, the better we can get rid of it.
In this guide, I’ll walk you through the most common diseases that affect cucumber plants, how to identify them, and what to do if they appear. You’ll also learn how to prevent serious infections in the first place — so your plants stay strong and productive throughout the season.
I’ll cover:
Identification: How to recognise each disease and the damage they cause
Prevention: Garden practices that reduce disease pressure
Treatment: Organic, as far as possible
For a better understanding, I’ve grouped the diseases by their cause, that is, whether they’re caused by fungi, viruses, or bacteria.
Quick Overview: Cucumber Diseases at a Glance
If you’re in a hurry, this table gives you a quick overview. Scroll down for detailed identification and treatment advice.
Leaf structure: Firm and elastic, no dry spots or discolourations
Growth: The plant grows regularly and evenly
Roots: Healthy root structure is firm and white
Blossoms: When plants bloom, their blossoms are fresh and firm
Hygiene
One of the most effective ways to prevent diseases from spreading is by washing your hands. Yes, just like in the kitchen.
Furthermore, when plants are already infected, I recommend disinfecting all gardening tools.
Choose resistant varieties
Seed manufacturers advertise resistant varieties, so next time you browse the seed catalogues, look out for that characteristic.
When you’re buying plants in a nursery, ask them what varieties are particularly resistant.
Watering
Cucumbers want constantly moist (but not wet) soil. Water them regularly every few days or when necessary, and only in the mornings. That way, the leaves can dry off during the day. Prolonged moisture on the leaves creates ideal conditions for fungal diseases.
Only water the soil around the plant and avoid splashing the leaves.
Good container drainage prevents many diseases — especially when growing cucumbers in pots.
Good air circulation
Especially in greenhouses, the climate can get very hot and humid on summer days. It’s essential, therefore, to guarantee good air circulation by opening the windows and maybe even the door.
The air not only cools down the temperature but also dries off the dew from the plants.
If the plants grow too many leaves, it can be advisable to remove some of them to let the air flow more smoothly around the plant.
Spacing and trellis
Observe the right spacing between cucumber plants and rows to ensure adequate air circulation.
Also, cucumbers are climbers, which means they need a trellis they can grow up. That way, the leaves are off the ground and dry off more easily.
Check for diseases
Regularly check for diseases. The sooner you spot an infection, the easier you can prevent it from spreading.
In my experience, early detection is far more effective than aggressive treatment.
How to Tell Diseases Apart from Pests
I know how it is: on your routine control, you discover a plant that’s obviously suffering from something, but how do you know whether it’s from a pest or a disease?
Several signs will put us on the right track.
Signs it’s a disease (not pests)
No visible insects or slime trails
Spreading spots or patches
Wilting despite adequate water
Mould or powdery coatings
Rotting stems or fruits without an obvious cause
Signs it’s a pest (not disease)
Visible holes with clean edges
Insects visible on the plant
Sticky residue
Webbing
Slime trails
Here’s how to identify diseases and manage the most frequent problems.
Not sure what’s wrong with your plants?
Get seasonal gardening tips, troubleshooting guides and preserving inspiration delivered straight to your inbox.
How to identify diseases quickly
Now that we know how to grow healthy plants and tell apart diseases from pests, let’s see which common diseases can affect cucumbers. It’s important to identify them as soon as possible so that we can quickly take measures against them.
Symptom
Most Likely Cause
Severity
White Powder on Leaves
Powdery Mildew
🟡 Serious but manageable
Yellow angular spots
Angular leaf spot or downy mildew
🔴 Remove plant immediately
Plants wilt despite watering
Fusarium or Verticillium wilt
🟡 Serious but manageable
Mushy fruit with foul smell
Bacterial soft rot
🟡 Serious but manageable
Grey, fuzzy mould
Grey mould
🟡 Serious but manageable
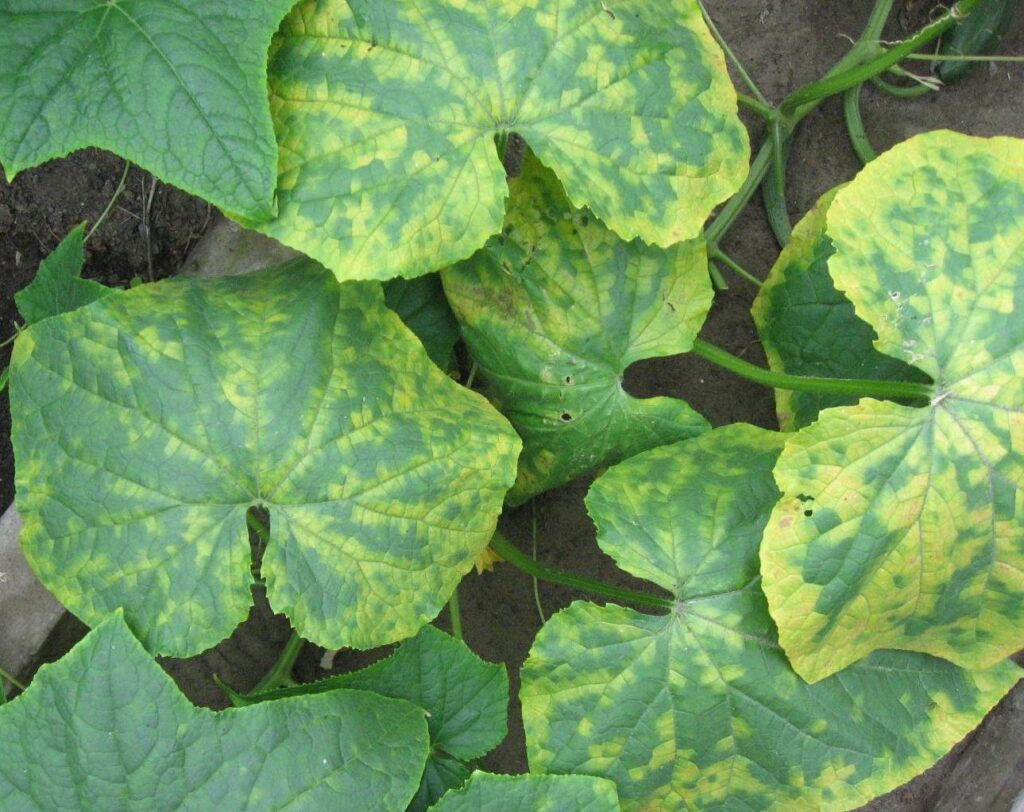
Deformed leaves and patchy fruits
Cucumber mosaic virus
🔴 Remove plant immediately
Fungal Diseases Affecting Cucumbers
General Rule
If a cucumber plant is infected with a fungal, viral or severe bacterial disease, remove it immediately and dispose of it in household waste rather than composting it.
Damping-Off
This fungal disease only affects seedlings and young plants. The stems look thin and water-soaked at the bottom, and sometimes white fluffy mould forms at the base. Eventually, the plants collapse at the soil line and die.
Damping-off often spreads very quickly and infects the entire seed tray.
How to prevent it:
Use sterile seed-starting soil.
Don’t overwater the seedlings and avoid splashing the seedlings.
Ensure good air circulation by opening the covering daily.
Avoid overcrowding seedlings.
Dust the soil surface with cinnamon powder (cinnamon is a natural antifungal)
How to get rid of it:
Destroy the infected plants as well as the substrate.
Powdery mildew (White Coating on Cucumber Leaves)
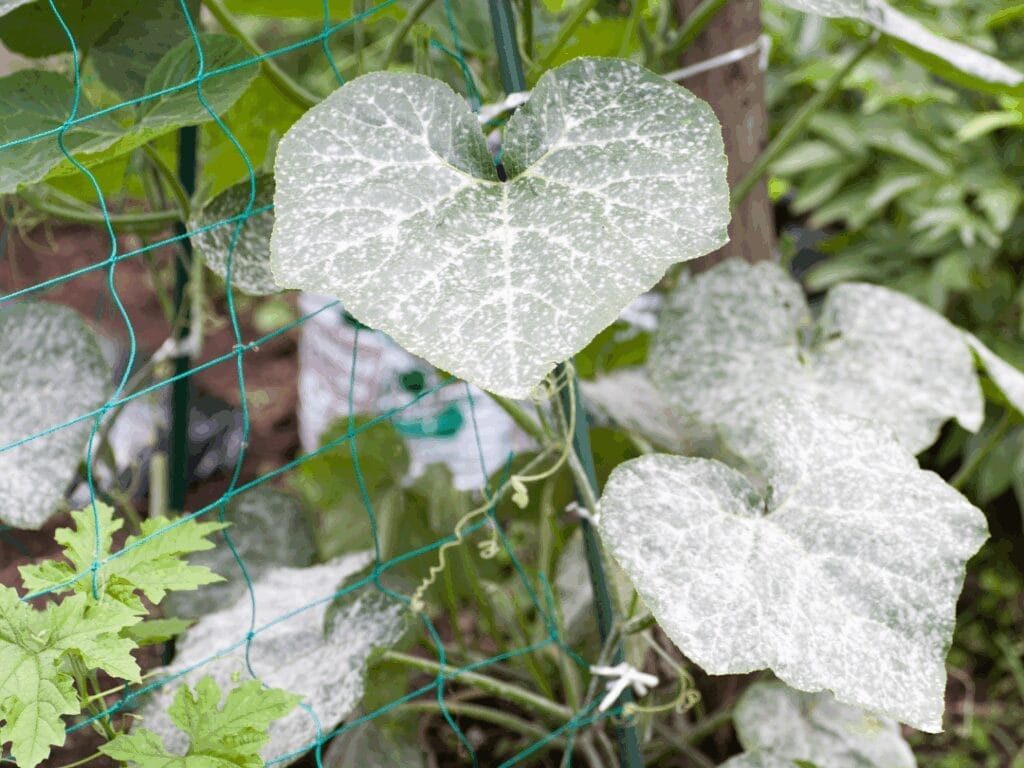
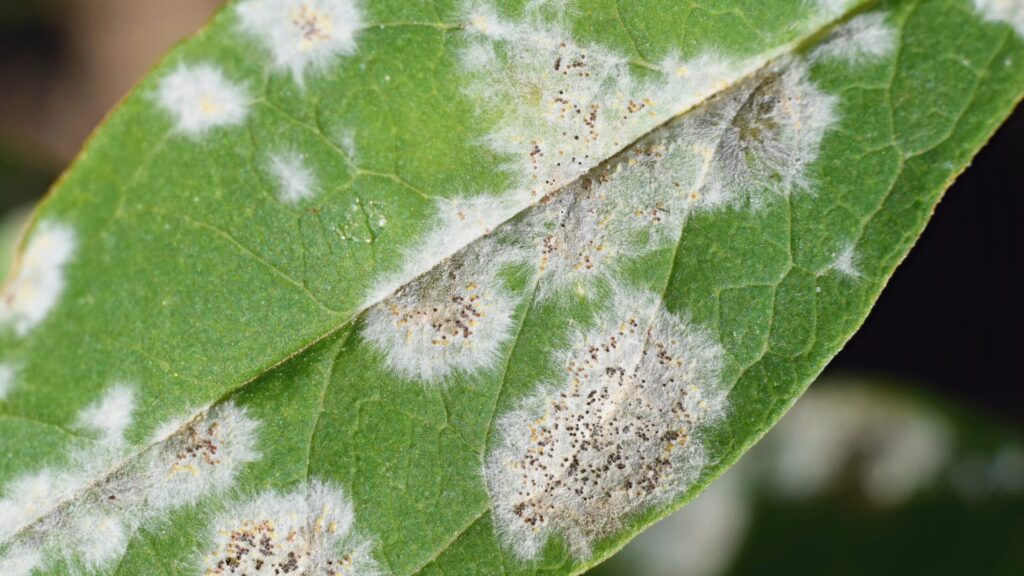
Powdery mildew is one of the most widespread fungal diseases that affect cucumbers. At first, we can see small white patches with white mycelium. These patches grow larger until the whole leaf is covered by it. The mycelium looks a bit as if the leaves were dusted with flour. Eventually, the leaves die.
Powdery mildew spreads best on dry and warm days. Powdery mildew cannot be cured completely, but removing infected leaves and improving growing conditions may slow its spread.
Strengthen the plants with plant manures, for example, from field horsetail
How to get rid of it
At the first stage of the disease, it can be helpful to spray the plant with a brew of field horsetail
Remove infected plant parts and dispose of them properly.
Spray the plants with a baking soda solution (dilute 1 tsp of baking soda in 1 litre of water)
Spray the plants with diluted milk spray (1 part milk with 10 parts water)
Spray the plants with potassium bicarbonate solution (1 part potassium bicarbonate to 40 parts of water)
Downy mildew (Yellow Spots on Cucumber Leaves)
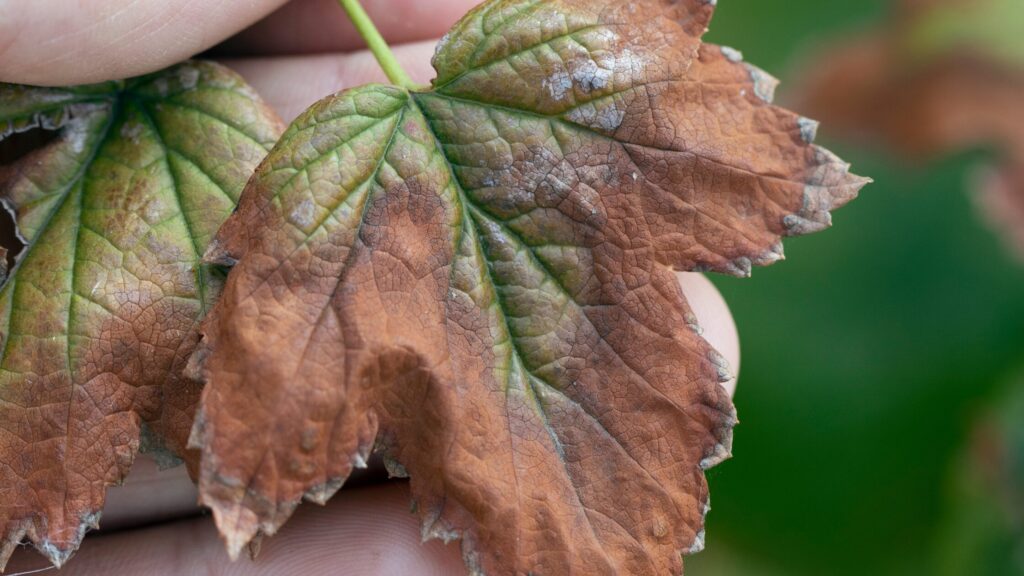
While powdery mildew spreads on warm and dry days, downy mildew haunts us when the weather is cool and moist. It shows by light green, yellow or brown patches on the leaves that stop at the leaf veins. The mycelium on the downside of the leaf is grey-violet. Within a few days, the leaves turn completely yellow. The fruits stop developing and may shrivel or rot. Eventually, the whole cucumber plant dies.
How to prevent it:
Keep leaves dry
Observe the right planting distance and only water the ground
Don’t overfeed the plants with nitrogen
Choose resistant and tolerant varieties
Spray preventively with garlic tea
How to get rid of it:
Remove infected plants and dispose of them properly.
In case of a strong infection, spray the leaves‘ undersides with a fungicide.
Grey mould (Grey coating)
The fungus mycelium of grey mould is, as the name states, grey. The spores can survive many years in the soil where they wait for the right conditions to attack again. Moist weather and wet cucumber leaves are ideal for them.
The fungus spreads on the whole plant, which eventually is covered with a thick coating.
How to prevent it
Air your greenhouse regularly to make sure that the leaves dry off quickly.
Water regularly but not excessively, and avoid splashing the leaves with water.
Observe the right planting distance between cucumber plants.
How to get rid of it
Remove infected plants and dispose of them properly.
Disinfect your gardening tools and wash your hands after handling infected plants.
Anthracnose (Grey or Brown Patches on Cucumber Fruits)
Anthracnose affects the whole cucumber plant. The fruit settings shrink and dry out; the cucumbers get grey or brownish patches with red fungal spores. These spores spread, and the cucumber, as well as eventually the whole plant, dry out.
How to prevent it
Make sure the soil for your plants is well-drained.
Use healthy, resistant varieties.
Only water the ground around your plants, not the plant itself and definitely not the leaves.
Keep ripening fruits from touching the soil.
Remove all plant debris after harvesting, as the fungus can survive in plant parts for a long time.
Observe the rules of crop rotation.
How to get rid of it
Remove infected leaves and fruits
Dispose of heavily infected plants
Disinfect garden tools
Fusarium wilt (Withered leaves)
Fusarium wilt is caused by fungi of the Fusarium genus and shows the following characteristics: at first, the cucumber plants wither during the day but seem to recover during the night. After a few days, the leaves become yellow and dry out completely. At this time, you may see a pink fungus mycelium at the bottom of the stem. The roots turn brown, and the plant eventually dies.
Black root rot (Black Cucumber Roots)
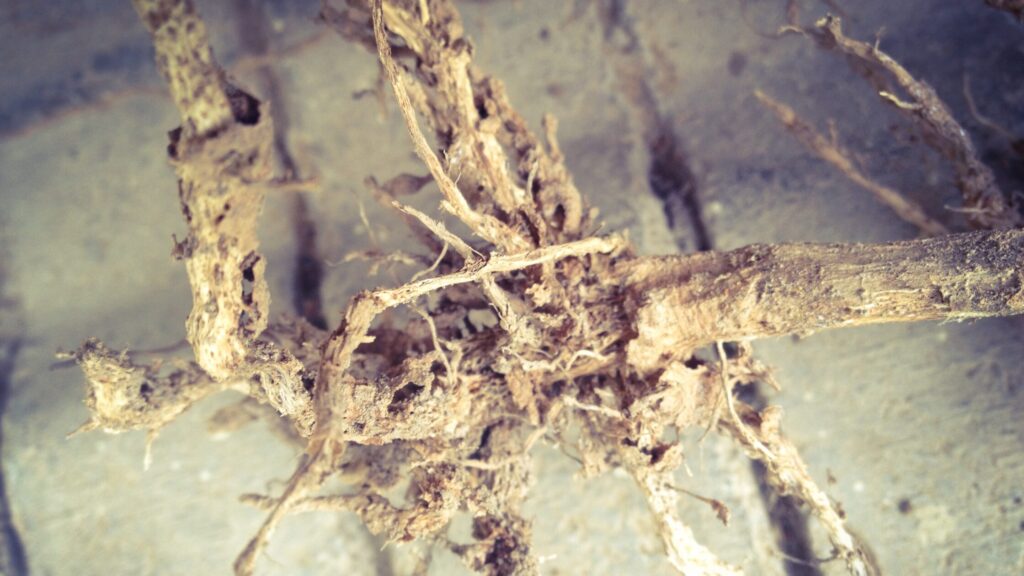
Black root rot is another fungal disease which attacks the roots of cucumber plants. The black colouring that shows on infected plants has given the disease its name. The base of infected plants becomes brittle, and the roots turn black and rot. The plant grows new roots, the so-called adventitious roots and the lower leaves wither and die.
Sclerotinia stem rot (White Mycelium at the stem base)
Sclerotinia stem rot, or sclerotinia withering, mostly affects the base of the stem but sometimes may also affect the cucumber fruits. Infected plants show a fungal mycelium that looks like cotton wool at the base of the stem and on infected cucumber fruits. Within the mycelium, you can see large black fruiting bodies of about 1 cm / 1/3 inch.
Stem rot (Green mycelium at Cucumber Stem Base)
This disease mostly affects cucumber plants in greenhouses where it typically spreads when the weather is warm. Infected cucumber plants suddenly wither and die quickly afterwards. The base of the stem shows a greenish fungus mycelium, becomes brittle and rots.
Verticillium wilt (Withering leaves)
This withering disease spreads when the air and soil temperatures are low. First, the lower leaves become limp and brown, often just on one side. During the night, the plant seems to recover. When you cut a stem, you’ll see grey and brown vessels.
How to prevent wilt diseases
All those withering diseases I described can’t be fought with chemical means. For that matter, it’s important to prevent them with the following measures to create optimum growing conditions.
provide the soil with healthy compost or humus every year
observe the rules of crop rotation and don’t cultivate cucumbers in the same spot for years in a row
don’t water cucumbers with cold water
remove all roots from the soil in autumn
in the greenhouse, exchange the soil
Let the soil dry before watering again. If you’re unsure, poke a finger in the ground and check if the soil is still moist
If one of these cucumber diseases has already broken out, we must prevent it from spreading and make sure that it won’t come again next year. For that reason, remove infected plants immediately and discard them.
Fungal diseases are unfortunately not the only diseases that can affect our cucumbers.
Virus diseases
Although virus diseases don’t form a coating on the cucumber plants, they nevertheless can be lethal.
Cucumber leaf spot virus (CLSV)
This disease affects mostly cucumbers in the greenhouse. Young leaves form yellow-green patches, starting at the edges. In the middle, you can see a brown spot, around which blisters form. On the cucumber fruits themselves, we can see no signs of a disease.
How to get rid of it
Up to now, there’s no way to fight this virus disease. To prevent it from spreading, remove infected plants immediately.
Cucumber mosaic virus (Mosaic-like patches on Leaves)
This disease is spread by aphids, and it shows as light green patches or circles on the leaves. Young leaves may even show deformations. Eventually, the cucumber fruits get patchy, too. When temperatures vary, the plant withers and can even die.
How to prevent it
Choose resistant cucumber varieties
Viruses are passed on through plant sap. It’s important, therefore, to regularly clean and disinfect your garden tools.
Remove all plant debris at the end of the growing season. Viruses can survive in plant parts for months.
Remove infected plants and dispose of them properly.
Disinfect garden tools after every use.
Closely monitor nearby plants.
Wash your hands after handling the plants.
Bacterial diseases
Apart from fungi and viruses, bacteria are the third group of pathogens that can affect cucumber plants.
Bacterial soft rot (Mushy, Rotting Cucumbers)
Soft rot is mostly transferred by water splashes that get into the plant via damaged or gnawed spots. The cucumbers become mushy, starting at the flower end, and even young cucumbers can be affected. The most telling sign is the foul odour of these infected cucumber fruits.
Tip:
This bacterium also loves zucchini, carrots and onions. When you suspect the disease, check the other plants as well for signs of infection.
How to prevent it:
Plant in well-drained soil.
Observe the rules of crop rotation.
Don’t overfertilise or overwater your plants.
How to get rid of it:
Remove infected plants and dispose of them properly.
Angular leaf spot (Holes in Cucumber Leaves)
Angular leaf spot spreads mostly when temperatures are above 24 °C (75 °F) and the air shows a high humidity. The leaves get angular, yellow patches that seem glassy. These patches get larger and turn brown until, in the end, they dry and fall out. On the downside of the leaf, there may be bacterial slime. The cucumber fruits form mushy, dark patches with a white spot in the middle.
How to prevent it
Choose resistant varieties
Only use healthy plants
Observe the rules of crop rotation.
How to get rid of it
Remove infected plants and dispose of them properly
Spray the plants with a copper-based bactericide
Disinfect your tools
When you’ve got an infection with angular leaf spot, don’t cultivate any cucurbitaceae in this patch for at least three years. After that time, the bacteria in the soil should be dead.
Frequently Asked Questions About Cucumber Diseases
Why are my cucumber leaves turning yellow?
Yellow cucumber leaves can have several causes. Common reasons include downy mildew, nutrient deficiencies, overwatering, underwatering, or natural ageing of older leaves. Check whether the leaves also show spots, mould, or other symptoms that may indicate a disease.
What is the most common cucumber disease?
Powdery mildew is one of the most common cucumber diseases, especially during warm, dry weather. It appears as a white powdery coating on the leaves and can quickly spread throughout the plant.
Can a cucumber plant recover from disease?
It depends on the disease. Mild fungal infections can sometimes be slowed down if detected early. However, viral diseases such as cucumber mosaic virus cannot be cured, and infected plants should be removed to prevent further spread.
Should I remove diseased cucumber leaves?
Yes, removing heavily infected leaves can help slow the spread of some fungal diseases. Always use clean tools and dispose of diseased plant material in household waste rather than on the compost heap.
Is it safe to eat cucumbers from diseased plants?
In many cases, cucumbers from plants with mild fungal diseases are still safe to eat if the fruits themselves are unaffected. However, fruits showing signs of rot, mould, soft spots, or bacterial infection should be discarded.
How can I prevent cucumber diseases naturally?
The best prevention includes crop rotation, proper spacing, good air circulation, watering at soil level, healthy soil, and regular inspection of plants. Choosing resistant varieties can also reduce the risk of disease.
Why are my cucumber plants wilting even though the soil is moist?
Wilting despite adequate moisture can indicate a serious disease such as Fusarium wilt or Verticillium wilt. Root damage, poor drainage, or severe bacterial infections may also cause similar symptoms.
Can cucumber diseases stay in the soil?
Yes. Some fungal and bacterial pathogens can survive in soil or plant debris for several years. This is why crop rotation and thorough garden hygiene are important parts of disease prevention.
What should I do with infected cucumber plants?
Remove severely infected plants as soon as possible and dispose of them in household waste. Avoid composting diseased plant material, as some pathogens may survive and infect future crops.
How often should I check my cucumber plants for diseases?
Inspect your cucumber plants at least once or twice a week during the growing season. Early detection gives you the best chance of preventing diseases from spreading to healthy plants.
The Key to Disease-Free Cucumbers
Healthy cucumber plants rarely become seriously ill. Most diseases take hold when plants are stressed by poor airflow, excess moisture, or unsuitable growing conditions. By checking your plants regularly and acting quickly when problems appear, you’ll often prevent a small issue from becoming a season-ending disaster.
A few yellow spots don’t necessarily mean the end of your harvest. With a bit of observation and timely action, most cucumber plants will reward you with plenty of crisp fruits throughout the season.
Want more cucumber-growing guidance? Check out these related articles:
Originally published June 2024 • Updated June 2026 with expanded planting guides, FAQs, and seasonal garden resources.
Many beginner gardeners think the sowing season ends in spring, but June is actually one of the best months for keeping the vegetable garden productive through summer and autumn. In this June planting guide, I’ll show you which vegetables you can sow and plant now.
June offers us gardeners the perfect opportunity to maximise our growing season with strategic plantings. If you want to harvest fresh produce all year round, this month presents ideal conditions for both cool-season succession plantings and warm-season varieties that thrive in the longer, sunnier days ahead.
The key idea here is succession planting. After all, we don’t want to have an overwhelming harvest once and afterwards only empty patches. Smart planning this month sets the foundation for a productive garden that bridges the gap between spring’s early greens and summer’s abundance.
Quick List: What to Sow and Plant in June
Here’s a cheatsheet of what you can sow and plant in June:
Sow indoors
Direct-sow outdoors
Plant outdoors
Kale
Carrots
Pumpkins
Broccoli
Beans
Zucchini
Brussels sprouts
Beetroot
Celery
Lettuce
Radishes
Leek
Cauliflower
Swiss chard
Brassicas
Rocket
Tomatoes
🌱 Prefer a printable version?
Download the free June Garden Checklist & Planting Guide — a calm, practical companion for what to sow, plant, and harvest this month.
✔️ Printable sowing chart ✔️ June garden task checklist ✔️ Seasonal garden reminders ✔️ Designed for temperate gardens (Zones 6–8)
Exact sowing times depend on your climate and last frost dates. These recommendations are based on a temperate Central European climate, hardiness zones 6 – 8, similar to my garden in Bavaria.
Vegetables to Seed-Start Indoors in June
If you’re new to seed-starting, you may want to learn more in my beginner’s guide to seed starting. Also, as it’s warm enough now and I like to have my windowsills back to normal, I usually seed-start now in the greenhouse. Let’s have a look at what can be sown indoors in June
Brassica
I know it’s just the middle of the year, but we must plan our winter harvest now. Late brassicas should be sown indoors now so that they are ready to plant out when the first spring vegetables like spinach, peas, or lettuce have been harvested, and you have some space in your beds again.
Good brassicas to start in June are
Kale
Palm kale
Black cabbage (also a kale variety)
Savoy cabbage
White and red cabbage (late varieties for making sauerkraut and storing)
Kohlrabi
Cauliflower
Broccoli
Brussels sprouts
Summer squash
It’s a good idea to seed-start a second batch of zucchini now and transplant them outside when the first batch gets slow and/or becomes infected with diseases, especially mildew. This is often the case during dry periods, and then it’s great to have some zucchinis ready to plant outside.
Lettuce
It’s good to seed-start lettuce indoors every four weeks. That way, we have a continuous supply of plants and will never run out of fresh lettuce during the growing season. Seeing that temperatures increase, however, we want to choose varieties that like warmer weather, like, for example, iceberg and oak leaf lettuce.
Sowing out lettuce every 3 – 4 weeks is not only a good method for a constant harvest but also makes sure that the beds are always covered.
🌿 Gardener’s Tip
Keep a few seed trays going throughout June.
Succession planting becomes much easier when young seedlings are always ready to fill empty gaps.
Vegetables to sow directly outdoors in June
Carrots
Now we can sow carrots for storing. Make sure you choose later varieties that are robust against low temperatures. Carrot seeds dry out quickly, so keep the soil evenly moist until germination.
Parsnips
Parsnips are related to carrots, and they can also be sown directly into the patches now for a late autumn harvest and for storage.
Beans
Both bush and runner beans can still be sown in June, either as a gap filler when some other vegetables are harvested or between heavy feeders like cabbages, cucumbers or tomatoes. Beans sown in June will often begin producing within 8–10 weeks.
Spinach, Swiss chard
Both vegetables are wonderful gap fillers that grow fast and thus cover the ground. Additionally, they taste delicious and – mostly in the case of the Swiss chard – are a very pretty sight.
Kohlrabi
You can either seed-start Kohlrabi now and plant them out later. Or, if you’ve got room now, sow them directly into the bed.
Lettuce
To fill your salad bowl regularly, you must continually sow and plant out lettuce. Now, we choose summer-proof varieties that are bolt-resistant. Lettuce usually takes about 8 weeks from sowing to harvest.
Rocket salad
Sow it, watch it grow quickly, harvest the leaves and let it bloom. That way, it will spread across your garden.
Radishes
If you have radish varieties that are bolt-resistant, you can sow them out now. The early varieties, however, will not work anymore as they’ll only produce flowers and seeds now.
Radishes need only a few days to germinate and just 4 weeks to be ready to harvest. They not only show us the row but are a yummy vegetable for salads or as a ferment.
Beetroot
In spring, we’ve sown only a few beetroots for immediate consumption, but now we can throw out handfuls of beetroot seeds for a large harvest in autumn. Beetroots can easily be preserved by freezing, pickling or fermenting.
No matter if you’ve seed-started vegetables in your living room or in the greenhouse, the seedlings must be hardened off before they can be transplanted outdoors. Start by putting your plants outside for 2 – 3 hours at first and gradually increase that time over a week. That way, you make sure that your veggies are healthy and sturdy enough for outdoor conditions.
🌿 Gardener’s Tip:
Keep a few spare seedlings in pots as “gap fillers.”
When early crops finish, or plants fail, you’ll already have replacements ready to transplant into empty spaces.
Brassica
All the cabbage plants we seed-started earlier that year are now ready to get outside. All brassica seedlings we have started indoors in April, like kohlrabi, Savoy cabbage, broccoli, Brussels sprouts and cauliflower, as well as white and red cabbage, can be planted outdoors in June. Leave plenty of space between the seedlings so that you can plant celery in between later. Cabbage and celery are great companions in the patch and repel each other’s pests.
As in the weeks before, our monthly batch of lettuce wants to be planted outside.
Leek
Winter leek can be planted outside in June. A great place would be next to the carrots you can now sow directly into the patch. Leek and carrot are a great combination as they keep each other’s pests away. Alternate leek and carrot rows to get the best protection.
Fruit vegetables
If you still have pumpkin seedlings, transplant them out now. Also, if you have seed-started a second batch of cucumbers, peppers/chillies, zucchini and eggplants, transplant them now in June to fill the gap if any of the plants you’ve already got in the garden get weak or infected by diseases.
When you prune tomatoes now, don’t throw away the side shoots, but put them in a glass with water. They’ll build new roots, and you get additional tomato plants that you can transplant now!
What Not to Sow in June
Some cool-season vegetables struggle in June heat and tend to bolt quickly, especially in warmer climates. Avoid sowing:
early spinach varieties
spring radishes
peas
lamb’s lettuce
Instead, wait until late summer or early autumn.
Frequently Asked Questions
What vegetables can I sow in June?
Carrots, beetroot, beans, lettuce, Swiss chard, radishes, kale, cucumbers, and many more vegetables can still be sown successfully in June.
Is June too late to plant vegetables?
Not at all. June is ideal for succession sowing, warm-season crops, and fast-growing vegetables that can still produce harvests later in summer and autumn.
Can I still plant tomatoes in June?
Yes — especially if you already have seedlings. In cooler climates, planting should happen as early in June as possible to ensure fruits ripen before autumn.
What is succession planting?
Succession planting means sowing small batches of vegetables regularly instead of all at once. This creates continuous harvests throughout the growing season.
🌿 Gardener’s Tip:
Sow small batches every 2–3 weeks instead of all at once.
This keeps harvests manageable and ensures you always have fresh vegetables coming in throughout summer and autumn.
Should I seed-start indoors in June?
Yes. Many brassicas and lettuces benefit from indoor seed-starting in June, especially for autumn and winter harvests.
🌿 Gardener’s Tip:
Don’t be discouraged if your June garden already looks a little chaotic.
Early summer is a time of explosive growth, constant harvesting, and succession sowing.
A productive garden rarely looks perfectly tidy.
🌿 Keeping track of all the June garden jobs?
You can download my free printable June Garden Checklist to keep beside you in the garden or greenhouse.
Mulch all plants larger than 10 cm / 4 inches. Mulching means you cover the soil with organic material like grass clippings, leaves, straw or wood chips. By mulching, you make sure that less water evaporates. Additionally, mulch suppresses weeds and thus your “weeding time” will be reduced considerably 🙂
Harvest whatever is ready in your garden. June is also the perfect time to harvest and dry herbs for later use. By the way, drying is not the only way to preserve herbs as you can see in this article about six ways to preserve herbs.
Fertilise heavy feeders like cabbage plants, tomatoes, pumpkins and zucchini that were planted in May. Ideally, you have given them basic fertilisation when you planted them. Now it’s time for maintenance fertilisation. A great homemade fertiliser with plenty of nitrogen for hungry veggies is nettle manure. It’s free and easy to make. You’ll find a detailed description on how to make nettle manure here.
June Planting Summary
June reminds us that the garden is never static. There is always something to sow, harvest, observe, or simply enjoy. If you’d like to explore the slower and more reflective side of this season, you may also enjoy my June reflections.
June is one of the most generous months in the vegetable garden. Every harvested lettuce creates room for new seedlings, and every empty patch becomes another opportunity to extend the season. A little planning now means baskets full of fresh vegetables far into autumn.
🌞 Want seasonal guidance like this every month?
Download the free June Garden Checklist & join the Seasonal Garden Newsletter for monthly planting guides, seasonal reflections, and gentle reminders aligned with nature’s rhythm.
Still not enough garden talk? Then these posts may interest you:
Originally published June 2024 • Updated June 2026 with expanded June garden task and FAQs.
The promises of May are kept in June! Forgotten is the doom of night frosts, and it’s time to fertilise, mulch and even harvest the first vegetables. Summer solstice is around the corner, and the days are long, hot and busy (read more about June in my June reflections). Even if you’re a beginner gardener, June is one of the most rewarding months in the vegetable garden. Small, consistent tasks now make a huge difference later in the summer.
With June, we’ve reached early summer, and we’re called upon to tend to the garden in a more intense way. In my garden in Bavaria, there’s a lot to do right now. Weeding, mulching, harvesting and filling the gaps with new vegetables keep me busy.
The most important June garden tasks are watering deeply, mulching beds, feeding heavy-feeding vegetables, monitoring pests, sowing succession crops, and harvesting regularly.
Let’s break down gardening jobs we can do in June:
June Garden Checklist: Essential Tasks at a Glance
If you only have time for a few things, focus on these essential June garden tasks:
Protect your vegetables from pests
Water sufficiently
Sow and plant vegetables outdoors
Stake and prune tomatoes
Fertilise vegetables
Mulch beds
Harvest and preserve
Here’s a quick overview of the most important garden tasks to tackle in June:
Garden Task
Best Time in June
Priority
Harvesting
When plants are ripe
High
Watering
When soil is dry
Medium
Mulching
When plants are about 10 cm (4 in) high
Medium
Sowing and planting
After gaps form due to harvesting
High
Checking for pests and diseases
Every second day
High
Weeding
Twice a week
Medium
Fertilising
Every 4 weeks
High
Pruning tomatoes
As soon as suckers form
High
Saving seeds
When seeds are ripe and dry
Low
If you’re transitioning from late spring preparation, you might also want to revisit the tasks from May. Many jobs started last month continue now — especially fertilising and mulching. → Continue from last month with my May Garden Tasks checklist.
What to Sow and Plant in June
1. Harvesting and preserving
✔️ Why it matters: Eat fresh vegetables or preserve them for winter
Many veggies that we sowed and planted earlier that year can now be harvested in June. Apart from lettuce, which we have already been harvesting for weeks, we can now yield sweet peas, broad beans, kohlrabi and our second batch of spinach and Swiss chard.
The strawberries are finally ripe (honestly, what’s in strawberries? I can never get enough of them!), and we’ll get busy cooking strawberry jam, the first jam of the season. If you happen to have elder bushes in the vicinity, you can harvest the flowers now and make elderflower syrup at home. It’s not only a tasty ingredient for drinks or in yoghurt, but can also be mixed with strawberries to make an interestingly flavoured jam. You’ll find more inspiration in this list of recipes for strawberry jam with a twist.
🌿Gardener’s Tip: Don’t wait too long to harvest your veggies.
One of the biggest issues in June is water. With rising temperatures, the soil dries out faster.
2. Watering
✔️ Why it matters: Plants and seeds need water to grow.
Watering is one of the most important garden tasks in June. So far, this year has been bone dry here in Bavaria. We had almost no rain in spring and only occasional rainfall in May, just enough to keep the plants alive. While I’m not a great fan of watering, it’s essential to support freshly sown or transplanted plants. Mulching (see next step) and hoeing are good additional methods to ensure that the soil stays moist.
🌿Gardener’s tip: The best time for watering is in the morning.
When we protect the soil, though, we don’t need so much water.
3. Mulching
✔️ Why it matters: Mulching keeps the soil moist and suppresses weeds
As soon as my plants are about 10 – 15 cm (4 – 6 inches) high, I cover the soil between them with mulch. I either use (dry!) grass clippings, (old) hay, straw or leaves. Other good mulch material is wood chips that have the additional advantage of being avoided by snails and slugs.
🌿 Gardener’s Tip: Add dry grass clippings, hay, straw or leaves as mulch.
4. Sowing and planting
✔️ Why it matters: Let’s close the gaps in harvested plants
Wherever we harvest, we should sow or plant afterwards to fill up the gaps in the patches. That way, we cannot only harvest continually but also keep the soil covered. This will suppress weeds and keep the soil moist. For a quick overview on what to sow now, check the list above or read this comprehensive list of vegetables we can sow and plant in June in our garden beds.
🌿 Gardener’s Tip: Keep seed-starting indoors so that you have ready plants when gaps arise.
5. Monitoring for pests and diseases
✔️ Why it matters: Pests and diseases can destroy your plants
One of the greatest garden “tasks” in June is taking a daily stroll through the garden. First of all, because it’s good for the soul. Is there anything more satisfying than witnessing how everything we planned and prepared earlier that year comes to life and works out? I can’t think of one.
While we are there to enjoy our bountiful garden, we should also watch out for pests and diseases like a hawk. We haven’t invested all that time and energy to see our babies be either eaten off overnight or die from some disease. The earlier we detect possible harm, the better the chances of protection.
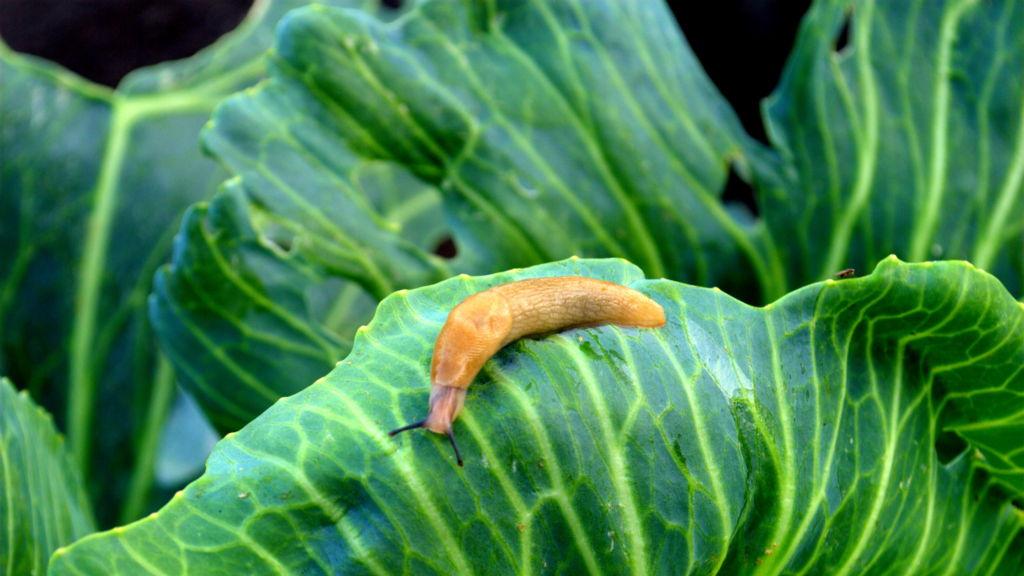
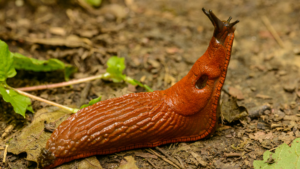
Snails and slugs, for example, are some dreaded pests, especially when it’s moist or wet, but even during dry spells, we should check for them under the mulch. A good way to keep those pests off our seedlings is to put snail collars around them, which they can’t overcome. Or you get out in the wee hours of the morning or the evening with a bucket and collect them. Choose your way, but I prefer the collars.
Other common pests are aphids, especially when the weather is dry. If aphids are already appearing on your beans or peppers, this guide on natural aphid control shows exactly what to do.
🌿 Gardener’s Tip: Check regularly for pests and diseases
Apart from pests and diseases, weeds must also be prevented.
6. Weeding
✔️ Why it matters: Weeds compete for nutrients.
Mulch is a good way to suppress weeds, but sometimes it’s not enough, and we have to weed regularly before dandelion, couch grass, and nettles get the upper hand. As plenty of weeds are edible, you should consider making a pesto from them (for more, see this article). From nettle, dandelions and horsetail (and some more), you can make liquid manure as a fertiliser for your plants. Read here how to make nettle manure.
🌿 Gardener’s Tip: Rip weeds out as soon as they occur.
When we’ve removed weeds, let’s feed our vegetables.
7. Fertilising vegetables
✔️ Why it matters: Plants need nutrients to grow optimally.
June is when hungry plants suddenly start demanding far more nutrients. Depending on what parts oft he plants we want to harvest, we have to use different fertilisers: brassicas, for example, where we harvest the leaves, need mostly nitrogen to build large heads. Tomatoes and cucumbers, on the other hand, where we harvest the fruits from, need more phosphorus and potassium to build many large fruits.
Fertilise your heavy-feeders every 3- 4 weeks and the medium-feeders every 4 – 6 weeks.
A nitrogen-rich fertiliser that you can easily make yourself is nettle manure.
Join my newsletter for monthly garden guidance aligned with nature’s rhythm.
8. Fertilising and mulching berry shrubs
✔️ Why it matters: Berries need nutrients, too.
We’ve talked mainly about vegetables, but our berry shrubs, like raspberries, gooseberries, currants, blackberries, and so on, need food as well. So, another garden task you should do in June is to fertilise your berry shrubs and fruit trees. They’ll profit as well from a healthy dose of that liquid manure from stinging nettles I mentioned above and will reward you with a large harvest. Additionally, you should cover the soil under the bushes and shrubs now with mulch.
🌿 Gardener’s Tip: Although perennial, berry shrubs and fruit trees need care, too.
While cabbages and lettuce are relatively easy to care for, tomatoes need a bit more attention.
9. Pruning tomatoes
✔️ Why it matters: Pruning helps tomatoes form more fruits and stay healthy.
Every time we turn our backs on our gardens, even if it’s only for a second, our tomatoes seem to shoot out new suckers from their leaf axils. If you want to induce the plant to produce many fruits instead of leaves, you must remove these suckers before they get too large. Over here, you’ll find a detailed guide on how to grow tomatoes.
You can put the pruned suckers into water, and they will soon form roots. If you want to and have some room left, you can transplant these new tomato plants in a few weeks into the patch.
🌿 Gardener’s Tip: Put the suckers in water; they’ll grow roots, and you can plant them out as well.
10. Saving seeds
✔️ Why it matters: Saving seeds saves money and preserves heirloom varieties.
If you still have some vegetables from last year in your garden, they’ll be blooming by now, which attracts beneficial insects. In a few weeks, these blooms will turn into seeds that we can harvest and store for the next gardening season. The plants from those seeds are usually more robust and better adapted to your (micro)climate. Best of all: gaining our own seeds helps us save heirloom varieties and makes us (at least partly) independent from large seed companies.
🌿 Gardener’s Tip: Save seeds on a dry day.
Frequently Asked Questions About Gardening in June
What vegetables can I still plant in June?
Many fast-growing vegetables can still be sown in June, including carrots, beetroot, lettuce, radishes, bush beans, cucumbers, zucchini, kale, and Swiss chard. June is also ideal for succession sowing to extend harvests into autumn.
How often should I water my garden in June?
Most vegetable gardens benefit from deep watering one to three times per week, depending on rainfall, soil type, and temperature. Newly planted seedlings and container plants may need water daily during hot weather.
Should I fertilise vegetables in June?
Yes. June is one of the most important months for fertilising because vegetables enter a phase of rapid growth. Heavy feeders like tomatoes, cucumbers, pumpkins, and cabbage especially benefit from regular feeding.
Is mulching necessary in summer?
Mulching becomes extremely valuable in June because it helps retain moisture, suppresses weeds, and protects soil life during rising temperatures. Grass clippings, straw, hay, and leaves all work well as natural mulch materials.
What pests appear in the garden in June?
Common June garden pests include aphids, slugs, snails, flea beetles, and cabbage white caterpillars. Regular inspections help catch infestations early before plants are seriously damaged.
Can I still sow seeds in June?
Absolutely. June is an excellent month for sowing many vegetables directly outdoors, especially quick-growing crops and succession plantings for continuous harvests later in the season.
Why are my tomato plants producing so many side shoots?
Tomatoes naturally produce suckers between the main stem and leaf axils. Removing these shoots helps indeterminate tomato varieties focus energy on producing fruits instead of excess foliage.
Common June Gardening Mistakes
Mistakes can happen, even when you’re an experienced gardener. To help you prevent them, I’ve listed the most common mistakes:
Overwatering in heat
Watering is important, especially when the weather is hot and dry, but much is not always best. Water deeply every 2 – 3 days instead of watering every day, which could lead to waterlogging.
Forgetting succession sowing
When we harvest, we’re often so delighted with it that we completely forget to fill the gaps that are created by ripping out the veggies. But that’s an important step for a) enhancing our harvest and b) keeping the soil covered.
Letting weeds seed
This is a common problem in June: one day, the weeds are tiny and barely visible, letting us think that “within the next few days” we’ll tackle them. Just to see that ONE DAY LATER they’ve grown exponentially and also produced seeds. Which will immediately seed and produce even more weeds. In short: weed as early as you see them.
Fertilising too late
In June, our vegetables get hungry and need nutrients to grow and thrive. If you fertilise them too late, they’ve already run on low, and either need more time to ripen or stay smaller and produce less fruit.
Ignoring pests until damage spreads
Target pests as soon as you see them. The earlier you get rid of them, the less damage they can cause and the less the chances of exponential reproduction.
Harvesting too late
Guilty of that one! Ripe vegetables are such a great sight that we sometimes want to prolong it. And miss the right time to harvest. The result: vegetables that have lost part of their flavour or have become fibrous. Watch your vegetables like a hawk and harvest them as soon as they’re ripe.
🌿 June Gardening Summary
In June, focus on:
Planting warm-season vegetables
Protecting seedlings from pests and weather
Establishing watering routines
Feeding and mulching actively growing plants
Each month builds on the previous one in the garden, and following seasonal rhythms makes gardening simpler and more productive year after year.
Why June Garden Tasks Matter
June is a bit like a summer camp – everything’s growing, thriving, and probably getting a little wild when you’re not looking. Between watering, weeding, and wondering why your tomatoes are taking their sweet time, remember that gardening is part science, part art, and part wishful thinking. Your plants don’t need perfection; they need care, consistency, and maybe the occasional pep talk. So grab your watering can, embrace the dirt under your fingernails, and enjoy watching your little green kingdom flourish. After all, every master gardener started with one slightly wonky seedling!
Can’t get enough of gardening? These articles may also interest you:
These June reflections are part of the Seasonal Reflections series — a year-long practice of living with the rhythm of nature.
In June, we transition from late spring to early summer. Days start early and nights fall later, culminating in the Summer Solstice at the end of June with the longest day and shortest night. After the new green May brought us, we’ve finally reached what we’ve been dreaming of during those cold and dark winter months: the sheer joy of summer energy.
👉 In these June reflections, we’ll explore seasonal living in June — from the garden and kitchen to simple ways of making the most of early summer.
In June, I (almost) don’t need an alarm clock to wake up in the morning. In fact, I sleep with the blinds and the window open and let myself be woken by the early morning dawn and birdsong. Transitioning into the day with the help of nature instead of an artificial alarm is so much more energising than getting up against one’s inner clock, don’t you think?
And this is exactly what living seasonally in June feels like…
Here in Bavaria, we traditionally watch for the “Frost Saints” in mid-May — after that, the danger of night frost is usually over. In fact, the nights can be pretty warm already, and I sometimes leave the windows of my greenhouse open during the night.
Flowers are blooming everywhere, be it in gardens, in parks, along field paths or in pots and containers on balconies and patios. Nature shows its full abundance without restraint. Nature is in full expansion mode now, pushing everything toward bloom and fruit. I think we should take that as an example sometimes and show all our “flowers” and facets. No holding back for Mother Nature, so why should we do it?
Speaking of which, I love gathering wildflowers now when I’m out strolling through the fields and meadows. A bouquet of buttercups, cuckoo flowers, daisies and wild carnations almost always decorates my coffee table.
June Gardening Tasks & Harvests
When I go into my garden now, I enjoy the sight of all the blooming herbs and flowers, and I often harvest some fresh lettuce and peas.
June brings the first truly generous harvests. Apart from peas and salad, early broccoli and carrots, as well as many fruits, are ripe now. Honestly, I could live on strawberries, raspberries, currants and gooseberries right now. With a healthy dollop of cream. And maybe some biscuits…
Around St. John’s Day, herbs are traditionally believed to be at their most potent. If you’d like to preserve that summer abundance, these six herb preservation methods are a lovely place to start.
There are several vegetables we can sow and plant now to fill the gaps in the vegetable garden that form with harvesting. If you’re wondering what to sow and plant in June, I’ve put together a comprehensive guide here.
But June is not always just sunshine and warm weather. When it rains, let’s step inside.
Seasonal Living in June: Kitchen & Home
After weeks of living in a jungle of seed trays and half-grown vegetables, I enjoy a minimalistic décor right now. Clean windowsills, clean surfaces and pastel-coloured cushion covers. This allows the wildflowers I mentioned earlier to shine all the more.
The textures in my home change now, too: I prefer cool linen sheets for the covers and the table that exude a natural counterbalance to the heat and the colourful whimsy of all the flowers outside. Bonus points when the sheets have been air-dried on the clothes line outdoors and have that wonderful scent of sunshine and fresh air.
In the kitchen, I love preserving all the strawberries I picked earlier, for example, with a classic strawberry jam or these strawberry jams with a twist. I also bake fruit cakes now, like this strawberry dome cake and make desserts like in this recipe for super-quick strawberry tiramisu.
On my strolls, I now forage elderflowers, which I preserve as syrup. That homemade elderflower syrup is a great addition to drinks (for example, with prosecco), but also a wonderful addition to strawberry jam.
June Self-Care Ideas
While I was sometimes a bit overwhelmed in May with all this new energy, I’m now full in flow mode and want to make the most of this wonderful early summer month.
Self-Care for Body…
I think by eating seasonally and going out as much as we can, we can give our bodies the best nourishment available. That said, freshly harvested ingredients from the garden, cooked from scratch or just tossed together as a salad, are just what my body needs right now. They provide enough fuel to sustain that summer energy without feeling heavy.
When we were children, my siblings and I used to go barefoot from May to September on the farm. At first, the pebbles in the courtyard felt quite piercing, but by the end of summer, we had developed a callus and could even run across them.
Now that the soil is finally warm enough, I also love taking a barefoot stroll around the garden or through the meadow. It not only reminds me to slow down but also helps me feel where I am. I refrain from walking over pebbles, though. Not all childhood memories must be repeated…
… For Mind…
June has so many events, many of them open-air. The hardest part is choosing which ones to attend. In Augsburg, the town near which I live, there’s an open Art Night every June with dozens of events at different locations, and I’m looking forward to attending it.
And just because it’s warm and I want to do everything at once doesn’t mean that I don’t find the time to read. In the evenings in bed, of course, but I also love to read outdoors now. In fact, I have a picnic blanket in the car, and whenever I have to wait somewhere, I take the blanket and a book and look for a lovely place to read and relax.
… And Soul
Soak up the sunlight whenever you can. In the mid-latitudes where I live, we must store every ray of sunlight we can get to boost our vitamin D, which can help support mood and our natural rhythms. Let’s get out there and capture as much natural light as we can.
And why not combine going outdoors with meeting friends? I love inviting people over for an informal garden party where everybody brings some food, or we meet up, go hiking and have a picnic. Good company, good food, warm weather and sunshine – is there anything better in life?
🌸 June Reflections
What abundance is blooming in my life right now?
Where am I holding back when nature would simply flourish?
How can I make more room for light this month?
Make the most of June’s abundance
June is one of those months that feels almost impossibly generous — with light, warmth, flowers, fresh food and opportunities to be outdoors. Living seasonally in June means harvesting what’s ready, preserving a little for later, gathering with people we love, and letting sunlight, birdsong and strawberry-scented kitchens remind us that life has seasons for flourishing, too.
Want to continue living with the season? Join my newsletter for monthly reflections, seasonal recipes and garden inspiration.
Want to continue living with the season? Check out all the articles of the Seasonal Reflections Series: