
.
Fermentation may sound mysterious, but it’s one of the simplest and oldest ways to preserve food. With very little effort, you can create delicious, probiotic-rich foods right in your kitchen. In this beginner’s guide, I’ll show you exactly how fermentation works, how to do it safely, and which easy ferments to start with.
But what exactly is fermentation, and how can you ferment vegetables?
| Question | Quick Answer |
|---|---|
| What is fermentation? | Preservation using beneficial microbes |
| Is it safe? | Yes, when basic rules are followed |
| How much salt? | Usually 2–3% by weight |
| How long does it take? | 5 - 14 days |
| Best beginner ferment? | Sauerkraut |
What Is Fermentation?
The (originally Latin) word „fermentation“ means „transformation of a substance“. This transformation is carried out by the smallest creatures called microorganisms or microbes, for example, bacteria and yeasts. Microorganisms transform organic substances, for example sugars, into alcohol and acids, depending on the kind of fermentation.
In simple terms, fermentation is a preservation method that uses beneficial microorganisms to transform and protect food.
Fermentation is NOT the same as pickling. In fact, those are two very different ways to preserve food.
Fermentation vs Pickling
While fermentation is carried out by live bacteria and takes time to develop, pickling relies on vinegar or another preserving medium to preserve food quickly. Harmful microorganisms are killed by briefly cooking the vegetables (or showering them with boiling water). Afterwards, the products are preserved in vinegar, salt brine, oil or alcohol. Pickled vegetables, therefore, have a sharper flavour, while the taste of fermented food is more complex.
Table:
| Fermentation | Pickling |
| Uses beneficial microbes | Uses vinegar |
| Develops over time | Instant acidification |
| Contains live cultures | Usually no live probiotics |
| Complex flavour | Sharper flavour |
If you want to learn more about that topic, you may want to read my comparison guide between fermentation and pickling.
Why Ferment Food?
Health benefits

Maybe you’ve heard the story of Captain Cook, who prevented scurvy by making his crew eat sauerkraut every day. We know today that scurvy is caused by a severe vitamin C deficiency due to a limited diet. We also know now that the vitamin C content of vegetables increases through fermenting, as well as the content of other vitamins and minerals. Fermented foods can contribute valuable nutrients and beneficial microbes to the diet.
Science has also found that the iron content in lacto-fermented vegetable juices is, to a certain extent, more soluble than that in raw juice.
Some fermented foods may contain small amounts of B vitamins, depending on the ingredients and fermentation process. As the only other sources for these nutrients are of animal origin, this is especially interesting for vegetarians and vegans.
While adding all this good stuff, at the same time, fermentation eliminates various toxins such as polyphenols and tannins.
But that’s not all.
Emerging research suggests that there is a connection between the ingestion of probiotics through fermented food and a reduction in blood pressure.
Some studies indicate that fermented food can also help regulate inflammation in the gut and boost anti-inflammatory cytokines.
And, last but not least, fermented goods are said to improve digestion.
So you see: the question should not be why we should eat fermented food but rather why not more often?
Improved flavour
Fermentation adds more depth and creates new nuances to the original product. As a ferment contains live microorganisms, the flavour keeps changing slightly over time.
Preserving seasonal harvests
Living seasonally has always included preserving abundance for leaner months, and fermentation is one way of doing that.
If you have a garden or a patio, a balcony or even just a south-facing windowsill, you can grow vegetables. Sometimes the harvest is more than we can eat, and that’s where preserving comes in. Why not cut that cabbage head into thin slices and make sauerkraut from it for the winter? Or let’s grate these carrots and parsnips and ferment them? Later in the year, when fresh vegetables are just a distant memory, this ferment will make a delicious and healthy side dish and provide us with all the good stuff I told you earlier about.
Reduced food waste
Despite all the amenities of modern life, such as freezers, fridges, and canners, one-third (!) of food is still thrown away, most of it in the Western world. According to studies, 90 kilograms of food are thrown away per capita in Western Europe.
Look, I’m guilty, too. That half head of broccoli, the two spears of leek that couldn’t fit into the soup any more or that bunch of radishes you harvested but no one wanted them that day, and then they had wilted and gone wizened – I had my share of vegetables I let go to waste.
Had I been a fermentista back then already, none of these presents from Mother Nature would have been thrown out. I’d definitely have them fermented.
Environmental benefits
Most fermentation processes don’t require electricity, neither in the making nor for storing. You don’t need a freezer, fridge (although it might come in handy) or a canner. All the energy you need is a bit of muscle to chop and slice the vegetables and press them into a jar.
At the same time, when you ferment vegetables that you have grown yourself or bought locally, you make sure to keep transportation routes short. That said, fermentation is the most sustainable way to preserve. Isn’t that cool? Fermentation is seasonal living in a jar!
Inexpensive
The fact that you neither need electricity nor fancy equipment (although I don’t say you couldn’t), makes fermentation a very low-budget way to preserve food. Even more so, when you cultivate the vegetables or fruits you use for fermentation by yourself.
I don’t know about you, but to me, fermentation sounds perfect: it provides nourishing, healthy food for the winter months, reduces food waste, is sustainable and doesn’t cost much. Above all, it’s a deeply satisfying, traditional preservation skill. So, where’s the flaw? You might ask. Let’s have a look at the question, most people ask themselves before starting to ferment anything:
Is Fermentation Safe?
The short answer is: Yes, BUT you must observe some basic rules
Fermentation Safety Checklist:
✓ use clean equipment ✓ use correct salt ratios ✓ keep food submerged ✓ avoid contaminated ingredients ✓ trust smell + visual cues ✓ use tested methods
- Use clean equipment: Thoroughly wash jars, lids and utensils with hot water and soap.
- Use the correct salt ratios: You may think that all that salt in a ferment can’t be good for your health, and you’d rather take a smaller amount. That’s a sure way to a spoiled ferment! The salt is necessary to keep harmful bacteria out and create an acidic environment where only beneficial microorganisms can grow. Besides, we only use 2 – 5 % salt, which is less than, for example, in some sausages.
- Keep the food submerged. When food swims on the surface, it can spoil and destroy the whole jar. As long as everything stays under the brine surface, all is fine.
- Avoid contaminated ingredients: never use mouldy, rotten or otherwise contaminated products. You can only make something good from something good.
- Trust your nose and eyes: Before you taste a ferment, check the smell and appearance. When it looks and smells fine (see the next point), it’s safe to eat.
- Use tested methods: Fermentation hasn’t changed much over the course of millennia – not because people weren’t creative, but because tried and tested methods lead to great results.
Signs a ferment is going well
As I said before, the eyes and nose are good agents to check if a ferment is going well.
Within a few days, a new ferment should be bubbling; that’s a sure sign of microbial activity and exactly what we want.
Some days later, the brine will change and become cloudy. That’s perfectly normal and a sign of maturing.
Now, check the smell: it should smell, of course, sour and a bit tangy. It should NOT smell mouldy, fishy or rotten.
If everything’s fine, taste your ferment. The vegetables should have softened but still have some crunch. They should smell sour, tangy and a lot more complex than in their original state.
Signs something went wrong
Some indicators will tell you that, alas, something’s gone wrong with your ferment:
The first indicator is the appearance: when fuzzy mould, pink or orange slime or some black growth has formed on the surface, it’s a sure sign of spoilage. Throw the whole jar out.
Even when there are no visual clues, the smell usually gives away that there’s something rotten in the state of Denmark – or rather your jar: It should NOT smell mouldy, fishy or rotten.
Our senses will warn us when something’s off.
If you’ve never fermented anything before, don’t worry. Thousands of people successfully make their first ferment every year with nothing more than a jar, vegetables, salt, and a little patience.
Your First Ferment in 6 Steps
1. Prepare the vegetables
Whatever vegetable(s) you choose, wash them thoroughly to remove any dirt. If necessary, peel them and then either slice or grate them.
2. Salt correctly
Weigh the prepared vegetables in grams/kilograms or pounds. It doesn’t do to measure the volume in cups! When you’ve determined the weight, you can calculate the amount of salt you’ll need. Let me give you an example:
Let’s assume we’ve got 750 g of grated carrots and need a salt ratio of 2 %. Divide the weight by 100 to get one per cent and multiply it by 2. That makes
750 / 100 = 7.5
7.5 * 2: 15
For 750 g of carrots, we need 15 g of salt.
3. Knead in the salt
Mix the salt and vegetables thoroughly in a bowl and knead them strongly. Then let it rest for a few minutes so that the brine forms.
4. Pack tightly
Put the vegetables in a jar, handful by handful, and press them tightly so that all air is removed.
If necessary, fill the jar with brine so that everything is covered, and there’s about an inch between the brine surface and the jar rim.
5. Keep submerged
Now put a weight on top of the vegetables to keep them submerged. This is a critical point, as only under the brine, that is, in anaerobic conditions, can the beneficial bacteria do their work.
6. Ferment at room temperature
Close the lid slightly and put the jar in a place without direct sunlight and at room temperature. After 1 – 3 days, you should see the first bubbles, and the brine may even be pressed out from under the lid.
7. Taste and store
After about 7 days, when bubbling has visibly slowed down, it’s time to taste the ferment. When you’re satisfied, put the jar in a cooler place, for example, a cool basement or the fridge, to slow down the fermentation process.
If it’s not yet to your liking, let it ferment for another few days. Taste it daily to see if it’s ready.
Want to Start Fermenting With Confidence?
Get my free Fermentation Starter Checklist and avoid the most common beginner mistakes.
✓ Safe salt ratios
✓ Equipment checklist
✓ Fermentation timeline
✓ Signs of a healthy ferment
✓ Troubleshooting guide
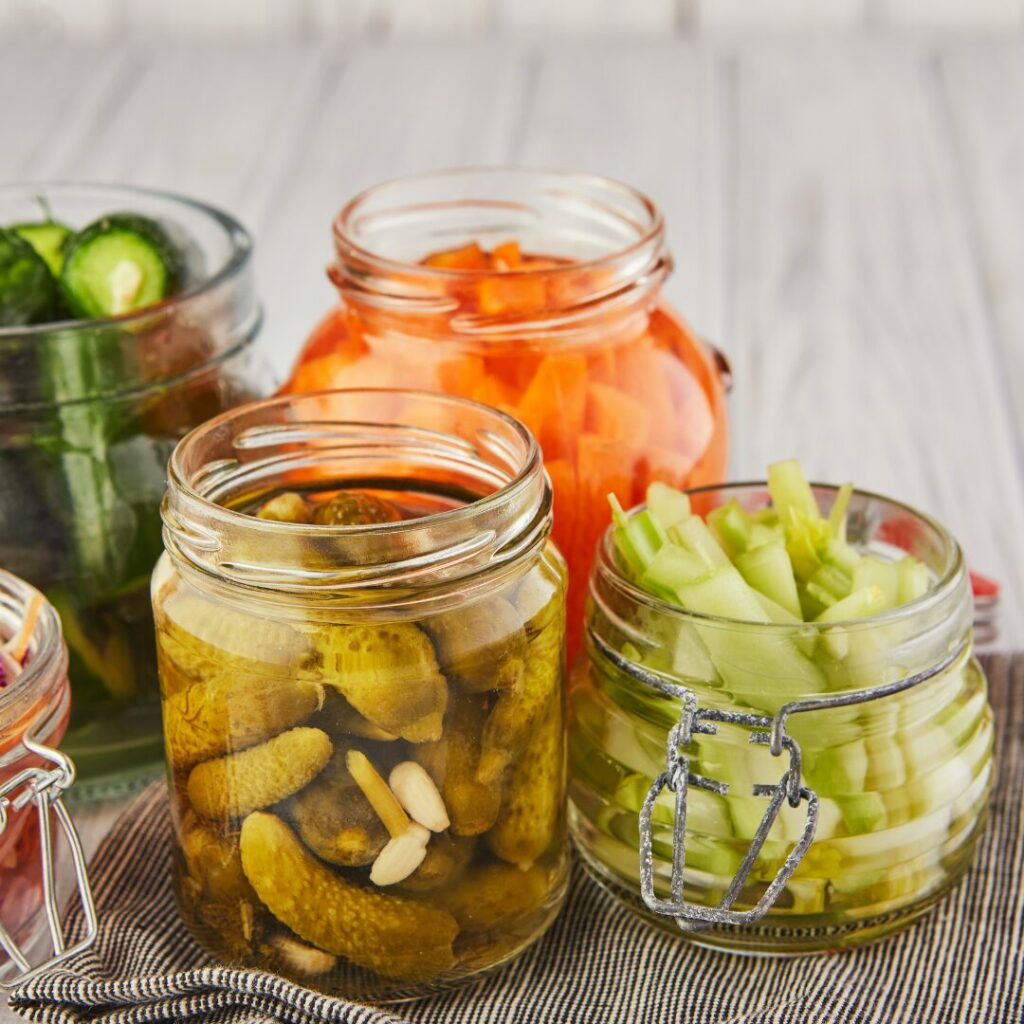
5 Easy Ferments for Beginners
You know all the theory now, so let me show you some beginner-friendly ferments you can try your hand at.
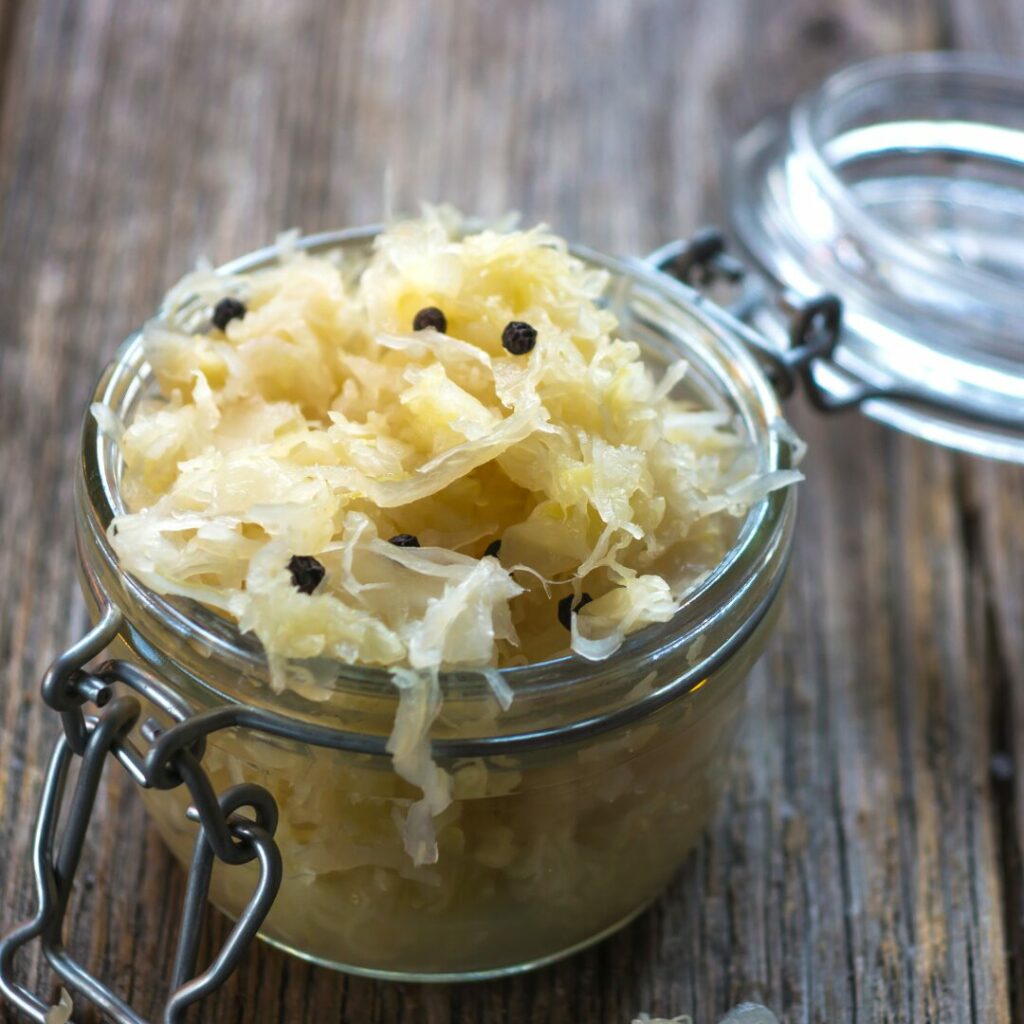
Easy Sauerkraut
Sauerkraut is the most widely known ferment in Europe and the US, and it’s very easy to make. A classic ferment that’s done in no time, yet tastes wonderful!
Channel Your Inner Oma: Simple Homemade Sauerkraut That Actually Tastes Amazing
Fermented Radishes
A surprising ferment from this cute spring vegetable that’s not only yummy but also a very pretty sight.
How To Ferment Radishes: Two Easy Recipes for Spring’s First Harvest
Fermented Carrots
Fermented carrots can be eaten as a quick, ready-made salad or on a bagel with cream cheese.
Fermented Garlic Honey
A slightly different ferment, as it’s made with honey instead of salt. An epiphany for the taste buds!
Fermented Lemons
Wonderfully salty and tangy, fermented lemons are a must-have for oriental cuisine, but also add an interesting flavour to salads, couscous and rice dishes.
When you stick to the step-by-step description, nothing should go wrong. But as a beginner, you may come across several issues you’ll want to know about.
How Fermentation Works (Simple Science)
Fermentation describes the microbial or enzymatic transformation of organic substances into acids, gases or alcohol. We either ferment by adding bacteria, fungi or other microbial cultures or by adding enzymes. These microorganisms are partly already on the initial product, inducing a wild fermentation.
When it comes to fermentation, we need certain bacteria and must prevent others. In the case of lacto-acid fermentation, the most important of the beneficial bacteria we need is called Lactobacillus. Several species of lactic acid bacteria work together during fermentation, creating the acidic environment that preserves food.
Lactic acid bacteria are practically everywhere: on vegetables, on our skin, and in our house, which is great for wild fermentation. During this process, they transform carbs into lactic acid and carbon dioxide (CO2) and prevent harmful bacteria from growing.
Think of fermentation as creating the perfect home for good microbes while making life difficult for the bad ones.
There are two methods of lacto-fermentation
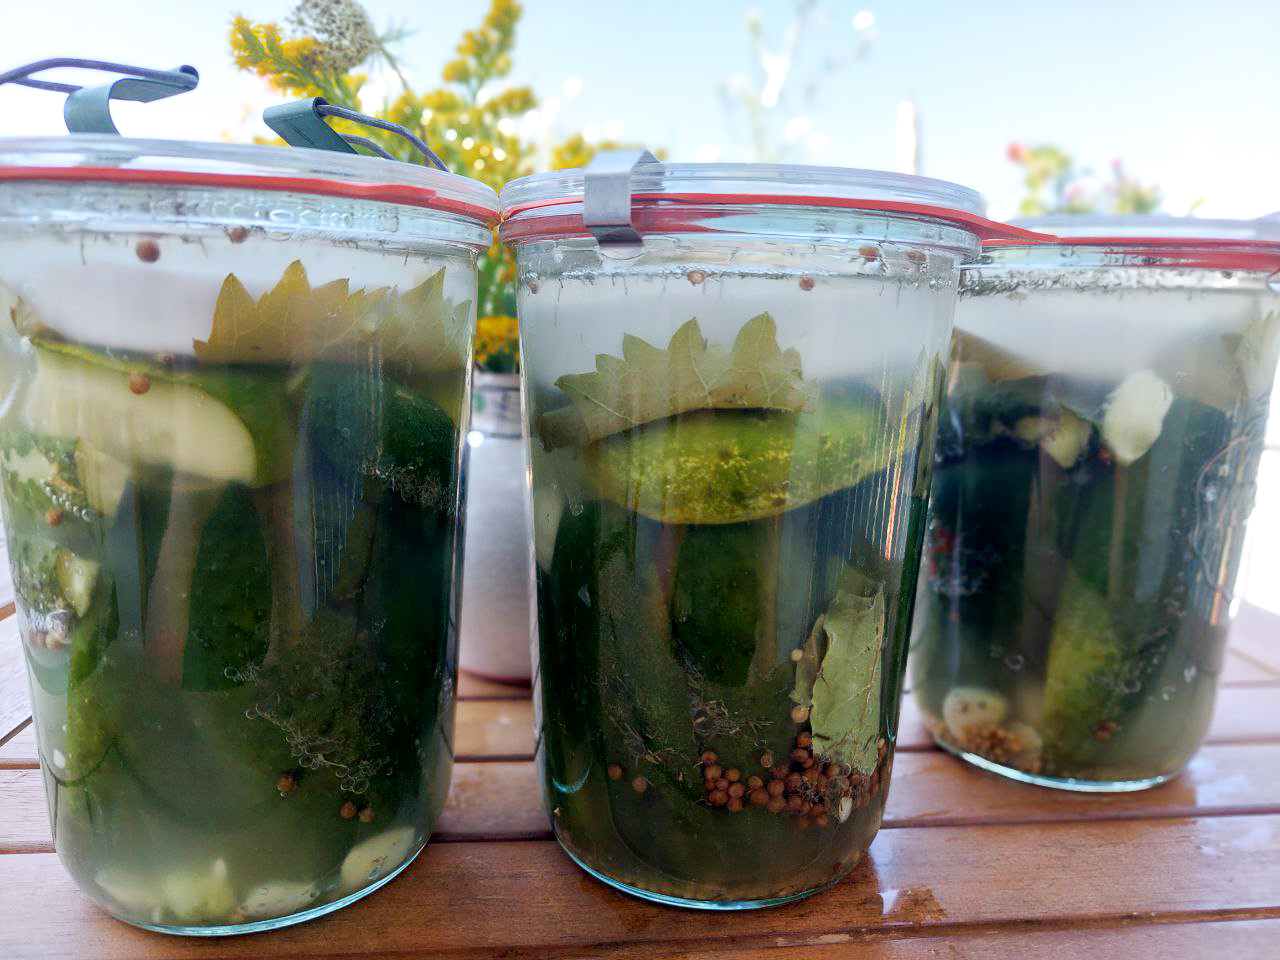
The brine method
Here, chopped or whole vegetables like carrots and cucumber sticks or cauliflower roses are put into a jar, which is then filled with brine until the vegetables are completely covered. Brine is essentially a water-salt solution with 25 – 50 g salt per litre of water, depending on the vegetables. Put the containers in a place without direct sunlight and temperatures between 13 and 24 °C, and let the contents ferment. If necessary, fill up with brine. The time of fermentation depends on the recipe.
The dry-salting method
Despite the name, this process is not dry. The vegetables are sliced as thin as possible and mixed with salt. Slicing breaks up the cell structure so that the salt can act more effectively and draw water out from the vegetables that gather as brine. Tightly press the vegetables into your containers and fill up with the remaining brine. Leave the containers in a place without direct sunlight at a temperature between 13 and 24 °C. The time of fermentation depends on the recipe.
Lacto-Fermentation for Beginners
Lacto-fermentation is not the only type of fermentation, though. Let me show you some other variants.
What are the different types of fermentation?
Here’s an overview of the most important types of fermentation:
Lactic acid fermentation
Microorganisms: Lactic acid bacteria (Lactobacillus species)
Outcome: Lactic acid → sour taste, preserving
Examples: sauerkraut, kimchi, fermented vegetables, yoghurt
Difficulty: ⭐ Easy – perfect for beginners!
Yeast fermentation
Microorganisms: Yeasts (Saccharomyces)
Outcome: Alcohol + CO₂
Examples: beer, wine, mead
Difficulty ⭐⭐⭐ Medium to advanced
Acetic fermentation
Microorganisms: Acetic acid bacteria (Acetobacter)
Outcome: Acetic acid → sour taste
Examples: apple vinegar
Difficulty: ⭐⭐ Easy to medium
Mould fermentation
Microorganism: noble mould fungi (Aspergillus, Rhizopus)
Outcome: Enzymes that develop complex flavours
Examples tempeh, miso, soy sauce, koji
Difficulty ⭐⭐⭐ Medium to advanced
Symbiotic fermentation
Microorganisms: Combination of bacteria and yeasts
Outcome: acid + a bit of carbon dioxide + low amount of alcohol
Examples: kombucha (SCOBY), kefir (kefir grains/crystals)
Difficulty: ⭐⭐ Easy to medium
In this guide, we’ll focus on lactic acid fermentation because it’s the easiest place for beginners to start.
Although we don’t need much to start our first ferment, there are some basic things we can’t do without.
Equipment You Need to Start Fermenting
The good news is that you can buy fancy equipment, but it’s not a must. In fact, if you just want to start, you probably have all you need already at home. I have written a comprehensive article on fermentation equipment, but let’s have a quick look at the basics :
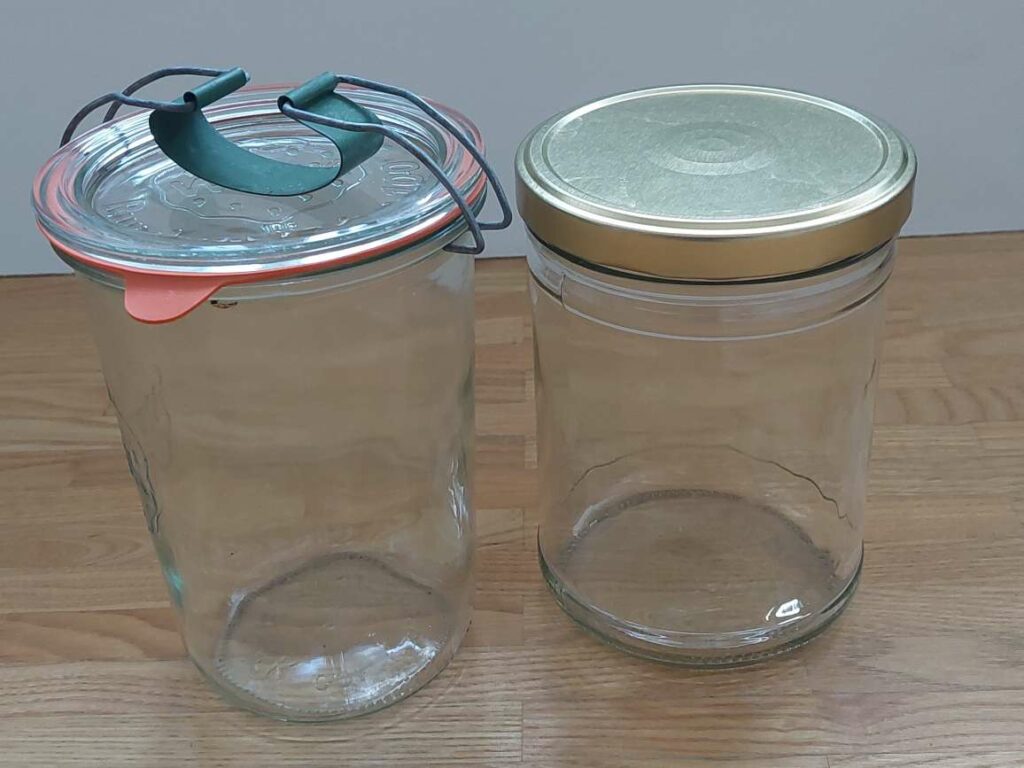
- Glass jars: Twist-off jars, mason jars, or Weck jars with rubbers and clips are equally fine
- Weights: There are really cool fermentation weights you can buy, but to start, simple freezer bags filled with water will work just fine
- Lids/airlocks: You need to cover the jars with lids, but you don’t necessarily need airlocks. The gases that form during fermentation will get out as long as you don’t twist the lids too tightly.
- Digital kitchen scale
- Non-iodised salt: Iodine will slow down or prevent fermentation
- Cutting board
- Knife
- Apart from good starter products and equipment, there are a few conditions that fermentation needs to work.
Fermentation conditions
There are a few factors that are crucial for a successful fermentation:
Hygiene
Before you start fermenting, wash your hands thoroughly with warm water and soap. Don’t use antibacterial soap, as this could inhibit the fermentation process – especially if you knead the cabbage. Wash your vegetables just with cold (!) water and don’t sterilise your equipment as this could kill our lactic acid bacteria. Just warm water and a bit of soap are enough to clean your equipment.
Temperature
I recommend a temperature between 13 and 24 °C for fermentation, as this is the range where lactic acid bacteria thrive. It’s important to keep the temperature constant. The warmer it is, the faster acid is produced. If it’s too warm, however, the microorganisms can’t develop quickly enough, and the taste will suffer.
If it’s too cold (especially at the beginning), the lactic acid bacteria can’t increase fast enough, which may lead to spoilage.
Light
A dark place is ideal for fermentation. This doesn’t mean that you have to store your fermentation crock in a pitch-dark hole, but it should also not be in direct sunlight. A shadowy corner in your kitchen or pantry where you can keep an eye on it is great.
Oxygen
As talked about earlier, fermentation happens without oxygen, so we must make sure that the vegetables are always under the brine. With the brine technique, this can mean that we have to add brine after several days. When applying the dry-salting technique, we can make sure that our veggies are constantly covered with brine by putting a weight on them and pressing them down.
Time
So, how long does it take until the fermentation process is complete and you can eat your fermented veggies? That depends, mostly on the kind of vegetables, but also on other factors like temperature and season. Technically speaking, veggies are fermented when they have reached a pH of under 4.6 (a pH of 7 is neutral, and the lower the pH, the more acidic the medium). If you want to determine the pH, go ahead and put a pH test strip into the brine. But you can also just rely on your taste buds: try your fermented food and eat it when you like the taste.
Ready to get started? Here’s a list of beginner-friendly fermentation recipes.
Best Ferments for Complete Beginners
| Difficulty | Ferment |
|---|---|
| Very Easy | Sauerkraut |
| Very Easy | Carrots |
| Easy | Radishes |
| Easy | Garlic |
| Medium | Fermented lemons |
The role of salt in fermentation
Salt can preserve fresh vegetables, including all their vitamins, for months or even years. It removes water from the cells, which gathers as brine in the fermentation crock. Brine again is important as lactic acid bacteria live anaerobically, i.e. without oxygen, which lots of other microbes need. To prevent the growth of those unwanted microbes, fermentations happen under the exclusion of oxygen, that is: in brine.
Salt also improves the consistency of the vegetables. It hardens the cells’ pectin so that they stay more stable and thus “crunchy”.
It may come as a surprise, but salt makes things salty and thus adds to the taste.
It also helps to keep unwanted bacteria and yeasts in check that are more sensitive to a salty environment than lactic acid bacteria.
Without salt, there could be an increase of yeasts that transform sugar not into lactic acid but into alcohol.
The best salts for fermentation are rock salt, sea salt and kosher salt. Always make sure that the salt you use doesn’t contain iodine, as this substance may slow down or even prevent fermentation.
Where to store fermented food
Storing fermented foods in the fridge slows fermentation almost to a standstill and helps preserve the flavour you enjoy.
If you are lucky and have a cool (below 10 °C but above 0°C) basement or even a root cellar, this is a great storage place for your fermented food! In that case, I recommend fermenting in larger containers because the food lasts longer the larger the container is. It is no coincidence that people used large fermentation crocks in the past.
Alternatively, you may preserve your fermented food in a water bath. With this method, you must be aware that precious vitamins and nutrients may be destroyed by the heat.
My basement is luckily very cool, and I can store all my fermented food there. If your cellar is too warm for that, I recommend a second fridge.
Common Fermentation Problems & Fixes
Here’s a short overview of common problems. For more detailed explanations, read my guide about fermentation problems and what to do.
Why is my ferment cloudy?
It’s perfectly normal that in the course of fermentation, the brine gets cloudy. You can eat it.
Is kahm yeast safe?
Kahm yeast is a thin white film on the brine surface that gets destroyed when you stir it slightly. Although it looks a bit suspicious, it’s safe.
Why do no bubbles form?
The most likely reason is that it’s too cold. Fermentation is best carried out at room temperature.
Why is it too salty?
Either you’ve added too much salt (stick to the ratio indicated in the recipe), or it’s too early, and you need to let it ferment a bit longer.
Why is my ferment mushy?
When you add too little salt, the fermented vegetables get mushy. Another reason would be that the ferment is older than a year.
Why is mould forming?
Most likely because the vegetables are not completely covered by brine. Lactic acid fermentation must be anaerobic.
Fermentation FAQ
How long does fermentation take?
That depends on the product you want to make and the type of fermentation. Lactic acid fermentation, for example, takes 5 – 10 days, while maturing a vinegar can take years.
Can fermentation happen without salt?
Salt is only necessary for lactic acid fermentation. Other types of fermentation don’t need salt.
Can I use tap water?
Yes, as long as it’s clean and unchlorinated.
Do fermented foods contain alcohol?
Some do, for example, beer, cider, and wine, which are fermented by yeasts. Other ferments like sauerkraut, sourdough or koji don’t contain alcohol.
Can I ferment fruit?
Yes, but it takes way shorter and should be eaten within 2 weeks. Due to the high sugar content, it can produce more bubbles and even become alcoholic.
Should fermentation smell bad?
To some people, cheese or sauerkraut smells “bad”, so that’s a very subjective term. As a rule of thumb, when you don’t like the smell, don’t eat it.
Can I ferment in metal containers?
No, as salt and acid will react with the metal over time.
Enjoy Traditional Food Skills?
Join the Seasonal Simple Life newsletter for seasonal gardening tips, preserving recipes, fermentation projects, and simple ways to live closer to nature.
Let’s revive a wonderful traditional preservation method
Fermentation connects beautifully with seasonal living because it teaches patience, trust, and making the most of abundance.
And it’s easier than you might have thought!
Our ancestors did it without any modern equipment – and you can do it, too. The most important thing: Just start. Your first sauerkraut needn’t be perfect, but with every new project you’ll gain experience.
Fermentation is more than a preservation technique. It’s a way of slowing down, working with nature instead of against it, and turning seasonal abundance into nourishing food for months to come. Start with a simple jar of sauerkraut and see where the journey takes you.
Welcome to the world of fermentation!
Continue Your Fermentation Journey
If you’re ready to start fermenting, these beginner-friendly guides will help you take the next step:
Start Here
Learn More
→ Fermentation vs Pickling
→ Common Fermentation Problems and Solutions
→ Fermentation Equipment for Beginners
Preserve More of Your Harvest
→ Fermented Gherkins
→ Spruce Tip Honey
→ Woodruff Syrup
0 Comments