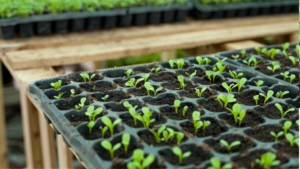
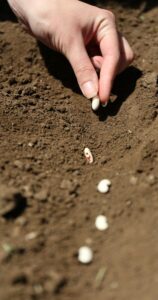
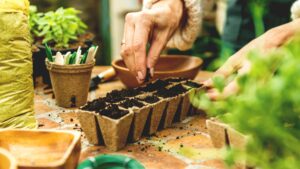
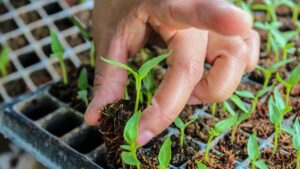
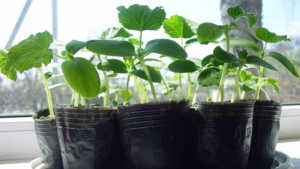
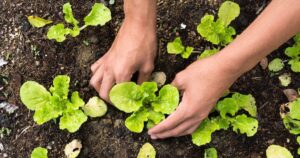
Where February still represents winter with a hint of spring as the days get longer, March is quite the opposite: spring with a hint of winter. There’s something magical about that transition from winter’s quiet to spring’s promise that gets my – still too clean – fingers itching and making me want to dig in the dirt. With rising temperatures in March, the list of vegetables to sow and plant grows as well.
While we can seed-start cold-sensitive veggies indoors, there are a few robust vegetables that can already be sowed and planted outdoors. Read on to learn what to sow and plant in March.
Loofahs belong to the cucumber family. As they like it very warm, they can only be cultivated in the greenhouse in my zone (7b). If you also want to include loofahs in your garden, now is the time to start them indoors. In my experience, it helps germination when we roughen up the seeds by grinding their edges on sandpaper and afterwards soaking them in lukewarm water for 24 hours before putting them into the soil.
Loofahs – like cucumbers – don’t like being transplanted, so I take larger pots and put in one seed per pot. That way, their roots won’t get meddled with, and we only have to disturb them once when we plant them outside.
Tomatoes
Mid-March is the right time to start all those tomato varieties indoors that you want to cultivate outdoors. Tomatoes for the greenhouse can already be started in February, but if you have missed it then, it’s not too late to start them now.
Usually, eggplants, chillies and peppers are started in February or even January because they need quite a long time to grow. You can still start them now, however! They may be a bit behind their time, but it’s not too late to grow them.
Greenhouse cucumbers
It’s too early to start cucumbers for the great outdoors, but if you want to cultivate them in the greenhouse, now is the time to start them. As with loofahs, cucumbers do not like to be transplanted, so take a large enough pot and put only one seed into it. That way, they need not be thinned and can later be planted in the greenhouse without having their roots disturbed.
Sow winter leek and – if you haven’t already – onions. I either sow 2 – 3 seeds per small pot, or I take a larger container and sow them in rows that I will be thinning later.
Onions I usually sow in small pots with three seeds per pot. When I transplant them later, I leave those small bundles of three together.
Lettuce
It’s best to sow lettuce every 3 – 4 weeks to ensure a continuous supply. There are some varieties that we can sow outdoors in March, while at the same time, seed-starting later varieties indoors. When it gets warmer, we can replace the harvested lettuce with those pre-grown plants and at the same time sow lettuce in different varieties directly into the beds.
Herbs
Parsley needs a really long time to germinate, and if you haven’t started it already in February, now is the time to do so.
Herbs, like basil, savoury, chervil, cress and others can now be pre-cultivated indoors, as well. Either sow several seeds in large pots (and thin them later if necessary) or take small seed trays and put one seed per tray.
Cabbages
We have already seed-started different members of the cabbage family in February, but we can still sow (again)
Red and white cabbage
Kohlrabi
Broccoli
Cauliflower and
Savoy cabbage
Remember to label the pots and note meticulously the kind of vegetable you’ve sown and its variety! You won’t be able to deduce it from the seedlings later. Believe me, I’ve been there, and you won’t want to make the same mistake.
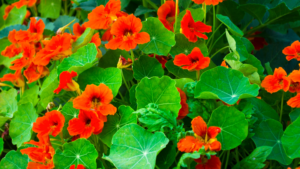
Nasturtium
Nasturtium is a great companion for cucumbers. It attracts insects that are harmful to cucumbers, like aphids, white flies and squash bugs and thus acts like a life trap to keep them away from the sensitive cucumbers. At the same time, it confuses and deters cucumber beetles and nematodes.
If all that wouldn’t be enough reason to plant nasturtium, it’s also a pretty sight in the garden with its beautiful flowers, and the whole plant (flowers, leaves and seeds) is edible.
Enough reasons to grow nasturtium? Grab your seed package and seed-start it now!
Potatoes
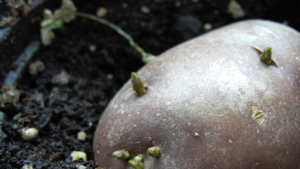
Sprouting your potatoes in March will give them a headstart for when you plant them in April. To sprout potatoes, lay them out on a surface and expose them to the light, for example, on a windowsill. I usually use egg cartons in which I put the potatoes. After a few days, we can see small sprouts growing out of the potatoes.
What to sow and plant outdoors in March
Depending on your hardiness zone, it may still be too early to sow anything outdoors, but in zone 7b, where I live, it’s ok to do so – IF we cover the seeds with protective covers or sow in the cold frame.
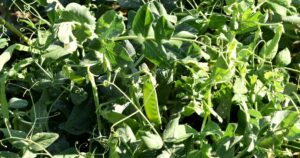
There are early varieties that can be sown outside mid to end of March. Just remember that peas are climbers and therefore install a trellis or net between the rows.
Carrots
Again, we’re talking early varieties here. If you have planted onion bulbs in autumn, sow the carrots in the rows between the onions. That way, carrots and onions will protect one another from harmful pests.
Broad beans
You can either sow broad beans outside in late autumn or now in March. It’s also possible to seed-start them indoors in January and plant them out now.
Broad beans are very tolerant of low temperatures and can even stand light frosts, which is why they don’t need protection against the cold. I usually cover them with fleece anyway, if not for their sake then at least for my peace of mind…
Lettuce
We’re talking about varieties here that are very tolerant of cold temperatures, like Asian lettuce and winter purslane. If we sow those outdoors now in March and later in April, plant the varieties we have seed-started indoors now, we can continually harvest different kinds of leafy greens. This method of sowing vegetables every 3 – 4 weeks is called succession planting, which not only ensures a continuous harvest but also that our beds are always covered.
Radishes
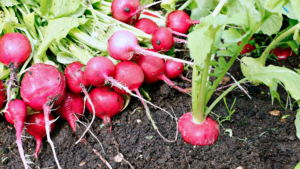
Radishes can be sown in a cold frame, a greenhouse or outdoors with protective fleece. As they have an exceptionally short maturity time, sow them every 2 – 3 weeks to have a continuous harvest.
Spinach
Spinach is almost a no-brainer: sow it, cover it with winter protection fleece and just let it grow. It’s usually quite tolerant of the cold and will grow well under protective cover.
Planting outdoors
Before we plant anything outdoors, it’s important to harden the seedlings off by gradually exposing them to outdoor temperatures. Start by putting your plants outside or in the greenhouse for 2 – 3 hours at first and prolong that time over the course of a week before transplanting.
Lettuce
Lettuce that we have started in February is now ready for transplanting outside. Make sure that the seedlings are not planted too deeply, or they may rot. As a rule of thumb, put them into the soil as deep as they were in the pot.
Strawberries
Plant strawberries in March, at best, different varieties that will ensure a long harvest, and cover them with protective mesh.
Spinach
If you have started spinach indoors, now is the time to transplant it, or you can sow it now directly into the patch (see above). No matter which way you take to get spinach into your garden, it will still need a protective cover against too-cold temperatures.
In March, we still have night frosts (and even some day frosts), but that doesn’t mean that there is nothing to do in the garden. Quite the opposite! There are plenty of garden tasks in March that will set your garden up for success. From preparing raised beds to sowing early vegetables, this March gardening checklist will help you make the most of the season.
Overview of garden tasks in March 2026
Here’s a quick overview of the most important garden tasks in March, including when to do them and whether frost protection is needed.
Garden Task
Best Time in March
Frost protection needed?
Priority
Seed-starting indoors
Any day this month
Yes - indoors only
High
Remove fir branches
Any dry day
No
Low
Remove mulch
Any warm day
No
High
Sprout potatoes
Anytime this month
Yes - indoors only
High
Force rhubarb (cover with bucket)
End of March
Yes
Optional
Air cold frames/greenhouse
On warm and sunny days
No
High
Fill up raised beds
When soil is no longer frozen and dry
No
Optional
Create new beds
When soil is no longer frozen and dry
No
Optional
Weeding
When soil is no longer frozen and dry
No
High
Plant strawberries
When soil is no longer frozen and dry
Yes
Optional
Sow/plant outdoors
When soil is no longer frozen and dry
Yes
High
Let’s go through each of these garden tasks in March in detail so you know exactly what to do and when.
#1 Fill up raised beds
Raised beds are not only filled with soil but also layered with organic materials like twigs, leaves, and plant stems. When that material decomposes, it is reduced in volume, which makes it sink down.
Now that your raised beds are empty, it’s a good time to fill them up with humus and compost. Fill more than the surface level, ideally forming a little mound, as the soil will sink again during the next weeks.
#2 Create new beds
If you want to enlarge your garden space, now is a good time to create new beds. I love this method of creating new patches as it doesn’t require digging or other heavy work, is very quickly done and wonderfully effective.
#3 Sprout potatoes for a head start
It’s still too early to plant potatoes, but you can give them a headstart by sprouting them. Lay them out flatly on a surface where they get lots of light. I usually put the potatoes into egg cartons that I place on the windowsill. After some time, they grow little green sprouts.
#4 Airing cold frames and greenhouses
With more sun hours, temperatures rise quickly in cold frames and greenhouses. Increased temperatures lead to increased condensation, which can make our plants rot. Air your cold frames and greenhouse regularly to let the moisture get out.
If you had protected plants with fir branches against the cold, it’s now time to remove them. While they were great in winter, we now need lighter materials for coverage, like straw or a winter protection veil that lets the light through. Fir branches at this stage of the season are too dense and can even impair growth.
#6 Remove mulch
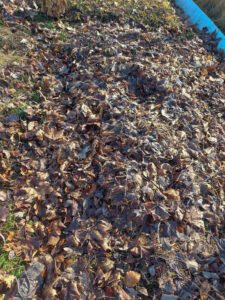
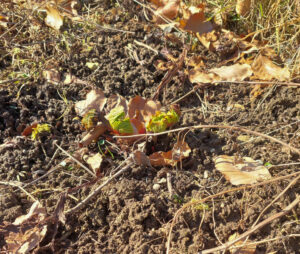
Mulch is not only a good protection against weeds, but it’s also a good insulator. On the downside, that means that it keeps the cold in the soil for longer than we want to. For that reason, it’s an important garden job in early spring to remove the mulch from our beds by raking it to the edges. That way, the soil can warm up quicker.
#7 Weeding
Even though we’ve covered the beds with mulch, there will still be some weeds. When we remove the mulch, it’s best to pull out the weeds that have grown underneath. Thankfully, they’ll come off easily.
Additionally, when the soil is bare and warms up, weeds will also start to grow. Pull them out soon before they get too large.
#8 Plant Strawberries
You can plant new strawberries now and protect them with a veil. If you have strawberries in your garden already, remove all wilted leaves now. They may be infected with diseases, and by removing them, you can prevent those from spreading.
#9 Force Rhubarb
Another garden task you can do in March is to put a bucket over your rhubarb to help it grow faster. The principle is that the early spring sun warms up the air and the soil underneath the bucket, which makes the rhubarb sprout faster. The lack of light doesn’t hamper that, but makes sure that the stalks become especially tender. With this method, rhubarb can be harvested about 4 – 6 weeks after covering.
At the same time, check the seedlings that you’ve started earlier in the year daily. Make sure the plants have enough water and are aired regularly so that excessive condensed moisture will not cause rotting.
#11 Sowing / planting outdoors
Admittedly, there are not many plants you can sow outdoors in March, but still, there are some. Here is an overview of vegetables that can be sown and planted outdoors now:
You’ll find more details about which varieties to use and how to protect those early seedlings in this post about what to sow and plant in March.
Transplanted vegetables not only need protection against the cold but also against pests like snails and slugs, which are very hungry now. A slug fence or collar is a good physical barrier against our slimy fellow lodgers and hopefully will keep them at bay.
Be grateful for every little helper 😊.
For the last few months, we were reduced to dreaming up our vegetable gardens. Now is the time to take action! And although it may still be cold outside, we can start doing these garden tasks in March. Grab your gardening gloves, hop outside and get gardening!
Dampfnudeln, those fluffy Bavarian steamed dumplings with a golden caramelised bottom, were my Oma’s speciality — and today I’m sharing her recipe so you can master them too. In this recipe, I’ll show you how to make traditional Bavarian Dampfnudeln step by step — including all the tips that ensure they turn out fluffy with that signature caramelised crust.
When Oma cooked for our family – usually during harvest when Mom and Dad were in the fields all day – she often made Dampfnudeln. She waited until the four of us children had gathered around the table, making sure our hands were washed. Every one of us already had a plate in front of them, along with two forks and a tablespoon. We had already grabbed the forks and held them like swords.
Finally, Oma brought the large pot and put it in the middle of the table. The lid was still closed, its edges covered with dishcloths to trap the steam, but we could already smell the sweet scent of the steamed Dampfnudeln. Although we could hardly wait, none of us would dare to open the lid, knowing that Oma would give us a good rap on the knuckles (I‘ll soon explain why).
She brought the large jug of vanilla sauce and finally, finally, opened the lid from the pot, releasing the steam that had been trapped in it. And oh, the smell!
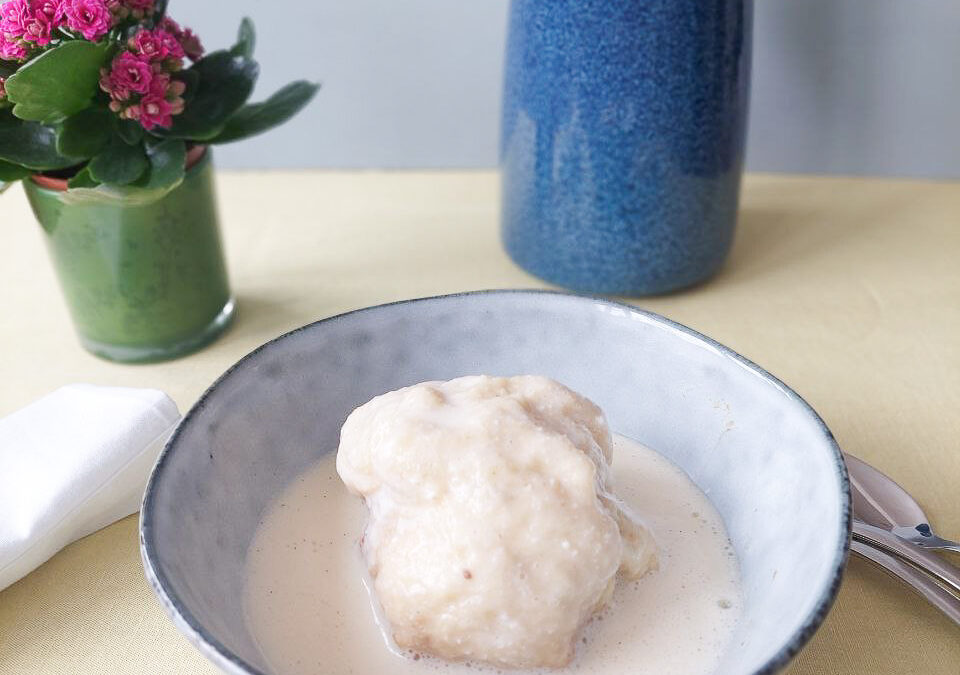
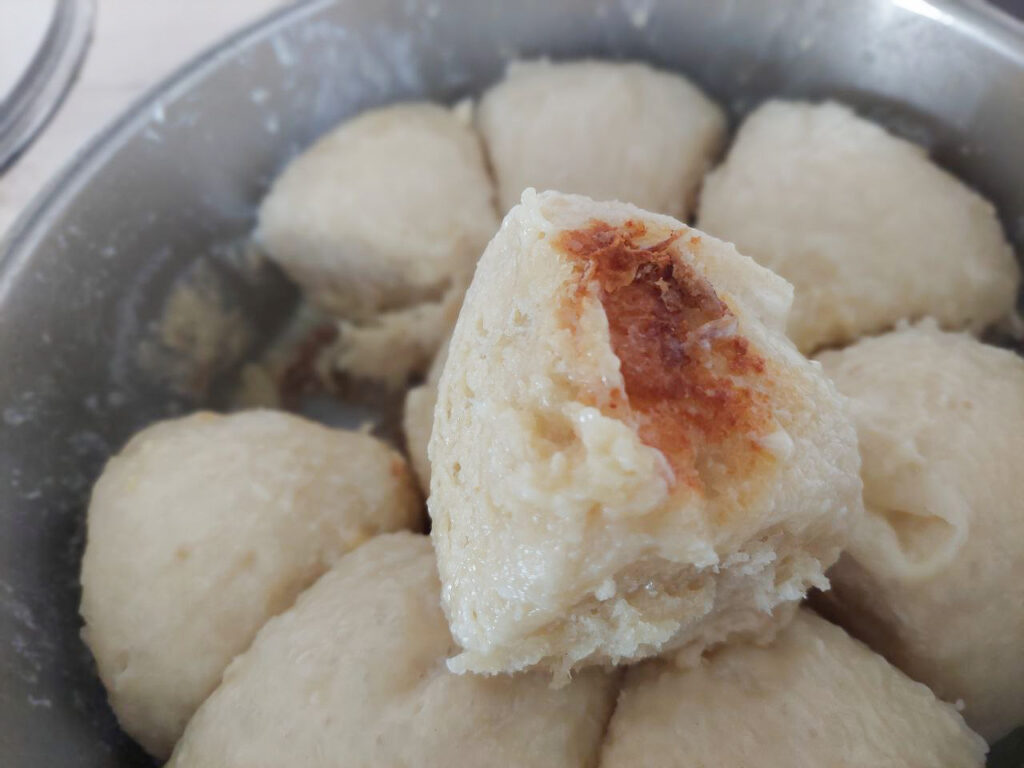
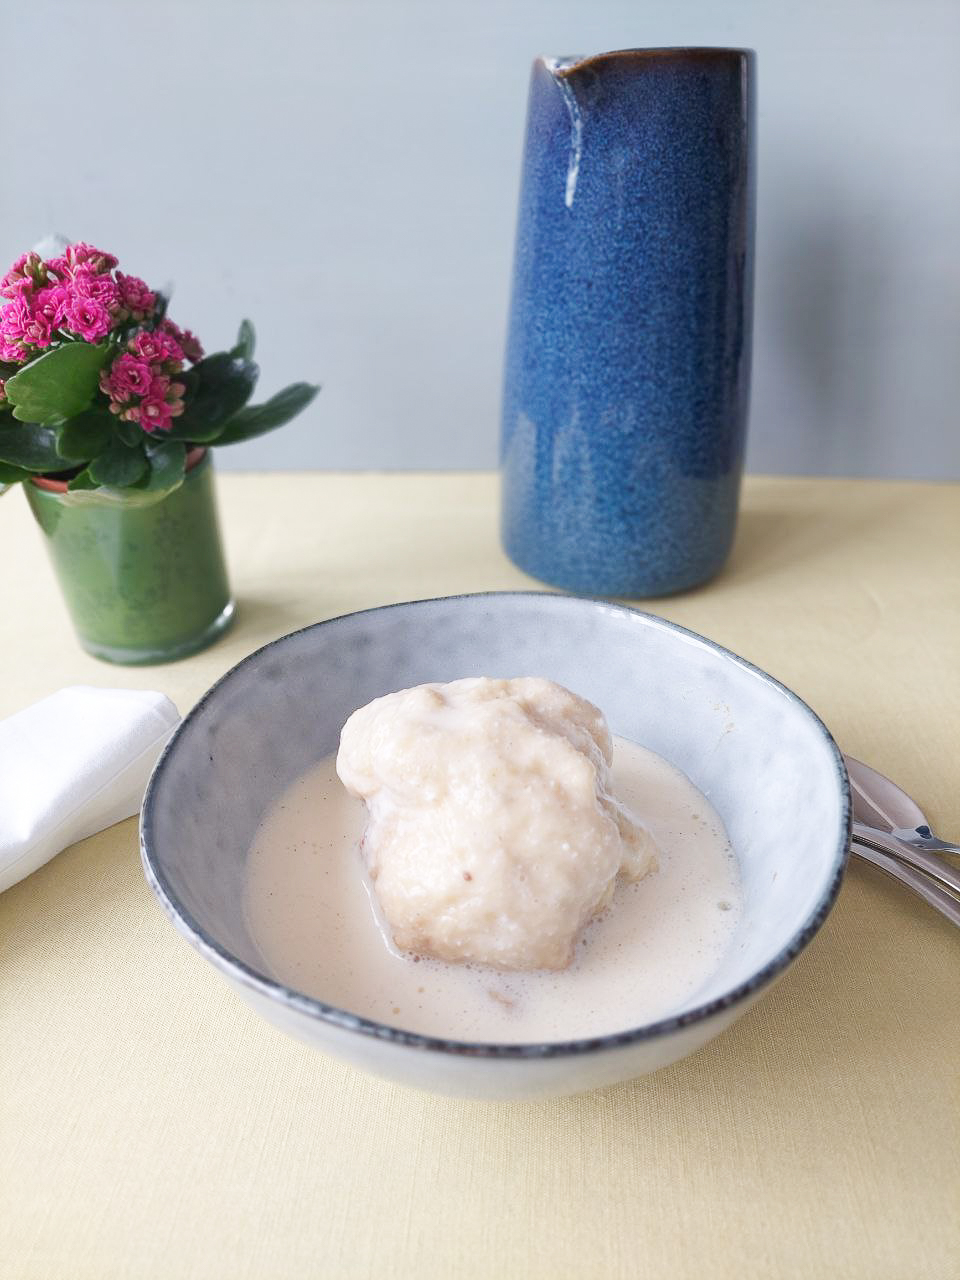
She carefully dug out one Dampfnudel after the other, and we could see the brown, caramelised crust underneath. As she’d placed them on our plates, we eagerly pulled them apart with our forks (hence two) and poured lukewarm vanilla sauce over them. It was pure bliss on a plate!
Aren’t familiar with Dampfnudeln? Let me explain what it is, where it originates from, and – last but not least – how to make the perfect Dampfnudel.
What is a Dampfnudel?
Basically, a Dampfnudel is a dumpling made from sweet, enriched yeast dough that’s steamed instead of baked. It’s a common dish popular across Southern Germany, Palatinate, Austria, Switzerland and the Alsace and is either served sweet or savoury as a main course.
The German word “Dampfnudel” translates as “steam noodle”. Now, “noodle” seems a strange word to describe what looks nothing like noodles, but it is actually an old word for “dumpling”.
Dampfnudeln (plural) are a traditional comfort food here in Bavaria, and they’re often served with sweet sauces like vanilla sauce or savoury sauces like mushroom sauce. They may sound like a dessert (and you can eat them as that), but in fact, they’re mostly served as a main dish, as they’re very filling. A pot of dampfnudeln and a jug of sauce can easily feed a whole family.
Where’s the Origin of Dampfnudeln?
Seeing as I’m from Bavaria, I’d love to say that Dampfnudeln originate here, in the heart of the land of mountains and lakes. But I can’t legitimately make that assertion, particularly as Rhineland-Palatinate, a state in the mid-West of Germany, claims that they’ve invented the Dampfnudel.
There’s a story about the village of Freckenfeld in Rhineland-Palatinate: During the Thirty Years’ War, the Swedes were threatening to plunder and burn down the village if the people wouldn’t pay an immense sum of money. The villagers persuaded the Swedes to spare them, and in return, they’d feed their soldiers abundantly.
The baker of Freckenfeld, a Mr Muck, was assigned the task to fulfil this promise. I’m sure he felt no pressure at all that he alone was responsible for the life or death of a village full of people.
He probably broke out in a sweat – and started to work.
It is said that Muck, with the help of his wife and his apprentice, made 1286 Dampfnudeln for the hungry soldiers (why anyone would want to count them is beyond me) and served them with enough sauce to feed, well, an army.
The village was spared, and the grateful villagers erected the “Dampfnudel-Tor” (Dampfnudel gate), consisting of the described 1286 Dampfnudeln (this time in stone) in commemoration of this event. The gate still stands, and if you ever come to Freckenfeld, go visit.
The Dampfnudel Gate in Freckenfeld (picture: pfalz.de)
In Bavaria, we don’t have a similar story, but we enjoy Dampfnudeln at least equally. The main difference between Bavarian and Palatinate Dampfnudeln is that we in the South usually enjoy them with a sweet sauce, fruit sauce or canned fruit. The people in the Palatinate, on the other hand, usually eat them with savoury sauces like mushroom or béchamel sauce.
Why You’ll love this German Dampfnudel recipe
Basic ingredients
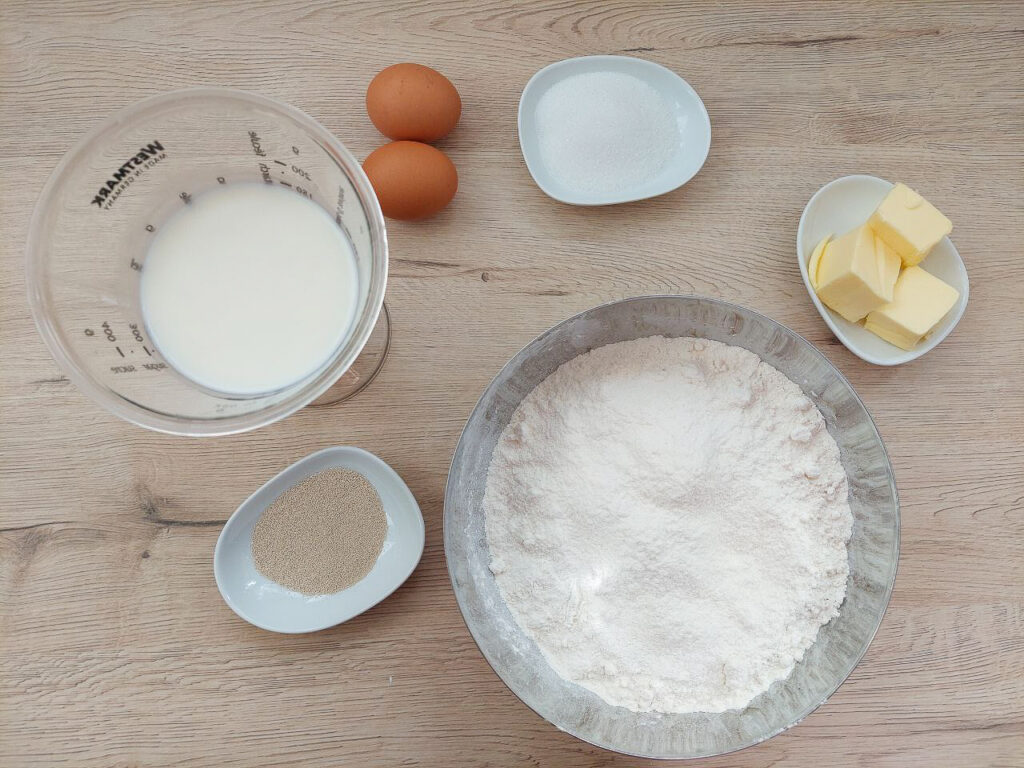
Dampfnudeln may seem difficult, but in fact, you’ll only need a few ingredients to make these delicious dumplings. In fact, it’s just a sweet yeast dough, enriched with butter, milk and eggs that makes the basis for Dampfnudeln. You’ll find the full list of ingredients in the recipe section.
Low cost
Seeing as the ingredients are very basic, you’ll see that this dish is very budget-friendly. You can feed a whole family with Dampfnudeln for only a few euros.
The same goes for the sauces or preserved fruits you’re gonna serve them with. Neither vanilla sauce nor mushroom sauce is complicated or expensive. Or you can just take a jar of homemade apple sauce or dry-canned apples from your pantry and serve them with a staple you made yourself.
Comfort
The best thing about Dampfnudeln, though – no matter if served sweet or savoury – is that they’re a real comfort food from autumn to spring. They’re warming, hearty, and pair beautifully with preserved pantry staples you’ve been putting up all summer. Their fluffy dough, drenched in sauce, is like a caress for the soul. Up to now, I have not come across anyone who wouldn’t love Dampfnudeln, and I promise you: your family will, too!
But enough talk. Head for the pantry, grab the ingredients for Dampfnudeln and let’s get started!
How to Make Dampfnudeln (Step-by-Step)
Prefer watching? Here’s how to make Dampfnudeln step by step.
You are currently viewing a placeholder content from Default. To access the actual content, click the button below. Please note that doing so will share data with third-party providers.
Put the flour, sugar, salt and dried yeast in a bowl (see recipe card for quantities).
Warm the milk to hand temperature and melt the butter in it.
Add the eggs to the dry ingredients and slowly pour in the milk. Stir all together to make a soft but not sticky dough and knead it thoroughly until it becomes pliable and the surface turns smooth and silky. If the dough is too sticky, add some flour; if it’s too dry, add some milk.
Knead the dough
You can either knead the dough by hand (which is my preferred method) or with the hook of a stand mixer. In either case, knead it for about 4 minutes until the dough gets the desired texture.
Proof
Put the dough in a bowl and cover it with cling film or a dishcloth. Set it in a warm place and let it rest for 60 – 90 minutes or until the dough has risen to twice its size.
Shape the dumplings
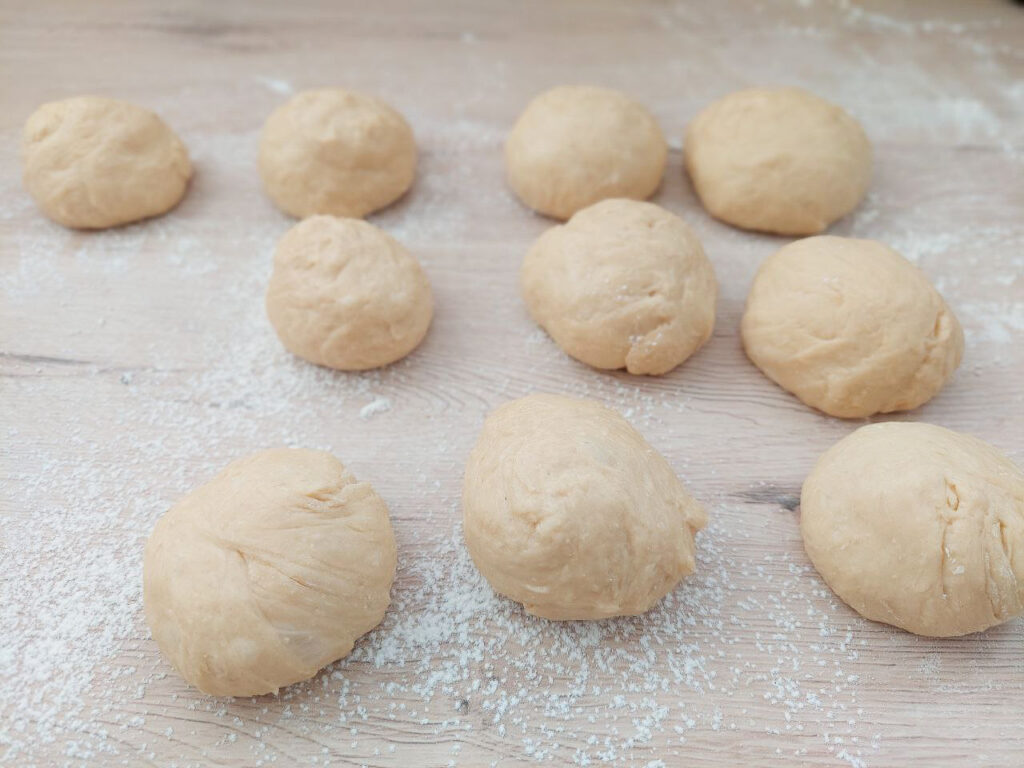
Get the dough out of the bowl and onto a lightly floured board, the kitchen counter or a table. Knead it gently and cut 8 – 10 equally large pieces out of it.
Roll the pieces to form dumplings, squeezing the seams together. Lay them on the floured surface, cover them and let them rest in a warm place for another 30 – 60 minutes.
Prepare the pot
In the meantime, take a large, heavy-bottomed pot or pan with high sides and put it on the stove. The pot should be large enough to hold all the Dampfnudeln. I, for example, use one with a diameter of 25 cm (10 inches). Put the sugar and butter in it and pour in the milk. Slowly heat the mixture and stir it until the butter has melted and the sugar dissolved.
How to steam Dampfnudeln
When the dough balls have risen considerably, carefully put them into the pot with the warm milk. Make sure they have enough room to rise, so don’t squash them too tightly.
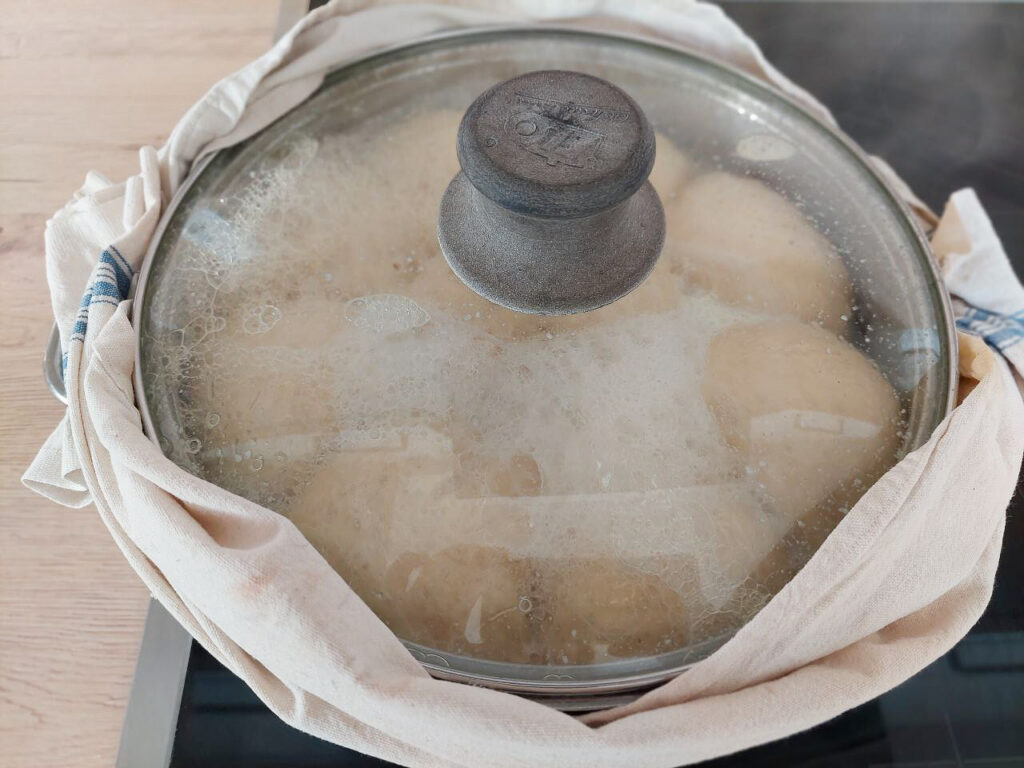
Close the pot with a lid, ideally made of glass, so that you can look into the pot. Bring the milk to a simmer on low. You want your Dampfnudeln to be steamed, not cooked. If the temperature is too high, the Dampfnudeln will burn while still raw in the middle. To trap the steam in the pot, you can wrap two dishcloths around the rim, just like Oma did.
From now on, do not open the lid until the Dampfnudeln are fully done! This is essential. When you open the lid, even just a tiny bit, the Dampfnudeln will crumble down.
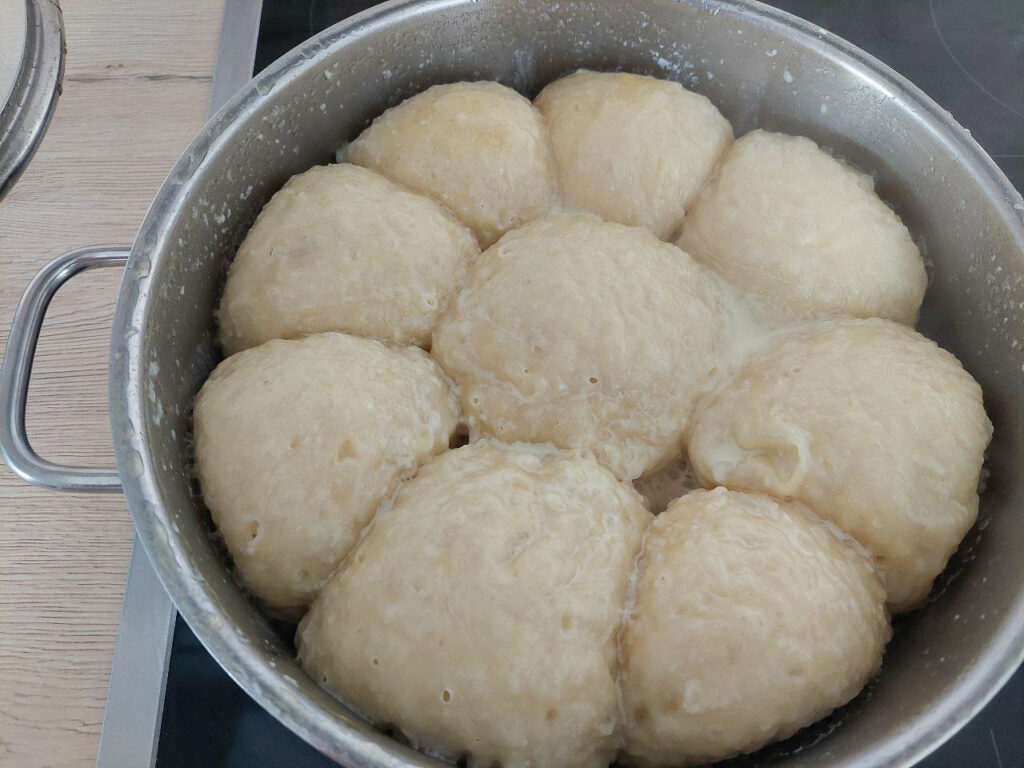
Set the timer and let the Dampfnudeln steam for 30 – 35 minutes. You’ll know they’re done when they don’t move anymore, as the bubbling liquid has been absorbed. As a result, their shape has become stable. The simmer gentles down, and condensation increases.
When they’re done, carefully open the lid. As they’re cooked through now, they won’t crumble.
Freshly steamed Dampfnudeln. Let them cook for another few minutes until the moisture is absorbed and the crust starts to form.
Form the crust
Increase the temperature to medium and let the Dampfnudeln simmer for another few minutes until the milk is completely absorbed. When you can hear a slight sizzling, the crust is forming.
Immediately remove the pot from the stove to prevent the Dampfnudeln from burning and serve them right away, ideally with homemade vanilla sauce. (In this post about apple strudel with vanilla sauce, I’ll give you my favourite recipe).
Why Dampfnudeln get crust (and why you mustn’t open the lid)
During cooking, the liquid evaporates and steam forms. That steam is trapped in the pot and cooks the dough gently and evenly. That’s the reason you must never open the lid during the steaming process. The steam would get out, and cold air would flow in, ruining the result.
The butter in the mixture not only adds some flavour (fat is a flavour carrier) but also prevents the dough from sticking to the pot. With the help of butter, the Dampfnudeln can brown in the end instead of getting scorched.
When at the end of the steaming process, all the liquid is absorbed and evaporated, the sugar concentrates on the bottom of the pot and caramelises. Only after steaming is finished, the caramelised Dampfnudel crust forms. Additionally, the milk proteins and the sugars cause what’s known as the Maillard reaction, which gives browned food its distinct flavour.
Dampfnudeln
Authentic German Steamed Buns with a Caramelised Crust
Put the flour, sugar, salt and dried yeast in a bowl.
Warm the milk to hand temperature and melt the butter in it.
Add the eggs to the dry ingredients and slowly pour in the milk. Stir all together to make a soft but not sticky dough and knead it thoroughly until it becomes pliable and the surface turns smooth and silky. If the dough is too sticky, add some flour; if it’s too dry, add some milk.
Knead the dough for about 4 minutes until it gets the desired texture.
Put the dough in a bowl and cover it with cling film or a dishcloth. Set it in a warm place and let it rest for 60 – 90 minutes or until the dough has risen to twice its size.
Get the dough out of the bowl and onto a lightly floured board, the kitchen counter or a table. Knead it gently and cut 8 – 10 equally large pieces out of it.
Roll the pieces to form dumplings, squeezing the seams together. Lay them on the floured surface, cover them and let them rest in a warm place for another 30 - 60 minutes.
In the meantime, take a large, heavy-bottomed pot or pan with high sides and put it on the stove. The pot should be large enough to hold all the Dampfnudeln. Put the sugar and butter in it and pour in the milk. Slowly heat the mixture and stir it until the butter has melted and the sugar dissolved.
When the dough balls have risen considerably, carefully put them into the pot with the warm milk.
Close the pot with a lid. Bring the milk to a simmer on low. To trap the steam in the pot, you can wrap two dishcloths around the rim.
From now on, do not open the lid until the Dampfnudeln are fully done!
Set the timer and let the Dampfnudeln steam for 30 – 35 minutes. When they're done, carefully open the lid.
Increase the temperature to medium and let the Dampfnudeln simmer for another few minutes until the milk is completely absorbed. When you can hear a slight sizzling, the crust is forming.
Immediately remove the pot from the stove to prevent the Dampfnudeln from burning and serve them right away, ideally with homemade vanilla sauce.
The Secret to Perfect Dampfnudeln (Troubleshooting)
If you enjoy traditional recipes like this and want more seasonal inspiration straight from my kitchen, join the Seasonal Simple Life newsletter below.
It took me years to make perfect Dampfnudeln that are fluffy on the inside and have a crispy, caramelised crust. After testing various methods and many batches of (sometimes failed) Dampfnudeln, I’ve learned my lessons. Let me show you.
The Dampfnudeln are raw inside.
This is a common occurrence when the temperature for simmering is set too high. That way, the Dampfnudeln are cooked instead of steamed, and the milk evaporates too fast.
Next time, make sure that you only let them simmer on very low heat.
The bottom is burned
This could either be a pan, timing or measuring issue:
Make sure you use a heavy-bottomed pot.
When the Dampfnudeln are ready, and you open the lid and let them cook a bit more on the stove, listen carefully. When they start to sizzle, the crust is done, and you must immediately remove the pot from the stove.
Measure the amount of milk or water for the pot carefully, and don’t use too little.
The Dampfnudeln have no crust.
You probably used too much liquid that wouldn’t evaporate fully, even after the lid was opened.
Carefully measure the liquid.
The Dampfnudeln have collapsed.
That’s a classic case of curiosity and impatience. You opened the lid too soon, that is, before the Dampfnudeln were completely steamed through. The steam escaped while at the same time, colder air got inside the pot and caused the Dampfnudeln to collapse.
Keep the lid closed during steaming! Even a slight opening is too much for the sensitive dumplings.
The Dampfnudeln are heavy and dense
Several reasons can lead to dense and heavy Dampfnudeln.
The most common mistake is that the dough was too dry in the first place. Make sure the dough is soft and pliable, and add some milk if necessary.
Another reason can be that the dough wasn’t kneaded enough for the gluten to develop. The yeast in the dough creates gas, which must be trapped within the dough for it to rise. When the gluten structure is insufficiently developed, it can’t hold the gas, and the dough won’t rise properly. Knead the dough until it is soft and pliable and has a smooth and silky surface.
Speaking of rising: give the dough enough time to proof. It must approximately double in size. Now, depending on the temperature the dough is left in, this takes longer or shorter. Don’t stick too close to the clock; rather, watch the dough.
Lastly, when the cooking temperature is too high, the outer dough will set too fast, and as a result can’t rise during steaming. Always simmer Dampfnudeln on very low heat.
The dough didn’t rise.
This can be due to yeast problems: When the yeast is too old, it sometimes gets weak and doesn’t produce enough gas for the dough to rise properly. Check that your yeast hasn’t expired.
Also, if the milk you add to the dough is too hot, it can kill the yeast. Make sure the milk is not hotter than 38 °C (100 °F).
Don’t worry, though. Even experienced cooks have these mishaps from time to time. Just remember that practice makes perfect.
Serving Ideas for Dampfnudeln
Dampfnudeln are incredibly versatile and can be eaten with sweet or savoury sauces. While sweet Dampfnudeln are the Bavarian classic, savoury versions are especially popular in the Palatinate.
Sweet Dampfnudeln (German classic)
Dampfnudeln with vanilla sauce: The classic (and in my opinion, most authentic) way to eat Dampfnudeln is with vanilla sauce.
Fruit: But, of course, you can also serve them with apple sauce or fruit compotes like these dry-canned apples. Oma, for example, always liked to add preserved elderberries or plums to the (obligatory) vanilla sauce.
Butter and sugar: Some people like to pour brown butter on top or dust them with poppy seed sugar, although that’s more common with Germknödel, a filled Dampfnudel variation (more on that below).
Savoury Dampfnudeln Ideas
Mushroom sauce: In Palatinate, it’s more common to steam Dampfnudeln in salted water instead of sweet milk and then serve them as a savoury dish, for example, with a creamy mushroom sauce.
Vegetables: Another delicious way to eat hearty Dampfnudeln is as a side dish to homemade sauerkraut, spinach or other vegetable sauce and soup.
Meat: Serve Dampfnudeln as dumplings with goulash.
Make Ahead and Storage
How to prepare Dampfnudeln in advance
The yeast dough for Dampfnudeln can well be made ahead. Just don’t let it proof in a warm place, but put it in the fridge instead. There, it’ll rise as well, but slower due to the low temperatures. When you plan to make Dampfnudeln in the evening, you can make the yeast dough in the morning or even the evening before and let it proof in the fridge.
Before shaping the Dampfnudeln, take the dough out of the fridge and let it warm up for 1 – 1.5 hours.
Another way to prepare Dampfnudeln ahead is by freezing the raw dumplings. Cut off equal pieces from the yeast dough and roll them into dough balls. Instead of letting them sit to proof, put them in a bag and then in the freezer. Dampfnudeln can be stored in the freezer for up to three months.
Before you cook them, take the dumplings out of the freezer and let them defrost in the fridge overnight.
How to store Dampfnudeln
You can store cooked Dampfnudeln in a closed container for two days at room temperature, 3 – 4 days when you put the container in the fridge.
Alternatively, freeze Dampfnudeln. Just make sure they’ve completely cooled down, then put them in a bag and store them in the freezer. Before eating, take them out of the freezer and let them defrost in the fridge overnight. The next day, you can heat the Dampfnudeln in a microwave or the oven.
How to reheat Dampfnudeln
You got your Dampfnudel out of the fridge or freezer, but how to reheat it so that it becomes that fluffy ball again? There are a few different methods:
Microwave: Moisten or even rinse the Dampfnudel, put it on a plate and let it steam in the microwave for 3 – 4 minutes (600 W)
Pot: Heat some water in a pot, hang a tight-meshed sieve, steaming basket or dishcloth in it (the water mustn’t touch it). If you use a dishcloth, tie it loosely to the pots’ handles so that it forms a slight hollow. Now put the Dampfnudel in whatever device you’re using, close the lid and let it slowly reheat in the steam for 15 – 20 minutes.
Oven: If your oven has a steam function, wonderful! Use that. If not, you can use a roasting pan and an oven rack. Preheat the oven to 160 °C (320 °F), bring some water to the boil and pour it into the roasting pan in the oven. Moisten or rinse your Dampfnudel, put it on the oven rack and push it into the preheated oven. Let the Dampfnudel steam for 20 – 30 minutes and make sure that the water doesn’t evaporate completely.
Steam cooker: Preheat the steam cooker and let the Dampfnudel steam for 15 – 25 minutes in the steaming basket.
Dampfnudel Variations (Traditional and Modern Recipes)
You’ve learned the traditional way to make Dampfnudeln now, but there are a few variations that I’d like to show you, as well.
Sourdough Dampfnudeln
This variety is wonderful as a side dish to goulash or a hearty soup.
Leave out the eggs and milk, and instead make the Dampfnudel dough with sourdough or sourdough discard (alongside the yeast) and water. They must proof a bit longer, around 1.5 – 2 hours, but the steaming process is the same. Put them into a pot with warm water, salt and butter and steam them for 30 – 35 minutes.
Wholemeal flour Dampfnudeln
You can substitute the all-purpose flour with the same amount of wholemeal flour to make Dampfnudeln. You may want to add a bit more milk or water to the dough as wholemeal flour tends to absorb more water. Also, proofing time may be a bit longer. Just give the dough enough time to double in size. Wholemeal flour Dampfnudeln can be either made sweet or savoury.
Filled Dampfnudeln (Germknödel)
A classic Austrian Germknödel, the Austrian version of a filled Dampfnudel, is traditionally filled with plum jam. When you cut the dough into pieces, pull the pieces a bit so that they become flat(ish). Now, place a large teaspoonful of plum or any other jam you like on the dough and close it around the filling. Press the seams together so that the filling is safely tucked inside, and roll the dough into a ball.
When all dumplings are made, leave them to proof, just like regular Dampfnudeln, before steaming them. Germknödel are usually served drizzled with melted brown butter and sprinkled with poppy seed sugar.
Vegan Dampfnudeln
The sourdough Dampfnudeln I mentioned earlier are a good vegan alternative for a salty version. But you can also make vegan sweet Dampfnudeln: Leave out the eggs, replace the milk with oat, almond or soy milk – whatever you prefer – and use margarine instead of butter. You will want to add about a third more margarine than in the traditional recipe, since you have to replace the eggs.
Vegan Dampfnudeln can be just as fluffy as traditional ones, but the crumb is usually slightly lighter and less rich because eggs and dairy add tenderness, structure and moisture.
Here are answers to the most common questions about making Dampfnudeln.
Frequently Asked Questions
Why are my Dampfnudeln dense?
You most probably haven’t kneaded the dough enough and/or given it enough time to rise. Other reasons are that the dough was too dry or you cooked the Dampfnudeln at too high a temperature.
Can I make Dampfnudeln without egg?
Absolutely. Leave the eggs out of the recipe and add more butter (or margarine, if you prefer a vegan version) and, if necessary, more liquid.
Can I make Dampfnudeln without a special pot?
Yes — any heavy pot with a lid works (pan, Dutch oven and so on)
Why must you not open the lid?
When you open the lid before the Dampfnudeln are cooked through, the trapped steam gets out of the pot while cold air gets into it, causing the Dampfnudeln to collapse.
Are Dampfnudeln the same as Buchteln?
Not quite, but close. The (sweet) yeast dough is the same, but while Dampfnudeln are steamed, Buchteln are baked.
Can I use fresh yeast instead of dry?
Absolutely. Use three times the amount of fresh yeast compared to dry yeast.
Can I make Dampfnudeln in the oven?
Yes. Put the (proofed) dough rolls in a greased casserole, fill the casserole with a mixture of warm milk, sugar and butter (like in the traditional recipe) and let the Dampfnudeln bake for 25 minutes at 180 °C (355 °F). Please note that the texture will be different: while traditionally steamed Dampfnudeln are soft on the surface, the baked version will be crisp on the outside.
Why don’t my Dampfnudeln brown?
When they’re cooked through, open the lid and let them cook until all the moisture is absorbed and evaporated. The crust forms after the steaming process.
Seasonal Simple Life Tips
Dampfnudeln are a wonderful Bavarian comfort food. Imagine coming home on a cold autumn day, where you’ve cleaned up your garden, to a steaming plate of Dampfnudeln with vanilla sauce. Pure bliss!
Alternatively (or additionally, if you prefer), serve the Dampfnudeln with homemade fruit preserves, like apple sauce, dry-canned apples, preserved elderberries (as Oma used to), plums or cherries. Try different fruit preserves; there’s no limit to your imagination.
Dampfnudeln are not only delicious, but also a traditional slow food. You need patience to let the dough proof twice, and especially during the steaming process. No lifting the lid, remember?! Take that time deliberately, to make a special, nourishing dish for your family.
While you’re at it, think about making a double batch and either freezing the raw dumplings or the steamed Dampfnudeln. That way, you’ll have a meal prepared that you only have to take out of the freezer the night before and just reheat.
From Oma’s Kitchen to Yours — Ready to Make Your First Dampfnudeln?
Do you remember the beginning of this article, where we four children were sitting at the table, forks raised like swords, waiting for Oma to open that lid?
I’d love for you to create that moment in your own kitchen.
It doesn’t matter if it’s your children, your partner, your friends or just yourself — there’s something deeply satisfying about setting a steaming pot of Dampfnudeln on the table, knowing you made them from scratch with a handful of simple ingredients. And yes, your first batch might not be perfect. The lid might have been lifted just a tiny bit (we’ve all been there), or the crust might not have formed quite right. Don’t worry. Even imperfect Dampfnudeln are delicious — and the next batch will be better.
That’s the thing about traditional recipes like this one: they reward patience and practice. Let the dough take its time. Don’t rush the proofing. And whatever you do — don’t open that lid.
This recipe shows you exactly how to make traditional Dampfnudeln with a fluffy crumb and caramelised crust — step by step.
Guten Appetit! 🥟
If you love traditional comfort food, you might also enjoy these seasonal favourites from my kitchen:
This Dampfnudeln recipe is part of my growing collection of traditional, seasonal dishes. Browse the full recipe archive here and find your next comforting kitchen project.
Imagine walking into a nursery in May and seeing healthy tomato transplants for €4 each. That’s exactly why starting seeds indoors is one of the best skills a vegetable gardener can learn — a whole packet of ten tomato seeds costs the same €4, meaning you could grow all ten plants for the price of one. Last year, I grew 40 tomato plants that way and saved 144 euros. Not bad for a bit of soil and some windowsill space.
Saving money is only one part of the story, though. Starting seeds indoors gives your plants a 6-8 week head start on the season.
But do you know what’s the best part of seed starting? The satisfaction and pride when you have coaxed those tiny seeds into sturdy, healthy, and yummy vegetables!
Now, I’ll be honest with you: it does take some effort and a bit of know-how. Sow your tomatoes too early, for instance, and by transplanting time, you’ll have a leggy, floppy mess that can barely hold itself upright, let alone produce a decent harvest. (I know what I’m talking about here.) Get the timing, light and soil right, though, and the results will make you wonder why you ever bought a seedling in your life.
This guide covers everything: which supplies you actually need (and which you can skip), when to start what, and how to nurse your seedlings from first sprout to garden-ready transplant — including how to fix the most common problems along the way.
Not sure if you can manage seed starting? Let me show you:
Is seed starting for me?
When do I start?
It depends on what vegetables you want to start from seed, but as a rule of thumb, start 6 – 8 weeks before your last frost date.
What should I start?
As a beginner, I recommend starting small with lettuce, cabbage, tomatoes and zucchini because they sprout effortlessly and fast.
Do I need lots of stuff?
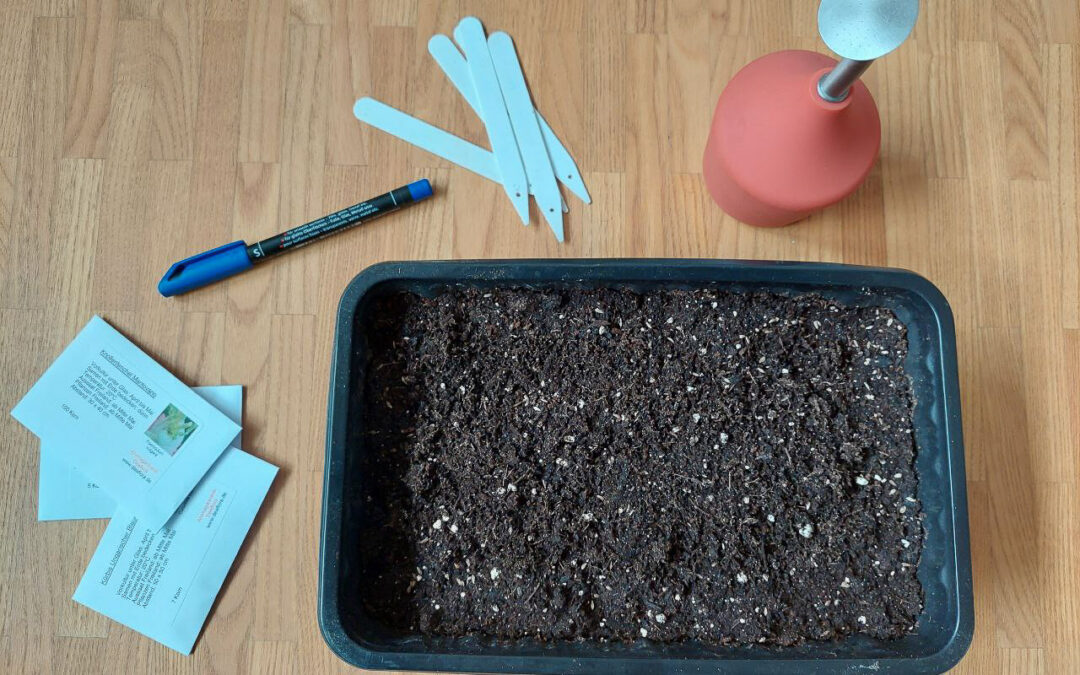
No, you’ll probably already have most of what you need to seed-start: pots (any form of container will do, e.g. empty milk jugs or egg cartons), cultivation soil, seeds of course, and plant labels.
What’s the biggest mistake?
Getting impatient and starting too early 😏.
How long does this take?
Most seeds germinate within a week; some (like peppers and chillies, for example) take longer. The seedlings will stay several weeks indoors before transplanting.
Can I actually do this?
Absolutely! You’ll make mistakes along the road, as we all have done (and still do), but this guide will show you exactly what to do and what to avoid.
Now that we’ve clarified that you can successfully start vegetables from seed, let’s see why it’s absolutely worth it.
Why seed starting?
Many gardeners shy away from seed starting. Too much work, too little space, too tedious. But that’s not true!
Look, I won’t sugar-coat it: you do have to spend some time starting vegetables (or flowers for that matter) from seed and tending to the seedlings, but it’s worth every minute!
Let me show you why:
Saving costs
Seed starting will save you an enormous amount of money. Don’t believe me? Let me show you a small calculation:
As I said earlier, one seed package of tomatoes, containing 10 seeds, costs about 4 €, that is 40 cents per plant. One tomato plant at the nursery costs at least 4 €, sometimes even more, depending on the variety.
That’s ten times the amount you pay for seeds.
Seeing as I grew about 40 tomato plants last year, that’s a saving of 144 € or a saving of 90 %!
Even if you have just a small garden or even only pots for your vegetables, your savings will still be considerable.
Variety
When you buy seedlings from a nursery, you usually can’t choose the variety of vegetables you want to plant. Or – if you can choose – they only have very few of the most common types.
BUT: when you decide to start your own vegetables and browse your first seed catalogue, you’ll find a whole new world of seed varieties. It’ll be almost as if suddenly you’ve discovered the door to Narnia!
You can choose from varieties that are perfect for your climate, heirloom varieties, old varieties and even varieties that have become almost extinct! By supporting this diversity, you not only get healthier plants that are better adapted to your climate, but you also contribute actively to preserving the diversity of varieties.
Headstart
We all love tomatoes, eggplants, chillis and peppers, but they need a long time to mature. If we were to sow them only when it’s warm enough outside (in my zone 7b, that’s mid-May), they would never have enough time to ripen, and they’d only get to produce some green fruit before autumn frosts fall.
By starting them from seed, we fool those plants a bit by pretending that it’s warmer and sunnier than it actually is, inducing them to germinate. By the time we can transplant them, they’ll have grown into healthy and sturdy young plants already.
That way, we give your plants a headstart of 6 – 8 weeks.
Indoors, your seedlings are safe from hungry pests—snails, cabbage flies, and voles can’t reach them.
They’re also protected from harsh weather. Rain, wind, and intense sun can damage young seedlings before they’re strong enough to handle it.
By starting them indoors, we can pamper our veggie babies until they become strong enough to face the outside world.
Efficient use of garden space
Seed starting is not only a task for spring, though. By continually starting lettuce, for example, we always have plants ready to be planted outdoors and fill the gaps we get by harvesting earlier vegetables.
When your beds are fully planted in early summer, start autumn vegetables indoors. When you harvest a vegetable variety, you can already plant the next batch, ensuring there won’t be a gap for too long.
Now that you know WHY seed starting is worth your time, let’s talk about WHEN to begin.
When to Start Seeds Indoors
Every vegetable has its own special requirements regarding the time of sowing, and we gardeners must stick to that time frame as if our veggies’ lives depended on it.
Which they do.
I know how tempting it can be to sow tomatoes in January already, but believe me, you’ll regret it. Yep, speaking of experience here. By the time you can finally plant your tomatoes outside, they’ll be too long and weak to bear their own weight, let alone bear lots of fruit.
The right timing is a decisive factor for healthy and fruitful plants. It mostly depends on the last frost dates in your hardiness zone.
Some vegetables must be started early from seeds, while others have a longer time frame. If you want to harvest continually (and who doesn’t?), one-time sowing is not enough. That’s why we sow vegetables like spinach, radishes, lettuce and carrots several times a season. This principle of staggered sowing and planting is called succession planting and is a total game-changer in the vegetable garden!
Your zone tells you when the last frost will likely fall and when to expect the first frost. These are important for calculating when to start vegetables indoors.
Which vegetables to start indoors vs direct sow
Basically, there are three groups of vegetables:
– those that MUST be seed-started to get a chance of harvest
– those that CAN be seed-started but needn’t necessarily be, and lastly
– those that NEED NOT be seed-started.
The sloths amongst our vegetables are cucumbers, tomatoes, eggplants, peppers, chillis and physalis. They need a long time to mature, and for that reason, must be sown indoors between January and March already. Later would be too late.
Then we have the “sensitive souls” like lettuce and all cabbages. Theoretically, you can sow them directly outside, but they are prone to being devoured by slugs while still young and their chances of surviving an attack of the pests are meagre.
Starting them indoors, however, and not transplanting them before they have become healthy, sturdy seedlings, makes them stronger and less vulnerable to pests.
The third group are those vegetables that can’t cope with transplanting, among them almost all root vegetables, for example, carrots and turnips. Think about it: their goal is to develop long and big roots, so they don’t like being removed from the soil (even for a short time) to be transplanted again. Root vegetables are best sown directly into the bed, except for knob celery.
When in doubt, look at the back of your seed packages: most of them have a recommendation as well as the appropriate sowing and planting times there.
Best seeds to start indoors for beginners
Some vegetables are almost no-brainers when it comes to starting them from seed, and some we could use some experience before we try them.
Beginner-friendly
For a beginner, tomatoes are the best first choice when it comes to seed-starting. They germinate and grow quite fast, are resilient, and the savings are large. One of my favourite beginner tomato varieties is “Sunviva”, a cocktail tomato that you can even cultivate in a pot.
Zucchini and pumpkins are also an excellent choice for beginners, because you just sow one seed per pot and can skip the thinning process entirely. For zucchini, I recommend the variety “Black Beauty”, and one of my favourite pumpkin varieties is “Amish Pie”.
Lettuce and other salad leaves are fast, satisfying and also very tolerant of beginner mistakes.
Confident beginners
Basil is quite easy to grow from seed, but it needs warmth and a little more attention. You also must observe not to cover it with soil, as basil needs the light to germinate.
Cabbages of all sorts and kohlrabi are good choices for confident beginners. They’re best started indoors to protect them from slugs. If you want to cultivate white cabbage in your garden, try “Brunswijk”; the best kohlrabi variety I know (because it doesn’t become “woody”) is “Superschmelz”.
Once you understand that cucumbers need it hot to germinate, you can try these as well. A wonderful salad cucumber is “Telegraph Improved”, and for pickling cucumbers, I recommend “Boston Pickling”.
Advanced
Slow-growing crops like peppers, chillies and eggplants have special needs — consistent heat being the main one — and they can be frustrating in a first season. But don’t let that put you off starting those veggies from seed eventually. My favourite variety for sweet peppers is “Roter Augsburger”. Just saying.
Essential Supplies for Seed Starting
Don’t worry, you don’t need to order fancy equipment to start plants from seed. In fact, you’ll have most of the must-haves already at your house. There are a few nice-to-have items, though, that’ll make seed starting easier, but if you’re just starting, there’s no need to order any of this yet.
When you’re hooked, which I’m sure you’ll be, you can think about buying some of the advanced stuff.
Must-have supplies
Now these are the non-negotiable items, but you can easily find alternatives for some of them.
Planting pots
Basically, we can use all sorts of planting pots and trays as long as they are not too high (which would require too much soil) and have good drainage.
You can reuse plastic pots from former plants, special cultivation trays and even plastic fruit boxes.
There are ready-made biodegradable pots that you can plant out.
Alternatively, you can make paper pots that you fill with soil by yourself, or you can use egg cartons or even eggshells.
Cut open empty milk or juice cartons (lengthwise or crosswise or use glass jars.
There’s almost no limit to the variety of pots you can use. Just look around your house, and you’ll find plenty of containers you can use for seed-starting.
No matter what containers you use, you should have a kind of transparent hood you can put onto them to create a greenhouse atmosphere that creates warm temperatures and relatively high humidity. If you don’t have a hood, you can also use glass covers or even cling film.
Make sure that you lift it several times a day to prevent mould or other fungi from growing. Once the seedlings are large enough to be separated, you can leave them without this protection.
Wash the containers thoroughly with hot water before using them for seedling cultivation. That way, you can destroy germs and fungi before they can wreak havoc.
Cultivation soil
No matter the outer appearance of your pots or trays, their “inner value” – aka cultivation soil – is what counts! A good cultivation soil is crumbly and low in nutrients. “Normal” potting soil is not suitable for seed-starting as it contains too many nutrients. Seedlings don’t need nutrients yet. If the soil contains too many nutrients, the seedlings grow too fast, become leggy, and the roots may be damaged.
You can either buy ready-made cultivation soil or use a mixture of equal parts garden soil, well-rotted plant compost and sand. Manure compost is not suitable as it contains too many nutrients.
If you use homemade soil, you’ll want to bake it at 150 °C (300 °F) for 20 minutes to kill weed seeds and diseases.
Seeds
For me, seed catalogues are a bit like Santa’s grotto. I can spend hours – days even – browsing through them and noting down every plant I’d like to grow, although I don’t buy all of those seeds in the end. But still plenty. Well, other women buy shoes…
Anyway, with newly bought seeds, you can be sure that they’ll germinate, but often there are more seeds in a package than you’ll need in one season. Likely, you’ll have seeds from last year – or even the year before. As seeds can germinate, you’ll have to check if they still germinate with this simple trick:
Fold two paper kitchen towels in half and moisten them with water. Put 10 seeds from one seed package onto one towel and cover them with the second one. Keep it all moist and wait until the seeds start to germinate. When at least 8 out of the 10 seeds start growing (that’s 80 %), this package is still ok to use.
Plant labels
There was a time when I passed labelling my plants because I knew I’d recognise them once they had germinated simply by looking at their leaves… Ok, I was just too lazy to label.
Long story short: I didn’t know which plant was which, and my garden became a huge Surprise Egg. It was a bit like buying a truckload of tins, scraping off the banderoles, mixing them up and playing food roulette.
An easy way to label your plants is with ice sticks. Write the name of the vegetable and variety with a pencil on the stick and put it into the pot. For outdoors, plastic or slate labels are better suited to endure weathering.
Watering
For watering the seeds and later the tiny seedlings, a watering ball or a spray bottle is better than a watering can. They don’t produce a hard jet of water, which could either water off the seeds to the corners of the pot or make the sensitive seedlings bend.
Nice-to-have equipment
Plant lamps
Light is an important factor when it comes to seedling cultivation. I have a rather large south window that’s occupied with seedlings from February to summer, and that’s good. Nevertheless, when the seedlings develop a certain stage of maturity, I put them in the (cooler) guest toilet and install a plant lamp. These lamps not only have the ideal light range for plants (which is why they have a very nasty violet shade for our eyes), but they can also be timed to shine for 12 – 16 hours, depending on the plants’ needs. You’ll never get this amount of light time, not even at a sunny window.
As a beginner, however, a sunny south-facing window where there’s enough room for the seedlings even when they require more space, will do for a start.
Heating mat
I’ve seed started for years without a heating mat, and it worked just fine. Well, at least as long as I dispensed with my hot water bottle that was busy warming the seeds.
Last year, I decided that I deserved some warmth, too, and I bought a heating mat for my warmth-loving plants. And it’s a real game-changer, because now I can snuggle up with my hot water bottle and get cosy in the evening without freezing my toes off.
And the plants are growing great, as well.
For warmth-loving plants such as tomatoes, eggplants, physalis, peppers and chillies, you may want to use a heating mat on which you can put the containers. These mats work like a hot water bottle and warm up the soil, inducing the seeds to germinate.
Dibber
A dibber is used for thinning the seedlings, that is, for putting them out of their initial seed-starting tray and repotting them into a larger container. For starting out, though, you can easily use a pencil.
Advanced supplies
Plant shelves
There are these shelves you can use for cultivating seedlings that come with a tent covering the whole shelf. That way, you don’t have any of this weird eye-hurting light from the plant lamps that are installed on the underside of each shelf board coming out. At the same time, it saves so much space when you can stack the seed trays above one another, instead of putting them side by side.
Soil blocker
A soil blocker is a device that makes square blocks from soil. Sow one seed per block and, instead of uprooting the seedlings and replanting them in a larger pot, you simply pull the blocks apart and repot them. This is especially good for vegetables that don’t like their roots to be messed with, like cucumbers, zucchini or pumpkins.
Ideal place for seedling cultivation
Seedling cultivation will occupy some space indoors for quite a long time. So, where to put all those plants? The most important factor to consider when choosing a place is temperature.
It shouldn’t be too warm. A cool stairwell, a non-heated guest toilet or even the basement are great. Although some vegetables like tomatoes, peppers and eggplants need it warm to germinate, once they are large enough to be separately planted into larger pots, they are happy with cooler temperatures.
You’ve got your supplies sorted—now let’s walk through the actual process, step by step.
Seed starting timeline: what happens after sowing
Below is a typical indoor seed-starting timeline. Use it as a framework — exact timing varies by crop, temperature, and light conditions.
Sow
Germinate
Thinning
Harden off
Transplant
Usually, 6 – 8 weeks before transplanting, sometimes before
5 – 20 days
When the first pair of real leaves shows
One week before transplanting
Depending on plant and zone, between end of March and mid-May
Think of this timeline as plant-stage guidance rather than strict dates. Some seeds germinate in a few days, while others take weeks. When in doubt, follow your seed packet first and use this timeline as orientation.
The most important milestone is the appearance of true leaves — this signals when seedlings are ready for the next step.
Seed Starting Process step-by-step
Got everything you need for seedling cultivation? Great! Let’s get started.
#1 Sowing
Put the soil into your containers and moisten it. Sow the seeds as deep as they need to be sown (look for that information on the back of the seed packages), lightly press the soil so that the seeds are pressed down and water it all with a spray bottle or a watering ball.
Oh, and remember to label your plants 😉
Some plants, like lettuce or basil, mustn’t be covered with soil but need the light to germinate.
#2 Temperatures
Some vegetables need relatively high temperatures (24 °C / 75 °F and above) to germinate, while others like it cooler. You can usually find this information on the back of the seed package.
As a rule of thumb, veggies that like it hot outside usually like it hot indoors. These veggies are, for example, cucumbers, tomatoes, peppers and chillies, pumpkins, zucchini and eggplants.
All other vegetables germinate at slightly lower temperatures between 18 and 22 °C (64 – 72 °F).
Giving your seeds the right temperature is vital for germination, so make sure to hit it right off. At this early stage, the right temperature is even more important than light. So, regularly check the temp, keep the soil moist and wait.
#3 Germination
The first green tips are showing out of the soil. Hurray! In case of warmth-loving plants, it’s now time to move the seedling trays to a slightly cooler environment, ideally with plant lamps installed.
#4 Care
When your plants have their first growth spurt, you needn’t do much. Just water the seedlings regularly to keep the soil moist. Yet, while before you could water from above, right onto the soil, now I recommend watering either from the side or into the saucers your trays stand in and let the soil absorb the moisture. That way, the leaves won’t get wet, which could cause diseases.
#5 Thinning
When the seedlings have developed their first pair of real leaves (the seed leaves don’t count), it’s time to thin them out by transplanting them into larger pots. This not only provides them with more space for developing roots but also with more light and nutrients.
For thinning, I carefully loosen the seedlings in the tray or pot with the pointed end of a dibber or a pencil. Holding the seedling by its stem with one hand, and helping with the dibber in the other hand, I meticulously remove the plant from the soil. Sometimes the roots get entangled with those from the neighbouring plant. Here also, the pointy end of the dibber or pencil comes in handy for cautiously “combing” them out of each other.
Now, I poke a hole in the soil of the new pots and put the seedling in there.
Make sure you plant the seedlings as deep as they were before. Tomatoes are an exception: plant them deeper than before because they can grow new roots on their stem which makes them grow sturdier.
If you are intimidated by thinning, why not start with vegetables like pumpkin, summer squash or sunflowers? You can sow one seed per pot and needn’t thin them out.
#6 Growth
Repotted, put your seedlings back in the cultivation station. Make sure the soil is kept moist and lightly fertilise cabbages and tomatoes.
It’s important to check your plants every day, water them when needed and make sure they don’t develop any diseases.
#7 Hardening off
Before we can release the seedlings into the wild outdoors, we have to harden them off.
Start about a week before transplanting and put the seedlings outside in the shade for a couple of hours.
Each day, prolong the time and after 3 days, even put them into the sunlight (not around noon, that would be too much).
To make them accustomed to the wind, gently brush them with your hand, simulating wind movement.
#8 Transplanting
You’ve grown healthy, sturdy plants that have already hardened off. Now it’s ready to plant them outside. Transplant your seedlings on a cloudy day or in the evening to reduce the risk of plant shock. Make sure you plant them at the right distance from one another (again: check your seed package).
Water the seedlings properly after planting so that the soil washes around the roots, leaving no air holes. If necessary, cover the seedlings with nets to protect them from the weather and/or pests.
Seed starting mistakes beginners make
Even with perfect conditions, problems can arise. Here’s how to troubleshoot the most common issues.
Now these mistakes are mostly made by beginners, but experienced gardeners sometimes get them wrong, as well.
Timing
Sowing too early is a classic. Remember when I started those tomatoes way too early, and they became all leggy and weak? Yes, I’ve also made that mistake. And more than once.
Sowing too late, however, is equally common, especially with slow-growing veggies like peppers and eggplants.
A further timing mistake beginners often make is to sow everything at once rather than in stages for succession planting.
Temperature and light
Temperature and light errors trip up a lot of people. Not providing enough light is probably the single most common reason for leggy, weak seedlings. Keeping seedlings too warm once they’ve germinated is another frequent mistake — people assume warmer is always better, but most seedlings actually prefer cooler temperatures after sprouting.
Soil
A common mistake I’ve seen beginners make (ahem… and myself for that matter) is using regular potting soil instead of a seed starting mix. Potting soil has too many nutrients, “burning” the seeds or making the seedlings weak.
Watering
Overwatering is much more common than underwatering with beginners. Let’s not drown the seeds, please!
Once the seedlings have emerged, they should only be watered from the side or in the tray their pots stand in.
Skipping key steps
One of the important steps that’s often rushed or even skipped is hardening off the seedlings before transplanting them. That’s a sure way to devastate an otherwise healthy batch of seedlings!
Another step that’s not paid too much attention to is thinning out as soon as the first pair of real leaves show. When you leave the seedlings too long together in their starting tray, they become overcrowded and compete for light and nutrients, which makes them weak.
Oh, and always remember to label the seeds right after sowing them. Otherwise, you’ll get a surprise garden like me that one year.
Giving up too soon
Look, we all have had bad seasons where nothing seemed to go right. I, too, have lost batches of vegetables I started indoors – and not in my first year of seed starting. Don’t abandon seed starting just because it didn’t work the first time!
Sometimes, beginners also start with crops that are known to be difficult to grow from seed, like celery or celeriac. Choose more forgiving vegetables instead, like tomatoes, pumpkins/zucchini or lettuce.
Common Problems and Solutions
There are a few common problems that may show when seed-starting vegetables:
Mould/fungal diseases
Fungal diseases spread best in damp and relatively cool environments. If you have mould or other diseases in your trays or on your seedlings, you probably haven’t ventilated the trays enough.
Solution: Open the hood more frequently and for a longer time. Also, make sure that the soil is only moist but not wet.
Leggy seedlings
When your seedlings grow very long (“leggy) and have rather light-green leaves, they usually don’t get enough light and try to compensate by spindly growing towards the light.
Other reasons for leggy growth are too high temperatures or too many nutrients in the soil.
Solution: Install plant lamps Move the seedlings to a cooler place. Repot the seedlings into nutrient-low soil.
Nutrient deficiencies
If your seedlings stagnate or even get yellow leaves, they may need nutrients. Hungry plants like tomatoes and cabbage need their first gift of fertiliser already about two weeks after germination.
Solution: Add some diluted liquid vegetable fertiliser
Pests
Obviously, we’re not talking about snails or voles here. Yet, there is the risk, for example, of fungus gnats in the soil. Last year, I had an invasion of those blighters and didn’t realise it until the little black flies were everywhere and my seedlings started to wilt.
Solution: Fungus gnats can be fought off with neem oil, for example, nematodes or other predatory mites, which you can buy (online) and add to the water. For more information about how to get rid of fungus gnats, look at this article.
Watering issues
Overwatering can cause root damage, while underwatering causes wilting. Both will eventually kill your seedlings.
Control your seedlings every day and adjust your watering routine to their needs.
Solution: Water until the soil is moist but not wet. Check your trays regularly.
Frequently Asked Questions About Seed Starting
How early should I start seeds indoors?
Most vegetables need 6-8 weeks indoors before transplanting. Tomatoes and peppers need 8-10 weeks. Check your seed packet for specific timing.
Do I need grow lights to start seeds?
A bright south-facing window can work, but grow lights produce sturdier seedlings by providing 12-16 hours of consistent light. If your seedlings get leggy, you need more light.
Can I use regular potting soil for seed starting?
No. Regular potting soil is too rich in nutrients for seeds. Use a seed starting mix, which is lighter, sterile, and prevents seedlings from growing too fast.
Which seeds are easiest to start indoors?
Tomatoes are very forgiving, as are zucchini, pumpkins and lettuce.
What temperature do seeds need to germinate?
Most seeds germinate at 65-75°F (18-24°C). Heat-loving plants like tomatoes and peppers prefer 75-85°F (24-29°C). Check your seed packet for specifics.
How do I prevent leggy seedlings?
Provide adequate light (12-16 hours under grow lights), maintain proper temperature (cooler after germination), and use a low-nutrient seed starting mix.
Ready to Start Your Seeds?
You now know what seed starting really takes — not perfection, but the right timing, enough light, and a little daily attention.
And the best part? You don’t need to start big.
A few pots on a windowsill are enough to experience that quiet magic of watching the first green tips emerge, and realising you grew them yourself.
You’re no longer just planting vegetables. You’re growing them from the very beginning.
Seed starting is one of those gardening skills that looks complicated from the outside but quickly becomes second nature once you begin. And every season, you’ll learn a little more.
If you ever feel unsure, come back to this guide and follow the steps one by one.
When I started this overview of common pepper and chilli plant diseases, I felt slightly overwhelmed: there seem to be so many fungi, bacteria and viruses out there that pose a threat to our pepper babies.
Yep, that’s mom-mode kicking in.
The good news, though, is that peppers are quite robust, and only certain environmental conditions make them prone to disease.
By following some basic principles and keeping a close eye on our plants, however, we can prevent most diseases before they ever take hold.
And in the unlikely case our plants get infected, it’s good to determine the cause. The sooner we identify the culprit, the better we can get rid of it.
In this guide, I’ll walk you through the most common diseases that affect pepper and chilli plants, how to identify them, and what to do if they appear. You’ll also learn how to prevent serious infections in the first place — so your plants stay strong and productive throughout the season.
I’ll cover:
Identification: How to recognise each disease and the damage they cause
Prevention: Garden practices that reduce disease pressure
Treatment: Organic, as far as possible
For a better understanding, I’ve grouped the diseases by their cause, that is, whether they’re caused by fungi, viruses, or bacteria. Although they’re technically not diseases, I’ve even included physiological disorders.
Quick Overview: Diseases at a Glance
If you’re in a hurry, this table gives you a quick overview. Scroll down for detailed identification and treatment advice.
Disease
Type
Main Symptom
Quick Fix
Damping-off
Fungal
Seedlings collapse
Remove affected plants, improve air-flow
Fusarium
Fungal
Yellow leaves, root rot
Remove affected plants, crop rotation
Blossom end rot
Physiological
Dark spot on the fruit end
Water regularly, feed calcium
Mosaic virus
Viral
Mosaic leaf pattern
Remove affected plants, control aphids
Powdery mildew
Fungal
White powder on leaves
Remove affected plants, spray with baking soda or milk solution
Downy mildew
Fungal
Mycelium on leaves’ undersides
Remove affected plants
Bacterial Leaf Spot
Bacterial
Spots on leaves
Remove affected plants, spray with copper-based bactericide
Sunscald
Physiological
Tannish spots on leaves and fruits
Shade plants, water sufficiently
Anthracnose
Fungal
Watery to black lesions
Remove affected plants, spray with copper-based fungicide
Bacterial Canker
Bacterial
Brown lesions, discoloured veins
Remove affected plants, spray with copper-based bactericide
Grey mould
Fungal
Glassy, moist patches, brown spots
Remove affected plants, disinfect tools
Blossom drop
Physiological
Blossoms drop off
Adjust temperature and water regularly
Blight
Fungal
Brown to black patches on fruits, leaves and stems
Remove affected plants, disinfect tools, and exchange soil
Bacterial Soft Rot
Bacterial
Fruits rot
Remove affected plants
Frogeye Leaf Spot
Fungal
Brown spots with a dark ring on leaves
Remove affected plants, spray with copper-based fungicide
Root rot
Fungal
Roots die, withering leaves
Let soil dry, repot in fresh soil
But let’s see first what we can do to prevent diseases from infecting our plants.
General preventive measures against diseases
There are a few things we can do to make it hard for diseases to take root.
Crop rotation
This describes the concept of not growing the same plants or members of the same plant family in the same spot year after year.
By rotating them every season, we not only prevent the soil from leaching out but also make sure that pests and diseases can’t spread easily.
Before transplanting or buying young plants at a nursery, check their health:
Colour: The leaves are shiny and equally coloured
Leaf structure: Firm and elastic, no dry spots or discolourings
Growth: The plant grows regularly and evenly
Roots: Healthy root structure is firm and white
Blossoms: When plants bloom, their blossoms are fresh and firm
Hygiene
One of the most effective ways to prevent diseases from spreading is by washing your hands. Yes, just like in the kitchen.
Furthermore, when plants are already infected, it’s very advisable to disinfect all gardening tools.
Choose resistant varieties
Seed manufacturers advertise resistant varieties, so next time you browse the seed catalogues, look out for that characteristic.
When you’re buying plants in a nursery, ask them what varieties are particularly resistant.
Watering
Peppers and chillies want constantly moist (but not wet) soil. Water them regularly every few days or when necessary, and only in the mornings. That way, the leaves can dry off during the day. Dampness and moisture cause fungal diseases!
Only water the soil around the plant and avoid splashing the leaves.
Especially in greenhouses, the climate can get very hot and humid on summer days. It’s essential, therefore, to guarantee good air circulation by opening the windows and maybe even the door.
The air not only cools down the temperature but also dries off the dew from the plants.
Spacing and pruning
Observe the right spacing between pepper plants and rows to ensure adequate air circulation.
When peppers and chillies become too dense, prune them to let the air flow freely within the plant.
Check for diseases
Regularly check for diseases. The sooner you spot an infection, the easier you can prevent it from spreading.
In my experience, early detection is far more effective than aggressive treatment.
But are our plants really suffering from a disease? Or is it more likely a pepper plant pest? I’ll show you.
How to Tell Diseases Apart from Pests
I know how it is: on your routine control, you discover a plant that’s obviously suffering from something, but how to know whether it’s from a pest or a disease?
Several signs will put us on the right track.
Signs it’s a disease (not pests)
No visible insects or slime trails
Spreading spots or patches
Wilting despite adequate water
Mould or powdery coatings
Rotting stems or fruits without an obvious cause
Signs it’s a pest (not disease)
Visible holes with clean edges
Insects visible on the plant
Sticky residue
Webbing
Slime trails
Here’s how to identify diseases and manage the most frequent problems.
How to identify diseases quickly
Sign
Likely disease
White powder on leaves
Powdery mildew
Grey mould on fruits
Grey mould (botrytis)
Dark spots on fruit’s bottom
Blossom end rot
Mosaic pattern on leaves
Mosaic virus
Seedlings collapsing
Damping-off
Yellow leaves and root rot
Fusarium, Verticillium Wilt, or Root Rot
Watery spots on leaves
Bacterial leaf spot or Anthracnose
Now that we know how to grow healthy plants and tell apart diseases from pests, let’s see which common diseases can affect peppers and chillies. It’s important to identify them as soon as possible so that we can quickly take measures against them.
Fungal Diseases Affecting Peppers and Chillies
Damping-Off
This fungal disease only affects seedlings and young plants. The stems look thin and water-soaked at the bottom, and sometimes white fluffy mould forms at the base. Eventually, the plants collapse at the soil line and die.
Damping-off often spreads very quickly and infects the entire seed tray.
How to prevent it:
Use sterile seed-starting soil.
Don’t overwater the seedlings and avoid splashing the seedlings.
Ensure good air circulation by opening the covering daily.
Avoid overcrowding seedlings.
Dust the soil surface with cinnamon powder (cinnamon is a natural antifungal)
How to get rid of it:
Destroy the infected plants as well as the substrate.
Fusarium
Fusarium is a fungal disease. Severely infected plants should not be consumed and should be removed promptly.
The leaves of Fusarium-infected plants are lighter or yellow and roll up before they wither and die. The roots rot, and white or pink mould forms.
How to prevent it:
Only transplant healthy and undamaged plants.
Choose resistant varieties
Observe crop rotation and leave two years before you plant peppers and chillies on the same patch.
How to get rid of it:
Immediately remove infected plants and dispose of them in household waste (not compost).
Unfortunately, there is no effective treatment once plants are infected. Prevention and resistant varieties are key.
Verticillium Wilt
Verticillium wilt is a disease that’s caused by fungi in the soil. It causes young shoots and leaves to die and fall off, and destroys the roots. Verticillium can survive for years in the soil.
How to prevent it:
Only use healthy plants
Observe the rules of crop rotation.
Don’t overwater or over-fertilise your plants.
Remove all plant debris.
How to get rid of it:
Remove infected plants and dispose of them properly.
In the greenhouse, exchange the soil.
Root rot
Root rot is a fungal disease that causes the roots to die. The symptoms are similar to those of Fusarium, that is, yellowing, withering leaves and root rot. Root rot is usually triggered by waterlogged, poorly drained soil.
How to prevent it:
Plant in well-draining soil.
Water regularly, but do not overwater.
Don’t plant too deeply.
How to get rid of it:
Let the soil dry before watering again. If you’re unsure, poke a finger in the ground and check if the soil is still moist.
Repot in fresh soil.
Powdery mildew
Powdery mildew is also a fungal disease which is primarily distributed through wind and water splashes. The spores get on the leaves and build a mycelium, much like a fungal highway. They penetrate the plant, suck out the sap and build a mycelium that’s white at first and brownish later.
Infected plants show a floury, whitish, removable coating on the surface of leaves and fresh shoots.
How to prevent it:
Choose resistant varieties
Keep the plants at an appropriate distance
Don’t overfeed them with nitrogen
Make sure not to spray the leaves when watering
Mulch the soil between the plants
Regularly check for infection
Strengthen the plants with plant manures, for example, from field horsetail
How to get rid of it:
Remove infected plant parts and dispose of them properly.
Spray the plants with a baking soda solution (dilute 1 tsp of baking soda in 1 litre of water)
Spray the plants with diluted milk spray (1 part milk with 10 parts water)
Spray the plants with potassium bicarbonate solution (1 part potassium bicarbonate to 40 parts of water)
Downy mildew
The fungal threads of downy mildew grow into the leaves and build a mycelium on the leaves‘ undersides. Downy mildew is specifically active when the weather is moist and cool, that is, in autumn and spring.
Infected plants show a whitish-grey to brownish mycelium on the underside of the leaves. (If it’s on the upper side, it’s most probably powdery mildew). The leaves show yellowish to brown patches, and infected parts die off eventually.
How to prevent it:
Keep leaves dry
Observe the right planting distance and only water the ground
Don’t overfeed the plants with nitrogen
Choose resistant and tolerant varieties
Spray preventively with garlic tea
How to get rid of it:
Remove infected plants and dispose of them properly.
In case of a strong infection, spray the leaves‘ undersides with a fungicide.
Anthracnose
Anthracnose is a group of different fungal diseases that not only affects vegetables but also fruits, trees and flowers and shows in similar ways: It forms round, watery lesions on the fruits, blossoms, shoots, leaves and stems, which sink in later and become black. Sometimes a white mycelium forms. Even the roots can be infected, which will eventually kill the plant.
How to prevent it:
Make sure the soil for your plants is well-drained.
Use healthy, resistant varieties.
Only water the ground around your plants, not the plant itself and definitely not the leaves.
Keep ripening fruits from touching the soil.
Remove all plant debris after harvesting, as the fungus can survive in plant parts for a long time.
Observe the rules of crop rotation.
How to get rid of it:
Remove infected plants and dispose of them properly.
Spray your plants with a copper-based fungicide according to label instructions. Be careful, though, not to overdo it, as copper may build up to toxic levels for microorganisms in the soil.
Wash your hands and disinfect garden tools.
Grey mould (Botrytis cinerea)
Grey mould is especially active when temperatures are mild (20 °C / 68 °F), and humidity is high. You can detect it from glassy, moist patches on pepper fruits, leaves and blossoms. Later on, brown spots of decay eventually get covered with a grey mycelium. The leaves and shoots wither and eventually die.
How to prevent it:
Air your greenhouse regularly to make sure that the leaves dry off quickly.
Water regularly but not excessively, and avoid splashing the leaves with water.
Observe the right planting distance between pepper and chilli plants.
Prune your peppers and chillies, paying special attention to removing superfluous leaves in the middle of the plant.
How to get rid of it:
Remove infected plants and dispose of them properly.
Disinfect your gardening tools and wash your hands after handling infected plants.
Pepper Blight (Phytophthora capsici)
You may have encountered blight on tomatoes, but it can affect all members of the nightshade family, that is, potatoes, eggplants and peppers. It especially spreads under warm, humid conditions and shows brownish to black patches on the fruits. Eventually, the leaves, as well as the stems, become greyish. The leaves wither, despite the soil being moist, which shows that the roots have died off.
Sometimes, the stems turn brown or black, occasionally showing reddish discolouration before the roots begin to die. The pathogen can survive in the soil for more than a decade.
How to prevent it:
Only use healthy plants
Observe the rules of crop rotation
Make sure that the conditions in the greenhouse are as dry as possible.
Only water the soil around your plants and avoid splashing the leaves.
How to get rid of it:
Remove infected plants and dispose of them properly.
Disinfect gardening tools and your hands.
Solarise the soil by covering it for 4 – 6 weeks with a clear plastic sheet in the summer heat. The soil will heat up under the cover and kill fungi.
After the growing season, thoroughly disinfect the greenhouse.
Exchange the soil in your greenhouse.
Southern Blight (Sclerotium rolfsii)
Fungi living in the soil cause this disease, which we can detect from white fungal growth on the stems at the soil line. Later, sclerotia that look like mustard seeds form.
Southern blight is more common in warm climates. If your hardiness zone is below 8, it’s unlikely to be a problem in your garden.
How to prevent it:
Only use healthy plants
Observe the rules of crop rotation
Make sure that the conditions in the greenhouse are as dry as possible.
Only water the soil around your plants and avoid splashing the leaves.
How to get rid of it:
Remove the infected plants and the soil around them
Solarise the soil.
Disinfect gardening tools and your hands
After the growing season, thoroughly disinfect the greenhouse.
Frogeye Leaf Spot (Passalora capsicicola)
Source: Wikipedia
The leaves get round to oblong spots, which are watery first and later turn brown with a dark ring around them (like a frog’s eye). The leaves wither and eventually die.
Cercospora Leaf Spot, another disease, causes similar symptoms to frogeye leaf spot, but it’s caused by a different pathogen.
How to prevent it:
Choose resistant varieties
Only use healthy plants
Observe the rules of crop rotation
Only water the soil around the plant and make sure that you don’t splash on the leaves.
Observe the right planting distance between peppers and chillies.
How to get rid of it:
Remove infected plants and dispose of them properly.
You may spray with a copper-based fungicide, but avoid copper buildup in the soil
Bacterial Diseases Affecting Peppers and Chillies
Bacterial Leaf Spot (Xanthomonas campestris)
At first, the infection shows as watery, dark spots on the underside of the leaves. Gradually, these spots become larger and can spread to all parts of the plant. Bacterial leaf spot spreads particularly fast under warm and humid conditions.
How to prevent it:
Choose resistant varieties
Only use healthy plants
Observe the rules of crop rotation.
How to get rid of it:
Remove infected plants and dispose of them properly.
Spray the plants with a copper-based bactericide
Disinfect your tools
Bacterial Canker (Clavibacter michiganensis)
Source: Wikipedia
Bacterial canker infects the plant via its roots or injuries and causes gradual wilting. It shows through brown lesions on the leaves and discoloured veins. The fruits get crater-like spots. Bacterial canker often starts from the bottom leaves or from one side, gradually infecting the whole plant and can affect all members of the nightshade family.
How to prevent it:
Choose resistant varieties.
Only use healthy plants.
Observe the rules of crop rotation.
Only water the soil around the plants and avoid splashing the leaves.
How to get rid of it:
Remove infected plants and dispose of them properly.
You may spray with a copper-based bactericide, but avoid copper buildup in the soil.
Bacterial Soft Rot (Pectobacterium carotovorum)
Bacterial rot thrives under warm, humid conditions and lets the fruits rot quickly. The bacteria penetrate the fruit through microscopic wounds, causing the tissue to degrade, which eventually leads to rot.
How to prevent it:
Plant in well-drained soil.
Observe the rules of crop rotation.
Don’t overfertilise or overwater your plants.
How to get rid of it:
Remove infected plants and dispose of them properly.
Viral Diseases Affecting Peppers and Chillies
Mosaic Viruses
Source: Wikipedia
Mosaic viruses are a group of viruses, among them the tobacco mosaic virus (TMV), pepper mild mottle virus (PMMoV) and cucumber mosaic virus (CMV). As their various names suggest, mosaic viruses can also befall cucumbers, tomatoes, pumpkins and other vegetables. The pepper mild mottle virus is a highly infectious viral disease that occurs mostly on plants in greenhouses.
Its appearance depends on how old the plant is: sometimes it only shows as a yellowing of leaves, but often we can detect a pattern of dark and light mosaic-like patches on young leaves. The fruits are smaller and sometimes curled, and the overall growth is stunted.
There’s nothing to be afraid of, though. While mosaic viruses sound alarming, they’re manageable with proper hygiene and prevention.
How to prevent it:
Choose resistant pepper and chilli varieties
Viruses are passed on through plant sap. It’s important, therefore, to regularly clean and disinfect your garden tools.
Remove all plant debris at the end of the growing season. Viruses can survive in plant parts for months.
Observe the rules of crop rotation.
Control insects that spread the disease, especially aphids.
How to get rid of it:
Remove infected plants and dispose of them properly.
Disinfect garden tools after every use.
Closely monitor nearby plants.
Wash your hands after handling the plants.
Physiological Disorders (Not Diseases)
Not every problem is caused by a pathogen. Some issues are stress-related or nutritional imbalances.
Blossom end rot
Blossom end rot is not a disease but a deficiency symptom. It shows that our plants do not take up enough calcium. Now, this could be due to a lack of magnesium in the soil, but more often it’s caused by irregular watering.
Another (rarer) cause is damaged roots, which could be caused by pepper pests.
Blossom end rot is easily identified by a dark, sunken, leathery spot on the tip of the fruit.
Don’t worry, though: you can still eat the peppers and chillies, just cut off the brown end.
How to prevent it:
Water your pepper and chilli plants regularly and cover the soil with mulch to keep it moist.
Avoid over-fertilising the plants with nitrogen; this will weaken them and make them more prone to infections.
Fertilise with a well-balanced fertiliser that also contains secondary nutrients like calcium, magnesium and sulfur.
How to get rid of it:
Water regularly.
Add calcium by working crushed eggshells or bone meal into the soil.
Some gardeners also use diluted milk sprays, although consistent watering is usually more effective.
Sunscald
„Sunscald“ is pepper-language for sunburn, and yes, plants can be affected, too. They get tannish spots and, in severe cases, the fruits won’t develop properly.
How to prevent it:
Protect your peppers and chillies from the sun with a shade or – if you grow them in pots – provide temporary shade during extreme heat, especially in the afternoon.
How to get rid of it:
Remove the fruits that are severely damaged, as they won’t recover. Fruits that are only slightly damaged are still edible.
Prune your plants selectively to allow some leaf cover over the fruits
Increase watering during heat waves
Blossom drop
When peppers and chillies drop off buds and blossoms, the temperature is usually not right for them. When temperatures get over 32 °C (90 °F) or fall below 13 °C (55 °F), the plants get stressed and throw off all their blossoms.
Other reasons for blossom drop can be inconsistent watering or over-fertilisation, especially when you feed your plants too much nitrogen.
When you grow peppers and chillies in the greenhouse, make sure to keep the door and windows open when it’s sufficiently warm so that pollinators can get in. Blossoms also fall off when they’re not pollinated.
Frequently Asked Questions About Pepper Plant Diseases
✔️ How do I know if my pepper plant has a disease or a pest problem?
Diseases cause issues without visible culprits: yellowing leaves without bugs, wilting despite adequate water, mouldy or powdery coatings, spreading spots, or rotting stems.
Pests cause visible physical damage you can see: holes in leaves or fruits, visible insects (even tiny ones), sticky residue, webbing, or slime trails.
Quick test: If you see actual bugs or bite marks, check my pepper plant pests guide. If plants look sick without visible insects, you’re dealing with a disease (this article).
✔️ Can I eat peppers from a plant with blossom end rot?
Yes, absolutely! Simply cut off the brown, leathery part at the bottom and use the rest normally.
✔️ My seedlings are collapsing at the soil line. What’s happening?
This is almost certainly damping-off, a fungal disease that affects seedlings. Remove them immediately, along with the soil they’re growing in, to prevent it from spreading to healthy seedlings.
✔️ Should I use chemical fungicides on peppers I’m going to eat?
Most pepper diseases respond well to organic and cultural methods when caught early. Chemical fungicides should be a last resort, and if you do use them, always follow label instructions carefully and observe the waiting period before harvest.
✔️ Can pepper plant diseases spread to my tomatoes?
Yes, many can. Peppers and tomatoes are both nightshades (Solanaceae family) and share many of the same diseases, for example, blight, fusarium, mosaic virus and others.
✔️ My pepper leaves are turning yellow. Is it a disease?
It depends on the pattern:
Lower leaves only: Usually normal ageing OR nitrogen deficiency—not a disease. Feed with balanced fertiliser.
Yellow between veins (veins stay green): Magnesium deficiency. Add Epsom salt solution (1 tablespoon per 4 litres of water).
Yellowing + wilting + root problems: Could be Fusarium, Verticillium, or root rot—these ARE diseases requiring removal of infected plants.
Yellowing + mosaic patterns: Likely a viral infection (mosaic virus).
Yellowing + visible insects: Check for aphids or whiteflies—see my pest guide instead.
Start by ruling out nutrient deficiencies and watering issues before assuming disease.
✔️ I think my plant has a fungal disease. Can I save it?
It depends on how far the infection has spread. In the early stages, removing infected plant parts and applying further methods can be enough. If the disease has spread too far, however, recovery is nearly impossible.
The Three Keys to Disease-Free Peppers
Growing peppers and chillies doesn’t mean you’ll never encounter a disease.
But you can stack the odds heavily in your favour by following three core principles:
#1 Start with Healthy Plants
Everything starts with good care from the beginning: well-draining soil, proper spacing, consistent watering, and balanced fertilisation.
Healthy, vigorous plants have natural defences that protect them from diseases.
Most of the diseases in this guide prey on weakness. Don’t give them an easy target.
#2 Stay Vigilant
Check your plants regularly — every few days during the growing season. Look at both sides of the leaves, inspect the fruits, and watch for early warning signs. A small yellowing spot caught today is far easier to manage than a widespread infection discovered next week.
Now, this isn’t paranoia; it’s good gardening.
#3 Act Swiftly
When you spot a problem, don’t wait to see if it magically goes away. Because it won’t.
Remove infected plant parts immediately. Dispose of them properly—never in the compost. Disinfect your tools.
The faster you respond, the more plants you’ll save and the less the disease can spread.
These three principles appear again and again throughout this guide.
Because they work.
They’re not complicated or expensive. They’re simply habits that separate gardeners who occasionally lose plants from gardeners who consistently harvest abundantly.
Diseases will happen. But with these practices in place, they’ll remain minor setbacks rather than season-ending disasters.
A healthy garden isn’t one without problems.
It’s one where the gardener knows what to look for — and what to do next.
And now, so do you.
Want more pepper-growing guidance? Check out these related articles: