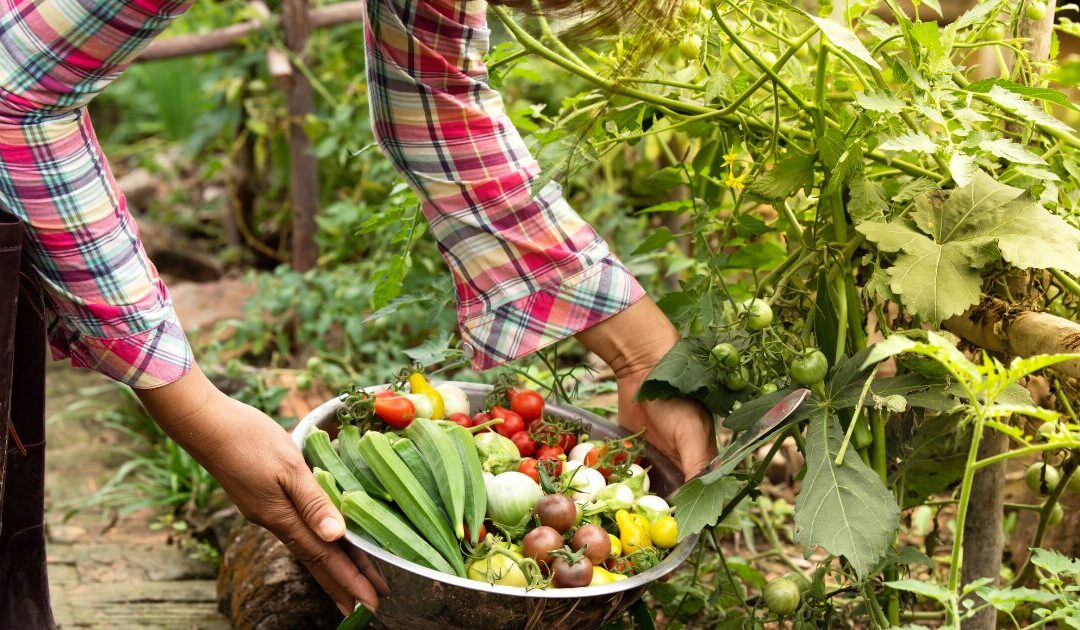
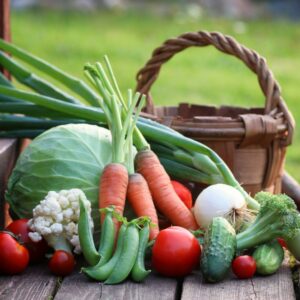
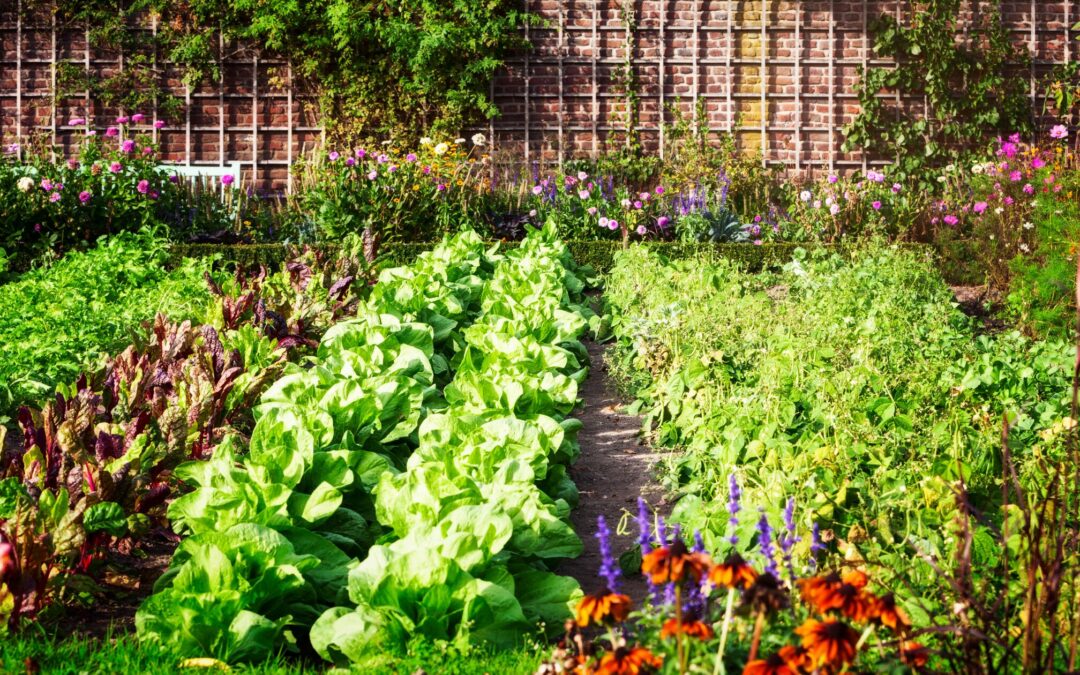
Did you know that over 67% of households started gardening during recent years? As you’ve found this article, I gather you’re a newbie, too, and you’re finally ready to start growing your own food. That’s wonderful! And don’t you let yourself become anxious that you might kill your plants. I’ve got you covered: because there are some vegetables that are practically begging to grow, no matter how brown your thumb might be. 2025 is your year to leave all doubts behind and finally develop that green thumb. Whether you have a spacious backyard or just a few containers on your patio or balcony, these 11 easy vegetables for beginners are practically guaranteed to thrive with minimal gardening experience. From fast-growing radishes to foolproof tomatoes, I’ll show you exactly what to plant for a successful first harvest. Let’s dig in! (Pun absolutely intended 😉)
What are “beginner-friendly” vegetables?
What makes a vegetable easy for beginners?
One criterion, for example is that they are robust against diseases and have a high germination capacity (that means, seeds grow easily) .
Furthermore, they must be easy in their demands on the soil, temperature and watering. Even in conditions that are not ideal, they can grow successfully. For that reason, maintenance requirements are comparatively low.
A furhter indicator is that beginner-friendly vegetables often have a rapid growth cycle. That means that you can harvest them after a relatively short growing time.
Easy vegetables for beginners
The following vegetables are easy to grow and thus great for beginners.
#1: Radishes – the perfect beginner’s vegetable
Sowing: When the soil’s no longer frozen Harvesting: 4 – 6 weeks after sowing Pot size: small; a balcony container is sufficient
Radishes were the first vegetables my mum let me grow when I was just a toddler. That said, radishes will work for anyone and everyone who has a patch of soil – be it in a garden, a pot or a container. They have very few requirements on the soil and you can harvest them already after 4 – 6 weeks!
Depending on your growing zone, you can start to sow radishes outside after the last days of frost. In my region (7b) that’s beginning to mid-April. If you have a greenhouse or a cold frame, you can start even earlier.
Prepare the soil and make rows with the stick of your rake or the side of your hand. Sow the seeds 1 cm (1/2 inch) into the row with a distance of 3 – 5 cm (1 – 2 inches). The distance between rows should be about 10 – 15 cm (4 – 6 inches). Cover the seeds with soil, water them and let nature do its magic.
When your radishes are about the size of a large cherry, they’re ready to harvest. If you leave them too long in the ground, they’ll become woody in texture.
You can continually sow radishes until September, which makes them a great gap filler. They grow very well in balcony containers.
Pro tip: When you’ve sowed too tight, plug out all the seedlings that are too close to one another. When they’ve too little room, they won’t build out bulbs.
#2: Rocket salad – an easy green
Sowing: early spring to early autumn Harvesting: 4 – 6 weeks after sowing, multiple times Pot size: small; a balcony container is sufficient
Rocket salad grows similarly fast and easy as radishes. It’s a great salad and addition to pizza and pasta.
Sow rocket salad at around the same time you sow radishes and also in rows. Sow the seeds 1 cm (1/2 inch) deep and keep a distance between rows of 15 – 20 cm (6 – 8 inches).
If you sow in spring, cover the rows with a garden mesh to keep the seeds warm. After about 6 weeks (depending on the temperature), you can harvest your first rocket salad by breaking off the leaves you want to eat.
You can also sow rocket salad continually until September. It also grows well in balcony containers.
Pro tip: Sooner or later rocket salad will shoot into bloom. At that stage, it won’t taste that good any longer. Cut off all the leaves at about 5 cm above the soil and it’ll soon build out new leaves.
#3: Sweet Peas – a must-have for a beginner’s vegetable garden
Sowing: early spring to early summer Harvesting: 6 – 8 weeks after sowing Pot size: You can sow sweet peas in a balcony container (one row per container) but you have to build some kind of stable support for the plants like twigs. Otherwise, the wind will snap them.
Sweet peas are one of my favourite veggies and usually, I snack them right from the stem! And the best thing is they’re terribly easy to grow.
Sowing time is after the last day frosts.
Prepare the soil and mark two rows with a distance of about 20 (8 inches) in between. Sow a pea seed every 3 – 4 cm (1 – 2 inches) and cover the seeds 4 – 5 cm (1.5 – 2 inches) with soil.
Peas grow to a height of up to 50 – 60 cm. For that reason, it is advisable (but not absolutely necessary) to build a trellis of wire or twigs to support the peas.
Also, protect the peas from birds during the first few weeks of growth with a protective net.
After about three months, the sweet peas are ripe for harvesting. Pluck off the peas when they’re still flat so that they’ll continue to bloom and build new peas.
Pro tip: Peas don’t like beans. If you want to grow beans as well, make sure that you don’t plant them next to peas.
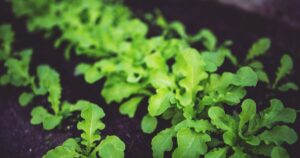
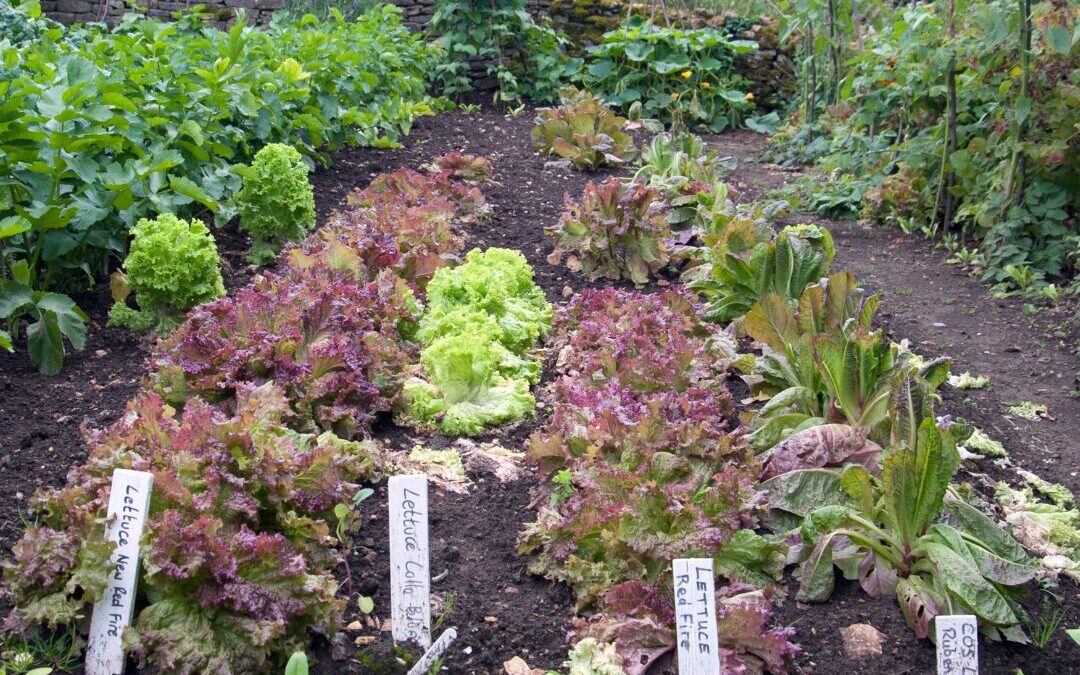
#4: Lettuce – easy to grow and so many varieties!
Sowing/planting: Depending on the variety early spring to early autumn Harvesting: 6 – 10 weeks after sowing, in case of pluck salad multiple times Pot size: A balcony container is sufficient for pluck salad; if you want to grow head salad in pots they should at least be as large as the ready-to- harvest head will be.
Lettuce comes in almost all colours and forms. There are green, red and purple varieties, some even with lovely speckles. Some lettuces build out round or elongated “heads”, others consist of loose leaves or rosettes. When you plan wisely, you can grow salad all year round, because some varieties like for example, radicchio unfold their full flavour not until it’s cold.
Lettuce grows quite fast which makes it a perfect gap filler.
The easiest lettuce to cultivate is pluck salad which you sow directly into your patch or container around the same time as radishes. Cover the seeds only very lightly with soil or just press them into the soil without covering them at all. If you just pluck the leaves without damaging the plant’s heart, it will continue to grow leaves for harvesting.
Head lettuce takes a bit more time and space to grow and you have to make sure that the varieties you sow or plant are appropriate for your climate. Head lettuce itself, for example, doesn’t like temperatures above 22°C (100 °F). In summer, therefore, it’s better to plant iceberg lettuce.
Pro tip: If you use seedlings, don’t plant them too deep. They must “wave in the wind”, otherwise they won’t build out heads.
#5: Swiss chard – an easy vegetable with a long harvesting time
Sowing: early spring to late summer Harvesting: 10 – 12 weeks after sowing, multiple times Pot size: The pot should be at least 20 cm high
In my opinion, Swiss chard is the prettiest vegetable ever. It comes in different colours (yellow, orange, red and green) and looks good even in a flower bed. It doesn’t need much regarding nutrients and maintenance and it’s well resistant to pests.
Sow Swiss chard when the temperature is above 15 °C (75 °F) during the day. Sow in rows with a distance of 15 – 20 cm (6 – 8 inches) between plants and about 30 cm (12 inches) between rows. Cover the seeds about 3 cm (1.3 inches) with soil.
After 10 – 12 weeks, you can harvest the stalks and leaves of Swiss chard. Make sure that you leave the plant’s heart intact. That way you can harvest until the first frost.
Pro tip: Swiss chard is closely related to spinach and beetroots which means they need about the same nutrients. To avoid competence, don’t plant these vegetables near each other.
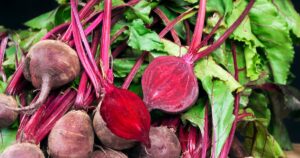
#6: Beetroot – an underrated vegetable for beginners
Sowing: mid to late spring Harvesting: about 6 – 8 weeks after sowing; leave it longer if you want to get larger plants Pot size: The pot should be at least 20 cm high
Beetroot is the jack of all trades in the vegetable world. They come in different colours (even striped varieties) and can be eaten raw, roasted or cooked. They can be stored in sand during the winter months and are also easily preserved.
Beetroot grows best at temperatures around 16 °C (60 °F) which means that we either sow it in spring or later at the beginning of autumn.
Sow beetroots in rows with a distance of 15 cm (6 inches) between plants and 25 cm (10 inches) between rows.
Beetroots can be harvested when they’re about the size of a golf ball, but you can also let them grow.
Pro tip: When harvesting, twist off the leaves. That way, the beetroots don’t dry out so fast and can be stored for a longer time.
#7: Bush beans – easy to grow and a rewarding harvest
Sowing: Late spring / early summer Harvesting: 6 – 10 weeks after sowing Pot size: You can grow bush beans in a balcony container but you must build a stable support for the plants, like twigs. Otherwise, the wind will snap them.
We differ between bush beans and climbing beans. The latter are more difficult to cultivate but bush beans are a great beginners’ vegetable.
Country lores tell us that beans want to hear the bells ring and that they are best planted barefoot. And it’s true! Beans shouldn’t be planted too deep, not more than 2 – 3 cm (about 1 inch) and when the soil is sufficiently warm to walk barefoot. In my region, that’s about the beginning of May.
Either sow bush beans in rows with a distance of 5 cm (2 inches) between plants and 20 cm (8 inches) between rows or sow them in groups of 6 seeds with a distance of 30 – 40 cm (12 – 16 inches) between groups. Sowing in groups has the advantage that the plants support each other. Nevertheless, as long as the variety doesn’t exceed a height of 25 cm (10 inches), I prefer sowing in rows.
After sowing and watering you needn’t do anything. Bush beans are very modest and don’t need much to grow. On the contrary, they even enrich the soil with nitrogen they catch out of the air and store in their roots.
Pro tip: Harvest regularly. The more often you harvest, the more beans you’ll grow.
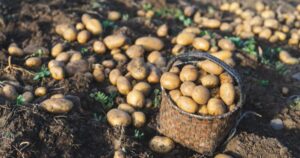
#8: Potatoes – an easy vegetable for beginners with a magic harvest
Planting: late spring Harvesting: depending on the variety 10 – 24 weeks after planting Pot size: Take a large pot of at least 50 cm (20 inches) in diameter or a sturdy sack.
To cultivate potatoes, you only need some space and time.
Give potatoes a headstart by presprouting them: about 4 weeks before planting, put the planting potatoes on a window sill (this is best done in an egg carton) and let them sprout. You can plant the potatoes about 3 – 4 weeks before the last night frosts.
Dig a hole 10 cm deep into the soil, place a potato with the sprout facing upwards in and carefully cover it with soil. When the leaves are about 15 cm high, earth them up by raking soil from around the plant and accumulating it around the leaves (don’t bury them; the green must still be visible).
Potatoes are also suitable for growing in pots. Put a drainage into a large pot, add about 20 cm (8 inches) of good, rich soil into it, put about 4 – 6 potatoes onto it (depending on the pot size) and cover it with 10 cm (4 inches) of soil. As the leaves grow, earth them up as described above.
Potatoes are ready to harvest when the leaves have died.
Pro tip: Earthing up not only supports the growth of more potatoes but it also protects them from the sun. If exposed to light, the potatoes will turn green and as a consequence won’t be edible.
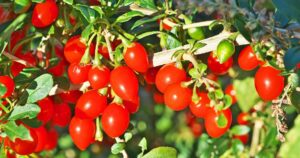
#9: Bush tomatoes – the easiest of their kind
Sowing (indoors): 6 – 8 weeks before planting out Planting (outdoors): after the last night frosts Harvesting: 8 – 10 weeks after planting, continually until the first frost Pot size: Depending on the variety from a balcony container to a large pot of at least 50 cm (20 inches) in diameter.
Admittedly, tomatoes are usually not considered a beginner-friendly vegetable. They have very special requirements regarding nutrients, temperature and watering and can be a bit tricky to cultivate. However, bush tomatoes are more forgiving than the larger varieties! They don’t need to be pruned or tied up and even grow in large pots.
As a beginner, I recommend buying plants from a good nursery. Prepare the soil by working in compost and/or manure to provide enough nutrients. After the last night frosts (in my zone that’s mid-May), you can plant the tomatoes outdoors, either into your garden patch or even into a large pot. Make sure they have enough water, especially when they grow in pots. (If you don’t know your hardiness zone, check out the “plantmaps” website.)
Bush tomatoes produce abundantly all summer long, providing you with loads of little fruit for a salad or just as a snack.
Pro tip: Tomatoes are very hungry: add some liquid fertilizer every 4 weeks to give them everything they need.
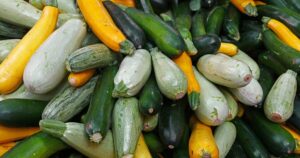
#10: Zucchini / Summer squash – more than you can eat
Sowing (indoors): 4 – 6 weeks before planting out Planting (outdoors): after the last night frosts Harvesting: 8 – 10 weeks after planting Pot size: The pot should be at least 50 cm (20 inches) in diameter
There’s hardly any vegetable that produces reliably so many fruits as a zucchini. 2 – 3 plants can easily feed a family of four, with plenty to spare for preservation. Zucchini can be eaten raw or cooked, even the blossoms are edible.
Summer squash is very easily grown from seeds. However, as the plant likes it warm, you’d best start them indoors. Zucchini grow very fast which is why I recommend sowing them around 4 – 6 weeks before the last night frosts. In my region, night frosts are usually over by mid-May, which means I sow the seeds indoors at the beginning of April.
When the plant has four leaves and night frosts are definitely over, you can plant it out into the garden patch or a large enough pot.
Zucchini need nutritious soil and some fertilising every four weeks or so. As a beginner, it’s best to use a ready-made liquid fertiliser for fruit-bearing vegetables which is normally made of organic manures. If you want to know more about fertilisation you can read about it here, here and here.
Pro tip: Harvest zucchini when they are between 15 – 20 cm (6 – 8 inches). They taste best at that size and continual harvest will produce an abundance of new fruit.
#11: Kale – the easy-to-grow superfood
Sowing: March (indoors), after the last night frosts (outdoors) Harvesting: August to October. If you harvest only the outer leaves you stimulate growth and harvest yield. That way you can harvest throughout winter. Pot size: Take a large pot of at least 50 cm (20 inches) in diameter.
Kale is not only a superfood due to its high vitamin content but also very easy to grow, even in containers.
Further, it’s frost-hardy which makes it great for early and late cultivation. You can even harvest it in winter when nothing else grows outside.
Kale is a hungry plant, however, which means that you must enrich the soil with nutrients, for example by digging in compost or well-rotted manure. Additionally, it needs further nutrients during the summer which can be done by watering it with diluted nettle manure.
Sow kale in rows at a distance of 50 cm (20 inches) between plants and rows.
Pro tip: Although frost is not necessary, light frost and sunshine stimulate the storing of sugar in the leaves which makes them even better.
Essential Growing Tips for Beginner Vegetable Gardeners
The next step on your way to cultivating vegetables is to remove all weeds, grass patches, rocks and debris from your patch. That way your vegetables won’t have to compete for nutrients, light and water
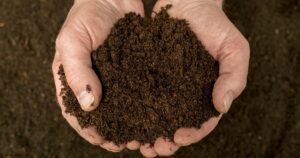
It’s good to incorporate compost, well-rotted manure or other organic matter into your soil. This not only adds nutrients and enhances water retention but it also improves the soil structure. Add 5 – 8 cm (2 – 3 inches) of organic matter and mix it thoroughly into the soil.
If you plant in a pot, make sure you have high-quality planting soil with all the nutrients vegetables need. Ask your local nursery what soil is best for your plans.
After planting, add a layer of mulch – yes, in pots as well. This will suppress weeds and retain moisture while at the same time regulating the soil temperature. Over time, the mulch will decompose and that way add more organic matter to the soil.
Watering techniques
After sowing or planting always water the seeds or plants thoroughly. That way, the soil is pressed close to the seed or roots without any space in between. The plants can grow easily into the soil and get water and nutrients from it without effort.
As we mulch, our plants needn’t be watered very often. Unfortunately, most beginner gardeners water way too much, sometimes even drowning their plants! Watch your vegetables and only water them when they show clear signs of a lack of water.
Watering is best done either in the mornings or in the evenings, never when the sun is blazing down. Imagine you take a sunbath and suddenly someone drowns you in cold water. That’s how your plants will feel if you water them during a hot day.
When you water, water deeply. Instead of regularly watering shallowly, water once but deeply. The water should go down all the way to the roots which in some cases can be pretty long.
If you want to invest a little, you can buy drip irrigation and water hose systems. These are the most efficient watering methods. They deliver water directly to the plant’s root zone, minimize water waste, and keep foliage dry. Drip systems can be set on timers for consistent, precise watering and are especially useful for larger gardens.
Sunlight requirements
Vegetables need light to grow, some more than others, but they all need it. Take therefore the sunniest part of your garden to create your vegetable garden, build a raised bed or put your pots. Make sure there are no large trees, buildings etc. that would throw a shadow onto your plants.
Pest management strategies
Better to hear the hard truth right now: there is no garden without pests! BUT: although we don’t want to share our veggies with them we should focus on using the least intervening methods first. The goal is to create a healthy, self-regulating environment in your garden and prevent pests rather than eliminating them with hard chemicals.
An easy but often overlooked approach is to build physical barriers. Install snail barriers and use garden mesh to protect your plants. Additionally, gather snails and harmful caterpillars and dispose of them far away from your garden.
A good step towards regulation is companion planting, which means planting together vegetables that help keep pests away from each other. A good example of that concept is planting onions and carrots together. Onions secrete an odour that keeps the carrot fly (a common pest for carrots) away while the carrots prevent onion flies from attacking the onions.
Fertilization fundamentals
As you know, plants need “food” which they take up with their roots from the soil. However, the nutrients in the soil are not always enough which is why we need to “feed” (= fertilise) them. Every kind of vegetable needs a mix of key nutrients for root growth, healthy leaves and overall plant strength. The key to success lies in the ground – literally. A simple soil test will tell you what your garden needs.
It’s always a good idea to work in compost or well-rotted manure before planting in spring. These methods will slowly release nutrients and improve soil structure. Depending on the plants’ requirements, however, you’ll have to add nutrients at different stages of growth. Be careful though to not overdo it. Much does not help much here.
Container-Friendly Vegetables for Small Spaces
If you don’t have a garden but maybe only a patio, balcony or concrete backyard, you can grow all of the above vegetables in containers. Container gardening is slightly different from regular gardening but with a bit of preparation, both are equally easy.
Soil and pot selection
If in doubt always take the larger pot. There’s nothing more frustrating than watching plants grow and then stagnate or even die before you can harvest anything, just because their roots don’t have enough space in their container.
The second important factor is the soil. Although it’s more expensive, use high-quality, nutrient-rich soil for your containers. You can use ready-mixed vegetable soil or compost. Especially fruit-bearing vegetables like zucchini or tomatoes need plenty of nutrients to keep them going during their long growth period.
Sunlight and watering requirements
All vegetables need sun but some more than others. Fruit-bearing vegetables like tomatoes, zucchini and potatoes prefer a place with many sun hours while others like salad and radishes can grow well in a place with fewer sun hours.
If you grow plants in containers, you must always have a sharp eye on the water. Containers dry out a lot quicker than soil in the garden and therefore must be watered more often. Especially tomatoes, zucchini and potatoes need plenty of water. Too much, on the other hand, isn’t good either. Watch your plants carefully and only water them when they need it.
Common Mistakes to Avoid for New Vegetable Gardeners
Here are a few common mistakes I’ve often seen new gardeners make:
Overwatering plants
Water thoroughly when sowing or planting and then only if it’s really necessary.
Incorrect spacing
Resist the urge to sow or plant veggies too close together and give them the space they need although it may seem too big at the beginning. But trust me, it’s a bit like children and oversized garments: they’ll grow into it.
Poor soil preparation
Prepare your patch into a bed your plants will want to lie in. That means, put out weeds and rocks and add compost and well-rotted manure
Ignoring local climate conditions
Learn your growth zone and cultivate your garden accordingly. It’s frustrating to plant too early only to watch our seedlings die from frost.
Unrealistic expectations
Remember the first letter you learned to write? Did you think you could write a whole book with it? No? Then why do you think you can feed a whole family from your first garden’s harvest? Like your garden, your experience will grow.
Conclusion
It can be a bit daunting to start cultivating vegetables but don’t let yourself be intimidated by that! By observing a few simple steps and using beginner-friendly vegetables, your success is guaranteed. Remember, every single gardener out there started exactly where you are now: with curiosity, a bit of uncertainty and the passion to grow something new. Don’t get discouraged by initial setbacks or small harvests. Gardening is a skill that will develop with time and the willingness to learn from every experience. Start small, stay curious and celebrate everything you grow.
Whether you’re nurturing a few balcony pots or transforming a backyard into a garden, you’re not just growing vegetables: You cultivate a deep connection with nature, understand where your food comes from and create something truly magical with your own hands!
Welcome to the wonderful world of gardening. Your adventure starts now!
Hey there future garden guru! Are you excited to try your hand at vegetable gardening, but feeling a bit nervous about where to start? Don’t worry – you’re in the right place!
Whether you have a large garden you want to start cultivating or just a small patio, in this ultimate guide I’ll show you how to create your own veggie paradise. From picking the perfect spot to choosing plants that practically grow themselves, we’ll turn you into a gardening whiz before you can say “carrot”.
So, are you ready for an adventure that will be equally rewarding for body and soul? Grab your gardening gloves and we’ll dig right in! With this step-by-step guide (and some foolproof tips), you’ll be soon eating your first homegrown tomatoes (even if they look a bit wonky).
Step 1: Choose the right spot for a vegetable garden
The first step on our journey is selecting the right spot for your vegetable garden-to-be.
Location
If you can, set up your vegetable garden near your house. That way, you can just step out and grab some lettuce and herbs for your lunch or some veggies for cooking dinner. A patio or balcony is also a good possibility to create a garden (think containers and raised beds).
If you don’t have a space, that’s not necessarily an obstacle. I, for example, live in a rented apartment on the second floor and created a vegetable garden on the outskirts of my village.
Watch out for seemingly unused land and ask the proprietor if you can establish a garden there.
Rent an allotment garden.
Ask a farmer if he can spare a row of a crop field that you can use.
Sometimes people with a huge garden that they cannot cultivate (any longer) will be happy to rent it out to you for either a small fee or a share of your harvest.
Get creative. You’ll find your perfect spot.
Light
When choosing where you want to set up your garden, the spot must be sunny, at best facing south/south-west and protected from winds. It should also be level, although a slight south-facing slope wouldn’t hurt. And there shouldn’t be any large trees or houses that could throw shadows on the patches.
Next, consider your available sunlight. 6 hours per day is a minimum. Most vegetables are sun worshippers and need long sunny days to thrive, although some like beetroots and spinach will also grow in a place with less sunlight.
Soil
Another important point to consider is soil quality. At least, if you want to plant directly into the ground. To get a feel for the soil, take a handful and press it together. Can you form a small sausage or does it run through your fingers? Is it soft and pliable or hard as a brick? To learn more about the different soil types, how to determine them and what you can do to improve them, read this post.
If you want to be sure about what soil type dominates your garden, take a few samples from different areas of the space and send them to a lab for testing.
Sounds too complicated? I understand perfectly. In step 3 I’ll show you my favourite (and the easiest) method to create your patches without worrying about the soil quality. Keep on reading!
Step 2: Determine the ideal size for your vegetable garden
Most beginners start with a garden that’s way too large for them, soon get overwhelmed and ultimately give up, thinking that they are “just not cut out for it”. That’s simply not true!
If you want to succeed, start small. 4 – 9 square meters (45 – 100 square feet) will be enough if you have never before cultivated a garden. You must be able to cope with watering, weeding and tending the garden without getting overwhelmed. When you’ve gained more experience, you can enlarge your garden by adding more patches.
If you only have limited outdoor space, don’t get discouraged. As I said before, you could look out for renting gardening space. Or you can try out alternative gardening techniques, such as square-foot gardening, or vertical growing systems. With these methods, you can use your space more efficiently to grow quite a large amount of produce.
Step 3: Create patches for your vegetable garden
There are different methods of creating patches for a vegetable garden.
Flat beds
Dig
The most common idea people have when creating a new patch is to grab a spade, spit into their hands and dig up the soil. Well, that can be a good method, especially when reviving a neglected vegetable garden and digging in some manure or compost to enhance your soil’s nutrient content. But that’s the only occasion I’d recommend digging for. If you want, of course, you can do that and show your determination and muscle to your neighbours. But why put in so much effort when you can have the same—or even a better—result a lot easier? Watch out for the next method.
No-dig (my favourite!)
I try to keep the amount of hard manual labour in the garden as low as possible. That’s why I love to make these compost patches. They don’t require any digging and can be made with minimum effort regarding time, muscle and money! All you need is cardboard boxes (which you can often get for free in bike shops and humus/compost. If you want to go really crazy, get some logs to border the patch but that’s not necessary. Cover the ground with cardboard, make a border for the patch with logs (optional) and fill up with humus and/or compost. That’s it! Easy, fast and so rewarding.
Raised beds
Common raised beds
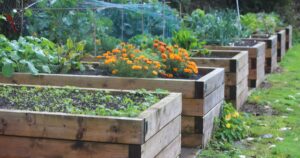
But what to do, when the place you have picked is a gravely, sandy or stone-hard area? Don’t worry! Even if you only have a concrete backyard or a balcony you can still plant vegetables there. Not in the ground, of course, but in raised beds that you can either build from scratch or buy as a simple DIY set.
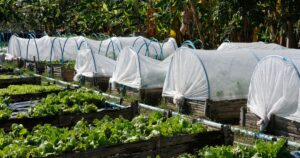
Besides the possibility of controlling your soil quality, raised beds have many more advantages: weeds grow sparsely, pests can be controlled easily and working in a standing position guarantees minimal back strain. So even when you have good garden soil, you can still build raised beds, create a lovely sight and spare your back.
Mound beds
Have you ever heard of “Hügelkultur” or mound beds? It’s a widespread concept in Eastern Europe and Germany and a great way to get rid of loads of garden waste and create a patch that’s self-fertilising for years to come.
The edges of the meadow where I have my current garden were (and in parts still are) overgrown with shrubbery and even small trees. To make entering possible, I had to severely cut back the wild bushes and even hack out several small trees. Although the majority of my newly designed patches were made according to the no-dig method with cardboard boxes and humus, I decided to add two “Hügelbeete” (mound beds) where I could discard all that garden waste. They hadn’t required fertilising during the first three years and although I had built them about 80 cm / 32 in high, now, in my fourth year, they have fallen to the same level as the other beds.
Step 4: Creating a garden layout
Let me share a pro tip here that I learned the hard way: graph paper is your best friend when planning a garden layout. Each square can for example represent one square foot or ¼ square metre which makes it super easy to plan. Take your time here: 30 minutes of planning your layout can save you hours of frustration later.
When planning your patches it’s ideal to make them no broader than 1,2 m / 4 ft. That way, you can reach every part of them without contorting yourself. Theoretically, the patch length doesn’t matter, but practical experience shows that 2 m /6.5 ft is ideal.
Leave at least 50 cm / 2ft between rows for walking paths that you can cover with wooden boards or planks, wood chips or even grass.
You’ll also have to consider access to water sources when planning your garden layout. You won’t want to drag a heavy hose across your yard every time you need to water your plants.
Make it as easy for you as possible!
Step 5: What vegetables do you want to grow?
Now that you have your garden layout you’ll want to consider what vegetables to plant.
This is where I see most beginners go wrong- they want to grow everything at once! When I started gardening, I made this mistake and ended up with way too many zucchini and not enough of the stuff we actually eat.
Here’s my tried-and-true method for choosing vegetables:
Preferences
Make a list of what your family likes and really eats. What are your favourites and what don’t you like at all? There’s no sense in growing kale if you loathe it.
Hardiness zone
When you know what you’d like to plant, check your hardiness zone.
If you live in the States or Canada just Google “hardiness zone + your zip code”, if you live in any other part of the world, search for “hardiness zone + your country”.
Knowing your hardiness zone is important for knowing what plants grow well in your climate and which of them may need additional support (like a greenhouse for example).
Vertical space
Have you thought of integrating poles and trellises into your garden plan? Believe me, using vertical space can make a huge difference. Even if you have a large garden, elements of vertical gardening can be a game-changer! Not only can you grow more on less space but it also makes harvesting much easier. Great plants for vertical gardening are for example peas, climbing beans, tomatoes and summer squash.
Beginner-friendly vegetables
Based on my experience (and that of a lot of gardeners 😊) some vegetables are easy to grow and for that reason perfect for beginners:
Leaf lettuce
Onions / Garlic
Zucchini/summer squash
Carrots
Spinach
Cherry tomatoes
Bush beans
Yet, don’t choose too many different veggies. As with the garden size, start small and expand.
Step 6: Make a planting plan
Alright, by now you not only know where to establish your vegetable garden and what beds to put in but you’ve also decided what vegetables to grow. Time to plant? Not yet. There’s one tiny – but important – step before and that’s: creating a planting plan. So grab your garden layout plan and let’s get started.
Basics
There are some basic things you should consider like planting large vegetables on the north side of your garden so that they won’t shadow smaller plants.
Another tried and tested tip is to group plants with similar water needs together.
However, that’s not all. When you want to make the most of your garden, you have to consider companion planting.
Companion planting
Remember that time in school when the teacher randomly divided the class into teams? You so wanted to be with your best friend in a group but instead, you ended up with that kid you loathed. Friendships and aversions also happen with plants. Some grow really well in each other’s company, others have a negative influence on each other. That’s what companion planting is all about: pairing “best buddy” veggies and avoiding planting arch enemies together.
Here are some examples of plants that work well together:
– Tomatoes + Basil (keeps pests away and improves flavour)
Making a planting plan may take some time but it’s worth every minute. A good plan is essential for healthy plants and a good harvest. Remember, your first garden plan isn’t set in stone. Think of it as a rough draft that you’ll keep tweaking as you learn what works best in your specific situation. That’s the beauty of gardening – there’s always room to grow and improve!
Step 7: Starting from seeds or buying plants?
Some plants thrive better when you sow them directly where they shall grow. Carrots are a good example. They don’t want to be transplanted as they build long roots but grow better when directly sown into the bed.
Other plants get a headstart when you sow them indoors and plant them out after the last night frosts. Cabbages, for example, which usually have a long cultivation time, profit from being sown indoors in February or March (depending on your climate zone) and transplanted into the garden mid to late April.
Another example of plants that should be sown indoors is tomatoes and peppers. As they like it really warm, you can only plant them outside after the last night’s frosts. In my zone (7b), that’s mid-May. If I started to sow them out then, their fruits would never ripen.
Starting plants from seeds indoors is also a great way for succession planting. For example: when you’ve harvested your spinach in late spring, you can plant cauliflower seedlings into the free row.
Although starting from seeds has its advantages, it also requires some knowledge about what the plants need and the right timing for each vegetable. As a beginner, it can be overwhelming to start from seeds, so it’s totally okay to work with plants from a nursery if possible. That way you can feel your way around gardening first and gradually gather more experience.
Later on, you sure will want to try to grow your vegetables “from scratch”, i.e. from seeds. You’ll have a larger variety with seeds and as I said it’s way cheaper. Also, there are some plants that you’ll always have to sow. Carrots for example (and other root vegetables) are sowed directly into the patch.
Later on, you’ll certainly want to try to grow your vegetables “from scratch”, i.e. from seeds. You’ll have a larger variety with seeds and it’s way cheaper.
Step 8: Sowing and planting
The time has come! You’re about to sow your first seeds and plant your first seedlings. Don’t worry: if you observe a few tips, everything will be fine.
Preparing the patch
Before you start to put something INTO the patch, you have to put OUT what doesn’t belong there. You guessed it: get started weeding. This step can be omitted, of course, if you have created a new patch or raised bed. In all other cases, make sure that your vegetable patch is weed-free.
After weeding, loosen the soil with a hoe and break up any soil clumps. Rake your patch to create an even surface to sow into.
Direct sowing
The exact time for sowing your seeds depends on the hardiness zone you live in. However, I recommend having a close look at your seed packets. They usually indicate the right sowing time together with the right spacing.
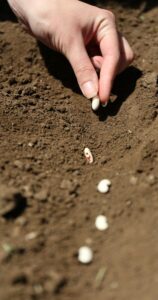
When you sow directly, draw a straight line with the handle of your rake. Using a string may help you to get straight rows. Then put the seeds into that line observing the right spacing. When the row is finished, carefully cover the seeds with soil and press it slightly either with your hands or with the back of your rake.
Carefully water the seed line so that it’s fully soaked through but not water-logged.
If you have large seeds like pumpkin or squash, you can make individual holes in the right spacing. Covering with soil and watering are carried out similarly.
Labelling
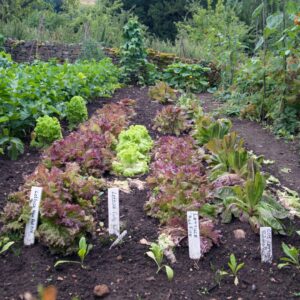
I must admit I’ve often “forgotten” (read: was too lazy) to label my seed rows and I don’t want to know how many seedlings I’ve ripped out, taking them for weeds. So do yourself a favour, write the plant name on a label and stick that at the end of the row. You can get labels made from plastic, wood, clay and even slate.
Seedlings
You’ve bought vegetable seedlings or a friendly neighbour gave you some spare ones and now you’re ready to plant. Prepare the soil as described above and then… don’t plant yet. You’ve got to harden the seedlings first.
Hardening off
The very first time I planted vegetables, I learned the hard way to harden off my seedlings. I was so excited about all the (store-bought) tomato seedlings, that I planted them straight from their warm and comfortable indoor spot right into the garden. This turned out to be a big mistake. Nearly half of them withered away from sunburn within a few days, and the rest looked like they were hanging on by a thread.
Seedlings can be compared to little children who have never been outside. You can’t shoo them out just like that but have to ease them into it. Some 7 – 10 days before transplanting, I start putting out the seedlings at a sheltered spot for just 2 – 3 hours.
Each day after that, I increase their outdoor time by about an hour and gradually move them into more direct sunlight. After that, they are ready to plant outside
Planting
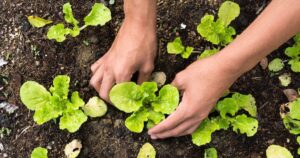
I recommend laying your seedlings out on the patch before planting. That way you can still adjust the spacing between plants. Then dig up a whole that’s slightly larger than the root bale and fill in some ripe compost or well-rotted manure. Carefully remove the plant from its container (make sure that the stem doesn’t break!), put it into the hole and fill the space between root bale and the hole edge with the soil you dug out earlier. Carefully press the soil around the plants and water them generously so that the soil there will be no air holes and the roots are well soaked.
Planting depth
A rule of thumb when it comes to how deep you should set your veggies is that they should be planted at the same depth they were growing in their containers. That way you usually can’t go wrong.
An exception to this rule, however, is tomatoes. I plant them super deep, which means I bury about 2/3 of the plant after having removed the lower leaves. That way those little fuzzy hairs on the stem turn into roots and thus make your plants super sturdy.
Planting width
When you start veggies from seeds, take a look at the seed package. Usually, the spacing between plants and rows is indicated there.
When you have seedlings to plant, here are some general widths to go with:
– Tomatoes: 70 – 100 cm / 24-36 inches apart (believe me, they need it)
– Peppers: 30 – 40 cm / 12-16 inches apart
– Cucumbers: 30 cm / 12 inches apart along a trellis
– Broccoli and cauliflower: 40 – 45 cm / 16 – 18 inches apart
Watering
After the initial watering directly after sowing and planting, cover the soil with mulch (for example dry grass clippings) to prevent it from drying out. During the first week, you best check the soil moisture daily by sticking a finger about 3 cm / 1 inch deep into the ground. If you have to water, it’s best to do so in the morning. This makes sure that the leaves can dry before the evening which helps prevent fungal diseases.
Remember, every garden is different, and what works in my Zone 7b might need tweaking in your area. But these basic principles of hardening off, proper spacing and careful watering have served me well through many growing seasons. The key is paying attention to your plants – they’ll let you know if they’re happy or struggling if you learn to read their signs.
Step 9: Maintenance
The garden patches are made, the vegetables are planted, and now you can relax and wait for the harvest? Wrong! Think of your vegetables as your babies: you have to make sure that they have everything they need to grow into healthy adults:
Watering
As I said before, watering the right way is especially important at the beginning when you’ve just planted your vegetables. Unfortunately, most beginners tend to overwater their plants. Except for the first week after planting, it’s much better to let your plants “sit dry” for a while before watering them. That way they will grow deep and strong roots that will not only provide them with water but also make them sturdier.
Mulching
I’m a huge fan of mulching! After sowing and planting, cover the soil with mulch to prevent it from drying out and protect it from weeds. If you have sowed, distribute a very thin mulch layer, for example, dried grass clippings so that the seeds get enough water and light to grow. When the plants are larger the mulch layer can be thicker. Just make sure that the mulch material is dry, otherwise it may mould and spread fungal diseases.
You may have to weed despite mulching but only sparsely and those weeds will come out very easily.
Fertilising
Like humans, plants need to eat. And just like humans, it’s not healthy for them to let them have fast food only. Nutrients are key to a healthy life! Get informed on your plants’ needs and feed them accordingly with fertiliser (from plants or animal origin). For beginners, it’s best to buy a well-balanced fertiliser but you can also make some organic fertiliser at home. Be careful, however: “Much helps much” is not valid in the garden! When “overfeeding” your plants they will become mushy and prone to diseases. It’s best to feed your plants organically throughout the season.
Step 10: Pests and diseases in the vegetable garden
Truth bomb: you will at some time have pests and diseases in your vegetable garden. Hopefully not often and not to a large extent but that’s how nature works. It’s got nothing against us (I hope) but seeks balance by eliminating weak or ill plants through pests and diseases. The good news is that you are not powerless.
Companion planting (again)
First of all, by doing companion planting you’ve already done a great thing to hold pests and diseases at bay. Take the classic couple of carrots and onions for example: while carrots keep the onion fly away, onions hold off the carrot fly. If you know that and plant accordingly, you’ve already taken a huge step toward a healthy vegetable garden.
Physical protection and collecting
Another thing you can do is use physical protection like vegetable mesh. If you protect your cabbage plants with a mesh when the cabbage fly is around, trying to lay its eggs on your fondly raised plants, it’ll lose out.
However, when you already have pests in your garden, especially caterpillars and snails, it’s effective to collect them and discard them somewhere else, far away from your garden. For hunting snails, early mornings and evenings are best, as they’ll then come out of their hiding places. Caterpillars are best collected during the day.
Eco-system
Taking the alleged easy way by using chemical pest control has no room in my garden world. After all, you should always bear in mind that pests and diseases in your garden are a sign of imbalance. Make sure to establish a healthy eco-system with enough room for beneficial insects, birds and small mammals that’ll help you keep pests at bay. Care for your garden soil by fertilising it wisely with organic material, discarding infected plant parts and mulching. That way your garden will stay healthy.
Step 11: Harvest and enjoy
Let me tell you about my first attempt at harvesting broccoli- I waited so long for those heads to get “grocery store big”… and ended up with tough, flowering stems that were practically inedible. Now I know better – Harvest when florets are tight and dark green
Harvest timing
Here’s a quick cheat sheet for common veggies I’ve learned through experience:
Beans: pick when they’re about as thick as a pencil but before you can see the beans inside
Tomatoes: Pick when colourful. but firm
Cucumbers: 6-8 inches is perfect
Zucchini: Check daily or prepare to find baseball bats hiding under the leaves
Bell peppers: wait until they reach full size and desired colour
Oh, and use actual garden tools instead of wrestling with your plants. Using clean, sharp scissors or pruners makes all the difference.
Preserving
The real challenge hits when everything starts ripening at once. I remember standing in my kitchen one August, surrounded by mountains of tomatoes and thinking “What in the world am I gonna do with all these?”
Freezing is my go-to for most vegetables as it’s fast and easy. Just remember to label everything you pop into the freezer – playing “freezer surprise” in January isn’t as funny as it sounds!
Canning is not as scary as it might look (although a pressure canner sends off those mad scientist vibes). I do water bath canning for tomatoes and pickles, and pressure can green beans and other low-acid veggies. Just remember to always follow tested recipes and processing times!
Dehydrating has become another favourite preserving method as dried vegetables take up way less storage space than canned or frozen ones. Just make sure everything is completely dry before storing, or you might end up with mouldy surprises later (don’t ask…).
Step 12: Build your soil
Ok, strictly speaking, this step is a preparation for your NEXT gardening year. But, as I’m absolutely sure that you’re hooked by now and on your best way to becoming a gardening addict, this step is crucial for a further great harvest in the upcoming season.
After harvesting, the garden season isn’t over. On the contrary: you have to make sure that your soil is well nourished and protected so that your vegetables will grow as well (or even better) in the next season.
Mulching
Make sure your soil is always well-covered during winter. You can either put half-rotted compost on your patches or cover them with dried grass, leaves, or wood chips. The soil beneath the mulch is usually a bit warmer and that way mulch protects the soil organisms.
Soil building
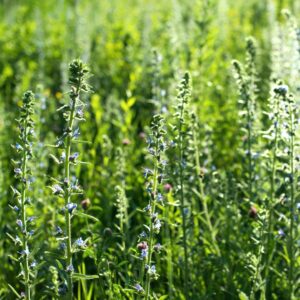
To build your soil, you can for example sow green manure like phacelia. Not only do they cover the soil and protect it from washing off but they also collect nitrogen from the air, thereby forming the basis for plant nutrition. Additionally, they build a mulch layer when they die in winter, covering and protecting the soil. In spring, you can cut them off and dig the remnants in.
Get Growing and Enjoy the Rewards!
Okay, let’s quickly recap the key steps to get a new vegetable garden up and running:
Choose a sunny spot with well-draining soil near your house (if possible)
Decide what to plant based on your climate and preferences
Build garden patches or raised beds
Buy seedlings, start them indoors or directly sow seeds outdoors
Properly plant and space your veggies
Water, weed, and care for your garden regularly
Growing your own veggies is incredibly rewarding! You’ll get fresh, flavourful and nutritious food and it’s a satisfying and eco-friendly task.
Even with limited space, you can have an amazing little garden.
Ready to get started? I’m excited to hear about your gardening journey. Reach out if you have any other questions. Happy growing!
In July it’s time to sow many vegetables we want to harvest later in the year. In this post, I’ve created an overview to show you what to do in the garden and what vegetables to sow (indoors and outdoors) and plant in July.
What vegetables to sow indoors in July
You can sow the following plants indoors to plant them out later:
Here’s a list of plants you can plant out into your vegetable garden in July.
Broccoli Brussel’s sprout Cabbage Cauliflower Kale Kohlrabi Leek Lettuce Zucchini
General garden tasks in July
Mulch all plants larger than 10 cm / 4 inches. Mulching means you cover the soil with organic material like grass clippings, leaves, straw or wood chips. By mulching, you make sure that less water evaporates. Additionally, mulch suppresses weeds and thus your “weeding time” will be reduced considerably 🙂
Harvest whatever is ready in your garden. July is also the perfect time to harvest and dry herbs for later use.
Fertilise strong uptakers like cabbage plants, tomatoes, pumpkins and zucchini that were planted in May. Ideally, you have given them basic fertilisation when you planted them. Now it’s time for maintenance fertilisation. For that purpose, you can either use fertiliser from animals, fertiliser from plants or even fertiliser from humans.
Still not enough garden talk? Then these posts may interest you:
To put it bluntly, this is certainly the best and most useful tip of this whole fertiliser series. As far as fertilisers are concerned, urine is the non-plus-ultra. It contains everything your plants need, it’s free and it’s always available. When you complement this gold water with mull from manure and compost, your garden is well provided for.
Advantages of urine
Urine is an extraordinary raw material for maintenance fertilisation during the growing season. It’s rich in nitrogen, works fast and is produced right “on-site”. An average adult urinates three to seven times per day and thus releases about 2 litres of urine.
With a person’s annual urine production, 50 – 350 square metres of cropland can be fertilised. A general recommendation is to fertilise with one to two litres of urine per square metre during cultivation season. The exact amount depends on the plants you grow and the soil you grow them in. In any case, an amount of 200 ml of concentrated urine per square metre should not be exceeded.
Urine is also a great compost accelerator. Compost sometimes consists of so many carbon-rich materials that the decomposition of leaves and dry twigs for example is affected. In that case, you should try to achieve a balanced ratio between carbon and nitrogen. Urine with its high nitrogen content can help with that. Put some urine onto the compost and thus accelerate the composting process.
Nutrient content of urine
One litre of urine contains about 7.4 g nitrogen, 0.6 g phosphorus and 1.6 g potassium. That said, urine has relatively much nitrogen and relatively little potassium. For that reason, it is especially suitable for potassium-rich soils like loam. Urine consists of about 95 % water and substances like urea, chloride, sodium, potassium and creatine. Fresh urine has a neutral pH value and usually carries no pathogens. In the body, urine is sterile. Bacteria can sneak in on its way out of the body or at handling. That’s harmless, however, when you fertilise with your own urine and thus can control your “fertiliser production”.
Disadvantages of urine
Some drugs and chemicals leave traces in urine. Most of those substances degrade quickly but that’s not the case, for example, for hormones like those in hormonal conception control. Those hormones decompose slowly and harm animals and the environment when they seep into the groundwater.
Hobby gardeners fertilising with urine usually know where it comes from. If a member of your family is treated with medicine like for example penicillin, you should refrain from collecting this person’s urine.
Some plants are sensitive to salt in the soil and on the leaves. Depending on your food, your urine may contain salts as well. If you’ve eaten a lot of salty food, you shouldn’t use the resulting urine as fertiliser.
Fertilising with urine
About one month after basic fertilisation in spring (for example with manure or compost), we must start to fertilise for maintenance. In early and high summer, the plants grow so fast that they need a “snack” to help them reach their full potential and provide us with a great harvest.
Urine is usually used for maintenance fertilisation as it provides a lot of nitrogen.
To fertilise with urine, dilute one part of urine with 9 parts water. The colour of this fertiliser should be pale, like very weak tea and it shouldn’t smell of anything.
Water the soil with this dilution but not the plants and don’t fertilise shortly before harvesting.
Make sure to not over-fertilise. It’s better to use too little than too much of it.
If you fertilise with urine only, add organic matter to the soil.
Faeces
Human faeces often cause a feeling of disgust but when writing about natural fertilisers I can’t leave this topic out. If that stinks for you, you needn’t read any further. If, however, you rise to the challenge, take a deep breath. We’ll open the toilet door…
In general, humans must defecate once a day, regardless of their sex, age, ethnicity, social class, weight, religion, culture or values. In some parts of the world, human excrement is a possible source of diseases. In the Western world, we flush away our heaps with just a touch of a button.
Advantages and disadvantages of human faeces
Human (like animal) excrements contain nutrients that are suitable for plants. Urine contains the most nutrients and is especially rich in nitrogen. Faeces contain mull material and nutrients like nitrogen, phosphorus and potassium. In the Western world, every person releases about 5 kilograms of nitrogen and 0.6 kilograms of phosphorus per year into the sewer system, together with about 20 m3 of drinking water.
Contrary to urine, stool may contain pathogens (bacteria, viruses and parasites) and must be composted or stored before you can use it as a fertiliser for edible plants. The compost must reach temperatures of at least 50 °C to ensure that harmful organisms die. If faeces are not heat-composted, they have to be stored for at least two years before that compost can be used in the vegetable garden.
Composting faeces
Before composting faeces in your garden, please research if it is allowed in your region. In Germany, for example, you can do it as long as there is no danger to the environment. It must be guaranteed, for example, that the faeces won’t be washed off by rain. Also, one has to make sure that there is no smell. However, composting faeces is forbidden if the garden is situated in a water protection area.
If you want to try composting faeces, you must separate the faeces from the urine and collect them. There are so-called “dry toilets” that help you with this process. When the toilet is full, make a compost heap of the faeces in your garden. Let it rot for about one year and then shovel it to another place so that the microorganisms and soil organisms can accelerate the composting process. After 2 –4 years the compost is hygienically safe and can be used as natural fertiliser for your garden.
Conclusion
I have never used natural fertilisers of human origin in my garden. I could envisage trying urine as a fertiliser but using faeces compost is not an option for me right now. Call me narrow-minded if you like, but it simply doesn’t feel right. However, if you want to try it, go ahead. And if you have tried it already, please leave a comment below and tell us about your experiences.
The cheapest and easiest way to make natural fertiliser for your vegetables is by using plants that already grow in and around your garden. No transportation is required, (almost) no processing is involved and most of it won’t cost a penny! Just rip out the weeds – or should we call them “green gold” – use them as mulch or make liquid fertiliser from them. Or you sow cover crops to enrich the soil with nutrients. Let’s see how you can make natural fertilisers from plants.
Homemade liquid fertiliser
You can make liquid fertiliser from various plants that I’m sure you’ll find in your immediate vicinity. The basic process is simple:
Take 1 kilogram of fresh or 150 g dried plants per 10 litres of water. Put the plants into a bucket, or a wooden or plastic barrel. Never use a metal container as it may react with the fertiliser in an undesired way. Fill the bucket or barrel with water about 5 – 10 cm (2 – 4 inches) under the brim. It’s best to use rainwater or stale water, warmed up by the sun. Cover the barrel or bucket with a lid so that air may get in and let it sit outside for about a week. You’ll know when the brew is ready because it’ll stink bestially 😊, usually after 2 – 3 weeks. Mix in some stone meal to get the smell under control and to prevent a riot from the neighbours.
Dilute the fertiliser at a ratio of 1 part fertiliser to 10 parts water and water or spray your plants.
Plants for liquid fertilisers and their benefits
These are the plants most commonly used for liquid fertilisers.
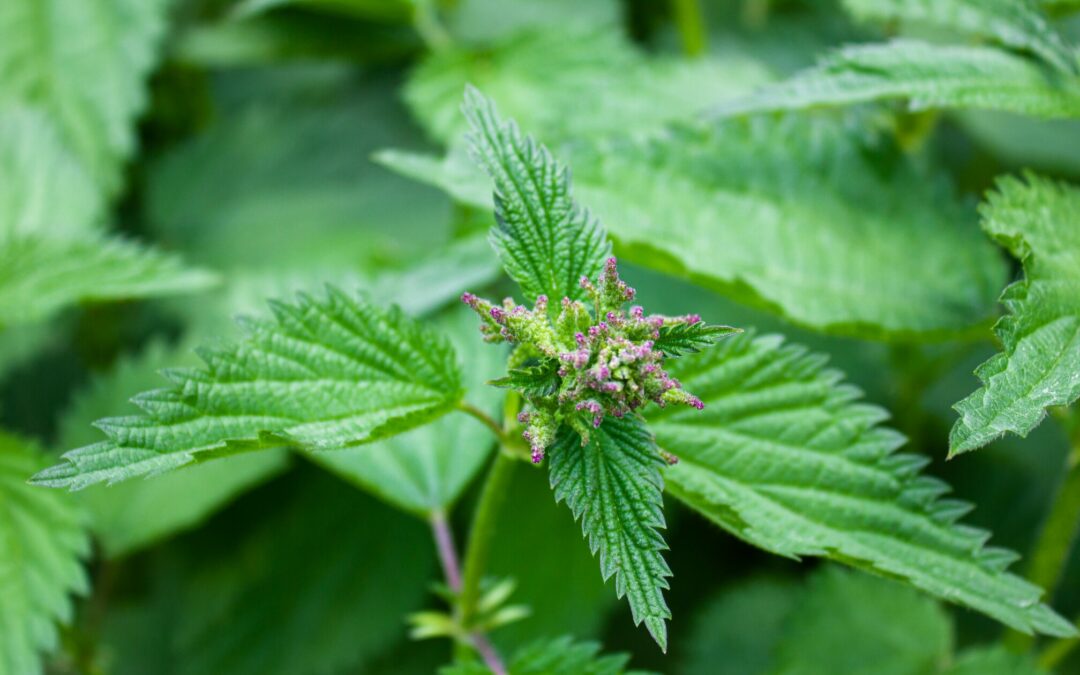
Stinging nettle (Urtica dioica)
Stinging nettle is one of many types from the family of nettles. They often grow – or rather proliferate – on soils that contain much nitrogen, thus indicating nutritious soil.
Besides nitrogen, stinging nettles are rich in potassium, iron, calcium and manganese. You can use it for liquid fertiliser as well as in your salad.
Comfrey (Symphytum officinale)
The comfrey family contains many types of lovely plants with small, tender flowers and large, stiff leaves. Liquid comfrey fertiliser is particularly rich in potassium but also contains calcium, phosphorus, magnesium, manganese, iron, selenium and zinc. It’s good for tomatoes. You can prepare the liquid fertiliser with a mixture of comfrey and stinging nettle to add more nitrogen.
Field horsetail (Equisetum arvense)
Field horsetail contains a lot of silicon, making it suitable for prevention against fungal diseases like mildew. If a plant is already ill, however, field horsetail can’t cure it. Make sure to use field horsetail for your liquid fertiliser and not the poisonous marsh horsetail.
Medicinal, aromatic and wild herbs
You can use medicinal and aromatic herbs as additives in liquid fertilisers. Those include chive, peppermint, marjoram, chamomile and hyssop. You may also use wild herbs like dandelion and shepherd’s purse. Just add one or two handfuls of herbs for example to your stinging nettle brew and let it ferment.
Fertilisation with liquid fertiliser
Liquid fertilisers are meant for maintenance fertilisation and as “energy drinks” or “snacks”.
Water the soil or spray the plant leaves with it.
Liquid fertiliser is a good substitute for urine when you want to fertilise vegetables shortly before harvesting.
Mulching
While fermenting plants to make liquid fertilisers is a direct method to enhance your garden’s nutrient content, mulching is an indirect way to make natural fertilisers from plants.
What is mulching
Mulching means covering the soil with organic material that comes either from plants or is of animal origin. With mulch, we imitate nature where soil never lies bare but is always covered with vegetation, leaves or other rotting organic material.
Advantages of mulching
Open soil is more vulnerable than covered soil. It erodes, dries out, gets cracks and becomes crusty. Without roots absorbing them, nutrients will wash out. And without food and “work” and “living space”, the soil animals and microorganisms disappear.
By covering your soil, its mull content rises, and it becomes porous. It can bind nutrients more easily and store water and oxygen better. A porous soil provides the plants with optimum conditions for growth. Also, the relatively constant temperature in a covered soil is beneficiary for vegetation. And last but not least, mulch suppresses weeds.
Covering soils with mulch is also called surface composting. Like in a compost heap, mulch material rots and becomes fine mull. The advantage of surface composting is that fewer nutrients disappear, and fewer greenhouse gases are released than with classic composting where high temperatures are generated.
Disadvantages of mulching
Alas, even mulching has its disadvantages. Snails and voles feel well under the moist mulch. Factors like microclimate, plant growth and thickness of the mulch layer also play an important role. If necessary, mulch in thinner layers.
Mulch material
In autumn, you can use leaves, in summer grass clippings and during harvesting time plant residues as mulch. You may shred the material (for example with your lawn mower) before using it as mulch. Apart from grass, leaves and plant residues you can also use hay, straw, bark and seaweed as mulch material, as well as sheep wool or hair from your pets.
How to mulch
Stack up about 5 – 30 of mulch, depending on your material. Grass clippings may stick together and rot when moist and spread too thickly. Let them dry a bit before using them as mulch. I recommend mulching more often and in small portions. Add new mulch as soon as the original mulch layer has decomposed and crumbled.
When organic carbon-rich material decomposes, part of the nutrients are used up during composting. You can compensate for that by fertilising with urine or liquid fertiliser from chicken manure.
Cover crops
Cover crops are special plants that improve the soil structure with their root system and at the same time provide nutrients. The plants themselves fertilise the soil with nitrogen, for their own growth and succession plants. That means they raise the nitrogen content (and only that) instead of decreasing it.
Nitrogen collectors
Legumes like beans, peas, lupines, flat and sweet peas, lucernes and clover can fix nitrogen from the air. It’s a miracle they can do by a symbiotic relationship between their root nodules and certain bacteria. Nitrogen is collected in the plant’s roots as well as in its aboveground parts. For this reason, you should dig in the remains after cutting the plants.
When the plant mass is worked superficially into the soil, decomposition starts and nitrogen is released into the soil. The organic material raises the soil’s mull content. 20 to 40 % of fixed nitrogen is released almost immediately for the successive crop.
Soil breakers
Cover crops with long roots like melilot and lupines “drill” into deeper soil layers and get nutrients from deep down. When you later work in the plants, the nutrients are released into the mother soil. This is a smart, yet simple process to make the otherwise inaccessible nutrients available.
A further advantage is that the roots that die off after cutting, leave long canals in the soil through which oxygen, water and nutrients can be transported. This results in a porous soil.
Furthermore, cover crops suppress weeds when they’re sown densely.
How to use cover crops
You can sow cover crops between plant rows or even between plants within a row. Beans and potatoes, for example, are a well-known and proven combination.
You can also sow cover crops after harvesting an early crop like lettuce or before a late crop to prevent the soil from lying bare.
When you create a new patch, cover crops are like a curative treatment for your soil. You must wait a year, that’s true, but you get a cultivation area in top form! For optimum results choose a mixture that provides nitrogen, loosens the soil deeply and suffocates weeds.
To prevent the cover crops from spreading their seeds, you must cut them off before. Some sorts may be cut several times during a season (and best used as mulch). Annuals can be worked into the soil late in autumn.
Perennials should be left on the patches over the winter to prevent washing out of nutrients. Work them into the soil in early spring or late autumn. You can also dig in dry leaves, straw or other carbon-rich materials.
Cover crop plants and their benefits
Depending on what your soil needs, you can choose the right cover crop plants:
Plants that gather nitrogen out of the air like legumes
Those that break up the soil like lupines and meliot
Plants that increase the mull content due to their great leaf mass like tansy phacelia
You can mix the seeds or buy ready-made seed mixtures.
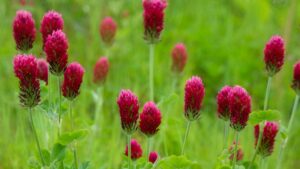
Crimson clover (Trifolium incarnatum)
An annual, fast-growing plant with a strong root system. Crimson clover is a good nitrogen collector.
Common vetch (Vicia sativa)
An annual, fast-growing plant that collects nitrogen well.
Bluebell (Phacelia tanacetifolia)
An annual, fast-growing plant that covers soil easily and well. Bluebells don’t collect nitrogen but absorb nutrients well from the soil.
Lupine (Lupinus)
An annual plant with a strong root system and good nitrogen-collecting abilities. The yellow and white lupine is suitable for light soils, and the blue lupine is great for heavy loam soil.
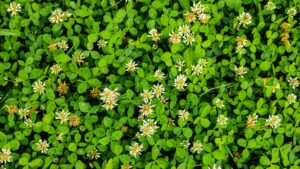
Persian clover (Trifolium resupinatum)
An annual plant with good nitrogen-collecting abilities that needs a lot of water.
Lucerne (Medicago)
A perennial, slow-growing plant with a deep root system. Lucerne is a great cover plant.
Burrowing clover (Trifolium subterraneum)
An annual plant with a strong root system. Burrowing clover is a great cover plant and a good nitrogen collector. Shade tolerant.
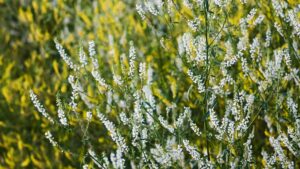
Sweet clover (Melilotus)
A bi-annual plant with a powerful taproot. Sweet clover is a good nitrogen collector.
There are many ways to use wild and cultivated plants as natural fertilisers for your garden! Plants in combination with fertilisers from animals not only give your vegetables a great start into the season. They also help you to maintain the soil’s nutrient level, thus ensuring healthy plants and a great harvest.
A healthy and fruitful vegetable garden is impossible without feeding your plants. After all, plants (like humans) need food and nutrition. In short: they need fertiliser. There are different kinds of fertilisers: mineral, organic and natural. Mineral fertilisers mainly consist of inorganic material in the form of water-soluble salts of chemical origin. They are artificial fertilisers. Organic fertilisers, on the other hand, primarily comprise substances in organically bound form. Unlike mineral fertilisers, the plant nutrients in organic fertilisers are not salts that dissolve quickly in water but are “packaged” into organically grown structures. Nevertheless, organic fertilisers are highly processed, too. Natural fertilisers are unprocessed, usually composted substances from nature that contain plenty of nutrients for your plants. They can be of animal, plant or even human origin, are easy to handle and can be found locally. This article deals with natural fertilisers from animals.
Brown Gold: Manure
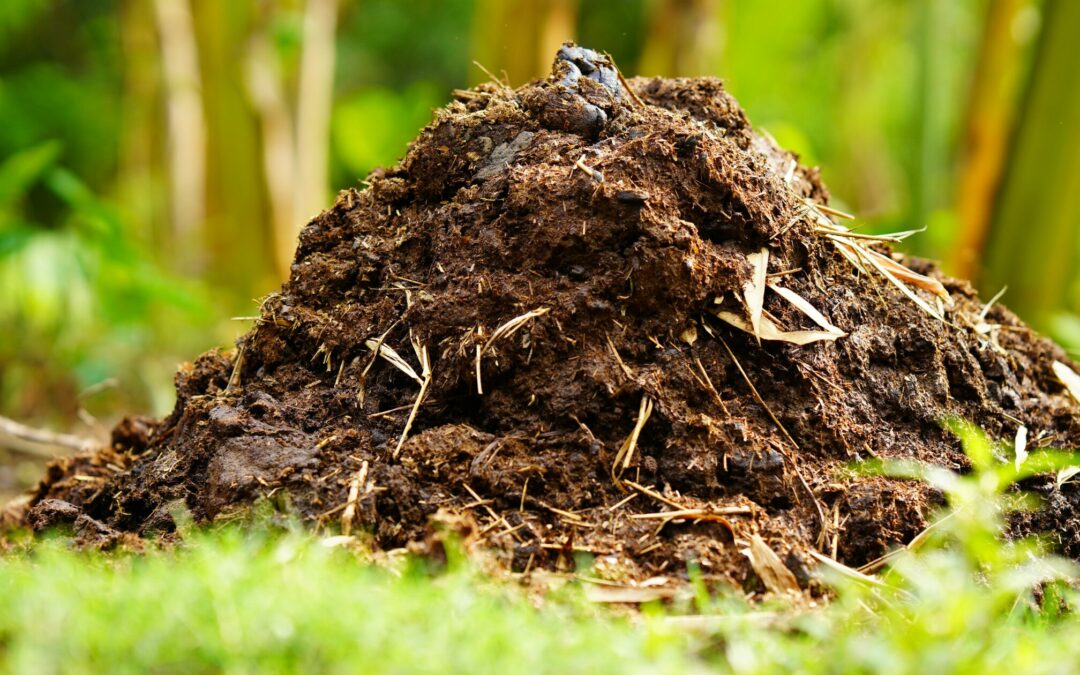
To the gardener, manure is gold! When we speak of manure, we mostly think of cattle or horse manure. However, manure is a general term for all faeces collected in stables and pens. Cattle, horses and chickens are good manure providers, but the excrements of other animals like sheep, goats and pigs are also usable. Even the faeces of cats, dogs, rabbits and other pets can be used in the garden. For hygienic reasons, however, pet excrement must be composted first.
Manure is a mixture of animal faeces, urine, water and bedding material. Straw and sawdust are usually used as bedding material and it’s distributed on the floor of stables and cages.
We can distinguish between fresh, rotted and composted manure. Depending on its consistency, we have liquid or solid manure.
We hobby gardeners usually use solid manure in different mixtures and with different additives. Manure in sacks is always rotted manure.
Nutrient content
Manure is an extraordinary, natural all-round fertiliser. It contains all important plant nutrients like nitrogen, phosphorus, potassium and trace elements as well as organic material which all contribute to the formation of humus. The most important plant nutrients are nitrogen, phosphorus and potassium. They should be distributed in a ratio of 100 (nitrogen), 15 (phosphorus) and 60 (potassium). That’s exactly the distribution in a manure heap.
The manure’s nutritional balance depends, among others, on the animal type and breed, the sex and age of the animals and the season. Further influences on the nutritional balance are the food the animals eat, how the manure is processed and the type and ratio of bedding material it is mixed with.
Where to get manure
If you have a farmer in your neighbourhood: lucky you! Most probably, he’ll be happy if you take some of the manure. If you live in the city, you may ask in riding stables for horse manure.
Ask about the animals’ health. They should not have been treated with antibiotics or anthelmintics. Otherwise, there may be residues of the substances in the manure. In a flower garden that may not be as harmful as in a vegetable garden. Nevertheless, even traces can harm the soil’s microorganisms. Manure with straw as bedding is better than manure with sawdust. Saw dust is a carbon-rich material that requires nitrogen to decompose. Also, the manure should contain more excrement than bedding material; do not use pure faeces.
Manure “temperatures”
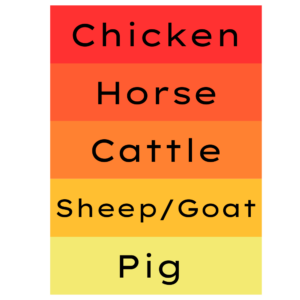
In the past, manure was often classified according to “temperature”. Some gardeners, especially the anthroposophical ones are still doing it this way. They distinguish the manure of different animals according to a scale from “cold” potassium-rich pig manure to “hot” phosphor- and nitrogen-rich chicken manure. In between range the manures of cattle and horses, with horse manure being slightly “warmer” than cattle manure.
Manure “temperatures” from hot to cold
Manure – a problem for the environment?
If used improperly, manure can be harmful for the environment
Nutrient run-off
Unfortunately, part of the nutrients disappears unused. That’s the case with all fertilisers. Nitrogen disappears as nitrate through surface run-off and washing out and as nitrogen gas, ammonia and nitrous oxides through outgassing.
If the manure lies near a river or lake, it may be washed off into the waterway which leads to surplus nutrients. This can cause excessive growth of undesirable water plants like algae, a process known as eutrophication.
You can avoid that by planting a buffer strip of vegetation along the waterside that catches run-off nutrients. Also, make sure that you don’t apply manure to your garden just before rain is forecast.
Odour
I don’t have to tell you that fresh manure has an unpleasant smell. In my garden, that’s no problem as no one’s living close by, but if you have immediate neighbours, the smell may cause a problem. Therefore, it’s best to use composted manure. If you add manure to your compost heap, cover it with dried material to keep the odour at bay.
Pathogens
Fresh manure can contain pathogens like bacteria and viruses which is why you should always wear gloves when handling fresh manure. When the manure is composted, however, it will generate sufficiently high temperatures to kill off any pathogens.
How can you best reduce nutrient loss and thus prevent negative effects on the environment? By composting manure, fertilising with it at the right time, in the right amount and working it into the ground you can prevent these possible dangers for the environment.
Let’s have a look at manure from different animals.
Considering how thoroughly cattle process their food, it’s no wonder that they produce a fertiliser of such a high quality. After chewing, the food passes the four stomach parts, rumen, reticulum, abomasum and omasum. Due to their special digestive system, cattle ruminate for at least eight hours per day.
Most gardeners value cattle manure as a well-balanced fertiliser. Almost half the nutrients are released within the first year, the rest in the second and third year in portions (see above). That means you can fertilise a non-fertilised soil in the first year with cattle manure and in the following years add a smaller amount. Cattle manure is mild and doesn’t burn the plant roots if you have taken too much of it.
Cattle manure contains all the nutrients that plants want, macros and micros. By combining a long-term fertiliser like cattle manure with a short-term fertiliser like chicken manure you can achieve a good overall nutrient balance.
Cattle manure rots slower than horse manure and thus needs longer to become compost with good nutrient content. Fresh cattle manure is sticky and smeary and can’t be easily handled.
Fertilising with cattle manure
Use three kilograms max (approx. 4 – 8 litres) of rotted cattle manure per square metre and season.
Divide the manure into three “portions”. Basic fertilisation is usually carried out once a year in spring. It aims to fill up the soil’s nutrient content so that it can provide the plants with all they need. About one month after this basic fertilisation, it’s time for maintenance fertilisation for nutrient-hungry plants. That’s when you give the second and third portions of the manure. You can make a liquid maintenance fertiliser with cattle manure by letting it steep in a bucket of water.
The horse’s digestive system is different from that of the ruminant cow. Grass, hay and concentrate are chewed and processed in the digestive system and excreted in a larger and drier consistency.
Horse manure is “warmer” than cattle manure and gardeners often use it for warm beds (for plants, not the gardeners😊). It rots easily and quickly. Horse manure has a good balance of macro- and micro-nutrients. If you have a horse stable in your vicinity, it’s most likely that you can get horse manure from them. Horse owners usually are glad to get rid of the stuff and will happily allow you to take as much as you want.
Horse manure is a long-term fertiliser but it works faster than cattle manure. Most nutrients are released during the first year. Horse manure doesn’t have a high nitrogen content and is therefore best mixed with a nitrogen-high fertiliser like chicken manure.
Fertilising with horse manure
The right dosage of horse manure depends on many factors and you must ask yourself the following questions:
How well-rotted is the manure? What do you want to grow? What type of soil do you have in your garden? What’s your soil’s structure, mull content and nutrient content?
An approximate recommendation is to use not more than 3 kilograms of rotted horse manure per square metre and season. It’s best to mix it with a nitrogen-rich fertiliser like chicken manure, especially if it contains a lot of bedding. If you mix it with other fertilisers, adjust the amount accordingly. Horse manure with a lot of bedding material should be composted first to avoid temporary nutrient loss.
Chickens produce a quick-working fertiliser. They eat hastily and shortly afterwards deliver dry and “hot” manure. Chicken manure has a higher nitrogen content and works faster than cattle or horse manure. That’s partly due to them eating more protein-rich food.
Chicken manure provides a quick nutrient “shot” to your plants. A good soil can store part of the nutrients, especially phosphorus and potassium whereas nitrogen is immediately absorbed. Contrary to other types of manure, chicken manure doesn’t contain many mull-binding substances making it a good complement at maintenance fertilisation.
Fertilising with chicken manure
When fertilising with chicken manure, it’s best to do so in early summer, in relatively small portions but often. Use it in combination with other manure. A few handfuls (not more than 200 ml) per square metre are enough. Dried chicken manure has a higher nutrient concentration than fresh one. You can make a liquid feed from chicken manure by putting a few handfuls of it into a bucket, filling it up with water and letting it rest for 24 hours. Either use it like that or dissolve it further to fertilise weak plants. It also speeds up the composting process.
Sheep, like goats, produce a dry and nutrient-rich manure which must rot for some time. Then it decomposes and becomes crumbly, thus making it easier to handle in the garden. Fresh manure often contains many weed seeds that die above 60 °C.
From spring to autumn, sheep and goats are usually out on the pasture which makes it hard to collect their manure. In winter, however, they are often in the stable where the manure and urine (+ bedding material) can be collected. This manure must rot for at least half a year. This rotted manure is an ideal soil improver.
Fertilising with sheep and goat manure
Sheep and goat manure is a valuable nutrient supplement. Mix sheep manure with garden or leave compost to increase the decomposing process.
Sheep and goat manure are a great way to improve the soil, increase the mull content and support microorganisms.
Fresh pig faeces stink horribly, there’s no way to sugarcoat that. Regarding its chemical composition, however, and its potassium, nitrogen and phosphorus content, pig manure is rather great. It contains other macro nutrients like magnesium, sulphur and calcium, as well as trace elements like copper and manganese.
More than any other manure, the nutrient content of pig manure depends on what they feed on. Pigs are omnivores and – like humans – eat almost anything. Unfortunately, it’s rather hard to lay your hands on pig manure (figuratively speaking). Only when you have your pigs or a pig farmer in your vicinity you can get some. Even then, it’s important to let the manure rot. As it is cold and moist, this process takes a relatively long time.
Fertilising with pig manure
Pig manure is a great fertiliser for potatoes due to its high potassium. It’s a long-term fertiliser that releases its nutrients slowly. Therefore, it’s best applied in autumn to prepare the beds for the next season.
The whole animal
It sounds disgusting at first to use slaughterhouse waste in your vegetable garden. On further reflection, however, it’s not more disgusting than manure. In today’s time with its attitude of resourcefulness and recycling, it should be politically correct to fertilise with animal waste, provided that it has been handled in the right way. However, everybody must decide for themselves if they want to take fertiliser based on slaughterhouse waste.
No animal is slaughtered only to gain plant nutrients. Slaughterhouse waste is a byproduct that goes right onto the waste heap if not used as fertiliser. A considerable part of the animal can be used as nutrient-rich fertiliser, for example, bones, horns, hooves, claws and blood. In the EU the use of wool, fur, feathers and hair is allowed in organic farming. These byproducts don’t have many nutrients but can be used as mulch. Please look up what animal fertilisers are allowed for organic farming in your country.
Bone meal which contains a particularly large amount of phosphorus is a long-term fertiliser. You can work in the meal in autumn to prepare the soil for the coming season. It releases the nutrients slowly for about three years, therefore fertilisation every other year is enough. Bone meal also contains trace elements and lime and is a great fertiliser for tomatoes, root vegetables and berry bushes. It’s especially suitable for loamy soil. The risk of over-fertilisation is very low.
A word of warning, though: Dogs may find it very interesting when you fertilise with animal fertilisers. They may even want to dig the place up to find the source of this (at least for them) heavenly smell. To prevent all neighbouring dogs from gathering at your vegetable patch for a digging party, water your garden thoroughly after bringing out animal fertiliser.
Horn meal contains a bit more nitrogen than bone meal. Horns (mostly from cattle) consist of the nitrogen-rich substance creatine. The nitrogen content of packaged horn meal varies a bit but is usually about 8 – 12 %. Like bone meal, horn meal releases its nutrients slowly and thus is a good long-term fertiliser.
Blood meal is – you might have guessed it – dried, ground blood from slaughtered animals. It contains a high amount of nitrogen and trace elements but few phosphorus and potassium. It’s not suitable for fertilisation in autumn but excellently suitable for maintenance fertilisation of cauliflower, cabbage, leek, spinach and celery. Fertilise often and in relatively small amounts during early summer. Work the blood meal thoroughly into the soil and water it well.
A mixture of bone and blood meal makes a nitrogen-, phosphorus- and potassium-rich fertiliser that works fast, yet is sustainable.
Meat meal is made from slaughtering and butchering waste. It contains less nitrogen but more phosphorus than blood meal. In the EU, meat meal cannot be purchased regularly but is mixed into certified fertilisers for organic farming.