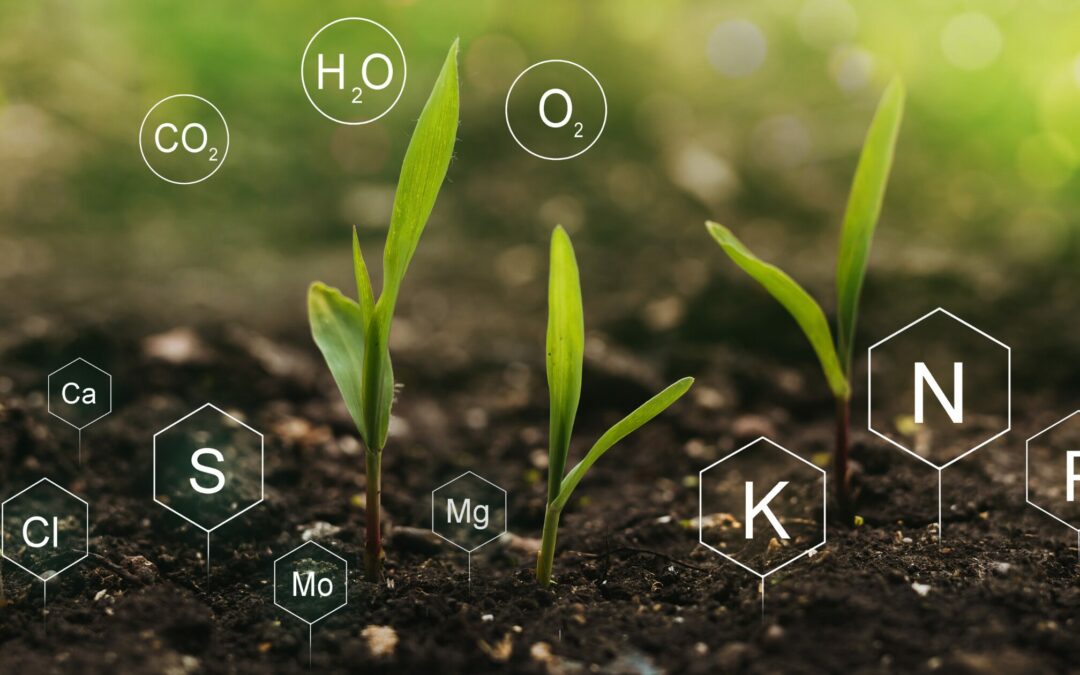
Plants are not unlike humans. To grow, thrive and stay healthy they need nutrition and sustenance. While for us fat, proteins and carbs are important, plants need different chemical elements for growth. The main part of a plant’s diet consists of carbon, oxygen and hydrogen which the plant can get out of the air and water. All other chemical components must be taken up as nutrients from the soil. When you know what those plant nutrients are you can provide your plants optimally, that is give them the right nutrients at the right time to make them grow, bloom and fruit lavishly.
Let’s have a closer look at the nutrients that plants need. We distinguish between macro- and micro-nutrients.
Plant nutrients: The Macros
The most important plant nutrients are called macro-nutrients. They include nitrogen (N), phosphorus (P) and potassium (K) but also magnesium (Mg), Calcium (Ca) and sulphur (S).
All plants need these nutrients in a relatively large amount, especially nitrogen, phosphorus and potassium.
Nitrogen (N)
Nitrogen is the most important nutrient for plants. It’s required in large amounts, is quickly used up and washes out easily off the soil when there is too much of it.
It’s not advisable to give too much nitrogen in one go. The plant won’t be able to consume it (or gets too much of it and becomes ill) and the excess will wash out into the groundwater.
Nitrogen is different from other nutrients as it’s mostly in the air. The air around us consists of about 2/3 of nitrogen. Nevertheless, the plants can only take it up via their roots. Bacteria and algae help the nitrogen get into the soil.
Insufficient nitrogen supply results in puny growth. The plants’ stalks and new shoots are weak, their leaves turn from a healthy green to yellow.
Nitrogen surplus results in excessive growth. The plants have thin stems and shoots and dark green leaves. They grow more leaves and less to no bloom. Nitrogen surplus makes the plant prone to illnesses and harms the storage time and the taste of your vegetables.
As nitrogen is a volatile nutrient (any excess washes or gasses out) it should be given continuously during the growing season but in low amounts. In spring and early summer, the plants need more of it. During summer, maintenance fertilisation can be carried out in lower doses according to the plants’ different demands.
Phosphorus (P)
Phosphorus can be found in the soil and water as salts, the phosphates. It influences the root system, growth, flowering, fruit formation and even photosynthesis.
It is more stable than nitrogen and is not as easily washed out of the soil.
Phosphorus deficiency is more rare than nitrogen deficiency.
Phosphorus deficiency results in a weakly developed root system and puny growth. Older leaves and leave stems turn red-brown-purple with a grey touch.
Phosphorus surplus prevents the plants from absorbing important micronutrients like iron and boron, resulting in a reduced growth. Soils with a high mull content are seldom low in phosphorus.
Potassium (K)
Potassium influences the metabolism and fluid balance. It supports fruit setting and improves resilience. A good availability of potassium also improves the quality and storage ability of fruits and vegetables.
Potassium deficiency makes the leaves dull and yellow-brown at the edges. A potassium surplus often leads to magnesium deficiency. Those two substances compete and hinder each other.
Sandy soils are more often prone to nutrient deficiency than loamy soils.
Magnesium (Mg)
Magnesium is important for seed building and the formation of chlorophyll which gives the plants their green colour.
With good magnesium availability, plants can easily absorb phosphorous. Potassium surplus can cause a magnesium deficiency and vice versa. Both nutrients compete with each other.
Magnesium deficiency shows in blotchy leaves with yellow patches between the veins. Leaves like that fall off too early.
Loamy soils are usually rich in magnesium while sandy and mull-rich soils have mostly lower amounts it.
Calcium (Ca)
Calcium influences the soil’s pH value. This is essential as the soil’s acidity regulates how nutrients are released and made available for the plants.
Calcium is important for the plant’s growth and immune system, its nutrient absorption and ripening.
If there is too much calcium in the soil, important trace elements like iron, manganese and boron are bound and unavailable for the plants.
Too little calcium – as is often seen in acid soils – is also harmful. In that case, it can be beneficial to add lime to raise the pH value and add calcium.
But even soils with a normal pH can have calcium deficiency. You can see that when the leaves roll their edges and the shoot tips, buds and young leaves dry out. Calcium deficiency also causes blossom end rot in tomatoes.
Sulphur (S)
Not long ago, soils near towns didn’t show sulphur deficiency due to the emissions of large industrial plants. With receding emissions, the need for sulphur has risen.
Like nitrogen deficiency, sulphur deficiency also results in reduced growth and bleaching of plants. While nitrogen deficiency can first be witnessed in older leaves, sulphur deficiency is first visible in the new, young leaves.
Carefully observe the ratio of nitrogen and sulphur. If you fertilise with nitrogen, you must also increase sulphur.
Plant nutrients: The Micros
Manganese, iron, copper, boron, chlorine, molybdenum and zinc
Often, there are enough trace elements in the soil. If there is a deficiency, however, a high pH value is often the cause.
A deficiency of one or more of those plant nutrients can result in reduced growth and bad harvest yields.
One symptom of iron, manganese and zinc deficiency is that the leaves turn yellowish between the veins. Manganese surplus results in brown stains on the leaves.
Boron deficiency shows by reduced growth of the shoot tips and puny growth of root vegetables Cauliflower may rot from the inside.
Essential substances for plants are macro-nutrients (nitrogen, phosphor, potassium sulpnur, calcium and magnesium) and some trace elements (boron, chlorine, molybdenum, copper, iron, manganese and zinc). The other micro nutrients are not crucial for plants but stimulate their growth.
Balanced nutrients
Learning about plant nutrients can be quite overwhelming at first. The easy method to obtain all the macros, therefore, is to buy some ready-made fertiliser that has a preset ratio of nitrogen (N), phosphorus (P) and potassium (K).
What does NPK mean?
On the packaging of an all-round fertiliser, you can find a so-called “NPK number”. One fertiliser, for example, may have an NPK of 12-8-16, indicating that this fertiliser consists of 12 % nitrogen, 8 % phosphorus and 16 % potassium. A more phosphorus-dominant fertiliser could have a ratio of 11-14-17. It’s suitable for flowers and vegetables producing fruit like tomatoes and beans.
Organic versus mineral fertiliser
However, the easy method is not always the best. NPK fertilisers do have their advantages, of course. They are quickly available – both for the gardener and the plant – and you needn’t think much about what to feed your plants. Just throw some fertiliser onto the soil and be done with it.
But, living in a world of duality, some disadvantages cannot be overlooked.
Mineral fertilisers
First, there are two types of NPK fertilisers, mineral and organic. Mineral fertilisers mainly consist of inorganic material in the form of water-soluble salts of chemical origin. In short, they are artificial fertilisers.
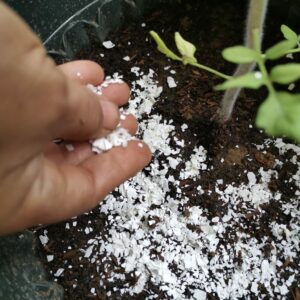
They usually work fast but not very long and thus are suitable for first aid in case of nutrient deficiency. Some artificial fertilisers are prepared as long-term fertilisers that release their nutrients slowly and over a prolonged time. If they are overdosed, however, they can have a negative effect not only on the plants but also on the soil, the environment and thus on us.
Although tempting, I don’t recommend using mineral fertiliser in your vegetable garden. The long-term disadvantages for your garden and the environment outweigh the advantages.
Organic fertilisers
Organic fertilisers, on the other hand, mainly consist of substances in organically bound form. The raw materials they are made of either originate from plant or animals. Unlike mineral fertilisers, the plant nutrients in organic fertilisers are not salts that dissolve quickly in water but are “packaged” into organically grown structure. The nutrients are less concentrated but improve the soil and keep the soil organisms happy. Organic fertilisers need some time to work but then they are continuous. Yet, there is also the possibility of overdosing them, leading to the same impacts like with mineral fertilisers. And let’s not put a blind eye to the fact that even organic fertilisers are processed.
In the (yet-to-come) series about natural fertilisers, I’ll show you how you can feed your plants, the soil and all the organisms with purely natural ingredients. Stay tuned.
Health check: Signs of imbalanced plant nutrients
Imbalanced nitrogen
Symptoms: reduced growth, pale or yellow leaves. Older leaves turn yellow fast. The lower leaves turn yellow from the tip, turn brown and dry out. Side roots are badly developed. Possible cause: nitrogen deficiency
Symptoms: excessive growth, thin stems and shoots. Dark green and excessively large leaves, sometimes with yellow edges. No bloom. Possible cause: nitrogen surplus
Imbalanced phosphorus
Symptoms: reduced growth, reduced fruit formation. Dark green, sometimes blue-green leaves. Lower leaves have a different colour (yellow, brown or red). The leaves’ underside is brownish/purplish. Leave veins are also brown-purple. Long roots but weak side roots. Possible cause: Phosphorus deficiency
Imbalanced potassium
Symptoms: reduced growth. Older leaves are yellow-green and striped. Burns and too early transition into hibernation. Possible cause: Potassium surplus
Symptoms: dry leave edges, sometimes yellow leaves. Older leaves die. Leaves curl and turn yellow-brown. Few and misshapen buds. Long main root but puny side roots. Fruit and vegetables taste bland Possible cause: potassium deficiency
Imbalanced calcium
Symptoms: reduced growth, pale green leaves Possible cause: calcium surplus Attention: calcium surplus may cause magnesium and potassium deficiency!
Symptoms: curled leaves with brown edges. Weakly developed root system. Brown patches on fruit. Blossom end rot at cucumbers and tomatoes. Brown leave edges at lettuce. Possible cause: Calcium deficiency
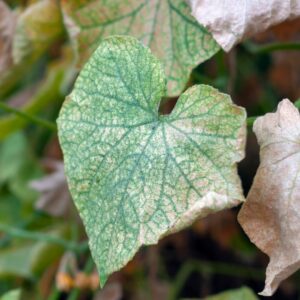
Symptoms: the areas between the leave veins turn almost white while the veins stay green. Molybdenum deficiency shows the same symptoms. Possible cause: Calcium deficiency
When to provide plant nutrients
When you watch any symptomes as described above, you must act and provide your plants with the according nutrient(s).
Apart from that there are plant stages that need special care:
Young growth
If you start your plants from seeds you sow them in a relatively nutrient-poor soil. When they start to grow however and form their first pair of real leaves they become hungry. Now is the time to give them some nitrogen
Newly planted
When it’s time to plant your vegetables out, they benefit a lot from phosphorus and potassium addition.
Blossoming
As soon as the plants develop their first blossoms, they want potassium, phosphorus and calcium to support the formation of blossoms.
Fruiting
All fruit vegetables like tomatoes, cucumbers, zucchini and pumpkins need a sufficient amount of potassium and phosphorus. These nutrients support the formation and healthy ripening of the fruits. Nitrogen is also important but only in small amounts.
Plant nutrients – A necessity
Gardening without nutrients is not possible for long. If you have a good enough soil your plants may grow well for the first one or two years but then they’ll become ill and stagnate or die and you’ll need a magnifying glass to see your harvest. To prevent that scenario you have the responsibility for your plants and soil to feed them according to their needs.
If you want to make your garden a success, it’s essential to know its soil type. Plants have different requirements regarding moisture, permeability and pH value. In short: different plants thrive in different soil types.
Types of soil are classified by grain size, colour, the amount of organic material and the minerals in it. Also, the percentage of sand, clay and silt is important and lastly, you should know the pH-value of your garden soil.
Nutrition
A plant cannot absorb water and fertiliser in one go. It can’t drink a whole can of water in one gulp and eat a whole load of fertiliser all at once. The soil’s important task is to store liquid and nutrients and deliver them to the plants so that they can have little snacks.
Also, plants cannot take in fertiliser in solid form. To make the best use of nutrients, plants need water as a solvent agent. A plant “eats” and “drinks” mainly with its root system but also little stomata in the leaves absorb a bit of water and nutrients.
The soil is a pantry
The soil is the plant’s pantry. In it, there are cavities (pores) where water, released nutrients and oxygen are stored. The cavities between particles are of different sizes, depending on the soil structure. A fine-textured soil has smaller cavities than a coarse-grained soil. The smaller the cavities, the better the soil can bind nutrients and water. If the cavities are large, water runs through the soil.
Soil structure
Different soil characteristics provide the plants with different prerequisites. When you know and understand your soil, you can easily maintain or improve it and thus offer your plants a suitable environment.
Naturally, soil is built “from below” as well as “from above. The lower part of the soil is based on the bordering rock. Basic mountain rock that was rich in minerals, has weathered and crumbled during millions of years. The upper part, which is known as mother soil, was mixed with organic material from animals and plants that had decomposed and turned into humus.
Thus, the solid parts in the soil consist of minerals and organic material. Between the solid particles, there are pores. At best there are as many pores as particles. The pores’ task is to store oxygen, liquid and nutrients and carry them to the plants’ roots.
Different grain sizes
Rock erodes and breaks down into particles of different particles. The size decreases from stone to gravel, sand and silt to clay. Most garden soils are a mixture of mineral soil and organic material.
Soil types
It is practical to categorize the soil with terms like “silty, slightly loamy soil”. By that, we know what we have and what we can do to improve the soil. Different soils have advantages and disadvantages, especially regarding what you want to plant.
The most common definition of soil types is based on pure mineral soil and uses the grain size as a description.
Sandy soil
Sandy soil has large particles; it is light and porous and can be worked easily. It warms up quickly in spring and cools quickly down in autumn. That makes it especially suitable for sensitive plants that must go into hibernation early to survive the cold season.
On the other hand, sandy soil badly stores liquid and nutrients. It dries out quickly and must be watered often.
Silty soil
The size of the silt grain lies between sand and clay, being smaller than sand and larger than clay. By covering the silty soil with organic material like leaves or bark mull encrustation can be prevented.
Loamy or clayey soil
Loamy soil has small particles that encrust easily. If loamy soil has a clay content of more than 40 % it is practically impenetrable. Loamy soil is nutrient-dense and stores moisture well.
Loamy soil takes longer to get warm in spring but also holds the warmth longer in autumn. Loamy soil has few cavities and thus is sensitive to pressure and trampling.
Chalky soil
As the name indicates chalky soils contain a relatively large amount of chalk which makes them alkaline and thus not very good for plants. They have little nutrients and tend to dry out easily but become a rain-slicked, loamy mass after heavy rains.
Every type of soil can be improved. The goal is to make sure that it can hold optimal amounts of moisture, nutrients and oxygen optimally. It’s great for any soil to add organic material.
How to find out soil types
Often, it’s enough to have a look at the soil to determine its type but to be sure, you can try out the following:
The rolling test
Take a bit of soil (about 1 tablespoon) and roll it between your hands to a “sausage”. If the soil doesn’t form a roll of any kind, you probably have sandy soil. The thinner the “sausage”, the higher the clay content in the soil. Loamy soil yields a roll of 1 mm diameter, 4 – 5 mm characterise silty soil.
The shaking test
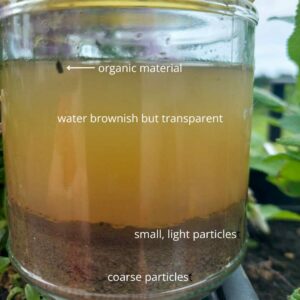
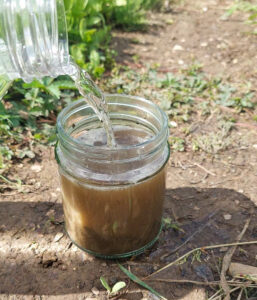
Fill a large glass jar with a handful of soil and add water at a ratio of 1 part soil and 2 parts water. Shake it well to mix the soil and water and let it set for 1 – 2 days without disturbing it. Slowly the soil particles will sink to the bottom and layer up there.
Sandy soil leaves the water almost clear; the particles have layered at the bottom.
Silty soil leaves cloudy water and most of the particles at the bottom.
Chalky soil leaves a layer of grit-like particles at the bottom of the jar; the water is a light grey.
Loamy soil shows relatively clear water and the particles are layered by grain size at the bottom with the smallest particles on top.
This is the result of the shaking test with my garden soil. Can you see the layers?
pH value
Soil can be acid, alkaline or neutral which can be determined with a pH-test. The pH scale goes from 1 = acid to 14 = alkaline. The middle value 7 indicates neutral. Most plants prefer a pH value between 5.5 and 7.5, with the ideal value between 6 and 6.5. The pH value impacts the plants’ nutrient uptake.
Extreme pH values under 3 and above 8 provide no suitable environment for plants as nutrients become encased and can’t be taken up by the plants. And then it doesn’t matter if or what you use to fertilise.
The pH value also influences the soil’s structure and microorganisms. And, finally, a balanced pH prevents the absorption of dangerous heavy metals from the soil.
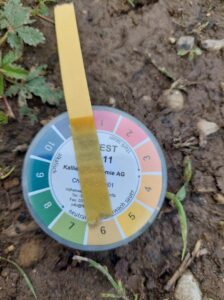
First, however, you must know your garden soil’s pH value. To determine that, you can either ask a lab to make a soil analysis or buy some litmus paper and do the tests yourself.
Measuring the pH value
1. Remove the upper soil layer (approx. 3 centimetres / 1 inch) and dig 20 cm / 8 inches deep. You need about 200 ml / 0.5 lb soil.
2. Put the soil into a large jar with a lid. Mix the soil at a ratio of 2/3 water to 1/3 soil with distilled water. (It’s important to use distilled water to make sure that the water’s pH value does not affect the test)
3. Close the jar and shake it for at least 2 minutes.
4. Let the mixture set for at least 10 minutes.
5. Insert the litmus paper into the water above the sediment.
6. Read the result and note it down. Take several soil samples from different places in your garden.
Compare the colour of the litmus paper with the indicator.
Favourable pH-values
Greens: 6.5 – 7.0
Cabbage: 6.5 – 7.5
Potatoes: 5.5 – 6.5
Raspberries: 5.5 – 6.5
Strawberries: 6.0 – 7.0
Berry bushes: 6.0 – 7.0
Blueberries: 5.0
How to improve your soil type
When you know your garden’s soil type, you can take measures to improve it by adding organic materials like compost and manure. Stay patient! building good soil requires time.
Sandy soil
As said before, sandy soil can’t store water very well because due to the sand’s large grain size, water will run through it. To improve moisture retention capacity, we can dig in plenty of bulky organic material like compost or well-rotted manure.
Always keep the soil surface well covered, either with mulch or with groundcover plants. Sow green manure between vegetables, cut it off when it becomes too large and use it as mulch. Leave the roots in the earth. They will stabilise the soil and help to store moisture.
Nevertheless, sandy soil will always need more fertiliser than other soil types. Fertilise sandy soil several times during the cultivation season and with relatively low amounts. If you give sandy soil more nutrients than it can store, they will be washed out.
Silty soil
Silty soil has a lot of nutrients and holds moisture well. It can be easily cultivated as long as it is well drained.
To improve drainage, dig in organic material like compost.
Chalky soil
Chalky soils have larger particles and are stonier than other soils. It is alkaline and, depending on its clay content, may be light or heavy.
First, we must lower the pH value by digging in lots of organic materials like compost or well-rotten manure but also half-rotten compost of conifers. Mulching with conifers in addition to other organic materials also improves the pH value long-term.
To break up the soil and add nitrogen, sowing leguminous plants is recommended.
Loamy soil
Loamy soil is usually a great mixture of sand, silt and clay. It’s nutritious and holds water easily. It warms up relatively quickly in spring and is easily cultivated.
Although loamy soil is already nutritious, it’s important to keep it that way. This is usually carried out best by adding organic material like compost and manure to the soil, making sure that it’s always covered with plants (green manure if necessary) and well-mulched. To aerate the soil, dig into it with a digging fork and jiggle it slightly. This is best done in autumn and early spring to ensure that enough oxygen gets into the soil without digging it up.
What to do to raise your soil’s pH?
If your soil’s pH is too low, that is if your soil is too acidic, you can add lime to your soil. But be careful, a too-high pH is equally unfavourable as a too-low pH. There are, however, good reasons to add limestone to your garden: it adds micronutrients to your soil which results in the plants not taking up too many heavy metals. especially loamy soil is better aired, more loose and thus easier for the roots to penetrate.
Different forms of lime
Lime is sold in different grain sizes. Powdered limestone has the smallest particles, granulated limestone consists of processed powdered limestone. the latter does not make a lot of dust and dissolves quickly into the soil. You can also buy lime chippings, but they dissolve relatively slowly.
Time and dosage
The best seasons to add lime are autumn and winter when rain and snow transport the lime into the soil.
The amount of lime you need depends on the soil type. Loamy soils usually need more to adjust the pH, sandy soils need less. As the lime products differ in their ingredients, you must follow the instructions valid for your product. If you prepare a new garden, you’ll need more lime than just for maintenance.
Conclusion
The first step for a healthy garden is determining your soil type. Different soil types require different improvement and maintenance methods. Every soil can be improved so that your garden provides the best conditions for your plants.
When you want to plant and grow your own tomatoes and want to get a great harvest, it’s important to suitably care for your plants and provide them with optimum growing conditions. In 14 steps, I’ll show you everything you need to know about tomatoes – whether you’ll grow them in the open, in a greenhouse or in pots. Let’s start!
Step #1: Choosing the right tomato seeds
Of course, you can buy pre-cultivated tomato plants from a nursery. Those plants, however, will often be hybrids which means that their seeds are not seedfast. In other words, you cannot take seeds from those plants to cultivate new tomatoes next year as they will not create the same tomato variety. If you’re fine with that, go ahead and buy plants.
If, on the other hand, you want to choose from the immense number of tomato varieties and cultivate some rare types, you’ll want to start your plants from seeds. Make sure that you always buy seedfast seeds that are suitable for your climatic conditions and – of course – your preferences. If you don’t have favourites yet, try out different types: cherry tomatoes for snacking, tomatoes for salads, plum tomatoes for tasty sauces, tomatoes in different colours etc. Note down which ones you liked best and harvest their seeds for next year.
Step #2: Sowing the seeds
When you’ve got your seedfast tomato seeds, sow them into a plastic container with herbal soil. Tomatoes are warmth-loving plants, which means they need temperatures between 18 – 23 °C to propagate.
They also need plenty of (sun-)light. A windowsill facing south or west is good for seedstarting. Alternatively, you can put your planting containers below a plant lamp. Make sure your plants get 14 – 18 hours of light per day, otherwise they will become leggy.
Step #3: Pricking tomato seedlings
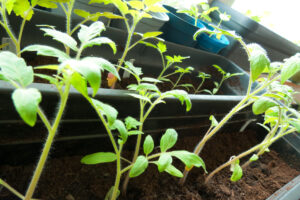
As soon as your tomatoes show the first pair of real leaves (not the seed leaves that come first), it’s time to move them into separate planting containers. Fill a pot of about 15 cm in diameter with planting soil and plant the tomatoes deeper by burying them up to the seed leaves. By that, they can grow more roots from the stem and become more robust.
The tomato plants still need warmth and enough light, so let those plant lamps shine.
Step #4: Hardening off
About 14 days before you want to plant out your tomatoes*, you must harden them off to prepare them for the different conditions outside or in your greenhouse. This is an important step as otherwise, your plants could die from the sudden changes in temperature and exposure to sunlight.
To toughen the tomatoes, put them out into the shade on a warm day (10 °C and above) for a few hours each day. Start with 1 – 2 hours and prolong those phases up to 4 – 6 hours. Make sure that on the first days of outdoor hardening off, your plants are protected from direct sunlight and wind. After a few days, you can put them for one hour in the morning sun and a few days after that into the full sun. Always take a look at your plant every hour or so to make sure that they don’t get scorched or suffer in some other way. Get the plants in during the night.
Another thing you can do to harden your tomatoes off is to tenderly brush over them with your hand. This imitates wind and causes minuscule breakings in the stems which the plant can repair and thus becomes harder and stronger.
*If you just asked yourself when’s the right time to plant out your tomatoes: after the last night frosts, better still when night temperatures do not drop below 10 °C. In Central Europe that’s about mid-May. If you have a greenhouse, you can plant them out already starting mid-April.
Step #5: Soil preparation
Tomatoes have a high demand for nutrients. In other words, they eat like a teenager after a rugby match! To give them a good start and plenty of “food”, we must prepare the soil before planting them out. To do so remove all weeds and the mulch. By exposing the soil to the sun it will warm up and, as I said before, tomatoes love warmth.
To enhance nutrient density, work some ripe compost into the soil.
Plant your seedlings outside when all danger of frost is over and the soil has reached a temperature of at least 15 °C.
Dig out planting holes and add some organic tomato fertilizer and a handful of bone meal. As an alternative to the ready-made fertiliser, you can put some stinging nettles into the plant hole. I always put some composted and wet cattle dung into the plant hole and plant the tomatoes directly into it. That way, they not only have fertiliser but also enough moisture to last for the first few days of growing in.
As you did when pricking, plant your tomatoes deeper than before by burying them up to the first leaves. To help them grow more roots and thus become more anchored into the ground, I always plant them at an angle of 45 degrees. That makes sure that additional roots will sprout out of the stem. Remove any leaves that touch the ground.
Plant your tomatoes about 45 centimetres apart.
If you use pots for planting, make sure that you use good-quality pots. Black ones are not great as they’ll heat up too much in summer and by that burn the roots. Wooden, terracotta or plastic pots with a capacity of at least 20 litres are ideal. Put some drainage in so that your plants won’t drown, add the soil – either compost or ready-made tomato planting soil – and plant your tomatoes as described above.
After planting, water your tomatoes thoroughly.
Step #7: Staking
We distinguish between indeterminate and determinate tomatoes.:
Determinate varieties, also known as bush varieties, grow about 60 – 100 centimetres tall. They produce fruit for a relatively short period of time as they tend to provide ripe tomatoes at the same time which makes them great for making sauce and canning. Determinate varieties don’t need any staking and are great for small places or pots.
Indeterminate varieties, or vining varieties as they are often called, produce large tomatoes all summer long, mostly starting mid- to late-season. Indeterminate tomatoes need staking to help them support their weight and height. For that matter, you can put a stake next to each plant into the soil and as the tomato grows, fix it loosely with a twine to it. A possibility you can use in your greenhouse is to fix a twine loosely at the ceiling and fix it around your tomato plant. As the tomato grows you wind it around the twine until it reaches the ceiling.
Step #8: Watering
Most gardener’s favourite activity is watering and that’s great for the first week or so after planting your tomatoes to make sure they root well. Afterwards, however, you can cause real damage to your plants when watering them too much: they will grow only shallow roots and thus not be firmly rooted in the ground and their fruit will taste watery.
It’s best to leave tomatoes out when watering and only water them if they really need it which they show by wilting leaves. Even in the greenhouse, my tomatoes can grow their roots deep enough to tap the water sources deep down in the earth. Don’t spoil your plants but raise them to become healthy, sturdy adult tomatoes with plenty of tasty fruit!
When you must water, however, water them deeply and make sure that the water soaks at least 10 – 15 centimetres into the ground. Always water at the base of the plant and don’t splash the leaves as this might cause diseases.
Step #9: Mulching
I’m a huge fan of mulch and I recommend mulching your tomatoes as soon as the soil is warm enough. Mulch not only helps your plants to retain moisture (see step #8: watering) and prevents soil-bourne diseases from splashing up onto the leaves. It also controls weeds and shades the soil. Did I say that I love mulch? I love mulch!
Step #10: Pruning
If you’re growing vining tomatoes, you must prune, that is: pinch off the suckers. Suckers are those tiny stems that form between the main stem and branches. They will not produce fruit but only take energy from the plant. It’s best to prune or pinch the suckers as soon as you notice them. When they’ve grown large already, it’s hard to just rip them off without damaging the plant. Also, the wound becomes too large and may invite diseases.
You can just use the suckers as mulch or you put them into a glass with water where they’ll soon form roots and thus new plants.
Step #11: Companions
Tomatoes are a sociable lot and love having companion plants around. The right partners will not only fight off pests and diseases but will also prepare the soil ideally for our hungry fellows.
Good vegetable partners are beans, lettuce, celery, cabbages, onions and garlic. Tomatoes also love basil – on the plate as well as in the soil – and if you want to add a pretty eyesight you can plant marigolds.
Step #12: Fertilizing
As I said before, tomatoes are gluttons. To make sure they get all they need, it’s best to give some long-time fertiliser into the plant hole. This can either be some ready-made tomato fertilizer, bone meal, a mixture of horn shavings and rock powder, stinging nettles or composted dung. This year, I’ll try out different methods to compare what works best (for me). I’ll keep you updated.
Nevertheless, during their main period of growth, tomatoes still need some quickly available fertiliser that provides them with nitrogen, potassium and phosphate. I always prepare a “manure” from stinging nettles and comfrey and add about 100 – 200 ml of the ready manure to 10 l water.
Be careful, though, to not over-feed your plants. Too much fertilizer will weaken them and make them produce many leaves but few, tasteless fruit. Fertilizing every four weeks is enough to provide your plants with sufficient nutrients so that they’ll produce a great harvest!
Step #13: Pollinating
During relatively cold summers but also in greenhouses with insufficiently large windows, pollination may be a problem. When it’s too cold, bees and other pollinators won’t be around that much and in the case of greenhouses they may not find their way in. Those wonderful blossoms on your plants will not be pollinated and just fall off instead of transforming into wonderfully tasty tomatoes. That’s a shame!
To support the bees, you can carefully (!) shake the plants a bit so that the pollen gets loose and swirls through the air. Tomatoes have bisexual flowers and can pollinate themselves when the pollen is released – by insects or by shaking the plants.
Step #14: Harvesting
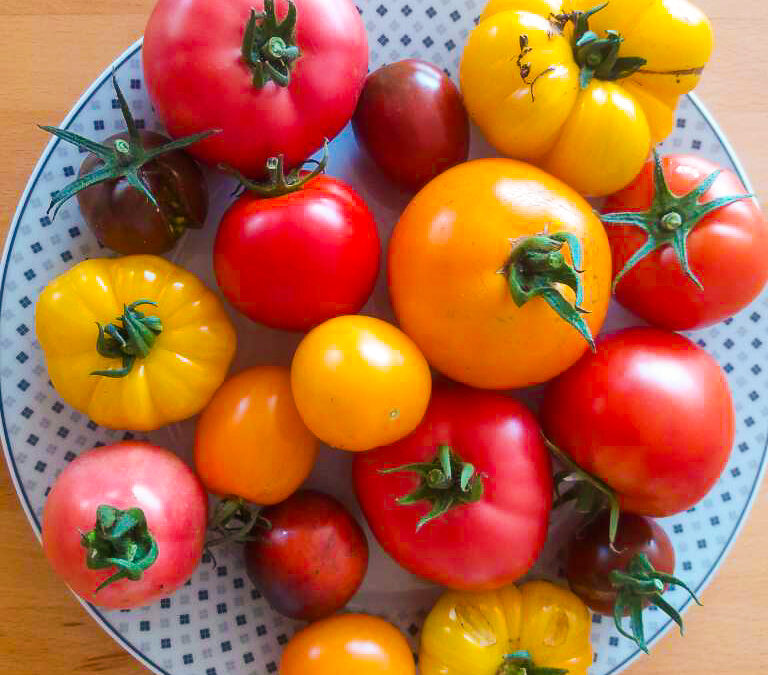
Hooray, the time to harvest has come! Harvest your tomatoes when they have the right colour (depending on your variety this can be red, orange, yellow, blue, violet, white or green in different shades), smooth and firm skin and easily remove from the plant. If you have to pull hard, they’re not ready yet.
If temperatures threaten to drop too low and there are still unripe tomatoes on your plants you can either pull out the whole plant (with roots) and hang it upside down from the ceiling of a cool basement or garage. Or you place the unripe tomatoes into a cardboard box or a paper bag and put it on the counter. With both methods, the tomatoes will ripen and you may have fresh tomatoes till Christmas.
You got more tomatoes than you can eat? No problem! Preserve them for winter by cooking and canning a tomato sauce. Nothing better than some pasta with homemade tomato sauce on a cold winter’s day.
Drying and soaking them in oil is another wonderful way to preserve your tomatoes. Cut small fruits in half or larger into quarters, put them onto a tray and dry them in the oven at 40 – 50 °C until they are dry but still chewy. Put them tightly into small glasses and fill them up with olive oil.
You see, when you observe these 14 steps it’s quite easy to plant, grow and harvest your own tomatoes and they taste sooo much better than the ones from the store. Is there anything yummier than eating warm ripe tomatoes right from the plant? Mmmh….
Are you dreaming of starting a vegetable garden and harvesting fresh produce:? A small vegetable patch is the first step to a whole new quality of life: the best food, fresh air and a contribution to a “greener” world. Let’s take this fantastic step together so that you can make your dream come true!
How to make a vegetable patch
You want to make a vegetable patch, maybe even a whole vegetable garden? You want to dig into the soil with your hands, and inhale this wonderful earthy scent? And you want to harvest vegetables that are fresher and tastier than anything you can buy in a shop?
That’s wonderful!
In this article, I show you step by step how you can create low-maintenance and fertile vegetable patches without tilling, and superfast, too. With a few tricks, it’ll not only be fertile from the beginning but it’ll also stay weed-free.
Let’s dive in.
Why no digging when creating a vegetable patch?
Admit it: when you think about creating a vegetable patch, you first think about digging up the earth, right? I know it was common in most gardens for a long time. Today, however, science tells us that it’s probably better for our soil to not dig at all. Which is great for both, the microorganisms and our backs.
Did you know that there are more microorganisms in a handful of garden soil than human beings on the earth? These tiny invisible helpers are immensely important for fertile soil.
Imagine an earthworm, for example, who usually looks for food at the surface of the earth but has to go hungry if you dig up the soil. He suddenly finds himself out there while his food is three floors below. That’s a catastrophe – not only for the earthworm without any sunscreen but also for soil fertility.
The trick is now to NOT disturb the microorganisms but to work with them from the very beginning. That’s why we create our vegetable patches without digging.
Start a vegetable patch in 5 steps
Let’s create a low-maintenance and high-yield vegetable patch!
Step 1: Prepare the ground
The first step is easy! The only thing you have to do is wait until the grass is long. When the grass is too short it cannot be bent. Then the pointy tips can easily penetrate the cardboard that we put onto the lawn. The cardboard suffocates long bent grass and it dies.
So, the first step in creating a vegetable patch: let the grass grow under your feet 😊!
Step 2: Dig in a lawn edging border
When making a vegetable patch, dig in a lawn edging border along the outer edge of your patch. Weeds and grass must stay outside. With a lawn edging border you make sure that no uninvited guests grow into the patches and reconquer them. To kill to birds with one stone, you can use a metal snail barrier which not only keeps the weeds but also the snails out. I have chosen to use that, as my garden is on a meadow.
Dig a v-shaped hole into the ground and put in the border so that about five centimeters are showing. I prefer this lawn edging border that also works as a slug barrier. It’s made of metal which is more durable than plastic edges that release microplastic into the garden when decomposing.
My patches are all 1,2 m broad because I can work them without contorting. I can reach the middle of the patch from every side without balancing or doing acrobatics.
Step 3: create bed borders (optional)
The lawn edging border is not very appealing and you sometimes may even stumble over them. For that reason, you may conceal it a bit. How about a bed border made from wooden trunks? Stabilize them with small stakes so that they are firmly in place and cannot roll away.
Other possibilities may be stones, boards, tiles, or deadwood. Many things are possible. Just make sure that the bed borders are not too high and throw a shade onto your vegetables.
Step 4: Cardboard, gimme cardboard!
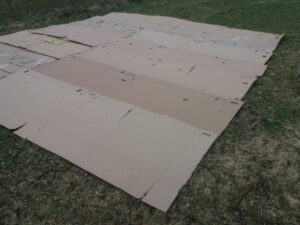
Now you get blank cardboard. It’s important to remove all tapes and staples so they do not get into the soil. Put the cardboard within the bed borders, overlapping at least 10 centimetres.
If you don’t have enough cardboard: ask your local bike shop. They have large cardboard transport boxes from the bikes which are great for a vegetable patch. They are huge and usually without print.
If you don’t want to use cardboard, anti-weed fabrics made of natural fibers that break down without any remnants are a good alternative.
Another possibility is to replace the cardboard with a layer of mulch. Apply 10 cm lawn cuttings or leaves and let it dry thoroughly. Then, distribute compost evenly on it.
Step 5: Spreading compost
Attention, ladies and gentlemen: here comes our star guest: his Royal Highness the Compost honors us with his entry into the garden!
That means you spread a 10 – 15 cm thick layer of mature compost on your beds
If you don’t have enough mature compost (which is likely when you want to start a vegetable garden), ask your local composting plant if you can buy some. It’s usually cheaper than a garden centre. In any case, make sure that the compost is made of organic material. Otherwise, it may contain lots of plastic – and we don’t want that in your vegetable garden!
I recommend using compost from green cuttings.
Bonus: Garden paths
Congrats: you now know everything about how to make vegetable patches. But also keep in mind that you may need garden paths, especially when you are creating several patches. You may separate them with woodchip paths. Plan the paths about 40 cm wide so that you can pass through with a wheelbarrow. Just spread the woodchips onto the cardboard. That way you can create easy-care garden paths in no time.
The patch is ready – what now?
The patch is ready, now it’s time for planting and/or sowing. You can plant or sow directly into the compost beds. The cardboard will decompose very soon so that the plant roots can grow through it without difficulty.
And earthworms, by the way, love soggy cardboard. Don’t worry: they’ll find their way to the surface.
You see: creating a vegetable patch is totally easy. The only thing you have to do is go outside and start! With these tips and tricks, you’ll create a vegetable garden in no time 😊
Mixed cultivation, crop rotation, pre-, main and post-crops… it’s difficult for a beginner to understand how to make a planting plan for your vegetable garden. Where do I plant, what and when can I harvest are some questions that may feel overwhelming at the beginning.
Yet, it’s high time to deal with them and create a planting plan for the upcoming gardening season. It’s not as complicated as it may seem at first. Just follow the steps and you’ll create a planting plan in no time.
Ready to start? Let’s go!
Plan your vegetable garden
First, you draw a layout of your garden. If you have patches already draw them. If you start creating a vegetable garden from scratch, plan patches with a width of 1,20 metres. That way, you can reach every part of the patch without contorting.
If you want to add several patches, they should optimally be 1,20 metres long, but you can make them up to 1,8 metres. Also, add paths between the patches so that you can reach every part of them.
Determine the location
Before creating a vegetable garden, it’s important to determine the best location. Important things to consider are
Distance to the house
Sun
Good soil
Plain or slightly south-bend area
Wind-break
Maybe you won’t find the ideal place for your vegetable garden, but that’s okay! Even if you had only a shadowy backyard for your vegetables, there’d still be some plants that grow well in the shade. Just consider this when planning your garden and you’ll still enjoy planting your veggies. Take what you have and make the best of it.
Once you’ve determined where your vegetable garden shall be, you can start making patches. It’s not too late to make new vegetable patches and plant them immediately. If you want to know how to start vegetable patches from scratch, check out this post.
Have you drawn the patches into your layout? Great, let’s move on.
What to plant
That’s easy: what you like. If you are a beginner, start with plants that are easy to grow. Herbs, lettuce, radishes, chard, beans, summer squash, beets, garlic and leek usually don’t make any problems and produce a good harvest.
Make a list of the vegetables you want to plant and how many you want.
Crop rotation
Different vegetables have different needs regarding soil and fertilization. There are plants with high nutrient demands like tomatoes and cabbage, medium nutrient demands like beets and low nutrient demands like peas and beans.
If you want to plant vegetables with high nutrient demands, it’s important to prepare the soil well, use compost and fertilize the plants. In the second year, you can plant vegetables with medium nutrient demand on this patch. They need less nutrients and profit from the fertilizer of the first year. In the third year, you plant veggies with low nutrient demand.
That said, divide your garden into three sections: one for plants with high, one for medium and one for low nutrient demands. Rotate these vegetables every year and use the nutrients optimally. Another benefit of crop rotation is that you minimize the danger of diseases. Would you plant the same vegetables at the same place year after year, the soil would exhaust, making it easier for pests and diseases to thrive.
So, take your list of vegetables you want to plant and categorize them into plants with high, medium and low nutrient demands. Here’s a list of vegetables and their category. Then determine which plants to grow where in your garden and prepare the soil for the high nutrient-demanding ones.
Mixed cultivation
Now that you know what plants to grow in which part of your garden, you have to determine which plants to pair. This is a bit like putting together a work team and – like in real life – some team members (or plants in that case) work great together and others loathe each other. To bring them together in an optimal way is called mixed cultivation and it’s a great way to hold pests and diseases at bay. Typical examples are carrots and onions: the carrot releases a scent that repels the leek fly and the onions release a scent that repels the carrot fly. Here’s a list of great mixed cultivation partners.
Note down great partners and disaster pairs, decide where to grow them and write them down in your garden plan.
The best is yet to come
Most vegetables don’t need the whole season to grow. Tomatoes for example are not planted before mid-May, that’s enough time to cultivate radishes and lettuce before. Almost any main crop, i.e. a vegetable group that occupies the patch for a long period, leaves time for a pre- or post-crop. Examples of main crops are tomatoes, potatoes, cucumbers and corn. By using the patches before and/or after the main crop for fast-growing vegetables you can harvest twice or even three times!
That’s why you should combine the different main crops with fast-growing pre and post-crops like radishes, spinach, lettuce and kohlrabi. Usually, it’s indicated on the seed bags when to sow which veggies. Using this information you can make a planting plan for the whole year and scale your harvest.
Note down in your plan how long the crops will take until they can be harvested and determine which places to use for pre and/or post-crops. It’s a bit like playing Tetris :-).
Grab your planting plan for your vegetable garden
Taking every of the above aspects into consideration when making a planting plan can lead to overwhelm. I, too, need several attempts until my plan is sound. I’m up to drafting out a planting plan for you, so stay tuned and come back!