A healthy and fruitful vegetable garden is impossible without feeding your plants. After all, plants (like humans) need food and nutrition. In short: they need fertiliser. There are different kinds of fertilisers: mineral, organic and natural. Mineral fertilisers mainly consist of inorganic material in the form of water-soluble salts of chemical origin. They are artificial fertilisers. Organic fertilisers, on the other hand, primarily comprise substances in organically bound form. Unlike mineral fertilisers, the plant nutrients in organic fertilisers are not salts that dissolve quickly in water but are “packaged” into organically grown structures. Nevertheless, organic fertilisers are highly processed, too. Natural fertilisers are unprocessed, usually composted substances from nature that contain plenty of nutrients for your plants. They can be of animal, plant or even human origin, are easy to handle and can be found locally. This article deals with natural fertilisers from animals.
Brown Gold: Manure
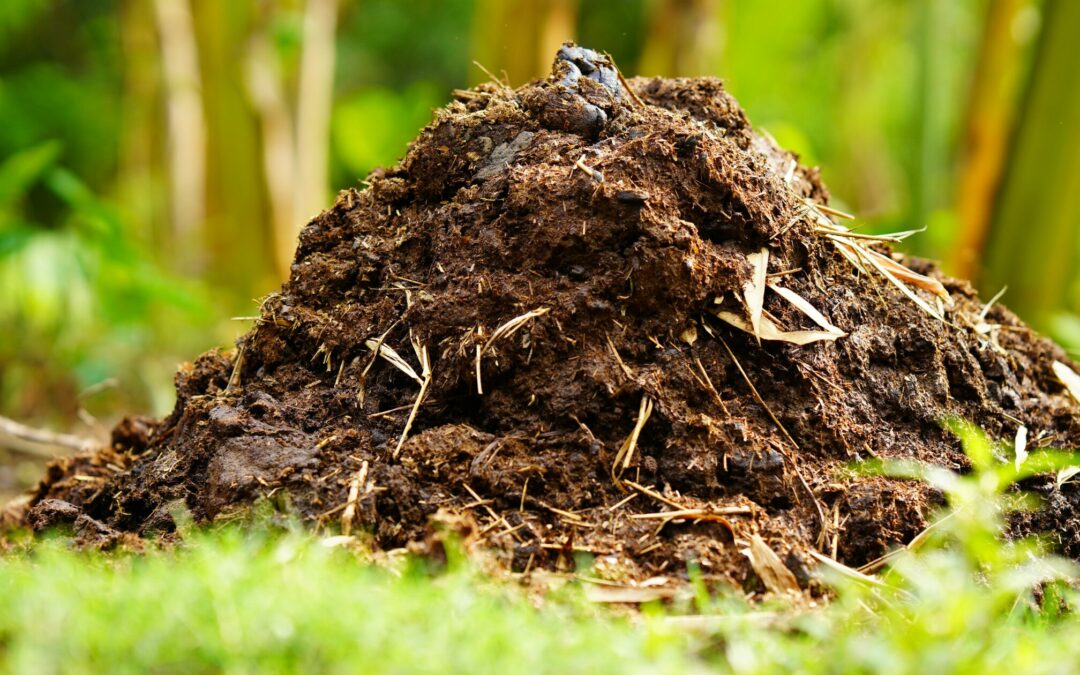
To the gardener, manure is gold! When we speak of manure, we mostly think of cattle or horse manure. However, manure is a general term for all faeces collected in stables and pens. Cattle, horses and chickens are good manure providers, but the excrements of other animals like sheep, goats and pigs are also usable. Even the faeces of cats, dogs, rabbits and other pets can be used in the garden. For hygienic reasons, however, pet excrement must be composted first.
Manure is a mixture of animal faeces, urine, water and bedding material. Straw and sawdust are usually used as bedding material and it’s distributed on the floor of stables and cages.
We can distinguish between fresh, rotted and composted manure. Depending on its consistency, we have liquid or solid manure.
We hobby gardeners usually use solid manure in different mixtures and with different additives. Manure in sacks is always rotted manure.
Nutrient content
Manure is an extraordinary, natural all-round fertiliser. It contains all important plant nutrients like nitrogen, phosphorus, potassium and trace elements as well as organic material which all contribute to the formation of humus. The most important plant nutrients are nitrogen, phosphorus and potassium. They should be distributed in a ratio of 100 (nitrogen), 15 (phosphorus) and 60 (potassium). That’s exactly the distribution in a manure heap.
The manure’s nutritional balance depends, among others, on the animal type and breed, the sex and age of the animals and the season. Further influences on the nutritional balance are the food the animals eat, how the manure is processed and the type and ratio of bedding material it is mixed with.
Where to get manure
If you have a farmer in your neighbourhood: lucky you! Most probably, he’ll be happy if you take some of the manure. If you live in the city, you may ask in riding stables for horse manure.
Ask about the animals’ health. They should not have been treated with antibiotics or anthelmintics. Otherwise, there may be residues of the substances in the manure. In a flower garden that may not be as harmful as in a vegetable garden. Nevertheless, even traces can harm the soil’s microorganisms. Manure with straw as bedding is better than manure with sawdust. Saw dust is a carbon-rich material that requires nitrogen to decompose. Also, the manure should contain more excrement than bedding material; do not use pure faeces.
Manure “temperatures”
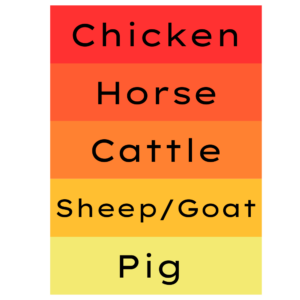
In the past, manure was often classified according to “temperature”. Some gardeners, especially the anthroposophical ones are still doing it this way. They distinguish the manure of different animals according to a scale from “cold” potassium-rich pig manure to “hot” phosphor- and nitrogen-rich chicken manure. In between range the manures of cattle and horses, with horse manure being slightly “warmer” than cattle manure.
Manure “temperatures” from hot to cold
Manure – a problem for the environment?
If used improperly, manure can be harmful for the environment
Nutrient run-off
Unfortunately, part of the nutrients disappears unused. That’s the case with all fertilisers. Nitrogen disappears as nitrate through surface run-off and washing out and as nitrogen gas, ammonia and nitrous oxides through outgassing.
If the manure lies near a river or lake, it may be washed off into the waterway which leads to surplus nutrients. This can cause excessive growth of undesirable water plants like algae, a process known as eutrophication.
You can avoid that by planting a buffer strip of vegetation along the waterside that catches run-off nutrients. Also, make sure that you don’t apply manure to your garden just before rain is forecast.
Odour
I don’t have to tell you that fresh manure has an unpleasant smell. In my garden, that’s no problem as no one’s living close by, but if you have immediate neighbours, the smell may cause a problem. Therefore, it’s best to use composted manure. If you add manure to your compost heap, cover it with dried material to keep the odour at bay.
Pathogens
Fresh manure can contain pathogens like bacteria and viruses which is why you should always wear gloves when handling fresh manure. When the manure is composted, however, it will generate sufficiently high temperatures to kill off any pathogens.
How can you best reduce nutrient loss and thus prevent negative effects on the environment? By composting manure, fertilising with it at the right time, in the right amount and working it into the ground you can prevent these possible dangers for the environment.
Let’s have a look at manure from different animals.
Considering how thoroughly cattle process their food, it’s no wonder that they produce a fertiliser of such a high quality. After chewing, the food passes the four stomach parts, rumen, reticulum, abomasum and omasum. Due to their special digestive system, cattle ruminate for at least eight hours per day.
Most gardeners value cattle manure as a well-balanced fertiliser. Almost half the nutrients are released within the first year, the rest in the second and third year in portions (see above). That means you can fertilise a non-fertilised soil in the first year with cattle manure and in the following years add a smaller amount. Cattle manure is mild and doesn’t burn the plant roots if you have taken too much of it.
Cattle manure contains all the nutrients that plants want, macros and micros. By combining a long-term fertiliser like cattle manure with a short-term fertiliser like chicken manure you can achieve a good overall nutrient balance.
Cattle manure rots slower than horse manure and thus needs longer to become compost with good nutrient content. Fresh cattle manure is sticky and smeary and can’t be easily handled.
Fertilising with cattle manure
Use three kilograms max (approx. 4 – 8 litres) of rotted cattle manure per square metre and season.
Divide the manure into three “portions”. Basic fertilisation is usually carried out once a year in spring. It aims to fill up the soil’s nutrient content so that it can provide the plants with all they need. About one month after this basic fertilisation, it’s time for maintenance fertilisation for nutrient-hungry plants. That’s when you give the second and third portions of the manure. You can make a liquid maintenance fertiliser with cattle manure by letting it steep in a bucket of water.
The horse’s digestive system is different from that of the ruminant cow. Grass, hay and concentrate are chewed and processed in the digestive system and excreted in a larger and drier consistency.
Horse manure is “warmer” than cattle manure and gardeners often use it for warm beds (for plants, not the gardeners😊). It rots easily and quickly. Horse manure has a good balance of macro- and micro-nutrients. If you have a horse stable in your vicinity, it’s most likely that you can get horse manure from them. Horse owners usually are glad to get rid of the stuff and will happily allow you to take as much as you want.
Horse manure is a long-term fertiliser but it works faster than cattle manure. Most nutrients are released during the first year. Horse manure doesn’t have a high nitrogen content and is therefore best mixed with a nitrogen-high fertiliser like chicken manure.
Fertilising with horse manure
The right dosage of horse manure depends on many factors and you must ask yourself the following questions:
How well-rotted is the manure? What do you want to grow? What type of soil do you have in your garden? What’s your soil’s structure, mull content and nutrient content?
An approximate recommendation is to use not more than 3 kilograms of rotted horse manure per square metre and season. It’s best to mix it with a nitrogen-rich fertiliser like chicken manure, especially if it contains a lot of bedding. If you mix it with other fertilisers, adjust the amount accordingly. Horse manure with a lot of bedding material should be composted first to avoid temporary nutrient loss.
Chickens produce a quick-working fertiliser. They eat hastily and shortly afterwards deliver dry and “hot” manure. Chicken manure has a higher nitrogen content and works faster than cattle or horse manure. That’s partly due to them eating more protein-rich food.
Chicken manure provides a quick nutrient “shot” to your plants. A good soil can store part of the nutrients, especially phosphorus and potassium whereas nitrogen is immediately absorbed. Contrary to other types of manure, chicken manure doesn’t contain many mull-binding substances making it a good complement at maintenance fertilisation.
Fertilising with chicken manure
When fertilising with chicken manure, it’s best to do so in early summer, in relatively small portions but often. Use it in combination with other manure. A few handfuls (not more than 200 ml) per square metre are enough. Dried chicken manure has a higher nutrient concentration than fresh one. You can make a liquid feed from chicken manure by putting a few handfuls of it into a bucket, filling it up with water and letting it rest for 24 hours. Either use it like that or dissolve it further to fertilise weak plants. It also speeds up the composting process.
Sheep, like goats, produce a dry and nutrient-rich manure which must rot for some time. Then it decomposes and becomes crumbly, thus making it easier to handle in the garden. Fresh manure often contains many weed seeds that die above 60 °C.
From spring to autumn, sheep and goats are usually out on the pasture which makes it hard to collect their manure. In winter, however, they are often in the stable where the manure and urine (+ bedding material) can be collected. This manure must rot for at least half a year. This rotted manure is an ideal soil improver.
Fertilising with sheep and goat manure
Sheep and goat manure is a valuable nutrient supplement. Mix sheep manure with garden or leave compost to increase the decomposing process.
Sheep and goat manure are a great way to improve the soil, increase the mull content and support microorganisms.
Fresh pig faeces stink horribly, there’s no way to sugarcoat that. Regarding its chemical composition, however, and its potassium, nitrogen and phosphorus content, pig manure is rather great. It contains other macro nutrients like magnesium, sulphur and calcium, as well as trace elements like copper and manganese.
More than any other manure, the nutrient content of pig manure depends on what they feed on. Pigs are omnivores and – like humans – eat almost anything. Unfortunately, it’s rather hard to lay your hands on pig manure (figuratively speaking). Only when you have your pigs or a pig farmer in your vicinity you can get some. Even then, it’s important to let the manure rot. As it is cold and moist, this process takes a relatively long time.
Fertilising with pig manure
Pig manure is a great fertiliser for potatoes due to its high potassium. It’s a long-term fertiliser that releases its nutrients slowly. Therefore, it’s best applied in autumn to prepare the beds for the next season.
The whole animal
It sounds disgusting at first to use slaughterhouse waste in your vegetable garden. On further reflection, however, it’s not more disgusting than manure. In today’s time with its attitude of resourcefulness and recycling, it should be politically correct to fertilise with animal waste, provided that it has been handled in the right way. However, everybody must decide for themselves if they want to take fertiliser based on slaughterhouse waste.
No animal is slaughtered only to gain plant nutrients. Slaughterhouse waste is a byproduct that goes right onto the waste heap if not used as fertiliser. A considerable part of the animal can be used as nutrient-rich fertiliser, for example, bones, horns, hooves, claws and blood. In the EU the use of wool, fur, feathers and hair is allowed in organic farming. These byproducts don’t have many nutrients but can be used as mulch. Please look up what animal fertilisers are allowed for organic farming in your country.
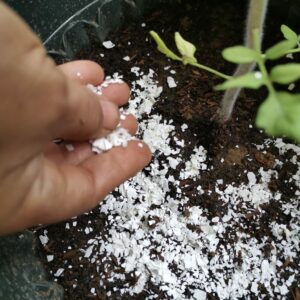
Bone meal which contains a particularly large amount of phosphorus is a long-term fertiliser. You can work in the meal in autumn to prepare the soil for the coming season. It releases the nutrients slowly for about three years, therefore fertilisation every other year is enough. Bone meal also contains trace elements and lime and is a great fertiliser for tomatoes, root vegetables and berry bushes. It’s especially suitable for loamy soil. The risk of over-fertilisation is very low.
A word of warning, though: Dogs may find it very interesting when you fertilise with animal fertilisers. They may even want to dig the place up to find the source of this (at least for them) heavenly smell. To prevent all neighbouring dogs from gathering at your vegetable patch for a digging party, water your garden thoroughly after bringing out animal fertiliser.
Horn meal contains a bit more nitrogen than bone meal. Horns (mostly from cattle) consist of the nitrogen-rich substance creatine. The nitrogen content of packaged horn meal varies a bit but is usually about 8 – 12 %. Like bone meal, horn meal releases its nutrients slowly and thus is a good long-term fertiliser.
Blood meal is – you might have guessed it – dried, ground blood from slaughtered animals. It contains a high amount of nitrogen and trace elements but few phosphorus and potassium. It’s not suitable for fertilisation in autumn but excellently suitable for maintenance fertilisation of cauliflower, cabbage, leek, spinach and celery. Fertilise often and in relatively small amounts during early summer. Work the blood meal thoroughly into the soil and water it well.
A mixture of bone and blood meal makes a nitrogen-, phosphorus- and potassium-rich fertiliser that works fast, yet is sustainable.
Meat meal is made from slaughtering and butchering waste. It contains less nitrogen but more phosphorus than blood meal. In the EU, meat meal cannot be purchased regularly but is mixed into certified fertilisers for organic farming.
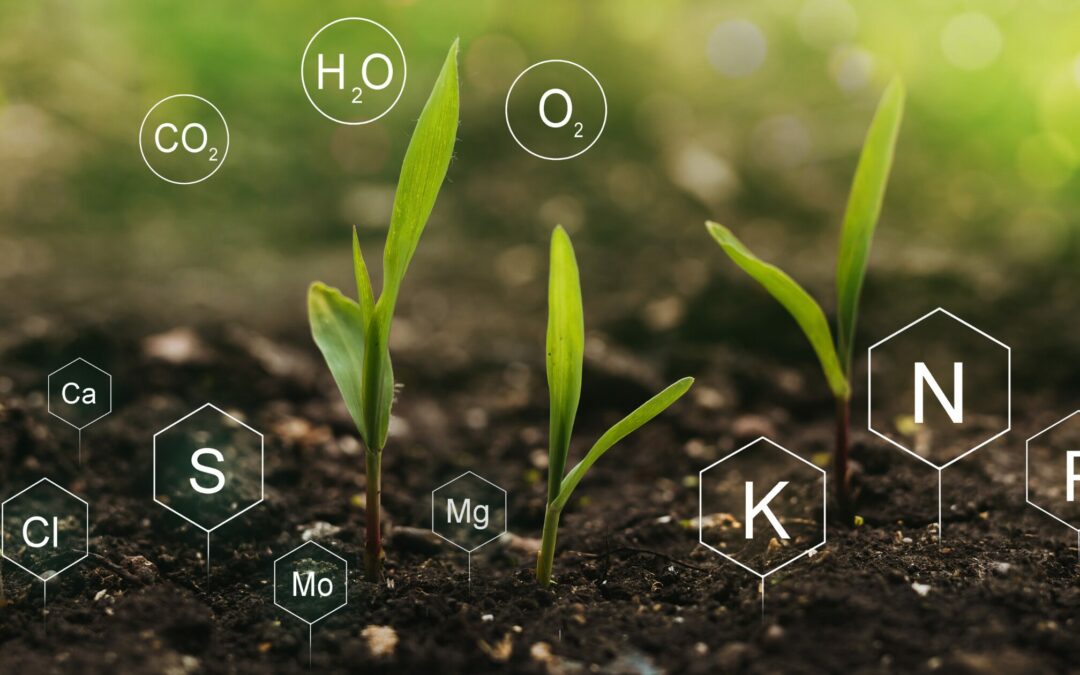
Plants are not unlike humans. To grow, thrive and stay healthy they need nutrition and sustenance. While for us fat, proteins and carbs are important, plants need different chemical elements for growth. The main part of a plant’s diet consists of carbon, oxygen and hydrogen which the plant can get out of the air and water. All other chemical components must be taken up as nutrients from the soil. When you know what those plant nutrients are you can provide your plants optimally, that is give them the right nutrients at the right time to make them grow, bloom and fruit lavishly.
Let’s have a closer look at the nutrients that plants need. We distinguish between macro- and micro-nutrients.
Plant nutrients: The Macros
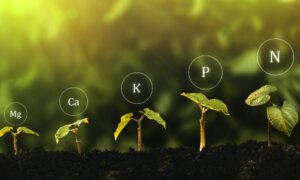
The most important plant nutrients are called macro-nutrients. They include nitrogen (N), phosphorus (P) and potassium (K) but also magnesium (Mg), Calcium (Ca) and sulphur (S).
All plants need these nutrients in a relatively large amount, especially nitrogen, phosphorus and potassium.
Nitrogen (N)
Nitrogen is the most important nutrient for plants. It’s required in large amounts, is quickly used up and washes out easily off the soil when there is too much of it.
It’s not advisable to give too much nitrogen in one go. The plant won’t be able to consume it (or gets too much of it and becomes ill) and the excess will wash out into the groundwater.
Nitrogen is different from other nutrients as it’s mostly in the air. The air around us consists of about 2/3 of nitrogen. Nevertheless, the plants can only take it up via their roots. Bacteria and algae help the nitrogen get into the soil.
Insufficient nitrogen supply results in puny growth. The plants’ stalks and new shoots are weak, their leaves turn from a healthy green to yellow.
Nitrogen surplus results in excessive growth. The plants have thin stems and shoots and dark green leaves. They grow more leaves and less to no bloom. Nitrogen surplus makes the plant prone to illnesses and harms the storage time and the taste of your vegetables.
As nitrogen is a volatile nutrient (any excess washes or gasses out) it should be given continuously during the growing season but in low amounts. In spring and early summer, the plants need more of it. During summer, maintenance fertilisation can be carried out in lower doses according to the plants’ different demands.
Phosphorus (P)
Phosphorus can be found in the soil and water as salts, the phosphates. It influences the root system, growth, flowering, fruit formation and even photosynthesis.
It is more stable than nitrogen and is not as easily washed out of the soil.
Phosphorus deficiency is more rare than nitrogen deficiency.
Phosphorus deficiency results in a weakly developed root system and puny growth. Older leaves and leave stems turn red-brown-purple with a grey touch.
Phosphorus surplus prevents the plants from absorbing important micronutrients like iron and boron, resulting in a reduced growth. Soils with a high mull content are seldom low in phosphorus.
Potassium (K)
Potassium influences the metabolism and fluid balance. It supports fruit setting and improves resilience. A good availability of potassium also improves the quality and storage ability of fruits and vegetables.
Potassium deficiency makes the leaves dull and yellow-brown at the edges. A potassium surplus often leads to magnesium deficiency. Those two substances compete and hinder each other.
Sandy soils are more often prone to nutrient deficiency than loamy soils.
Magnesium (Mg)
Magnesium is important for seed building and the formation of chlorophyll which gives the plants their green colour.
With good magnesium availability, plants can easily absorb phosphorous. Potassium surplus can cause a magnesium deficiency and vice versa. Both nutrients compete with each other.
Magnesium deficiency shows in blotchy leaves with yellow patches between the veins. Leaves like that fall off too early.
Loamy soils are usually rich in magnesium while sandy and mull-rich soils have mostly lower amounts it.
Calcium (Ca)
Calcium influences the soil’s pH value. This is essential as the soil’s acidity regulates how nutrients are released and made available for the plants.
Calcium is important for the plant’s growth and immune system, its nutrient absorption and ripening.
If there is too much calcium in the soil, important trace elements like iron, manganese and boron are bound and unavailable for the plants.
Too little calcium – as is often seen in acid soils – is also harmful. In that case, it can be beneficial to add lime to raise the pH value and add calcium.
But even soils with a normal pH can have calcium deficiency. You can see that when the leaves roll their edges and the shoot tips, buds and young leaves dry out. Calcium deficiency also causes blossom end rot in tomatoes.
Sulphur (S)
Not long ago, soils near towns didn’t show sulphur deficiency due to the emissions of large industrial plants. With receding emissions, the need for sulphur has risen.
Like nitrogen deficiency, sulphur deficiency also results in reduced growth and bleaching of plants. While nitrogen deficiency can first be witnessed in older leaves, sulphur deficiency is first visible in the new, young leaves.
Carefully observe the ratio of nitrogen and sulphur. If you fertilise with nitrogen, you must also increase sulphur.
Plant nutrients: The Micros
Manganese, iron, copper, boron, chlorine, molybdenum and zinc
Often, there are enough trace elements in the soil. If there is a deficiency, however, a high pH value is often the cause.
A deficiency of one or more of those plant nutrients can result in reduced growth and bad harvest yields.
One symptom of iron, manganese and zinc deficiency is that the leaves turn yellowish between the veins. Manganese surplus results in brown stains on the leaves.
Boron deficiency shows by reduced growth of the shoot tips and puny growth of root vegetables Cauliflower may rot from the inside.
Essential substances for plants are macro-nutrients (nitrogen, phosphor, potassium sulpnur, calcium and magnesium) and some trace elements (boron, chlorine, molybdenum, copper, iron, manganese and zinc). The other micro nutrients are not crucial for plants but stimulate their growth.
Balanced nutrients
Learning about plant nutrients can be quite overwhelming at first. The easy method to obtain all the macros, therefore, is to buy some ready-made fertiliser that has a preset ratio of nitrogen (N), phosphorus (P) and potassium (K).
What does NPK mean?
On the packaging of an all-round fertiliser, you can find a so-called “NPK number”. One fertiliser, for example, may have an NPK of 12-8-16, indicating that this fertiliser consists of 12 % nitrogen, 8 % phosphorus and 16 % potassium. A more phosphorus-dominant fertiliser could have a ratio of 11-14-17. It’s suitable for flowers and vegetables producing fruit like tomatoes and beans.
Organic versus mineral fertiliser
However, the easy method is not always the best. NPK fertilisers do have their advantages, of course. They are quickly available – both for the gardener and the plant – and you needn’t think much about what to feed your plants. Just throw some fertiliser onto the soil and be done with it.
But, living in a world of duality, some disadvantages cannot be overlooked.
Mineral fertilisers
First, there are two types of NPK fertilisers, mineral and organic. Mineral fertilisers mainly consist of inorganic material in the form of water-soluble salts of chemical origin. In short, they are artificial fertilisers.
They usually work fast but not very long and thus are suitable for first aid in case of nutrient deficiency. Some artificial fertilisers are prepared as long-term fertilisers that release their nutrients slowly and over a prolonged time. If they are overdosed, however, they can have a negative effect not only on the plants but also on the soil, the environment and thus on us.
Although tempting, I don’t recommend using mineral fertiliser in your vegetable garden. The long-term disadvantages for your garden and the environment outweigh the advantages.
Organic fertilisers
Organic fertilisers, on the other hand, mainly consist of substances in organically bound form. The raw materials they are made of either originate from plant or animals. Unlike mineral fertilisers, the plant nutrients in organic fertilisers are not salts that dissolve quickly in water but are “packaged” into organically grown structure. The nutrients are less concentrated but improve the soil and keep the soil organisms happy. Organic fertilisers need some time to work but then they are continuous. Yet, there is also the possibility of overdosing them, leading to the same impacts like with mineral fertilisers. And let’s not put a blind eye to the fact that even organic fertilisers are processed.
In the (yet-to-come) series about natural fertilisers, I’ll show you how you can feed your plants, the soil and all the organisms with purely natural ingredients. Stay tuned.
Health check: Signs of imbalanced plant nutrients
Imbalanced nitrogen
Symptoms: reduced growth, pale or yellow leaves. Older leaves turn yellow fast. The lower leaves turn yellow from the tip, turn brown and dry out. Side roots are badly developed. Possible cause: nitrogen deficiency
Symptoms: excessive growth, thin stems and shoots. Dark green and excessively large leaves, sometimes with yellow edges. No bloom. Possible cause: nitrogen surplus
Imbalanced phosphorus
Symptoms: reduced growth, reduced fruit formation. Dark green, sometimes blue-green leaves. Lower leaves have a different colour (yellow, brown or red). The leaves’ underside is brownish/purplish. Leave veins are also brown-purple. Long roots but weak side roots. Possible cause: Phosphorus deficiency
Imbalanced potassium
Symptoms: reduced growth. Older leaves are yellow-green and striped. Burns and too early transition into hibernation. Possible cause: Potassium surplus
Symptoms: dry leave edges, sometimes yellow leaves. Older leaves die. Leaves curl and turn yellow-brown. Few and misshapen buds. Long main root but puny side roots. Fruit and vegetables taste bland Possible cause: potassium deficiency
Imbalanced calcium
Symptoms: reduced growth, pale green leaves Possible cause: calcium surplus Attention: calcium surplus may cause magnesium and potassium deficiency!
Symptoms: curled leaves with brown edges. Weakly developed root system. Brown patches on fruit. Blossom end rot at cucumbers and tomatoes. Brown leave edges at lettuce. Possible cause: Calcium deficiency
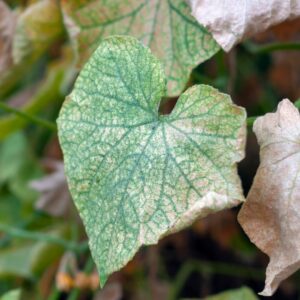
Symptoms: the areas between the leave veins turn almost white while the veins stay green. Molybdenum deficiency shows the same symptoms. Possible cause: Calcium deficiency
When to provide plant nutrients
When you watch any symptomes as described above, you must act and provide your plants with the according nutrient(s).
Apart from that there are plant stages that need special care:
Young growth
If you start your plants from seeds you sow them in a relatively nutrient-poor soil. When they start to grow however and form their first pair of real leaves they become hungry. Now is the time to give them some nitrogen
Newly planted
When it’s time to plant your vegetables out, they benefit a lot from phosphorus and potassium addition.
Blossoming
As soon as the plants develop their first blossoms, they want potassium, phosphorus and calcium to support the formation of blossoms.
Fruiting
All fruit vegetables like tomatoes, cucumbers, zucchini and pumpkins need a sufficient amount of potassium and phosphorus. These nutrients support the formation and healthy ripening of the fruits. Nitrogen is also important but only in small amounts.
Plant nutrients – A necessity
Gardening without nutrients is not possible for long. If you have a good enough soil your plants may grow well for the first one or two years but then they’ll become ill and stagnate or die and you’ll need a magnifying glass to see your harvest. To prevent that scenario you have the responsibility for your plants and soil to feed them according to their needs.
Everybody knows lemon curd but did you know you can make curd from vegetables also? I tried out carrot curd which, in combination with cream cheese, is the topping for these moist carrot muffins. We have carrots in abundance all year round, either fresh from the garden or sand storage, so I can make this treat whenever I like. And with this easy recipe, you can, too!
Carrots and hazelnuts complement each other wonderfully and the fresh and slightly salty taste of the cream cheese is a marvellous addition to the sweet and earthy carrot curd.
Carrot muffins with cream cheese – carrot curd topping
Yield: 14 muffins
Ingredients
For the carrot curd:
125 ml carrot juice, freshly juiced
150 g sugar
1 tbsp cornstarch
45 g butter in cubes
2 egg yolks
1 whole egg
¼ tsp cinnamon
For the carrot muffins:
180 g grated carrots (you can take the leftovers from the juice-maker and grate some fresh carrots additionally if it’s not enough)
4 eggs
130 g brown sugar
60 g flour
200 g ground hazelnuts
1 tbsp baking powder
For the Topping:
150 g carrot curd
150 g cream cheese
Instructions
Carrot curd
1. Mix the carrot juice, sugar and cornstarch in a bowl. Bring the mixture to a boil over medium heat while constantly stirring until it thickens.
2. Take the pot off the heat and stir in the butter until it has melted. Afterwards, add the egg yolks and the whole egg.
3. Put the pot back on the heat and stir for 5 – 6 minutes until the mixture has thickened considerably and falls heavily from the spoon. Put it aside, cover it with cling film so that it won’t form a skin and let it cool down.
Carrot muffins
1. Preheat the oven to 180°C (355°F)
2. Separate the eggs. Whisk the egg whites with half the amount of sugar until it’s solid.
3. Beat and froth the egg yolks with the remaining sugar.
4. Sieve the flour and baking powder and mix both with the ground hazelnuts.
5. Mix the flour and nuts, as well as the grated carrots under the egg yolk mass. Carefully fold in the whipped egg whites.
6. Fill the mixture into a muffin form and let the muffins bake for about 25 minutes. Insert a chopstick into a muffin to see if it’s done. When you pull the stick out there should be no dough sticking to it.
7. Take the muffins out of the oven, remove them from the muffin form and let them cool down.
Assembly
1. Mix the cream cheese with the carrot curd until homogenously combined.
2. Either spread or pipe the topping onto the muffins.
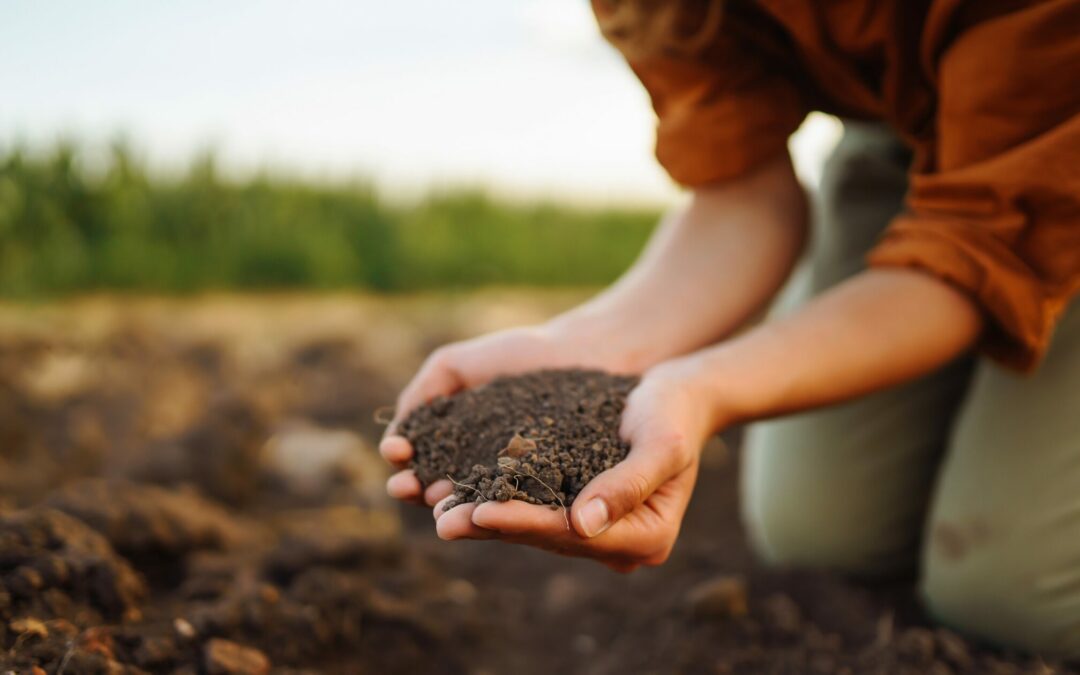
If you want to make your garden a success, it’s essential to know its soil type. Plants have different requirements regarding moisture, permeability and pH value. In short: different plants thrive in different soil types.
Types of soil are classified by grain size, colour, the amount of organic material and the minerals in it. Also, the percentage of sand, clay and silt is important and lastly, you should know the pH-value of your garden soil.
Nutrition
A plant cannot absorb water and fertiliser in one go. It can’t drink a whole can of water in one gulp and eat a whole load of fertiliser all at once. The soil’s important task is to store liquid and nutrients and deliver them to the plants so that they can have little snacks.
Also, plants cannot take in fertiliser in solid form. To make the best use of nutrients, plants need water as a solvent agent. A plant “eats” and “drinks” mainly with its root system but also little stomata in the leaves absorb a bit of water and nutrients.
The soil is a pantry
The soil is the plant’s pantry. In it, there are cavities (pores) where water, released nutrients and oxygen are stored. The cavities between particles are of different sizes, depending on the soil structure. A fine-textured soil has smaller cavities than a coarse-grained soil. The smaller the cavities, the better the soil can bind nutrients and water. If the cavities are large, water runs through the soil.
Soil structure
Different soil characteristics provide the plants with different prerequisites. When you know and understand your soil, you can easily maintain or improve it and thus offer your plants a suitable environment.
Naturally, soil is built “from below” as well as “from above. The lower part of the soil is based on the bordering rock. Basic mountain rock that was rich in minerals, has weathered and crumbled during millions of years. The upper part, which is known as mother soil, was mixed with organic material from animals and plants that had decomposed and turned into humus.
Thus, the solid parts in the soil consist of minerals and organic material. Between the solid particles, there are pores. At best there are as many pores as particles. The pores’ task is to store oxygen, liquid and nutrients and carry them to the plants’ roots.
Different grain sizes
Rock erodes and breaks down into particles of different particles. The size decreases from stone to gravel, sand and silt to clay. Most garden soils are a mixture of mineral soil and organic material.
Soil types
It is practical to categorize the soil with terms like “silty, slightly loamy soil”. By that, we know what we have and what we can do to improve the soil. Different soils have advantages and disadvantages, especially regarding what you want to plant.
The most common definition of soil types is based on pure mineral soil and uses the grain size as a description.
Sandy soil
Sandy soil has large particles; it is light and porous and can be worked easily. It warms up quickly in spring and cools quickly down in autumn. That makes it especially suitable for sensitive plants that must go into hibernation early to survive the cold season.
On the other hand, sandy soil badly stores liquid and nutrients. It dries out quickly and must be watered often.
Silty soil
The size of the silt grain lies between sand and clay, being smaller than sand and larger than clay. By covering the silty soil with organic material like leaves or bark mull encrustation can be prevented.
Loamy or clayey soil
Loamy soil has small particles that encrust easily. If loamy soil has a clay content of more than 40 % it is practically impenetrable. Loamy soil is nutrient-dense and stores moisture well.
Loamy soil takes longer to get warm in spring but also holds the warmth longer in autumn. Loamy soil has few cavities and thus is sensitive to pressure and trampling.
Chalky soil
As the name indicates chalky soils contain a relatively large amount of chalk which makes them alkaline and thus not very good for plants. They have little nutrients and tend to dry out easily but become a rain-slicked, loamy mass after heavy rains.
Every type of soil can be improved. The goal is to make sure that it can hold optimal amounts of moisture, nutrients and oxygen optimally. It’s great for any soil to add organic material.
How to find out soil types
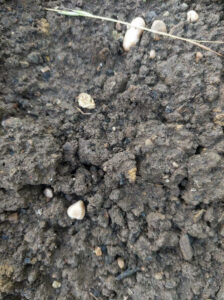
Often, it’s enough to have a look at the soil to determine its type but to be sure, you can try out the following:
The rolling test
Take a bit of soil (about 1 tablespoon) and roll it between your hands to a “sausage”. If the soil doesn’t form a roll of any kind, you probably have sandy soil. The thinner the “sausage”, the higher the clay content in the soil. Loamy soil yields a roll of 1 mm diameter, 4 – 5 mm characterise silty soil.
The shaking test
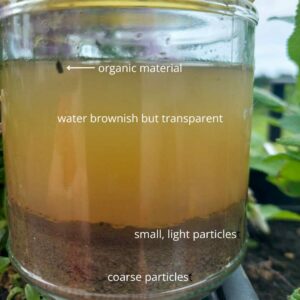
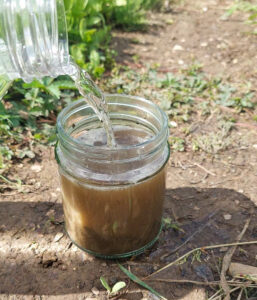
Fill a large glass jar with a handful of soil and add water at a ratio of 1 part soil and 2 parts water. Shake it well to mix the soil and water and let it set for 1 – 2 days without disturbing it. Slowly the soil particles will sink to the bottom and layer up there.
Sandy soil leaves the water almost clear; the particles have layered at the bottom.
Silty soil leaves cloudy water and most of the particles at the bottom.
Chalky soil leaves a layer of grit-like particles at the bottom of the jar; the water is a light grey.
Loamy soil shows relatively clear water and the particles are layered by grain size at the bottom with the smallest particles on top.
This is the result of the shaking test with my garden soil. Can you see the layers?
pH value
Soil can be acid, alkaline or neutral which can be determined with a pH-test. The pH scale goes from 1 = acid to 14 = alkaline. The middle value 7 indicates neutral. Most plants prefer a pH value between 5.5 and 7.5, with the ideal value between 6 and 6.5. The pH value impacts the plants’ nutrient uptake.
Extreme pH values under 3 and above 8 provide no suitable environment for plants as nutrients become encased and can’t be taken up by the plants. And then it doesn’t matter if or what you use to fertilise.
The pH value also influences the soil’s structure and microorganisms. And, finally, a balanced pH prevents the absorption of dangerous heavy metals from the soil.
First, however, you must know your garden soil’s pH value. To determine that, you can either ask a lab to make a soil analysis or buy some litmus paper and do the tests yourself.
Measuring the pH value
1. Remove the upper soil layer (approx. 3 centimetres / 1 inch) and dig 20 cm / 8 inches deep. You need about 200 ml / 0.5 lb soil.
2. Put the soil into a large jar with a lid. Mix the soil at a ratio of 2/3 water to 1/3 soil with distilled water. (It’s important to use distilled water to make sure that the water’s pH value does not affect the test)
3. Close the jar and shake it for at least 2 minutes.
4. Let the mixture set for at least 10 minutes.
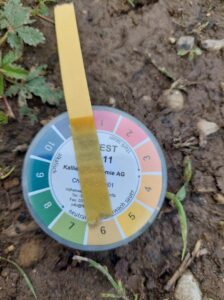
5. Insert the litmus paper into the water above the sediment.
6. Read the result and note it down. Take several soil samples from different places in your garden.
Compare the colour of the litmus paper with the indicator.
Favourable pH-values
Greens: 6.5 – 7.0
Cabbage: 6.5 – 7.5
Potatoes: 5.5 – 6.5
Raspberries: 5.5 – 6.5
Strawberries: 6.0 – 7.0
Berry bushes: 6.0 – 7.0
Blueberries: 5.0
How to improve your soil type
When you know your garden’s soil type, you can take measures to improve it by adding organic materials like compost and manure. Stay patient! building good soil requires time.
Sandy soil
As said before, sandy soil can’t store water very well because due to the sand’s large grain size, water will run through it. To improve moisture retention capacity, we can dig in plenty of bulky organic material like compost or well-rotted manure.
Always keep the soil surface well covered, either with mulch or with groundcover plants. Sow green manure between vegetables, cut it off when it becomes too large and use it as mulch. Leave the roots in the earth. They will stabilise the soil and help to store moisture.
Nevertheless, sandy soil will always need more fertiliser than other soil types. Fertilise sandy soil several times during the cultivation season and with relatively low amounts. If you give sandy soil more nutrients than it can store, they will be washed out.
Silty soil
Silty soil has a lot of nutrients and holds moisture well. It can be easily cultivated as long as it is well drained.
To improve drainage, dig in organic material like compost.
Chalky soil
Chalky soils have larger particles and are stonier than other soils. It is alkaline and, depending on its clay content, may be light or heavy.
First, we must lower the pH value by digging in lots of organic materials like compost or well-rotten manure but also half-rotten compost of conifers. Mulching with conifers in addition to other organic materials also improves the pH value long-term.
To break up the soil and add nitrogen, sowing leguminous plants is recommended.
Loamy soil
Loamy soil is usually a great mixture of sand, silt and clay. It’s nutritious and holds water easily. It warms up relatively quickly in spring and is easily cultivated.
Although loamy soil is already nutritious, it’s important to keep it that way. This is usually carried out best by adding organic material like compost and manure to the soil, making sure that it’s always covered with plants (green manure if necessary) and well-mulched. To aerate the soil, dig into it with a digging fork and jiggle it slightly. This is best done in autumn and early spring to ensure that enough oxygen gets into the soil without digging it up.
What to do to raise your soil’s pH?
If your soil’s pH is too low, that is if your soil is too acidic, you can add lime to your soil. But be careful, a too-high pH is equally unfavourable as a too-low pH. There are, however, good reasons to add limestone to your garden: it adds micronutrients to your soil which results in the plants not taking up too many heavy metals. especially loamy soil is better aired, more loose and thus easier for the roots to penetrate.
Different forms of lime
Lime is sold in different grain sizes. Powdered limestone has the smallest particles, granulated limestone consists of processed powdered limestone. the latter does not make a lot of dust and dissolves quickly into the soil. You can also buy lime chippings, but they dissolve relatively slowly.
Time and dosage
The best seasons to add lime are autumn and winter when rain and snow transport the lime into the soil.
The amount of lime you need depends on the soil type. Loamy soils usually need more to adjust the pH, sandy soils need less. As the lime products differ in their ingredients, you must follow the instructions valid for your product. If you prepare a new garden, you’ll need more lime than just for maintenance.
Conclusion
The first step for a healthy garden is determining your soil type. Different soil types require different improvement and maintenance methods. Every soil can be improved so that your garden provides the best conditions for your plants.
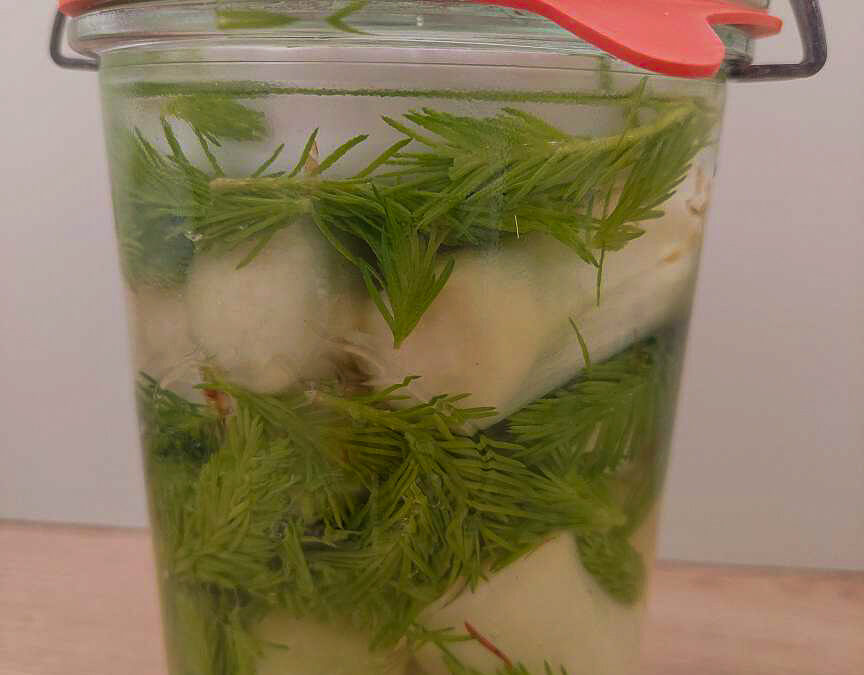
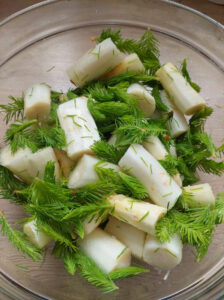
For quite a long time, I only ate asparagus with sauce hollandaise and young potatoes, topped with some bacon if I felt adventurous. Not because I like asparagus best that way but because I didn’t know it in any other way. So, when a short while ago, I tasted raw white asparagus for the first time I was thrilled by its fresh taste of young shoots. These days, whenever I buy asparagus, I have to force my willpower not to eat the whole bunch just like that. Spruce tips have a lemony, slightly dry taste and go well with the crisp asparagus. You can forage the spruce tips in April and May. The younger they are, the more delicate they taste. Alas, nothing is forever, and the season for both, asparagus and spruce tips is very short. What would be more logical than preserving both for when they won’t be available? And what better way than fermenting to keep the asparagus crisp and all the nutrients alive. The best thing is: you won’t need many ingredients for this simple recipe for fermented asparagus with spruce tips.
Fermented asparagus with spruce tips
Ingredients
Shelf life: several months
500 g white asparagus
salt
water
1 handful of spruce tips
Instructions
1. Peel the white asparagus and cut it into pieces of 4 – 5 cm (about 2 inches).
2. Mix the asparagus and the spruce tips with 30 g salt in a bowl and let it rest for 30 minutes.
3. Put the asparagus and spruce tips into glasses and fill them up with a salt solution of 3 % (30 g salt on 1 litre of water). Put a weight on top of the asparagus to keep everything well under the brine.
4. Close the lid and let the vegetables ferment at a dark and warm place for about one week.
5. When the taste is to your liking, store the asparagus in the fridge.
Both, asparagus and spruce tips are such great foods to experiment with. For example, have you tried out this recipe for tarte flambée with asparagus and walnuts? It’s delicious. Or get over here and read how you can make a very easy homemade spruce tip honey and preserve the flavour of a spring forest. I’m not done with trying out new recipes either. Stay tuned!