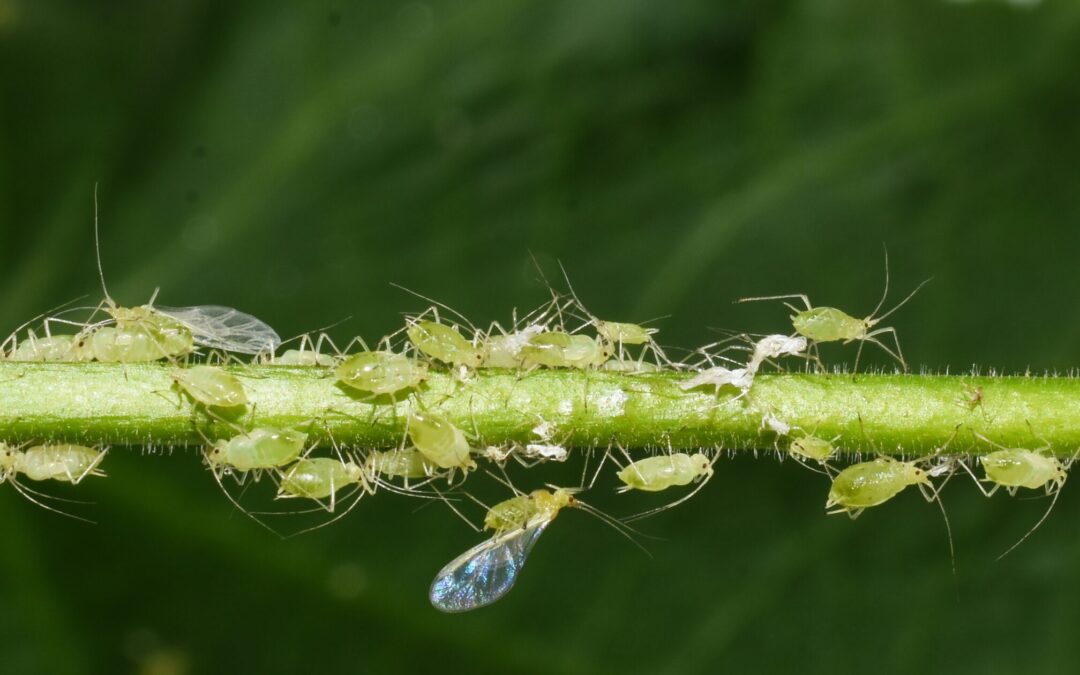
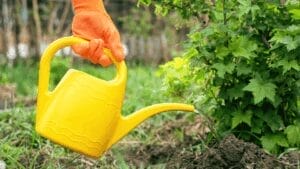
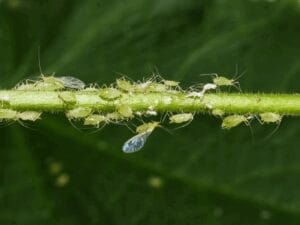
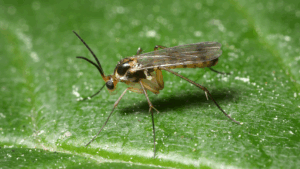
Aphids are a common pest and make life hard for gardeners. Within a very short time, these yellow, green, red or black insects can grow into gigantic hordes and damage the leaves and young shoots of many plants with their piercing-sucking mouth parts. Additionally, aphids often transmit dangerous pathogens, especially viruses. However, it’s not necessary to fight aphids with chemicals. There are much cheaper and – what’s even more important – natural household remedies to get rid of aphids. Let’s have a look!
Preventing aphids
The right place and nutrients
As so often, it’s best to take every measure to keep pests like aphids away from your plants. One way to do that is not to plant too many of the same plants together. In an ornamental garden, this could mean combining roses with different perennials; in the vegetable garden, you should apply the system of companion plants. That way, we can already combine plants that help each other.
Healthy plants that get enough nutrients, water and light are generally less prone to pests than over-fertilised or weak plants. Avoid over-fertilising with nitrogen, because aphids like the nourishing plant sap.
Attract natural enemies
A further step to prevent aphids is to attract their natural enemies like ladybugs, lacewings, ichneumon flies, hoverflies and other insects. Offer them enough nesting opportunities, for example deadwood hedges, lacewing boxes and insect hotels. When aphid hunters feel comfortable in your garden, the aphids will decrease noticeably in late spring or early summer. The reason is that with an increased food supply, the beneficial insects proliferate as well. In summer, we usually have a good balance.
Strengthen your plants
Seeing as pests first infest weak and unhealthy plants, it’s a good idea to strengthen them. Here, too, we have tried-and-tested household remedies for strengthening:
Horsetail manure
To make horsetail manure, you need 1 kg fresh or 200 g dry field horsetail. Soak it in 10 litres of cold water for 24 hours and filter it. Dilute 2 litres of the liquid manure with 10 litres of water and water or spray the plants every week.
To prevent aphids from infesting your tomato plants, mix one litre of skimmed milk or whey with 4 litres of water and spray the concoction once a week on your plants. If the aphids have already infested your tomatoes, however, this won’t help.
Diluted with water is a strengthening tonic for young and weak plants and helps prevent aphids.
Wormwood manure
Wormwood manure (not to be confused with wormwood tea) does not repel pests but distracts them with its strong and pungent smell. It’s made in the same way as nettle manure.
Vinegar
Vinegar, for example your homemade apple vinegar, is also a preventive means against aphids, as they shy away from acid. You must be careful, however, and only use vinegar dilutedly. Otherwise, you risk damaging your plants with too high acidity.
How to get rid of aphids with household remedies
One day, everything’s fine in your garden, and the next day, all your plants have aphids! At least, it often seems as dramatic as that because aphids proliferate very fast and can truly infest a garden within a week.
So, what to do now? Here are some tried-and-tested household remedies to get rid of aphids in a natural way.
Water
Yep, that’s right, just plain old water. Often, a strong jet of water is enough to catapult the aphids into nirvana. Just shoot them off the plant. This works for house plants, as well. Put them into the shower or bathtub and rinse the aphids off.
Soft soap or dish soap solution
The most commonly known household remedy against aphids is soft soap. This soap is made with potash instead of sodium hydroxide and has no surplus of fat. An alternative to soft soap is dish soap, although it contains fragrances and colourings.
Shower gel and other body care products on the basis of soap are not suitable. They contain environmentally dangerous substances and can damage your plants.
To make an effective household remedy against aphids, dissolve 50 g of soft soap or dish soap in one litre of warm water. Let the solution cool down and fill it into a spray bottle. Spray the infested plants.
Pro tip: In case of a heavy infestation with aphids, stir 2 teaspoons of alcohol or spirit to the soft soap solution to enhance its power.
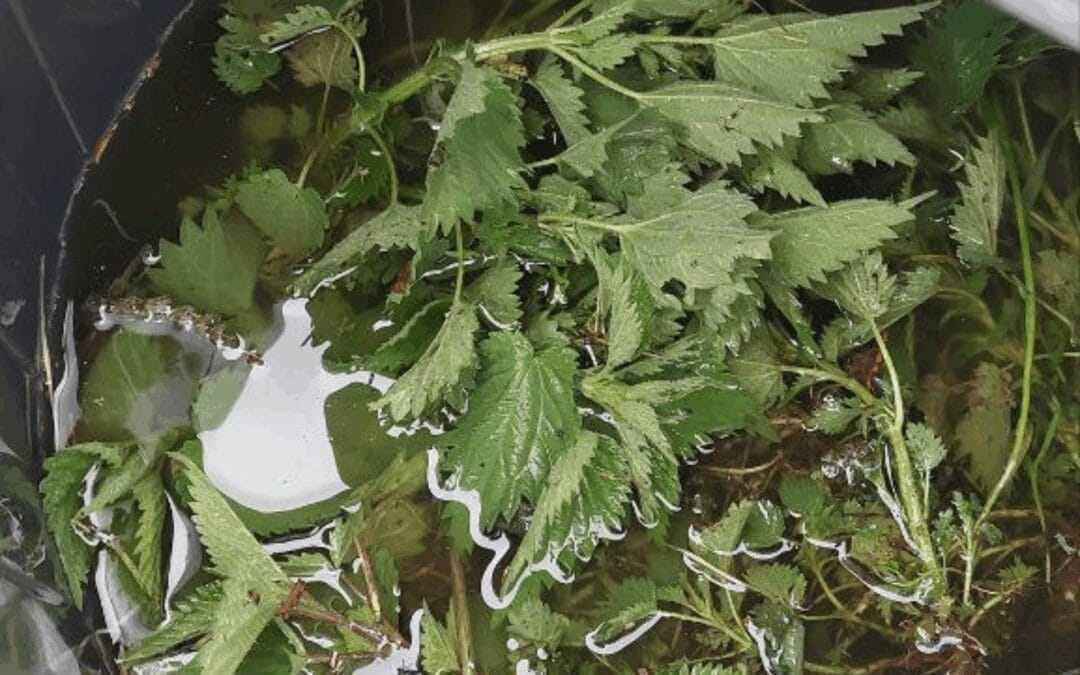
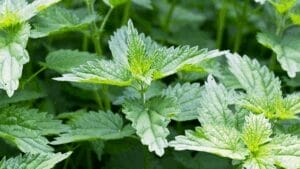
Nettle brew
A brew (not manure) from stinging nettles is also a successful household remedy to get rid of aphids. To make an extract, put 100 – 200 g of fresh stinging nettles into one litre of water and let them steep for two days. You can use the brew undiluted against aphids, also on houseplants.
Make sure to filter the brew after two days and dispose of the nettles. Otherwise, the liquid will ferment and become nettle manure, which mustn’t be used undiluted on any plants.
Oregano
You may know oregano in the kitchen, but this herb is also suitable against aphids. To make a spray solution, take 100 g fresh or 10 g dry oregano and add one litre of boiling water. Let it steep for 15 – 20 minutes and filter it. Dilute the brew at a ratio of 3:1 with water and spray it on the aphid-infested plants.
Tansy brew
Soak 500 g fresh or 30 g dried tansy in 10 litres of water for 24 hours. Filter the brew and dilute it with 20 litres of water. Fill the solution in a spray bottle and spray it on the diseased plant.
Wormwood tea
Besides aphids, wormwood tea (not wormwood manure, see above) also helps against other sucking and eating pests. Brew 100 g fresh or 10 g dry wormwood leaves (Artemisia absinthum) with one litre of water and let it steep for 24 hours. Filter the tea and use it undilutedly against aphids.
Bracken brew
Mix one kilogram of bracken with 10 litres of water. The brew can be used undilutedly against aphids and is especially suitable for houseplants. Bracken contains lots of potassium, and the brew strengthens the plant like a fertiliser.
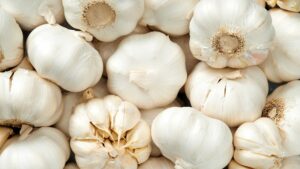
Onion and garlic „tea“ as a household remedy against aphids
Onions and garlic can help against many pests. Make a tea from 40 g chopped onions or garlic and 5 litres of boiling water. Let the tea steep for at least three hours (closed with a lid, it stinks!) and filter it afterwards. Spray your plants with this undiluted tea every 8 – 10 days against aphids and preventively against fungal diseases.
Rhubarb leaf brew
If your beans are infested with black bean aphids (Aphis fabae), a brew from rhubarb leaves is a good household remedy. Boil 500 g of leaves for half an hour in 3 litres of water, filter the brew and spray your plants with the cooled liquid once a week.
Black tea
Black tea is also a good household remedy against aphids. Take two teabags of black tea and pour one litre of boiling water over them. Let it steep for at least 15 minutes. Fill the cooled tea in a spray bottle and spray your plants from all directions.
Conclusion
Aphids are a common pest, and to a certain extent we have to live with them. In a natural garden, where their natural enemies feel comfortable, we usually get a good balance.
In case of a large infestation, however, we should not use chemicals to fight them as these would also harm beneficial insects. Instead, there are so many cheap or even free household remedies that really help get rid of aphids in a natural way. The ecosystem and environment will thank you, and you can eat your vegetables with an easy conscience.
Interested in more garden talk? Browse my garden library for tutorials on all things vegetable garden.
Here are some examples that I’m certain will help you:
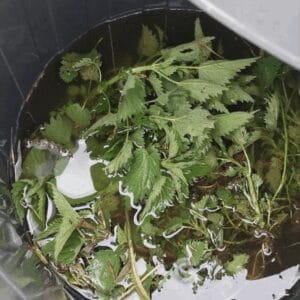
Liquid manure made from stinging nettles is a must-have in every vegetable garden as you can use it for different purposes: first and foremost as a natural fertiliser for your vegetables, as a tonic to strengthen your plants and as a pesticide to get rid of damaging pests. So let’s not waste any more time, I‘ll show you how to make nettle manure!
Quick overview
7 Steps to making nettle manure
Step 1: Harvest 1 kg of stinging nettles and chop them roughly. ⇒ Best to wear gloves
Step 2: Put the nettles in a container ⇒ made of wood or plastic. Don’t use a metal container!
Step 3: Fill up with 10 litres of water ⇒ Rainwater is best
Step 4: Add a handful of rock flour ⇒ It binds the odour
Step 5: Stir it all well and cover the container loosely ⇒ Nettle manure needs oxygen
Step 6: Stir daily ⇒ The nettle manure is ready to use when no more bubbles appear.
Step 7: Dilute nettle manure ⇒ Ratio 1:20
How to make nettle manure
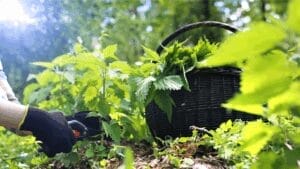
Grab your garden gloves, shears and a basket or bucket and get out into nature.
Look for stinging nettles that don’t grow near a street or at the edge of a field so that we can be sure our soon-to-be fertiliser is free from harmful substances.
Cut off about 1 kg of stinging nettles and take them home. If you like, you can chop them into pieces of 2 – 3 cm (about 1 inch). That way, you can also fill the nettle residues into your watering can and water them out with the manure. I don’t cut the nettles, but filter the manure and use the remaining nettle parts selectively for certain plants.
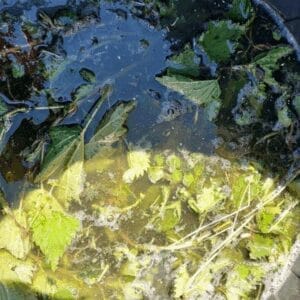
Put the nettles into a container that’s not made of metal. That’s important because during the fermentation process, the manure would react with metal, causing undesired chemical processes.
Now, fill in about 10 litres of water. Rainwater is best as it’s soft and doesn’t cost a thing, but you can also use tap water.
It lies in the nature of manure to stink. To keep the smell at least a bit under control, you can add one to two handfuls of rock flour or compost. It helps bind the odour and additionally enriches the manure.
Now stir the liquid thoroughly with a stick and cover the container loosely so that the air can circulate and provide our manure-to-be with oxygen for the fermentation process. Besides, the resulting gases can’t build up pressure.
Stir your manure every day until no more bubbles appear. Now your homemade fertiliser is ready!
How to use nettle manure
Mature nettle manure is a concentrate and would be too harsh for your plants. That’s why you must dilute it 1:20, that means one part nettle manure and 20 parts water. For example: put 0.5 litres of nettle manure in your watering can and fill up with 10 litres of water. Now, water the soil around your vegetables with it.
Avoid watering the stems or leaves with nettle manure. If you get residues of the fermented nettles on the ground, that’s okay. They’ll rot and provide nourishment for the soil organisms.
Fertilise plants with high nutrient uptake, like tomatoes or pumpkins, every three to four weeks, plants with low nutrient uptake only to strengthen them and if they are infected with pests. It’s best to produce nettle manure continually so that you can use it throughout the growing season.
Stored in a cool and dark place and covered with a lid, nettle manure has quite a long shelf life. Over time, however, nutrients decline, and the manure loses its power. In autumn, therefore, when you don’t have to fertilise anymore, pour the residual nettle manure on your compost heap or dilutedly on harvested patches. Next year, you can make nettle manure afresh.
The different uses of nettle manure
Fertiliser
Nettle manure is a wonderful fertiliser, containing everything your plants need. The nutrients are instantly available, and that’s why your plants will thrive when you fertilise regularly with nettle manure.
Before you plant your seedlings out into the open, dip their root bales in three to four days old (that is: relatively fresh) nettle manure. That strengthens the roots and defences and facilitates taking root.
If your vegetables are a bit weak and don’t grow properly, nettle manure can help. Water your plants every one to two weeks with a dilution of 1:20, and they’ll thrive in no time!
Strengthening tonic
Your plants tolerate capricious weather conditions like heavy rains or lasting drought better when you feed them with some nettle manure.
Or if your veggies have been damaged by hail, nettle manure can help them to recover and grow healthily again
Protection
If your plants are infected with pests, you can help them with nettle manure:
Take nettle manure that’s about 4 – 7 days old and still bubbles powerfully and foams when stirred, and dilute it at a ratio of 1:50. Spray that mixture on a cloudy day or in the evenings on the leaves of your infected plants. That’ll repel aphids and other pests.
If time is of the essence because there are already too many pests, you can also make nettle extract:
Chop up 100 g of stinging nettles and fill them up with 1 litre of water. Let the concoction sit for 24 hours, and use it without diluting.
Ingredients of nettle manure
Due to its wonderful ingredients, nettle manure can be used versatilely. It contains nitrogen and potassium, vitamins and growth-inducing enzymes that push your veggies!
Another substance in nettle manure is silicic acid, which makes your plants strong and resistant. That way, your vegetables can fight off pests and diseases better or cope with damage from hail or downpours.
Making nettle manure is a great way to produce a wonderful energiser for your plants that fertilises and strengthens them at the same time. Nettle manure is easy to make, fast and has so many advantages. Make it continually throughout the summer, and you’ll have a wonderful plant food. So, get out into nature, harvest stinging nettles and make your own nettle manure!
Wanna read more about how to grow vegetables successfully?
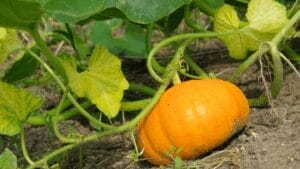
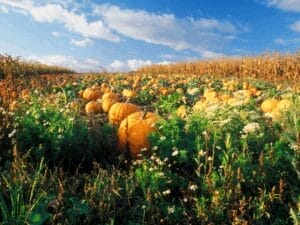
When I say berries, I bet you think of currants, strawberries, raspberries, maybe gooseberries or even blueberries. I also bet pumpkins are neither your first nor your second, or third idea. But that’s what pumpkins are: berries. The largest berries on earth, in fact. And now that we’re talking about them, I’ll even make a third bet: you want to cultivate them in your garden, amiright? That’s wonderful, because they’re not only a beautiful sight (whatever colour or form you choose) but they can also feed a family. Some even the whole town. There are a few things you need to know about successfully cultivating pumpkins in your garden. Whether it’s your first time growing pumpkins or whether you’re already best buddies, this comprehensive guide on cultivating pumpkins will leave no question unanswered.
Overview of cultivating pumpkins
Here’s a quick overview of the most important points about cultivating pumpkins
Choose the right variety, depending on your goal: do you want to feed your family, gather the seeds or want to take part in a competition? Or do you just want them for decoration? Are you a novice regarding pumpkins, or do you already have experience with that vegetable? How large is your garden space?
Seed-start pumpkins indoors about four weeks before the last night frosts in your hardiness zone.
About a week before it’s time to plant them out, gradually harden them off.
Pumpkins need a sunny, warm spot with loose soil and plenty of water.
Pumpkins are heavy feeders, meaning they need a balanced dose of nutrients every three to four weeks.
The fewer pumpkins you leave on the plant, the larger they get.
Carefully watch for pests and diseases so that you can act quickly in case of infestation.
Pumpkins are ready to be harvested when the stem gets woody and they sound hollow when you knock on them.
Cure harvested pumpkins for about three weeks in a dry and warm place.
Depending on the variety, pumpkins can be stored up to nine months when properly cured.
Choosing the Right Pumpkin Varieties
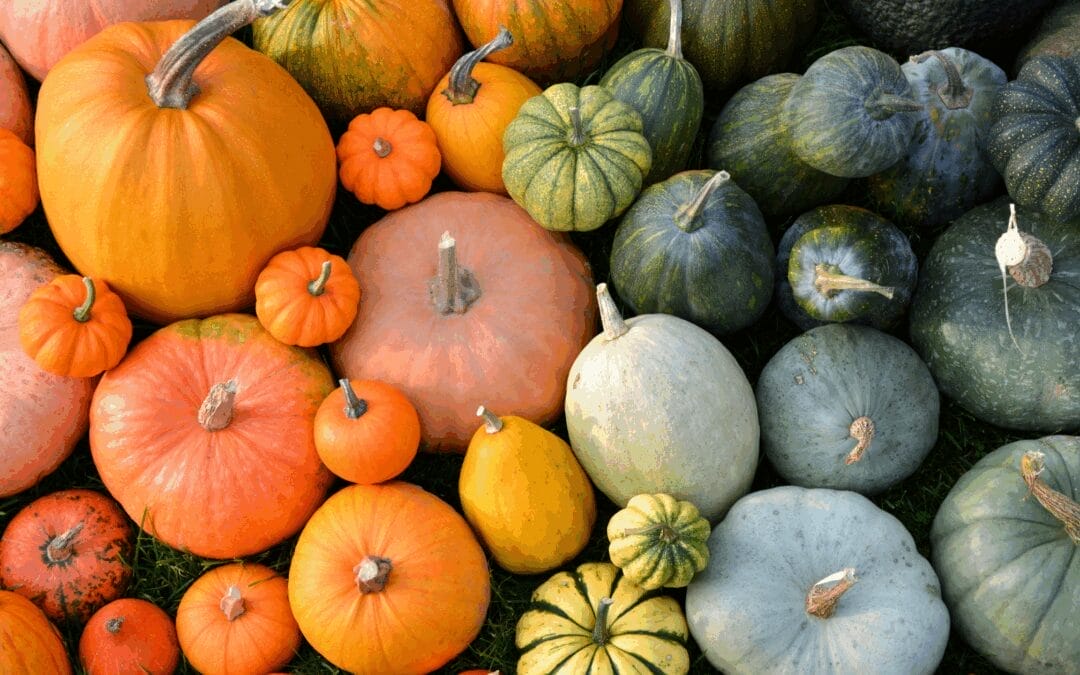
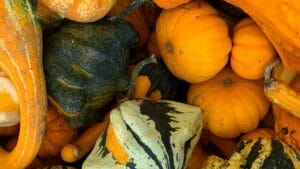
Can you believe that there are more than 800 pumpkin varieties? It makes me feel sad, because there’s no chance we can try all of them. The good news is that there’s a variety for every desire! Whether you’ve got a large garden or just a towel-sized raised bed, whether you want to feed a large family or you’re looking for the perfect pumpkin to be carved for Halloween, there’ll be plenty of varieties just for your needs. Let’s have a look:
Carving pumpkins vs. cooking/pie pumpkins
Our pumpkins from last Halloween
Carving pumpkins are typically large and have thinner skin, making them easier to carve. They also have fewer guts inside, which makes them easier to clean.
Cooking or pie pumpkins, on the other hand, are usually (but not always) smaller. Theoretically, all cooking pumpkins can be used for carving, but not every carving pumpkin is edible. If you want to eat your pumpkins (with or without carving them first), make sure you plant edible varieties.
Giant varieties for competitions
Over 800 varieties of pumpkins cover a wide range of colours and – especially – sizes. If you want to take part in a pumpkin competition (or feed your whole town), choose varieties like “Atlantic Giant”, “Big Max” or “Prizewinner” which can grow up to -and often even above – 100 kg.
By the way, the world record for the heaviest pumpkin currently lies with Travis Gienger from Minnesota. In 2023, he grew a record pumpkin weighing 1247 kg!
Ornamental varieties
Just by looking at them, it’s difficult to distinguish between purely ornamental and culinary pumpkins. Here’s how you can tell if your variety is edible:
Ornamental pumpkins are usually much smaller than their edible relatives.
They mostly have extraordinary colours and forms. However, some edible pumpkin varieties also have spectacular patterns or striking forms (for example, “Flat White” or “Musquee de Maroque”), which makes it difficult to tell for sure by only assessing their appearance.
Cut the pumpkin. If it’s ornamental, its skin will be relatively thick, and it’ll have little flesh.
If still in doubt, cut off a small (!) piece of pumpkin flesh and test its taste. If it’s bitter, spit it out. The bitterness comes from the substance cucurbitacin, which is toxic. It’s important to taste the pumpkin raw because the bitterness will vanish when the pumpkin is cooked, while the cucurbitacin is still there, causing sickness and vomiting.
Lovely examples for ornamental pumpkins are “Bicolor pearl” or “Autumn Wing”.
Heirloom options
Heirloom pumpkin varieties offer a huge diversity in shape, colour, size and flavour, and their origins sometimes go back hundreds of years!
They often have a very unique visual appearance, like for example the ribbed ‘Musquee de Provence’ or the flat, cheese-wheel shaped ‘Long Island Cheese’.
Many old varieties were cultivated specifically for particular culinary uses, from the sweet ‘Sugar Pie’ to the drier-fleshed soup varieties. There are pumpkins with ultra-smooth flesh that’s perfect for pies (like ‘Winter Luxury’) and firmer varieties ideal for roasting and savoury dishes.
Some heirlooms, like ‘Boston Marrow’, were specifically selected for their exceptional keeping qualities, lasting months in proper storage.
Recommended varieties for beginners
The choice of pumpkins is endless, and you can easily lose yourself in the labyrinth of seed catalogues with all those tempting varieties. If you’re looking for some easy-to-grow classics, read on:
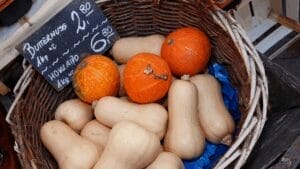
One of them is the Hokkaido pumpkin „Red Kuri“. This variety produces orange fruits of about 1,5 kg with yellow flesh. They have a mild, slightly sweet taste, which makes them great for many sweet and savoury dishes, and they can easily be stored till spring.
A great pumpkin from the moschata family is „Butternut Waltham“. With its fine nut-like taste, it’s a wonderful vegetable to be baked in the oven. The pumpkins are about 2 kg and can also be stored for months.
Dark orange coloured hokkaido pumpkins and butternuts
If you have a large family or simply want to grow large pumpkins, I can recommend“Muscat (or Musquee) de Provence”. They produce ripped, green-orange fruits which weigh up to 15 kg! They taste like nuts and chestnuts and can be used for sweet and savoury dishes alike.
„Sweet Dumpling“ has white or yellowish skin with green stripes and stays relatively small with a weight of about 0,5 kg. They also taste a bit like chestnuts and can be stored up to four months.
Understanding Pumpkin Growing Requirements
Pumpkins need space. Even the varieties that produce small-sized fruits will require at least one square meter (10 square feet), preferably 1,5 – 2 m2 (16 – 20 square feet). For that reason, cultivating pumpkins in a pot is out of the question.
Pumpkins like sandy-loamy soil that warms up quickly and has good water retention capabilities. Add a high humus content, and the pumpkins are happy. If you don’t know how to determine your garden’s soil type, read on here.
Even more important than soil conditions, however, is climate. Pumpkins are warm-season plants that grow well in zones 3 to 9. They like to have a hot head and moist (not wet!) feet, which means that high temperatures in the direct sun and moderate watering are the key to successfully cultivating pumpkins.
Lastly, pumpkins need lots of nutrients, especially nitrogen for growth and phosphorus and potassium for fruit building. Add some long-term fertiliser to the planting hole and then give them liquid fertiliser (like nettle manure, for example) every 4 weeks to give them all the nutrients they need.
Starting Your Pumpkin Journey: Timing and Planting
When to plant for autumn harvest
Pumpkins must be harvested before the first frost strikes. To calculate when to sow pumpkins for your garden, look up the estimated first frost date for your zone (if you don’t know your growing zone, check it out here).
Depending on the variety, pumpkins need between 90 and 140 days to reach full maturity. So, we take our estimated first frost date and calculate backwards 100 – 150 days to be on the safe side. That’s the latest date to sow your pumpkins. In my zone, 7b, the first frosts hit around the beginning of November. 150 days earlier is the beginning of June. That’s the latest sowing date for pumpkins.
Now, look up the latest night frosts for your zone and see if they are already over before your latest sowing date.
As we want to give our pumpkins all the time they can get, we usually start them even earlier than the required 100 – 150 days.
I seed-start my pumpkins mid-April, that is four weeks before I can plant them out after the last night frosts in mid-May. If I wanted to (yes!) and had some space (ahem…), I could still sow some of them directly into the patch until the beginning of June.
Starting seeds indoors
As I said, I always seed-start my pumpkins by sowing them indoors around mid-April. That way, I have four-week-old seedlings that I can plant outdoors after the last night frosts. However, you must observe a fact when seed-starting: pumpkins – like all Cucurbitaceae – do not like to get their roots disturbed. Therefore, you can’t sow several seeds in one pot and transplant them later into larger pots like we do with cabbages, for example.
Instead, take single pots of about 8 – 10 cm in diameter (3 – 4 inches) and sow one pumpkin seed per pot, 2 – 3 cm (1 inch) deep.
Let them germinate at 22 – 24 °C (68 – 75 °F) in a sunny spot with plenty of light.
After three to four weeks, they’ll have several sturdy leaves. Now, you can put them in a cooler place, but they still need much light, the more the better. Make sure not to let them dry out and add some liquid fertiliser to the water as they are heavy feeders.
Before you can plant your pumpkins outdoors, it’s crucial to harden them off. Put them out into the open for 2 – 3 hours, increasing the time every day. On the first day, put them in the shade and gradually expose them to more light and even wind.
When you finally plant your pumpkins in the patch, do not disturb their roots.
Besides a prolonged growing time, seed-starting pumpkins (and cucumbers and zucchini for that matter) has an additional benefit: your plants will already have reached a robust size when you plant them outside, making them less prone to pests like snails and slugs, who prefer munching on the soft seedlings. Yet, to make sure snails and slugs aren’t tempted by your pumpkins, always protect the young plants with a slug collar or a slug fence around your patch.
Proper spacing
Pumpkins are spreaders, and they can easily cover several square meters/feet of garden with their fast-growing vines and large leaves. It’s important, therefore, to plant them with enough space between each other:
Plant small pumpkins at least 1 x 1 m (3 x 3 feet) apart, large varieties at least 2 x 2 m (6,5 x 6,5 feet).
Essential Care Throughout the Growing Season
Watering
Pumpkins like their feet moist, so make sure you water them properly. It’s not necessary to water every day, but rather water once or twice a week (depending on the temperatures) and then sufficiently. If in doubt, carefully dig about 2 – 3 cm (1 inch) deep, test the soil for moisture and water only when it’s dry. Much as they need moisture, pumpkins can die in waterlogged soil, so be careful not to overdo it.
Mulch
Always keep a thick layer of mulch, like straw, grass clippings or leaves, around your pumpkins. That way, you not only retain moisture in the soil but, later in the season, also prevent bruises on the fruits. Another good way to protect the pumpkin fruits from getting damaged is to lay them on wooden boards.
Fertilisation schedule and recommended nutrients
Pumpkins are heavy feeders, which means they need plenty of nutrients to grow and produce large fruits. To become robust and healthy plants that grow many high-quality fruits, pumpkins need nitrogen, phosphorus, potassium, as well as micronutrients like zinc, manganese and copper.
To prepare your patch for the pumpkins, add rotted manure in spring and work it into the soil. That way, you’ll have the soil enriched with nutrients before the plants get into the ground. When planting, put some mature compost into each plant hole to let the roots grow into it.
Three to four weeks after transplanting, you should fertilise your pumpkins. You can, of course, buy some ready-made fertiliser at the nursery (make sure it’s natural, not chemical), but there are plenty of homemade solutions that won’t cost you anything, are organic, easy to make and as rich in nutrients as any store-bought version:
Coffee grounds: Coffee grounds are rich in nitrogen, phosphorus and potassium, which pumpkins need for growth. It can also improve the soil by increasing its permeability and suppressing weeds. However, don’t add too many coffee grounds as they affect the soil’s ph value.
Ash: Ash from wood or paper contains plenty of potassium. It can also help to regulate the soil’s ph value for optimum nutrient uptake.
Milk: Milk contains nitrogen, calcium and other nutrients that our pumpkins need to grow healthily and robustly.
Nettle manure: This contains mostly nitrogen and other nutrients that support growth. To add potassium, make a brew from nettles and comfrey. Dilute it with water at a ratio of 1:10.
Urine: You can also fertilise your pumpkins with urine, which is rich in nitrogen, potassium, magnesium and phosphorus and therefore an optimal fertiliser for heavy feeders. Make sure to dilute it with water at a ratio of 1:10.
Fertilise pumpkins every 2 – 3 weeks with liquid fertiliser or every 4 – 6 weeks with compact fertiliser.
Companion planting strategies
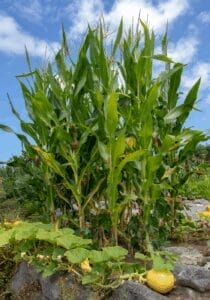
Pumpkins go very well with beans and corn. In fact, the classic Milpa or “Three sisters” bed consists of those three vegetables. Sow corn and when it’s about a foot (30 cm) high, sow climbing beans. They will use the corn as a trellis and add nitrogen to the soil. Now you plant pumpkins in between, which will cover the soil and suppress weeds while at the same time preventing the soil from drying out. This concept of planting vegetables that “like” each other together is called “companion planting“.
Other good companions for pumpkins are herbs like oregano, marjoram, lavender or peppermint, flowers like calendula and sunflowers and vegetables that need little to medium nutrients like peas, lentils, lettuce and spinach.
Vegetables that don’t grow well with pumpkins are all the other members of the Cucurbita family, like cucumbers, zucchini and melons, as well as other heavy feeders like cabbages, tomatoes, peppers or eggplants.
Training vines for space efficiency
Pumpkin vines can sprawl extensively, but with proper training techniques, you can grow them efficiently even in limited spaces.
When vines begin to develop and reach about 1-2 feet in length, you can start guiding their growth. Direct the main vine in the direction you prefer by using gentle stakes or trellises. For bush varieties, minimal training is needed, but vining types benefit from regular redirection.
For vertical growth, install sturdy trellises or A-frames early in the season. As vines grow, carefully weave them through or tie them to the support structure using soft plant ties or strips of cloth. For larger pumpkin varieties, create hammock-like slings from netting or old t-shirts to support developing fruit.
To maximise ground space, try guiding vines in a circular pattern around the central plant, or train them along garden borders. Regularly redirect wandering vines back into your designated growing area.
Pruning can also help with space management. Once you have several developing fruits, pinch off the growing tip of the main vine to redirect energy. You can also remove some secondary vines (those growing out of the main vine) if the plant becomes too crowded.
Managing Pests and Diseases When Cultivating Pumpkins
Whenever we cultivate a plant, we have this idyllic picture of sturdy, blooming plants with lots of healthy fruits and a huge yield in mind. However, in reality, sometimes there’s trouble in paradise:
Common pumpkin pests
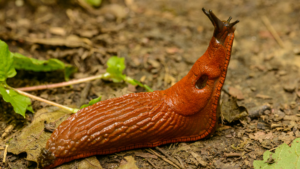
Snails and slugs
Here in Southern Germany, the most dangerous pests for pumpkins are snails and slugs, and we get rid of them best by not letting them anywhere near our pumpkins in the first place.
How to get rid of them:
Put snail collars around the plant or a snail fence around the patch (or garden) to protect your plants.
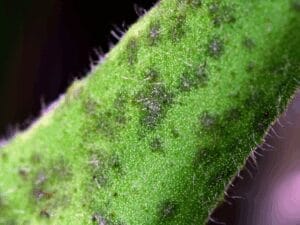
Aphids
Aphids can also endanger our pumpkins, especially in hot, humid summers. They are tiny and can mostly be found on the underside of the leaves or at the stems where they suck out the plants’ sap, leaving them weak and wilting or even producing sooty mould due to the sticky substance they leave behind.
How to get rid of them:
Wash the aphids off by spraying them with a hose. Then, mix 1 tablespoon of bleach-free dishwashing liquid with 1 litre of water and spray the leaves and stems (and if there are still some) the aphids with it. Repeat that every three days for about two weeks. When there seem to be none left, spray once a week to keep them away.
White flies, like aphids, are also often found on the underside of the leaves where they suck out the plants’ sap and make the leaves turn yellow and wilt.
How to get rid of them:
Plant strong-smelling plants like rosemary, basil, thyme, marigolds or nasturtium near your pumpkins. Their smell will repel white flies.
The following pests are nearly unknown here in Germany but very common in other areas of the world:
Squash bug
The squash bug, for example, is a common and dreaded pest in the US. They not only suck the sap out of your plants, leaving them to wilt, but also lay their eggs on the leaves’ underside. From there, new generations of bugs that will also feed on your pumpkins will be born.
How to get rid of them:
Disgusting as this may sound, you’ll have to remove squash bugs and their eggs by hand on a daily basis. Put newspapers on the ground; they’ll hide underneath, and you can remove them easily. Additionally, spray your plants (and the bugs if you get them) with neem oil, which repels them.
Vine borer
Vine borers are also a common garden pest in the US. They have specialised in all members of the cucurbitacea family, like cucumbers, zucchini and pumpkins. Vine borers are moths, but it’s their larvae that inflict the most harm because they burrow into the stems of your pumpkins, eventually even wandering into the fruits.
How to get rid of them:
Like with snails and slugs, the best way to get rid of the vine borer is to not let it get near your plants. That’s easier said than done, however. Cover your plants with a protective net, but remove it for pollination as soon as the plant blooms.
Sprinkle diatomaceous earth around the base of your pumpkins to keep vine borers off the plants.
If all things fail, you may even have to use insecticidal soap.
Armyworms
Armyworms are caterpillars, and they feed on pumpkin leaves and even fruits. If undetected, they can exfoliate your pumpkin plants before you can say “Halloween”!
How to get rid of them:
If you suspect armyworms are eating your pumpkins, take a nightly stroll through the garden and check the underside of the pumpkin leaves. If you detect any armyworms, remove them by hand. Get out there every night to eliminate or at least considerably decimate them. Neem oil can also help to repel armyworms.
Cutworms
While you’re on your nightly round through the pumpkin patch, you can also keep a lookout for cutworms. These caterpillars can cause severe damage to young seedlings, including pumpkins.
How to get rid of them:
Like armyworms, cutworms are night-eaters (aren’t we all!) and are therefore best detected after nightfall. Check the leaves and the soil around your pumpkins and remove the cutworms by hand. When all are off, put collars of tin foil or cardboard around your plants. The collars must be a few inches below the soil and about 10 – 15 cm (4 – 6 inches) high to keep the caterpillars off.
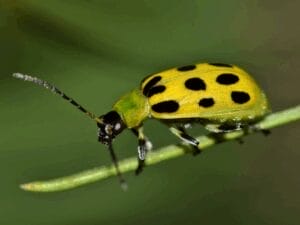
Cucumber beetle
Cucumber beetles not only eat on your pumpkins, cucumbers or zucchini but also transmit bacterial wilt, a disastrous disease that kills members of the cucumber family.
How to get rid of them:
Protecting your pumpkins by covering them with floating row covers is the best method to keep cucumber beetles away from your plants. Just remember to remove the covers once the flowers bloom to let them be pollinated.
However, covers won’t be enough as the beetles also come out of the earth. Sprinkle the soil around your pumpkins with diatomaceous earth to repel them and spray your plants with neem oil. That way, they won’t be able to lay their eggs on the plant leaves.
Pumpkin diseases
It’s mostly fungal diseases that affect our pumpkins. The most common are
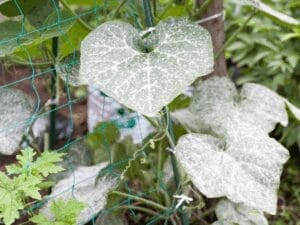
Powdery and False Mildew
A floury residue on the leaves is a sure sign of an infection with powdery mildew, which often occurs when the air is very dry.
False mildew, on the other hand, can be identified by yellow-brownish stains on the leaves’ upper sides as well as a greyish-white residue on the underside. False mildew is most common when the weather is cold and moist.
How to get rid of it:
The fungus doesn’t like acidic soil. For that reason, we can regulate our soil’s pH value before planting by spraying it with diluted milk or apple vinegar, which lowers the soil’s pH and makes it harder for the fungus to grow.
Additionally, make sure to plant your pumpkins at a proper distance from each other so that they dry off quickly.
Also, a preventive dose of garlic and/or onion brew can strengthen your plants.
If your pumpkins are strongly infected with mildew, you shouldn’t plant members of the cucumber family for at least three years on that patch, as the fungus can survive in the soil. Do not compost infected plant parts.
Mosaic virus
The first sign of an infection with mosaic virus is mosaic-like yellow blotches on the pumpkin leaves, which will eventually wilt.
How to get rid of it:
Mosaic virus mostly occurs at the end of the vegetation period, and therefore, it’s usually not necessary to do anything against it.
However, it’s never wrong to strengthen your plants preventively by fertilising them with nettle manure or rock flour and spraying them with neem oil.
Didymella bryoniae
Didymella bryoniae is a microscopic sac fungus that causes gummy stem blight. The fungus thrives especially at high summer temperatures and penetrates into the plant through small injuries on the surface. Blotches on the leaves, black tissue on the pumpkins and a jelly-like softening of the stem are typical symptoms.
How to get rid of it:
To prevent the fungus, cultivate pumpkins in a dry and airy place. Avoid injuries on the plants’ surface where the fungus could penetrate. Do not over-fertilise with nitrogen.
If your plants are infected, there’s no other way (at least none that I know) than using a fungicide. Here in Germany, the active ingredient difenoconazole is permitted. Check your country’s regulations for permitted fungicides.
Crop rotation importance
To keep your soil healthy and prevent diseases and pests from overrunning your garden, it’s important not to plant the same crops in the same place year after year. The principles of crop rotation tell us that we should vary what we plant so that pests and diseases won’t have a chance of thriving, and the soil will not be leached of nutrients.
Pumpkins belong to the family of Cucurbitaceae, of which cucumbers, melons and zucchini are also members. Members of the same family should not be planted in close vicinity or year after year in the same place. Keep a 3 – 4 year rotation break before planting the same family in the same spot.
When you pair crop rotation with companion plants that support each other’s growth, your garden will thrive.
Special Techniques for Growing Giant Pumpkins
I know they always say that we should focus on the inner values, but sometimes size does matter! If you intend to take part in a competition where the largest pumpkin wins the prize, here are a few tips:
Genetics, genetics, genetics
There’s no giant Hokkaido pumpkin, so choose your variety wisely. If you want to grow really – really! – big pumpkin berries, choose a ‘Cucurbita Maxima’ (giant pumpkin) variety, a sub-family of pumpkins that produces the largest fruits. “Atlantic Giant” is a common variety which commonly grows pumpkins of 50 – 100 kg, even in hobby gardens!
Soil preparation and amendments
To prepare the soil for your heavyweight pumpkin, work in mature compost or manure in early spring. That way, you add enough nutrients that your seedlings can feed on once they’ve been transplanted. Also, test the soil’s pH-value which should be between 6.5 and 6.8 and adjust it if necessary.
As pumpkins in general and giant pumpkins especially need lots and lots of nutrients, it’s a common technique to plant them directly at the foot of the compost heap where they can feed excessively.
Plant the pumpkins at a distance of at least 2 x 2 m (6.5 – 6.5 feet). The narrower the spacing, the smaller the fruit. Furthermore, narrowly planted pumpkins are more prone to diseases and pests.
Pruning and training techniques
Pruning and training your pumpkin plants is essential for growth. For extraordinarily large fruits, it’s advisable to leave only one main vine with 2 – 3 secondary and third vines. When the plant grows larger, bury the vine partially at the nodes. That way, more roots are built that can nourish the pumpkin and make the plant more sturdy and stable. When the pumpkin fruits develop, remove all but the largest fruit so that there’s no competition for nutrients.
Fertilisation Secrets of Champion Growers
Giant pumpkins are extremely heavy feeders. Besides nitrogen, they need mostly potassium and phosphorus. Check your soil’s nutrient content before the season starts and add what’s needed. Additionally, fertilise the plants every 2 -3 weeks with liquid plant manure from stinging nettle and comfrey, compost water or manure water.
Pollination and Fruit Development
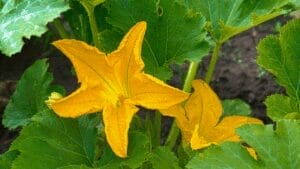
Pumpkins develop male and female blossoms, which can be easily distinguished. Understanding the “who is who” of pumpkin blossoms improves pollination chances and makes it easier for you to pollinate by hand if necessary
Understanding male and female flowers
The male blossoms sit on long, thin, hairy stems. In the middle of the male flowers sit stamens that produce pollen. Male blossoms appear more often and mostly at the beginning of the vegetation cycle.
Female blossoms have shorter stems, which are closer to the ground. The stigma, which receives the pollen, sits in the middle of the flower.
Hand pollination techniques
Usually, pollination is done by flying insects like bees, bumble bees and others. However, due to unfavourable climatic conditions like cool soil temperature and high humidity, pollinators may not be able to do their job properly. In that case, we may have to pollinate our pumpkins ourselves:
The best time for hand pollination is the early morning when the flowers start to open. Make sure you have both male and female flowers at the same time.
Pick a fresh male flower and carefully remove the petals to expose the stamens.
Rub the male stamens directly on the stigma of the female flower. Alternatively, you can use a small, clean brush to take the pollen and transfer it to the stigma of the female blossom.
If successfully pollinated, female pumpkin blossoms will show a thickened ovary at the bottom of the flower, which looks like a small version of the later pumpkin.
When the pumpkins form, a wooden board or a thick layer of mulch underneath the fruit prevents it from rotting.
Harvesting Your Pumpkins
While summer squash like zucchini and patissons are best harvested young, pumpkins must mature completely to develop their best taste and be able to be stored for a long time. When the leaves start to wilt, the maturity process begins. After that, we must be patient for some further weeks.
Signs that pumpkins are ready to harvest
It’s time to harvest your pumpkins when they have the right colour (depending on the variety) and the fruit stem has become hard, brown and woody. The skin can no longer be scratched with a fingernail.
Mature large fruits, for example “Muscat de Provence”, sound hollow when you knock on them, but this doesn’t work for small varieties like Hokkaido or butternuts.
Proper cutting techniques to maximise shelf life
Leave the pumpkins as long as possible on the plant and put them either on a thick layer of straw or a wooden board to prevent them from rotting.
Pumpkins must not be exposed to frost, so before the first frost strikes, cut the pumpkin with a sharp knife off the plant, leaving at least 10 cm (4 inches) of stem on the fruit. If the stem is too short, pathogens might enter the plant.
Curing process for extended storage
Only unscathed pumpkins can be stored for a long time. Immediately after harvesting, let the pumpkins cure for about 2 – 3 weeks in a dry place of about 20 °C (68 °F), for example, in a warm boiler room or a heated living room. During that time, small injuries will close and get sealed with a cork-like plaster.
Storing and Preserving Your Harvest
We’ve come such a long way from seed-starting our pumpkins to harvesting them. Now let’s find out how we can store them properly so we can enjoy them for months:
Optimal storage conditions
After curing, our pumpkins are best stored in a dry, cool place, at temperatures between 10 and 15 °C (50 – 60 °F). A cold basement or stairwell is great. The room should not get direct sunlight and should also be well aerated.
Store pumpkins on a shelf or in a box with straw. Make sure they don’t touch. It’s best to store them 5 – 10 cm (2 – 4 inches) away from each other. Don’t stack them on top of each other. Alternatively, put the pumpkins in nets (one pumpkin per net) and let them hang from the ceiling.
The storage time of pumpkins depends widely on the variety.
Hokkaido pumpkins can be stored up to 3 months. Butternut varieties have a longer shelf life: in optimum storage conditions, they’ll last up to 6 months. Moschata pumpkins, which are even larger, can be stored up to 9 months.
Preserving pumpkin flesh
Once a pumpkin is cut open, it must be used within several days, which can be managed with small varieties, but what to do with pumpkins of 2 kg and above? The answer is preservation, and pumpkin can be preserved in many ways:
Freezing Pumpkin can be best frozen either raw (in cubes, grated or slices) or as a puree.
Canning As pumpkin is a vegetable with low acid content, it must be canned with a pressure canner. Waterbath canning won’t be safe! It’s best to can pumpkin in cubes. They’ll be safely cooked through, and you can puree them after opening the jar.
Dehydrating You can dehydrate raw or blanched pumpkin slices in the oven or the dehydrator. Either store those chips or make pumpkin powder out of them.
Jam Did you know that you can cook jam from pumpkins? Try it in combination with orange, vanilla or pumpkin spice. It’s delicious!
Conclusion
Growing pumpkins in your garden might take some work, but the results are totally worth it! By picking the right spot with lots of sun, preparing your soil with compost, planting seeds after the last frost, and giving your vines plenty of water and space to grow, you’ll be on your way to an awesome pumpkin harvest. Don’t forget to keep those weeds away and watch out for pests that might try to munch on your plants.
When fall comes around and you’re carrying your very own home-grown pumpkins into the house, you’ll feel so proud! Just imagine the delicious pumpkin pies, roasted pumpkin seeds, and Halloween jack-o’-lanterns you can make with what you grew yourself. Plus, your friends and family will be super impressed!
Another great thing about pumpkins is how well they keep after harvest. With proper curing in a warm, dry place for 2 -3 weeks, your pumpkins can last for months in a cool spot in your home. You can also freeze cooked pumpkin chunks or puree for up to a year, or can or dehydrate your pumpkin harvest to enjoy your garden’s bounty even in the middle of winter!
So grab those seeds, dig in the dirt, and start your pumpkin patch. Before you know it, you’ll be the pumpkin-growing champion of your neighbourhood!
Wanna learn more about gardening? These articles may also interest you:
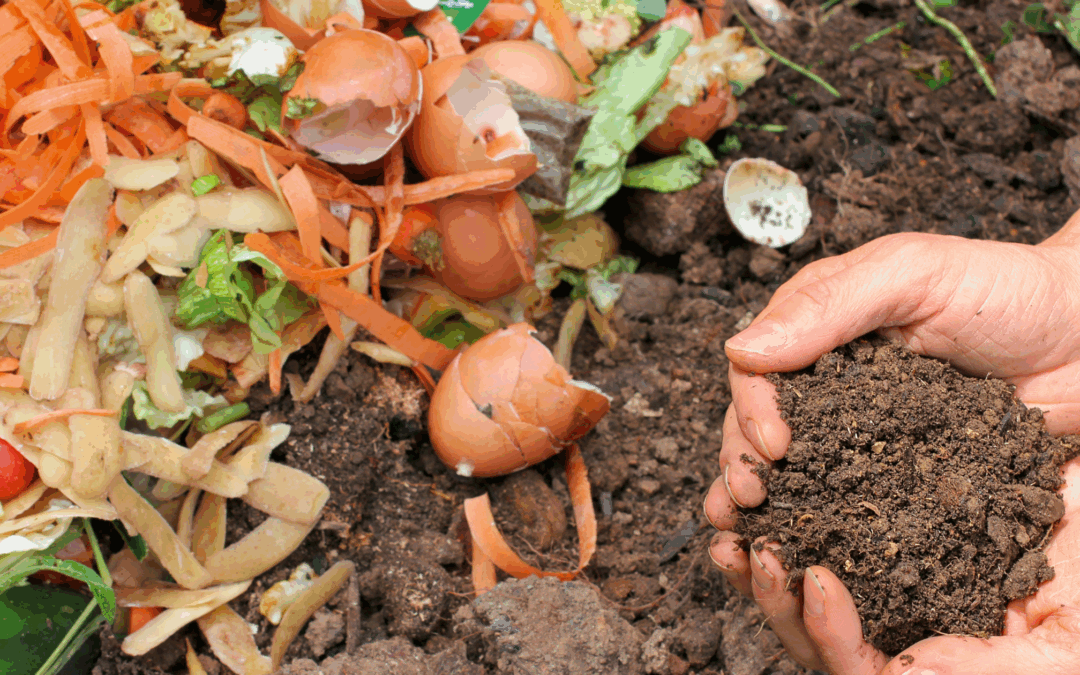
Ah compost! The gardener’s “brown gold” that is the magic bullet for all our garden problems: Wanna add nutrients to your soil? Mix it with compost. Got water retention issues? Add compost to your soil. Looking for the perfect seed-starting soil? Compost it is. In this article, I’ll show you what you need for good compost and how to make compost, even if you don’t have a garden!
Learn with this step-by-step guide how you can transform garden and kitchen waste into valuable humus.
Benefits of composting
With a compost, you can dispose of kitchen and garden waste and put it back into the natural cycle of transformation. With the help of microorganisms, all the organic material will be broken down into a new, nutritious gardening soil.
Compost improves the soil by loosening its structure and enhancing its water retention capability.
With compost, you have a natural, organic fertiliser for your plants. It’s not called “the gardener’s brown gold” for nothing. 😉
That wonderful fertiliser and soil improver will save you money.
Better still, compost is environmentally friendly as it is all-natural and well-tolerated by plants and soil.
Composting systems
Before you make your first compost, let’s get an overview of the different models. They all have their advantages and disadvantages.
You must also consider how much space you’ve got in your garden, and how much garden and kitchen waste you will produce.
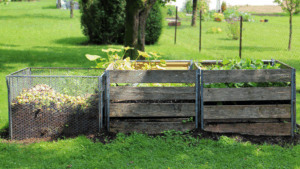
Open composting systems
The classic open composting system is the compost heap, where you just pile all your garden and kitchen waste. Open compost heaps should be at least 1,2 m (4 feet) broad, 80 cm (2,5 feet) high and – if necessary – several metres long. They are best for large gardens with plenty of organic waste.
Open composters are usually grids or frames made of wood or metal that surround the compost heap. They are relatively cheap, and you can even build them yourself out of wooden slats, palettes or sturdy metal fences.
Open composters are well-aired and easily accessible.
On the downside, the compost in open systems needs more time to mature, up to 12 months and longer.
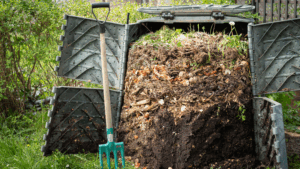
Closed composting systems
Closed composters are usually made of well-isolating plastic or metal containers that usually come with a flap on ground level where you can take out the mature compost. They should be able to contain at least 200 litres to make sure that the composting process takes place fast and effectively.
They protect against weathering and animals (like rats) and require less space than open systems.
Their most important advantage is that they generate high temperatures, making the compost mature a good deal faster than in open systems. These systems are often called thermo composters.
Disadvantageously, closed composters are more expensive than open ones
An alternative closed composter that needs less space is a drum composter. By regularly turning the drum, you’ll mix the waste and provide it with oxygen.
If you want to buy a thermo composter, make sure that the plastic is weather and UV resistant.
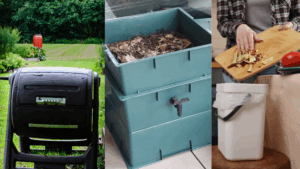
Composters for the balcony
Even on a balcony or patio, you can make compost.
You can, for example, use the above-mentioned drum composters that have a compact size.
Also, worm bins are a good method of composting with little space. They do not smell and are very efficient. You can either buy worm bins or build them yourself. The necessary composting worms can be bought online.
Another great method of composting with limited space is a Bokashi bucket, in which you ferment your organic waste and transform it into nutritious soil.
How to make compost: finding the right location
A compost, no matter which system you choose, is usually not a very pretty sight. Sometimes, it can even smell bad. So, to avoid stress with the neighbours, you shouldn’t place the compost directly at the property boundary.
The perfect location for your compost heap should lie in the half-shadow, maybe under trees or (fruit) shrubs. That way, it’s not only protected from winds and sun but also from views. If you have the possibility to hide it, do so.
It’s also important that you can access your compost with a wheelbarrow. All that black gold has to be transported to your patches 😊
Compost should not lie in the direct sun as it dries out very fast. Yet, I don’t have (half-)shade in my garden, and so the compost is exposed to the blazing sun. To keep it from drying out, therefore, I have to water it during the summer, and sometimes I put a cardboard on top to keep the moisture in.
Composts should always have direct contact with the soil. That way, worms and microorganisms can get into it, and excess water can flow away. Even many closed composting systems are open at the bottom. With a floor grid, you can prevent voles, rats, mice and other pests from entering.
If you want to compost on the balcony, make sure that the total weight doesn’t exceed maximum load.
Basic composting factors to observe
Before you make a compost, there are some basic factors you have to observe:
Size
Closed systems have a preset size but an open system should be at least 1 x 1 metre (3,5 x 3,5 feet) to produce enough heat for the rotting process. Larger compost heaps should not be broader than 2 m (6 feet) to ensure sufficient ventilation.
Material
The one thing we need to make compost is: compostable matter! Usually, we get plenty of organic waste from our garden and the kitchen.
“Brown” material like wood chips, twigs and branches, straw and leaves contains much carbon (C)
“Green” material like grass clippings, kitchen waste, weeds, coffee grounds, or manure contains more nitrogen (N).
For an optimal composting process, the ratio between carbon and nitrogen should be between 15:1 and 25:1. That means that we compost more brown material than green one. Ideally, we collect brown material and every time we throw some green material on the compost, we add an amount of brown material.
Chop up large chunks of wood or vegetables to accelerate composting, but don’t make them too small. Sizable parts of organic matter make sure that air is held within the heap, which prevents it from moulding or putrefying.
Oxygen
Oxygen is a vital factor for the composting process. Make sure your heap is well-ventilated by adding coarse material like twigs, straw and leaves.
Moisture
Your compost should be moist but not wet. If it’s too dry, water it now and then; if there’s heavy rain, cover it to avoid putrefaction.
The best time to start a compost
Basically, you can start a compost at any time of the year, but I recommend the warm seasons. Life in the compost heap, like bacteria, microorganisms, worms and other creatures, develops and thrives better when it’s warm.
In winter, however, there is next to no activity. The beneficial bacteria are slow and they even stop working when it gets too cold. It may help to cover the compost to protect it from cold and wetness.
How to Make Compost in 8 Easy Steps
Step 1
Lay a grid against voles and mice on the ground. Then, build a basic layer of coarse material like twigs, straw or leaves. This layer ensures good ventilation and prevents waterlogging.
Step 2
After that, alternately layer green materials (moist and nitrogen-rich) like grass clippings, vegetable scraps or coffee grounds and brown materials (dry and carbon-rich) like leaves, straw or chopped loppings. Each layer should be about 10 – 15 cm (4 – 6 inches) high. The smaller the materials, the faster they decompose.
Step 3
Activate your compost by one of the following methods:
Add mature compost as a starter. It contains the microorganisms required for composting.
Mix a compost starter from 10 litres of lukewarm water, 1 kg of sugar and two packages of dry yeast and pour it over the compost heap. The microorganisms love that!
Have you ever heard of Effective Microorganisms? They are mixtures of different aerobic and anaerobic microorganisms that can, among other uses, accelerate composting.
Step 4
If necessary, water the compost to ensure enough moisture. Compost should always be moist but never wet.
Step 5
Cover the compost heap on hot days with a layer of leaves, straw or cardboard to prevent it from drying out and overheating.
Step 6
Oxygen is an important factor for composting. Mix in enough coarse material to get in air pockets and (optionally) turn the compost over every 4 – 6 weeks to mix the ingredients well and ventilate it.
Step 7
Let the compost mature for about 6 – 12 months. During that time, microorganisms and soil organisms break the material down and transform it into nutrient-rich humus. You know that your compost is ready when it looks dark and crumbly and smells of forest soil.
Step 8
When your compost is ripe, you can use it as a fertiliser and soil improver in your garden. Distribute the compost on your patches to provide your plants with nutrients and loosen up the garden soil. You can also use mature compost as potting soil for balcony boxes and planting pots.
Kitchen waste: fruit and vegetable remains (untreated), coffee grounds
Egg shells (crushed)
Tea and coffee filters (from paper)
Sawdust and wood shavings (untreated); don’t use too much of it as it may attract wireworms
Litter from small animals (plant-based and untreated), manure, feathers
Paper and cardboard (uncoated and in small amounts)
What NOT to put in the compost
Do not put any of the following on your compost:
Cooked or baked food
Meat and fish remains
Dairy products
Weeds with seeds or roots that hardly decompose (e.g. goutweed, couch grass). Plants with contagious diseases like blight or mildew. The disease is not killed but spreads through the new compost into the soil and infects your whole garden. Always throw parts of ill plants into the garbage bin.
Treated wood, plastics or metals
How to use compost
There are different stages of decomposition and in each of them the compost can be used, but for different purposes.
Half-rotted compost: Mulch
The temperature of the compost heap has decreased, and large chunks remain. You can now use them as mulch for your patches.
Nearly mature compost
The temperature has fallen to normal, and there are only a few smaller bits and pieces in there. The compost smells of forest soil. Now you can use it as fertiliser for heavy feeders like cabbage, tomatoes and cucumbers.
Mature compost
The compost has a dark colour, a fine and crumbly structure, and it smells of forest soil. Use this compost as seed-starting soil or make a new vegetable patch with it.
I made a new patch with my compost where I’m going to plant strawberries
You can throw the compost through a sieve and sort the chunks out. They need a bit longer to decompose so put them back in the compost.
Usually, compost is distributed inearly spring, as soon as the soil warms up and needs new nutrients for the plants. Add a layer of about 2 cm (1 inch) of compost to your vegetable patches, flower beds or under your fruit trees and bushes and rake it slightly in.
You can add compost to your soil in autumn as well, but only as long as the soil is still warm. And you need to cover it with mulch afterwards.
If you can’t use the compost right away, store it in closed buckets until you need it. That way, the nutrients won’t be washed out by rain.
Compost maintenance
Once you’ve layered all the material, your compost doesn’t need you to do its work. However, there are a few factors that need controlling to ensure a fast and good decomposition process:
Temperature
In closed composting system the temperature will get higher than in open systems. The hotter the temperature, the faster the composting process will be.
Moisture
If the compost is too dry, the microorganisms can die; if it’s too wet, it may rot. But how to know if the moisture is right? I usually take a large stick and poke some holes into the compost. When it feels like a squeezed sponge, the moisture is right.
Oxygen
Composting needs oxygen to work properly. That’s why it’s so important to not add too many (wet) grass clippings to your compost as that would lead to an anaerobic (that is: without oxygen) mass that moulds and rots.
Compost troubleshooting
Composting does not always go without trouble. Here are the most common problems and their solutions.
#1 The compost stinks
The reason for bad smells from the compost is that it has too little oxygen and thus creates an anaerobic atmosphere.
Solution:
Check if your composting system is water permeable towards the ground and the cover is water-tight.
Open the composter and shovel everything out. Now put it back into the composter, but mix in plenty of dry brown material to keep oxygen in.
#2 The compost moulds
Although we associate mould and mildew with moisture, it’s the contrary: the compost is too dry.
Solution:
Turn the compost over and mix in some mature compost to reactivate it. Then water it with several buckets of water and keep an eye on its moisture the next time.
#3 Animal infestation
Animals like rats, voles or mice can be attracted by a compost heap.
Solution
Make sure that it’s well protected, for example by putting a metal grid on the ground before starting the compost. Also, don’t ever put meat, fish or cooked food on the compost!
#4 Composting takes too long
Although composting takes its time, more than a year is too long. This may be caused by too little moisture or an imbalance in green and brown material.
Solution:
Turn the compost and add what’s necessary, either moist or dry material and mix it regularly. That way, oxygen gets in, and the good microorganisms thrive.
Composting is not difficult. With the right tips and tricks you can soon transform your garden and kitchen waste into great humus for your garden. Just make sure to use the right materials, to layer the compost in the right way and to give it enough oxygen, moisture and warmth. That way, you contribute to a sustainable eco-cylce and do something good for your garden. Your vegetables will soon thrive in the “brown gold” and reward you with a great harvest. So, get out there, look for a good spot and start composting!
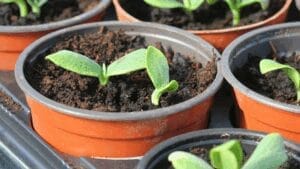
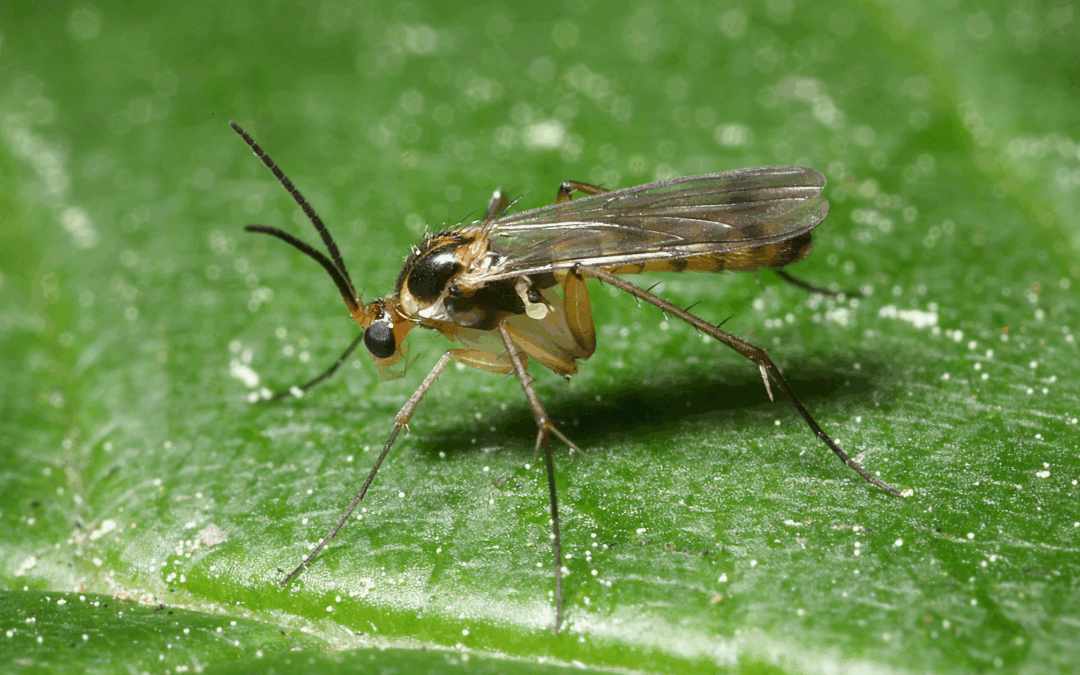
Nearly everybody who has indoor plants will sooner or later make the dubious acquaintance of fungus gnats. Not only but especially in winter, those tiny black insects whirl up from the soil when we water our plants and fly around seemingly aimlessly. Unfortunately, fungus gnats are not only an annoying or aesthetic problem but a real threat to our seedlings because they like to nibble on plant roots! If we only had two or three gnats taking a small bite out of the roots, that wouldn’t be a problem. However, as it happens, fungus gnats never work alone but rather in clouds of gazillions. You can imagine the havoc these numbers can wreak among our baby vegetables. In order to find out how to get rid of fungus gnats, we first must look at what they are exactly.
What are fungus gnats?
Fungus gnats can be found all over the world. In Europe, there are around 600 different types. They are related to midges but cannot sting. In nature, especially in woods or moors, but also in gardens, their larvae play an important role as they decompose organic material.
Fungus gnats are often introduced with potting soil that already contains eggs or larvae, but they can also get into the house through open windows.
You have an infestation when swarms of 2 – 4 mm black insects rise from the pots every time you move or water them. Contrary to fruit flies, fungus gnats have long legs and feelers as well as large wings. They preferably lay their eggs in the moist soil of indoor plants, and one female can lay up to 200 eggs, out of which wormlike, about 5 – 7 mm long, white larvae hatch. They live in large groups in the moist soil. After about 13 days, the larvae pupate, and five to six days later, the fungus gnats hatch.
What damages do fungus gnats cause?
While the black fungus gnats are only pesky, their larvae, which live in the soil, eat not only dead plant parts but also the plants’ roots. Large plants can usually cope with that, but seedlings and cuttings can die. The damaged roots can’t take up enough water and nutrients, and bacterial and fungal diseases can penetrate the plant through the open roots.
How to get rid of fungus gnats
Now, the good news is that there are ways to get rid of those little black beasts – and without throwing a chemical bomb into your living room. Read on!
Prevention
Prevention, they say, is better than cure. So the best way to get rid of fungus gnats is to not let them in in the first place.
Soil preparation
Since we mostly bring fungus gnats in ourselves with the soil we use for potting or seed starting, it’s certainly a great idea to give that a closer look. Only buy high-quality potting soil in undamaged sacks. If you use your own potting preparation, for example with compost, sterilise it before use. For that purpose, heat the soil in the oven at 150 °C (300 °F) for 30 minutes and let it cool down.
Watering correctly
As fungus gnats need moist soil to survive, we should only water our plants when the surface is really dry. However, this can be a bit tricky with seedlings as they must not dry out. It’s better to water several times a week with little water instead of once with a lot. Reliable water monitoring is essential when it comes to healthy seedlings and getting rid of fungus gnats.
Traps
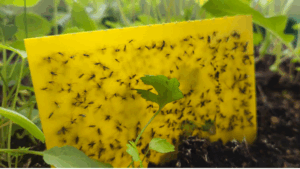
There are those yellow sticky traps that you can put into the planting pots. They attract (amongst others) fungus gnats, which will stick to the gluey cards. However, those traps only catch the male gnats, and although males and females are necessary for producing fertilised eggs, sticky traps are not enough to get rid of all the gnats in your home. The traps are an indicator of an infestation and also a good addition to the next steps:
Natural antagonists
Nematodes
There is a kind of secret weapon, like a SWAT team, in the battle against fungus gnats: nematodes (Steinernema feltiae or SF-nematodes). They are minuscule, wormlike animals that live in the soil and kill fungus gnats’ larvae. Sounds disgusting, but it works wonderfully and is a great non-chemical way of getting rid of our plants’ unwanted roommates.
You can buy nematodes online. They come in small packages and look like a powder that you have to dilute with water. I always use a large mason jar for that, and then add the dilution to the watering can, where I fill it up with more water.
Before you spread the nematodes, however, the potting soil must already be moist. Nematodes (like fungus gnats) die in dry soil, so water your plants in advance, then bring out the nematodes and keep the soil moist during the next weeks. It usually takes about 2 – 4 weeks to notice a considerable decline in fungus gnats.
Predatory mites
Like nematodes, predatory mites also find fungus gnats irresistible. You can use the types Hypoaspis miles, Hypoaspis aculeifer, and Macrocheles robustulus. They usually come as a granulate that you spread on top of the soil.
Bacteria
Special bacteria, like Bacillus thuringiensis subsp. Israelensis are also a good weapon against fungus gnats. Like nematodes, they are diluted in water and poured on the potting soil with a watering can.
Neem oil
Neem oil affects the insects’ hormonal system and prevents them from forming chitin, so that they will not reach the stage of mature gnats and, as a consequence, are not able to reproduce. If you are sure that there are no beneficial insects in the vicinity that you want to spare, neem oil is a good way to get rid of fungus gnats. I wouldn’t use it outside, though, for fear of affecting bees and other pollinators.
Soil cover
A well-known home remedy to prevent the gnats from laying their eggs in the soil is to cover it with quartz sand, where the flies will not get through it. However, the layer should be about 1 cm (0.5 inches) thick. Sprinkle a bit of baking soda on top of the sand to set a double barrier.
Tempting as it might be, however, do not cover your potting soil with organic material as that provides nourishment for the gants and larvae.
However tedious, fungus gnats are not one of the seven plagues, and as easily as we can bring them in unconsciously, we can get rid of them. It’s best, of course, to take precautions, but as you have seen above, there are also several non-chemical ways to protect our green friends from those root nibblers.
Aphids are just one of many garden challenges! For more organic pest solutions, seasonal planting guides, and beginner-friendly tutorials, browse my complete gardening library.