Cultivating a vegetable garden is one of the most satisfying occupations in the world! However: sometimes it can be pretty frustrating, especially when you’ve invested a lot of time (and money) and the outcome is a meager – if any- harvest. I know because I’ve been there as well. During my first years in vegetable gardening I made many mistakes. Mistakes you won’t have to repeat as you can profit from what I learned. With the right knowledge, you can sidestep common pitfalls and cultivate a thriving garden that’ll make your neighbours green with envy.
Ready to avoid mistakes? Great! Here comes your shortcut to garden success!
#1 Planning too big
Every year when I browse through seed catalogues I think about enlarging my vegetable gardening space to make room for all the plants and varieties I want to try out. After some time in cloud-cuckoo-land, however, I usually come to my senses and remember that our garden’s size is well manageable now and every square foot larger would make it overwhelming.
Solution:
Especially when you are a beginner, I recommend thinking big but starting small. With growing experience, you can enlarge your garden space step-by-step until you’ve reached the garden size that’s manageable for you.
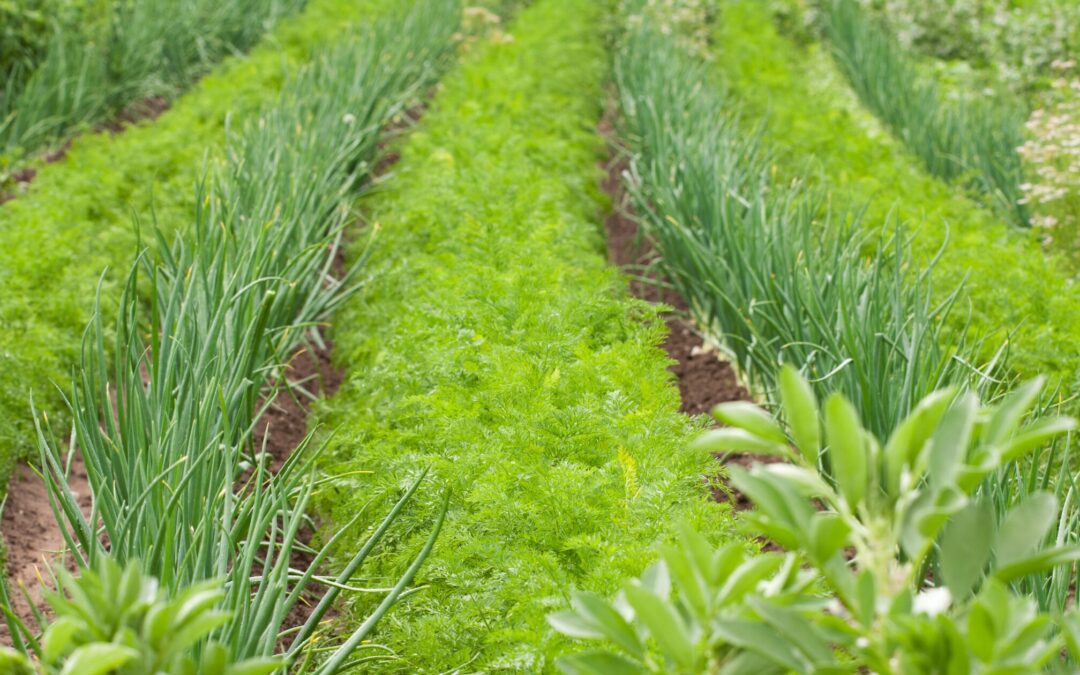
#2 Choosing the wrong spot
Before creating a vegetable garden you must make sure to pick the perfect spot. The key requirements to be met are
Sunlight: Vegetables need at least 8 hours of sunlight per day. Everything below that time is too shady.
Drainage: Make sure that the spot you choose is not water-logged but has good drainage.
Protection: Your garden should be protected from cold, harsh winds
Solution:
Choose the spot for your vegetable garden wisely. It should be sunny, well-drained and protected from cold winds.
Solution: There are soil test kits available online and in nurseries. Once you know what soil type your garden has, you know what plants will thrive there and what you can do to spruce it up for other vegetables.
#4 Not knowing your hardiness zone
Hardiness zones are determined by the annual minimum temperature of a region, thus telling you what plants will thrive and survive there. Not knowing your hardiness zone may tempt you to grow vegetables outside that will not have enough sun hours and high enough temperatures to mature fully and produce a good harvest.
Another important piece of information you’ll get is the last frost date for your region. After that date, it’s safe to plant sensitive veggies like tomatoes and cucumbers outdoors. Any earlier can kill your plants (see #10)
Solution: Go to plantmaps.com and check out your hardiness zone.
#5 Using the wrong plants
First of all: there is no such thing as “wrong” plants but rather plants not suitable for your hardiness zone. Once you know what zone you live in, you’ll know what plants you can grow in your region
Tempting as it may be to go for sun-loving tomatoes in zone 4, you won’t be happy with the outcome if you plant them outside. The time frame of optimal conditions will simply not be long enough for them to ripen all their fruit.
Solution: Check your hardiness zone and choose your plants accordingly. If necessary, make adjustments like adding a greenhouse or a cold frame to prolong your season and create a better climate for sensitive veggies like tomatoes and peppers if necessary.
Check your hardiness zone and, if necessary, make adjustments l. Alternatively, cultivate sensitive plants in pots and bring them indoors as soon as it gets too inhospitable for them outside.
#6 Sowing/planting in wet and/or cold soil
One year, spring wouldn’t come, and when around mid-April the sun finally started to come out, I was so anxious to make up for the “lost” time that I started to sow into the still-wet and cold soil. Needless to say, it didn’t work to smear the seeds in. Germination was practically zero, and I had to do it again a few weeks later when the soil was finally dry and warm.
Solution: Wait until the soil is sufficiently dry and warm in spring before sowing and planting.
#7 Poor soil preparation
Plants draw nutrients from the soil and to make sure that your garden is thriving next year, you’ll have to prepare your soil to fill it up with nutrients for the upcoming season. Gardeners who neglect this task, will soon have only weak plants with little to no harvest.
Solution: When everything is harvested in autumn, it’s time to put your garden to sleep under a thick blanket of mulch or green manure like phacelia. This not only protects the soil but adds nutrients when the organic matter decomposes.
Additionally, work in compost or well-rotted manure in spring before you start sowing and planting to further enrich the soil with nutrients.
#8 Poor weeding
Weeds compete with your veggies for nutrients, water and space and believe me: weeds clearly have the advantage! That said, it should go without saying that sowing and planting between weeds will neither make you nor your plants happy.
Solution: I know it’s tedious but your garden beds must be absolutely weed-free before you start sowing and planting. When you cover them with a thick layer of mulch, there won’t be many weeds and this task will be done in no time.
It’s best to weed at the same day you sow and plant. That way, the weeds need some time to start growing again and won’t compete with your vegetables for nutrients.
If you mark the sowing rows, you can weed in between without accidentally ripping out your soon-to-be-growing plants.
#9 Seed-starting too early or too late
The first sunny days in January and I want to seed-start whatever seeds I’ve got in my storage boxes. But while there are some vegetables you can start as early as January, it would be too early for most of them. Take tomatoes for example. Seed-started in January they would only become leggy and too weak to hold their own weight by mid-May when we can finally plant them outdoors.
If, on the other hand, we seed-start them in April, there won’t be enough time for them to mature and produce a good harvest.
Solution: If in doubt when to seed-start vegetables, check your hardiness zone first and then have a good look at the seed packages where you’ll find the necessary information.
Sunlovers like tomatoes, peppers and eggplants cannot be planted outdoors before the last night frosts are over; otherwise, they will die. Spinach and some lettuce varieties, on the other hand, cannot stand temperatures above a certain degree without producing blooms.
The right timing when planting is equally important as with seed-starting.
Solution: Check your hardiness zone for the last frost dates and either look at seed packages for ideal planting time or ask in your local nursery.
#11 Planting too shallow /too deep
If you plant too shallow, your vegetables will have trouble with rooting and become prone to falling over. Planting too deep, on the other hand, will result in restrained growth and small plants.
Solution: As a rule of thumbs, plant your vegetables as deep as they were in the pots. Exceptions are tomatoes, which you can plant twice as deep as the pot they were in before and bulb celery which you should plant higher than the pot level.
#12 Ignoring spacing
Cabbages should be planted 50 cm (20 inches) apart, but nursery (or seed-started) plants look so small that sometimes we underestimate the space they require when fully grown and plant them too close together.
Solution: As with seed-starting and planting time, you’ll find the ideal spacing for your vegetables on the seed packages. Alternatively, ask in your local nursery.
#13 Not observing crop rotation
I get it: the plan for your vegetable garden has worked out wonderfully and you want to copy it every year. Never change a winning horse, right?
Wrong! Planting the same kind of vegetables in the same place will leach out the soil and result in reduced to no harvest.
Solution: Observe the plant families and rotate your crops every year. Where last year you got strong uptakers (like cabbage or tomatoes), you’ll put plants with low nutrient uptake this year (e.g. beans or peas). Next year, you’ll follow that with medium uptakers like carrots or onions.
#14 Monoculture
If you grow only one sort of vegetable in a bed (yes, that’s monoculture), they are more likely to get diseases or be slaughtered by pests. Mixed culture is the keyword here!
Watering, it seems, is the most favourite task of many gardeners. They water until their plants cry for their life jackets and start singing “My heart will go on”. Plants can drown, too, you know.
Not watering at all, however, is no solution either. Water is what keeps the plants’ metabolism running. If they get not enough water, plants will die.
Solution: Water thoroughly after sowing and planting and then: don’t. Only water again if the soil is really dry and your plants show signs of wilting. That way, they grow deeper roots which makes them sturdier and healthy.
Additionally, cover the soil between the plants with mulch (see next point).
#16 Not using mulch
My granny and my mom prided themselves with their “clean” vegetable gardens where there were only plants and (weed-free) soil. The amount of time it cost, however, to keep this soil weed-free and to water the plants – especially during hot summers – was immense.
In my garden today, the soil is almost always covered in mulch, even in winter. It keeps the weeds at bay, the soil moist and produces compost when it decomposes.
Solution: Mulch your beds thickly as soon as the plants are about 10 cm (4 inches) high. Good mulch material are wood chips, grass clippings, leaves and half-rotted compost.
#17 Improper fertilisation
“The more the better” is not true when it comes to fertilisation. Some plants need many nutrients, others not so many. Some need more nitrogen, while others need a healthy dose of phosphorus and potassium.
Also, the timing of fertilisation is important. Giving too much too soon or all in one dose will result in weak (or even dead) plants.
Solution: Add a healthy dose of organic or mineral fertiliser (for example, well-rotted manure or rock powder) when planting and get acquainted with your vegetables’ needs. Tomatoes, for example, want phosphorus and potassium about 4 – 6 weeks after planting to produce many fruits. When in doubt, rather use less fertiliser.
#18 Not using fencing
As you know, my vegetable garden is situated on a meadow at the outskirts of my village. If I hadn’t installed a (sturdy) fence, the deer, rabbits and even the foxes would eat my produce while the dogs and cats would be happily digging holes and misusing it as a loo.
Solution: Depending on where your garden is, set up a fence to keep off animals.
#19 Not controlling pests
One snail is not the end of the world but have you ever seen just ONE snail? Me neither! When they come, they come in droves like every pest under the sun.
Solution: Regularly check on your garden so that you can intervene at the early stages of a pest invasion and prevent a plague.
Additionally, apply the rules of companion planting to repel certain pests.
#20 Not using pollinators
No fruit without pollinators, right? So make sure you’ve got plenty of those flowers in and around your garden that attract pollinating insects.
Solution: Flowers and herbs like nasturtium, basil and calendula are not only a beautiful sight in your garden but also help attract pollinators for all your fruit vegetables like tomatoes, peppers and cucumbers. Make sure to integrate bloomers in your vegetable garden.
#21 Not pruning
This mostly applies to fruit trees and bushes but also to vegetables like tomatoes. Letting them grow as they like will considerably reduce your harvest.
Solution: Fruit trees and bushes are best pruned in winter while they’re dormant. With fruit trees, cut off all branches that grow downwards, inwards or obstract each other. With fruit shrubs, cut off old branches at soil level. And here is a comprehensive guide on how to grow tomatoes successfully with a detailed explanation on how to prune them.
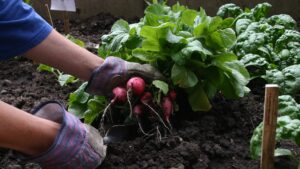
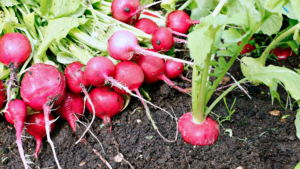
#22 Harvesting too late
It’s interesting to see how many gardeners hesitate to harvest until it’s (almost) too late. If not harvested at the right time, radishes and kohlrabi will get “woody”, lettuce will suddenly sprout blooms and tomatoes will become mushy.
Solution: Always harvest as soon as your vegetables are ripe. That way, you’ll not only have nutrient-dense vegetables but often will induce your plants to produce more fruit.
#23 Not enjoying gardening
In my opinion, this is the most important point! Don’t get all uptight when it comes to gardening. There will always be something that won’t turn out quite as expected. After all, it’s Mother Nature we are working here with.
So relax and, while trying to do your best, enjoy your garden. Take your time to sit there in the sunshine, admire all that grows, listen to the birds and savour your harvest! Our gardens should always be our happy places.
Want to learn more about gardening?
Browse my complete gardening library for step-by-step guides on every aspect of vegetable growing, from planning to harvest.
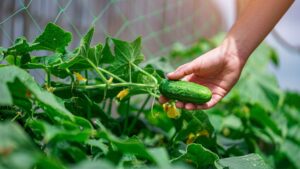
Imagine having fresh vegetables from your garden throughout the entire growing season. With succession planting, you can transform your garden from a place with a one-time harvest to a continuous source of fresh produce!
When I started as a new gardener, I was overrun with harvest for a few weeks every season for the first couple of years. We couldn’t possibly eat or preserve everything that was ripe then and the neighbours started changing the roadside when they saw us coming from fear of being forced upon cucumbers or zucchini. Some weeks later, however, the situation was quite the opposite and we had to run to the supermarket to buy all those vegetables we had in abundance a short while before.
It took me a while to figure out how to ensure a continuous harvest throughout the whole season without any “gaps”. With a bit of smart planning, the next year’s harvest was a good deal more satisfying and we had almost no gaps between harvests. Over the years, I improved my planting plan and now I can proudly say that I can continually harvest from spring to late autumn.
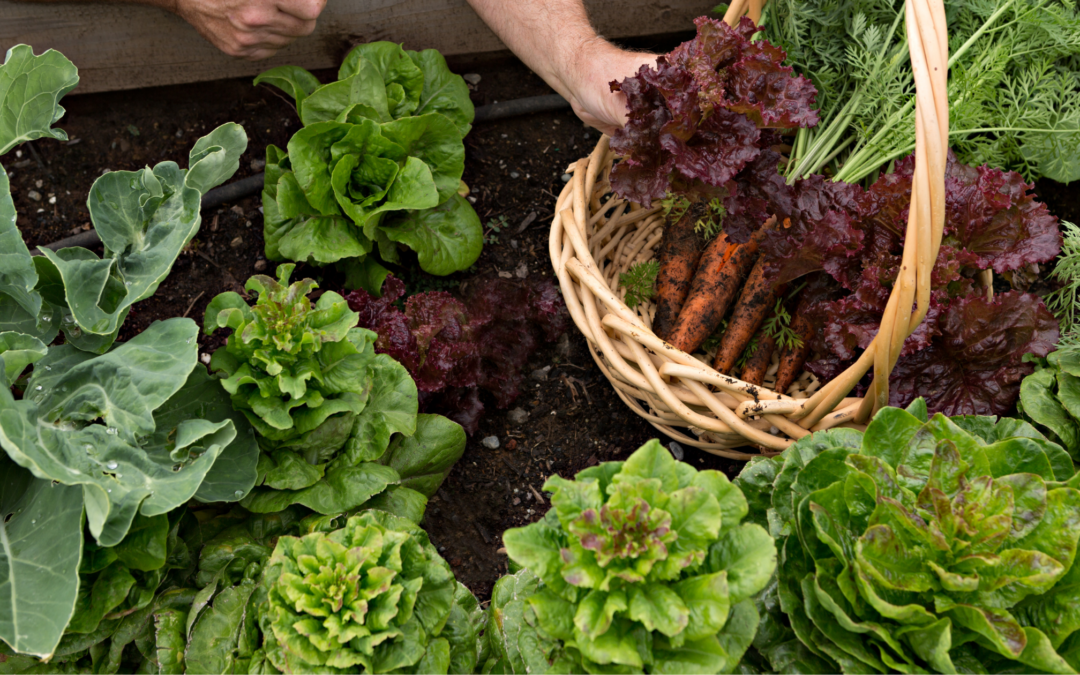
The trick is to sow or plant vegetables whenever there is a gap where some other vegetables have been harvested.
I’ve been using these techniques for years, and I’m excited to share how you can maximize your garden’s potential.
Understanding Succession Planting
By cleverly sowing or planting whenever there are gaps in the beds after harvesting, we can ensure a continuous harvest throughout the whole season. This successive planting is called (drumroll, please!): “succession planting”. Apart from a continuous harvest, there are a lot more benefits and advantages of succession planting
Succession planting reduces weeds by constantly keeping the soil covered. Whenever we have harvested one kind of vegetable, we sow or plant right afterwards so that the gaps close fast and weeds don’t stand a chance. It also keeps the soil moist.
With clever planning and observing what plants go well together (i.e. mixed culture), staggered planting guarantees our soil’s health. For example: when we plant legumes like peas or beans which collect nitrogen before or after hungry plants like cabbages or tomatoes, we can ensure that the soil won’t be leached out.
Succession planting also helps control pests and diseases. By avoiding growing large numbers of the same vegetables at once, we create a natural barrier. Besides, different growth stages attract different beneficial insects.
When, due to the weather, pests or disease one crop fails, succession planting is our backup plan and reduces the risk of losing our entire harvest.
By spreading out planting and harvesting times, we prevent an overwhelming workload, either of planting or harvesting. As I told you before, I had this experience when I started gardening. I had lots to do in spring what with sowing and planting and then later with harvesting simply everything at once!
The different methods of succession planting
Succession planting is not only a season-long lettuce harvest. Instead, there are quite a few different methods to do it:
Same-crop succession
This covers the above-mentioned lettuce harvest. By planting the same crop every few weeks, for example lettuce, we ensure a constant harvest of this crop throughout the season. Make sure to always choose a different place for the same crop. Otherwise, the soil will get leached out of nutrients.
Different-crop succession
This means following one crop with a different crop, for example plant tomatoes after early peas.
Interplanting
A clever way to make the best use of your space is to plant fast-growing vegetables between slow-growing ones. A good example for interplanting is to cultivate radishes between cabbage plants.
Relay planting
This means starting one crop before the other has finished. A good example of relay planting is the famous “three sisters” bed, where we plant winter squash (harvest in autumn) between corn rows (harvest in late summer).
Temperature-based succession
Some plants like it hot, others thrive in colder temperatures. Choose different varieties of your crops and plant them accordingly by cultivating cold-season crops that are “followed by warm-season crops.”
Catch cropping
No matter how well you plan your vegetable garden, there will always be gaps for a few weeks. In that case, we plant or sow fast-growing vegetables like radishes or spinach to close the gaps and cover the soil until the next main crop can be planted.
Succession planting misconceptions
There are some common misconceptions about succession planting that I want to rectify.
“I need a large garden space”
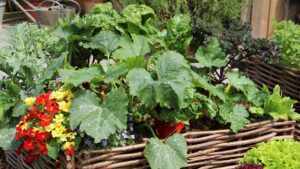
That’s not true. You can apply succession planting in a raised bed and even in large pots on your patio.
“Succession planting means planting the same crop repeatedly.”
As you can see above, there are different methods of succession planting, same-crop succession being only one of them.
“I need to follow a fixed calendar schedule”
Local climate and weather conditions matter far more than a strict schedule. While not leaving out the calendar completely, it’s more important to watch the weather at your place.
“All plants are suitable for succession planting”
Some main crops like tomatoes and peppers don’t work well with succession planting. Instead, stick to the tried and tested veggies that go well with this concept.
“It’s too complex for beginners”
Definitely not! Even as a fledgling gardener you can apply basic succession planting methods.
“Every planting will show the same results”
Unfortunately: no. Growth rates and harvest yield strongly depend on seasonal changes like temperature, moisture and sun hours.
What do we need for succession planting?
Well, first of all, time. Wait, don’t go yet! The time I’m talking of is mostly spent on planning your vegetable garden and especially what to plant and when. Additionally, it costs a bit of time to sow (indoors or outdoors) or plant every few weeks and regularly monitor for harvest timing.
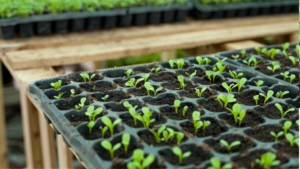
Another thing we need is a continuous supply of seeds or seedlings. You can either seed-start or sow your plants directly or plant seedlings from the nursery into the gaps.
Plants need nutrients, so you have to feed them with compost or other fertilisers.
If you want to extend your season, you’ll need row covers or a cold frame.
Although you have to constantly monitor your garden, the workload is spread throughout the whole season rather than concentrated in spring and fall. This makes gardening more manageable despite requiring consistent attention.
Planning Your Succession Garden
There are a few things you have to observe when planning your succession garden.
First of all, you should make a planting calendar where you indicate when to sow, seed-start and plant what vegetables. Don’t confuse a planting calendar with a planting plan. The first is about timing while the latter is about what veggies you want to plant and where.
The next step is to understand your actual growing season which is determined by frost dates, temperature, daylight hours and microclimate. Your growing season or hardiness zone, indicates the length of time you can grow crops outdoors. Cold frames, winter gardens and greenhouses prolong this growing season. Not sure about your hardiness zone? Find out at this site.
A further important factor to consider is maturity dates, i.e. the time different vegetables need until they can be harvested. This information is usually printed on seed packages or in seed catalogues. If you know, for example, that a certain variety of tomatoes you want to plant needs about 75 days to be harvested, you’ll want to write down when you planted them (for example: May 15th). Then, you can calculate the estimated date of the first harvest, in this case, July 29th. To adjust to local growing conditions, you might want to allow for a wiggle room of 7 – 10 days.
With all that planning, always keep a close eye on how far each of your plants needs to stand from each other. You’ll also find this information on the back of the seed packages or in seed catalogues. I know how tempting it is to reduce the space between plants, especially when they are still young and small. Every gardener has made that mistake at least once. (Some of us more often… ahem). However, vegetables that are planted too close compete for nutrients and space and will stay a good deal smaller than those planted with enough distance from one another.
During the season it’s helpful to keep a record of your gardening. Be it with a software/app or with a traditional handwritten gardening journal, there are a few things that should be covered:
The crops you choose
Crop varieties
Days to maturity
Expected and actual harvest date
Notes on the crops’ performance
Succession intervals
Space planning
This might look something like this:
Crop
Variety
Planting date
Days to maturity
Expected harvest
Actual harvest
Yield
Location
Notes
Feel free to use this chart as an example or create your own and remember to update your chart during the season.
Best Vegetables for Succession Planting
To get a good basis for planning succession planting, we must distinguish between fast-, medium- and slow-growing crops.
Fast-growing crops (30 – 40 days)
Radishes: Plant every 2 weeks March-September
Lettuce: Plant every 2-3 weeks March-September
Arugula: Plant every 2-3 weeks March-September
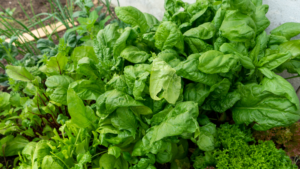
Baby Spinach: Plant every 2 weeks March-May, August-September
Baby Asian Greens: Plant every 2-3 weeks March-September
Make sure you choose the appropriate variety for the respective season (remember: there are cool- and heat-tolerant varieties!)
Medium-Speed Crops (50 – 60 days)
Bush beans: Sow every three weeks from May to July
Carrots: Sow every three weeks from April to August
Beets: Sow every three weeks from April to August
Kohlrabi: Sow every three weeks from April to August
Slow-Growing Crops (60 + days):
Tomatoes: staggered plantings 2 – 3 weeks apart in spring
Peppers: staggered plantings 2 – 3 weeks apart in spring
Broccoli: Early spring and late summer plantings
Cabbage: Early spring and late summer plantings
Brussels Sprouts: Late spring for fall/winter harvest
Winter Squash: Single planting in late spring
Either grow the Speedy Gonzales veggies between the sloths or let a fast-growing one follow a medium-growing crop.
Season-by-season guide
Depending on your hardiness zone, terms like “early spring” and “late summer” can vary considerably. For that reason, let’s define these seasons by their temperature:
– Early Spring (soil temp 5 – 10 °C / 40-50°F)
– Mid-Spring (soil temp 10 – 15 °C / 50-60°F)
– Late Spring/Early Summer (soil temp 15 – 20 °C / 60-70°F)
– Mid-Summer (soil temp 20 – 30 °C / 70-85°F)
– Late Summer/Early Fall (soil temp 15 – 20 °C / 60-70°F)
– Autumn (soil temp 10 – 15 °C / 50-60°F)
That defined, let’s have a look at exemplary tasks that’ll help you to keep your garden’s soil covered and harvest rolling in continually.
Spring succession tips
Prepare the soil as soon as you can work it without smearing it. Remove the mulch to let the soil warm up. Then, rip out all weeds that may have grown, loosen up the soil with a hoe and work in some compost to add nutrients.
Start with cool-season crops like peas, spinach, radishes, and lettuce in early spring (depending on your hardiness zone). Cold frames and low tunnels allow you to plant and sow a few weeks earlier than normal.
Let carrots, beets and Swiss chard follow in Mid-spring. Continue the succession of lettuce and radishes and plant the first bush beans. Now, it’s also time to seed-start indoors the warm-season crops like tomatoes, eggplants, peppers and so on.
In late spring, when the temperature rises, succession plants more quick-growing greens like lettuce, arugula and radishes every 2 weeks.
Continue the greens succession and plant the last cool-season crops before summer.
Summer planting strategies
When late spring changes into early summer, replace the bolting spring crops with heat-tolerant varieties. It’s also time now to plant, summer squash, cucumbers, tomatoes and peppers and other heat-loving vegetables. Continue to plant herbs and leafy greens every 2 – 3 weeks and seed-start fall crops like broccoli, cabbage and kale indoors. Plant out the last set of cucumbers.
In Mid-summer you can sow quick-maturing crops like bush beans directly into the bed.
By the end of August, you can plant a second round of cool-season vegetables like spinach, arugula and lettuce and sow fall root crops like turnips and radishes. Continually plant short-season crops.
Although it can still be hot, consider the first frost date for your region and choose your vegetables accordingly. It’s best now, to cultivate varieties which take no longer than 30 – 45 days to mature. That way you’ll make sure that they ripen before the first frost hits.
Autumn garden planning
Continue to plant cold-hardy greens and root vegetables, always considering the first frost date. If necessary, you can use row covers to protect your vegetables from cold temperatures and thus extend the growing season.
Plant your last batch of quick-maturing crops like spinach and lettuce by mid-September. Now is also the best time to plant garlic for next year’s harvest.
Sow cover crops in every gap that arises when you have harvested or cover the soil with mulch.
Winter preparations
Protect your perennials, like certain herbs as well as vegetables like leek, kale and winter lettuce with covers from the cold.
Winter is the time for planning next year’s garden and succession planting. If you have recorded your garden year in a journal, you can see what worked well and where you can make improvements next year.
In January, you can seed-start the first vegetables for the upcoming season.
Soil Management
As the soil is always covered with crops that take nutrients out of it, it is our task as gardeners to provide exactly those nutrients. After all, we not only want to maintain our soil’s fertility but also to ensure the healthy growth of our plants.
To do that, we start with working compost into the soil in early spring.
When planting strong uptakers like cabbage or tomatoes, we can add well-rotted manure or compost into the plant hole.
During the season, we need to make sure to add organic or mineral fertiliser to give the plants what they need when they need it.
When we have harvested one crop it’s good to loosen the now uncovered soil and work in some compost, well-rotted manure or another long-term fertiliser before sowing or planting the next crop.
Always keep in mind which plants grow great together (and which don’t) and apply the rules of companion planting. That way, we can prevent soil depletion.
Like in nature, our garden’s soil should always be covered, either by plants or by mulch. The cover not only holds the weeds at bay but also retains moisture and prevents the soil from being washed away by rain.
Advanced Succession Strategies
Beyond the basics, there are some advanced strategies you can use that will make you look like a succession planting pro in no time:
Intercropping Techniques
Plant crops together that complement each other, for example, tall corn and low-growing beans. That way you make the most use of your space, keep pests at bay and improve nutrient cycling
Companion Planting
Companion planting means knowing which crops support each other’s growth and strategically placing them together. The combination of tomatoes and basil or carrots and onions are good examples of companion planting. A clever combination of “best buddies” helps to repel pests, enhances nutrients and supports soil health.
Vertical Gardening Methods
Make the most of your space and let your vegetables grow upwards. You can use trellises, for example, where cucumbers, pole beans or winter squash can climb. Or you try hanging pots from carport ceilings or patio canopies and plant them with vegetables. On your balcony or patio, you can also use wall-mounted planters or buy stackable growing systems. Vertical gardening is ideal for small spaces.
Season Extension
With cold frames or a greenhouse, you can extend your region’s growing period. You can sow and plant weeks earlier than outdoors and, depending on your hardiness zone, ensure a year-round harvest, if necessary with a bit of additional protection.
Especially for the first crops outdoors, row covers are a game-changer. They protect the seedlings from harsh weather and temperature variations. Hoop houses create a microclimate that’s beneficial for growing and great for keeping pests out.
Microclimate Creation
With a bit of clever planning, you can create a beneficial microclimate in your garden and thus manipulate your local growing conditions in your favour! My garden, for example, has a slight slope. To prevent the soil from being washed off, I have created the beds at a 90 ° angle to the slope. That way, water is kept longer at the beds’ edges and has more time to seep in.
It’s important to place your plants strategically to create a good microclimate. Large or climbing plants, like corn or pole beans, should be planted at the back of the garden so that they don’t cast a shadow on other plants.
Or you use them as a wind-breaker to protect other, more sensitive plants from harsh winds. A side effect may be the retention of warmth that benefits heat-loving plants like tomatoes and peppers.
Succession in Small Spaces
Gardening in containers is no reason to give up on succession planting. On the contrary: what works in a garden works in containers as well. However, given that we only have a limited amount of soil in containers, fertilising is more important to keep the soil nutritious enough to ensure the healthy growth of your vegetables. Also, use smaller varieties that are better for being grown in containers, like dwarf plant varieties. As with a garden, make a planting and a growing plan.
Succession Planting Wrap-up
You see: a good succession planting strategy can easily provide you with fresh produce during the whole growing season. Just observe the following points:
To get started with succession planting, begin small by focusing on quick-growing crops like lettuce, radishes, and bush beans.
Keep a calendar to track planting dates and expected harvest times, taking into consideration your hardiness zone.
Make sure that you’ve always new crops ready to replace any gaps where plants have been harvested.
Match the crops to the seasonal temperature ranges. Make sure to plant cold-hardy veggies in spring and late summer and heat-loving ones in late spring / early summer.
Maintain your soil’s health by working in compost in late winter and spring, fertilising according to your plants’ needs during the growing season and making sure that the soil is continually covered through successive planting.
Start planning your succession schedule now, and you’ll be amazed at how much food you can grow in even a modest garden space.
When my siblings and I were children, we used to play outside a lot (those were the days), even in winter. Or rather: especially in winter. We had a (small but great) hill in our back garden that used to be frequented by all the children in the neighbourhood as a sledge hill. When, after a long day of bobsleighing, building snowmen and doing snowball fights, we came back into the house, cold and wet with snow, my mum sometimes had made an authentic Bavarian apple strudel (what else?) to warm us up and get us back our strength. It was heaven! Even today, when I eat apple strudel, I remember those days and sometimes I still can smell the snow.
However, apple strudel is not only for winter but it’s a year-round sweet dish or dessert that’s best served with vanilla sauce. Our Bavarian strudel has a slightly thicker dough and is crispier than its Austrian brother which requires pulling the strudel dough very thinly. If you are new to making strudel dough or a bit intimidated by the pulling process, read this article where I’ve described step-by-step how to do it.
But no matter which strudel you prefer, just make sure you bake plenty of it. There won’t be any leftovers. 😉
You are currently viewing a placeholder content from Default. To access the actual content, click the button below. Please note that doing so will share data with third-party providers.
Sieve the flour into a bowl, add the other ingredients and knead it all into a smooth dough. Brush the dough with oil, put it back in the bowl, cover that with cling film and let it rest for at least 30 minutes (the longer, the more elastic the dough gets).
If you use fresh apples, peel and core them and cut them into thin slices. Put them in a bowl and mix them with lemon juice to prevent them from browning. If you use dry-canned apples, just put them into the bowl.
Roast the nuts in a pan without fat until they are lightly brown. Immediately get them out of the pan and either grind them finely in a kitchen mixer or put them as they are (as chops or flakes) to the apples.
Add the raisins (if you like), sugar and cinnamon and mix it all well.
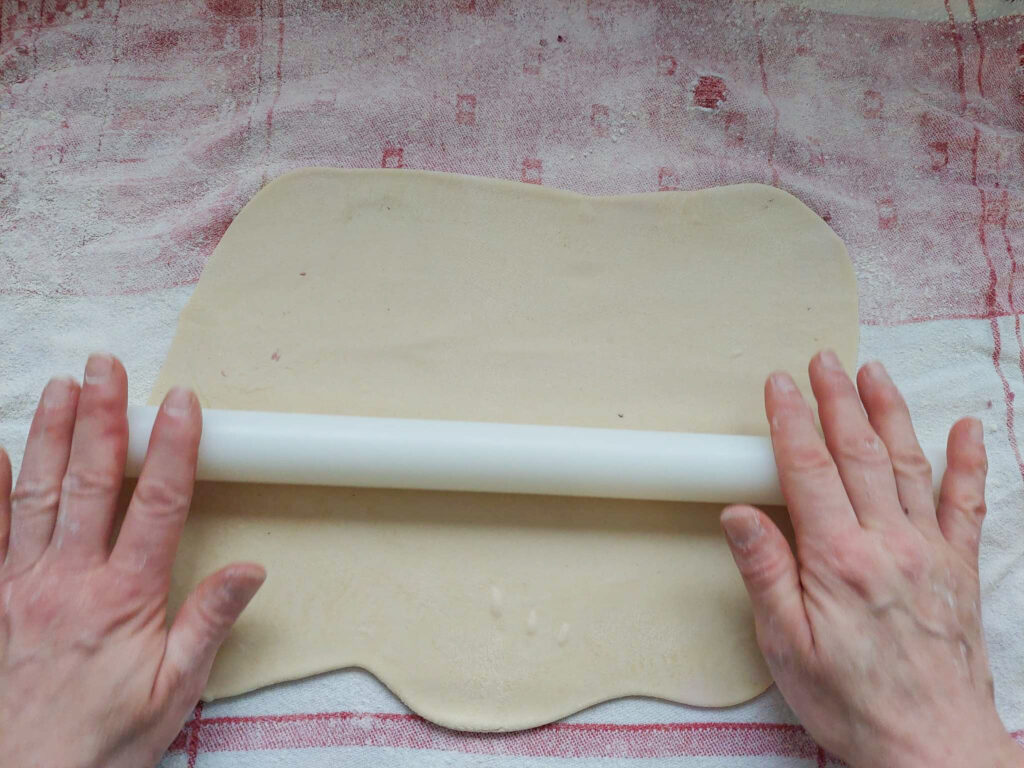
Dust a kitchen towel with some flour and roll out the strudel dough on it with a rolling pin. Now pull the dough with your hands to the desired size.
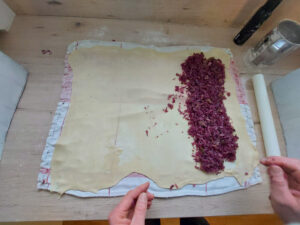
Spread the filling evenly across the whole dough but leave out about 2 cm (1 inch) from the edges.
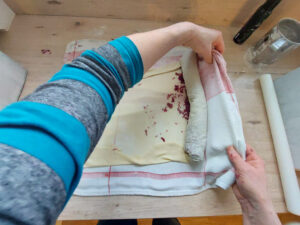
Fold the shorter edges in and roll the strudel with the help of the kitchen towel. Put the strudel either on a baking tray or in a roasting pan that is either covered with a baking tray or greased with butter, lard or tallow.
Brush the strudel with butter and egg yolk and bake it in the preheated oven for 45 minutes at 180 °C (350 °F) (no fan-oven).
Vanilla sauce
Ingredients:
1/2 l milk
1/2 vanilla pod
80 g sugar
2 tbsp cornstarch
2 eggs
Instructions:
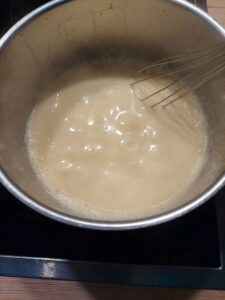
Separate the eggs and mix the egg yolks with sugar, corn starch and a bit of the milk to a homogenous mass.
Cut the vanilla pod lengthwise in half, scrape off the seeds and put the seeds and the pod in a pot. Add the milk and put it to the boil.
When the milk wells up, add the egg yolk mixture.
Stir it all well until the sauce thickens. Put the pot off of the plate.
While the sauce cools down, beat the egg whites and fold them into the (still hot) sauce.
Let it cool and stir once more before serving.
Cut this Authentic Bavarian apple strudel into slices and serve them with a huge dollop of vanilla sauce.
Variations
Finely grind the nuts or almonds and add them with 200 g cream cheese to the filling.
Bake the strudel in a deep roasting pan. Bring 120 ml milk, 25 g butter and 20 g sugar to the boil and add the mixture after 20 – 25 minutes of the baking time to the strudel. Let it bake until the strudel has soaked up all the milk (total baking time about 40 – 45 minutes).
If you don’t want to make vanilla sauce, you can serve the strudel with vanilla ice cream as well.
Authentic Bavarian Apple Strudel
Authentic Bavarian apple strudel is not only a main dish for autumn and winter but a year-round dessert that's best served with vanilla sauce.
Sieve the flour into a bowl, add the other ingredients and knead it all into a smooth dough. Brush the dough with oil, put it back in the bowl, cover that with cling film and let it rest for at least 30 minutes (the longer, the more elastic the dough gets).
If you use fresh apples, peel and core them and cut them into thin slices. Put them in a bowl and mix them with lemon juice to prevent them from browning. If you use dry-canned apples, just put them into the bowl.
Roast the nuts in a pan without fat until they are lightly brown. Immediately get them out of the pan and either grind them finely in a kitchen mixer or put them as they are (as chops or flakes) to the apples.
Add the raisins (if you like), sugar and cinnamon and mix it all well.
Dust a kitchen towel with some flour and roll out the strudel dough on it with a rolling pin. Now pull the dough with your hands to the desired size.
Spread the filling evenly across the whole dough but leave out about 2 cm (1 inch) from the edges.
Fold the shorter edges in and roll the strudel with the help of the kitchen towel. Put the strudel either on a baking tray or in a roasting pan that is either covered with a baking tray or greased with butter, lard or tallow.
Brush the strudel with butter and egg yolk and bake it in the preheated oven for 45 minutes at 180 °C (350 °F) (no fan-oven).
Vanilla sauce
While the strudel is baking, prepare the vanilla sauce:
Separate the eggs and mix the egg yolks with sugar, corn starch and a bit of the milk to a homogenous mass.
Cut the vanilla pod lengthwise in half, scrape off the seeds and put the seeds and the pod in a pot. Add the milk and put it to the boil.
When the milk wells up, add the egg yolk mixture.
Stir it all well until the sauce thickens. Put the pot off of the plate.
While the sauce cools down,beat the egg whites and fold them into the (still hot) sauce.
Let it cool and stir once more before serving.
When the apple strudel is baked, dust it with icing sugar, cut it into slices and serve it with a huge dollop of vanilla sauce.
Notes
Variations:
Finely grind the nuts or almonds and add them with 200 g cream cheese to the filling.
Bake the strudel in a deep roasting pan. Bring 120 ml milk, 25 g butter and 20 g sugar to the boil and add the mixture after 20 - 25 minutes of the baking time to the strudel. Let it bake until the strudel has soaked up all the milk (total baking time about 40 - 45 minutes).
If you don't want to make vanilla sauce, you can serve the strudel with vanilla ice cream as well.
Apple strudel is one of my favourite sweet dishes and although I’ve made lots of them myself and have eaten even more in restaurants and cafés, my mum’s apple strudel is still the best I’ve ever tasted. She always made two baking trays of strudel for our large family, plus two generous cans of vanilla sauce. What shall I say? There never were any leftovers! It tasted too good to leave a single crumb on the plate (especially for my brothers who always ate like there was no tomorrow).
When I tried to make my first strudel, it was, well, not a disaster but not a pretty sight either. The dough was too thick in some parts and so thin in others that it tore and had holes in it. It tasted good, however, and that kept me going. Since then I’ve gathered a lot of experience in making strudel dough and pulling it without tearing – although the occasional hole may form.
If you’ve ever wanted to make an apple strudel by yourself but have shrunk back from pulling the strudel dough, here’s your chance to learn how to do it. Some basic ingredients and a few knacks to observe are all you need for a delicious strudel dough for all kinds of fillings!
Strudel basics
What makes a strudel into a really good strudel?
A good strudel has a beautiful colour. It is usually golden yellow, but it can also be almost black, for example, when the dough is coloured with cocoa or sepia.
The outer layers should be crispy and the strudel should look good when cut into pieces.
Nevertheless, the most important thing about a strudel is the filling which may be sweet or savoury.
What kinds of strudel doughs are there and what do you use them for?
The classic strudel dough is a pulled dough which refers to the fact that you have to pull out the dough very thinly before you spread the filling on it. Pulled strudel dough is typically used for apple or vegetable strudel.
Other strudel doughs include for example puff pastry, shortcrust, yeast dough, curd cheese dough and even pancake dough.
In this post, we’re gonna learn to make a classic Bavarian and an Austrian pulled strudel dough.
Basic knowledge about pulled strudel dough
Most beginners are not afraid of the simple kneading of the dough but the “pulling” part. When pulled properly, the dough should be very thin (some say you should be able to read a newspaper through it) and it shouldn’t tear.
How do we manage that?
By mixing flour with water. The flour proteins (gluten) build a network with the water and form a rubber-like, elastic mass. This network enables us to pull the dough very thinly without tearing it. The longer the dough can rest, the better its capacity to be pulled. The dough should rest for at least half an hour, but it’s better to let it rest for 1 – 2 hours or even overnight in the fridge.
If you want to use the dough now, it still needs to rest for about 30 minutes but my mum always used to cover it with a hot metal bowl: she poured hot water into a metal bowl that was slightly smaller than the dough bowl opening, drained off the water and dried the bowl. Then she put the bowl upside down over the dough.
Ingredients like oil, vinegar and egg also enhance the dough’s elasticity.
It’s also important to knead the dough thoroughly as kneading intensifies the protein-water-reaction. When you work the dough for some time you’ll realize that it starts to feel elastic, smooth, even and not in the least sticky.
What flour should you use?
As you heard before, the proteins (= gluten) in the flour are important. The higher the protein content, the more elastic the dough.
Worldwide there are different flour types. What we in Germany know as “Type 550” (wheat flour) is the “all-purpose” flour in English-speaking countries. Flours of a higher type like bread flour or high-gluten flour are also suitable. The same goes for spelt flour.
No matter what flour you use, however, it’s important to observe the water-flour ratio. After kneading the dough should be smooth, elastic and a little bit moist but not sticky.
Storage
Strudel dough can be kept in the fridge for about 2 days. It may change its colour to a light grey but that’s quite normal and will lighten when kneaded. Always let the dough reach room temperature before processing it further.
You can even freeze raw strudel dough and let it thaw overnight before processing it.
If you want to freeze a whole (or parts of a) strudel, put the (raw or baked) strudel onto a tray with baking paper and put it into the freezer until it’s completely frozen. Afterwards, put it into a container or freezer bag.
How to fill a strudel
There are two different methods to fill a strudel.
1) Put the filling on the first third of the dough
With this method, it’s important to have a thin strudel dough as you have several layers of it on the outside when it’s baked. If the dough were too thick, the outer layers would be hard and you couldn’t cut them well.
Always leave out the edges which will be folded inwards before rolling the strudel.
This method is recommended.
when you have a relatively moist and hardly compact filling
when the filling contains a good amount of eggs that will rise during baking
when you want to get more crispy strudel dough instead of only one layer
when you want to make sure that the strudel dough won’t tear
when you want to make an elegant strudel that can also be presented standing
when you want to use store-bought dough like filo, yufka or strudel dough. Brush each layer with melted butter before adding another dough leaf (not more than 4 – 6 leaves)
2) Put the filling on the whole dough
For this method, you can use thin and (even better) thicker doughs which stay more compact during baking and don’t tear as easily as thin doughs. If your filling contains eggs or beaten egg whites, the risk of tearing is higher during baking as the filling expands. Just make sure to roll the strudel not too tightly.
Sieve the flour into a bowl, add the other ingredients and knead it all into a smooth dough.
Brush the dough with oil, put it back into the bowl, cover the bowl with cling film and let the dough rest for at least 30 minutes, the longer the better. If you want to use it right away, cover it with a hotly rinsed and dried metal bowl for 30 minutes.
This dough is traditionally pulled very thinly.
Strudel dough – step-by-step instructions
1. Put the flour, egg/vinegar, salt and oil into a bowl and add the lukewarm water
2. Mix the ingredients thoroughly and knead the dough…
3…. until it’s smooth. Form the dough into a ball, brush it with oil, put it back in the bowl that you cover with cling film. Let it rest for at least 30 minutes.
4. Dust a kitchen towel with flour and roll out the dough with a rolling pin.
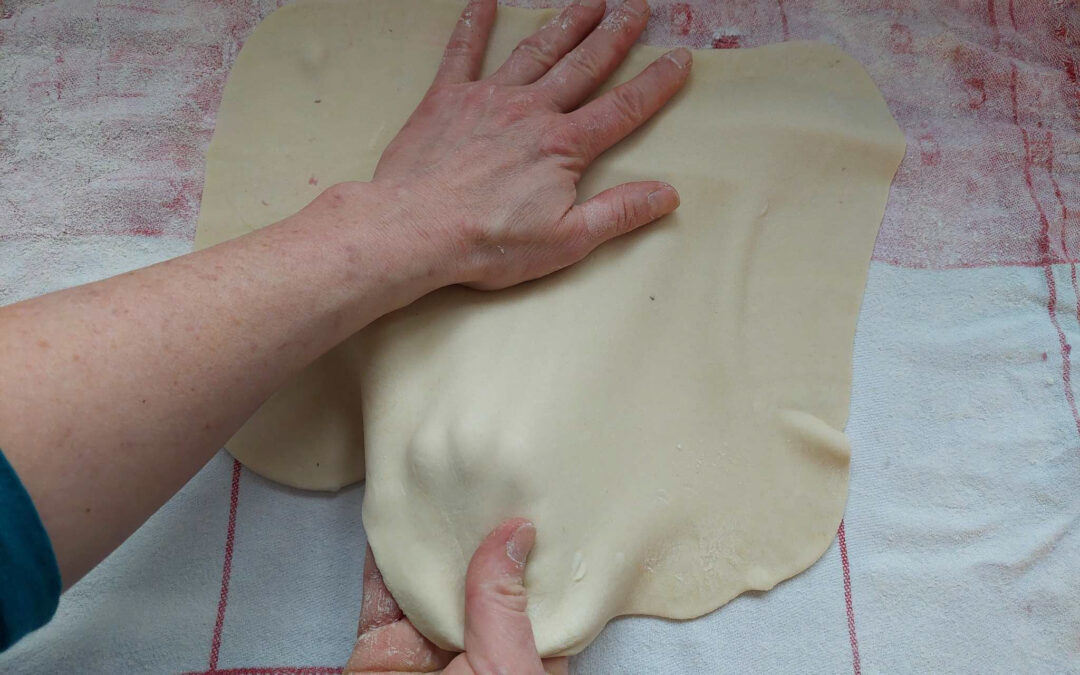
5. Start pulling the dough carefully at the edges with your fingers.
6. Pull the dough with the back of your hand while holding it with the other hand.
7. Pull the dough thinly into a rectangle. You should see slightly through it.
8. Either spread the filling on one-third of the dough…
9. … or across the whole dough. Leave out the edges.
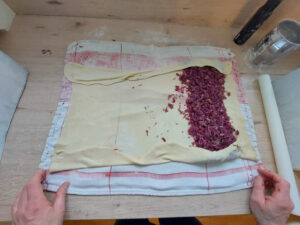
10. No matter how you placed the filling, fold in the edges.
11. Gently roll the strudel with the help of the towel.
12. Prick the strudel with a pin so that moisture can evaporate during baking.
13. Bake the strudel at 180 °C (350 °F) for 35 – 45 minutes and let it cool down a bit before serving.
Bavarian Strudel Dough
This authentic Bavarian strudel dough recipe creates a delicate, paper-thin pastry that's both elastic and tender. When stretched correctly, this dough becomes nearly transparent—the hallmark of traditional strudel. Mastering this technique opens the door to countless sweet and savory fillings, from classic apple to savory meat variations.
Put the flour, egg/vinegar, salt and oil into a bowl and add the lukewarm water.
Mix the ingredients thoroughly and knead the dough until it's smooth.
Form the dough into a ball, brush it with oil and cover it with cling film. Let it rest for at least 30 minutes.
Dust a kitchen towel with flour and roll out the dough with a rolling pin.
Start pulling the dough carefully at the edges with your fingers.
Pull the dough with the back of your hand while holding it with the other hand.
Pull the dough thinly into a rectangle. You should see slightly through it.
Either spread the filling on one-third of the dough or across the whole dough. Leave the edges out.
No matter how you placed the filling, fold in the edges.
Gently roll the strudel with the help of the towel.
Prick the strudel with a pin so that moisture can evaporate during baking.
Bake the strudel at 180 °C (350 °F) for 35 - 45 minutes and let it cool down a bit before serving.
Tips and tricks for a perfect strudel
Dust the kitchen towel with flour before you roll the dough out with a rolling pin. Remove rings, bracelets, watches etc., they only cause holes. Always pull with the whole (back of the) hand and work slowly and relaxed.
Before rolling, fold in the short edges. That way no filling can spill.
Make sure that the seams of your strudel are tightly closed so that no filling gets out during baking.
If your filling contains eggs, it’ll rise during baking and will need more room. Don’t roll the strudel too tightly.
Prick the strudel with a pin before baking so that moisture can evaporate and the dough won’t tear.
If you brush the strudel with egg yolk before baking, it gets a beautiful colour and becomes crispy.
Brushing with olive oil or butter also makes the strudel crispy.
If the dough has become too hard after baking, cover the strudel with a cloth or brush it lightly with salt or sugar water and let it cool. It becomes softer.
Troubleshooting
The strudel dough is too moist.
The right ratio between flour and water is essential for a strudel dough which should be smooth and elastic, slightly moist but not sticky. If the dough is too moist, knead in some flour, a little at a time.
The strudel dough is too dry.
If the dough tears when kneaded, it usually is too dry. Wet your hands repeatedly when kneading and thus moisten up the dough.
What to do when strudel dough tears
You did everything right but your dough has torn nevertheless? The flour may be the reason. Flour is a natural product and the protein (gluten) content can vary.
However, it’s no drama if your dough has torn. That has happened (and still does) to everyone who has ever done a strudel. There are, however, a few things you can do:
1) Most tears and holes aren’t large. Just press the dough together with your fingers and close the hole.
2) Depending on where the holes have formed, you may not see them when the strudel has been rolled up. “Mending” won’t be necessary then.
3) If there are really many holes (think Swiss cheese) you could put the dough together, knead it through and try to pull it out again. Or you cut off parts of the edges and stick them onto the holes. You could even cut off dough strips and decorate the wrapped-up strudel creatively. Remember, the most important part of the strudel is the filling!
Making strudel dough is very easy and pulling it thinly without tearing is also not rocket science. If you’re a newbie to strudel making, I suggest starting with the Bavarian strudel dough as it needn’t be pulled out too thin and is more forgiving. Make sure that you observe each step and you’ll be on your way to becoming a strudel master before you can say “apple strudel”!
When my youngest son was in 7th grade, his school grades suddenly worsened and he became quieter and more introverted. At first, I thought it was probably normal, what with puberty and all, but one day he told me that he “didn’t get along with” (read: was bullied by) the boy sitting next to him. The moment he could change seats and get away from the bully, his grades got better and he was his usual easy-going self again. What applies to people is even more valid for plants. Some thrive in each other’s vicinity while others just can’t stand one other. The concept of considering these veggie loves when planning a garden is called Companion Planting.
But who to pair and who to separate? Whether you want to start gardening on a tiny balcony or in a large backyard, I’m about to introduce you to some plant partnerships that are practically guaranteed to work out. Better still, these aren’t high-maintenance vegetables but easy-going duos that’ll make you soon famous for your green thumb. I know, companion planting can feel overwhelming – even if you have already some experience – but I’ve discovered some foolproof combinations that just work!
Before we grab our garden gloves and head out, though, let’s see what companion planting is and why it works.
What is companion planting?
Companion planting is a gardening technique where different plant species are grown near each other for mutual benefit.
Think of it as playdates in your garden. Just like people, plants can be great friends who help and support each other in all sorts of ways.
Some share nutrients that they gather with their neighbours, others are great at sharing space, like offering a bit of shade on hot days or becoming a live trellis their friends can climb.
Others are the bodyguards of the patch and keep pests and diseases away from their pals. can be paired to help each other by repelling pests, attracting beneficial insects, providing nutrients, offering physical support, or creating beneficial growing conditions like shade or ground cover.
Getting Started: Essential Tips for Success
Pairing great vegetable couples alone, however, will not make your garden a success. There are a few preparations you have to take and recommendations you should observe.
Soil type
First of all, get to know your garden’s soil type and make arrangements to adjust it if necessary. Don’t worry, it’s easier than it sounds and you can look at how to do it here.
Soil preparation
Loosen the soil on your patch with a hoe, remove all the debris and weeds and rake it even. Work in some compost and/or well-matured manure to enhance the soils nutrient content. If you start from scratch, I’ll show you here the easiest way to build a new garden patch without digging.
If you plant in containers, make sure you use high-quality planting soil that’s suitable for vegetables.
Spacing guidelines
It’s tempting to plant too close and even seasoned gardeners make that mistake from time to time (yep, that would be me). But: your vegetables won’t thrive when they haven’t got enough space. At the back of your seed packages is usually a space guideline which you should observe!
Timing
Depending on your growing zone, planting and sowing can differ by weeks. The first step is to find out your growing zone (for example here) and then to watch nature and observe the weather forecast. You should realize when day frosts are over and when the last night frosts will happen.
Basic tools
Apart from soil, you need a few tools for gardening. A large garden fork is great for digging in compost and manure if you have patches. A hand trowel and hand cultivator are essential for both container and patch gardening.
A rake (large or hand-sized) helps you to get the soil even.
Buy a good watering can for watering specific plants and seedlings. If you use a hose, make sure it has an adjustable nozzle.
For your own protection, you’ll need gardening gloves and maybe a knee pad.
If you want to cultivate a backyard garden, a wheelbarrow is a useful investment for carrying compost, manure or other heavy things around. Additionally, a bucket comes in handy for smaller amounts of soil or weeds.
The 10 Surefire Companion Planting Pairs
Now that we know how companion planting works and how to prepare our beds and containers, Here are some foolproof companion planting pairs that are guaranteed to be a success! I’ll show you how they benefit from each other and give you tips for growing.
No 1: Tomatoes and Basil
Pest control: Basil can prevent pests like spider mites, white flies or aphids and thus protect tomato plants from them. The basil’s essential oils either confuse or repel these pests. On the other side, basil attracts ladybirds, the natural antagonist of for example aphids.
Normally, you harvest basil before it blooms, but as we want to attract beneficial insects, let at least some blossoms start to bloom. (Not sure how you can preserve herbs? Take a look over here.)
Use of space: Tomatoes grow high while basil stays relatively short. In combining these two, you can use your garden space optimally while at the same time making sure that the tomatoes can shadow the sensitive basil and thus protect it from too much direct sunlight which would burn its leaves.
Ground cover: On the other side, basil covers the soil and prevents evaporation. This leads to constantly moist soil which is beneficial for the tomatoes.
Soil improvement: Basil loosens the soil with its shallow and well-branched roots and enables oxygen to get into the soil. Its structure supports the creation of a good microclimate around the tomatoes, strengthening their vitality and enhancing the harvest
Taste enhancement: Many gardeners have experienced that basil enhances the taste of tomatoes – not only on the plate but also when planted together.
Planting and growing tips
You can start growing tomatoes and basil indoors by sowing them about 6 weeks before you can plant them out which is after the last night frosts. When this will be depends on the zone you live in. (Not sure what your growing zone is? This page will help you find out). If you have a greenhouse, you can plant them out a few weeks earlier.
Basil grows best in a bit of shadow which the tomatoes easily provide. Both plants like it warm and protected from wind and rain.
Tomato plants need about 60 cm (25 inches) distance from each other, bush varieties about 40 cm (15 inches). Plant the basil between or around the tomatoes but not too close so that the leaves of both plants won’t touch.
If you plant in containers make sure they are large enough. A diameter of 30 cm (12 inches) is the minimum.
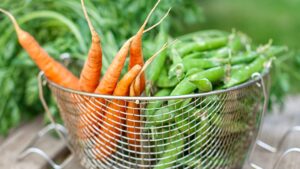
No 2: Carrots and Onions
Pest control: Carrots keep the onion fly away while onions deter the carrot fly. Both plants absorb a scent that repels the pests.
Use of space: As carrots have deep roots and onions shallow ones, the combination of both guarantees an optimal use of gardening space. Besides, both plants get their water and nutrients from different zones of the soil and don’t compete.
Planting and growing tips
Loosen the soil with a digging fork before you sow and plant. This will make sure that the carrots can grow easily into the depth and build long straight roots.
Sow carrots and plant onions after the last day frosts and when the soil has warmed up. In my zone 7b this is around the beginning to mid-April. As carrots may need it a bit warmer, you can also plant the onions first and sow the carrots later when the soil has turned warmer. Make sure to keep enough space between the onion rows, so that there’s plenty of room for the carrots.
Carrots take their time to grow leaves which makes it hard to weed during the first weeks. To make it easier, mark the rows of carrots when you sow, either with a plant sticker or by sowing radishes between the carrots. They grow very fast and indicate soon where the rows are.
No 3: Cucumbers and Nasturtiums
Pest control: Nasturtiums attract pests like aphids, white flies and squash bugs, thus acting like a trap and keeping the cucumbers relatively pest-free. In particular, nasturtium confuses and deters cucumber beetles, which are a major pest for cucumber plants. Additionally, nasturtium help deter soil nematodes.
With their beautiful flowers nasturtium attracts bees, butterflies and other pollinators. This can lead to higher fruit yield and a better harvest.
Use of space: Cucumbers are known to be avid climbers and grow on trellises. As nasturtiums grow low, they can be cultivated between the cucumber plants to optimally use the space.
Ground cover: Nasturtiums cover the ground between the cucumbers and shadow their roots. That way, they also prevent evaporation and help retain moisture in the soil. As cucumbers like moist soil, this is a great combination. Additionally, it prevents weed growth and keeps the soil cool.
Soil improvement: Nasturtiums also loosen the soil due to their root structure and that way enable oxygen to reach the cucumbers’ roots.
Taste enhancement: Nasturtium is said to improve the taste of cucumbers.
Edible flower bonus: If all that hasn’t convinced you, this is the absolute bonus: nasturtium not only looks pretty, its flowers (and leaves) are also edible and pimp every salad or the occasional pasta dish. If that’s no reason to grow nasturtium, I don’t know what is.
Planting and growing tips
Pre-cultivate cucumbers and nasturtium indoors by sowing them about 4 – 6 weeks before the last night frosts. Both like it warm and sunny and should not be planted out before it’s really warm enough.
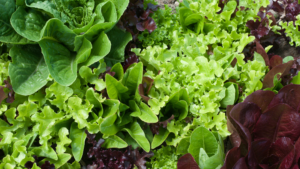
No 4: Lettuce and Marigolds (tagetes)
Pest protection: Marigolds are the SWAT team of pest protectors! Their strong sent, for example, repels aphids while secretions of their roots kill soil nematodes. At the same time, they deter leaf-eating pests from the salad and build a barrier against common garden pests like snails. If that’s not high-level natural pest control, I don’t know what is!
Soil improvement: Marigolds improve the soil structure with their robust root system which enables oxygen to get into the soil where it’s also beneficial for the lettuce.
It also provides organic material, for example when spent blooms fall off and decompose.
Ground cover: Both plants provide good ground cover for each other which makes the soil stay moist but also prevents weeds from growing.
Edible flower bonus: Some marigold varieties have edible flowers, for example tagetes lemmonii, tenuifolia and minuta
Planting and growing tips
The best way to plant marigolds and lettuce together is to cultivate a marigold border around salad patches. Plant the marigolds with a distance of 20 – 30 cm (8 – 12 inches). If you have a large lettuce patch, plant the occasional marigold between the lettuce.
No 5: Beans, Corn and Pumpkin
The trio of beans, corn and pumpkin is called the “Three Sisters”, a famous companion planting scheme from native Americans. They are cultivated together for the following benefits:
Structural support: Beans in this case means climbing beans. The corn stems provide a sturdy structure for the beans to climb up.
Use of space: Corn and beans grow high while pumpkin spreads along the ground which makes that the perfect example of an optimal use of space.
Soil improvement: Beans are nitrogen-collectors which means that they gather nitrogen from the air and store it in their roots where the corn and pumpkin benefit from it. (Read more about plant nutrients here.) When the beans are harvested, cut them off above the ground and leave the roots there. That way, the nitrogen stays in the soil.
Ground cover: The spreading pumpkin provides a great ground cover, thus retaining moisture and preventing weeds from growing.
Planting and growing tips
Make sure to choose the right varieties of beans and corn. Use mid to low-growing beans and strong-growing corn, otherwise, the beans will crush the corn stems.
It has also proven advantageous to choose coloured beans which makes it simpler to find them later in the thicket of the patch.
Sow corn about two weeks before the last night frosts (in zone 7b that’s the beginning of May) with a distance of 40 cm (16 inches) between plants and 60 – 80 cm (24 – 32 inches) between rows. Sow up to 3 beans around each corn and plant pumpkin between the rows with a distance of 2 m (6.5 feet) between the pumpkin plants.
You can even cultivate the “Three Sisters” small-scale in a container. Choose one with a diameter of at least 50 cm (20 inches), plant low-growing corn in the middle, 3 – 4 bush (!) beans at the container edge and between corn and beans one small pumpkin variety.
No 6: Radishes and Spinach
Pest control: Spinach’s strong scent can help repel certain insects, while radishes deter leave-eating pests.
Use of space: Radishes have deep roots and spinach develops shallow roots. That, in addition to them having similar requests regarding watering, makes those two vegetables a great example of how to use space efficiently.
Ground cover: Spinach covers the ground well with its large leaves and thus keeps the soil moist and prevents weeds.
Soil improvement: Furthermore, radishes help loosen the soil with their deep roots and thus support the more complex root system of spinach.
Planting and growing tips
Both, radishes and spinach can be sowed throughout the growth season, just make sure to pick the right varieties. You can start sowing spinach and radishes early in the year, in fact, after the last day frosts (here around that’s beginning to mid-April). Due to their relatively short growing time, both can be used as a gap filler or preparatory cultivation for plants that take a longer time to grow. There are also summer varieties which tolerate heat and, when sown every 6 – 8 weeks, ensure a continuous harvest from spring to autumn.
Radishes can be harvested after 3 – 5 weeks so that they won’t compete with spinach for nutrients.
No 7: Peppers and Oregano
Pest control: Oregano releases a scent that repels certain pests like aphids, spider mites and other pepper-loving bugs. The scent can be so strong that it covers up the peppers’ scent so that pests can’t detect them.
Ground cover: Oregano, planted between and around peppers is a great ground cover which suppresses weeds and retains moisture in the soil. It also keeps the soil’s temperature stable and reduces soil splashing onto the pepper leaves during rain or watering, which minimises the risk of soil-borne diseases.
Flavour enhancement: Some gardeners report that oregano planted with peppers enhances their flavour. I personally haven’t had the same experience but maybe my taste buds aren’t refined enough 😊. Try it out and let me know what you think!
Planting and growing tips
Peppers and oregano enjoy the same sunny conditions and well-drained soil. But while peppers grow fast and vertical, oregano grows slower and stays more compact, thus building a good ground cover (see above). Both plants have different root depths and get their nutrients and water from different soil zones which means they don’t compete.
No 8: Zucchini and Nasturtiums
Zucchini and cucumbers are both members of the gourd family or Cucurbitaceae. Knowing that, it’s no wonder that zucchini, like cucumbers, pair well with nasturtiums.
Pest control: As described above, nasturtiums attract pests like aphids, white flies and squash bugs, keeping zucchini pest-free. Additionally, nasturtium helps deter soil nematodes.
Pollination benefits: Nasturtium with its large, beautiful flowers attracts bees, butterflies and other pollinators. This can lead to higher fruit yield and a better harvest.
Ground cover: Most gardeners know zucchini only as growing spaciously on the ground, but if you grow them vertically by binding them to a stick (yes, just like tomatoes), you not only save space but also keep the zucchini healthier. Nasturtium then works as a ground cover that keeps the soil moist and prevents weeds.
Planting and growing tips
Pre-cultivate zucchini and nasturtium indoors by sowing them about 4 – 6 weeks before the last night frosts. Both like it warm and sunny and should not be planted out before it’s really warm enough.
No 9: Peas and Carrots
Use of space: The carrot tops are relatively sparse, allowing the pea vines to grow upwards. This vertical growth pattern allows you to grow more food in a smaller space.
Soil improvement: Peas (like beans) are nitrogen collectors; that means they gather nitrogen out of the air and store it in their roots where it’s partially available for the carrots. When the peas are harvested, cut them off shortly above the ground and leave their roots in the soil. That way, the nitrogen stored in their roots enhances the soil.
Peas have shallow roots whereas carrots develop deep taproots that go well into the ground. That way, both plants get their water and nutrients from different soil zones and don’t compete with one another.
Planting and growing tips
Peas are cool-season crops that can be planted early and carrots can either be sowed at the same time or slightly afterwards. By the time the carrots need more space for their roots, the peas will most likely be harvested and can be cut off. If you leave their roots in the ground, the carrots can access the nitrogen that’s stored in there.
No 10: Cabbage and Dill
Pest control: The strong scent that we love about dill, deters pests like cabbage white butterfly and aphids. Additionally, dill attracts insects like ladybugs, wasps and hoverflies that prey on cabbage pests.
Use of space: Dill grows upright and airy whereas cabbage shows a spreading form. Also, the root systems of those two don’t compete regarding water and nutrients as dill has shallow roots and cabbage has deep roots. That way, both plants can be cultivated well together, using garden space optimally.
Flavour enhancement: Some gardener’s say they perceive a flavour enhancement in cabbage when planted together with dill. I’d say, it’s worth a try!
Planting and growing tips
Both plants can be grown during the same seasons but dill grows a good deal faster than cabbage which allows for continuous garden use. When dill goes to seed, it can self-sow for the next season while cabbage continues growing.
Common Mistakes to Avoid
Companion planting is a great method to enhance your garden’s productivity but there are still some rules to observe. Here are some of the mistakes you should avoid:
Overcrowding
Even seasoned gardeners sometimes make this common mistake: planting companions too close together. Please bear in mind that all plants need their proper space for root growth and air circulation. By planting too close, you increase the risk of diseases and competition for resources instead of diminishing them.
Incompatible combinations
Make sure you know which plants get along well and which don’t. As described above, some plants inhibit growth in other plants. When you plant antagonists together, you needn’t wonder why your veggies don’t thrive.
Timing errors
Consider how long different vegetables need to be harvested. Some have a very short cultivation time (for example radishes), others are practically the whole season on the patch (cabbage). Use short-seasoned plants to fill the space until those who stay longer need more room.
However, it’s no good to combine vegetables with different plant windows. None of them will thrive.
Sunlight requirements
Sun lovers will become straggly in the shadow and the sun sensitives will get sunburnt in the blazing sun. Always plant veggies with similar sunlight requirements together. Also, take into consideration the shadow plants will cast on each other once they reach their final height.
Companion Planting – It’s worth the effort!
Companion planting can be a bit intimidating at first but you can make so much more of your patch if you bear in mind which pairs are love matches and which want to go at each other’s throats.
Whether you’re teaming up tomatoes and basil or letting beans and corn support each other, these combinations are practically guaranteed to succeed. Think of it as playing cupid with veggies – and these couples are definitely a match!
Still overwhelmed? There’s no need to put all the above into practice at once. Start slow and just try one or two of these tried-and-true pairs, watch them thrive together and before you know it, you’ll also be infected with the “garden bug” and want to try out more!
Now get out there, grab your garden gloves and a shovel and let these plant pals work their magic in your garden!🌱