These January reflections are part of a monthly practice of noticing what each season asks of us.
When I look outside my bedroom window on a typical January morning, I can see the nearby woods, sometimes covered in tiny snow hats. At least, that’s the case this January (so far) as snow has become increasingly rare around here in the alpine upland. A hundred kilometres to the south, snow is a certainty, but not here. That’s why I’m so happy that this year we are covered in white.
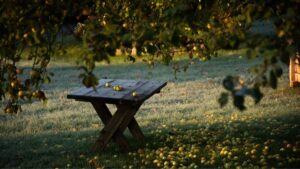
View from my bedroom window in January.
Temperatures hover steadily below 0 °C (32 °F), and a slight wind blows from the west. Going outside is a marvel – if you’re appropriately accessorised with a thick scarf, a woolly hat and mittens. The air smells crisp and clean with a hint of wood smoke. On my strolls through the snow-covered woods, there’s almost no sound. Everything seems muffled by the white blanket that buries all the plants, or at least considerably changes their appearance.
The sun rises late this time of the year, and sometimes we don’t see it at all (despite it being day) due to thick fog. On days like these, I light as many candles as I can to make our home cosy and light, despite the dullness outside. When the sun does come out, however, its light is reflected by zillions of snowflakes, making it almost blinding.
When I was a child, life had slowed down on our farm. Dad went to the woods to fell trees if necessary, but on the farm itself, beyond caring for the animals, we mainly did maintenance work. We organised the workshop and kept the machines and tools well-tended.
I love the slow pace of January.
Only a few things need, can and should be done. While others crowd gyms and plan overhauls, I prefer to hibernate as much as I possibly can. This resistance to January’s forced productivity isn’t just personal preference—it runs contrary to how humans historically understood the year.
I learned that it was Julius Caesar who determined the first of January as the start of the year, choosing the date because it was when the new consuls started their work. Later, Pope Gregory XIII reformed the Julian calendar but kept January 1 as the year’s start.
This was largely a political decision rather than a seasonal one. Before that, many cultures started the New Year at the spring equinox on March 20/21.
This makes so much more sense to me!
Nature starts reviving again, so it’s a lot more plausible to “start” anew then, instead of in the deepest winter. No wonder January can feel misaligned with our energy!
While the world rushes with resolutions, nature rests – and we should do the same. Instead of getting myself stressed out, I’d rather sit on my couch with hot cocoa, browsing through seed catalogues, or journaling by the Christmas tree (which we’ll keep until the end of January). No hectic for me, thank you very much. This is my January: dreaming, planning, organising – a quiet preparation for spring.
The Garden’s Deep Sleep
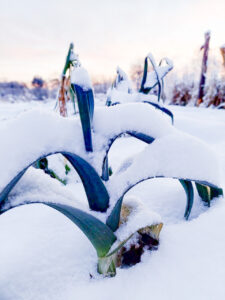
When I stroll through my garden in January, everything is dormant. It’s like watching a child sleeping peacefully, deep in dreams, undisturbed. Snow covers the garden, tucking the earth into winter’s rest.
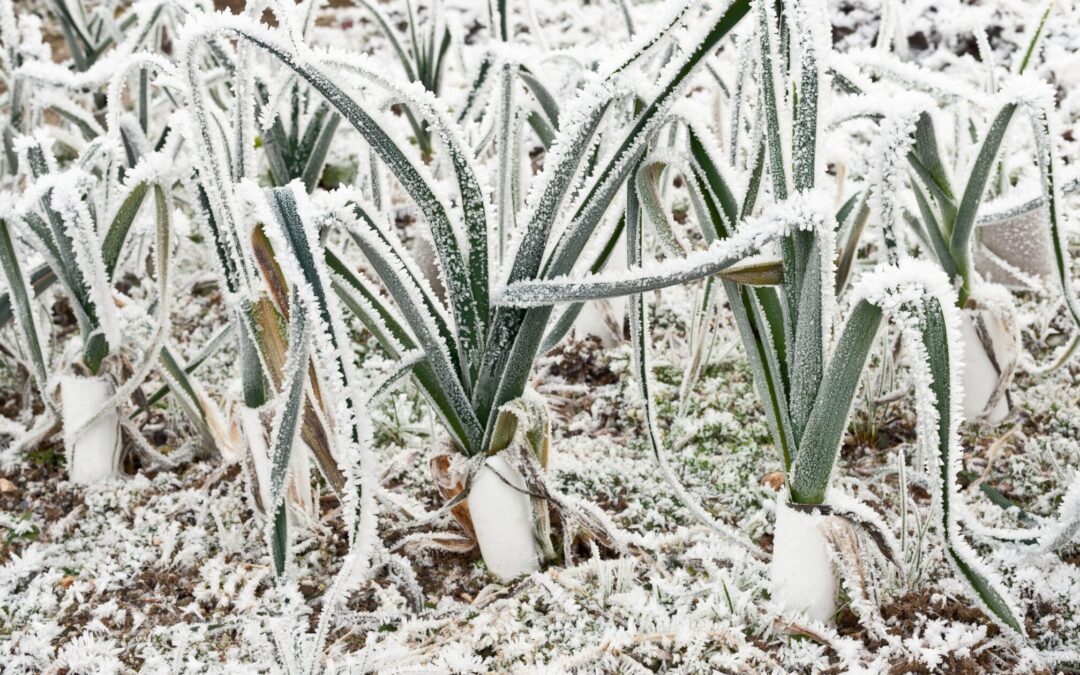
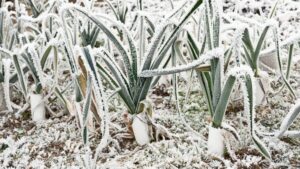
The branches of the nearby trees and shrubs are bare, showing their form and unique structure clearly against the deep blue January sky. The beds in the vegetable garden are almost empty; only a few hardy leeks brave the cold.
At first glance, it might seem bleak, yet a garden in winter is incredibly beautiful in its bareness.
The necessity of dormancy
This dormancy is necessary for our garden to regain its strength for the upcoming growing season. Just like the child I mentioned earlier, our garden needs its rest after a long year.
Nevertheless, there’s work underneath that we can’t see: the roots of trees, shrubs, and perennials strengthen and store as much energy as possible, invisibly preparing for spring.
The garden as teacher
The garden quietly teaches us something important here: rest isn’t laziness; it’s necessary preparation. Just like nature – and we are part of nature – we live in cycles. There’s a time to work and a time to rest, daily and yearly. Trusting these cycles makes us stronger and more productive in the long run–not despite the rest, but because of it.
The garden asks very little of me right now.
There’s little to do in the garden right now. I clean my tools and repair them as needed. I also sketch out a planting plan for the vegetable garden, dream of new patches and order new seeds – remember the seed catalogues I mentioned earlier.
If you dream of adding a greenhouse, now is the perfect time to research and plan. When I built my greenhouse from scratch, I started planning it in January.
Let’s be honest: January is the darkest month of the year. Indeed, the days get longer again after the winter solstice at the end of December, yet the festive glamour of Christmas is over, and it can all look very bleak. Whenever I catch myself sinking into melancholy, I tell myself that January is meant to be dark and quiet. It’s nature’s permission to hibernate, and I try working with it instead of fighting it.
Winter Self-Care Practices
For body…
Just because it’s cold doesn’t mean we shouldn’t go outside. On the contrary, a walk in the snow gets us enough fresh air and movement to keep us fit and healthy during the cold months. And it’s mesmerising to see how our surroundings look so different when they’re covered in snow. No gym session offers quite the same nourishment.
After the walk, a long, hot bath, ideally with dried herbs from summer, is perfect. The hot water envelops us like a soft embrace and warms us up after our time in the cold.
It’s a small ritual, but it makes a difference.
To nourish my body, I love eating warm food, often made from root vegetables, but also meat with delicious gravy. These rouladen with Spaetzle, for example, are one of my favourite dishes in winter.
I’ve found out that in January, I often need more sleep than in any other month, and I’ve learned to give myself permission to go to bed early and get that extra sleep if I need it.
That, too, feels like winter care.
…Mind…
One of my favourite things in January is reading all the books that I saved for winter. Right now, for example, I’m reading a biography about Franz Schubert, which I’ve had for almost a year now. I couldn’t muster the energy for it during the busy growing season, but now is the perfect time to indulge in Schubert’s life and work.
I also tackle creative projects that I simply don’t have the time for the rest of the year. Knitting a shawl or fingerless gloves is on my list. As I’m not an avid knitter, I need time and muse to concentrate on a knitting pattern. Now is a wonderful time to just give it a go.
As an introvert who needs her alone time to recharge, I take winter as the perfect excuse to say no to as many obligations as I can. I’ve experienced that I’m much more outgoing and sociable in summer, but in winter, I love being at home, either alone or with my boys and not interacting with any other people if I can avoid it. If all else fails, there’s always the weather to blame for not being able to leave the house…
… and Soul
Whenever it’s dim and dusky in January, I light candles. Their natural, flickering light creates an atmosphere of enchantment and cosiness. It lifts my mood and touches my soul. Also, I light up the Christmas tree as long as we have it in our apartment. It has artificial candles, but the light banishes the darkness–and with it any chance of a dark mood.
What has also helped me a lot when my mood plummets is listing five things I’m grateful for. For that purpose, I keep a gratitude journal on my nightstand where I can reach it literally any time, day or night. I’ve found gratitude practice a powerful tool to boost my energy and mood.
I’m not good at meditation (my thoughts always wander elsewhere), but I love just sitting in a quiet environment. In my job, I almost constantly communicate with many different people, which sometimes can be overwhelming. That’s why I treasure some quiet time at home all the more.
Creating Cosy (Gemütlichkeit)
What Hygge is for Scandinavian folk is Gemütlichkeit for Bavarians. Both describe the same longing for warmth and shelter, the art of making your home a sanctuary. It doesn’t take much. Some candles, one or more thick blankets and some tea or hot chocolate can transform a home into a cosy nest.
Gemütlichkeit deepens when nothing needs to be rushed. When you are not obliged to be productive but permit yourself to live slowly, you’ve reached a new level of relaxation.
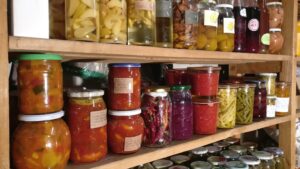
Pantry Gratitude
May I tell you a secret? Sometimes I go down to the basement just to look at all the jars of homemade preserves. I’m immensely grateful to my former self for having cooked, canned, fermented, and dried all the vegetables, fruits, and herbs that we can now consume. Having tomato sauce with our pasta, sprinkled with dried herbs, then a dessert made of frozen or canned berries, is like opening jars of preserved summer.
It’s also deeply satisfying to cook creatively with what we have and not run to the store and buy “fresh” ingredients from the other end of the world. Cooking from what we already have feels quietly abundant. Traditional winter recipes pave the way for a more sustainable life in harmony with the seasons. For me, re-learning to make do – and finding joy in it – is the best part of preserving.
Right now, I wish that January would never end. The slowness of the month and the cosiness I have created for us feel deeply relaxing. By month’s end, I know I’ll get restless, sensing daylight lengthen, but that’s weeks away. For now, I take my garden’s advice and allow myself to rest, relax, and contemplate my intentions, not resolutions, for the upcoming year.
I hope you, too, can embrace January’s slow energy! If you’re looking for permission to rest – you have it. It’s not a luxury – it’s essential. I’m making my home cosy, flowing with January’s energy, and caring for myself— I hope you’ll do the same.
I wonder if you feel this pull too—this permission to rest when January arrives. However you spend this month, may you find the rhythm that serves you best. Spring will come — but for now, winter is enough.
If you’re interested in more cooking and baking recipes, look here: Recipes – seasonalsimplelife.com Many (but not all) of the recipes there are authentically Bavarian.
Although our gardens are sleeping right now, that doesn’t mean that we gardeners have nothing to do! Garden tasks in January keep dedicated gardeners busy even during winter’s quiet months. Admittedly, it won’t be so many outdoor tasks like weeding and planting, but more indoor chores like maintenance and planning. However, these are not the only garden tasks in January. Below, I’ve listed 12 actionable tasks you should think about.
Note: My garden is in a USDA zone 7b, and these tasks are timed for zones 6-8. If you’re in a warmer or colder region, adjust timing accordingly based on your last frost date.
#1 Planning your garden in January
If you’re new to gardening and just starting, this may seem a bit overwhelming, but don’t worry, I’ve got you covered! Whether you have a large backyard you want to turn into a veggie paradise or just a patio or balcony with a few containers to cultivate in, planning is always the first step. This is also valid if you already have a garden or if you want to expand. Let’s dive in and start planning our dream garden step by step.
Drawing
Grab a piece of square paper and draw the patches you have or want to have. Just don’t get overambitious, but start small, especially as a beginner.
It’s best to start with one or two beds of about 1.2 x 1.2 metres (4 x 4 feet). Leave room for paths and future expansion.
Imagine what you’d want your garden to look like. Do you want a cottage garden with flower borders and herbs? Will you start with raised beds? Do you want to have a greenhouse and/or cold frames? Or is a permaculture garden what you’d like?
Dream big first – then adjust your ideas to your available space, budget, and time. Expansion is always possible later.
Creating your vegetable wishlist
The next step is to make a wish list of all the vegetables you’ll want to grow.
Focus on crops you and your family actually enjoy eating. It’s no use to grow spinach if you loathe it, but you should plant more of those radishes that your children are so fond of.
Add a few new varieties you’d like to experiment with. If you’ve already dipped your toe into gardening, you may want to try out new types of crops; put them on your list.
Adjust choices based on your space and experience level. If you’re a garden greenhorn, start with these easy vegetables for beginners. With more experience, you can try other, more complicated crops.
Ordering seeds in January
When you know which vegetables you want to grow, check the seeds you already have to see if they’re still germinable (see “2. Seed checking)”.
For new seeds, browse seed catalogues (my favourite garden task in January!) and order what you need and want.
January is an ideal time for ordering seeds, as widely popular varieties sell out later in the season.
If you want to learn more about starting a vegetable garden, this beginner’s guide will tell you everything you need to know on that topic.
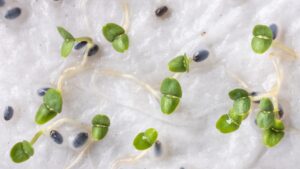
#2 Check your seeds for germination
Among the most important January garden jobs is checking if your seeds are still able to grow.
If you have seeds left, especially when they are more than two years old, you’ll want to check if they are still capable of germination. Some plants, like parsnips and celery, can be a bit finicky when it comes to germinating.
To find out if they’re still good, put some seeds between moist kitchen paper and observe for a few days if they germinate. If two-thirds or more sprout, the seeds are good to use; if it’s less, order new seeds.
Testing old seeds now prevents disappointment later when trays stay empty.
#3 Create new patches
January is a good time to build new patches. Don’t worry, you won’t have to dig up your garden (which would be especially tedious with frozen ground).
My favourite method of building new patches only requires cardboard and good planting soil or compost.
Gather enough cardboard to cover the ground of your new garden bed.
Peel off any plastic from the cardboard and lay it flat on the ground where you want to have the patch.
Distribute well-rotted compost or planting soil about 10 – 15 cm (4 – 6 inches) on it.
Done! If you want a detailed step-by-step guide on how to make these easy no-dig garden beds, hop over to this article.
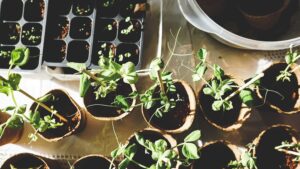
#4 Prepare your indoor growing station
Another January garden task is to clean trays, pots, and tools with hot water to remove pathogens and pests before sowing season begins.
Also, sterilise your growing soil by baking it at 150 °C (300 °F) for 30 minutes. This will kill, for example, fungus gnats but also pathogens that can be a real danger for seedlings.
If you don’t have any planting lights already, consider buying some. They’re a real game changer when it comes to indoor sowing, as the natural light usually isn’t sufficient to help develop healthy plants.
#5 Seed-starting
Toward the end of January, you can start sowing slow-growing crops indoors, especially in regions with long growing seasons. Remember: I’m talking about zones 6 – 8 here; if you live in a warmer or colder climate, adjust timing accordingly based on your last frost date.
Some vegetables, for example chillies and peppers, are real sloths when it comes to growth. To give them enough time to become large enough to plant them out eventually, sow them indoors at the end of January. Cabbage, cauliflower, leeks and onions can also be sown indoors at the end of the month. Want to read more about what vegetables you can seed-start in January? This complete guide to seed-starting in January contains a comprehensive list.
#6 Protect your plants
Whenever you’re out in winter, you’ll probably be covered up from head to toe to be protected from the harsh weather. Your plants need the same treatment.
One of our garden tasks in January, then, is covering them with frost protection fleece, which not only protects them from the cold but also from drying winds.
Still got any root crops in the ground? Cover them with an extra layer of mulch to protect them from the freezing weather.
You can also use the branches of your Christmas tree to cover your root crops or herbs, BUT ONLY if it hasn’t been treated with pesticides! We don’t want that in our gardens, do we? Always choose organic trees if you plan to use them in your garden.
#7 Harvesting
If you’ve ever harvested frozen vegetables in winter, you’ll know that, for example, lettuce becomes soft and slimy once it has thawed. The reason for that is that the plant you harvested can’t recover from the frost once its roots are cut off.
Rule of thumb: Never harvest frozen vegetables unless they are protected from frost or temperatures are above freezing.
#8 Watering
This may sound weird, but your plants can suffer from dryness even in winter, especially when it’s sunny and windy. This phenomenon is called frost drought.
When the ground is frozen, your plants can’t take up water, but they still evaporate moisture through their leaves, especially on sunny and/or windy days. Frost drought occurs when frozen soil prevents water uptake, but plants continue losing moisture through their leaves.
To protect your plants from drying out, you have to water them. This is best done in the mornings when temperatures will still rise, and the plants will get a chance to snatch up the water during the day.
#9 Pruning
January is an ideal time to prune:
Fruit trees
raspberries and blackberries
blueberries
currants and gooseberries
The best time to do that is while the plants are still dormant. If you haven’t done so earlier (ahem… yes: guilty), cut out any old growth from your fruit trees and berry shrubs to maintain their productivity in the upcoming season.
#10 Tool inventory and maintenance
Check if you’ve got everything ready for the upcoming season:
Frost protection and nets Do you have enough frost protection fleece? Winter may go on a bit longer, or frost may hit even after some warm days. In that case, you’ll want some spare fleece at hand.
Pest control supplies Stock up on pest protection nets for spring and summer if you don’t want to share your harvest with maggots. Also, if you have as many slugs in your garden as I have, make sure you have enough barriers like snail collars and snail fences to keep them off your vegetables.
By the way: Companion planting, which means planting vegetables together that support and protect each other, also helps to keep pests and diseases at bay. If you want to learn more about some foolproof pairs for your vegetable garden, you can explore proven companion planting combinations in this article.
Tool cleaning and repairs If you haven’t done it already, clean up your garden tools by scraping off the dirt and washing them thoroughly. Afterwards, it’s good to sharpen them, if necessary, and oil them. If something’s broken, repair it.
#11 Build what you need (and want)
The garden is still dormant, so why not head into your workshop and build what you’d like to have?
Whether it be a
trellis
raised beds
a scarecrow or
an insect hotel,
Now is a good time to put your designs into reality.
#12 Support the animals
Our feathery friends will be grateful for food, so hang up bird feeders and fill them with appropriate food for wild birds.
If you have squirrels in your garden, you can also hang a squirrel feeder with balanced squirrel food in one of your trees. Install the feeder far from the house and at least 2 metres (6.5 feet) above the ground.
Leave dead plant stems and fallen leaves on the ground as they offer hedgehogs and insects a great winter home. You can clean it all up later in spring when they’ve woken up from hibernation.
☐ Plan garden layout:- Vegetable Wishlist- Order Seeds- Create and Draw plan
☐ Check seeds for germination
☐ Prepare indoor growing station: ☐ Clean trays, pots and tools with hot water ☐ Sterilise growing soil by baking at 150 °C (300 °F) for 30 minutes ☐ Consider investing in planting lights
Frequently Asked Questions About January Garden Tasks
Can I really start seeds in January?
Yes! Cold-season crops like cabbage and cauliflower can be started indoors at the end of January. Peppers and chillies also need an early start due to their slow growth rate.
What if I live in a different climate zone?
These tasks are timed for USDA zones 6-8. Gardeners in warmer zones (9-11) can start earlier, while colder zones (3-5) should wait 2-4 weeks. Always check your last frost date.
Is it too cold to work in the garden in January?
Many January garden tasks can be done indoors (planning, seed starting, tool maintenance). Outdoor tasks like pruning should be done on milder days when plants are dormant.
Do I need to water my garden in winter?
Yes, plants can suffer from frost drought during sunny, windy winter days. Water in the morning when temperatures are rising so plants can absorb moisture before nightfall.
When should I order seeds for my garden?
January is ideal for seed ordering. Popular varieties often sell out by late winter, so ordering early ensures you get what you want.
A quiet month with a big impact
You see, even if almost nothing’s growing outside right now, there are still some garden tasks in January that we can do. And although the tasks seem different, they can be mostly summed up as: Preparation. Whether it’s planning new patches and crops, maintaining and repairing tools, building new things or seed-starting indoors, these are all steps that lead to the next season’s garden. Have fun and enjoy the (relative) calm. We’ll soon be digging in the soil again!
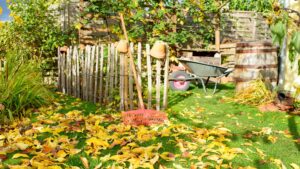
When the leaves start to paint warm hues on the landscape, it’s time for us gardeners to roll up our sleeves for the last time this year and do an autumn garden cleanup.
But what does autumn garden cleanup mean? In short, it’s the process of preparing your garden for its winter rest. Just like preparing a child for bedtime by brushing their teeth, giving them a bath and putting on their PJs, we clear out dead plants from our garden, manage fallen leaves and protect it from cold weather damage.
In this guide, I’ll walk you through the essential steps of autumn garden cleanup, from timing your efforts to sustainable practices that benefit both your garden and local wildlife.
Importance of an autumn garden cleanup
An autumn garden cleanup isn’t just for appearances, but helps our garden to stay healthy for the seasons to come.
It prevents the overwintering of pests and diseases and improves soil health for the next growing season.
Additionally, an autumn cleanup enhances our garden’s appearance during the winter months.
And lastly, it will reduce our workload next spring.
Timing your autumn cleanup
It’s important to choose the right timing for your autumn cleanup. Starting too early may deprive beneficial insects of their habitat, while starting too late may make cleaning up more difficult.
Roughly put, an autumn garden cleanup typically takes place between late September and early November. There is no one-size-fits-all date, though; it rather depends on the climate you live in:
Northern regions have earlier frost dates, starting in September to early October, while southern regions have their first frost later in the year, sometimes not before November or even December. In coastal areas, frost also comes late.
Also, growing seasons are shorter in northern areas and longer the nearer you get to the equator.
An additional factor is the altitude of our region: the higher we live, the earlier the first frost may come.
Knowing all that, we’ll want to start cleaning up our garden early in colder and/or wet climates. The warmer the climate we live in and the drier, the later we may leave the time to clean up.
Keep in mind, however, that these are general guidelines. Local weather patterns, microclimate variations, and specific plant needs should always be considered when determining the optimal timing for autumn garden cleanup.
Signs that indicate it’s time to begin
There are several signs that indicate it’s time to start a garden cleanup:
Nighttime temperatures consistently drop below 10 °C (50 °F).
The first frost date is approaching.
The leaves change colour and start to fall.
Annual plants finish their life cycle.
Perennials begin to die back.
Tasks for autumn garden cleanup
I always recommend a gradual approach over several weeks to cleaning up your garden. It’s way better than trying to do everything at once, which will only lead to overwhelm. Besides, a longer cleanup time allows for a longer enjoyment of all those beautiful late-blooming plants.
Vegetable garden
✅Harvest late vegetables like beetroots, carrots, celery, parsnips and parsley roots.
✅Before the first frost, cover spinach and winter lettuce like lamb’s lettuce with a special gardening mesh that will protect your vegetables from the cold.
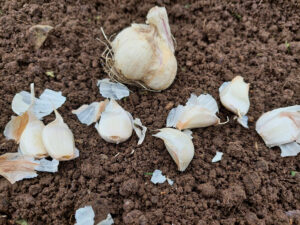
✅ Plant garlic and winter onions to give them a head start for next year’s harvest. Look here for a comprehensive guide on cultivating garlic: How To Grow Garlic: Complete Planting Guide
✅ If you haven’t sown cover plants in August or early September, cover the soil with mulch.
Orchard
✅ Harvest the last fruits from the trees to avoid pests and diseases from overwintering and spreading.
✅ Remove and destroy any mummified fruits, that is, dried, shrivelled fruits that are still on the branches. Also, clean up fallen fruit to prevent disease spread.
✅ Check for and remove pest egg masses or cocoons.
✅ Trim dead, diseased or crossing branches from trees and shrubs. For the overall pruning of fruit trees and bushes, late winter is a better time.
✅ If your area is prone to winter sunscald, consider whitewashing the tree trunks. The white colour will reflect the sunlight so that the bark will not heat up too much. The tree temperature changes only slightly, which is great, considering that extreme temperature fluctuations are the cause of sunscald.
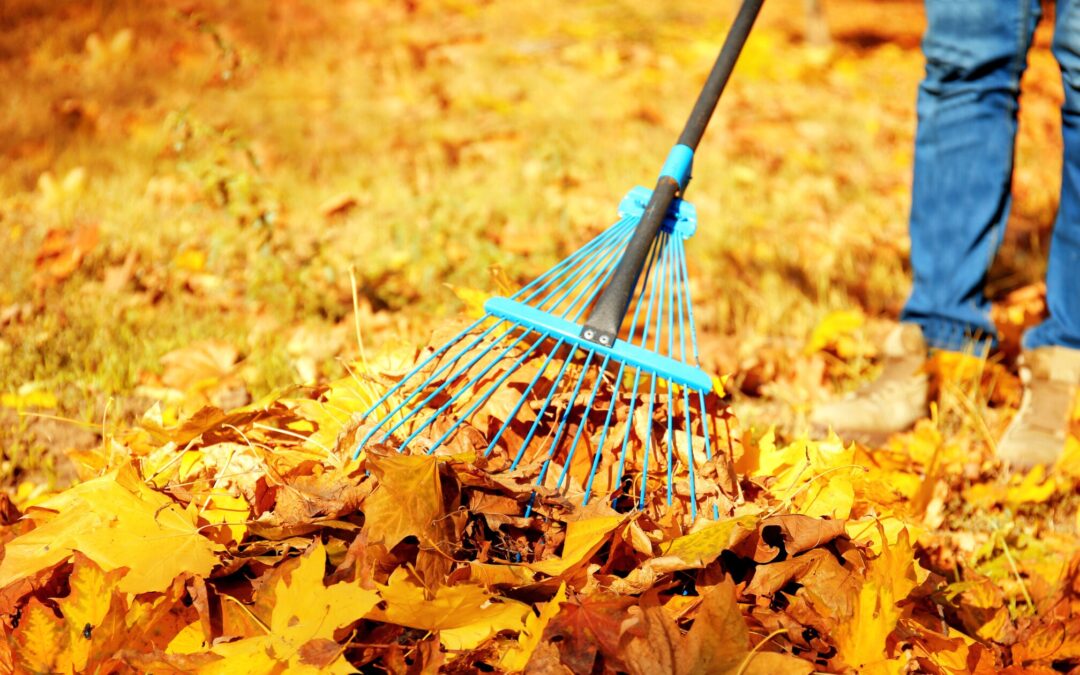
✅ Rake fallen leaves and remove those with a disease. Use the remaining leaves as mulch, either under the trees or in the vegetable garden. You can also create a leaf compost. The leaves will rot very fast, and the compost will be available in spring. Additionally, this compost heap will make a shelter for hedgehogs and insects.
✅ Spread compost or well-rotted manure under fruit trees and shrubs. Make sure to avoid direct contact with the trunks.
✅ Cover the soil beneath the trees and shrubs with mulch and make sure to extend the mulch to the trees’ drip line, which means the radius of the treetops.
Ornamental garden
✅ Remove spent annual flowers and compost any disease-free plant material.
✅ Cut back the dead foliage of perennials but leave some stalks for wildlife habitat. Note that some plants, like ornamental grasses, can be left standing for winter interest and wildlife habitat as well.
✅ Spread mulch around perennials and shrubs, and give sensitive plants insulation with extra mulch.
Remember, a thorough fall cleanup doesn’t mean creating a sterile environment. Leaving some areas slightly untamed can provide crucial winter habitats for beneficial insects and wildlife. That way, we can strike a balance between garden health and ecological responsibility.
Protecting sensitive plants
Depending on your hardiness zone, some plants require special protection to survive cold winters. In my garden, for example, I need to care especially for Mediterranean herbs like rosemary, thyme, and oregano, as well as the artichokes in my DIY greenhouse.
I mulch the plants with leaves, hay or straw. Then, I put straw onto them so that they are covered with it and fix that with twigs. You can also use protective wrapping made of non-woven material or jute. Do not use plastic, though, as moisture will build up beneath it and cause the plant to rot.
During winter, especially when it’s wet, you should check the plants for rotting. In that case, remove the mulch and protective layers and replace them with new, dry material.
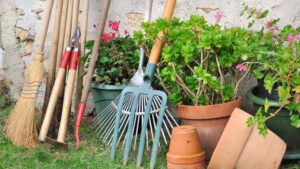
Tool maintenance
Once you’re finished with cleaning up your garden, it’s time to care for your garden tools.
✅ First, clean all your garden tools thoroughly by removing any dirt and debris. Soak the tools in warm, soapy water, then scrub the dirt off and rinse. Let them dry well.
✅ If necessary, sharpen your tools with a file or a sharpening stone.
✅ Repair any damage (if possible), tighten loose screws, bolts and nuts and replace any broken or worn parts.
✅ Apply vegetable or machine oil to the metal parts to prevent rust and keep them moving smoothly.
✅ For wooden handles, use linseed oil to protect and nourish the wood
✅ Lastly, store your tools in a dry space, for example a garden shed, a garage or the basement, to prevent moisture build-up.
Conclusion
A garden cleanup in autumn is more than just tidying up: it’s an investment in the health and vitality of our garden.
By removing spent plants, protecting sensitive specimens and using fallen leaves as mulch or compost, we not only prevent pests and diseases from overwintering but also create a fertile environment for the next growing season.
Your garden has given you months of joy and abundance; now is the time to return the favour by preparing it for its winter rest. So, embrace the crisp autumn air, put on your gardening gloves, and tackle your autumn cleanup with enthusiasm.
Happy gardening, and here’s to a productive autumn cleanup and a glorious garden in the year to come!
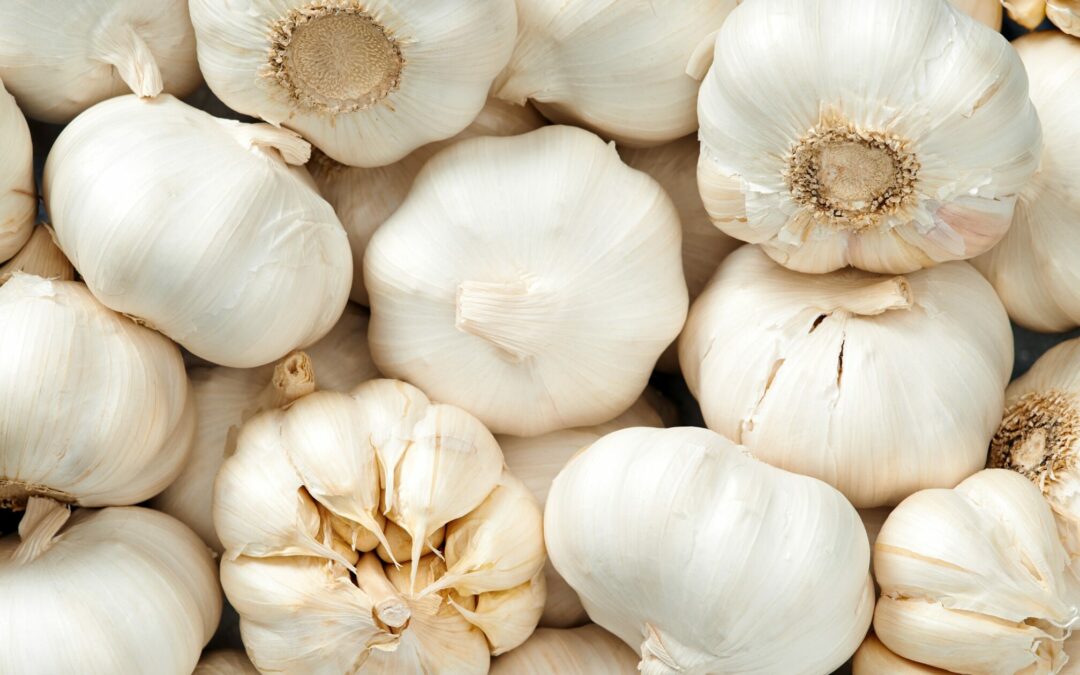
Garlic is such a great vegetable! It’s a star in the kitchen, it’s healthy, AND it’s easy to cultivate, even if you’re a complete beginner. Don’t believe me? Then read on! This guide covers everything from choosing the right planting time to storing your harvest. I’ll give you an overview of the different types of garlic and show you exactly how to grow garlic. Following these steps, an abundant harvest is inevitable!
Choosing your garlic
Hardneck vs Softneck
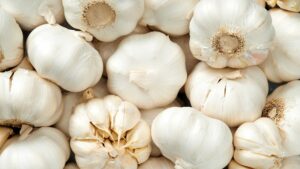
Garlic is divided into two groups: hardneck and softneck varieties.
Hardnecks, as the name indicates, develop a hard flower stem or scape, which is edible, as well. Hardneck bulbs form a single ring of large, easy-to-peel cloves around a central stem. Hardnecks are more cold-tolerant than softnecks, which makes them wonderful for planting in autumn, and they have a strong, sharp flavour. My favourite hardneck varieties are ‘Ajo Rosa’, ‘Deutscher Porzellan’ and ‘Chesnok Wight’.
Softneck varieties build a soft stalk and usually have a less pronounced flavour. They are better suited for warmer climates or spring cultivation. The garlic found in stores is usually a softneck variety, as these types are better suited for machine handling. Softneck varieties I like are ‘Thermidrome’, ‘Germidour’ and ‘Cledor’.
I recommend starting with hardneck varieties. They’re more reliable, produce bigger cloves, and you get the bonus of garlic scapes to cook with.
Even though its name suggests otherwise, elephant garlic is not a garlic variety but a leek relative. Nevertheless, it can be harvested and used just like real garlic.
Cloves vs Cormels
There are two different ways of planting garlic:
The first option is planting cloves. You simply put single cloves into the earth, and each clove grows into a garlic bulb. It’s easy and the fastest way to get a good harvest.
Option number two is planting cormels. When we let garlic blossom, it will build out tiny mini-cloves or cormels on the scape. You can plant them as well, but in their first year, they’ll only become a clove. This clove can be planted a second time, and then it’ll develop into a bulb.
Cultivating garlic from cormels is more cumbersome and takes longer to produce a harvest. On the pro side, you don’t have to sacrifice cloves from your harvest. I mostly choose the faster way of planting cloves, though.
Where to buy seed garlic
It seems easy to buy some garlic in the supermarket and plant it in your garden. However, supermarket garlic usually comes from sites in very warm climates. If your climate is cold, store-bought cloves won’t grow very well in your garden.
Furthermore, supermarket garlic is usually treated with a sprouting inhibitor to prevent sprouting in the market. However, this also keeps the cloves from sprouting in your garden.
If you must buy garlic for growing in the supermarket, go for organic garlic, which is less likely to have been treated with an inhibitor.
A better possibility to get good garlic seeds for planting is to look for local seed manufacturers. Their cloves are well-adjusted to your climate. Or ask friends who already cultivate garlic if they’ll give you a few cloves for planting.
I always set the largest bulbs of my garlic harvest aside and use their cloves for planting. That way, I develop and gather garlic cloves that are perfectly adjusted to my garden conditions.
Choosing the right planting site for garlic
Sunlight
First of all, select an area that gets at least 6 – 8 hours of full sunlight per day. Light shade is ok, but the bulbs and thus the yield will be smaller. The best position for planting garlic is on a south-facing bed without any tree shade.
Soil
Garlic is a bit fussy about the soil it wants to grow in. It likes a loose, crumbly, yet not too light soil that its roots can easily penetrate.
The most important factor for where to grow garlic is drainage. Garlic will rot in waterlogged soil, so good drainage is essential.
Garlic doesn’t like weeds (who does?), so make sure that the bed you want to cultivate garlic in is weed-free.
Also, mixing in compost won’t hurt as it’ll help to improve the soil structure, drainage and fertility. Fresh manure, however, is not suitable for the soil you want to plant garlic in, as it causes bulb splitting.
If your garden doesn’t provide good conditions for garlic, think about creating a raised bed. You can even cultivate garlic in planting pots.
How to plant garlic: step-by-step
If you follow this step-by-step guide, you’ll be rewarded with an abundance of garlic next summer!
When to plant garlic
There are two possibilities for when to plant garlic:
Autumn
Planting garlic cloves between the end of September and the beginning of November will give them a head start. They’ll grow until it becomes too cold, overwinter and restart growing in spring. That way, the bulbs will be much larger, and that’s why I recommend planting garlic in autumn.
Spring
If you didn’t plant garlic in autumn, you can still do so in early spring. Plant the cloves as soon as the soil is workable. Depending on your growth zone, that’s between mid-February to late March. Garlic needs some cold to develop bulbs and not shoot into bloom; therefore, you must plant it early enough to still catch some of the cold weather. Garlic that has been planted in spring will develop equally fine bulbs, albeit smaller ones, that you can harvest the same year.
How to plant garlic
Soil preparation
Before planting, thoroughly remove any weeds from the patch as they compete for nutrients.
It’s always a good idea to add some compost to the patch to enhance nutrients and organic matter in the soil. (Don’t know your soil type? Here’s how to determine it. You can also dig in manure, which should, however, be well-rotten, as fresh manure would be too sharp for garlic.
Loosen the soil a bit with a garden fork by digging into it and wiggling the fork a bit. That way, the garlic can set its roots deeply into the ground, and it may even be easier to harvest the bulbs in summer.
Both the compost/manure and the loosening of the soil support good drainage and soil structure.
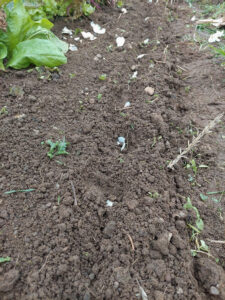
Planting garlic
The easiest and most common way is to break up the bulb and stick the single cloves into the soil. Use the largest and healthiest cloves – usually the outer ones – and leave the papery skin on as it protects the clove from rot and disease. Discard any cloves that are soft or squishy, discoloured, diseased or in any other way damaged.
The pointed tip must face upwards. That’s where it’ll start sprouting, and we want it to be able to sprout upwards via the sunlight. The flat, rounded end will produce the roots.
I recommend planting garlic in rows with a distance of 15 cm between cloves and 25 cm between rows. Within the rows, you make holes of about 4 – 6 cm (1,5 – 2,5 inches) for cloves, 1 – 2 cm (0.3 – 1 inch) for cormels. A dibble can help with preparing the holes. Put one garlic clove or cormel per hole and cover it with soil that you slightly press around it.
Break up the bulb so that you get out the single cloves.
Break up the bulb so that you get out the single cloves.
Always plant garlic with the tip facing upwards.
Watering and mulching
A great advantage of planting garlic in autumn is that usually the soil is already sufficiently moist. That way, we don’t have to water the cloves at all. If it’s very dry when planting, water the rows with the freshly set cloves.
I don’t water my garlic after planting, but depending on your climate, it may be necessary to do so.
If you’ve followed me for some time, you know that I’m a huge fan of mulching. So, when I’ve planted my garlic, I put on a thin layer of mulch, either straw, dried leaves, well-rotted compost or grass clippings. When the sprouts show and the weather tends toward freezing, I add more mulch to protect the cloves from extreme cold and keep the soil moist and weed-free. However, garlic can develop fungal and viral diseases when mulched too thickly, so make sure that the mulch layer is not thicker than about 3 – 5 cm (1 – 2 inches).
How much to plant
As a rule of thumb, I calculate 8 – 10 cloves per person. For my family of three, that means about 30 cloves of garlic, which may sound much but doesn’t take up much space.
If you’re very pressed for space, garlic can be planted well between strawberries, carrots, parsnips, lettuce or tomatoes, where it’s more of a gap filler and needs very little space. As a side effect, those plants profit from garlic’s antifungal characteristics as well as its repellent smell. If you want to read up more on companion planting and what veggies go well together, hop over here.
If you’re a beginner to vegetable gardening, I recommend starting with 10 – 20 cloves to get a feel for it.
How to Care for Your Garlic
Autumn (if Autumn planted)
2 -4 weeks after planting, green shoots will appear. When it gets too cold, the plants will stop growing and go dormant. Don’t worry, they’re fine, even though they have sprouted already.
Apart from removing weeds, you don’t have to do anything for your garlic. If it’s very dry, water it, but that’s usually not necessary. Cover it with mulch, though, to protect it from cold temperatures and drying out.
Winter (December – February)
In winter, the plant is dormant, and although there’s no visible growth above ground, the roots develop further underground. This cold period is essential for producing bulbs.
During this time of rest, you’ve got nothing to do. Don’t disturb your plants. After severe frost periods, you may want to check that the cloves have not been heaved out of the ground. If so, just press them back in carefully.
Spring (March – May)
When the air grows warmer in spring, scrape the mulch away so that the soil can warm up.
If you haven’t planted garlic in autumn, early spring is the second-best time to do so. As soon as the soil is workable, plant the cloves as described above.
Weeding
Remove weeds as they will compete with the garlic for nutrients and water. It’s best to weed by hand as garlic has shallow roots that can easily be destroyed by hoeing.
The leaves grow tall and lush now, and the plant builds up energy for bulb development.
If the soil is compacted, gently loosen it around the garlic plants to improve drainage.
Watering
Keep the garlic well-watered, especially as the weather gets warmer, but avoid over-watering it. Inconsistent watering can cause bulb splitting, that’s why watering a little but more often is better than occasional soaking. Always water at ground level and not overhead to avoid diseases. The best time for watering is early morning.
To check your soil’s moisture, dig in about 2 – 5 cm (1-2 inches) deep with your finger: the soil should be moist but not soggy.
Fertilising
A healthy dose of a light nitrogen-emphasised fertiliser, for example, stinging nettle manure or blood meal, provides nutrients in spring. By mid-May, you should stop all feeding, as it would lead to leaf development instead of bulb formation.
Pest and disease control
Keep an eye out for pests and diseases like thrips or mould. Remove ill plants immediately to keep pests and diseases at bay.
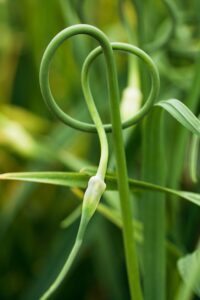
Scape removal (hardneck varieties only)
These beauties are the scapes. If you let them on the plant, they’ll burst into bloom, which is quite a pretty sight and later on develop cormels. If you want to get large garlic bulbs, however, you must cut the scapes off.
If you cultivate hardneck garlic, remove the scapes (i.e. flower stalks) as they form so that all the energy goes into the bulb and thus enhances growth. The scapes are ready to harvest when they’ve made 1-2 complete curls and are still tender and flexible. You should be able to snap them off easily with your fingers. If you wait too long, they’ll straighten out, become woody and fibrous, and will be tough to eat. The best test is to gently bend the scape – if it bends easily, it’s perfect. If it feels stiff or starts to crack rather than bend smoothly, you’ve waited a bit too long (though they’re still edible, just tougher).
The cool thing is that scapes are quite delicious themselves! They have a mild garlic flavour and you can use them like spring onions. Chop them into stir-fries, pasta or pesto, for example, or grill them whole as a side dish. Once cut off, they can be stored in the fridge for 2 – 3 weeks.
Common problems and solutions
We always hope that our crops go through the seasons without any problems and reward us with a large harvest. But although garlic is a very undemanding crop, some issues may occur. Let’s have a look and see how we can deal with them:
Yellow Leaves
If your garlic’s bottom leaves turn yellow in June/July, that’s perfectly normal: the bulbs are maturing.
If the problem occurs in spring, however, we’ve got a problem! Usually, the cause is overwatering or a nutrient deficiency.
What to do: Check if the soil is waterlogged. If it’s dry, feed the garlic with dissolved nettle manure or liquid seaweed.
White Rot
White rot is a serious disease! The first step is an early yellowing of the leaves and the formation of a white, fluffy mould on the bulb base. The bulb then becomes soft and decays, developing a strong odour.
What to do: Remove the affected plants immediately and throw them in the bin. Do NOT compost them!
White rot cannot be cured or treated, and it remains in the soil for 15 – 20 years. That means, if you get white rot in your garden, you can’t plant any alliums (garlic, onions, leeks) on that patch for at least 15 years.
To prevent white rot, you should only use certified seed garlic and practice crop rotation. Also, make sure your soil has good drainage.
Rust
When your garlic leaves show orange-brown spots or streaks, they have caught rust. It usually appears in damp conditions and is more common in softneck varieties.
What to do: Improve the air circulation by removing weeds and – in the first place – planting your cloves with enough space in between.
Rust usually doesn’t kill the plant, but you should remove all badly affected leaves. Do NOT compost them.
You’ll still get a usable harvest, but it may be slightly reduced.
Bolting (Premature Flowering)
While flower stems or scapes are normal in hardneck varieties in May/June, you have to watch out for scapes that appear much earlier than that and scapes in softneck varieties.
The phenomenon is more common in spring-planted garlic and is usually caused by temperature stress or the wrong variety.
What to do: Remove the flower stems immediately (these you CAN compost). The plant will still produce a bulb, albeit a smaller one.
To prevent bolting, plant your garlic at the right time and choose appropriate varieties.
No Bulbs Formed
Usually, the cause for no bulbs forming is the wrong timing in planting. Garlic needs several weeks of low temperatures to sprout, which is why it’s best to plant it in autumn. If you’ve planted it either too late in spring or this spring didn’t have a cold period, the garlic didn’t get the trigger for forming bulbs.
Another, less common cause is that you fertilised with too much nitrogen late in the growing season. Nitrogen enhances leaf growth but not fruit (or in this case: bulb) formation.
What to do: Stick to autumn planting for reliable results. If you plant in spring, do it as early as the soil is workable.
Harvesting and storing garlic
When to harvest garlic
As a rule of thumb, garlic takes 8 – 10 months if it’s an autumn variety and 4 -5 months for spring varieties to become ready for harvesting.
We can harvest it, therefore, in June and July if it was planted in autumn and in July and August if it was planted in spring.
The exact timing, of course, depends on the variety and the weather.
How to know when garlic is ready to be harvested?
You know that the garlic is ready for harvesting when the bottom third to half of the leaves have turned yellow or brown, while the upper leaves are still green and start to flop over. The bulb wrapper must still be intact, and the bulbs should be closed. If you wait too long, the bulbs may open up, which reduces their storage time.
Don’t wait until the leaves die back or collapse completely. In that case, the bulbs will split and deteriorate, which, as a consequence, doesn’t allow them to be stored well.
If you’re unsure about whether your garlic is ready to harvest, carefully dig up one bulb to check its size and development. If the bulb is clearly defined and shows a tight skin, it’s ready.
Harvesting
Choose a dry day for harvesting. Dry soil makes lifting the bulbs out easier and cleaner, and they can be stored for a longer time.
Loosen the soil around the garlic with a garden fork and pull out the bulbs. Clean up the garlic right on the bed by carefully removing the outer skin, which is usually already very loose. That way, there won’t be any soil on the bulbs, and they are ready to cure.
Curing
Curing is an essential step after harvesting garlic. It dries the outer skins and seals the cloves, and by that dramatically extends the garlic’s storage life. If you skip this step, your garlic will rot within a few weeks!
For curing, place the garlic into bundles and hang them in a dry, well-ventilated area for about two weeks. If you have a canopy at your house, a garage or even a balcony that’s protected from rain, that’s an ideal place. Just make sure that the garlic is out of direct sunlight, as that would cause bleaching and a degradation of the flavour.
If you don’t have a place to hang your garlic up to cure, however, you can always cure it lying flat on a rack or a slatted shelf. Keep the stems attached (they’ll dry down into the bulb) and don’t pile the bulbs on top of each other. Every few days, you should turn the bulbs to ensure that they’ll dry evenly. If you’ve got no place outdoors, cure your garlic indoors in a dry place (no moist basements!).
Depending on your curing location (and the weather, if it is outdoors), curing takes between 2 and 4 weeks. The garlic is ready for storage when the bulbs’ outer skins have become papery and dry, the stems are completely dry and brittle, and the roots have shrivelled.
Once your garlic is fully cured, you should brush off any remaining soil, but don’t wash the garlic! Then, either braid the stems if you have softnecks or bind the hardnecks together. Now it’s ready for storage.
How to store garlic
There are a few things we need to observe when storing garlic.
Optimal Storage Conditions
The perfect environment for storing garlic is a cool place with temperatures between 10 and 15 °C (50 – 60 °F). It should be dark or at least dim, because light causes sprouting. The place should have low humidity (about 50 – 60 %) and good air circulation.
These conditions are commonly found in a pantry, utility or spare room. I store my garlic in the basement, which is cool, dim, but thankfully not damp.
Storage methods
There are some ways to store garlic in such a way that it will last until the next harvest:
Mesh bags or nets
Putting garlic bulbs into mesh bags or nets is an easy method to store garlic, especially hardneck varieties, for the long term. The bags or nets provide excellent air circulation and make it easy to check on the bulbs. You can easily hang them from the ceiling or a shelf, and thus they won’t take up too much room
Braiding (softneck only)
Braid the stalks of softneck garlic while they’re still slightly flexible and hang them from the ceiling or a shelf in a cool and dry place. As with mesh bags, braids provide good air circulation and don’t take up much room.
Wooden crates or boxes
Put an old newspaper on the bottom of a crate or box and put garlic bulbs on it. The bulbs should not touch. Cover the bulbs with a second newspaper and go on layering the bulbs in the crate. Don’t stack them too deep, though. 3 – 4 layers is the maximum. This is a good method of storage for large harvests, but you must check the bottom layers occasionally and discard any rotten bulbs as soon as possible.
Paper bags
This is a good method for small quantities: poke some ventilation holes in a paper bag and put the bulbs in. You can hang the bag from the ceiling or a shelf if it’s not too heavy, or just store it on the shelf.
How NOT to store garlic
There are some mistakes in storing garlic that you need to avoid.
Storing in plastic bags
Plastic bags don’t allow for air circulation and trap moisture. Garlic will rot.
Storing in the fridge
Remember, garlic needs a cold period to sprout. If you store it in the fridge, you’ll imitate that cold period, and your garlic will be doing just that.
Storing in humid areas
High humidity and dampness will cause your garlic to mould and/or rot
Storing together with potatoes
Potatoes release a plant hormone in the form of a gas called ethylene. Garlic is sensitive to that gas and will start to sprout when exposed to it.
Expose garlic to light
Light, as well, stimulates sprouting, so keep your garlic in a dark or at least dim place.
Crop rotation
Crop rotation is essential for a sustainable gardening practice; it balances soil nutrients and thus improves soil health in the long run.
As with most vegetables, it’s not advisable to plant garlic in the same place year after year. Not only would it leach out the soil, but it would pave the path for pests and diseases. Instead, wait at least 3 – 4 years before replanting garlic in the same spot and don’t plant it where any other alliums (onions, leeks or shallots) have grown recently, this season or the season before.
Crop rotation prevents all this disease build-up (especially white rot) and breaks pest life cycles. If white rot appears, don’t plant any alliums there for 15 – 20 years.
Companion planting
Garlic is a member of the allium family and therefore mustn’t be planted near any other members of that family, like
Onions
Leek
Shallots
Chives or
Spring onions.
Many plants, however, are great companions for garlic. These are
Tomatoes
Lettuce and salads
All members of the brassica family (cabbage, broccoli, kale, Brussels sprouts, cauliflower
Pumpkins, zucchini and courgettes
Peas and beans
Root vegetables like carrots, parsnips and potatoes
Strawberries
Fruit trees or shrubs
Growing garlic in containers
If you don’t have a garden space, you can still grow your own garlic in containers. In fact, it’s quite easy to cultivate garlic without a garden bed, making it the perfect crop for people who only have a patio or a balcony.
There are, however, a few things you need to observe when growing garlic in containers.
Container requirements
The container you want to grow garlic in should be at least 30 cm (12 inches) high to give the roots enough space. The width is not that important; any size will do. The wider your container is, the more cloves you can plant.
Also, the material does not matter. Your planting container can be made from terracotta, plastic or even fabric; all pots work.
What is essential, however, is that the container has some holes in it to ensure good drainage. Garlic will mould and rot in moist soil, so it’s important that water can drain off quickly.
Spacing
When planting garlic cloves in containers, you must observe the same spacing as in a garden bed. Put the cloves 10 – 15 cm (4 – 6 inches) apart. If you just have small one-litre pots, put one clove per pot. In a larger pot with a diameter of 40 cm, you can put 6 – 9 cloves.
Container care differences
Caring for garlic in containers is slightly different from a garden bed.
For example, containers tend to dry out faster. For that reason, you must check the soil regularly, at best daily, and water if necessary.
Use a good-quality, multi-purpose compost mixed with 20 % perlit or grit for drainage.
Also, garlic in containers may need a light feeding in spring as the container soil has limited nutrients.
If you plant your garlic in autumn, which I recommend, you must put the container against a wall or insulate it if the weather gets very cold.
In general, put the containers in a place with full sun. Move them to track the sun if possible.
Apart from that, garlic has the same requirements as in a garden bed. It still needs a cold period to sprout, so leave it outside all winter. Planting and harvesting timing are the same as for garlic cultivated in patches.
Frequently Asked Questions
Can I grow garlic from supermarket cloves?
Technically, it’s possible, but I don’t recommend it for several reasons:
First of all, supermarket garlic is mostly imported and mostly from climates that are very different from yours.
And although it may look good and is safe to eat, the cloves may carry diseases that you’d spread in your garden when planting them.
Lastly, supermarket garlic is almost always treated with sprouting inhibitors to prevent the bulbs from sprouting in the market.
If you want to experiment, though, choose organic supermarket garlic, which is less likely to be treated. You must understand, however, that the results will be unpredictable.
My recommendation: Instead of using supermarket garlic, spend 5€/£/$ (or whatever your currency is) on certified seed garlic for much better results.
Can I plant garlic cloves that have sprouted in storage?
Yes!
Sprouted garlic cloves from your pantry or storage can still be planted, and they’ll often grow just fine. The green sprout shows the clove is viable and ready to grow.
However, sprouted cloves may have used some of their stored energy, so they might produce slightly smaller bulbs than unsprouted ones. Plant them as you would any other clove, with the sprout pointing upward. Just make sure the clove itself is still firm – if it’s soft, mushy, or mouldy, discard it.
This is actually a great way to use up garlic that’s past its prime for cooking!
Why didn’t my garlic form bulbs?
Garlic needs 6 – 8 weeks of cold (0 – 10 °C / 30 – 50 °F) to trigger bulbing (i.e. the formation of bulbs). If you plant it in a mild spring or too late in spring (March is already too late) without a cold period, it will not form bulbs.
Another reason for no bulbs is that you fertilised your garlic with nitrogen late in its season. While it’s ok to add a little nitrogen in March/April, it’s counterproductive to do so later, as nitrogen promotes the growth of leaves over bulbs.
Lastly, maybe you harvested too early, and what looks like no bulb is actually just an immature bulb.
My recommendation: Plant in autumn for reliable bulbs. Spring planting is always riskier.
My garlic cloves are very small – what went wrong?
One cause for small cloves is that you planted your garlic in the spring. The season is shorter compared to autumn planting, and therefore, the cloves will be smaller.
Check your soil’s nutrients and adjust them accordingly. Although garlic doesn’t need much, insufficient nutrients result in small bulbs.
Another reason is spacing. It’s tempting to set the cloves closely together, but they need at least 10 cm (4 inches), better yet 15 cm (6 inches) apart from each other to form good bulbs.
Make sure you water your garlic adequately during its growing season, that is, from late spring onward.
If you’ve got hardneck varieties, remove the scapes. Otherwise, the plant will put all its energy into flower-making instead of bulbing.
Don’t harvest too early, but give it time to mature.
Lastly, choose high-quality seed garlic over cheap cloves.
My recommendations:
Prepare your soil well and adjust nutrients if necessary.
Plant your garlic in autumn and space the cloves adequately.
Remove the scapes from hardneck varieties and
water your garlic consistently.
Is it too late to plant garlic now?
That depends on the current month:
October-early November: Perfect timing! This is prime garlic planting season.
Late November-December: Still possible in mild winter areas if the soil isn’t frozen. Get the garlic in the ground ASAP.
January: It’s risky. I’d only attempt planting garlic now in very mild areas. The bulbs will be small, though.
February-March: When you’ve missed autumn planting, switch to spring planting. Plant your garlic cloves as early as the soil is workable.
April-September: Now it’s too late for spring planting. Use this time to prepare your bed and source quality seed garlic for October planting.
My recommendation: Mark your calendar now for October and don’t miss the window!
How much garlic will I harvest from one clove?
One planted clove will result in one full bulb. Each bulb contains between 5 to 12 cloves, depending on the variety. So, one clove becomes 5 – 12 cloves at harvest.
Hardnecks typically produce larger but fewer cloves, usually around 6 – 8 large cloves.
Sofneck varieties have smaller but more cloves, usually around 10 – 10 small cloves per bulb.
On average, you can calculate your harvest by multiplying the number of cloves you planted by 6 – 10.
My garlic sprouted over winter – is that okay?
Yes, that’s completely normal for autumn-planted garlic!
2 – 4 weeks after planting in autumn, the cloves sprout and the green shoots reach a height of 5 – 10 cm (2 – 4 inches) before winter. In winter, growth stops or slows down considerably, only to restart vigorously again in spring.
So, if your garlic sprouted over winter, this is exactly what should happen!
Why you should grow garlic
Growing garlic is almost a no-brainer. Stick the cloves in autumn in the soil, forget about them during the winter, watch them joyfully growing in spring and harvest them in summer. Garlic is genuinely one of the easiest crops to grow, and even beginners get great results!
The key factors to a successful and massive garlic harvest are making sure that the soil has good drainage and planting the cloves in autumn. Oh yes, and be patient. That’s usually the hardest part.
The satisfaction of harvesting your own bulbs is enormously motivating. So come and join the garlic-planting club! With this guide, you have everything you need to know about it in a nutshell. A bountiful harvest is almost inevitable – as are the envious stares of your neighbours.
Tomatoes are one of the most popular vegetables in the whole wide world, not only among gourmets but also among us gardeners. And there are so many varieties out there: from teeny-tiny, pinhead-sized beads to enormous, almost melon-like specimens, in colours ranging from the classic red to orange, yellow, white, green and even black. There’s a tomato for everyone’s heart. There are so many varieties, I’d either need a much larger garden or at least three lives to try them all. When I’ve found a variety I love, however, I want to grow it every year. But why invest in seeds for tomatoes you’ve already successfully cultivated, when you can save them from your own fruits? It’s easier than you think, and it’s so satisfying to be part of the cycle of seed, becoming fruit, becoming seed again. I’ll show you which tomatoes you can harvest seeds from, what to look out for and how to make sure that they germinate well next season.
Why save tomato seeds?
Apart from the magic and fun, there are many more reasons to save your tomato seeds:
Cost
One seed package with 6 – 8 tomato seeds costs around 3 €. Now, I don’t know about you, but I’m not known for cultivating only one variety. More like 10 – 15. That would be 30 – 45 € just for tomato seeds every single year! Ehm…. no. Especially not, when I can get hundreds of seeds for free.
Adaptation
Plants adapt to their growing conditions. So, no matter what your garden’s conditions are, your tomatoes will, within one life cycle (!), adapt to them. Seeds from the plants in our garden, therefore, are better adjusted to your microclimate than any store-bought seeds ever will be.
Moreover, plants become increasingly resilient over generations. When you save seeds from your healthy tomato plants, you contribute to their future health.
Variety Preservation
Many heirloom tomatoes are bordering on extinction, and there are also quite a few rare or hard-to-find varieties. By saving their seeds, you take an active part in preserving those precious tomatoes and making sure that generations to come will still be able to cultivate and taste them.
Understanding Tomato Varieties for Seed Saving
Now, do we just go out and save tomato seeds? Not quite! First, you must understand that not all tomato varieties can be propagated by saving their seeds.
Open-pollinated tomatoes
Tomato blossoms have male and female parts. The male parts (anthers) contain the pollen, while the female parts (pistils) receive it and produce fruits and with them seeds. That way, tomatoes can be self-pollinating, seeing that male and female parts are so closely together, but they often get help in pollination from insects.
“Open-pollinated” means that those tomatoes are pollinated naturally, either by self-pollination or with the help of insects.
The cool thing about that is that open-pollinated tomatoes always produce the same kind of tomato (e.g. an ‘Indigo Rose’ plant produces only ‘Indigo Rose’ tomatoes) and all seeds harvested from an open-pollinated tomato will produce exactly the same variety next season. They breed “true to type”.
Which is great for us seed-collectors as we only have to, well, collect their seeds to make sure we can cultivate the same variety next year.
Heirloom tomatoes
We speak of heirloom tomatoes when the variety has been cultivated for at least 50 years or was commercially introduced before 1940.
All heirloom tomatoes are open-pollinated, but not all open-pollinated tomatoes are heirlooms.
Hybrid tomatoes
Hybrid tomatoes are a cross between different varieties. They have been created to enhance characteristics we want, like flavour, size, pest and disease resistance, colour and longevity. Unlike open-pollinated tomatoes, hybrids don’t produce seeds true to type; instead, they revert to their parents’ genes, either recreating one of them or creating a tomato with different characteristics. Hybrid tomatoes, therefore, are not suitable for seed-saving.
When you look at your seed package and F1 is printed behind the name, it’s a hybrid.
Open-pollinated vs cross-pollinated
Cross-pollination means that pollen from one variety has pollinated the blossom of another variety. It doesn’t alter the fruits, but the seeds are no longer true to type. In fact, cross-pollination creates hybrids and, as we’ve learned, hybrids are not suitable for seed-harvesting.
To avoid cross-pollination in our gardens, we should plant different varieties at a distance of about 3 m (10 feet) from each other. Another good method for guaranteeing that our varieties stay true type is to cover them with a finely-meshed cloth once they show buds. When the buds have opened, carefully shake the plant so that the pollen can reach its destination.
A good method to help pollination is to use an old electric toothbrush that you brush across the blossoms. The vibration of the toothbrush loosens the pollen from one blossom and lets it fall readily onto the next one, thus fertilising it.
When tomatoes form, you can remove the cloth.
The crucial step: Fermentation
Saving tomato seeds is easy, but it comes with a little catch: to make sure that the seeds germinate well next year and do not carry any diseases, we must ferment them.
Tomato seeds are enclosed in gel casings. These casings contain growth inhibitors that keep the seeds from starting to sprout inside the tomato. Fermentation breaks up the gel casings and removes the growth inhibitor. If we used the seeds without fermenting them, the gel casings and with them the growth inhibitors would still be intact and prevent most of the seeds from growing.
In our garden, when tomatoes fall to the ground, they decay and by that break up the gel casings. Fermentation copies that process.
By fermenting the seeds, we also make sure to kill any seed-borne pathogens and only cultivate inherently healthy plants.
How to save tomato seeds
Step 1: Choose the right fruits
Choose tomatoes that are ripe and healthy and show all the signs you like in a variety, that is, the appropriate (or even larger) size and flavour.
You can use overripe tomatoes, but make sure they aren’t damaged.
Always use tomatoes from more than one plant to maintain the genetic diversity. Also, if one tomato plant turns out to have a disease, e.g. the blight, you’ll still have healthy seeds from another plant.
It’s best to use tomatoes from mid to late season as they have adapted better to your specific garden conditions and climate.
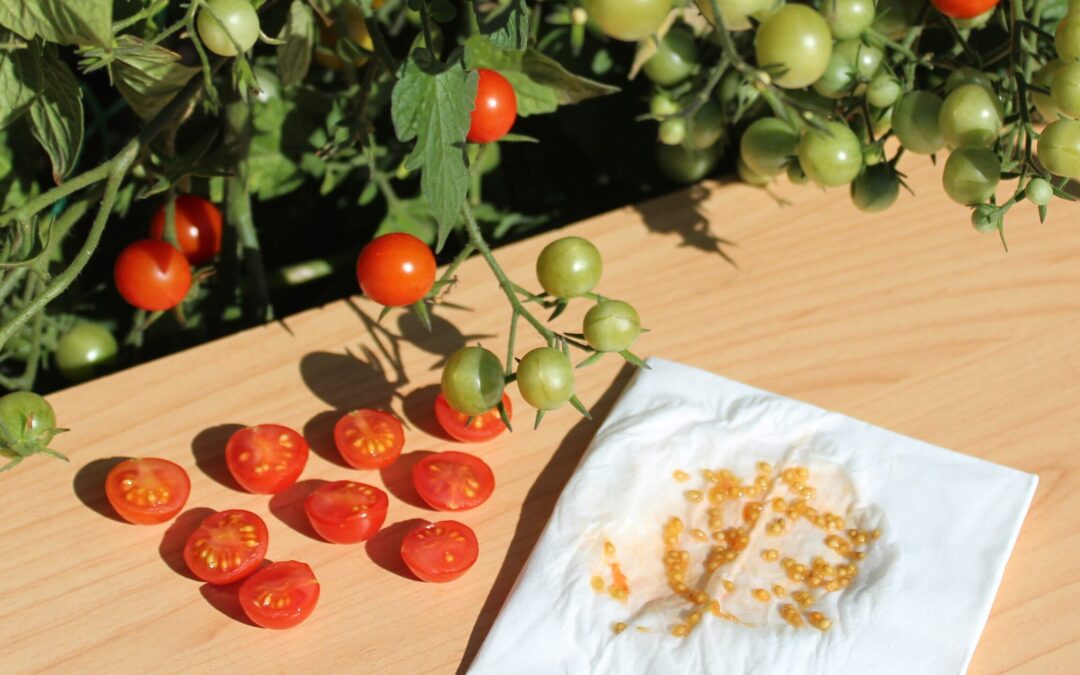
Step 2: Get the seeds
Wash them and cut them open around the middle.
With a finger or a spoon, scrape out the seeds and the jelly they’re in into a jar. Use the now seedless tomatoes for a salad or pasta sauce, or whatever you like to do with them.
Step 3: Water
Add water to the jar so that the seeds and the pulp can be stirred. I usually add about two fingers of water. Cover the mixture with a cloth; it needs air circulation.
Step 4: Labelling
Never trust your memory, but label the jar with the tomato variety you’ve got in there. You’ll thank yourself later.
Step 5: Fermentation
Put the jar in a warm place. I usually put it on the windowsill, but you should make sure that the temperature doesn’t change too much. Avoid any drafts. Temperatures between 20 and 25 °C (70 – 80 °F) are ideal for fermentation. If it’s colder, fermentation will still work, but it’ll take longer.
Stir your seeds every day. Usually after 3 – 5 days (depending on the temperature), they’ll sink to the ground. A little time later, an opaque film will form on the surface and – I’m sorry to say – the mixture will start to stink abominably. Take that into consideration when looking for a fermentation place. The kitchen may not be the best option.
The good news is: all these signs show that fermentation has started!
Step 6: Rinse
The good news is that once fermentation has started, you can remove the seeds from the jars. Pour them into a sieve and rinse them thoroughly. Take this process seriously. Rinsing not only removes the pulp and the now dissolved gel casings around the seeds, but it also stops the fermentation process.
Put the seeds back in the jar and fill it with water. Any seeds that float on the surface after this final rinse are bad and can be discarded.
Step 7: Dry the seeds
Rinse the rest again and put them on a tissue paper to dry. I either use the scrap of a kitchen towel or half a paper tissue, but you can also use waxed paper, parchment paper, coffee filters or a mesh screen over a plate. Remember to label whatever your seeds dry on. Stir the seeds so that they don’t clump.
Put the seeds in a warm place, away from direct sunlight. A good place in my house is the top of the fridge. Make sure temperatures are not too high, or else the seeds will sprout.
After one to two weeks, depending on your drying medium, the seeds will have dried.
Step 8: Storage
To check if your seeds are completely dry, try to break them. A dry seed breaks in half with a snap, while a still moist seed will bend or rip. Once the seeds are completely dry, you can store them in paper envelopes, brown glass jars or plastic bags. Make sure the seeds are really 100 % dry, especially when stored in plastic or glass containers. Otherwise, the moisture will make them mould and rot.
Remember to label the seed packages with the variety and harvest date.
Store the seeds in a cool, dry place. They are usually good for 4 – 6 years.
Final thoughts
As you can see, saving tomato seeds is easier than it sounds, and it’s so rewarding. One year from now, you’ll be making a tomato salad from fruits that only exist because of your seed-saving efforts. And imagine the satisfaction of telling your friends and family that the tomato salad they’re eating right now is not only from your garden but also grown from seeds you saved yourself! Admiring looks included.
Start now, choose some tomatoes you like, even if it’s only one variety, and save their seeds. You’ll be proud of yourself!
Wanna learn more about tomatoes? This article is for you then:
June is a time for harvesting in the vegetable garden. But if you think the time of sowing and planting is over, think again! June offers us gardeners the perfect opportunity to maximize our growing season with strategic plantings. If you want to harvest fresh produce all year round, this month presents ideal conditions for both cool-season succession plantings and warm-season varieties that thrive in the longer, sunnier days ahead. The keyword here is succession planting. After all, we don’t want to have an overwhelming harvest once and afterwards only empty patches. Smart planning this month sets the foundation for a productive garden that bridges the gap between spring’s early greens and summer’s abundance. To get an overview, I’ve prepared a list of vegetables to sow and plant in June.
Seed-start indoors
If you’re new to seed-starting, you may want to read up and learn about all the necessary steps and equipment. Also, as it’s warm enough now and I like to have my windowsills back to normal, I usually seed-start now in the greenhouse. Let’s have a look at what can be sown indoors in June:
Brassicas
I know it’s just the middle of the year, but nevertheless we must plan our winter harvest now. Late brassicas should be sown indoors now so that they are ready to plant out when the first spring vegetables like spinach, peas, or lettuce have been harvested, and you have some space in your beds again.
Members of the Brassica family that you can seed-start indoors in June are
Kale, palm kale and black cabbage (which is also a variety of kale)
Savoy cabbage
White and red cabbage (late varieties for making sauerkraut and storing)
Kohlrabi
Cauliflower
Broccoli
Brussels sprouts
Summer squash
It’s a good idea to seed-start a second batch of zucchini now and transplant them outside when the first batch gets slow and/or becomes infected with diseases, especially mildew. This is often the case during dry periods, and then it’s great to have some zucchinis ready to plant outside.
Lettuce
It’s good to seed-start lettuce indoors every four weeks. That way, we have a continuous supply of plants and will never run out of fresh lettuce during the growing season. Seeing that temperatures increase, however, we want to choose varieties that like warmer weather, like, for example, iceberg and oak leaf lettuce.
Sowing out lettuce every 3 – 4 weeks is not only a good method for a constant harvest but also makes sure that the beds are always covered.
Vegetables we can sow directly outdoors in June
Carrots
Now we can sow carrots for storing. Make sure you choose later varieties that are robust against low temperatures. Carrot seeds dry out quickly, so
Parsnips
Parsnips are related to carrots and they can also be sowed directly into the patches now for a late autumn harvest and for storage.
Beans
Both bush and runner beans can still be sown in June, either as a gap filler when some other vegetables are harvested or between heavy feeders like cabbages, cucumbers or tomatoes.
Spinach, Swiss chard
Both vegetables are wonderful gap fillers that grow fast and thus cover the ground. Additionally, they taste wonderfully and – mostly in case of the Swiss chard – are a very pretty sight.
Kohlrabi
You can either seed-start Kohlrabi now and plant them out later. Or, if you’ve got room now, sow them directly into the bed.
Lettuce
To fill your salad bowl regularly, you must continually sow and plant out lettuce. Now, we choose summer-proof varieties that are bolt-resistant.
Rocket salad
Sow it, watch it grow quickly, harvest the leaves and let it bloom. That way, it will spread across your garden.
Radishes
If you have radish varieties that are bolt-resistant, you can sow them out how. The early varieties, however, will not work anymore as they’ll only produce flowers and seeds now.
Radishes need only a few days to germinate and then not only show us the row but are a yummy vegetable for salads or as a ferment.
Beetroot
In spring, we sowed only a few beetroots for immediate consumption, but now we can throw out handfuls of beetroot seeds for a large harvest in autumn. Beetroots can easily be preserved by freezing, pickling or fermenting.
When harvest season arrives, you’ll want to know how to preserve all that abundance. My preserving guides cover everything from canning to fermenting.
Planting outdoors
No matter if you’ve seed-started vegetables in your living room or in the greenhouse, the seedlings must be hardened off before they can be transplanted outdoors. Start by putting your plants outside for 2 – 3 hours at first and prolong that time over a week. That way, you make sure that your veggies are healthy and sturdy enough for outdoor conditions.
Brassicas
All the cabbage plants we seed-started earlier that year are now ready to get outside. All brassica seedlings we have started indoors in April, like kohlrabi, Savoy cabbage, broccoli, Brussel’s sprout and cauliflower, as well as white and red cabbage, can be planted outdoors in June. Leave plenty of space between the seedlings so that you can plant celery in between later. Cabbage and celery are great companions in the patch and repel each other’s pests.
As in the weeks before, our monthly batch of lettuce wants to be planted outside.
Leek
Winter leek can be planted outside in June. A great place would be next to the carrots you can now sow directly into the patch. Leek and carrot are a great combination as they keep each other’s pests away. Alternate leek and carrot rows to get the best protection.
Fruit vegetables
If you still have pumpkin seedlings, transplant them out now. Also, if you have seed-started a second batch of cucumbers, peppers/chillies, zucchini and eggplants, transplant them now in June to fill the gap if any of the plants you’ve already in the garden get weak or infected by diseases.
When you prune tomatoes now, don’t throw away the side shoots but put them in a glass with water. They’ll build new roots, and you get additional tomato plants that you can transplant now!
General garden tasks in June
Mulch all plants larger than 10 cm / 4 inches. Mulching means you cover the soil with organic material like grass clippings, leaves, straw or wood chips. By mulching, you make sure that less water evaporates. Additionally, mulch suppresses weeds and thus your “weeding time” will be reduced considerably 🙂
Harvest whatever is ready in your garden. June is also the perfect time to harvest and dry herbs for later use.
Fertilise strong uptakers like cabbage plants, tomatoes, pumpkins and zucchini that were planted in May. Ideally, you have given them basic fertilisation when you planted them. Now it’s time for maintenance fertilisation. A great homemade fertiliser with plenty of nitrogen for hungry veggies is nettle manure. It’s free and easy to make. You’ll find a detailed description on how to make nettle manure here.
Still not enough garden talk? Then these posts may interest you: