When I first heard about fermented lemons, I wondered what you could use them for. After all, if you wanted to taste something salty, you’d simply add salt, wouldn’t you? And if you wanted a dish to taste more lemony, you’d add lemons, right? But like so often, you have to try something to form an opinion. I’ll never forget the moment I first tried fermented lemons: the taste of the lemons was so enhanced, yet neither too acidic nor too salty. It was bursting with flavour and (for a short time) it rendered me speechless. A whole new world of taste had opened up and I had to have them at home. You’ll be delighted to hear that it is super-easy to make fermented lemons by yourself!
Fermented lemons
Ingredients
8 whole lemons, organic! 90 – 150 g unrefined salt 2 tbsp freshly squeezed lemon juice as necessary
Instructions
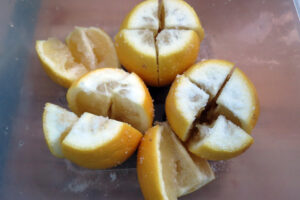
Wash the lemons in cold water, cut off the fruits’ edges (about 5 mm) and cut the lemons lengthwise twice almost (!) through. If you’ve done it right, your lemons have four wedges that are held together at the bottom. Remove the pips and put the lemons into a bowl. Sprinkle the salt into the cuttings and around the lemons.
Press the lemons into your fermentation container so that the brine shows on the surface. If the lemons are not completely covered, add some lemon juice. Sprinkle the surface with 2 tbsp salt, put a weight in so that the lemons stay under the brine and close the container.
Put the container onto a tray and let the lemons ferment for 21 – 30 days at a cool place without direct sunlight. Check from time to time if they are still covered with brine.
After 21 days, the fermented lemons are ready, but you can let them ferment longer which only adds to the taste. With time, the brine becomes a bit thicker and the lemon flavour intensifies.
Store the fermented lemons in the basement or the fridge for up to 18 months.
Variations
Add spices to your fermented lemons such as cinnamon sticks, cloves, coriander seeds, peppercorns, juniper berries or bay leaves. Or you can try out limes instead of lemons and add onions, garlic, coriander seeds, cilantro and chillis. There are still so many variations to try. If you’ve further ideas, leave a comment below.
You wanna start fermenting and dread what you have to buy for it? No worries! The cool thing about fermentation is that you don’t need any fancy fermentation equipment. A bowl, a cutting knife and board, glass jars or other containers as well as a weight to press the vegetables under the brine are enough to start. Let’s have a look at the basics you need and some of the fancy stuff you might want to buy later:
Fermentation equipment: Containers
First of all, please make sure that you don’t use any containers made of metal or plastic. Metal reacts with acid which can lead to a dissolving of metals into the brine. This can cause serious health problems! The same applies to plastic: not all plastics are acid-resistant. The softer the material the stronger it reacts to acid. If you use freezer bags as weights, make sure they don’t contain PVC or BPA.
Fermentation crocks
Traditional fermentation crocks have proved their worth as they store the vegetables dark and cool. If you buy a new one, check out its net weight as they are usually very heavy. Then add the weight of the vegetables and brine and think about if you can lift it when it’s full.
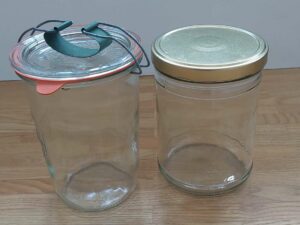
Glass jars and lids
I usually use twist-off or flip-top jars. They are cheaper than crocks and you can ferment smaller portions. Additionally, you can see through the glass what’s going on inside. On the other hand, it’s more likely that brine will bubble over the rim and you’ll have to put it on a dish or into a bowl to prevent a mess.
Airlock systems grow in popularity because they make things a whole lot easier. With an airlock, you can leave the whole thing to itself. You must make sure, however, that you leave enough space from the top of the brine to the top of the glass jar, at least 2 – 3 fingerbreadths.
Note: I know that many people just use clean cloth to cover their jars or open the jars every day during fermentation but the risk of mould-forming is so much higher with these methods! I always use the lid and – in case of twist-off jars – secure it loosely or – in case of flip-top jars – secure it tightly. The gases can leak out either under the lid or the rubber ring and you minimize the risk of mould-building.
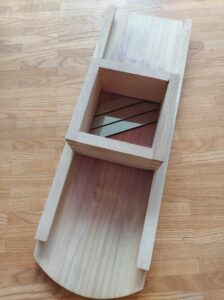
Cutting devices
It’s great if you have a cabbage slicer as part of your fermentation equipment, especially when you want to make sauerkraut or ferment other cabbages. As the name indicates, it’s great for cabbage slicing and it’s way faster than cutting cabbages with a knife.
If you’re just starting, however, you don’t need a slicer as you can also do the job with a knife and a cutting board.
I know that some people use the cutting or grating device of their kitchen machine. Go ahead if you like, but make sure that the slices are not too thin and mushy.
Bowls
Nothing to add: you just need a bowl of any kind (glass, metal or plastic) where you can gather all your sliced vegetables and mix them or knead them if you make sauerkraut.
Weights
Some people don’t use weights for fermentation, but I find them extremely helpful to keep the vegetables under the brine. Crocks usually come with suitable weights but if you don’t have any, you can use a dish for example.
You can also use stones but depending on their lime content they might react with the acid. You should at least boil them for 10 minutes before using.
There are also glass weights which are great, especially regarding hygiene. They are, however, comparatively expensive.
For beginners, I recommend using freezer bags. Fill them with water or pebbles and put them onto the covering (e.g. a cabbage leaf) to keep the veggies under the brine.
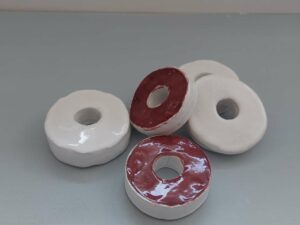
As I ferment a good deal and neither wanted to add to the waste with all those freezer bags nor wanted to sell my soul for good fermentation weights, I decided to make my own out of clay. I cut out circles of a 1 cm thick slice of clay, making their diameter slightly less than the opening of my jars. Then I cut a hole in the middle and glazed and baked the clay weights. During baking, they shrank a bit further and now their size is perfect for my jars.
You can also make weights from hardwood that doesn’t secrete resin like walnut. Keep in mind, though, that wood swells in brine! Saw a circle with a diameter of one centimeter less than the opening and drill a hole into the middle where the brine could get through. Put the wooden weight into water for one to two days and look how much it swells before you use it. I’ve never used them as I find the clay weights perfect for my needs but go ahead and try making wooden weights if you like and leave me a comment about it!
Tamper
Again, it’s great if you have a wooden cabbage tamper to squeeze the cabbage (or other vegetables) into the jars really tightly, but it’s not necessary to start fermenting. You can always use your hands or a (clean!) empty bottle to press the vegetables into your containers.
I’m sure you’ll find all the necessary fermentation equipment in your kitchen and don’t have to buy anything new. You can always add fancy things to your birthday list 😉 Let’s start fermenting!
Fermenting your vegetables is a marvellous way to preserve your harvest. Not only that but it can also be easily done. You don’t need any fancy equipment or ingredients, just your vegetables (or fruit) and a bit of salt. But although it’s easy for you to initiate fermentation, the process itself is complex and thus certain problems may arise. In this article I describe some of those fermentation problems and what you can do about them.
The fermented food is too salty
Well, that happens all to often, I’m afraid. To avoid that beforehand, you should add the salt to your vegetables in portions and taste them before you put them into your fermentation containers. When it tastes good to you, but you still have some salt left: don’t add it. It’ll be fine and taste wonderful.
If the veggies are already fermented and now you realize they are too salty, you could try taking out the portion you want to eat and putting it into a bowl with clear water. Drain it and repeat this process until all the salt has been washed out. Let it drain in a sieve (plastic or acid-proof metal) for 15 minutes and taste it. If it’s still too salty to eat, compost it or – better still – put it onto a part of your garden that’s crowded with weeds. The sauerkraut (or whatever vegetables you’ve fermented) will hold them at bay. 😊
The fermented food is too sour
That’s a question of personal taste. What’s too sour for one person is just right for the next one. Nevertheless, if it’s too sour for your liking, maybe it has fermented for too long. Next time, test the taste a bit earlier.
The fermented food is not sour enough
Take the jar out of the fridge and let it ferment further. Try it after a few days and if it’s still not enough to your taste, add a little bit of sugar (1/2 tsp per kilogram) so the lactic acid bacteria have something to eat and can produce more acid.
The fermented food is too dry
It may seem as if the brine has vanished when you had the glass in the fridge but it only contracts during resting there. Just press the vegetables together. If you still think, there’s too few brine, add some brine from another glass, but never water.
The fermented food tastes strange
“Strange” is a subjective term, but it’s likely that some of the unwanted bacteria have found entry into your food. Listen to your gut and if it tastes bad, throw it away and start over with fresh vegetables.
The fermented food is too soft
There are different reasons for that:
Fermentation happened too quickly (maybe because it was too warm)
The salt was not distributed evenly
You didn’t use enough salt
The weight you used to keep the vegetables under the brine wasn’t heavy enough
If the vegetables still taste good, you can eat them.
Mould on your fermented food
Believe it or not: green or grey mould on the surface is quite normal. Throw away the upper layer. If it’s black, pink or orange mould, however, or if it smells strange, throw it away.
The fermented goods have a strange colour
Fermented food darkens with storage or too high a temperature. An uneven distribution of salt may also be a reason for darkening. If it smells and tastes good, you can eat it anyway.
Is it pink? Certain spices or vegetables may be responsible for that, for example shiso or radishes. But it may also be yeasts that sneaked their way into your food. If that’s the case you must throw it away.
There’s a white layer on the surface of the brine
That’s most likely kahm yeast and it is harmless. I’ve also had it and tried to remove it but that’s hard because it dissolves into tiny fragments the moment you touch it. It’s best to leave it alone and carefully drain it before you eat your vegetables.
It’s always good to know what problems can happen in fermentation and be prepared. I hope you’re still willing to give it a try and start fermenting your veggies!
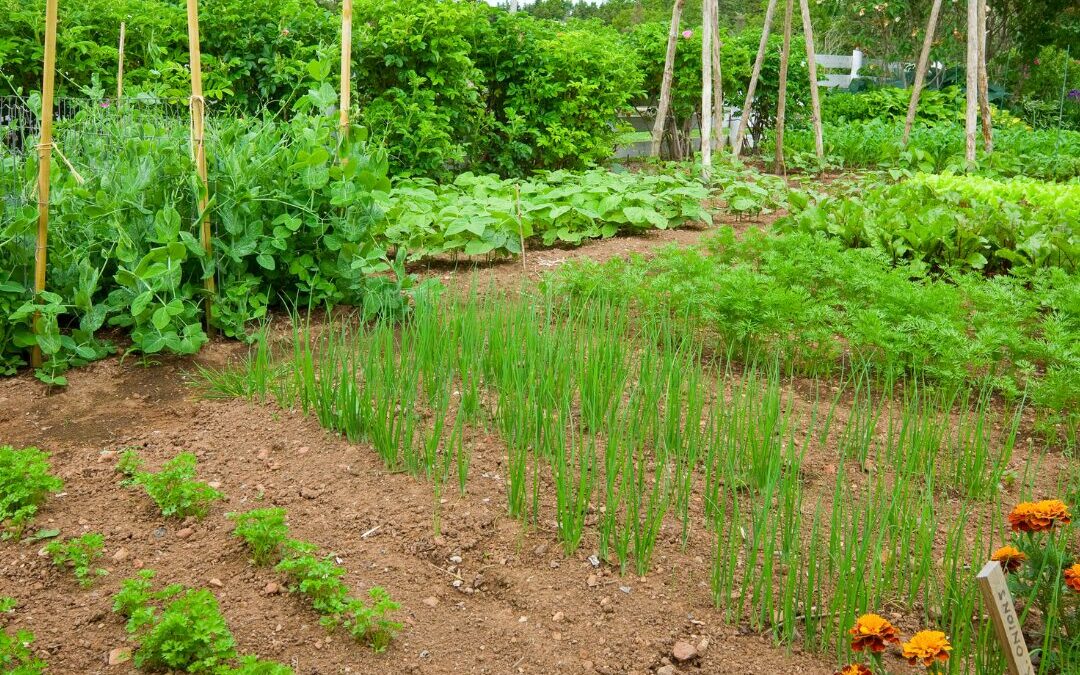
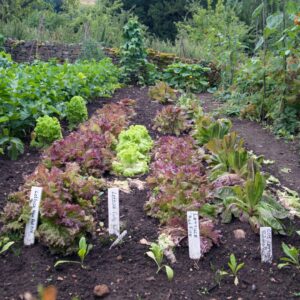
Are you dreaming of starting a vegetable garden and harvesting fresh produce:? A small vegetable patch is the first step to a whole new quality of life: the best food, fresh air and a contribution to a “greener” world. Let’s take this fantastic step together so that you can make your dream come true!
How to make a vegetable patch
You want to make a vegetable patch, maybe even a whole vegetable garden? You want to dig into the soil with your hands, and inhale this wonderful earthy scent? And you want to harvest vegetables that are fresher and tastier than anything you can buy in a shop?
That’s wonderful!
In this article, I show you step by step how you can create low-maintenance and fertile vegetable patches without tilling, and superfast, too. With a few tricks, it’ll not only be fertile from the beginning but it’ll also stay weed-free.
Let’s dive in.
Why no digging when creating a vegetable patch?
Admit it: when you think about creating a vegetable patch, you first think about digging up the earth, right? I know it was common in most gardens for a long time. Today, however, science tells us that it’s probably better for our soil to not dig at all. Which is great for both, the microorganisms and our backs.
Did you know that there are more microorganisms in a handful of garden soil than human beings on the earth? These tiny invisible helpers are immensely important for fertile soil.
Imagine an earthworm, for example, who usually looks for food at the surface of the earth but has to go hungry if you dig up the soil. He suddenly finds himself out there while his food is three floors below. That’s a catastrophe – not only for the earthworm without any sunscreen but also for soil fertility.
The trick is now to NOT disturb the microorganisms but to work with them from the very beginning. That’s why we create our vegetable patches without digging.
Start a vegetable patch in 5 steps
Let’s create a low-maintenance and high-yield vegetable patch!
Step 1: Prepare the ground
The first step is easy! The only thing you have to do is wait until the grass is long. When the grass is too short it cannot be bent. Then the pointy tips can easily penetrate the cardboard that we put onto the lawn. The cardboard suffocates long bent grass and it dies.
So, the first step in creating a vegetable patch: let the grass grow under your feet 😊!
Step 2: Dig in a lawn edging border
When making a vegetable patch, dig in a lawn edging border along the outer edge of your patch. Weeds and grass must stay outside. With a lawn edging border you make sure that no uninvited guests grow into the patches and reconquer them. To kill to birds with one stone, you can use a metal snail barrier which not only keeps the weeds but also the snails out. I have chosen to use that, as my garden is on a meadow.
Dig a v-shaped hole into the ground and put in the border so that about five centimeters are showing. I prefer this lawn edging border that also works as a slug barrier. It’s made of metal which is more durable than plastic edges that release microplastic into the garden when decomposing.
My patches are all 1,2 m broad because I can work them without contorting. I can reach the middle of the patch from every side without balancing or doing acrobatics.
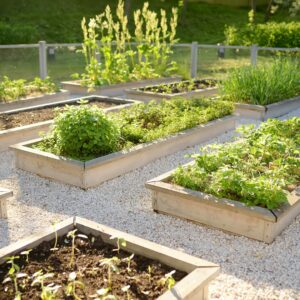
Step 3: create bed borders (optional)
The lawn edging border is not very appealing and you sometimes may even stumble over them. For that reason, you may conceal it a bit. How about a bed border made from wooden trunks? Stabilize them with small stakes so that they are firmly in place and cannot roll away.
Other possibilities may be stones, boards, tiles, or deadwood. Many things are possible. Just make sure that the bed borders are not too high and throw a shade onto your vegetables.
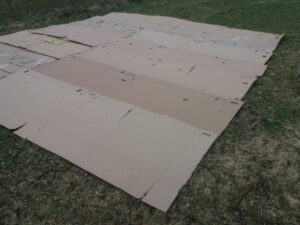
Step 4: Cardboard, gimme cardboard!
Now you get blank cardboard. It’s important to remove all tapes and staples so they do not get into the soil. Put the cardboard within the bed borders, overlapping at least 10 centimetres.
If you don’t have enough cardboard: ask your local bike shop. They have large cardboard transport boxes from the bikes which are great for a vegetable patch. They are huge and usually without print.
If you don’t want to use cardboard, anti-weed fabrics made of natural fibers that break down without any remnants are a good alternative.
Another possibility is to replace the cardboard with a layer of mulch. Apply 10 cm lawn cuttings or leaves and let it dry thoroughly. Then, distribute compost evenly on it.
Step 5: Spreading compost
Attention, ladies and gentlemen: here comes our star guest: his Royal Highness the Compost honors us with his entry into the garden!
That means you spread a 10 – 15 cm thick layer of mature compost on your beds
If you don’t have enough mature compost (which is likely when you want to start a vegetable garden), ask your local composting plant if you can buy some. It’s usually cheaper than a garden centre. In any case, make sure that the compost is made of organic material. Otherwise, it may contain lots of plastic – and we don’t want that in your vegetable garden!
I recommend using compost from green cuttings.
Bonus: Garden paths
Congrats: you now know everything about how to make vegetable patches. But also keep in mind that you may need garden paths, especially when you are creating several patches. You may separate them with woodchip paths. Plan the paths about 40 cm wide so that you can pass through with a wheelbarrow. Just spread the woodchips onto the cardboard. That way you can create easy-care garden paths in no time.
The patch is ready – what now?
The patch is ready, now it’s time for planting and/or sowing. You can plant or sow directly into the compost beds. The cardboard will decompose very soon so that the plant roots can grow through it without difficulty.
And earthworms, by the way, love soggy cardboard. Don’t worry: they’ll find their way to the surface.
You see: creating a vegetable patch is totally easy. The only thing you have to do is go outside and start! With these tips and tricks, you’ll create a vegetable garden in no time 😊
Mixed cultivation, crop rotation, pre-, main and post-crops… it’s difficult for a beginner to understand how to make a planting plan for your vegetable garden. Where do I plant, what and when can I harvest are some questions that may feel overwhelming at the beginning.
Yet, it’s high time to deal with them and create a planting plan for the upcoming gardening season. It’s not as complicated as it may seem at first. Just follow the steps and you’ll create a planting plan in no time.
Ready to start? Let’s go!
Plan your vegetable garden
First, you draw a layout of your garden. If you have patches already draw them. If you start creating a vegetable garden from scratch, plan patches with a width of 1,20 metres. That way, you can reach every part of the patch without contorting.
If you want to add several patches, they should optimally be 1,20 metres long, but you can make them up to 1,8 metres. Also, add paths between the patches so that you can reach every part of them.
Determine the location
Before creating a vegetable garden, it’s important to determine the best location. Important things to consider are
Distance to the house
Sun
Good soil
Plain or slightly south-bend area
Wind-break
Maybe you won’t find the ideal place for your vegetable garden, but that’s okay! Even if you had only a shadowy backyard for your vegetables, there’d still be some plants that grow well in the shade. Just consider this when planning your garden and you’ll still enjoy planting your veggies. Take what you have and make the best of it.
Once you’ve determined where your vegetable garden shall be, you can start making patches. It’s not too late to make new vegetable patches and plant them immediately. If you want to know how to start vegetable patches from scratch, check out this post.
Have you drawn the patches into your layout? Great, let’s move on.
What to plant
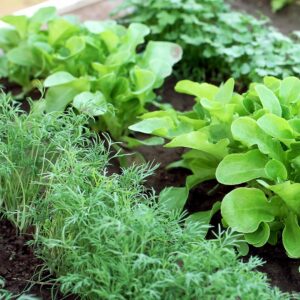
That’s easy: what you like. If you are a beginner, start with plants that are easy to grow. Herbs, lettuce, radishes, chard, beans, summer squash, beets, garlic and leek usually don’t make any problems and produce a good harvest.
Make a list of the vegetables you want to plant and how many you want.
Crop rotation
Different vegetables have different needs regarding soil and fertilization. There are plants with high nutrient demands like tomatoes and cabbage, medium nutrient demands like beets and low nutrient demands like peas and beans.
If you want to plant vegetables with high nutrient demands, it’s important to prepare the soil well, use compost and fertilize the plants. In the second year, you can plant vegetables with medium nutrient demand on this patch. They need less nutrients and profit from the fertilizer of the first year. In the third year, you plant veggies with low nutrient demand.
That said, divide your garden into three sections: one for plants with high, one for medium and one for low nutrient demands. Rotate these vegetables every year and use the nutrients optimally. Another benefit of crop rotation is that you minimize the danger of diseases. Would you plant the same vegetables at the same place year after year, the soil would exhaust, making it easier for pests and diseases to thrive.
So, take your list of vegetables you want to plant and categorize them into plants with high, medium and low nutrient demands. Here’s a list of vegetables and their category. Then determine which plants to grow where in your garden and prepare the soil for the high nutrient-demanding ones.
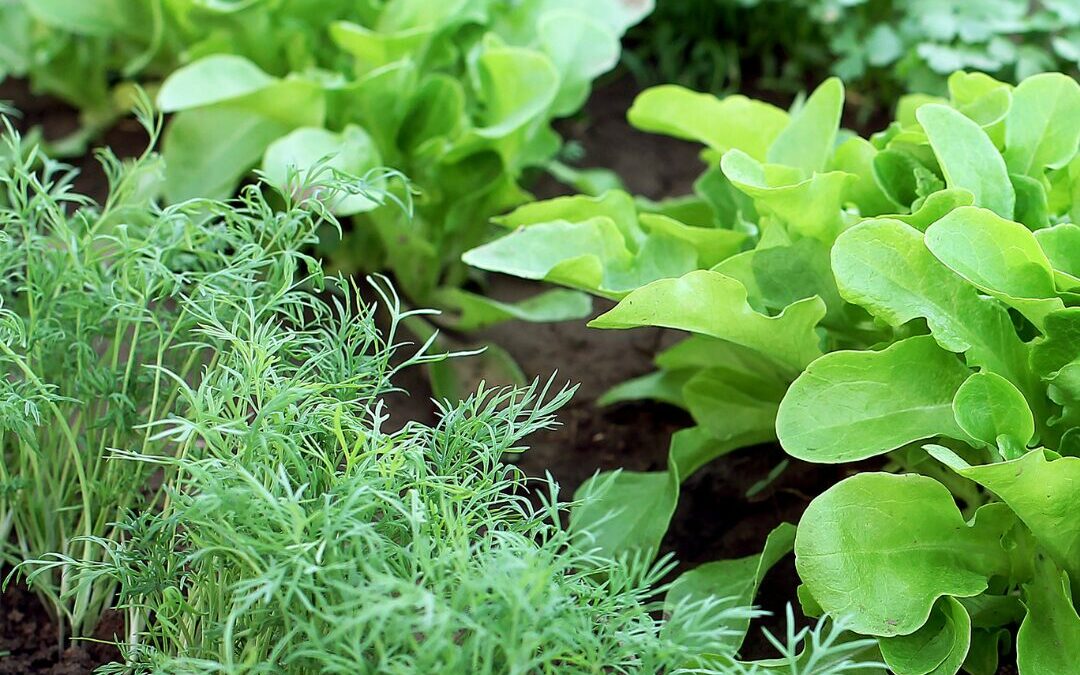
Mixed cultivation
Now that you know what plants to grow in which part of your garden, you have to determine which plants to pair. This is a bit like putting together a work team and – like in real life – some team members (or plants in that case) work great together and others loathe each other. To bring them together in an optimal way is called mixed cultivation and it’s a great way to hold pests and diseases at bay. Typical examples are carrots and onions: the carrot releases a scent that repels the leek fly and the onions release a scent that repels the carrot fly. Here’s a list of great mixed cultivation partners.
Note down great partners and disaster pairs, decide where to grow them and write them down in your garden plan.
The best is yet to come
Most vegetables don’t need the whole season to grow. Tomatoes for example are not planted before mid-May, that’s enough time to cultivate radishes and lettuce before. Almost any main crop, i.e. a vegetable group that occupies the patch for a long period, leaves time for a pre- or post-crop. Examples of main crops are tomatoes, potatoes, cucumbers and corn. By using the patches before and/or after the main crop for fast-growing vegetables you can harvest twice or even three times!
That’s why you should combine the different main crops with fast-growing pre and post-crops like radishes, spinach, lettuce and kohlrabi. Usually, it’s indicated on the seed bags when to sow which veggies. Using this information you can make a planting plan for the whole year and scale your harvest.
Note down in your plan how long the crops will take until they can be harvested and determine which places to use for pre and/or post-crops. It’s a bit like playing Tetris :-).
Grab your planting plan for your vegetable garden
Taking every of the above aspects into consideration when making a planting plan can lead to overwhelm. I, too, need several attempts until my plan is sound. I’m up to drafting out a planting plan for you, so stay tuned and come back!