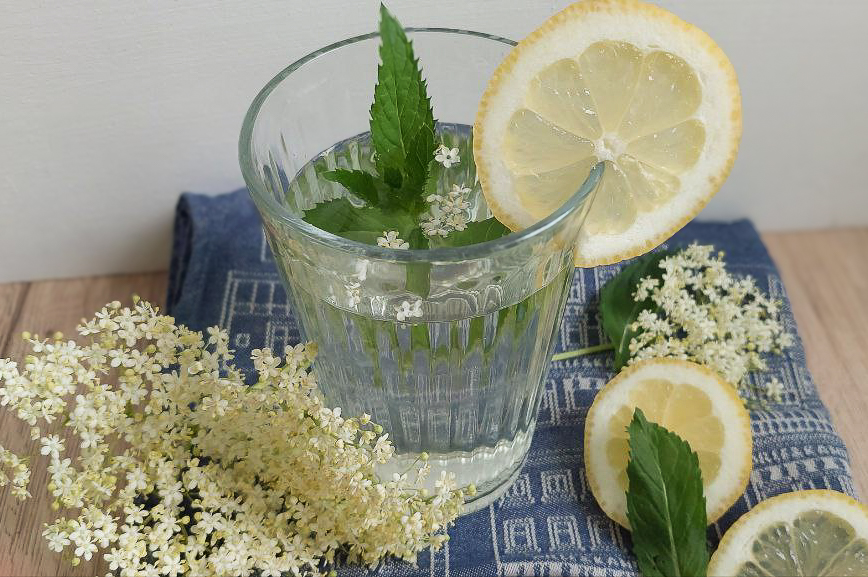
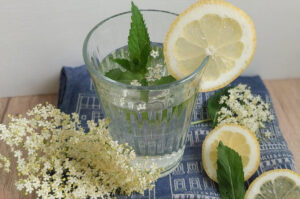
When it suddenly smells of summer at the end of May/beginning of June – sweet, flowery and a bit like childhood – then it’s elderflower time! And as this fragrance is too precious to enjoy just on a walk, I preserve it every year with my homemade elderflower syrup.
Elderflower syrup is not only a classic but also wonderfully versatile. Whether you add it to sparkling wine, use it as a lemonade, drizzle it over ice cream or scent your cake dough with it, this delicious syrup immediately lifts the mood of everyone tasting it. And the best thing about it is that you can make elderflower syrup very easily at home with this simple recipe.
When and how to forage elderflowers
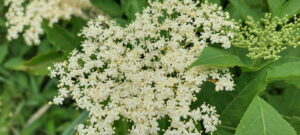
Depending on where you live, elderflowers bloom between mid-May and mid-June. When you spot them, take a basket and garden shears and head out to forage them.
Only gather umbels that grow far away from streets, at the edge of the woods, on field paths or in gardens. At those places, you can be sure that they are not polluted by exhaust fumes or other environmental toxins.
Elderflowers are quite easy to identify, but I strongly recommend you don’t pick anything if you are not 100% sure what it is. If in doubt, consult a good book on plant identification or ask somebody with experience.
Always cut the elderflower umbels with garden shears or scissors. That way, you won’t shake the flowers too much and lose their valuable pollen with the flavour.
Make sure to forage only elderflowers that are in full bloom and still fresh, meaning that the little flowers don’t fall off when shaking them. The best time for harvesting is the late morning of a sunny day. Ideally, it has been sunny for several days because that’s when the fragrance is strongest, and there are hardly any insects in the flowers.
A basket is best for carrying the harvested elderflowers home, because they lie lightly and airily without being pressed too much together.
One important request: don’t overpick! Never take more than a third of umbels per bush to leave enough for bees and birds! And to come back in autumn and harvest the elderberries 😉.
Essential Equipment and Ingredients for Making Elderflower Syrup
This recipe is simple, not only because you don’t need many ingredients, but also because you certainly already have all the equipment.
Basic Equipment
You need
A pot
A large bowl (optional, you can also add the flowers to the liquid in the pot)
A fine-mesh strainer or a cheese cloth to filter the syrup
Bottles with matching lids, sterilised
Funnel
Ingredient list
Making elderflower syrup was never easier! You just need these ingredients:
8 – 10 fresh elderflower heads in full bloom
500 g sugar
2 untreated lemons
600 ml of water
Citric acid (purely optional; I don’t like its tangy taste and don’t use it)
Elderflower Syrup: Step-by-Step Making Process
Step 1
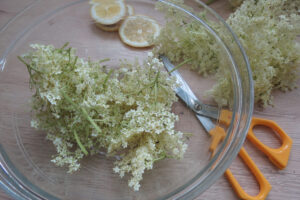
When you’ve brought the umbels home, just shake them carefully to remove insects. If you want to be absolutely sure that no insects are left, leave the flowers outside in a dry and shady place for about 20 minutes. That way, the insects can wander off.
Do not wash the elderflowers! Their flavour lies in the pollen, and if you wash them, the pollen – and with it the flavour – would be rinsed off.
Once the elderflowers are clean, cut off the thick stems.
Step 2
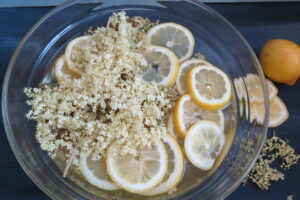
Wash the lemons with hot water, dry them and cut them into slices.
Step 3
Mix the water and sugar in a pot and slowly bring the mixture to the boil while constantly stirring until the sugar has dissolved. Fill the sugar syrup into a bowl.
Step 4
Add the elderflowers and the lemon slices to the syrup and cover it with a cloth or lid. Let the mixture rest for 2 – 3 days and stir occasionally.
Step 5
Sterilise the bottles by rinsing them with hot water. Remove the elderflowers and lemon slices from the syrup and filter it through a fine mesh strainer. Alternatively, you can filter the syrup through a cloth and wring it out to get the last drops of elderflower syrup. If you press the flowers, the syrup may become a bit more opaque, but that’s ok.
Step 6
Fill the elderflower syrup in a pot and bring it to the boil. Fill the hot liquid into the sterilised bottles and tightly close the lids.
Angela Braun
Elderflower syrup
Elderflower syrup is not only a classic but also wonderfully versatile. Whether you add it to sparkling wine, use it as a lemonade, drizzle it over ice cream or scent your cake dough with it, this delicious syrup immediately lifts the mood of everyone tasting it.
Citric acidpurely optional; I don’t like its tangy taste and don’t use it
Equipment
1 pot
1 large bowl (optional, you can also add teh flowers to the liquid in the pot)
1 fine-mesh strainer or cheesecloth to filter the syrup
bottles with matching lids sterilised
1 funnel
Method
When you’ve brought the umbels home, just shake them carefully to remove insects. If you want to be absolutely sure that no insects are left, leave the flowers outside in a dry and shady place for about 20 minutes. That way, the insects can wander off.Do not wash the elderflowers! Their flavour lies in the pollen, and if you wash them, the pollen – and with it the flavour – would be rinsed off.
Once the elderflowers are clean, cut off the thick stems.
Wash the lemons with hot water, dry them and cut them into slices.
Mix the water and sugar in a pot and slowly bring the mixture to the boil while constantly stirring until the sugar has dissolved. Fill the sugar syrup into a bowl.
Add the elderflowers and the lemon slices to the syrup and cover it with a cloth or lid. Let the mixture rest for 2 – 3 days and stir occasionally.
Sterilise the bottles by rinsing them with hot water. Remove the elderflowers and lemon slices from the syrup and filter it through a fine mesh strainer. Alternatively, you can filter the syrup through a cloth and wring it out to get the last drops of elderflower syrup. If you press the flowers, the syrup may become a bit more opaque, but that’s ok.
Fill the elderflower syrup in a pot and bring it to the boil. Fill the hot liquid into the sterilised bottles and tightly close the lids.
Notes
Elderflower syrup can be stored in a cool and dry place (e.g. the basement) for up to one year.
How Long Can You Store Elderflower Syrup?
You can either consume the elderflower syrup as soon as it’s ready (after 2 – 3 days). Kept in the fridge, it’ll last for about 10 days.
Alternatively, you can boil the filtered syrup and fill the hot liquid into bottles. Stored in a cool and shady place (your basement, for example), it lasts up to one year.
Another way to store elderflower syrup is to put it in the freezer, where it will also last up to one year.
Flavour Variations and Enhancements
The classic elderflower syrup, as described above, is a treat in itself. However, if you want to get creative, you can vary and enhance the flavours by adding other ingredients:
Add the slices of an orange to the sugar infusion
Instead of lemons, use limes
Add a stem of mint and/or lemon verbena to the syrup
Put 3 – 5 slices of ginger into the mixture and let it steep for 2 – 3 days
You can even adjust the level of sweetness to your taste. However, the less sugar you use, the shorter the storage time of the syrup, even when it’s boiled.
Creative Uses and Serving Suggestions for Elderflower Syrup
Elderflower syrup is incredibly versatile. Here are some ideas on how to use it:
Fill it up with cold (sparkling) water and you’ve got a refreshing lemonade. Additionally, you might add several mint leaves and cucumber slices.
Mixed with prosecco, elderflower syrup makes a wonderful summer cocktail.
Speaking of cocktails: elderflower syrup is also a great additive for gin and tonics and mojitos. Just saying…
Next time you serve a fruit salad, yoghurt or ice cream, drizzle some elderflower syrup over it to give it that extra taste of summer.
Elderflower syrup can be wonderfully made into a sorbet or ice cream
You can flavour cakes and pastries by adding elderflower syrup to the dough or the fillings.
Have you ever tried flavouring your pancake dough with elderflower syrup? Well, you should!
A bottle of elderflower syrup is a great homemade gift that everybody likes.
Troubleshooting Common Issues
Making elderflower syrup is very simple. However, there are some issues that you may face. Here’s what you can do about them:
The syrup is too sweet or not sweet enough
If it’s too sweet, you have used too much sugar; if it’s not sweet enough, too little.
In the first case, I’d recommend making a second batch of elderflower syrup with a little less sugar than indicated (e.g. 300 g) and mixing both batches to adjust the sweetness.
If the syrup is not sweet enough, don’t just add sugar to it, because it won’t dissolve properly. Instead, add sugar to about a third of the syrup and heat it up while constantly stirring until the sugar has completely dissolved. Add this to the remaining syrup and preserve it as described in the recipe.
The syrup’s cloudy
A certain opaqueness is normal, especially when you squeeze out the elderflowers into the syrup when filtering it off. That’s the pollen that carries the flavour, and it’s not harmful.
However, if the syrup shows white (or – heaven forbid – black) streaks and smells sour, alcoholic or vinegary, pour it away. It may have fermented spontaneously (see below).
The flavour is too weak.
Usually, if your elderflower syrup has only a weak flavour, you’ve used too few elderflowers. If the umbels are very small, you may have to add some more. Filter the syrup, add some fresh elderflowers and let the mixture steep for 24 hours before filtering.
Another reason for a weak flavour is that the elderflowers you used were too old. They should be freshly opened when you gather them from the tree, and not lose their tiny flowers when shaking them or even have already gone brown. That’s a clear sign of over-mature flowers. Pick fresh ones instead, and if there aren’t any left, make sure you harvest them earlier next year 😉.
However, if you can’t lay your hands on more elderflowers, a weak-tasting elderflower syrup needn’t be thrown away. Add some mint leaves and, if you like, some slices of lemon, and let it steep for 24 hours. That way, you get a lemon-mint syrup with a hint of elderflowers.
The syrup ferments
If you have used no other ingredients than the ones mentioned in the recipe and the elderflower syrup forms bubbles and smells sour, alcoholic or vinegary, I’m sorry to say you’ll have to throw it away. It has fermented spontaneously. This happens when natural yeasts on the elderflowers begin fermenting the sugar in your syrup, creating alcohol. The risk increases if you infuse the flowers for too long – beyond 3-4 days can trigger spontaneous fermentation.
Another fermentation issue may be the growth of mould, which is also due to the uncontrolled growth of undesired bacteria.
All these issues can be prevented by the following factors:
Timing control: don’t let the infusion steep for more than 2 -3 days. I know there are recipes out there suggesting up to one week of infusion, but with every day, the risk of fermentation increases.
Acidity: Adding lemon slices, juice, or citric acid helps to keep the “bad” bacteria at bay and thus prevents spontaneous fermentation.
Hygiene: Sterilise all your equipment and pick flowers only from unpolluted areas
Temperature: Pasteurising the elderflower syrup before filling it into bottles kills most of the yeast and bacteria in it. After opening a bottle, keep it in the fridge and consume it within a week.
Conclusion: Elderflower syrup is Summer to Drink!
For me, making elderflower syrup has become a yearly ritual. The glorious scent, the harvest, the bottling – it all has a soothing effect. And no matter how the weather is: every glass of elderflower syrup brings a little piece of summer to drink.
Wanna read more on how to preserve nature in a jar? Read on here:
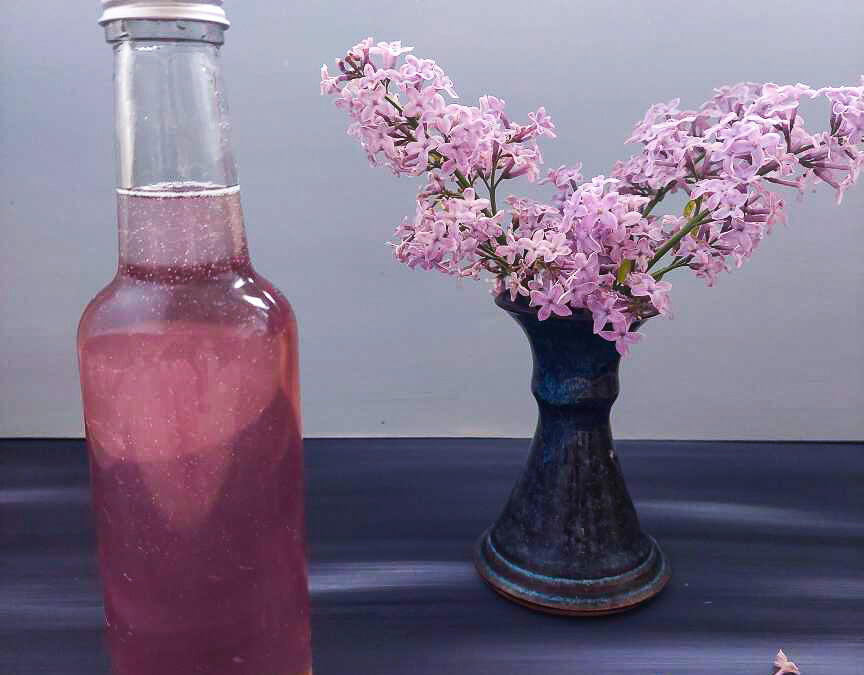
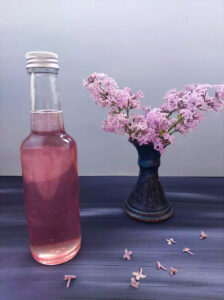
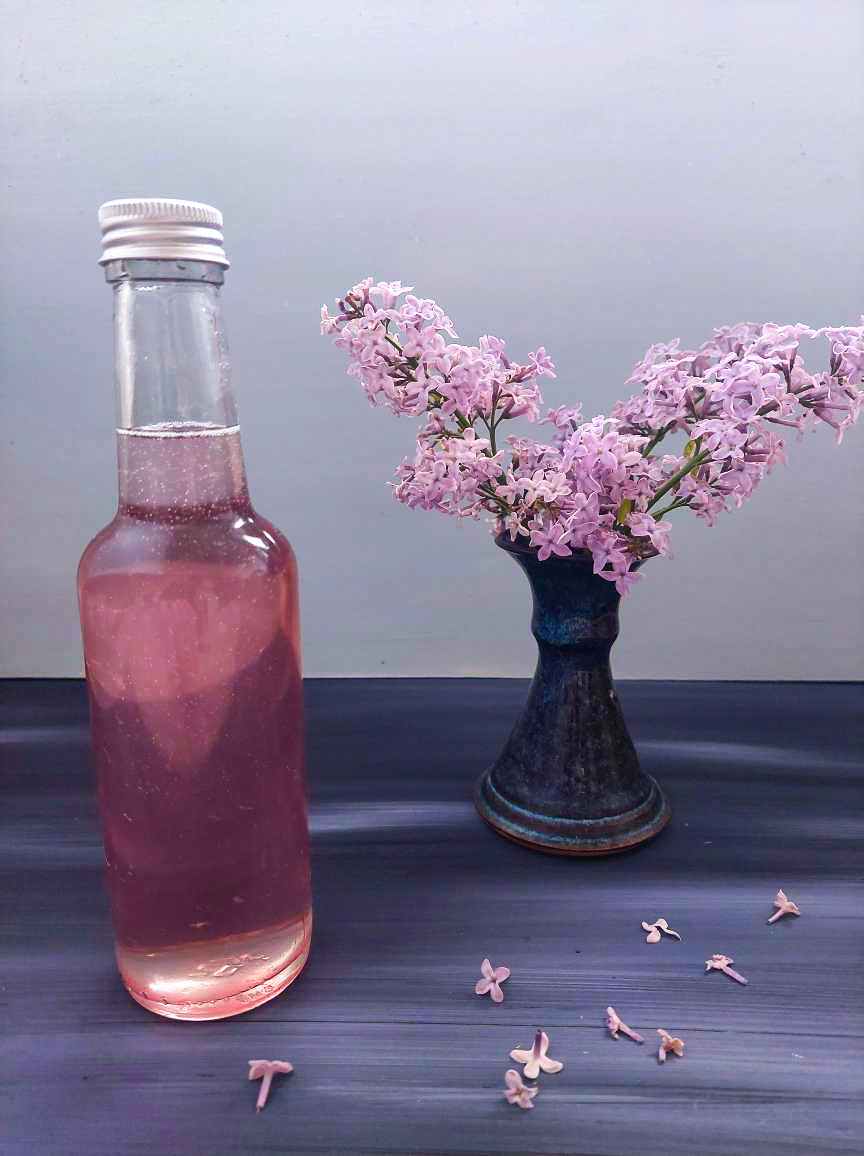
Every year, I can’t wait for the lilac to bloom, and every year, I’m sad when it fades again a few weeks later. That’s why I try to preserve those beautiful flowers as best as I can and thus prolong their season. Contrary to popular opinion, lilac flowers are not toxic. In fact, any variety of lilacs (Syringa spp.) is edible. One of my favourite recipes is this homemade lilac syrup. Its colour is stunning, and lilac syrup in a lemonade or on top of ice cream adds an extravagant touch!
For the colour, however, we must use a trick, as it does not come from the lilac itself. Nevertheless, it’s totally natural and organic. I’ll show you how to do it.
Lilac syrup
Yield: 500 ml
Ingredients
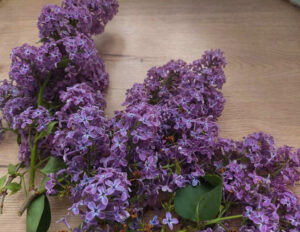
a bowl full of lilac flowers: make sure to use unsprayed lilac; also, do not use lilac from a roadside where it gets polluted by exhaust fumes and dust
250 ml water
250 g sugar
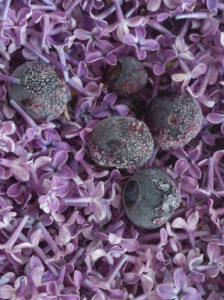
3 – 4 blueberries for the colour
1 tbsp lemon juice
Instructions
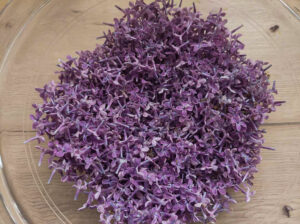
1. Carefully pluck the flowers off the stems. Make sure that nothing green gets into the bowl, only the flowers. The green parts of the flowers would make the syrup bitter.
2. Carefully wash the flowers with cold water.
3. Put the water and sugar into a pot and boil the solution while constantly stirring it. The sugar must be dissolved completely.
4. Remove the pot from the heat and add the blueberries and lemon juice. Stir slightly until the liquid has the colour you like.
Blueberries give our lilac syrup that wonderfully light lavender hue.
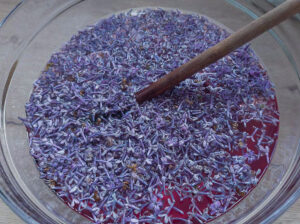
5. Let the syrup cool down to room temperature. Now, add the lilac flowers and stir them slightly in.
Cover the pot and let it all rest for about 18 – 24 hours.
The lilac syrup is ready to rest for about 18 – 24 hours
6. Strain the mixture through a fine strainer into another pot. Gently press the last syrup out of the lilac flowers.
7. The mixture is ready for use now, but it will only last 2 – 3 days in the fridge.
If you want to preserve it for longer, bring the syrup to a short boil once more and pour the hot liquid into glass bottles. Close them immediately with lids. Preserved that way, lilac syrup can be stored up to 18 months. Once you open a bottle, consume the syrup within 2 – 3 days.
Alternatively, you can freeze the lilac syrup.
Angela Braun
Lilac Syrup
This elegant syrup adds a touch of botanical sophistication to cocktails, lemonades, and iced teas. Drizzle it over pancakes or waffles, stir into yoghurt, or use as a finishing touch for cakes and pastries.
Carefully plug the flowers off the stems. Make sure that nothing green gets into the bowl, only the flowers.
Wash the flowers with cold water.
Put the water and sugar into a pot and boil it while constantly stirring. The sugar must be dissolved completely.
Remove the pot from the heat and add the blueberries and lemon juice. Stir slightly until the liquid has the colour you like.
Let the syrup cool down to room temperature, add the lilac flowers, cover the pot and let it all rest for about 18 - 24 hours.
Pour the mixture through a fine sieve into another pot. Gently press the last syrup out of the lilac flowers.
The mixture is ready for use now but will only last 2 - 3 days in the fridge. If you want to preserve it for longer, bring the syrup to a boil once more and the boiling liquid into glass bottles. Alternatively, you can freeze the lilac syrup.
Notes
Add lilac syrup to cocktails, lemonades and iced teas. Mix it with sparkling wine and you have an extravagant aperitif. However, lilac syrup is not only for drinks. Get creative and drizzle it over pancakes or waffles, stir it into yoghurt, or use it as a finishing touch for cakes and pastries.
How to use lilac syrup
Beverages
Stir a tablespoon into a glass of iced tea for a floral afternoon refreshment
Swirl into plain yoghurt with fresh berries and granola
Blend into smoothie bowls
Stir into overnight oats with sliced almonds and blueberries
Brush onto warm scones fresh from the oven
Desserts
Brush onto cake layers before frosting for added moisture and flavour
Drizzle over vanilla ice cream
Mix into whipped cream for a floral topping on desserts
Use as a sweetener in homemade popsicles with berries
Capture Spring in Every Sip
Lilac blooms are fleeting, but with this simple lilac syrup you can bottle their delicate fragrance and flavour to enjoy long after the blossoms fade. Whether swirled into sparkling lemonade, stirred into cocktails, drizzled over pancakes, or mixed into yoghurt and desserts, this floral syrup brings a touch of springtime elegance to everything it touches. A little patience while steeping the blossoms rewards you with a beautiful, aromatic syrup that truly makes the most of lilac season — a seasonal treat worth preserving and sharing.
If you want to make more syrups, try out these recipes
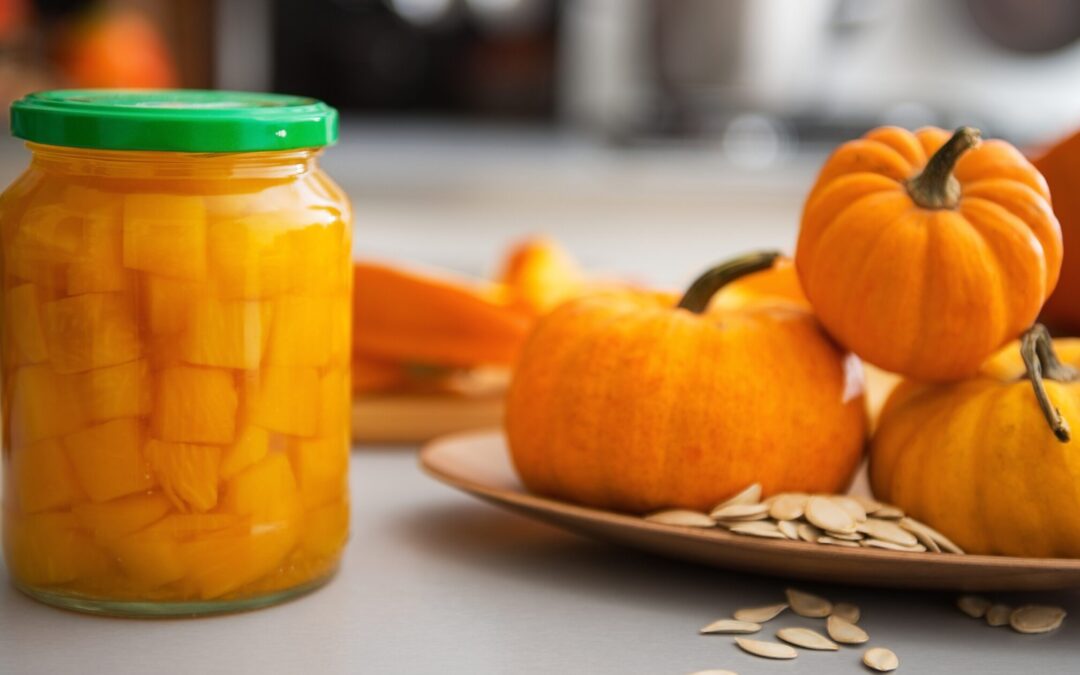
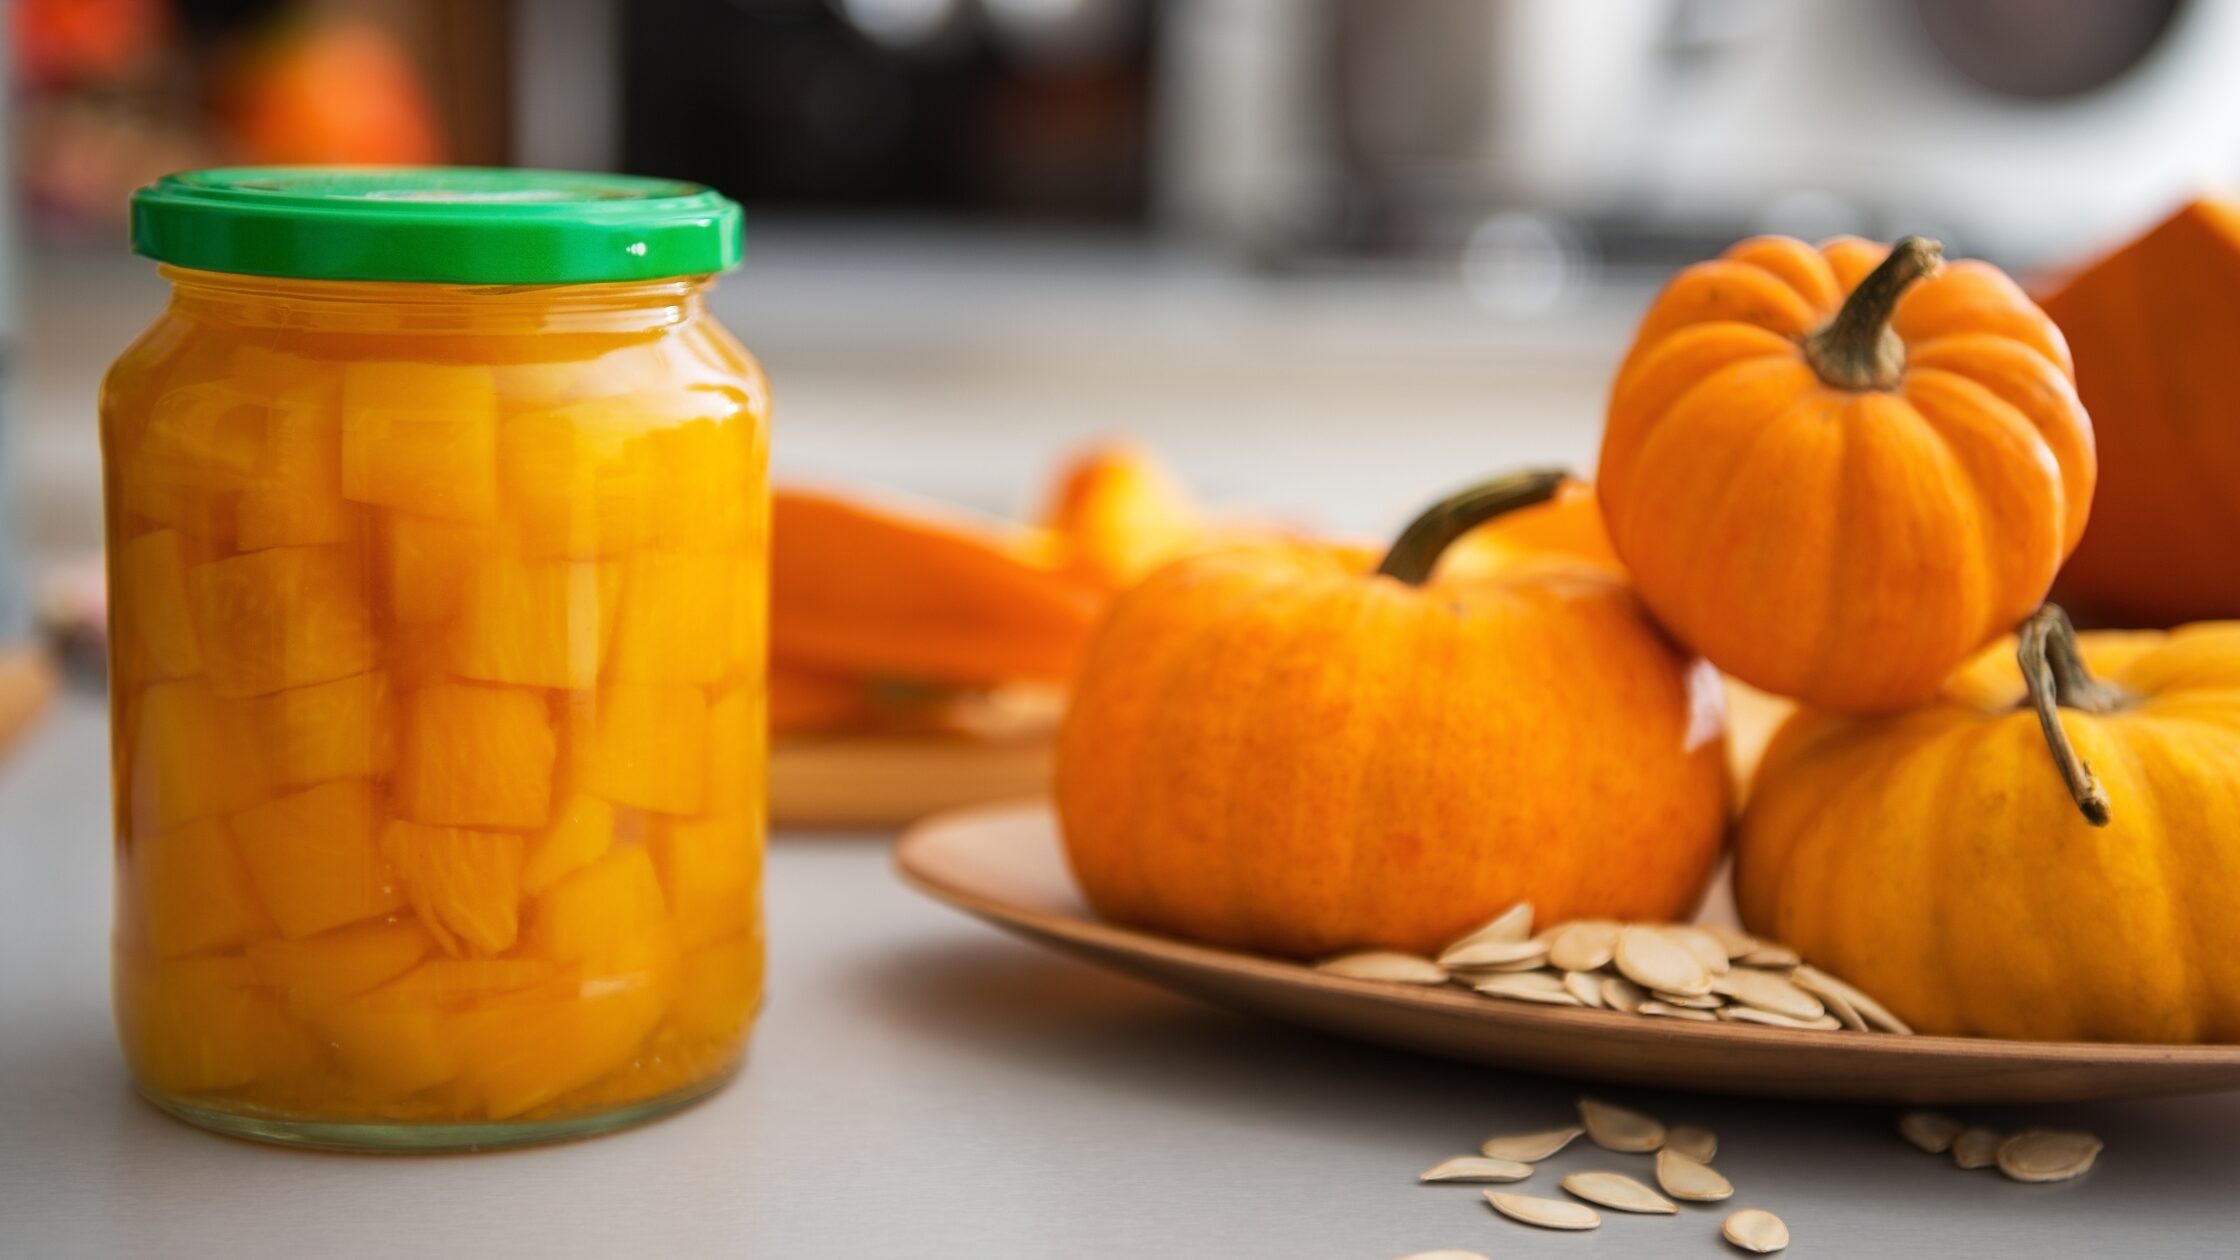
Let’s be honest: there comes a point every autumn when we hit “peak pumpkin spice”. You know, when even your neighbour’s cat seems to wear a pumpkin spice collar. But wait: before you swear off anything pumpkin for the rest of your life, let me introduce you to this recipe for sweet-sour pumpkin.
In this form, pumpkin proves it is more than just soup or pie. This German-inspired dish (we call it “Kürbis süß-sauer” – try to say that three times fast!) balances the pumpkin’s natural sweetness with a tangy vinegar-based sauce.
I grew up with this heavenly dish. My mom still makes it usually around mid-November and the smell of the sweet vinegar and spices in combination with misty days, tell me that we’re nearing Christmas time.
The best thing about this dish is that it’s so versatile: What I love most about this dish is its chameleon-like quality – serve it warm alongside your Thanksgiving turkey, at room temperature on a holiday appetizer board, or chilled as a unique addition to winter salads. The sweet-sour preparation also means it keeps beautifully in the fridge, making it perfect for busy weeknight meals or advance holiday preparations.
Serve it warm, and it’s comfort food. Serve it cold, and it suddenly becomes fancy antipasto. Leave it in the fridge, and it gets even better. Whether you grew your own pumpkins this year or picked some up from the local farmers’ market, this recipe offers a delicious way to preserve the yellow berries well into winter.
So if you’re ready to rescue a pumpkin from its pie-destined fate and transform it into something that’ll make your taste buds do a happy dance, stick around. This recipe is about to become your new fall flex – because nobody needs to know it’s actually super easy to make. (That’ll be our little secret!)
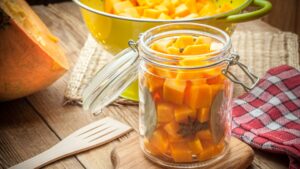
1. Chop the firm flesh of ripe but not overripe pumpkins into cubes of about 1,5 cm (3/4 inch).
2. Put vinegar, sugar, lemon peel and spices into a pot and bring it to a boil.
3. Cook the pumpkin cubes in several portions until they are glassy through and through. This takes some time, about 20 – 30 minutes, depending on the size of the cubes. Make sure they are really cooked through, otherwise the preserve won’t last.
4. When the pumpkins are well cooked, put them out with a slotted spoon and put them into the jars.
5. Let the liquid boil for 5 minutes. Remove the lemon peel and pour the boiling-hot juice into the jars so that the pumpkin cubes are under the brim. Immediately tight-seal the lids.
6. Stored in a cool and dark place, sweet-sour pumpkin will last at least for one year.
Sweet-sour pumpkins
The best thing about sweet-sour pumpkin is that it’s so versatile: What I love most about this dish is its chameleon-like quality – serve it warm alongside your Thanksgiving turkey, at room temperature on a holiday appetizer board, or chilled as a unique addition to winter salads. The sweet-sour preparation also means it keeps beautifully in the fridge, making it perfect for busy weeknight meals or advance holiday preparations.
Chop the firm flesh of ripe but not overripe pumpkins into cubes of a 1.5 cm (3/4 inch)
Put vinegar, sugar, lemon peel and spices into a pot and bring it to a boil.
Cook the pumpkin cubes in several portions until they are glassy through and through. This takes some time, about 20 – 30 minutes, depending on the size of the cubes. Make sure they are really cooked through, otherwise the preserve won’t last.
When the pumpkins are well cooked, put them out with a slotted spoon and put them into the jars.
Let the liquid boil for 5 minutes. Remove the lemon peel and pour the boiling-hot juice into the jars so that the pumpkin cubes are under the brim. Immediately tight-seal the lids.
Stored in a cool and dark place, sweet-sour pumpkin will last at least for one year.
Now, if that’s not proof enough that pumpkins can break free from their spice-laden destiny, I don’t know what is! This recipe has turned more pumpkin sceptics into believers than a fairy godmother turning pumpkins into carriages (although, unlike Cinderella’s ride, these sweet-sour pumpkins won’t turn back into regular pumpkins at midnight).
So, if you’re looking for a pumpkin recipe other than pie, this one’s your new best friend. Your taste buds will thank you and your dinner guests will be impressed. And if anyone asks where you got this recipe, just wink mysteriously and say it’s an old family secret. Or you know, share the link to this blog – I’m good either way! 😉
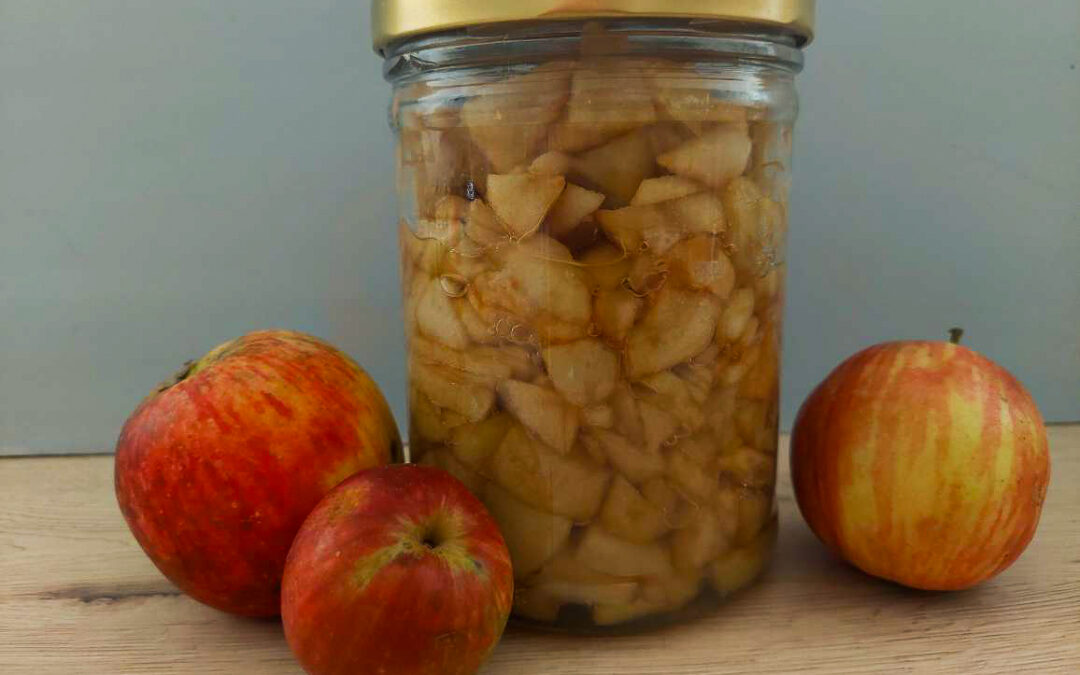
Usually, when we preserve fruits or vegetables by canning, we add some liquid (usually water) to fill up the jars. But did you know that you can also preserve apples by dry-canning them? These dry-canned apples are the basis for a quick apple strudel or the filling for an apple cake. You can even use it for a crumble.
All you need is a water-bath canner, jars with lids and some apples. I recommend at least one kilogram, but the more the better.
Preparation
Prepare your jars by washing them and the lids in hot water or the dishwasher. Put the jar lids and rings or the rubber bands in a pot and cover them with water. Bring the water to a boil and let it all cook for five minutes. Remove the lids, rings and/or rubber bands from the boiling water and put them onto a clean dish towel on the kitchen counter. Let them dry.
Instructions
Rinse the apples in your sink to wash off any dirt. Also, remove any leaves, grass or other residues. Then peel them, cut out the cores and any rotten parts and quarter them. You can use the apple scraps for making apple vinegar. For that purpose, it’s great to have three bowls at hand: one for the apple quarters, one for the “good” scraps for making apple vinegar and one for the rotten parts and wormy cores to discard.
Half the quarters lengthwise and chop the apples into slices of about 3 millimetres. When you’ve chopped all the apples, fill them tightly into the prepared jars. Make sure that there’s as little room left in between the slices as possible. Leave about one inch of headspace. Before closing the lids, make sure that the rim of the jar is clean. That’s best ensured by dipping a clean cloth (for example a towel) into some vinegar and wiping the rims clean. Seal the jars with the lids.
Dry-canning apples
Fill the water bath canner with as much (cold to lukewarm!) water as indicated in the instructions. Put the jars into the canner, ensuring enough space so they don’t touch. Heat the canner to 100 °C. Once it has reached that temperature, let it simmer for 40 minutes. When time’s up, remove the jars with a glass lifter from the water bath canner and put them onto a dishcloth on the counter. Let the glasses cool down slowly.
Stored in a cool, dry place, dry-canned apples have a shelf life of at least two years.
Dry-canned apples
Did you know that you can preserve apples by dry-canning them? These dry-canned apples are the basis for a quick apple strudel or the filling for an apple cake and even crumble.All you need is a water-bath canner, jars with lids and some apples. I recommend at least one kilogram, but the more the better.
Prepare your jars by washing them and the lids in hot water or the dishwasher. Put the jar lids and rings or the rubber bands in a pot and cover them with water. Bring the water to a boil and let it all cook for five minutes. Remove the lids, rings and/or rubber bands from the boiling water and put them onto a clean dish towel on the kitchen counter. Let them dry.
Rinse the apples in your sink to wash off any dirt. Also, remove any leaves, grass or other residues.
Then peel the apples, cut out the cores and any rotten parts and quarter them. You can use the apple scraps for making apple vinegar.
Half the quarters lengthwise and chop the apples into slices of about 3 millimetres. When you’ve chopped all the apples, fill them tightly into the prepared jars. Make sure that there’s as little room left in between the slices as possible. Leave about one inch of headspace. Before closing the lids, make sure that the rim of the jar is clean. That's best ensured by dipping a clean cloth (for example a towel) into some vinegar and wiping the rims clean. Seal the jars with the lids.
Fill the water bath canner with as much (cold to lukewarm!) water as indicated in the instructions. Put the jars into the canner, ensuring enough space so they don’t touch. Heat the canner to 100 °C. Once it has reached that temperature, let it simmer for 40 minutes. When time’s up, remove the jars with a glass lifter from the water bath canner and put them onto a dishcloth on the counter. Let the glasses cool down slowly.
Stored in a cool, dry place, dry-canned apples have a shelf life of at least two years.
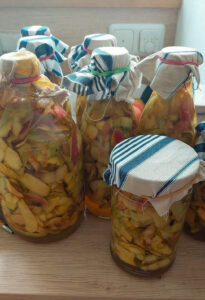
If you, like me, pickle a lot of vegetables, you need a good deal of apple vinegar. Instead of buying it, however, why not try your hand at making it by yourself – from scraps! It’s so easy, that you’ll wonder why you didn’t do it earlier and never will buy a drop of apple vinegar again. All you need is apple scraps that is peels and cores (for example from making apple sauce or dry-canning apples), water, sugar and a bit of raw apple vinegar to start. As containers you’ll need sufficiently large sterile bottles or jars as well as some cloths to cover the jars
But before we start, let’s take a quick look at how vinegar is made.
Step 1: Sugar becomes alcohol
The first step to making apple vinegar is the production of apple wine. Natural yeasts transform the sugar from the apples plus the sugar we add into alcohol. You can see that by the formation of white foam on the surface. It’s also possible that after a few days, a white layer forms on the surface. That’s kahm yeast and it’s harmless.
When, after some time, the acid content in the liquid rises, kahm (and other) yeast(s) disappear.
Step 2: Alcohol becomes vinegar
As soon as the first alcohol has formed, acetic acid bacteria also start to work. They are naturally in the air and on the fruits and need alcohol and oxygen to multiply. For this reason, it’s essential that you only cover the jars with a cloth because without oxygen the acetic acid bacteria cannot work.
The alcohol is now fermented to acetic acid. If you want to learn more about how fermentation works, this article is just the thing you need:
How to make apple vinegar from scraps
Prepare your jars by washing them and the lids in hot water or the dishwasher and then let them dry.
Before processing your apples, wash them thoroughly in the sink to remove any dirt. Now peel and quarter them (depending on what you want to do with those apples) and remove the core. Cut off any rotten parts. Only unspoiled and healthy peels and cores can be used for making vinegar.
When chopping apples, I usually have three bowls at hand: one for the apple quarters to be processed, one for the “good” apple peels and cores and one for the rotten parts to be thrown away.
Put the peels and cores into a one-litre glass bottle until it’s about ¾ full. Add half a cup of sugar, and half a cup of apple vinegar as a starter and fill the bottle up with water. Stir or shake the mixture until the sugar has dissolved.
Don’t close the bottle with a lid as we need oxygen to make vinegar. Instead, put a clean piece of cloth on the bottle opening and fix it with a rubber band. That way, the liquid is exposed to oxygen, but no fruit flies or dirt can get into it.
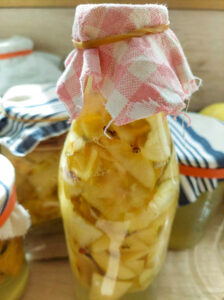
Put the bottle in a warm, dark place (no direct sunlight) and let it sit for about 10 – 14 days. After a few days, you’ll see tiny bubbles forming.
After a few days, bubbles start to form
Sometimes, the mixture builds foam and may even bubble over the rim. If a thin white spread forms on the surface that destroys when you stir it slightly, that’s no reason to worry. It’s kahm yeast and will neither affect the process nor the taste. Around day 6 it’ll start to smell of vinegar.
After about 10 – 14 days, strain the liquid through a colander into a clean glass bottle. Make sure to squeeze out any residual liquid from the peels. If you have, you can add a vinegar mother to your fresh vinegar. This will help it to mature.
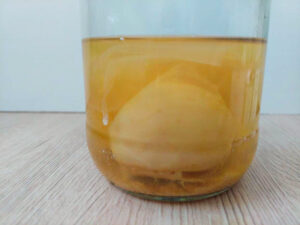
Put a fresh clean cloth on the opening and fix it with a rubber band. Let the vinegar mature in a cool, dark place for about six months. During this time, a mother of vinegar might form which is a great sign that everything’s going well! Taste your vinegar after six months. If it’s to your liking and a vinegar mother has formed, decant it into a fresh bottle. Carefully put the vinegar mother into a separate jar and fill it up with enough vinegar to cover it completely. You may use it as a starter for the next vinegar.
Homegrown jellyfish, a.k.a. mother of vinegar
Other fruit vinegars
I’ve also tried making vinegar from pear and quince scraps and it worked out very well. The pear and quince vinegar took a bit longer to mature (about 8 – 12 months) but the wait was absolutely worth it! Both vinegars tasted deliciously fruity and relatively mild and they add an interesting flavour to fruit salads. Pear and quince vinegar are also marvellous in a vinaigrette for autumn salads like lamb’s ear and chicory with pears, grapes and walnuts.
Apples are available all year round, especially when you grow a variety of them that ensure a long harvesting and shelf life. If you don’t have an orchard, you still can buy apples at any time of year. Nevertheless, fresh apples, plucked right from a tree when they are ripe are the privilege of autumn. I’m lucky enough to have a wonderful brother with a vast orchard and enough love for his sister that he allows her (that is: me) to have her share of his fruit harvest. Where we had very few fruits last year, this year has presented us with an abundance of them! Apart from eating the apples right from the tree and baking apple cakes in all varietes, what better way to preserve them for the upcoming winter than by canning apple sauce?
Ingredients and equipment for canning apple sauce
You’ll need a water bath canner (no pressure canner necessary for this recipe), appropriately large jars with well-closing lids and apples – at least one kilogram, the more the better – and sugar if you like.
Preparations
Prepare your jars by washing them and the lids in hot water or the dishwasher. Put the jar lids and rings or the rubber bands in a pot and cover them with water. Bring the water to a boil and let it all cook for five minutes. Remove the lids, rings and/or rubber bands from the boiling water and put them onto a clean dish towel on the kitchen counter. Let them dry.
Instructions for canning apple sauce
Rinse the apples in your sink to wash off any dirt. Also, remove any leaves, grass or other residues. Once washed, peel the apples, quarter them and cut out the cores. Cut off all rotten parts. If you want to make apple vinegar from the scraps, make sure that you only use unspoiled peels and cores. I usually take three bowls when preparing apple sauce: one for the apple quarters to be cooked, one for rotten apple parts or wormy cores to discard and one for all the scraps I later use for making vinegar.
Cooking
Once you’ve peeled and cut all the apples, wash the quarters again and put them into a large pot (or several if you have too many apples to fit into one, though you can also cook them in succession). Fill up water to about a quarter of the pot and put the apples to a boil. When the water’s boiling, carefully stir the apples from the top under so that they cook as well. After some minutes – depending on the sort – the apples become soft. Now use a hand blender to mix them into a smooth, homogenous mass. If you want, you can now optionally add some sugar to the apple sauce, but it isn’t necessary for preserving. I don’t use sugar in my apple sauce but if you want to and like your sauce sweeter, go ahead and add sugar to your taste.
When the sauce is blended stir it well until it’s boiling. Be very careful at this stage as the thick mass will easily bubble over and explosively release splashes of hot apple sauce that usually shoot at an unsuspecting arm or hand. I’ve gotten burnt more than once and know what I’m talking about…
Remove the pot from the stove and with the help of a funnel, ladle the apple sauce into the jars. Leave about one inch of headspace. Before closing the lids, make sure that the rim of the jar is clean. That’s best ensured by dipping a clean cloth (for example a towel) into some vinegar and wiping the rims clean. Seal the jars with the lids.
Canning
To can the jars, fill as much water into your water-bath canner as indicated in the manual and heat it. The water in the pot must have approximately the same temperature as the apple sauce in the jars. If we put the hot jars into cold to medium-warm water, they would break due to the huge temperature difference between the outside (water) and the inside (apple sauce). When the water has reached about 70 °C (160 °F), you can put the jars into the water bath canner (the apple sauce in the jars will have cooled down to approximately the same temperature by now). Make sure there is enough space between the jars and they don’t touch. Close the pot lid and bring the water to a boil. Once it boils, set the timer to 35 minutes and let the canner do its wonders.
When time’s up, carefully open the canner lid. Beware of the hot steam! Remove the jars with a glass lifter out of the canner and put them onto a towel on the counter to cool down.
When they’ve cooled down completely, store the apple sauce in a cool and dark place. It’ll last up to two years.
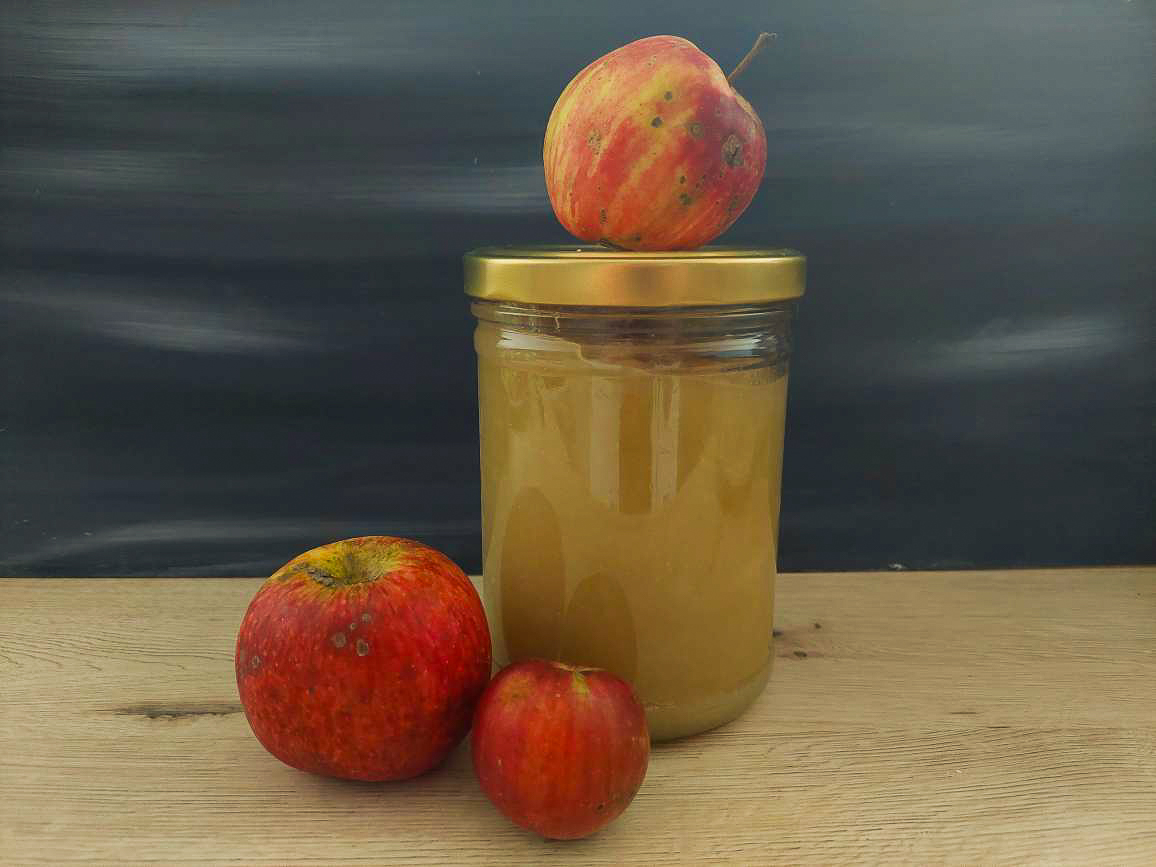
Apple sauce is a wonderful addition to pancakes or waffles, you can stir it into your morning yoghurt, make an autumnal apple tiramisu with it or just scoop it right from the jar.
Apple Sauce
Apple sauce is a wonderful addition to pancakes or waffles, you can stir it into your morning yoghurt, make an autumnal apple tiramisu with it or just scoop it right from the jar.
apples, at least one kilogram, the more the better
sugar (optional),to taste
Method
Prepare your jars by washing them and the lids in hot water or the dishwasher. Put the jar lids and rings or the rubber bands in a pot and cover them with water. Bring the water to a boil and let it all cook for five minutes. Remove the lids, rings and/or rubber bands from the boiling water and put them onto a clean dish towel on the kitchen counter. Let them dry.
Rinse the apples in your sink to wash off any dirt. Also, remove any leaves, grass or other residues.
Once washed, peel the apples, quarter them and cut out the cores. Cut off all rotten parts. If you want to make apple vinegar from the scraps, make sure that you only use unspoiled peels and cores.
Once you've peeled and cut all the apples, wash the quarters again and put them into a large pot (or several if you have too many apples to fit into one, although you can also cook them in succession). Fill up water to about a quarter of the pot and put the apples to a boil.
When the water's boiling, carefully stir the apples from the top under so that they cook as well. After 5 - 20 minutes - depending on the variety – the apples become soft. Now use a hand blender to mix them into a smooth, homogenous mass. If you want, you can now optionally add some sugar to the apple sauce, but it isn't necessary for preserving.
When the sauce is blended stir it well until it’s boiling. Be very careful at this stage as the thick mass will easily bubble over and explosively release splashes of hot apple sauce that usually shoot at an unsuspecting arm or hand.
Remove the pot from the stove and with the help of a funnel, ladle the apple sauce into the jars. Leave about one inch of headspace. Before closing the lids, make sure that the rim of the jar is clean. That's best ensured by dipping a clean cloth (for example a towel) into some vinegar and wiping the rims clean. Seal the jars with the lids.
To can the jars, fill as much water into your water-bath canner as indicated in the manual and heat it. The water in the pot must have approximately the same temperature as the apple sauce in the jars. If we put the hot jars into cold to medium-warm water, they would break due to the huge temperature difference between the outside (water) and the inside (apple sauce). Make sure there is enough space between the jars and they don’t touch. Close the pot lid and bring the water to a boil. Once it boils, set the timer to 35 minutes and let the canner do its wonders.
When time's up, carefully open the canner lid. Beware of the hot steam! Remove the jars with a glass lifter out of the canner and put them onto a towel on the counter to cool down.
When they’ve cooled down completely, store the apple sauce in a cool and dark place. It’ll last up to two years.