Shortly before one Christmas, I sent one of my boys down into the basement, where we store our preserves, and asked him to get a jar of sweet-and-sour pumpkin. It took him a while – men rarely find something on the first go. When he finally made it up again our three flights of stairs, he proudly presented me with a jar of something brown and sluggish in it. Hadn’t it borne a label with “sweet-sour pumpkin” on it, I would never have guessed the content. With a lot of guesswork, we figured out that it must have been from the year before we moved apartments, which was six entire years ago. My son had taken a jar from the very back of the shelf, showing me painfully why I needed to do a pantry audit at least once a year and that a clever rotation system prevents food from being spoiled.
Why a Pantry Audit Matters
Forgetting about food we already have doesn’t just cost money—it costs a lot of money. We buy duplicates of items already in our pantry while perfectly good food spoils at the back of the shelf.
This is not only a financial disaster, but it also has a significant impact on the environment: according to the Food and Agriculture Organisation of the United Nations (FAO), people in Germany discard 18 million tonnes of food per year. That’s roughly one-third of our total food consumption of 54.5 million tonnes. To put this in perspective: we throw out 313 kilograms of good food every second!
In terms of agricultural land, 2.6 million hectares of land are cultivated in vain each year, not to mention the greenhouse gas emissions.
A well-audited pantry, on the other hand, saves money and helps the environment while benefiting our health through fresher ingredients. While many foods remain safe past their ‘best by’ dates, fresher ingredients naturally offer better nutrition and flavour.
This doesn’t only apply to store-bought stock, but also to our lovingly made preserves. It’s heartbreaking when all the time and care we put into growing, harvesting and preserving our food simply goes to waste, just because we didn’t know what was sitting forgotten in our pantry.
When to Conduct a Pantry Audit
Optimally, we should conduct a pantry audit once every three months – or so “they” say (whoever “they” are).
I’ve found twice a year works perfectly for my household: once in May before harvest season begins—when I’m using up last year’s preserves to make room for the new season’s bounty—and again in early January after the holiday cooking frenzy.
A clear sign that it’s high time for a pantry audit is when you can’t find things you know you bought, discover duplicate items hiding in the back, or notice expired products.
The key is choosing a schedule that works for YOUR household and sticking to it. Whether it’s quarterly, twice yearly, or seasonally, having set dates means you’ll actually do it rather than putting it off indefinitely.
Preparing for Your Pantry Audit
Before we dive deep into the realm of our pantry, let’s gather a few things:
What you’ll need
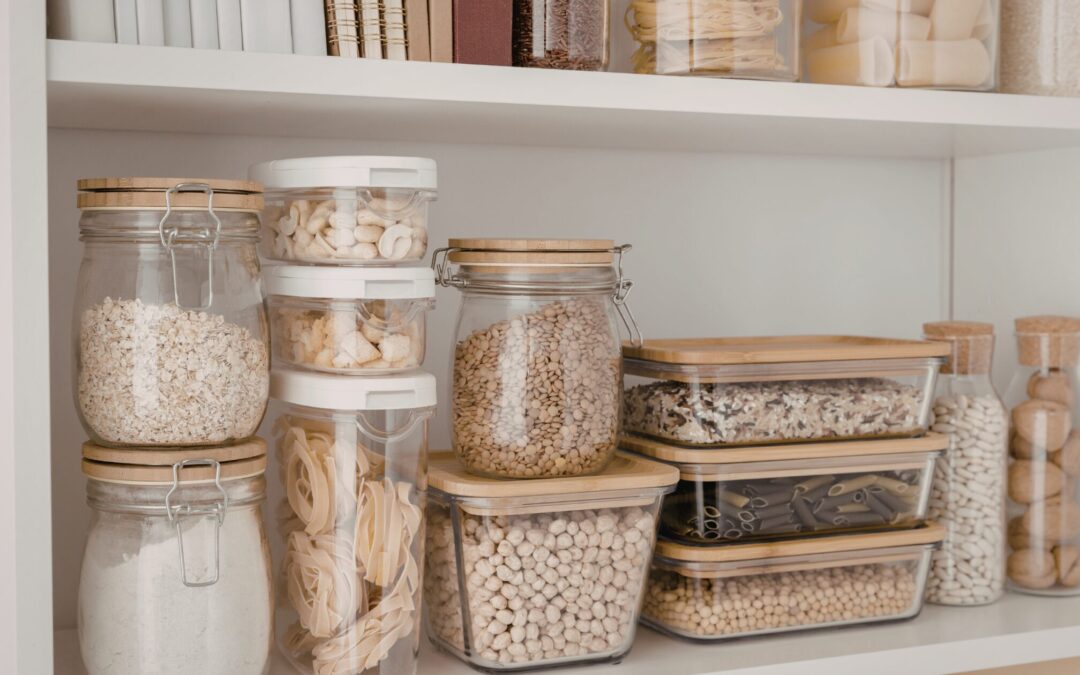
Containers of different sizes for storage If you have some already, great. If not, don’t buy them yet—wait until after your audit to see what you actually need! If you do need to buy containers, choose transparent ones with lids so you can see what’s inside at a glance. Also, look if you have some empty large jars with lids left. They are great for storing rice, grains or pasta in them. And when you don’t need them for storage, they can be used for canning.
Labels and markers These are essential for homemade preserves and freezer stock. Nothing more annoying than when the bag of “frozen red peppers” is actually rosehips you chopped for making jam! Yep, talking of experience here.
Inventory tracking tools A notebook works brilliantly for tracking what’s in your pantry. You could dedicate one page per shelf, or create a spreadsheet listing items and quantities. Whenever you use something, add it to your shopping list. There are also inventory apps available, though I haven’t tried them myself.
Cleaning supplies Since we’ll be emptying the shelves anyway, this is the perfect opportunity to clean them properly. Get your all-purpose cleaner and several cleaning rags ready.
Setting Up
Clear some workspace where you can temporarily place items as you empty the pantry. This can be a table, or the kitchen counter, or even the top of your freezer. Keep your containers and supplies within reach.
Now take a deep breath – let’s get started.
Step-by-Step Pantry Audit Process
Step 1: Empty Everything Out
Take everything off the shelves and place items on your workspace. If your pantry is large or your workspace is limited, work in sections—empty one category at a time (for example, all the pasta), then clear one shelf to make room as you continue.
Thoroughly check for any pests or moisture issues and vacuum the entire pantry, especially the corners.
Step 3: Check Expiration Dates
Now, check all your inventory and sort the items per group by expiration date.
Understanding date labels:
‘Best by’ or ‘Best before’: Quality dates, not safety dates. Food is typically still safe to eat after this date, though quality may decline. Use your judgment—if it looks, smells, and tastes fine, it’s usually okay.
‘Use by’: Found on perishable items. Take these more seriously, especially for dairy, meat, or refrigerated goods.
Canned goods: Often safe well beyond printed dates if the can is undamaged (no rust, dents, or bulging).
Food slightly past its ‘best by’ date is usually still fine—use your judgment based on how it looks, smells, and tastes. Items past their ‘use by’ date should be discarded for safety, especially perishables.
If your items have an expired “use by” date, however, they’ll not be safe for consumption any longer, and you should discard them.
When in doubt, trust your senses. If something smells off, looks mouldy, or has changed texture significantly, discard it.
For homemade preserves, always label jars with the preparation date (for example, ‘Tomato Sauce – September 2025’). This helps you track age and avoid surprises like my six-year-old pumpkin incident!
Step 4: Categorise Your Items
When you have all the items on your workspace, group them by category: grains, pasta, canned goods, baking supplies, spices, oils, condiments, snacks and home-preserved items.
This is also a good time to check for duplicates—do you really need four half-empty bags of flour?
Step 5: Take Inventory
It’s time to create your master list. Note down all the items you have and their quantities. That way, you can simultaneously identify gaps (items to add to your shopping list) and surpluses (ingredients you should prioritise using in upcoming meals).
I keep this list on the back of my pantry door, together with a pen on a string, so that I can adjust the quantity of items whenever I take something out.
Step 6: Reorganise Strategically
If your current pantry layout works well, keep it! But if you’re constantly searching for items or things feel chaotic, now’s the time to redesign.
Strategic placement principles
Heavy items low: Flour, canned goods, bottled items
Eye level = prime real estate: Items you use daily (in our pantry, that’s pasta, rice, and everyday spices)
Top shelves: Duplicates, rarely used items, or bulk backstock
Transfer bulk items like flour, rice, sugar, and oats into clear, airtight containers. Label EVERYTHING—and I mean everything with its content! I cannot stress this enough! You think you’ll remember what’s what, but trust me, in three months you won’t be able to tell your all-purpose flour from your bread flour. Also, add the expiration date (if not visible), and if there is none indicated on the package, note down the date you bought it.
Create designated zones for each category and consider labelling the shelves themselves if it helps your household stay organised. If you share your kitchen with others, clear labels on shelves help everyone maintain the system.
Now put all your items, organised by category, back onto the shelves. Place the oldest items at the front and the newer ones at the back.
Understanding the FIFO Rotation System
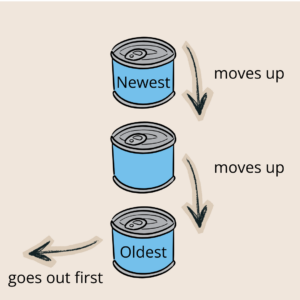
Have you ever heard of FIFO? It stands for First In, First Out—a simple principle where you use the oldest items in your pantry before the newer ones. Simple as it is, FIFO is incredibly powerful for preventing food spoilage and waste, saving you money while ensuring you’re always eating the freshest ingredients possible.
The key is visual placement: older items at the front of the shelf, newer items behind them. When you reach for something, you’ll automatically grab the oldest item first—it’s that simple.
In the case of homemade preserves, the labelling system I mentioned earlier is invaluable, so you can see at a glance how old a jar is: Apart from the content, add the date of making, for example: “Sauerkraut – September 2025”. These jars are placed behind the jars of Sauerkraut that were made the previous year. (Though let’s be honest: I know that your homemade sourkraut tastes so good, there won’t be any year-old jars anyway!)
Upholding the system
Before each shopping trip, scan your pantry shelves. With the FIFO system, you can quickly see what’s running low or needs restocking – no more buying duplicates of items hiding in the back.
When you return from shopping, resist the temptation to stuff items wherever they fit. Instead, take an extra two minutes to place new items behind older ones in their designated categories. This small habit keeps your FIFO system running smoothly with minimal effort.
What to do if your pantry is tiny
In our last apartment, the pantry was incredibly small. So small, in fact, that we could only install 20 cm-deep shelves (8 inches), which made it impossible to stack our items front-to-back. What I did instead was mark the latest purchases with Post-it stickers. That way, I knew what food to use first, although the items were stacked side by side.
Common FIFO mistakes
Simple as it may seem, FIFO can present some pitfalls. Knowing them beforehand will help you to avoid them in the first place:
Skipping the labels
Once you transfer items into storage containers, it’s tempting to think you’ll remember what’s inside. You won’t. Always label containers with both the contents AND the best-by date. Your future self will thank you when you’re not playing guessing games at dinner time.
Inconsistent rotation
It’s easy to tell yourself you’ll organise purchases “later” when you’re tired from shopping. But later rarely comes, and skipping rotation even once creates chaos. The good news? It typically takes just 2-3 minutes to put new items in their proper spots behind older ones. Make it part of your grocery unloading routine—like putting away the milk—rather than a separate task you’ll do “eventually”.
Ignoring what’s up front
FIFO only works if you actually USE the items you’ve rotated to the front. Make it a habit to scan front-row items when meal planning—these are your ‘use soon’ ingredients. If something’s been sitting up front for weeks, either plan a meal around it or accept it might not be something your family enjoys (and don’t buy it again).
Buying more than you need
Even with perfect rotation, FIFO can’t help if you’re constantly overbuying. Before adding items to your cart, check your pantry first. Just because pasta is on sale doesn’t mean you need five boxes when you already have three at home. Buy what you’ll realistically use before it expires.
Making FIFO a lasting habit
Get the whole household on board
Every member of your household should not only be acquainted with the rules of FIFO but also be dedicated to maintaining it. Even small children understand the simple principle behind the system and can be encouraged to help maintain it. Ideally, every household member takes out the front item of what they want and notes on the grocery list what they’ve taken.
Make it a game for younger children—who can find the item with the earliest date? Reward consistent participation with a special treat. For teens, explain the financial benefits: every item that doesn’t go to waste is money saved for things they care about.
Audit regularly
FIFO isn’t a set-it-and-forget-it system—it needs regular attention to stay effective. The good news? A quick weekly scan of your pantry takes just 5-10 minutes. Pull older items forward, check for anything approaching its expiration date, and note what needs restocking.
This weekly check naturally becomes your grocery planning session: you’ll see exactly what’s running low and what ingredients you need to use up soon.
Connect FIFO to meal planning
The most effective way to maintain your rotation system is to tie it directly to meal planning. Each week when planning your meals, deliberately choose recipes that use ingredients sitting at the front of your pantry. This ensures nothing gets forgotten and naturally keeps your rotation moving.
Adapt to changes
Your pantry isn’t static—it evolves with your family’s tastes, dietary needs, and cooking habits. When you discover new recipes requiring unfamiliar ingredients, don’t just squeeze them in anywhere. Take a moment to decide: Is this a one-time purchase or a new staple? One-time ingredients can go in a designated ‘speciality items’ section, while new staples deserve their own spot in your regular rotation.
The same principle applies to seasonal products and bulk purchases. If you buy 10 kilos of potatoes in autumn, designate a specific storage area and rotate through them systematically. During preserving season, adjust your pantry layout to accommodate the influx of homemade jams, pickles, and sauces—then reorganise again in spring when those shelves empty out.
Time to take action
A well-organised pantry with a solid rotation system isn’t about perfection—it’s about progress. Whether you’re managing a tiny cupboard with Post-it notes or a spacious walk-in pantry with labelled zones, the goal remains the same: use what you have, waste less, and always know what’s hiding on your shelves.
Start small if the whole process feels overwhelming. Maybe this month you just tackle the canned goods, or focus solely on labelling your homemade preserves. Next month, you can expand to another category. The beauty of FIFO is that even partial implementation helps—every item you rotate to the front is one less jar destined to languish for six years like my unfortunate pumpkin.
Remember, your pantry should work for YOU, not the other way around. Adapt these strategies to fit your space, your family, and your lifestyle. Check in regularly, adjust as needed, and be patient with yourself as you build new habits.
Now go take a look at your pantry. What’s lurking in the back? What treasures have you forgotten about? Your pantry audit awaits—and I promise, it’s not as daunting as it seems. Your future self (and your wallet, and the planet) will thank you. Don’t forget to grab your free Pantry Inventory Template here to track everything easily!
Wanna learn more about preserving? These posts are for you:
Looking for practical zero-waste uses for orange peels? Here are 13 creative and eco-friendly ways to use orange peels in the kitchen, for cleaning, and even for skincare. Instead of tossing those peels in the trash, transform them into useful products that save money and reduce waste. Using organic peels, you can make everything from candied treats to homemade vinegar cleaners.
How I discovered different uses for orange peel
As you know – at least if you’ve read my About Me Page – I work at a school. There, we have a contract with a local grocery distributor who delivers organic fruit or vegetables once a week for the pupils in primary school. Depending on the produce and size, some moms come over and chop the fruit (or veggies) into smaller pieces so that nothing gets wasted.
Last week, we got oranges, and I rubbed my hands with glee. When the moms came to prepare the oranges, I asked them to put the peels aside for me and in the end, I got 2 large bags full. My office smelled like an orange farm! I was astonished, though, that they had never heard of the different uses for orange peel, and so I decided this topic was worth a blog post.
Important: Always use organic oranges for edible recipes. Conventional oranges are treated with chemicals that concentrate in the peel.
How to use orange peels in the kitchen
#1 Candied orange peel
For decades, I had loathed candied orange peel because I was only familiar with the store-bought version. It didn’t look or taste anything like orange at all, and even today I’m not sure if there is anything remotely orange in it (except, perhaps, some artificial orange colour). Whenever I made Christmas cookies, gingerbread, or other traditional baked Christmas goods that required candied orange peel, I either left it out completely or mixed it with fresh orange juice to form a paste, so I could incorporate some of the flavours. Yet, I was never satisfied until I tried some at a local market in Italy. It was heaven! Juicy and chewy and bursting with flavour. Back home, I researched recipes for making candied orange peel by myself, and you’ll be happy to know that it isn’t difficult at all!
Angela Braun
Candied orange peel
An easy recipe for the most yummy and flavourful candied orange peel!
If you want to dry them afterwards and use them as snacks, leave them like that. If you want to use them in cakes or cookies, cut them up into tiny squares.
Now, put them into a pot and fill up with water so that the peels are covered. Bring to the boil and let it boil for about 10 minutes. Pour the peels into a sieve and let them drain. Repeat the whole process twice and rinse the peels. This pre-cooking removes the bitter taste from the peels.
Cooking
Put 0.5 l water into the pot and add 1 kg sugar or multiply the amounts if you have lots of peel. Just stick to the ratio of one part water to two parts sugar.
Bring this mixture to the boil while constantly stirring until the sugar is dissolved. When the syrup is boiling add the orange peels and let it simmer for about 30 minutes until the peels are well cooked.
Now, you either take the peels out onto a wire rack and let them dry for 12 – 24 hours until they are almost dry and still a bit sticky.
Storage Option I
Put some sugar into a bowl, add the peels in portions and mix them through until the peels are well-covered in sugar. In the fridge, they will last for up to one week.
Storage Option II
The other option is to put the cooked orange peel cubes into a glass jar and add some of the orange syrup so that the peels are covered in it. Close the jars with lids and once cooled down put them into the fridge. They’ll last for up to one year.
#2: Orange syrup
Bonus tip from the candied peel recipe:
Don’t throw away the syrup from the candied orange peels. It’ll make an amazing flavour addition to water, cocktails, soda and more. You can even add it to some apple vinegar, pour about 20 cl in a glass and fill it up with sparkling water. This makes a wonderfully refreshing, non-alcoholic drink for summer.
Looking for more syrup recipes? Have a look at those:
For this recipe, you must remove the white part of the peel (the "pith"): If the orange is already peeled with the pith still on the peels, put the peels upside down on a wooden board and, with a sharp knife, scrape the pith off the orange peel.Or, if the orange is still intact, thinly cut off the peel from the fruit, leaving the pith on the orange.
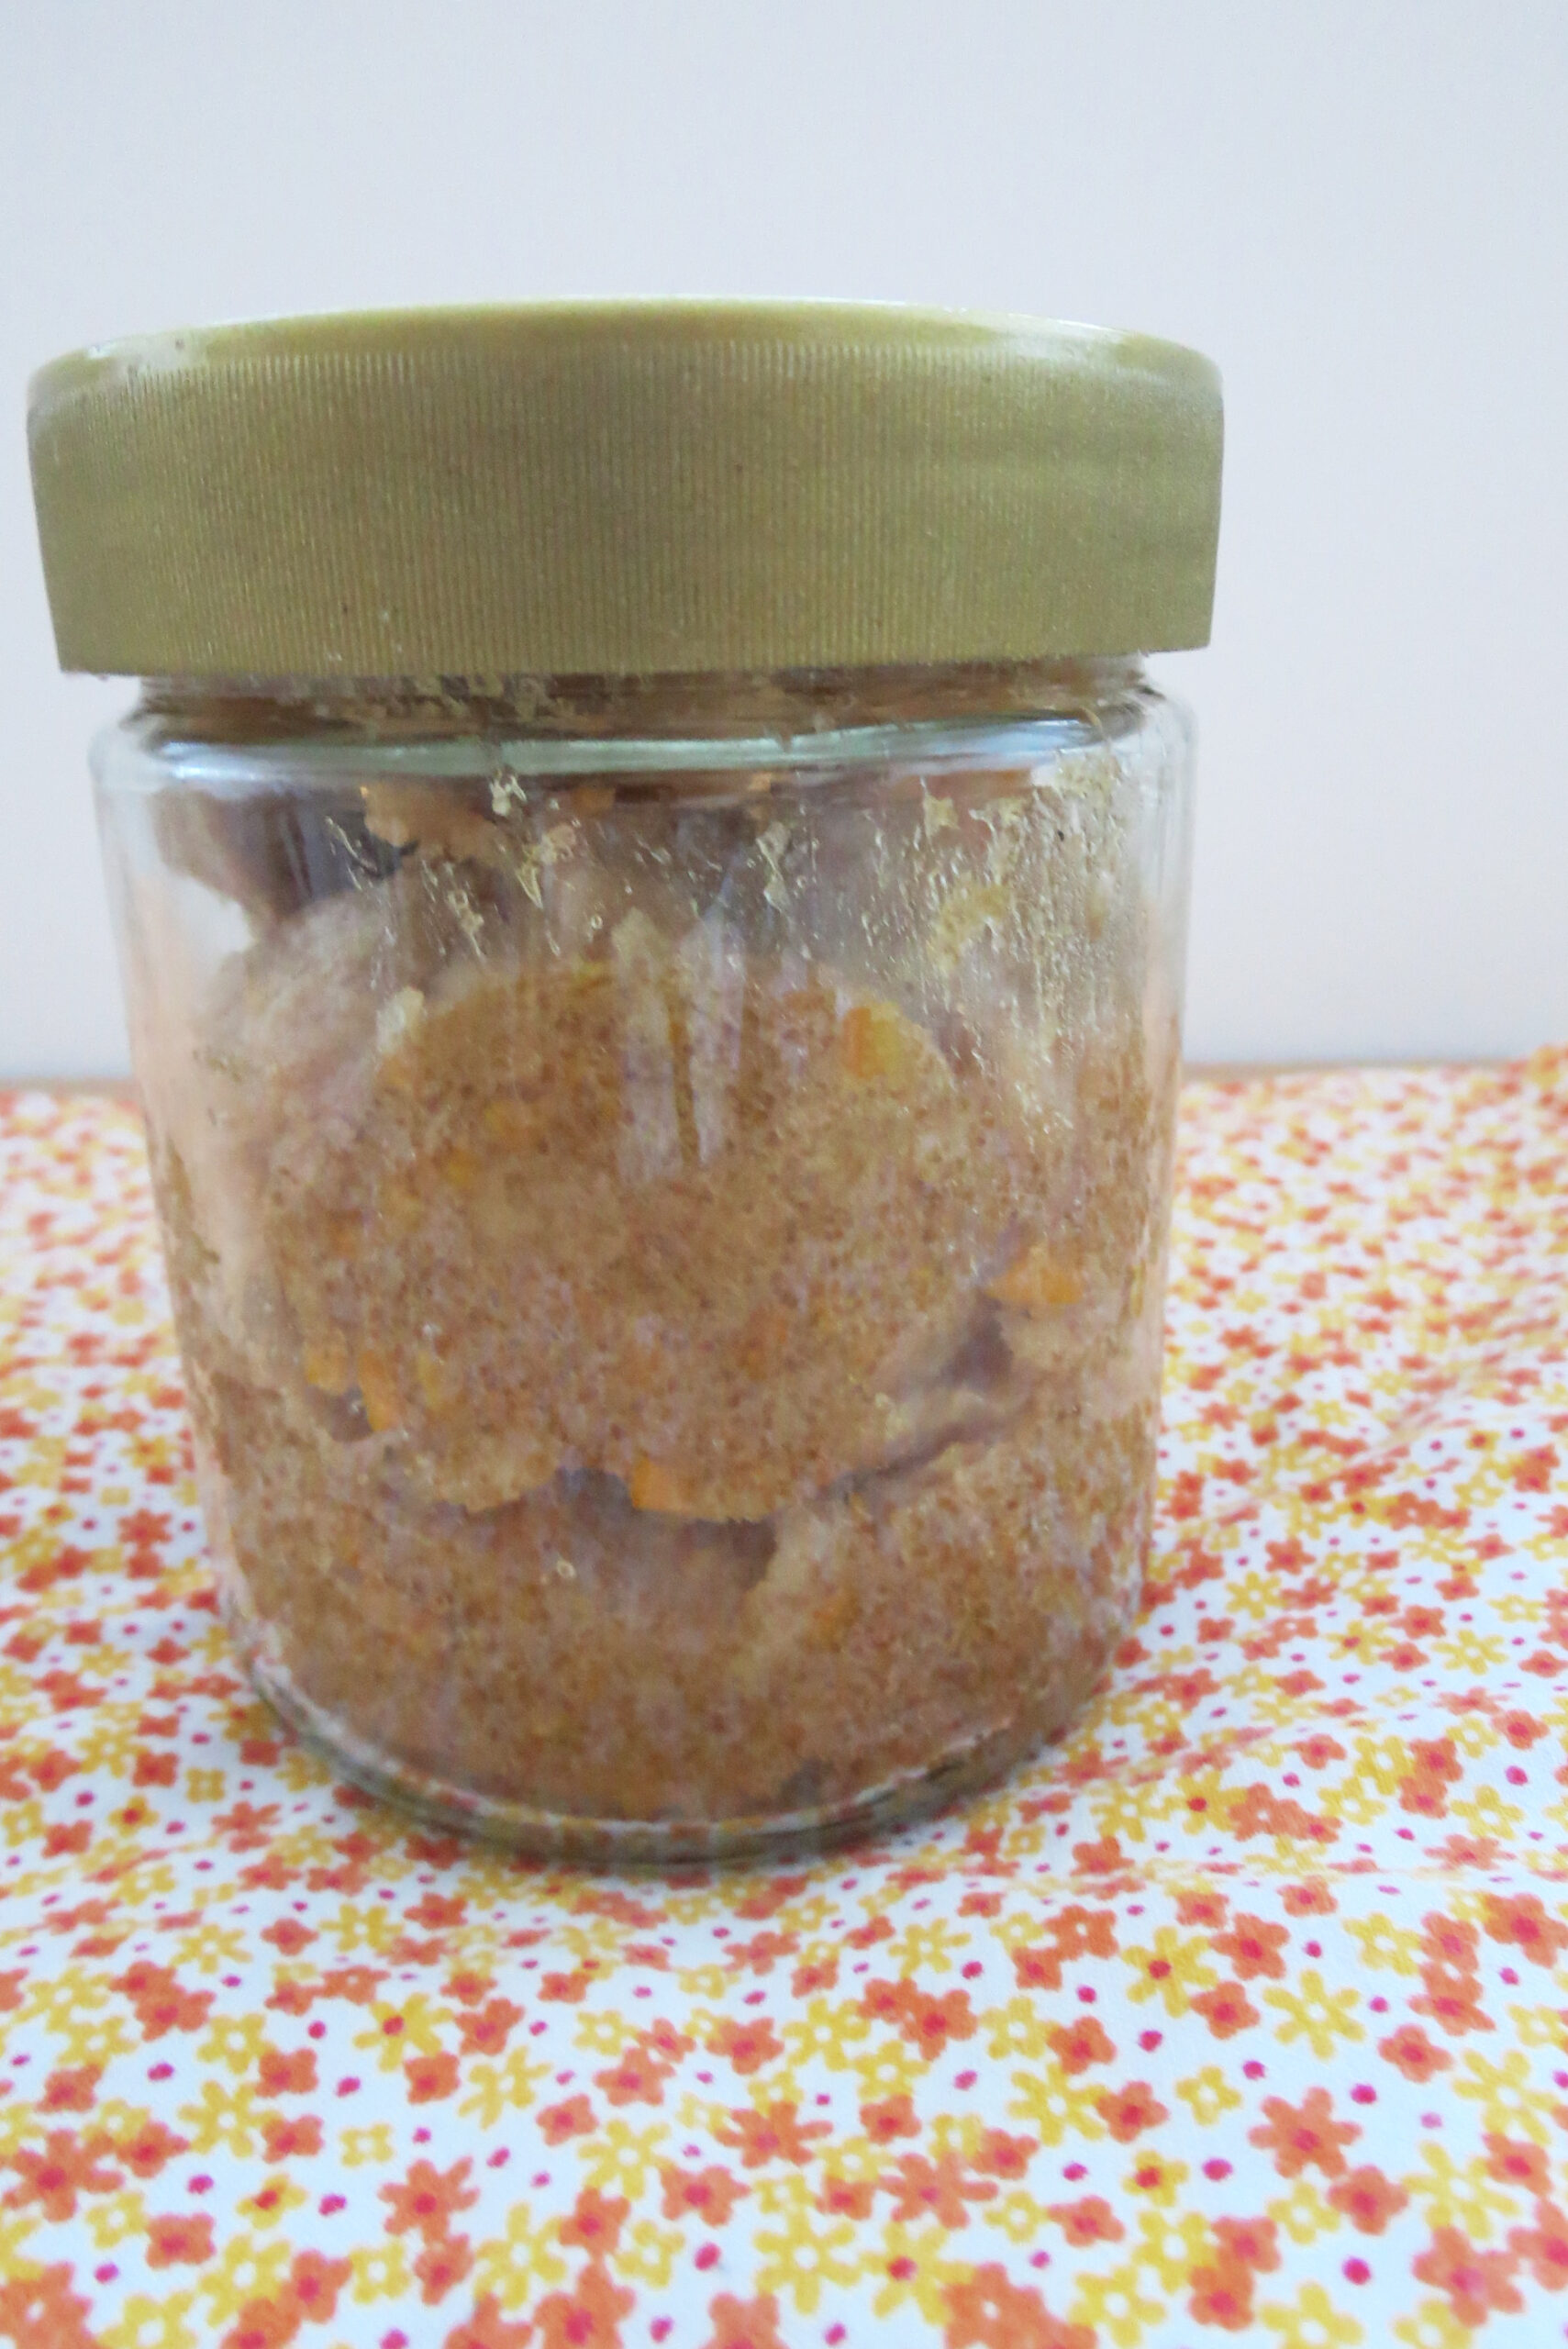
Either way, cut the peels into pieces, mix them with sugar and put them into a blender. Mix until the sugar and peel are powdery.
Distribute the moist mixture on a baking tray and let it dry in the oven at low heat until it’s completely dry.
Let the orange sugar cool down and, if necessary, break it up.
Store the orange sugar in a tight container. Essentially, it’ll last indefinitely, but it’s best consumed within a year of its creation. With time, it'll lose flavour.
Notes
Use your homemade orange sugar in cakes or desserts, mix it in hot cocoa or just drizzle it over pancakes.
Either cut the peel off the orange thinly so that you leave the pith (the "white stuff" underneath the peel) on the fruit. Or, if you just have the peels, put them upside down onto a wooden board and, with a sharp knife, scrape the pith off the peels.
Put the peels on a baking tray and let them dry in the oven at low heat. Alternatively, dry them in a dehydrator.
Test if the peels are completely dry by breaking them in half. If they're still bendy, put them back in the oven. If they break with a snap, they're ready.
Let the dried peels cool down. Put them into a blender and grind them until they've become a powder.
Store the orange powder in a closed jar at a cool, dry and dark place.
Notes
Use orange powder wherever you need a bit of orange flavour, i.e. in cakes, salad dressings or savoury dishes.
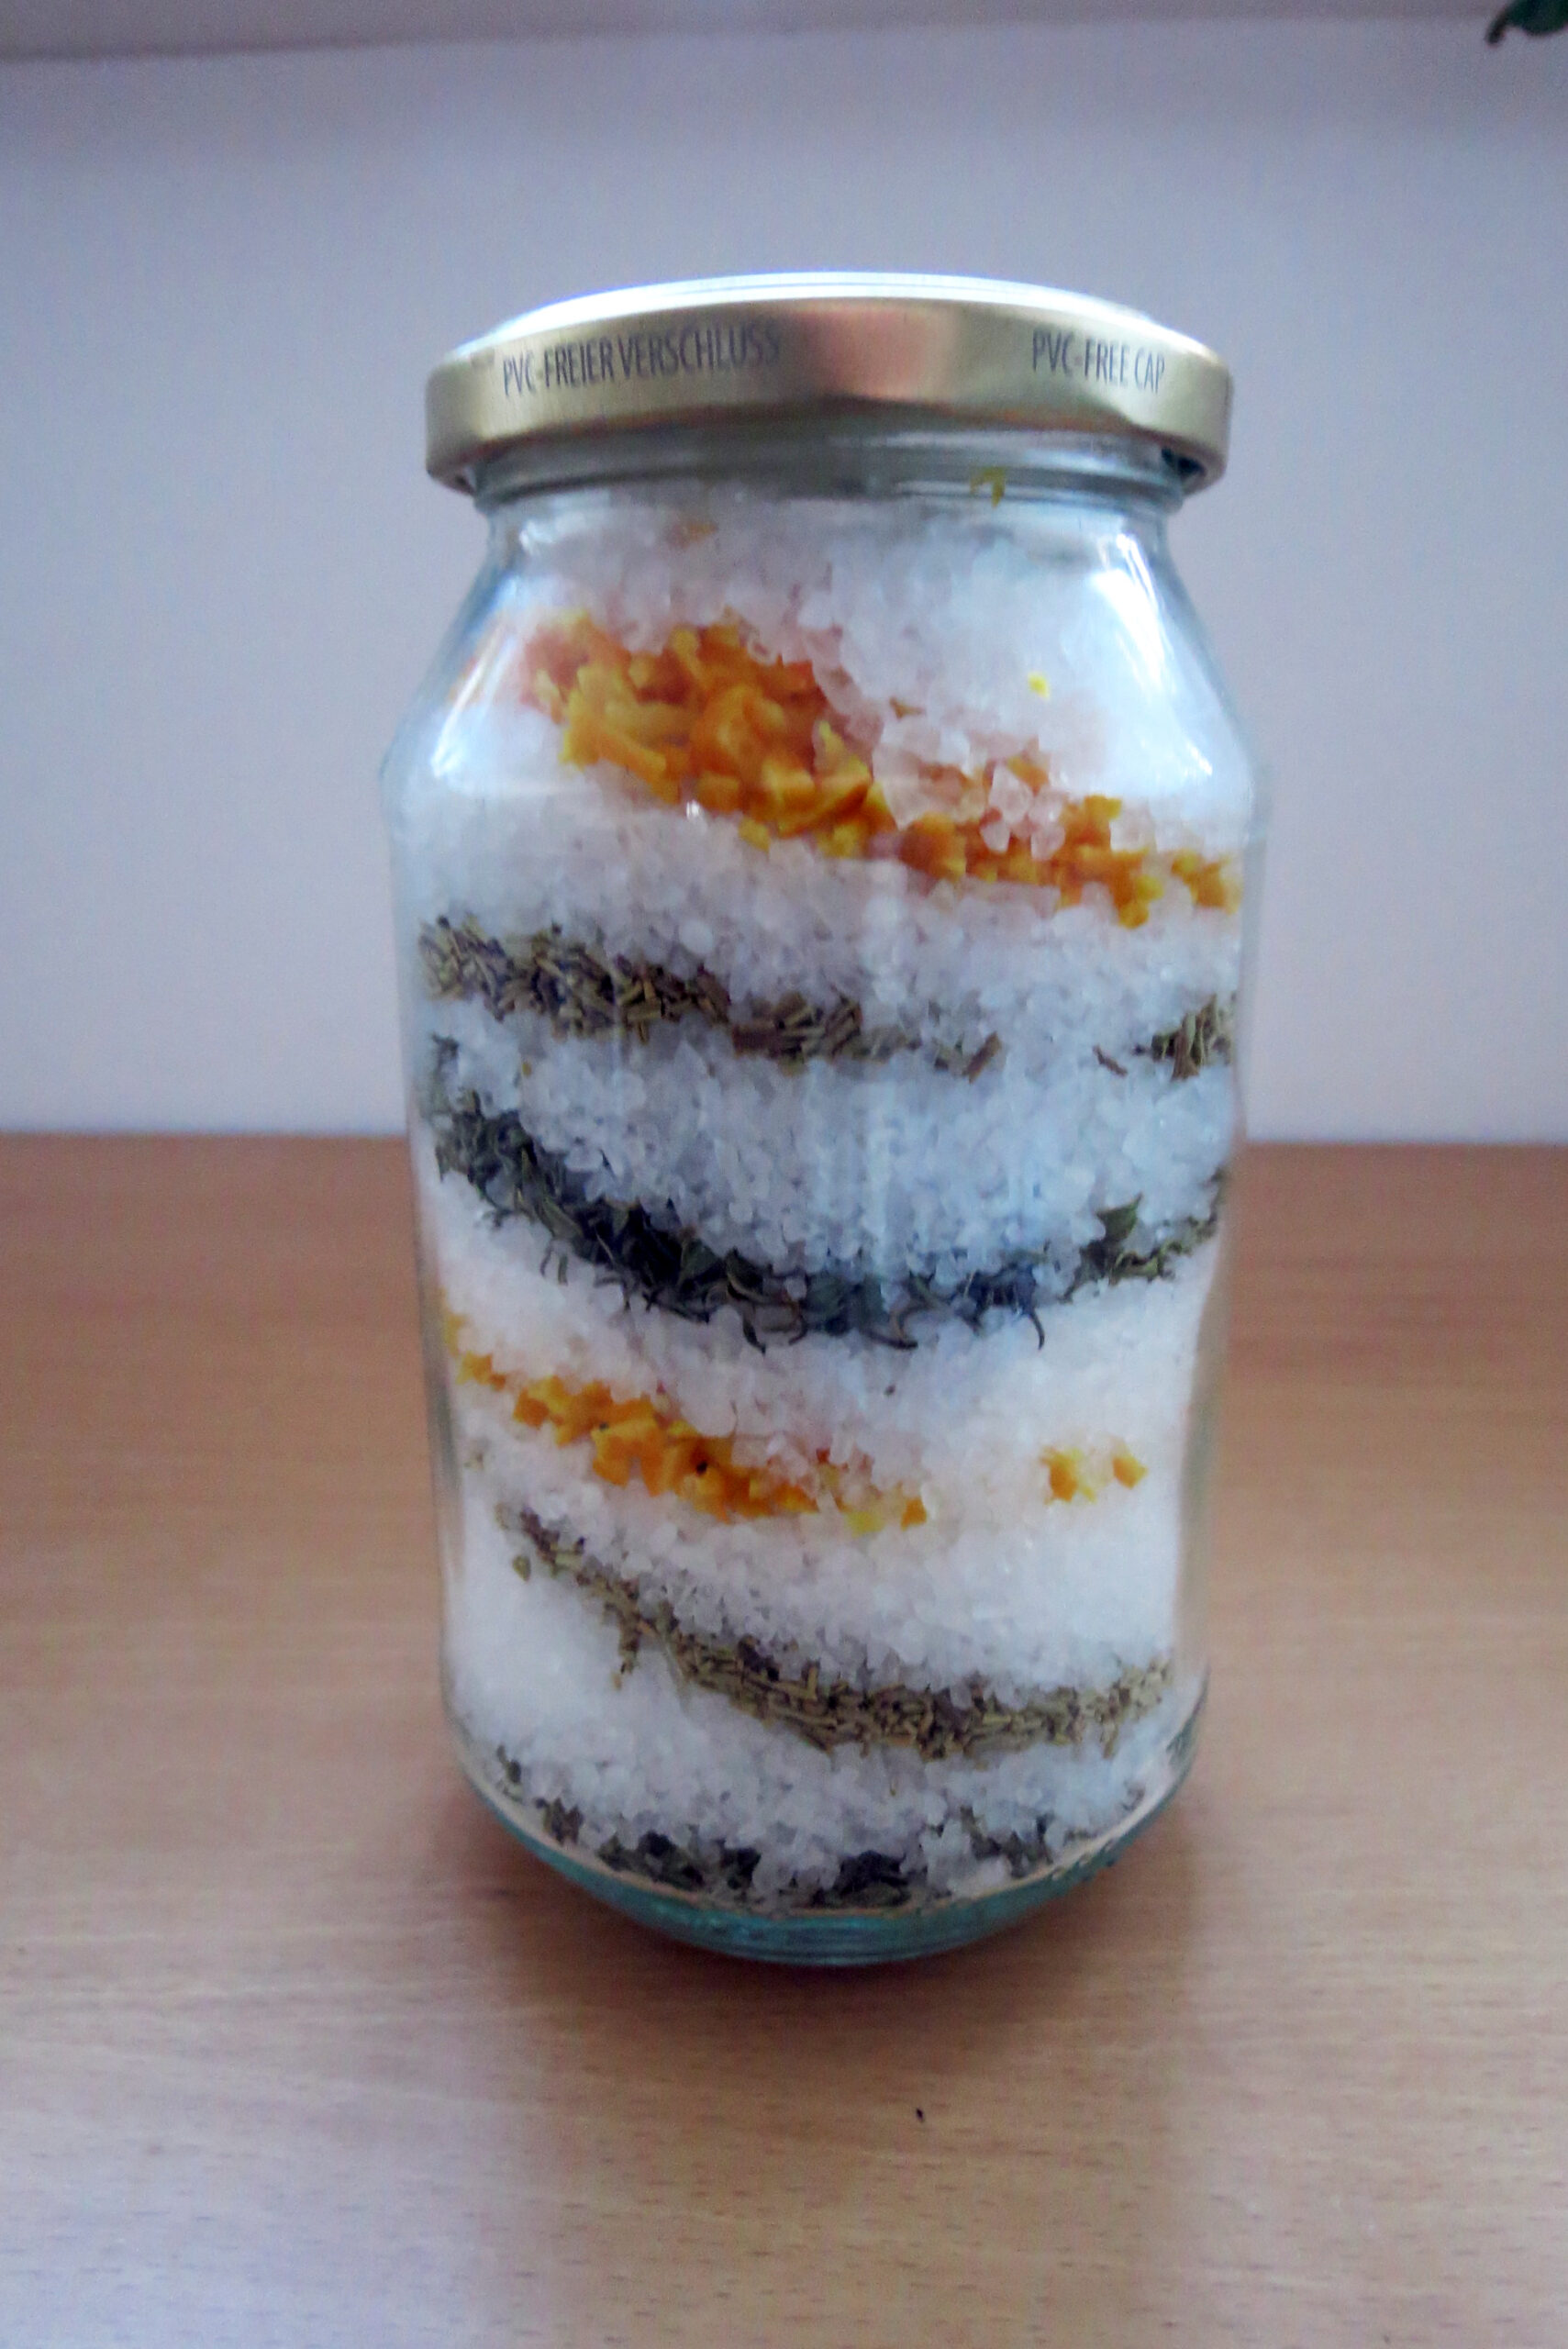
Either cut the peel very thinly off the orange so that the pith (the "white stuff" underneath the peel) stays on the fruit. Or, remove the pith by putting the peel upside down on a wooden board, and, with a sharp knife, scraping it off the peel.
Cut the peels into very small pieces.
Wash the thyme and rosemary and dry them thoroughly.
Put the salt, the orange peels, thyme and rosemary in layers into a glass jar and close it with the lid. After two weeks, the salt has taken on the flavours. You can either let it be as it is (this will make for a beautiful gift) or put the mixture in a blender and mix it until it's powdery.
Notes
Use orange salt in soups, gravies, tartes and dressings or sprinkle it over oven-baked vegetables.
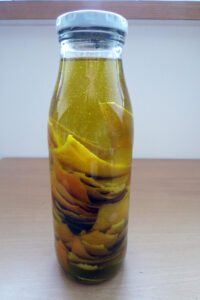
#6: Infused orange oil
To make infused orange oil, remove the white part (“pith”) of the orange peels and put them into a glass bottle until it’s about half full. Fill the bottle up with very good olive oil and let it sit for two weeks. Afterwards, remove the peels. You now have some great orange-flavoured oil that you can use for salad dressings, pasta sauces or even on your pizza.
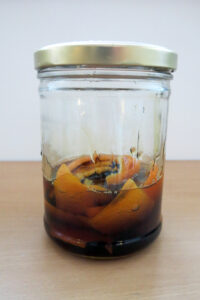
#7: Orange-flavoured honey
Cut the peel off one orange very thinly so that the pith stays on the fruit, or scrape off the pith from the peels.
Put the peels into a glass jar.
Add 250 grams of honey – either the real thing or one of your homemade herb kinds of honey, like this dandelion honey – and let it sit for 5 – 7 days.
The honey will get liquid during that time, but that’s fine.
Remove the peels and use your orange-flavoured honey in your tea or, instead of sugar, in pastry like this German yeast bun or “Martinsgänse”.
Either cut the peel very thinly off the orange so that the pith stays on the fruit. Or put the peels upside down on a wooden board, and, with a sharp knife, scrape the pith off.
Put the orange peels in a glass bottle so that it's about one-third full.
Fill the bottle up with clear alcohol. I prefer vodka because its taste is neutral.
Let the mixture sit for at least two weeks in a dark place. I usually put the bottle into my pantry.
There's no need to remove the peels. Just pour out as much extract as you need and, if necessary, fill the bottle up with vodka (or whatever you used) to keep the peels under the liquid.
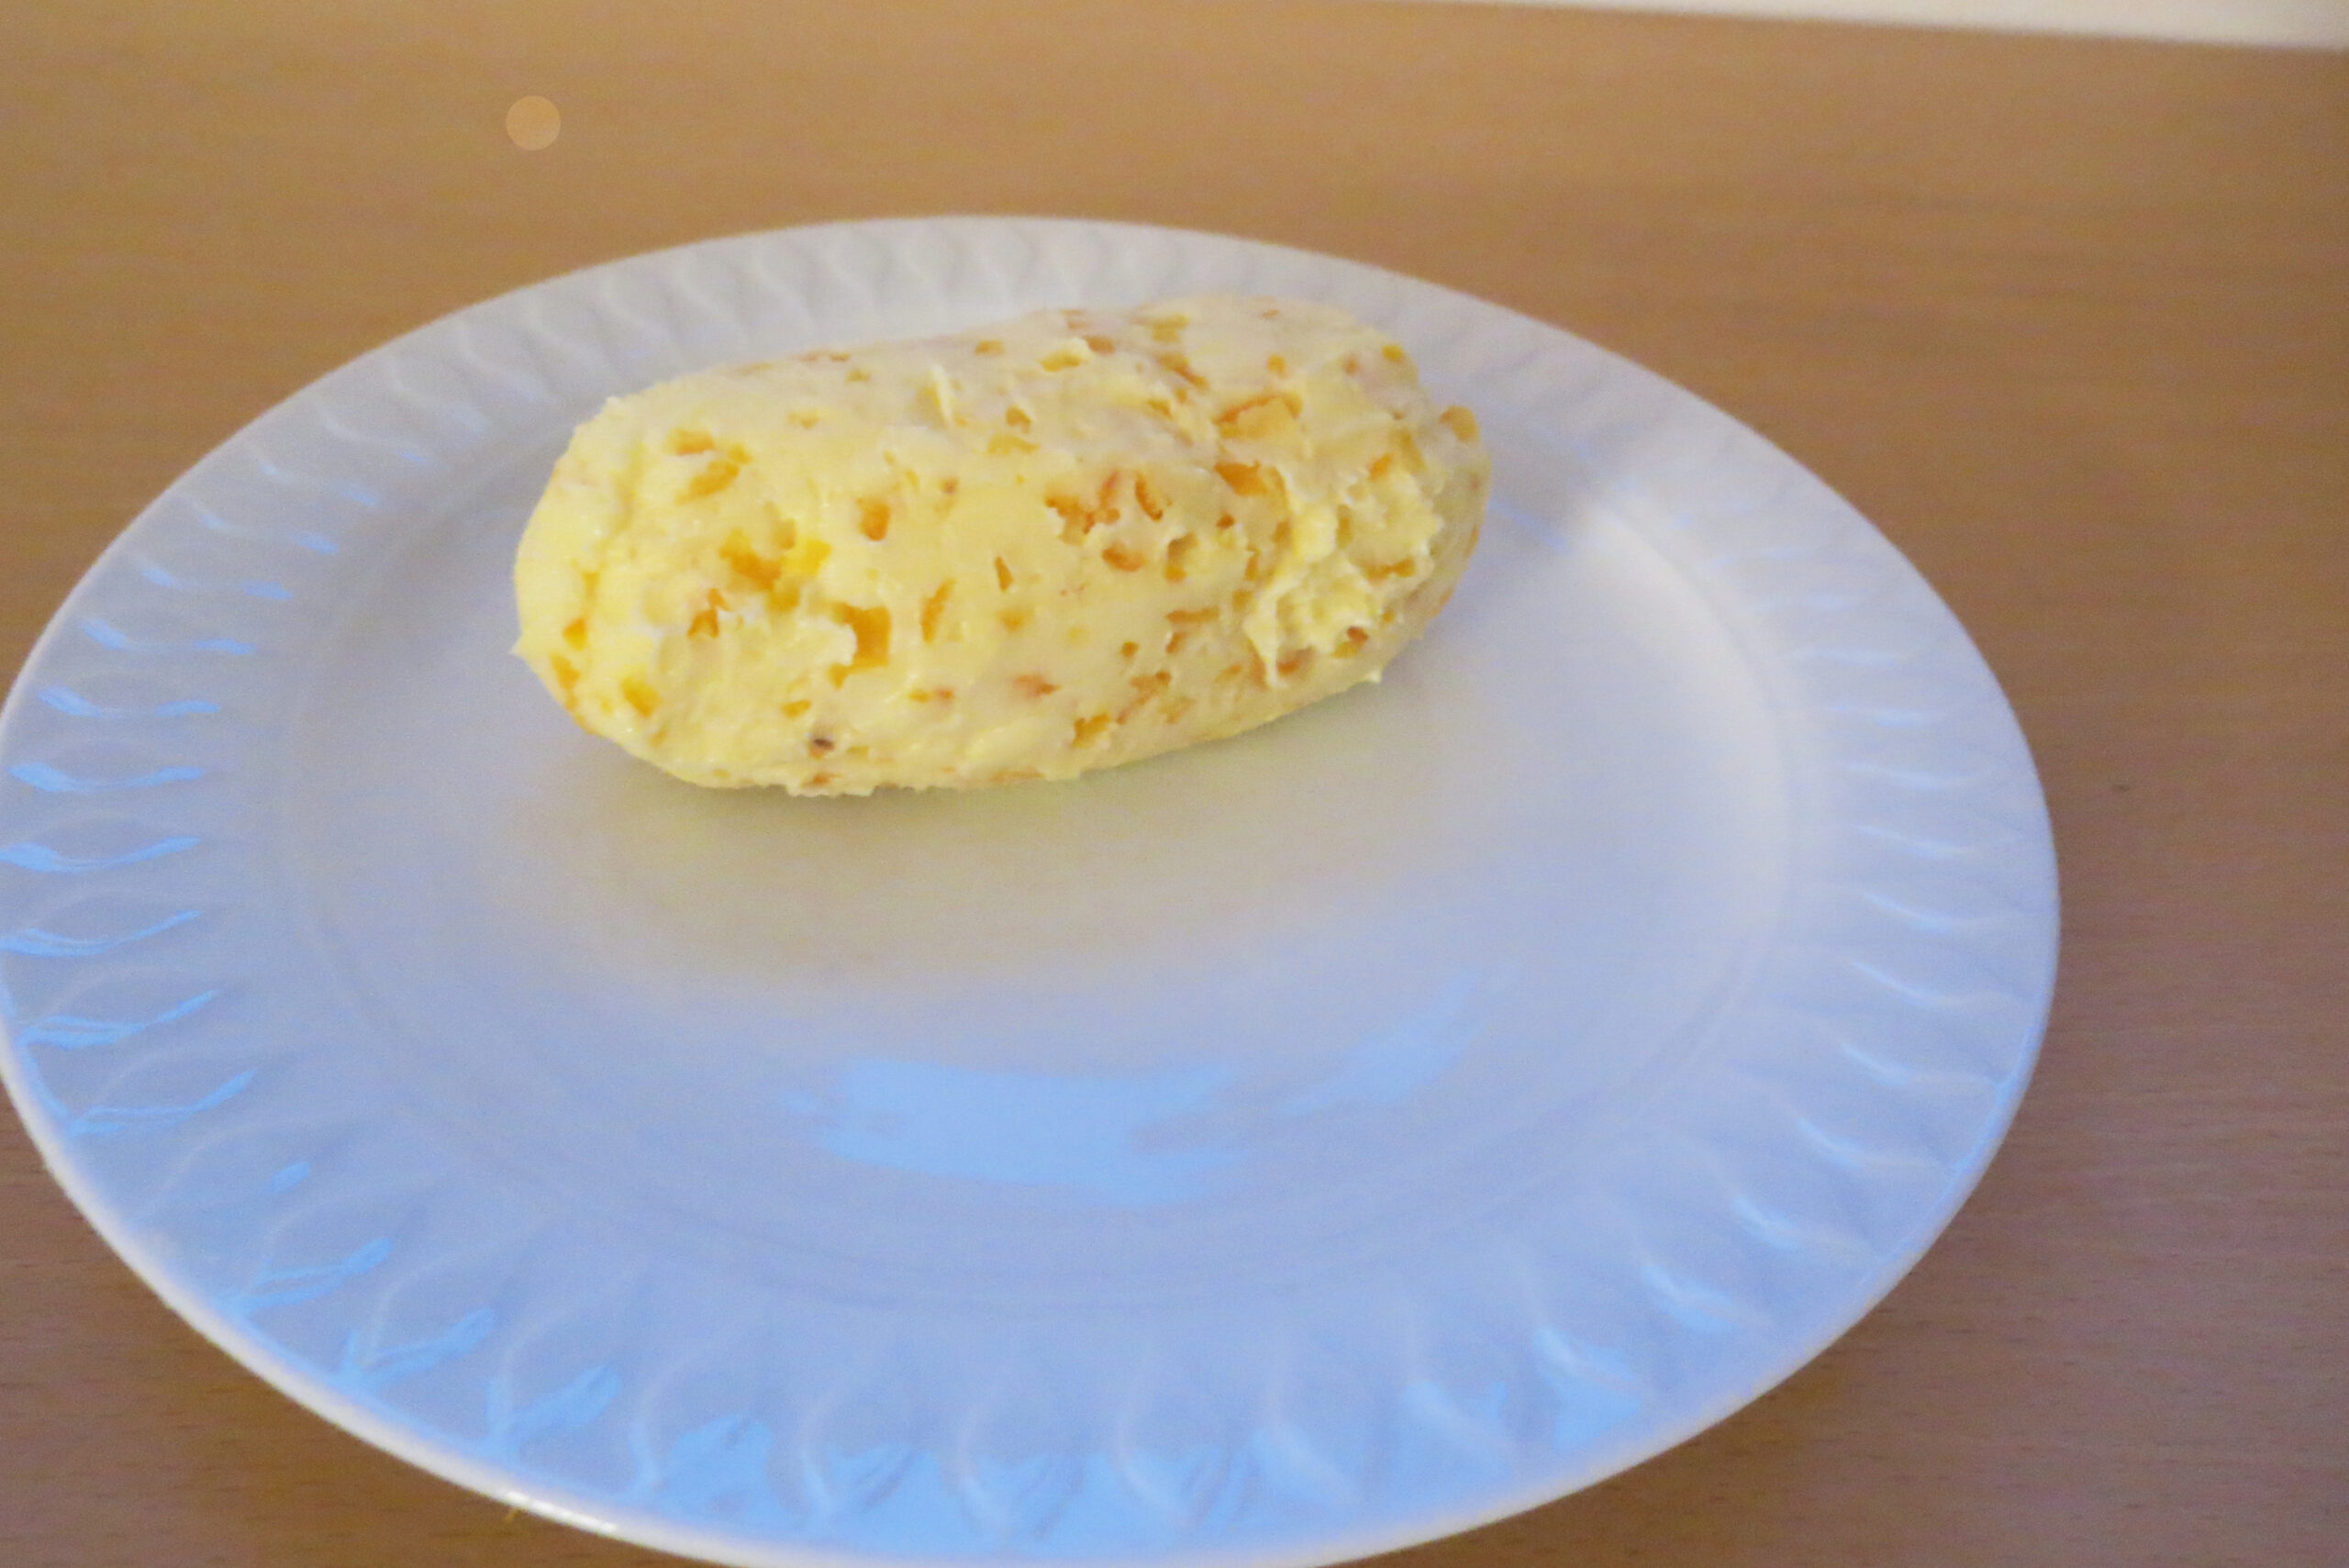
Cut the peel very thinly off of the orange so that the pith (the "white stuff" underneath the peel) stays on the fruit. Or put the peels upside down on a wooden board and scrape the pith off with a sharp knife.
Cut the peels into tiny pieces.
If you want to add herbs, wash them and dry them thoroughly, then cut them into tiny pieces.
Stir the butter to soften it, and then add the tiny orange peels, some salt and (optionally) herbs. Alternatively, you can use homemade orange powder (see blog for recipe) instead of the fresh peels or homemade orange salt.
Mix it all well and form the butter into a roll. Wrap the roll in cling film or aluminium foil and put it into the fridge until it's firm. This takes at least 30 minutes.
Notes
Enjoy homemade orange butter on some homemade bread or with grilled meat. Store the butter in the fridge where it will keep fresh for about one week. You can also freeze the orange butter so that you’ll have it available when the BBQ season starts. It'll store well for about 6 months.
#10: Ice cubes
This is a simple one: remove the white part (pith) of the orange peels, cut them into small strips and put them into ice cube forms. Fill up the forms with water and put them into the freezer. I love these orange ice cubes for all kinds of drinks as they don’t water them down but give them a subtle orange flavour.
DIY Orange Peel Cleaners
Not for consumption!
#11: Orange peel cleaner
I love cleaning with this orange peel vinegar cleaner. Not only does it remove stains well, but it also smells really good – not at all like vinegar.
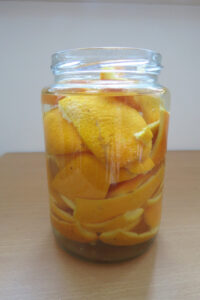
To make your own orange peel cleaner, put some orange peels (no need to remove the pith for this one) into a large jar until it’s about three-quarters full.
Fill the jar up with white vinegar or vinegar essence and let it sit for two weeks. Remove the peels and fill the cleaner in a spray bottle. If you used vinegar essence to make the citrus cleaner, you must dilute it. Fill about two-thirds of the bottle with it, and fill it up with water. Fill the bottle up with water.
You can use this cleaner against water stains in the bathroom or for cleaning your kitchen or pantry surfaces. In short, almost everywhere you can use vinegar for cleaning. Just avoid using it on porous stone surfaces, as the vinegar can etch
Orange peels for homemade body care products
#12: Orange body scrub
Orange Body Scrub
This is a fast, cheap and easy way to make a healthy body scrub with totally natural ingredients that will do your body nothing but good!
Thinly cut the peels from the orange so that the pith stays on the fruit. Or put the peels upside down on a wooden board and, with a sharp knife, scrape off the pith.
Cut the peels into tiny pieces.
Mix the peels with the coconut oil, sugar and orange juice until everything is well combined.
Put the homemade orange body scrub into a glass and store it in the fridge for up to one week.
Notes
This also makes for a wonderful last-minute DIY gift!
Which oranges are best for making orange peel recipes?
Always go for organic and untreated oranges. That’s the single most important factor (especially for food or skin-related recipes).
Then, look out for oranges with a relatively thick and aromatic peel. A peel that’s not too thin helps when candying, infusing, drying or zesting: it gives more “substance” and oils.
Also, the bitterness and sweetness in the peel should be well-balanced. Some oranges have bitter pith, which can make peels unpleasant if not properly prepared; a less bitter variety helps.
Can you eat orange peels?
Yes, absolutely! As long as the oranges are organic, you can eat the peels. They’ve got a very intense flavour, and you can either eat them raw (straight from the fruit) or preserved like candied orange peel, orange sugar, etc.
Can I freeze orange peels?
Yes. Actually, I often freeze orange or lemon peels when I don’t have time to use them right away. When you want to use them, just take them out of the freezer and let them thaw before processing them.
How do you dry orange peels quickly?
Remove the pith from the peels or thinly cut the peel off. The smaller the peels, the quicker they’ll dry. If you’re in a hurry, cut the peel into tiny strips before dehydrating them in a dehydrator or the oven.
How long does homemade orange extract last?
Forever. Seriously, the alcohol keeps the extract fine indefinitely as long as the peels are under the liquid. However, when you take out some of the extract and fill the bottle up with vodka several times, you may want to consider removing the peels and adding fresh ones.
Stop Throwing Away Orange Peels!
Just like those moms at my school who were amazed by these ideas, I hope you’re now excited to transform your orange peels from trash to treasure.
From now on, you’ll never look at an orange peel the same way.
Whether you’re whipping up candied treats for the holidays, mixing natural cleaners for your home, or creating luxurious body scrubs, these peels are pure gold.
The best part? You’re saving money, avoiding chemicals, and keeping waste out of landfills – all while making your home smell amazing. So next time you eat an orange, save those peels. Your future self will thank you.
What’s your favourite way to use orange peels? Share your tips in the comments – I’d love to hear from you!
If you’ve been searching for a non-bitter orange marmalade recipe, you’ve come to the right place. Traditional marmalade can be a bit… much. That sharp, bitter bite from all the pith and peel? It’s not for everyone. And if you’ve always thought marmalade just wasn’t your thing, I completely understand.
But here’s the thing: it doesn’t have to be that way.
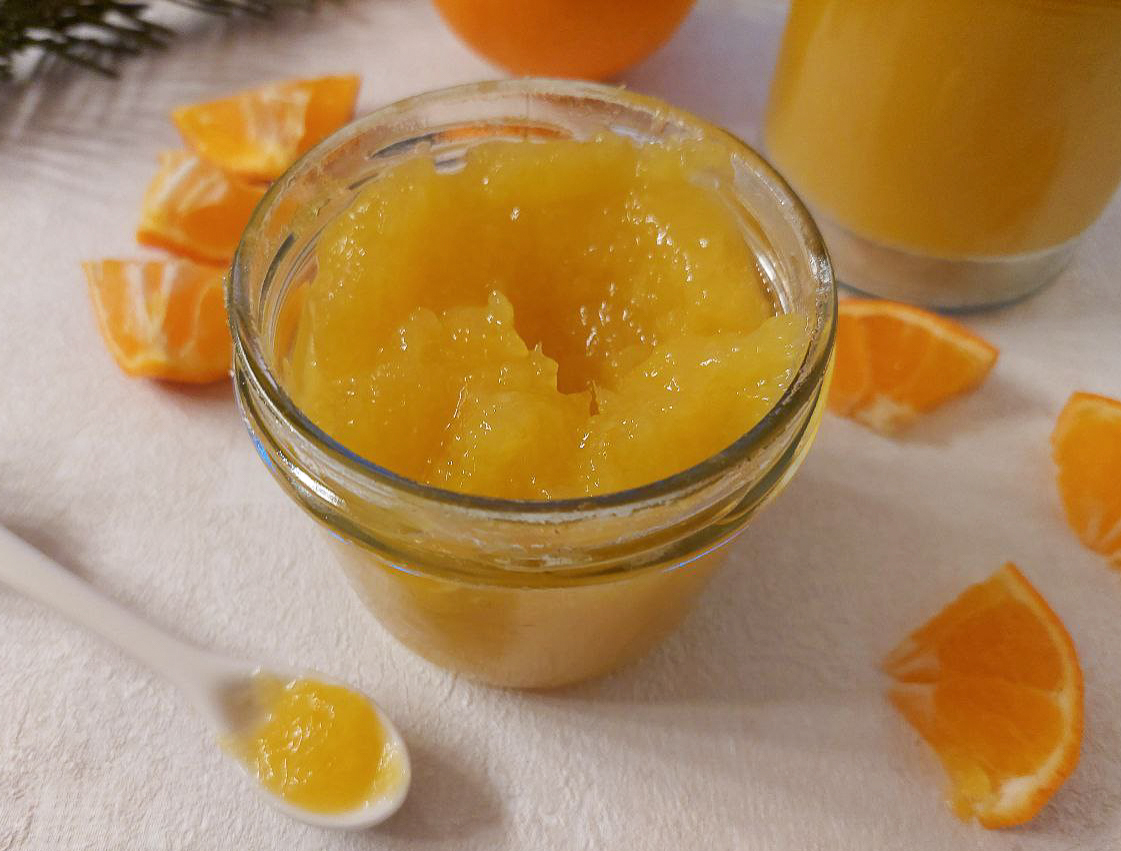
This easy orange marmalade recipe is ridiculously simple—just three ingredients, one pot, and about half an hour of your time. No boiling chunks of orange peel, no wrestling with bitter white pith, no complicated steps. Just fresh orange juice, a bit of finely grated zest, and sugar. That’s it.
What you get is a bright, sunny marmalade that tastes purely of oranges—sweet, glossy, and absolutely wonderful on warm toast or swirled into yoghurt or dolloped on scones. Or use it to fill these wonderfully citrusy Orange Christmas Cookies!
If you’ve been put off by bitter marmalade in the past, this recipe is your fresh start. Let’s make something delicious together!
Ingredients
This non-bitter orange marmalade requires just three simple ingredients:
Oranges
You’ll need 10-15 oranges, depending on their size – enough to yield 900 ml (about 4 cups) of freshly pressed juice. It’s better to have a few extra than to come up short!
Choose organic oranges whenever possible, since we’re using the zest as well as the juice. The zest is where all that bright orange flavour lives, and organic means no wax or pesticide residue on the peel.
Sugar
Sugar serves two purposes in marmalade: it preserves the fruit and helps it set properly, ensuring your marmalade stays shelf-stable for months.
Although oranges have natural sweetness, we still need sugar for preservation. For this recipe, use a bit more than one-third the amount of sugar compared to juice (350g sugar for 900ml juice).
You have two options:
Household sugar + pectin: Use regular granulated sugar and add pectin separately
Jam sugar: This already contains pectin, making the process even simpler
Pectin
Pectin is what makes your marmalade gel and set properly. If you’re using regular household sugar (not jam sugar), you’ll need to add pectin separately.
Check the package instructions on your pectin brand for the exact amount—it varies by manufacturer. Most sachets are designed for specific fruit-to-sugar ratios, so look for one labelled for 2:1 or even better 3:1 (fruit to sugar).
Instructions
Making this non-bitter orange marmalade is so simple, you’ll wonder why you ever bought it from the store!
Step 1: Prepare the jars
Sterilise the jars and lids you want to store your marmalade in, by using one of the methods described in this article.
Step 2: Grate the zest
Wash ALL the oranges thoroughly under warm water to remove dirt and residues. Using a fine grater or microplane, finely grate off the zest of two oranges—just the bright orange outer layer, avoiding the white pith underneath, which adds bitterness. Gather the zest in the pot you’ll use for cooking.
Step 3: Press the juice
Now, cut the oranges crosswise in half (around the “equator”). Use a citrus juicer to squeeze each half and pour the juice into a measuring jug. Continue until you have 900 ml (about 4 cups) of freshly pressed orange juice.
Don’t throw away the orange peels! In this article, you’ll learn about 12 different uses for orange peel.
Step 4: Mix the ingredients
Pour the orange juice into the pot with the zest. Add the sugar and pectin (if necessary) and stir everything together until well combined.
Step 5: Cook the marmalade
Bring the mixture to a rolling boil. As soon as it bubbles, set your timer for 4 minutes and let the marmalade cook. Keep the heat at medium-high to maintain the rolling boil and regularly stir the marmalade to prevent it from burning or boiling over.
Step 6: Gel test
After 4 minutes, test if the marmalade thickens by putting some of the hot liquid onto a cold plate. Let it sit for about 15 – 20 seconds and slowly tilt the plate.
If the mixture thickens visibly and runs only slowly, or wrinkles slightly when you push it with your finger, the marmalade is ready to be ladled into the jars.
If it’s too runny, cook the marmalade for another 1 – 2 minutes.
Step 7: Pour the marmalade into jars
Once the marmalade is ready, fill it into the prepared jars with a ladle. Be careful: it’s literally boiling hot!
Fill each jar, leaving about 1cm (⅓ inch) headspace at the top. Then, close it tightly with the lid (again, be careful: it’s hot!), and put it upside down on a kitchen towel on your counter. Leave the jars inverted for 10 minutes, then flip them right-side up.
Let the marmalade cool down completely and listen for the satisfying ‘pop’ as the lids seal while cooling.
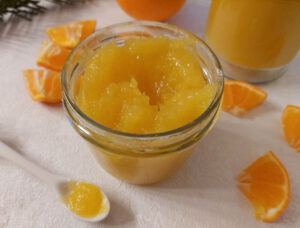
Non-bitter orange marmalade
This easy recipe uses fresh juice and zest for sweet, sunny marmalade in 30 minutes.
Sterilise the jars and lids as described in this article.
Wash the oranges.
Finely grate the zest of two oranges with a fine grater or microplane into a large pot. Just use the bright orange outer layer and avoid the white pith underneath.
Press the oranges until you have 900 ml of fresh juice. Put the juice in the pot to the orange zests.
Add the sugar and pectin (if necessary), and mix all the ingredients with a wooden spoon.
Bring the mixture to a rolling boil at medium-high heat and maintain the boil for 4 minutes
Test if the marmalade thickens as described in the blog post.
Ladle the hot marmalade into jars, tightly close them with lids, and put them upside down onto a kitchen towel on the counter.After 10 minutes, flip them back and let them cool down completely.
Notes
Orange marmalade can be stored in a cool and dry place for up to one year.This makes for 5 jars à 250 ml.
Your New Favourite Marmalade
And there you have it—non-bitter orange marmalade that’s actually a joy to make and eat. No complicated steps, no wrestling with pith, just three ingredients and half an hour of your time. If traditional marmalade has always been too much for you, this is your fresh start. And it makes for a great (last-minute) gift! Spread it generously, share it with friends, and enjoy every sunny, sweet spoonful!
Do you like jam and marmalade as much as I do? Then you’ll love these articles:
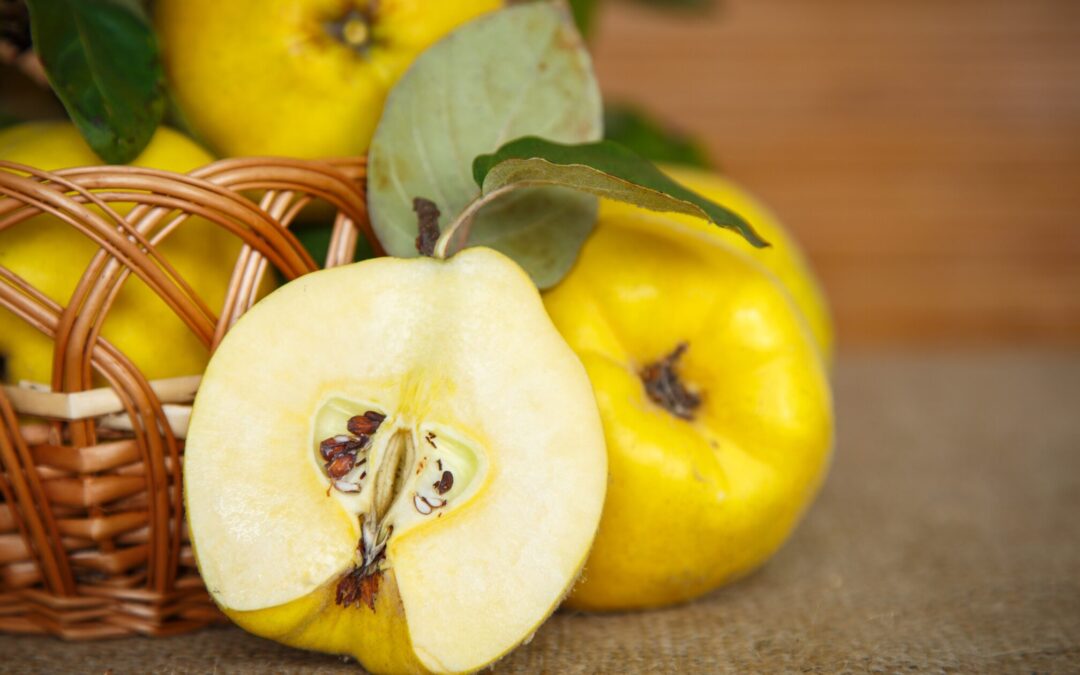
Once the apples, plums, and pears are harvested, once all the nuts are dried and in bags for storage, and the vegetable garden is cleaned up for winter, we are blessed with one last fruit: the quince. Looking like a knobbly apple but smelling deliciously aromatic, quinces transform from hard and astringent into sweet or savoury preserves and dishes. For decades, quinces were regarded as old-fashioned, but their unique flavour has been rediscovered for preserving and seasonal cooking. Unlike apples and pears, to which they are related, quinces can’t be eaten raw. Through preservation, however, they transform their colour and release their wonderful fragrance, a mixture of apples, pears and roses. Whether you’ve discovered these golden beauties at a local farmers’ market or are lucky enough to have a quince tree in your garden, I show you five foolproof ways to preserve their unique charm.
From classic jellies to Spanish membrillo (a quince paste) that pairs wonderfully with cheese, these recipes will help you capture the essence of autumn’s golden fruit in jars. Even if you are an absolute beginner and have never preserved fruit before, these step-by-step methods will ensure success in the kitchen.
A Brief History of Quince
Quince is the sole member of the genus Cydonia of the Rosaceae family (source: Wikipedia). As I said before, quinces are related to apples and pears, which are Rosaceae, as well. Originally, quince is native to the region of the Caspian Sea, but it thrives in a variety of climates, even cold ones.
In ancient Greece, quinces were attributed to Aphrodite and often called “golden apples”, which shows how cherished they were even then. But also in Europe, quinces were highly esteemed and for some time even a status symbol for wealth.
Typically, quinces are available from late September through December. While apples and pears store very well and thus can be consumed almost year-round, fresh quinces cannot be stored very long. If we want to extend their enjoyment throughout the entire year, we have to preserve it.
Unique Transformation Process
Raw quinces are hard, astringent and inedible. By cooking and preserving, however, they undergo a remarkable change:
Their colour transforms from a pale yellow to a beautiful rose-pink to red.
Their hard flesh becomes tender and succulent.
Harsh tannins, which are responsible for the astringent effect, develop into a honeylike sweetness.
Their fragrance and flavour intensify.
Culinary Versatility
So, why would we make the effort to preserve quinces? The answer is easy: preserved quinces are more versatile than fresh ones. Quince jelly, for example, brightens your morning toast and pairs very well with roasted meats. Membrillo, a Spanish quince paste, is essential for cheese boards. Preserved quince in syrup can be added to desserts all year round. And have you ever tasted how dried quince can enhance a winter stew!
Apart from adding to your stockpile, home-preserved quince products can also make unique and appreciated gifts for loved ones. Speciality quince preserves may be expensive to buy ready-made, but are affordable to make at home.
Last but not least, quinces are beneficial to our health: they are rich in vitamin C, dietary fibres, as well as antioxidants. Furthermore, they have natural compounds that aid digestion. Best of all, these beneficial properties are retained by our preservation methods.
Before You Begin
Selecting and Preparing Quince
To get the best preserves, you must make sure that you have the best fruit. Quinces are usually ripe between the end of September and the end of October. Only choose firm, ripe quinces without any blemishes. Look for a yellow-gold colour; green quinces are not ripe yet.
If you can’t process the quinces right after harvest, you may store them in a cool and dark place at room temperature, i.e. 13 – 15 °C (55 – 60 °F) for 1 – 2 weeks.
You can also store them in the fridge: wrap them individually in newspaper and put them in the crisper drawer. That way, they’ll last for 2 months.
If you have a very cold basement or a root cellar, you can store quinces in shallow boxes layered with newspaper. At a temperature of 0 – 4 °C (32 – 40 °F) and a humidity of 85 %, they’ll last 3 – 4 months.
Never store quinces in plastic bags as they will retain too much moisture and mould!
Basic preparation steps
There are some basic steps for preparing quinces. First of all, remove the downy fuzz by rubbing it off with a wet cloth. This is an important step as the fuzz causes a bitter taste.
Afterwards, wash the quinces and dry them thoroughly.
Depending on what you want to make, you’ll have to peel the fruits. This is best done with a potato peeler. Then quarter the quinces and remove the core. This may be a bit tricky as the quinces are relatively hard. Be careful with your fingers.
How to preserve quince: preserving methods
There are various methods for preserving quinces, ranging from cooking to juicing and even drying. Let’s break down every method:
Classic Quince Jelly
Angela Braun
Classic Quince Jelly
Classic quince jelly is easy to make, but requires juicing first.
To make quince jelly, we have to make juice first. For that purpose, rub off the downy fuzz, then wash the quinces and cut them into quarters. For making juice, it’s not necessary to peel the quinces or remove the core. On the contrary: as the peels contain a large amount of pectin, it’s advantageous to leave them on.
There are two methods for making juice from quinces (or apples or pears, for that matter): with a steam juicer or with a normal pot.
If you use a steam juicer, fill the bottom pot with water to the mark. Put on the juicer pot and insert the fruit basket in which you put all the quince quarters. Close the lid and heat the water. The hot water vapour will gently cook the fruits and release their juice, which gathers in the juice pot. From there, it can be extracted via the attached tube and filled into sterilised glass bottles or jars.
However, a steam juicer is not the only tool you can use to make juice from quinces. A simple (large) pot with a lid is also ok. In that case, chop the quinces into quarters, put them into the pot and fill it up with water until all the fruits are under the brim. Bring the water to the boil and let it simmer for 45 – 60 minutes. Afterwards, strain the juice through a colander that you layered with a cheesecloth. To squeeze out every last drop of the juice, gently press the quinces. Fill the hot juice into sterilised bottles or jars.
Cooking the jelly
To make the jelly, measure one litre of the quince juice. Put it into a pot and add 500 g of preserving sugar 2:1 or 500 g of normal sugar and one sachet of pectin.
Mix it all very well until the sugar has dissolved, and bring this syrup to a boil. Let it boil for 4 minutes and test its consistency by dropping a spoonful of liquid onto a plate. Tilt the plate and let the mixture run. Wipe through the jelly trail with your finger. If it sets, it’s ready to be poured into jam jars. If not, let it boil for another minute and repeat the test.
When the jelly’s ready, carefully ladle it into jars of 250 ml. Fasten the lid and put the glasses upside down on a dishcloth. After 15 – 20 minutes, put the jars upright again.
Let the jelly cool down completely, label the jars and store them in a cool, dark place for up to one year.
If you like this quince jelly, you’ll wan to try out these recipes as well:
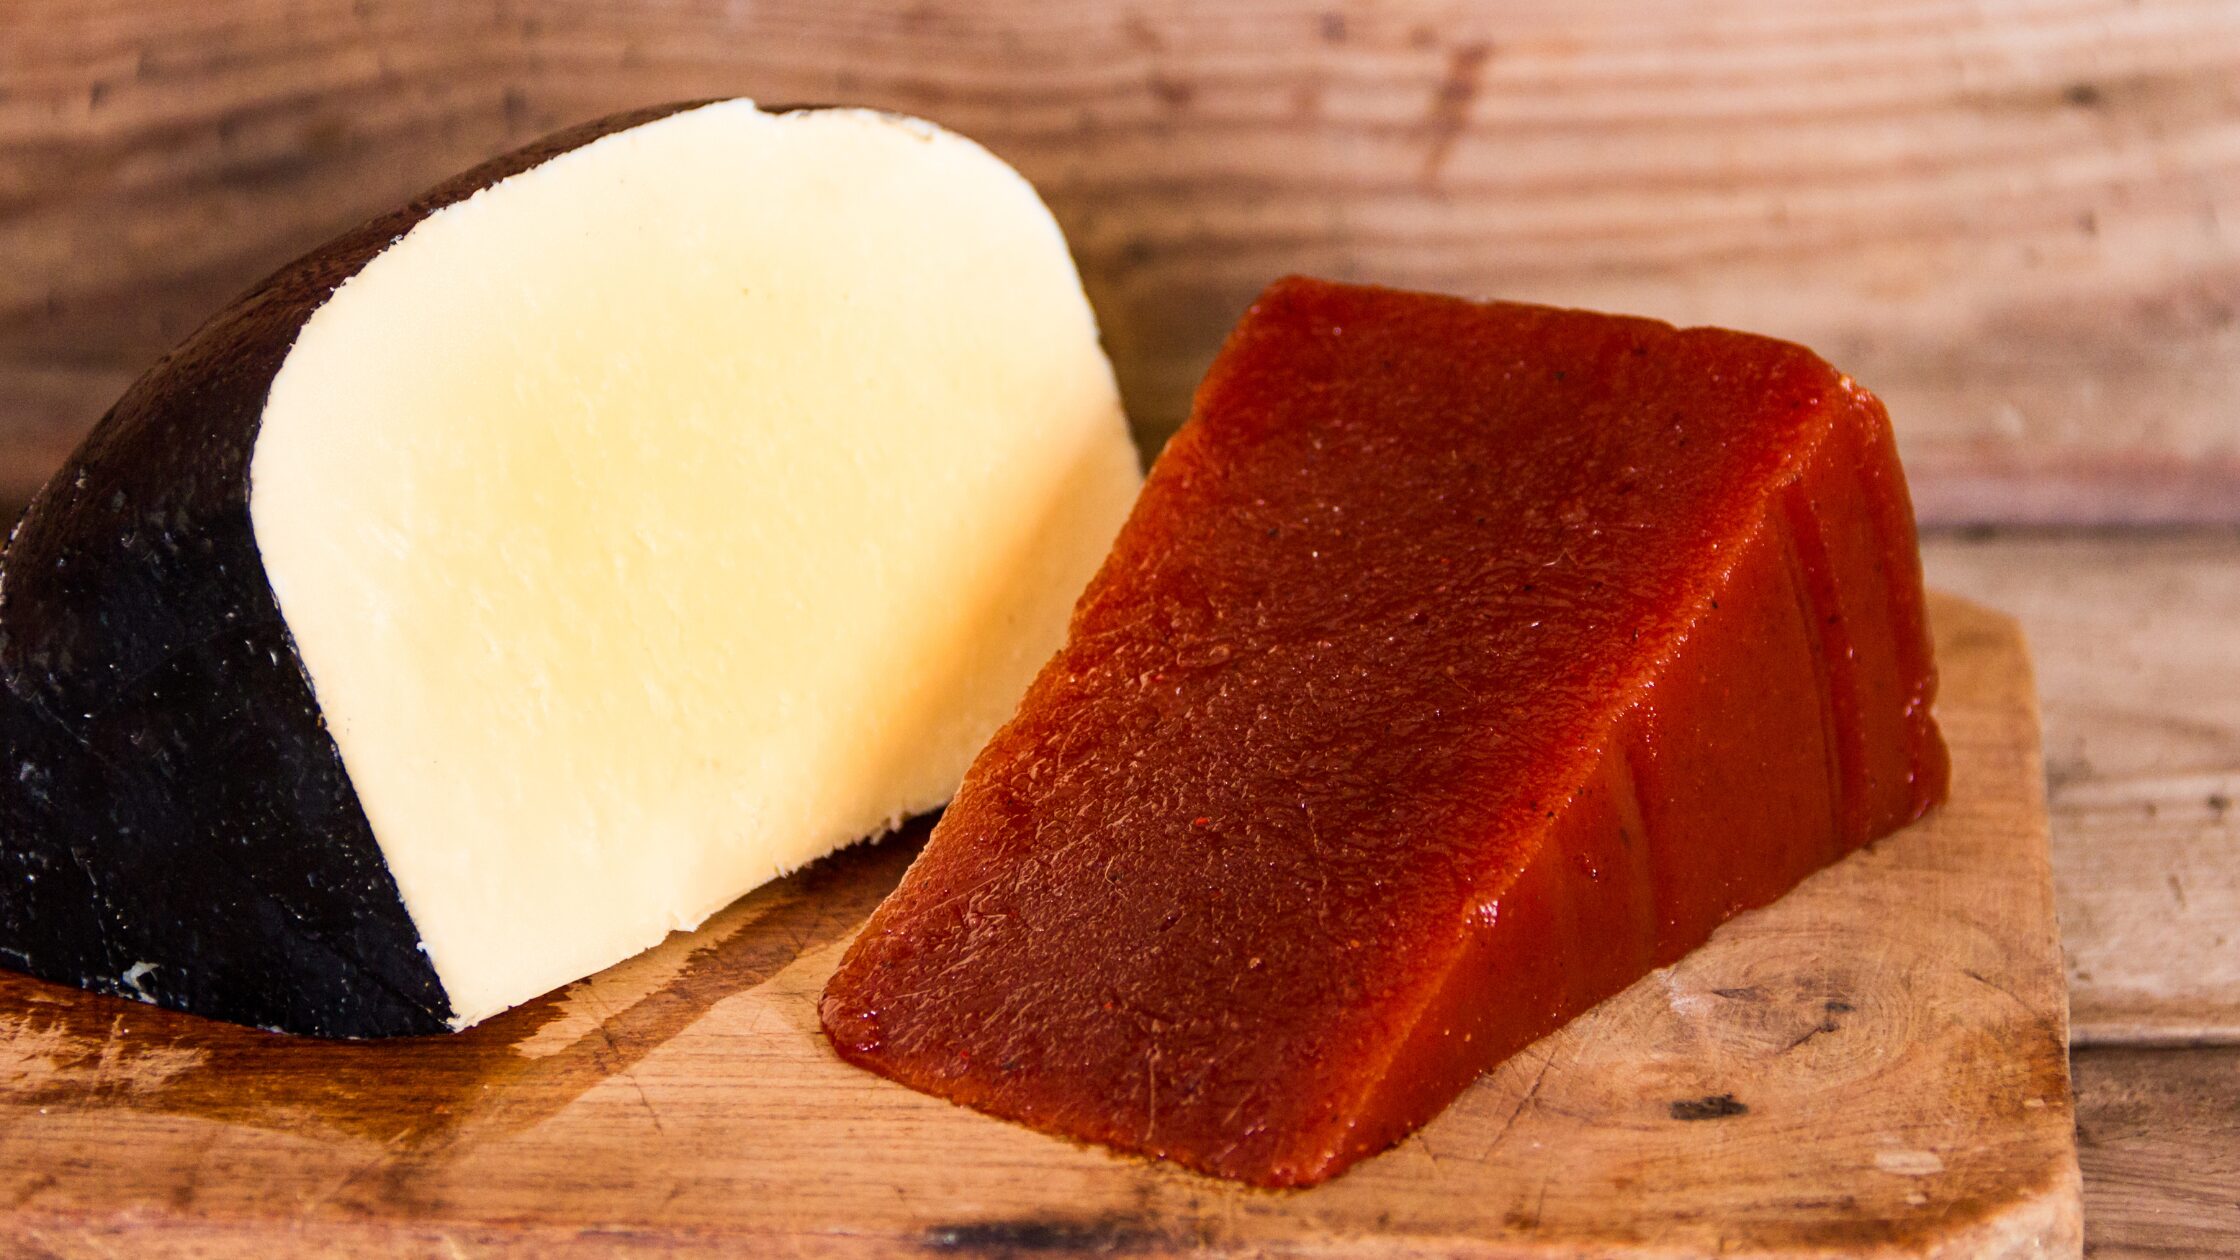
Shortly put, membrillo is a quince paste, known in France as cotignac and in Germany as Quittenkäse (“quince cheese”). The basic principle is always the same: cook quince with sugar, blend it, then let it set and – optionally – dry it. Easy, isn’t it? Let’s break the process down.
Angela Braun
Membrillo
Membrillo, also known as cotignac (France) or Quittenkäse (Germany) is a paste made of quinces.
Rub the fuzz off the quinces and wash them thoroughly.
Quarter the quinces, peel them and remove the cores and any hard or “grainy” parts. You can use undamaged peels and the cores to make quince vinegar. If you want to know more about that, hop over to this article on apple vinegar. The process is the same, and you’ll get a marvellous homemade vinegar from scraps!
Weigh the cut quinces before cooking and put them in a pot. Add 1 litre of water and bring it all to a boil. Let it simmer until the quinces are tenderly cooked. This will take 30 – 45 minutes.
Puree the fruit with a kitchen blender until you get a smooth mass. Add the sugar to the quince puree and let it all cook while constantly stirring. The colour will progressively change from yellow to a brownish-red. Keep stirring well to prevent burning the paste.
When the dough releases from the sides of the pot, you can ladle it into a square or rectangular form, lined with baking paper.
Let it cool down completely. When it’s firmly set, you can drop it out of the form.
If you want to store it, leave it in that shape and cover it with powdered sugar. Afterwards, wrap it in greaseproof paper and store it in the fridge where it will last for at least 3 months. Alternatively, you can freeze membrillo for up to one year.
Notes
Serving suggestions:To serve the membrillo, cut slices of about 1 cm and chop them into small squares. It pairs wonderfully with hard or semi-hard cheese like Manchego or brie. Alternatively, membrillo can also be used as an ingredient in various dishes, such as a filling for tarts and pastries, or as a glaze for meats.
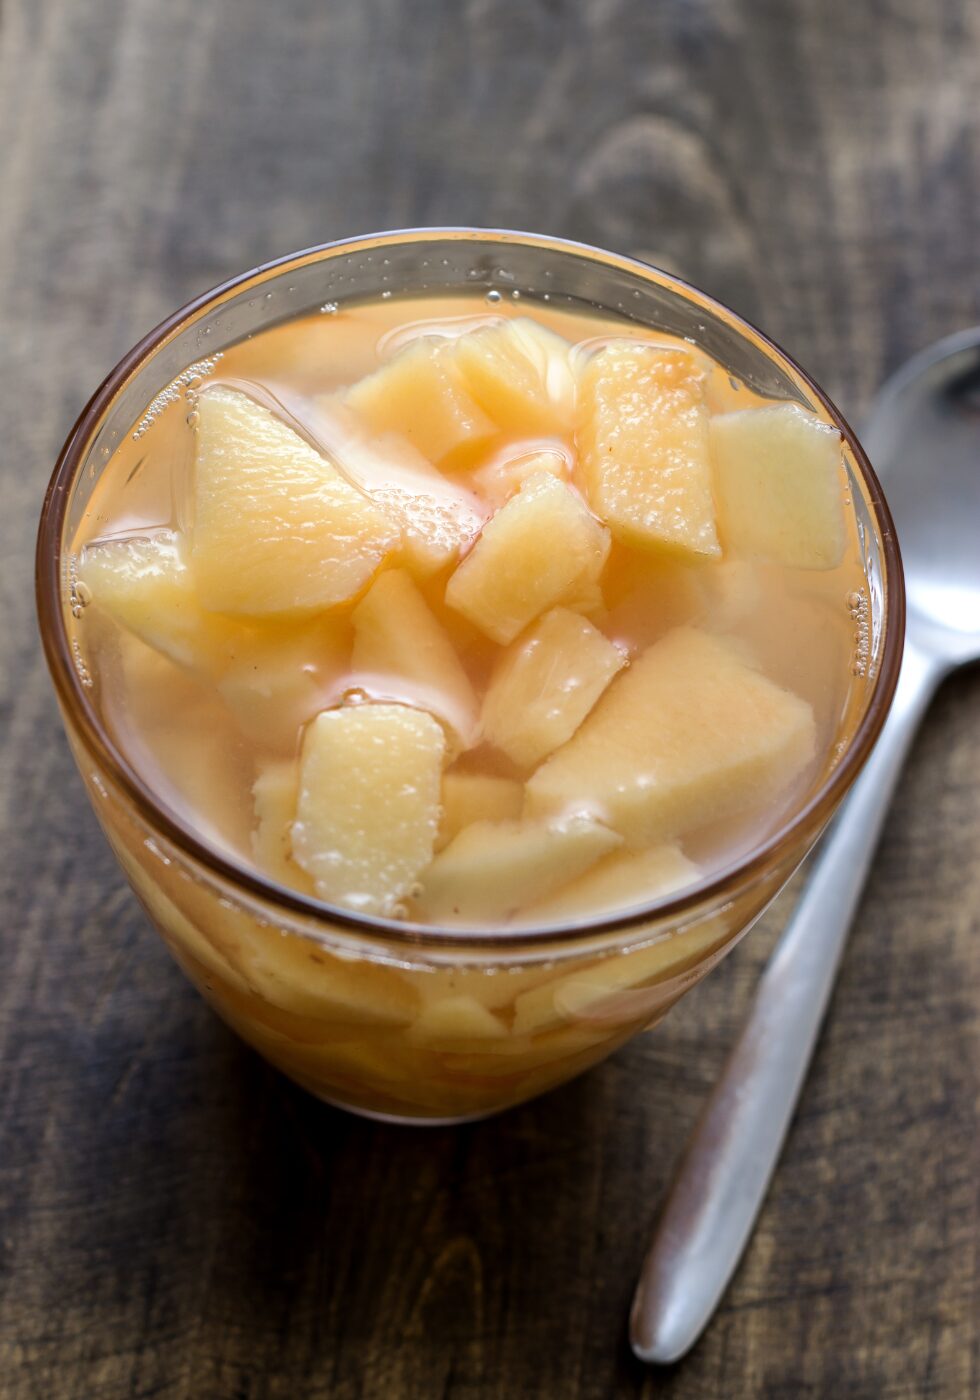
Quince in Syrup
Similar to pears, quinces can be canned in syrup. They pair marvellously with rice pudding or can be used as a filling for cakes and pies. And if you haven’t tried quince crumble yet, I sincerely recommend baking one with these quinces in syrup as a base!
Rub the fuzz off the quinces and wash them thoroughly.
Put some water into a bowl and add the lemon juice or apple vinegar
Quarter the quinces, peel them and remove the cores and any hard or “grainy” parts. Either leave the quince quarters or chop them into cubes of about 2 – 4 cm (1 inch). Put the quinces into the acidified water so that they won’t turn brown.
When all the quinces are done, prepare the syrup:
Put the water and sugar into a pot and stir until the sugar has partly dissolved. Slice the vanilla bean lengthwise and scrape the vanilla out with a knife. Add the vanilla seeds, the sliced pod and the cinnamon stick to the sugar water.
Bring all to a boil and stir until the sugar has dissolved completely. Let the syrup simmer for 5 minutes.
Now drain the quince (cubes) and add them to the simmering syrup. Bring it to a boil once again and let it simmer until the quinces are tender (about 45 – 60 minutes). They should have turned a beautiful rose-pink colour by now.
Pack the quinces into the sterilised jars.
Remove the cinnamon stick and vanilla bean from the syrup and carefully fill the jars up with syrup, leaving 1 cm (½ inch) of headspace. Immediately seal the jars tightly with the lids.
Let the jars cool down completely and check the lids for tightness.
Quinces in syrup can be stored up to one year in a cool and dark place. Once opened, put the jar in the fridge where it may last up to 1 month.
Notes
Serving suggestions
Serve quinces in syrup as a dessert together with whipped cream, vanilla ice cream or yoghurt. It’s also great as a topping to cheesecake, rice pudding or on your morning porridge.Use the syrup to flavour tea, cocktails or sparkling water.
Rub the fuzz off the quinces and wash them thoroughly.
Put some water into a bowl and add the lemon juice or apple vinegar
Quarter the quinces, peel them and remove the cores and any hard or “grainy” parts. Chop the quarters into cubes of about 2 – 4 cm (1 inch). Put the quince cubes into the acidified water so that they won’t turn brown.
Drain the quinces and put them into a pot. Add the water, sugar and spices and bring all to a boil. Let the quinces simmer until they’re soft (20 – 30 minutes).
You can eat the compote just like that, or you can put it still hot into the sterilised jars with ½ inch (1 cm) headspace. Secure the lids tightly. To prolong its shelf-life, can the compote for 30 minutes at 80 °C in a water-bath canner.
Notes
When canned, quince compote can be stored in a cool and dark place for up to one year. Alternatively, fill the cooled compote in portions in plastic bags and put them in the freezer.If you like, mix the quinces with apples before cooking.
Serving suggestions
Serve quince compote with your morning porridge or granola. It also makes a great topping for waffles and French toast. Or just stir it into yoghurt to make a quick and yummy dessert.
Dried Quince
Who would have thought that you could dry quinces? For a long time, I believed that quinces had to be cooked to become edible, but obviously, drying them is also a great method for preserving them. Dried quince is a delicious snack to go, but can also be used in stews, cakes or even as tea!
Rub the fuzz off the quinces and wash them thoroughly.
Put some water into a bowl and add the lemon juice or apple vinegar
Peel the quinces if you like, but it’s not essential. Quarter them and remove the cores and any hard or “grainy” parts.
Cut the quinces into slices of about ¼ inch (6mm) and put them into the lemon water to prevent browning.
Drain the quince slices and dab them dry.
You can either dry the quinces in the oven or a dehydrator.
Dehydrator
Clean the dehydrator trays and arrange the quince slices so that they don’t overlap. Start the dehydrator at 60 °C (135 °F) and dry the slices until they’re leathery.
Oven
Line parchment paper on trays or racks and arrange the quince slices so that they don’t overlap.
Set your oven to 60 °C / 140 °F (fan oven) and put the racks or trays with the quinces in. Prop the door slightly open by sticking a wooden spoon into the opening. That way, the condensation water can evaporate.
Dry the quinces for 6 – 12 hours.
Note: it’s impossible to give you an exact drying time as it depends on many factors like air humidity, room temperature, thickness of the slices and the overall moisture content of the fruit.
How to determine whether your quinces are dry enough
First, properly dried quince should be leathery and pliable, not sticky or tacky to the touch. When you cut or squeeze them, there mustn’t be any moisture.
Storage
The most important point is to let the dried quinces cool completely before storing. Once they are cool, put them into airtight containers or vacuum-sealed bags. Stored in a cool and dark place, they will last for 6 - 12 months if properly dried.
Notes
How to use dried quince
The most common (and fastest) use is to snack on dried quinces directly as they are. You can also add them to your morning granola or mix them with nuts for a healthy snack mix.You can, however, also use dried quince in a more versatile way in sweet and savoury dishes:- Soak them in hot water, tea or wine, for example, until they are soft again (approx 15 – 30 minutes). Then use the soaking liquid in recipes as it contains flavour and nutrients.- Add dried quinces to food like Middle Eastern stews (especially khoresh), Moroccan tagines or Turkish compotes. It’s also a great component of European meat dishes, pairs well with savoury dishes like rice pilaf or can be part of stuffing mixtures.- Chop your dried quince and add it to your oatmeal or porridge. It adds a delicious flavour (and some nutrients) to yoghurt and breakfast cereals. Also, dried quince can be baked very well into muffins, scones or bread. Use it in fruit cakes or spiced holiday desserts as well as in ice cream or frozen yoghurt.- Use dried quince for beverages. For example, steep it in hot water for a fruity tea. You may also add it to mulled wine or cider to add a fruity flavour.
Quinces are Great!
The versatility of quinces makes them a rewarding fruit to preserve, whether you’re drawn to the ruby-red glow of poached quinces, the sweet intensity of membrillo, or the delicate flavour of quince jelly. While these ancient fruits require more time and patience than modern quick-preserving methods, the results are truly worth the effort. The transformation of hard, astringent quinces into tender, aromatic preserves is a wonderful tradition that connects us to generations of home preservers before us.
Whether you’re an experienced preserver or trying quince for the first time, remember that the key to success lies in selecting ripe, fragrant fruit and taking the time to prepare it properly. Your reward will be a pantry stocked with preserved quinces to enjoy throughout the year, adding their unique flavour to cheese boards, desserts, or simply spread on fresh bread.
If you are lucky enough to have a quince tree in your yard or know someone with a quince tree who is eager to share their harvest with you, don’t hesitate to try preserving them! Not only will you be participating in an age-old culinary tradition, but you’ll also be creating something truly special that can’t be found on supermarket shelves.
Do you want more autumn fruit recipes? Try out these:
If you grow your own vegetables, you can certainly relate: we carry the first zucchini of the season into the house like a trophy and celebrate cooking it with obsessive care. Zucchini No. 5 is watched with growing unease, and by the tenth, the family becomes mutinous, and we are torn between the urge to just let them grow out of control and the regret of letting them go to waste.
But here’s the solution, for I have the best recipe for pickled zucchini that will solve your zucchini overflow problem! With this recipe, you not only preserve an abundance of the green, yellow or striped varieties before they become baseball bats, but you’ll also create a flavour-packed treasure for the cold winter months.
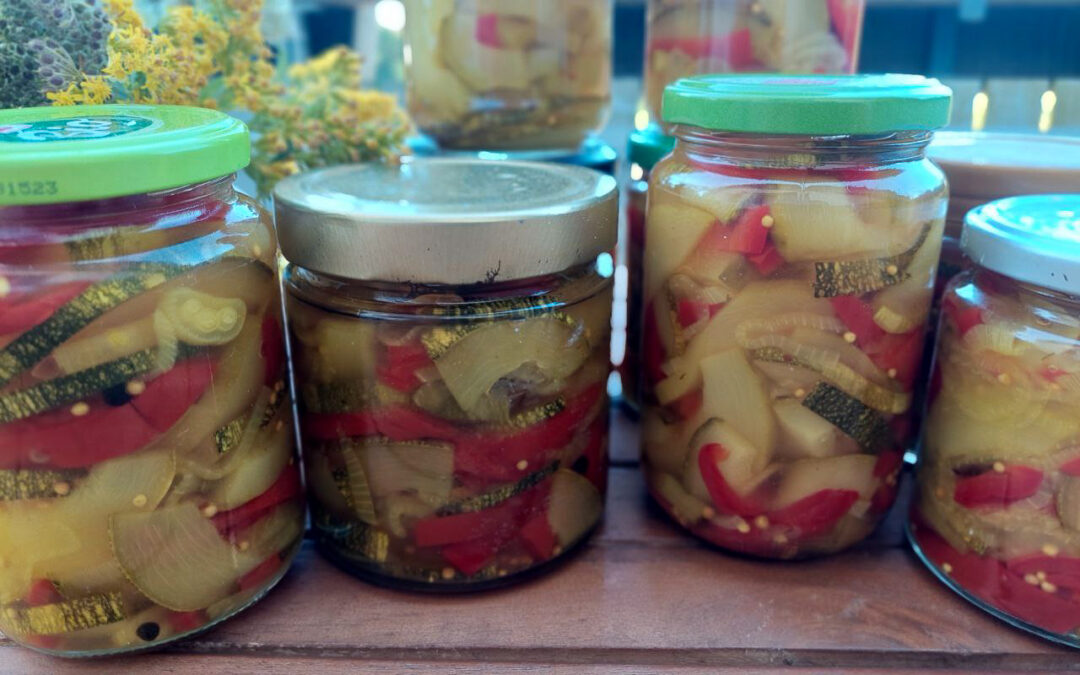
Pickled zucchini
Yield: 6 jars of 1/4 l
Ingredients
2 kg zucchini of any size 1 kg bell peppers of any colour 0.5 kg onions, cut into rings 3/4 l apple cider vinegar (store-bought or homemade) 1 l of water 0.5 l apple juice 200 g sugar 4 tbsp salt 2 tbsp curry powder 1 tbsp dill 1 tbsp mustard seeds 1 tbsp peppercorns juice of one lemon
Instructions
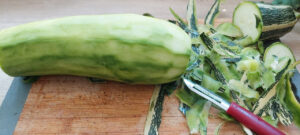
One of the many great advantages of this recipe is that you can use zucchini of any size.
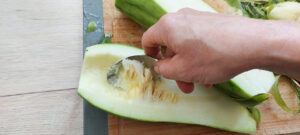
If they have really grown into baseball bats, you can peel them, cut them lengthwise into quarters and remove the mushy, seed-containing core with a spoon.
Cut the zucchini, bell peppers and onions into slices of 2 – 3 mm (1/10 inch). This recipe requires no salting before pickling.
Mix the vegetables in a bowl so that they are evenly distributed.
Put the vinegar, water and apple juice in a pot and bring it to a rolling boil.
Add the vegetables and spices, and let it boil for one minute. If your pot is too small to handle all the vegetables at once, you can boil them in portions and layer each batch in the jars after cooking.
Fill everything in jars, fill up with brine, leaving a headspace of about an inch. Then close the lids tightly.
Once they’ve cooled down, you can eat the pickled zucchini right away. However, I like them best when they have had a resting time of 2 – 3 days.
After cooling down, you can store the pickled zucchini in a cool place (a cool basement works fine; alternatively, put them in the fridge) for up to one year.
Once a jar is open, you must store it in the fridge and consume it within 7 days.
How to use pickled zucchini
Pickled zucchini make a great side dish for a charcuterie or cheese assortment or as an ingredient in sandwiches and wraps. We also like it chopped up and mixed in potato mash to add a complex, salty and vinegary flavour. Or you mix it into an egg salad together with (pickled, fermented or raw) onions and mayonnaise.
Angela Braun
Pickled zucchini
A quick and easy recipe to deal with the surplus of zucchini from your garden!
One of the many great advantages of this recipe is that you can use zucchini of any size. If they have really grown into baseball bats, you can peel them, cut them lengthwise into quarters and remove the mushy, seed-containing core with a spoon.
Cut the zucchini, bell peppers and onions into slices of 2 - 3 mm (1/10 inch). This recipe requires no salting before pickling.
Put the vinegar, water and apple juice in a pot and bring it to a rolling boil.
Add the vegetables and spices and let it boil for one minute. If your pot is too small to handle all the vegetables at once, you can boil them in portions and layer each batch in the jars after cooking.
Fill everything in jars, fill up with brine, leaving a headspace of about an inch. Then close the lids tightly.
Once they've cooled down, you can eat the pickled zucchini right away. However, I like them best when they have had a resting time of 2 - 3 days.
After cooling down, you can store the pickled zucchini in a cool place (a cool basement works fine; alternatively, put them in the fridge) for up to one year.
Once a jar is open, you must store it in the fridge and consume it within 7 days.
Notes
Pickled zucchini make a great side dish for a charcuterie or cheese assortment or as an ingredient in sandwiches and wraps. We also like it chopped up and mixed in potato mash to add a complex salty and vinegary flavour. Or you mix it into an egg salad together with (pickled, fermented or raw) onions and mayonnaise.
Your zucchini problem? Solved!
This recipe transforms your “zucchini problem” from overwhelming to solved. It’s incredibly simple: no salting, and any zucchini size works.
Imagine those jars of pickled zucchini lined up in your pantry, waiting to be opened on a cold winter day when garden-fresh zucchini are only a dim memory. There’s hardly anything more rewarding!
So, harvest your zucchini now while they’re still abundant (and before they become baseball bats) and make these delicious pickles. Your future self will thank you.
Every autumn, there comes a time when my kitchen fills with the sharp, tangy scent of fermenting cabbage. Even though it may still be warm and sunny outside, for me, the season for winter comfort food has officially begun. Call it genetic programming if you like. I don’t consider myself to be a typical German. I usually wear jeans and a shirt (I don’t even own a Dirndl), I’ve never been to the Oktoberfest, and I’ve got a fair sense of humour, if I may say so myself. When it comes to Sauerkraut, however, my German DNA takes over completely.
Whether I’m piling it alongside creamy mashed potatoes for the ultimate comfort meal, tucking it into a flaky strudel, or serving it as an elegant wine-braised side dish (yes, with sausages – some clichés exist for good reasons!), there’s simply no surviving a German winter without proper sauerkraut. And after years of mediocre store-bought versions, I discovered something wonderful: making your own is ridiculously simple.
You only need cabbage, salt, and a little patience to create sauerkraut that’s tangier, crunchier, and infinitely more satisfying than anything from a jar. Plus, there’s nothing more gratifying than watching this ancient preservation method work its magic right on your countertop. Ready to channel your inner German Oma and work some cabbage magic? Here’s everything you need to know.
What You Need For Homemade Sauerkraut
Once you see how simple it is to make sauerkraut and how little you need for it, you’re gonna ask yourself why you haven’t done that long before.
Equipment
I promise you’ll already have every equipment item in your kitchen!
Essential equipment for beginners
You need a wooden board and a sharp knife to slice the cabbage.
Once you’ve done so, you need a large bowl to put the cabbage slices in and mix them with salt.
For the fermentation process, take some jars with lids. Twist-off caps are fine, but even better are jars with rubber rings and a glass lid.
To keep all the kraut slices under the brine, you need weights. If you’re just starting, you can fill freezer bags with water (about a quarter full, depending on the bag size), close them and use them as weights.
Optional but helpful tools
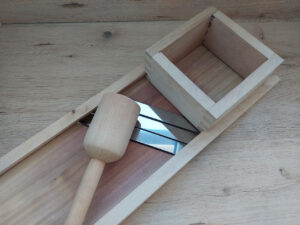
If you intend to make large batches of sauerkraut, you may want to think about buying a kraut slicer, which is a real game-changer when it comes to slicing cabbage heads.
Another great gadget for making sauerkraut is a kraut tamper, kind of a wooden club on a long stick. Optionally, you can use a (clean) bottle. You’ll find kraut slicers and tampers in every well-assorted German hardware store (which I highly recommend visiting when you are in Germany!) or on the internet.
For the fermentation process, you can use the aforementioned jars or a large sauerkraut pot.
Sauerkraut pots usually come with two halves of a clay weight; for jars, there are good glass weights you can buy.
Ingredients
For the classic version of homemade sauerkraut, you only need cabbage and salt. Make sure the salt doesn’t contain any additives like anti-caking agents, iodine or others. I like to use sea or rock salt.
Instructions For Homemade Sauerkraut
First of all, sterilise the sauerkraut pot or the jars and lids. You can read up here on how to do that properly.
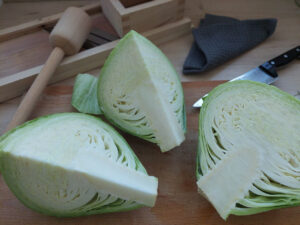
Preparing the cabbage
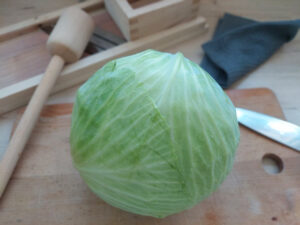
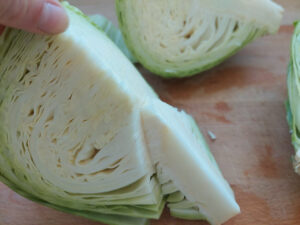
Cut the cabbage head lengthwise in half and quarter it. Remove the outer leaves and put them to the side; we’ll need them later.
Now you can generously cut off the stalk part, which is too hard (and bland) to make sauerkraut from.
Weigh the cabbage.
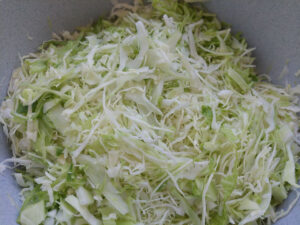
Finely slice the cabbage quarters, either with a knife, in the food processor or with your kraut slicer.
Put the cabbage slices in a large bowl.
Kneading and Packing
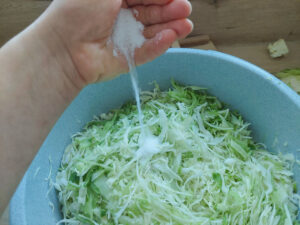
Now, add salt to the cabbage, about 1 tablespoon of salt per 1.5 kilograms of cabbage.
Roughly mix the salt into the slices and taste them. It should be salty but not oversalted.
Now, start kneading the cabbage slices thoroughly to break open the cell structure of the cabbage slices and knead the salt in. This takes some time; the larger the amount of cabbage, the longer. The slices will lose volume during this process, they’ll lose their usually opaque appearance and become glassy, and brine will form. If you can’t for the life of you squeeze out enough liquid from the cabbage – after a fair amount of wrestling with it, of course – cover the bowl, let it rest for 45 minutes and knead it again.
Put a handful of the cabbage into the kraut pot or a jar and press it thoroughly down with your fists, a clean bottle or the kraut tamper.
It’s important to apply sufficient pressure to get all the air bubbles out. Fermentation only works without oxygen, so if there’s air in the jars, the kraut will spoil. While pressing, you can see the brine welling up.
Alternately, add cabbage and press it in with the bottle or tamper until the pot or jar is full. Leave room to the edge of about 2 cm (1 inch). I know that some people recommend leaving more room in the jars, but I found that the risk of spoilage due to too much residual oxygen in the glass, even after fermentation, is higher.
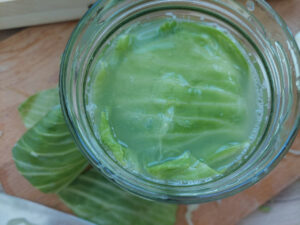
Now, take one of the outer cabbage leaves you put aside earlier, rinse it and cut it so that it can cover the cabbage in the jar.
Put a weight on top and thus fix the cabbage slices under the brine.
The Fermentation Process
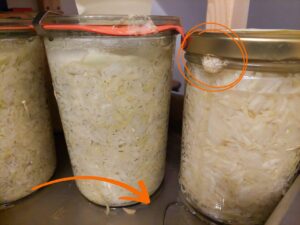
Close the pot or jars with their lids and put them on a baking tray.
Put the jars in a place without direct sunlight and at temperatures between 15 and 22°C (60 – 70 °F). After a few days, the brine begins to bubble and foam, and it usually presses out of the jars. Now’s the time when you’re glad you put the jars on a baking tray.
Let the cabbage ferment for about 5 – 7 days (the colder the place, the longer the fermentation process takes, which can be up to 14 days). Check the jars daily and fill up with brine if necessary. For that purpose, mix 1/2 l of water with 15 g of salt and stir it until the salt has dissolved.
Storage
You can either taste the sauerkraut and – when it’s to your liking – store it in a cooler place of about 8 – 12 °C (45 – 55 °F) or you wait until the initial process of bubbling over is finished and put it in a cooler place then.
Closed jars can be stored at a cool and dark (but not necessarily pitch black) place for up to one year.
Once you’ve opened a jar, keep it in the fridge and consume the sauerkraut within 1 – 2 weeks.
Angela Braun
Traditional Sauerkraut
A simple, down-to-earth recipe for traditional sauerkraut.
1tbspsea saltwithout additives or anticaking agents
Equipment
Cutting board
Sharp knife or a food processor or kraut slicer
large bowl
Kraut tamper or a clean bottle or just your fist
Jars with lids or
Sauerkraut pot
Weights
Method
Sterilize the sauerkraut pot or the jars and lids. You can read up here, how to do that properly.
Cut the cabbage head lengthwise in half and quarter it. Remove the outer leaves and put them to the side; we'll need them later.
Now you can generously cut off the stalk part, which is too hard (and bland) to make sauerkraut from. Weigh the cabbage.
Finely slice the cabbage quarters, either with a knife, in the food processor or with your kraut slicer.
Put the cabbage slices in a large bowl.
Now, add salt to the cabbage, roughly 1 tablespoon of salt per 1.5 kilograms of cabbage.
Roughly mix the salt into the slices and taste them. It should be salty but not oversalted.
Start kneading the cabbage slices thoroughly to break open the cell structure and knead the salt in. This takes some time; the larger the amount of cabbage, the longer. The slices will lose volume during this process, lose their usually opaque appearance and become glassy, and brine will form. If you can't for the life of you squeeze out enough liquid from the cabbage - after a fair amount of wrestling with it, of course - cover the bowl, let it rest for 45 minutes and knead it again.
Put a handful of the cabbage into the kraut pot or a jar and press it thoroughly down with your fists, a clean bottle or the kraut tamper. It's important to apply sufficient pressure to get all the air bubbles out. Fermentation only works without oxygen, so if there's air in the jars, the kraut will spoil. While pressing you can see the brine welling up.
Alternately add cabbage and press it in with the bottle or tamper until the pot or jar is full. Leave room to the edge of about 2 cm (1 inch). I know that some people recommend leaving more room in the jars but I found that the risk of spoilage due to too much residual oxygen in the glass, even after fermentation, is higher.
Now, take one of the outer cabbage leaves you put aside earlier, rinse it and cut it so that it can cover the cabbage in the jar. Put a weight on top and thus fix the cabbage slices under the brine.
Close the jar with a lid but don't screw it too tightly. When the fermentation process starts, it's likely the brine bubbles out of the jar and that works best when the lid is still a bit loose.
Put the jars in a place without direct sunlight and at temperatures between 15 and 22°C (60 - 70 °F). After a few days, the brine begins to bubble and foam, and it usually presses out of the jars. Now's the time when you're glad you put the jars on a baking tray.
Let the cabbage ferment for about 5 - 7 days (the colder the place, the longer the fermentation process takes, which can be up to 14 days). Check the jars daily and fill up with brine if necessary.
You can either taste the kraut and - when it's to your liking - store it in a cooler place of about 8 - 12 °C (45 - 55 °F) or you wait until the initial process of bubbling over is finished and put it in a cooler place then.
Notes
Closed jars can be stored in a cool, dark (but not necessarily pitch-black) place for up to one year.Once you've opened a jar, put it in the fridge and consume it within 1 - 2 weeks.
I could imagine that you feel a bit amazed now that you see how easy it is to make sauerkraut at home, right? Just like a conjurer revealing his tricks, I hope I’ve shown you that there’s actually not much to it – it really is this simple: Slice some cabbage, mix it with salt, knead it until liquid starts coming out, fill it into jars and let nature do the rest. So, what are you waiting for? Grab your cabbage heads and some jars and start making sauerkraut. Your inner Oma will dance with joy.
Already hooked on fermenting? Then these recipes are for you!