How to plant, grow and harvest tomatoes in 14 steps

How to plant, grow and harvest tomatoes in 14 steps

When you want to plant and grow your own tomatoes and want to get a great harvest, it’s important to suitably care for your plants and provide them with optimum growing conditions. In 14 steps, I’ll show you everything you need to know about tomatoes – whether you’ll grow them in the open, in a greenhouse or in pots. Let’s start!

Step #1: Choosing the right tomato seeds

Of course, you can buy pre-cultivated tomato plants from a nursery. Those plants, however, will often be hybrids which means that their seeds are not seedfast. In other words, you cannot take seeds from those plants to cultivate new tomatoes next year as they will not create the same tomato variety. If you’re fine with that, go ahead and buy plants.

If, on the other hand, you want to choose from the immense number of tomato varieties and cultivate some rare types, you’ll want to start your plants from seeds. Make sure that you always buy seedfast seeds that are suitable for your climatic conditions and – of course – your preferences. If you don’t have favourites yet, try out different types: cherry tomatoes for snacking, tomatoes for salads, plum tomatoes for tasty sauces, tomatoes in different colours etc. Note down which ones you liked best and harvest their seeds for next year.

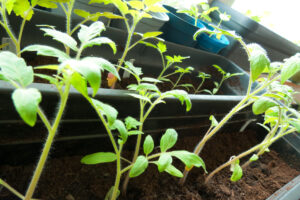
Step  #2: Sowing the seeds

When you’ve got your seedfast tomato seeds, sow them into a plastic container with herbal soil. Tomatoes are warmth-loving plants, which means they need temperatures between 18 – 23 °C to propagate.

They also need plenty of (sun-)light. A windowsill facing south or west is good for seedstarting. Alternatively, you can put your planting containers below a plant lamp. Make sure your plants get 14 – 18 hours of light per day, otherwise they will become leggy.

Step #3: Pricking tomato seedlings

As soon as your tomatoes show the first pair of real leaves (not the seed leaves that come first), it’s time to move them into separate planting containers. Fill a pot of about 15 cm in diameter with planting soil and plant the tomatoes deeper by burying them up to the seed leaves. By that, they can grow more roots from the stem and become more robust.

The tomato plants still need warmth and enough light, so let those plant lamps shine.

Step #4: Hardening off

Harden off your tomatoes by carefully brushing over them

About 14 days before you want to plant out your tomatoes*, you must harden them off to prepare them for the different conditions outside or in your greenhouse. This is an important step as otherwise, your plants could die from the sudden changes in temperature and exposure to sunlight.

To toughen the tomatoes, put them out into the shade on a warm day (10 °C and above) for a few hours each day. Start with 1 – 2 hours and prolong those phases up to 4 – 6 hours. Make sure that on the first days of outdoor hardening off, your plants are protected from direct sunlight and wind.  After a few days, you can put them for one hour in the morning sun and a few days after that into the full sun. Always take a look at your plant every hour or so to make sure that they don’t get scorched or suffer in some other way. Get the plants in during the night.

Another thing you can do to harden your tomatoes off is to tenderly brush over them with your hand. This imitates wind and causes minuscule breakings in the stems which the plant can repair and thus becomes harder and stronger.

*If you just asked yourself when’s the right time to plant out your tomatoes: after the last night frosts, better still when night temperatures do not drop below 10 °C. In Central Europe that’s about mid-May. If you have a greenhouse, you can plant them out already starting mid-April.

Step #5: Soil preparation

Tomatoes have a high demand for nutrients. In other words, they eat like a teenager after a rugby match! To give them a good start and plenty of “food”, we must prepare the soil before planting them out. To do so remove all weeds and the mulch. By exposing the soil to the sun it will warm up and, as I said before, tomatoes love warmth.

To enhance nutrient density, work some ripe compost into the soil.

If you want to create a new vegetable patch for your tomatoes, read here about the easiest method to do so.

Step #6: Planting out

Plant your seedlings outside when all danger of frost is over and the soil has reached a temperature of at least 15 °C.

Dig out planting holes and add some organic tomato fertilizer and a handful of bone meal. As an alternative to the ready-made fertiliser, you can put some stinging nettles into the plant hole. I always put some composted and wet cattle dung into the plant hole and plant the tomatoes directly into it. That way, they not only have fertiliser but also enough moisture to last for the first few days of growing in.

As you did when pricking, plant your tomatoes deeper than before by burying them up to the first leaves. To help them grow more roots and thus become more anchored into the ground, I always plant them at an angle of 45 degrees. That makes sure that additional roots will sprout out of the stem. Remove any leaves that touch the ground.

Plant your tomatoes about 45 centimetres apart.

If you use pots for planting, make sure that you use good-quality pots. Black ones are not great as they’ll heat up too much in summer and by that burn the roots. Wooden, terracotta or plastic pots with a capacity of at least 20 litres are ideal. Put some drainage in so that your plants won’t drown, add the soil – either compost or ready-made tomato planting soil – and plant your tomatoes as described above.

After planting, water your tomatoes thoroughly.

Step #7: Staking

We distinguish between indeterminate and determinate tomatoes.:

Determinate varieties, also known as bush varieties, grow about 60 – 100 centimetres tall. They produce fruit for a relatively short period of time as they tend to provide ripe tomatoes at the same time which makes them great for making sauce and canning. Determinate varieties don’t need any staking and are great for small places or pots.

Indeterminate varieties, or vining varieties as they are often called, produce large tomatoes all summer long, mostly starting mid- to late-season. Indeterminate tomatoes need staking to help them support their weight and height. For that matter, you can put a stake next to each plant into the soil and as the tomato grows, fix it loosely with a twine to it. A possibility you can use in your greenhouse is to fix a twine loosely at the ceiling and fix it around your tomato plant. As the tomato grows you wind it around the twine until it reaches the ceiling.

Step #8: Watering

Most gardener’s favourite activity is watering and that’s great for the first week or so after planting your tomatoes to make sure they root well. Afterwards, however, you can cause real damage to your plants when watering them too much: they will grow only shallow roots and thus not be firmly rooted in the ground and their fruit will taste watery.

It’s best to leave tomatoes out when watering and only water them if they really need it which they show by wilting leaves. Even in the greenhouse, my tomatoes can grow their roots deep enough to tap the water sources deep down in the earth. Don’t spoil your plants but raise them to become healthy, sturdy adult tomatoes with plenty of tasty fruit!

When you must water, however, water them deeply and make sure that the water soaks at least 10 – 15 centimetres into the ground. Always water at the base of the plant and don’t splash the leaves as this might cause diseases.

Step #9: Mulching

I’m a huge fan of mulch and I recommend mulching your tomatoes as soon as the soil is warm enough. Mulch not only helps your plants to retain moisture (see step #8: watering) and prevents soil-bourne diseases from splashing up onto the leaves. It also controls weeds and shades the soil. Did I say that I love mulch? I love mulch!

Step #10: Pruning

If you’re growing vining tomatoes, you must prune, that is: pinch off the suckers. Suckers are those tiny stems that form between the main stem and branches. They will not produce fruit but only take energy from the plant. It’s best to prune or pinch the suckers as soon as you notice them. When they’ve grown large already, it’s hard to just rip them off without damaging the plant. Also, the wound becomes too large and may invite diseases.

You can just use the suckers as mulch or you put them into a glass with water where they’ll soon form roots and thus new plants.

Step #11: Companions

Tomatoes are a sociable lot and love having companion plants around. The right partners will not only fight off pests and diseases but will also prepare the soil ideally for our hungry fellows.

Good vegetable partners are beans, lettuce, celery, cabbages, onions and garlic. Tomatoes also love basil – on the plate as well as in the soil – and if you want to add a pretty eyesight you can plant marigolds.

Step #12: Fertilizing

As I said before, tomatoes are gluttons. To make sure they get all they need, it’s best to give some long-time fertiliser into the plant hole. This can either be some ready-made tomato fertilizer, bone meal, a mixture of horn shavings and rock powder, stinging nettles or composted dung. This year, I’ll try out different methods to compare what works best (for me). I’ll keep you updated.

Nevertheless, during their main period of growth, tomatoes still need some quickly available fertiliser that provides them with nitrogen, potassium and phosphate. I always prepare a “manure” from stinging nettles and comfrey and add about 100 – 200 ml of the ready manure to 10 l water.

Be careful, though, to not over-feed your plants. Too much fertilizer will weaken them and make them produce many leaves but few, tasteless fruit. Fertilizing every four weeks is enough to provide your plants with sufficient nutrients so that they’ll produce a great harvest!

Step #13: Pollinating

During relatively cold summers but also in greenhouses with insufficiently large windows, pollination may be a problem. When it’s too cold, bees and other pollinators won’t be around that much and in the case of greenhouses they may not find their way in. Those wonderful blossoms on your plants will not be pollinated and just fall off instead of transforming into wonderfully tasty tomatoes. That’s a shame!

To support the bees, you can carefully (!) shake the plants a bit so that the pollen gets loose and swirls through the air. Tomatoes have bisexual flowers and can pollinate themselves when the pollen is released – by insects or by shaking the plants.

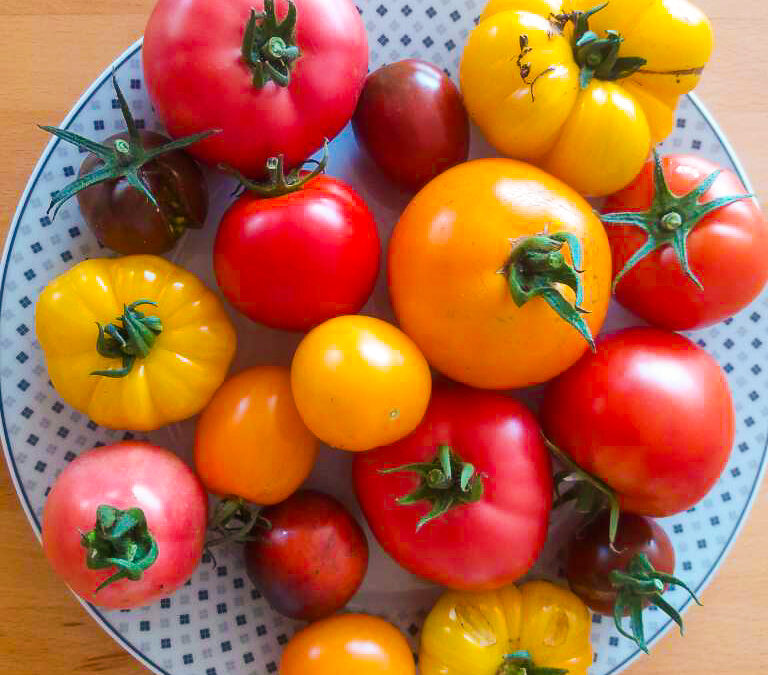
Step #14: Harvesting

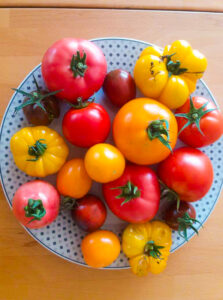
Hooray, the time to harvest has come! Harvest your tomatoes when they have the right colour (depending on your variety this can be red, orange, yellow, blue, violet, white or green in different shades), smooth and firm skin and easily remove from the plant. If you have to pull hard, they’re not ready yet.

Tomato varieteis

If temperatures threaten to drop too low and there are still unripe tomatoes on your plants you can either pull out the whole plant (with roots) and hang it upside down from the ceiling of a cool basement or garage. Or you place the unripe tomatoes into a cardboard box or a paper bag and put it on the counter. With both methods, the tomatoes will ripen and you may have fresh tomatoes till Christmas.

You got more tomatoes than you can eat? No problem! Preserve them for winter by cooking and canning a tomato sauce. Nothing better than some pasta with homemade tomato sauce on a cold winter’s day.

Drying and soaking them in oil is another wonderful way to preserve your tomatoes. Cut small fruits in half or larger into quarters, put them onto a tray and dry them in the oven at 40 – 50 °C until they are dry but still chewy. Put them tightly into small glasses and fill them up with olive oil.

You see, when you observe these 14 steps it’s quite easy to plant, grow and harvest your own tomatoes and they taste sooo much better than the ones from the store. Is there anything yummier than eating warm ripe tomatoes right from the plant? Mmmh….


Tarte flambée with asparagus and walnuts

Tarte flambée with asparagus and walnuts

Every year I yearn for the first asparagus ’cause it’s the unmistakable sign that we are heading out of late spring and right into early summer! I love all types of asparagus, white, green and violet but if I had to choose (which thankfully I don’t), I’d say that I love green asparagus a teeny tiny bit more. In my eyes (or should I say: taste buds?), it’s got more of a taste, bringing herbal, nutty and spinach flavours to the table. And it’s so versatile! Sauté green asparagus and mix it with orange slices and Parmigiano to get a delicious salad. Or cook it in white wine sauce and add it to your pasta, sprinkle the whole dish with some freshly grated nutmeg and you’ll stun your friends and family.
For this recipe, I’ve chosen to combine a classic tarte flambée with green asparagus. For taste – and colour – I added red onions and walnuts. Apart from the yeast dough which needs to be prepared about an hour before baking, this is a speedy recipe.

Tarte flambée with green asparagus and walnuts

Green asparagus

Ingredients for 4 servings

Yeast dough

250 g all-purpose flour

7 g dry yeast or 15 g fresh yeast

Salt

125 ml warm water

Topping

400 g green asparagus

3 red onions

100 g walnuts (shelled)

200 g sour cream

200 g cream cheese

salt, pepper

walnut oil

Instructions:

  1. If you use fresh yeast, crumble it into the warm water and stir it until the yeast has dissolved. Weigh the flour, add a teaspoon of salt and pour the yeast water into it. Knead into a smooth dough.
    If you use dry yeast, weigh the flour and measure the water, add the yeast and a teaspoon of salt to the flour, pour the water in and knead into a smooth dough.
    Either way, let the dough rest in a warm place for about 30 minutes.
  2. In the meantime, cut off the ends of the asparagus spears and peel them. As we use green asparagus, only the lower half of the spears must be peeled. Cut the spears into thin slices.
    Peel the onions and cut into thin slices.
    Chop the walnuts.
  3. In a bowl, mix the sour cream and cream cheese, add salt and pepper to your taste and stir in 2/3 of the walnuts.
  4. Preheat the oven to 240°C.
    Divide the dough into four portions and on a floured surface roll them out very thinly.
    Line a baking tray with parchment and place the rolled-out dough onto it. Evenly spread the cheese-nut mixture onto the dough, add the asparagus and onion slices and sprinkle the rest of the walnuts on top.
  5. Bake the tartes for 12 – 15 minutes. Season with salt and pepper to your taste and drizzle with walnut oil before serving.
Spring salad with poached egg

Spring salad with poached egg

Spring is finally here and we all long for the first freshly harvested lettuce! Also, the first wild herbs can be foraged and why not add the young leaves of nettle, ribwort plantain and dandelion to your salad bowl to boost your energy. Mix in slices of radishes and mushrooms and poach your salad bowl with poached eggs and flower petals: you’ll have a health-boosting vegetarian meal and a beautiful dish to impress your guests with!

Spring salad with poached egg

Ingredients (for 4):

1 head of lettuce

1 handful of wild herbs (nettle, ribwort plantain, dandelion, sorrel, chickweed etc.)

1 bunch of radishes

200 g mushrooms

wildflowers (dandelion, cuckoo flower, red clover, violet, daisy etc.)

4 eggs

6 tbsp apple vinegar

4 tbsp walnut or hazelnut oil

salt (normal or orange herb salt), pepper

Instructions:

  1. Wash the lettuce and wild herbs thoroughly and shake them to dry
  2. Wash the radishes and cut off the leaves and the roots. Wipe the mushrooms with a moist kitchen cloth.
  3. Mix the apple vinegar and nut oil with salt and pepper.
  4. Bring a large pot with water and two tablespoons of vinegar to the boil. Crack the egg open into a glass. When the water is boiling, stir it until a vortex forms. Carefully insert the egg into the vortex and cook for about 4 minutes.
  5. In the meantime, arrange the lettuce, herbs, radishes and mushrooms on four plates and pour the dressing over the salad.
  6. When the eggs are cooked, take them out with a skimmer and put them onto the salad. Sprinkle with wildflowers and flower petals and serve.


Green Mint Soap: Beginner Recipe

Green Mint Soap: Beginner Recipe

This mint soap beginner recipe was the first soap recipe I made and it’s still one of my favourites! It’s suitable for beginners which means that it doesn’t require many ingredients.

This is a soap specially for sensitive skin due to the green clay. Consistent with this topic, we add hemp oil and mint fragrance. The soap can be used for body and face, even as a shampoo for normal hair or sensitive scalp. In short, it’s the perfect travelling soap!

If this is your first soap, you should become familiar with the soapmaking process, as well as carefully observe the safety guidelines.

Green Mint Soap – Beginner Recipe

Superfat: 7 %

Ingredients

250 g Coconut Oil
150 g Hemp Oil
600 g Olive Oil
137 g sodium hydroxide (NaOH)
320 g Water
30 g Green Clay (powder)
4 g essential mint oil

Instructions

  1. Prepare your soap mould and put on an apron, gloves, breathing mask and safety goggles.
  2. Weigh the oils. Slowly melt the coconut oil, then add the hemp and olive oil. Put a thermometer into the oil mixture and measure the temperature.
  3. Weigh the water in a large enough, heat-proof container.
  4. Weigh the essential oil and the green clay and put them aside for later use.
  5. Weigh the sodium hydroxide. Put the water container into a sink and slowly pour the sodium hydroxide into the water (never the reverse!). Stir carefully and slowly with a spoon until the NaOH crystals have dissolved. Put a thermometer into the lye-water and measure the temperature.
  6. When the temperature of the lye-water and the oils has reached fallen to 40 – 45 °C, carefully pour the lye into the oils (never the reverse!). Fully immerse the blender and start mixing both liquids until they are well combined. Make sure that the blender stays in the batter to prevent air bubbles. Mix the batter until a trace forms.
  7. Add the green clay and the essential oil to the soap batter.
  8. Pour the soap batter into the mould and either cover it with cling film or spray it with isopropyl alcohol. Cover the mould with towels to keep it warm. Leave the soap in the mould for 48 hours.
  9. After 48 hours, carefully remove the soap from the mould and cut it into bars.
  10. Let the soap bars cure at a cool and well-ventilated place for 4 – 6 weeks before use.

This makes for a great all-purpose soap for your face and body. It smells wonderfully fresh and has a slightly cooling effect due to the mint oil which makes it a fabulous soap for summer.

Soapmaking equipment

Soapmaking equipment

To start with soapmaking, you only need some basic soapmaking equipment. Later, when you are infected with the soapmaking virus, you can always buy additional tools that’ll make the process easier and allow you to make more elaborate designs.

When looking for equipment, take its durability and safety into consideration. Wooden tools are not a good choice, for example, as they are damaged by the lye. The same applies for all things aluminium. Never use anything made from aluminium when making soap as it reacts with lye! It’ll not only ruin your soap but will also form hydrogen, a toxic and explosive gas.

Checklist for your soapmaking equipment

Soap making equipment

Safety equipment

  • Chemical-resistant gloves, like medical disposable gloves or rubber dishwashing gloves.
  • Safety goggles that cover the whole eye (and glasses if you wear them); alternatively, you can wear a face shield.
  • Breathing mask to avoid breathing in any lye dust or toxic gasses that form when the lye is added to the water.

To become familiar with the safety guidelines for soapmaking, hop over here and carefully read this article.

Bowls and tools

Scale

All ingredients in soapmaking are measured by weight, not by volume as weight is more precise and precision is essential in soapmaking. Digital scales work best, but manual models are also ok. Choose a scale that can hold enough amounts for soapmaking.

Cups and spoons

Cups are great for colouring small portions of soap batter and as a design tool, especially when they have spouts.

Measuring spoons are useful for precision when it comes to dry additives like colourants, clays or exfoliants.

Also, you need one long-handled spoon for creating designs.

Lye-water container

Use a heat-resistant bowl with a handle and preferably a spout. Choose a large enough container as it is important to have plenty of headspace when mixing lye-water.

Bowls

Use heat- and chemical-resistant plastic, glass or stainless steel bowls for mixing the soap batter. Two or three bowls that are large enough for different soap batches (including extra room) are ideal. Additionally, containers with a handle and a spout make it a good deal easier to pour the batter into the mould or create certain techniques.

Thermometer

You need two thermometers (100 °C) to measure the temperatures of oils and lye-water. Lab thermometers are as suitable as candy or digital thermometers.

Whisks, spatula and blender

Whisks in different sizes are great for mixing fragrance oils and other additives into the soap batter. They are also useful for maintaining the appropriate trace as you work. Stainless steel is ideal.

Spatulas are used to scrape the last batter of soap out of the bowl and create certain designs. They should be made from silicone or heavy-duty rubber.

A stick blender is a useful tool that’s almost essential for modern soapmaking. It reduces the tracing process from a 30- to 90-minute process to just a few minutes- When buying a stick blender, look for a model that will not whip much air into the soap batter and has a stainless steel shaft. If you can detach the shaft from the electrical unit, it’s easier to clean.

Other useful equipment

These items aren’t critical for soapmaking but they make the process easier and more convenient.

  • Rubbing (isopropyl) alcohol to spray on the surface of the soap to prevent the formation of soda ash.
  • Plastic squirt bottles are used for certain designs, like swirling or multi-layers.
  • Mini mixer (mini milk frother) for mixing colourants and clays with oil.
  • Pipette for precisely measuring fragrance and essential oils

Soapmaking Equipment: Moulds

There are so many options when it comes to moulds for soapmaking: you can make your own out of milk containers, boxes lined with freezer paper and beverage cartons. You can use common kitchen containers (Tupperware) or mini cake moulds (like muffin moulds in different shapes and sizes). Or you can buy moulds made of wood, silicone or plastic that are made specially for soapmaking.

DIY moulds

When you are new to soapmaking, you needn’t buy a soap mould but you can always “misuse” items you already have. Just keep in mind that once used for soapmaking, these items mustn’t be used for food ever again. The second thing is to make sure that the soap batter doesn’t come into contact with aluminium.

Glass and metal are not optimal as it will be nearly impossible to remove the soap from the mould

The following things can be used as soap moulds:

  • Waxed cardboard milk and juice cartons
  • Empty potato chip tubes
  • PVC tubes, washed out and dried; fix one end either with a plastic lid or multiple layers of duct tape
  • Cake moulds: best are those made of silicone. If you have cake moulds made of metal, layer them with cling film so that the soap batter doesn’t come into contact with the metal
  • Plastic containers like yoghurt cups, Tupperware etc. You may want to grease them before filling in the soap batter
  • Wooden moulds; you always have to line wooden moulds with freezer paper

I’m sure there are many more options. Be creative!

Standard moulds

There are great soap moulds in many different sizes, shapes and materials on the market. The most common materials for moulds are silicone, plastic and wood.

Depending on the techniques you want to carry out in your soapmaking process, you can either use log moulds, slab moulds or silicone moulds.

Needless to say, you can also buy special moulds with which you can make very special forms. Often, they’re made of heavy-duty plastic and the removal of the soap can be challenging. It’s therefore best to use a recipe for a comparatively hard soap for this kind of mould.

Conclusion

You see, despite needing some basic equipment, there’s no need to go overboard when starting with soapmaking. Most things you’ll already have and nothing prevents you from using for example a stick blender you already have – as long as from now on you’ll use it for soapmaking only! You should invest in good safety goggles that protect your eyes from lye splashes but other than that, soapmaking equipment needn’t be expensive.  After all, you can always add fancy equipment and moulds to your birthday wishlist.

Have fun getting started with soapmaking!