Everybody knows lemon curd but did you know you can make curd from vegetables also? I tried out carrot curd which, in combination with cream cheese, is the topping for these moist carrot muffins. We have carrots in abundance all year round, either fresh from the garden or sand storage, so I can make this treat whenever I like. And with this easy recipe, you can, too!
Carrots and hazelnuts complement each other wonderfully and the fresh and slightly salty taste of the cream cheese is a marvellous addition to the sweet and earthy carrot curd.
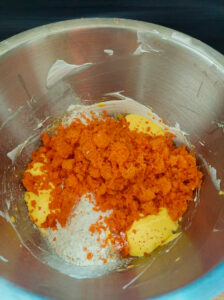
Carrot muffins with cream cheese – carrot curd topping
Yield: 14 muffins
Ingredients
For the carrot curd:
125 ml carrot juice, freshly juiced
150 g sugar
1 tbsp cornstarch
45 g butter in cubes
2 egg yolks
1 whole egg
¼ tsp cinnamon
For the carrot muffins:
180 g grated carrots (you can take the leftovers from the juice-maker and grate some fresh carrots additionally if it’s not enough)
4 eggs
130 g brown sugar
60 g flour
200 g ground hazelnuts
1 tbsp baking powder
For the Topping:
150 g carrot curd
150 g cream cheese
Instructions
Carrot curd
1. Mix the carrot juice, sugar and cornstarch in a bowl. Bring the mixture to a boil over medium heat while constantly stirring until it thickens.
2. Take the pot off the heat and stir in the butter until it has melted. Afterwards, add the egg yolks and the whole egg.
3. Put the pot back on the heat and stir for 5 – 6 minutes until the mixture has thickened considerably and falls heavily from the spoon. Put it aside, cover it with cling film so that it won’t form a skin and let it cool down.
Carrot muffins
1. Preheat the oven to 180°C (355°F)
2. Separate the eggs. Whisk the egg whites with half the amount of sugar until it’s solid.
3. Beat and froth the egg yolks with the remaining sugar.
4. Sieve the flour and baking powder and mix both with the ground hazelnuts.
5. Mix the flour and nuts, as well as the grated carrots under the egg yolk mass. Carefully fold in the whipped egg whites.
6. Fill the mixture into a muffin form and let the muffins bake for about 25 minutes. Insert a chopstick into a muffin to see if it’s done. When you pull the stick out there should be no dough sticking to it.
7. Take the muffins out of the oven, remove them from the muffin form and let them cool down.
Assembly
1. Mix the cream cheese with the carrot curd until homogenously combined.
2. Either spread or pipe the topping onto the muffins.
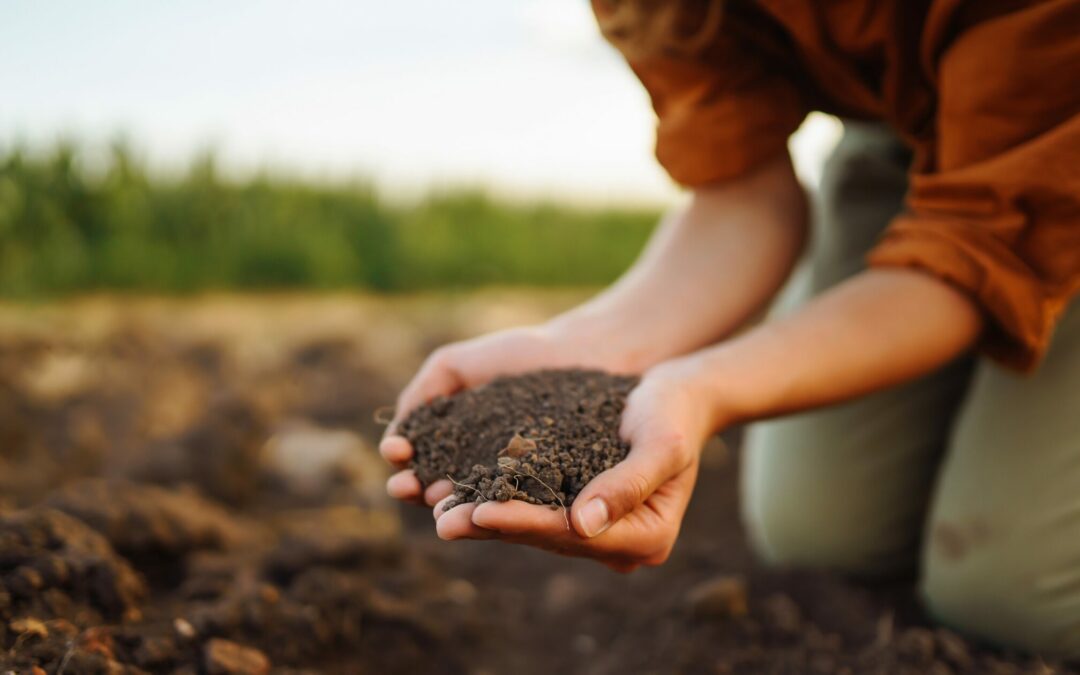
If you want to make your garden a success, it’s essential to know its soil type. Plants have different requirements regarding moisture, permeability and pH value. In short: different plants thrive in different soil types.
Types of soil are classified by grain size, colour, the amount of organic material and the minerals in it. Also, the percentage of sand, clay and silt is important and lastly, you should know the pH-value of your garden soil.
Nutrition
A plant cannot absorb water and fertiliser in one go. It can’t drink a whole can of water in one gulp and eat a whole load of fertiliser all at once. The soil’s important task is to store liquid and nutrients and deliver them to the plants so that they can have little snacks.
Also, plants cannot take in fertiliser in solid form. To make the best use of nutrients, plants need water as a solvent agent. A plant “eats” and “drinks” mainly with its root system but also little stomata in the leaves absorb a bit of water and nutrients.
The soil is a pantry
The soil is the plant’s pantry. In it, there are cavities (pores) where water, released nutrients and oxygen are stored. The cavities between particles are of different sizes, depending on the soil structure. A fine-textured soil has smaller cavities than a coarse-grained soil. The smaller the cavities, the better the soil can bind nutrients and water. If the cavities are large, water runs through the soil.
Soil structure
Different soil characteristics provide the plants with different prerequisites. When you know and understand your soil, you can easily maintain or improve it and thus offer your plants a suitable environment.
Naturally, soil is built “from below” as well as “from above. The lower part of the soil is based on the bordering rock. Basic mountain rock that was rich in minerals, has weathered and crumbled during millions of years. The upper part, which is known as mother soil, was mixed with organic material from animals and plants that had decomposed and turned into humus.
Thus, the solid parts in the soil consist of minerals and organic material. Between the solid particles, there are pores. At best there are as many pores as particles. The pores’ task is to store oxygen, liquid and nutrients and carry them to the plants’ roots.
Different grain sizes
Rock erodes and breaks down into particles of different particles. The size decreases from stone to gravel, sand and silt to clay. Most garden soils are a mixture of mineral soil and organic material.
Soil types
It is practical to categorize the soil with terms like “silty, slightly loamy soil”. By that, we know what we have and what we can do to improve the soil. Different soils have advantages and disadvantages, especially regarding what you want to plant.
The most common definition of soil types is based on pure mineral soil and uses the grain size as a description.
Sandy soil
Sandy soil has large particles; it is light and porous and can be worked easily. It warms up quickly in spring and cools quickly down in autumn. That makes it especially suitable for sensitive plants that must go into hibernation early to survive the cold season.
On the other hand, sandy soil badly stores liquid and nutrients. It dries out quickly and must be watered often.
Silty soil
The size of the silt grain lies between sand and clay, being smaller than sand and larger than clay. By covering the silty soil with organic material like leaves or bark mull encrustation can be prevented.
Loamy or clayey soil
Loamy soil has small particles that encrust easily. If loamy soil has a clay content of more than 40 % it is practically impenetrable. Loamy soil is nutrient-dense and stores moisture well.
Loamy soil takes longer to get warm in spring but also holds the warmth longer in autumn. Loamy soil has few cavities and thus is sensitive to pressure and trampling.
Chalky soil
As the name indicates chalky soils contain a relatively large amount of chalk which makes them alkaline and thus not very good for plants. They have little nutrients and tend to dry out easily but become a rain-slicked, loamy mass after heavy rains.
Every type of soil can be improved. The goal is to make sure that it can hold optimal amounts of moisture, nutrients and oxygen optimally. It’s great for any soil to add organic material.
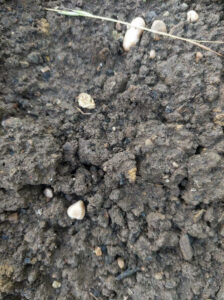
How to find out soil types
Often, it’s enough to have a look at the soil to determine its type but to be sure, you can try out the following:
The rolling test
Take a bit of soil (about 1 tablespoon) and roll it between your hands to a “sausage”. If the soil doesn’t form a roll of any kind, you probably have sandy soil. The thinner the “sausage”, the higher the clay content in the soil. Loamy soil yields a roll of 1 mm diameter, 4 – 5 mm characterise silty soil.
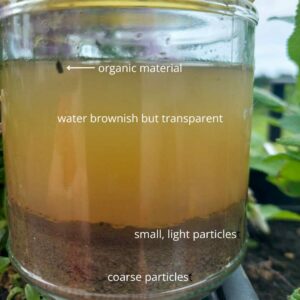
The shaking test
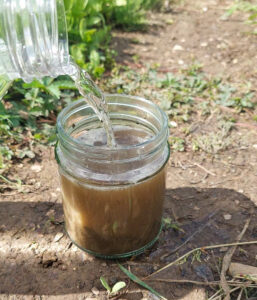
Fill a large glass jar with a handful of soil and add water at a ratio of 1 part soil and 2 parts water. Shake it well to mix the soil and water and let it set for 1 – 2 days without disturbing it. Slowly the soil particles will sink to the bottom and layer up there.
Sandy soil leaves the water almost clear; the particles have layered at the bottom.
Silty soil leaves cloudy water and most of the particles at the bottom.
Chalky soil leaves a layer of grit-like particles at the bottom of the jar; the water is a light grey.
Loamy soil shows relatively clear water and the particles are layered by grain size at the bottom with the smallest particles on top.
This is the result of the shaking test with my garden soil. Can you see the layers?
pH value
Soil can be acid, alkaline or neutral which can be determined with a pH-test. The pH scale goes from 1 = acid to 14 = alkaline. The middle value 7 indicates neutral. Most plants prefer a pH value between 5.5 and 7.5, with the ideal value between 6 and 6.5. The pH value impacts the plants’ nutrient uptake.
Extreme pH values under 3 and above 8 provide no suitable environment for plants as nutrients become encased and can’t be taken up by the plants. And then it doesn’t matter if or what you use to fertilise.
The pH value also influences the soil’s structure and microorganisms. And, finally, a balanced pH prevents the absorption of dangerous heavy metals from the soil.
First, however, you must know your garden soil’s pH value. To determine that, you can either ask a lab to make a soil analysis or buy some litmus paper and do the tests yourself.
Measuring the pH value
1. Remove the upper soil layer (approx. 3 centimetres / 1 inch) and dig 20 cm / 8 inches deep. You need about 200 ml / 0.5 lb soil.
2. Put the soil into a large jar with a lid. Mix the soil at a ratio of 2/3 water to 1/3 soil with distilled water. (It’s important to use distilled water to make sure that the water’s pH value does not affect the test)
3. Close the jar and shake it for at least 2 minutes.
4. Let the mixture set for at least 10 minutes.
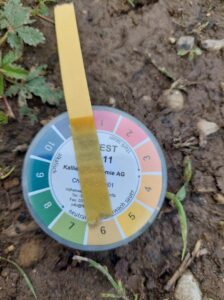
5. Insert the litmus paper into the water above the sediment.
6. Read the result and note it down. Take several soil samples from different places in your garden.
Compare the colour of the litmus paper with the indicator.
Favourable pH-values
Greens: 6.5 – 7.0
Cabbage: 6.5 – 7.5
Potatoes: 5.5 – 6.5
Raspberries: 5.5 – 6.5
Strawberries: 6.0 – 7.0
Berry bushes: 6.0 – 7.0
Blueberries: 5.0
How to improve your soil type
When you know your garden’s soil type, you can take measures to improve it by adding organic materials like compost and manure. Stay patient! building good soil requires time.
Sandy soil
As said before, sandy soil can’t store water very well because due to the sand’s large grain size, water will run through it. To improve moisture retention capacity, we can dig in plenty of bulky organic material like compost or well-rotted manure.
Always keep the soil surface well covered, either with mulch or with groundcover plants. Sow green manure between vegetables, cut it off when it becomes too large and use it as mulch. Leave the roots in the earth. They will stabilise the soil and help to store moisture.
Nevertheless, sandy soil will always need more fertiliser than other soil types. Fertilise sandy soil several times during the cultivation season and with relatively low amounts. If you give sandy soil more nutrients than it can store, they will be washed out.
Silty soil
Silty soil has a lot of nutrients and holds moisture well. It can be easily cultivated as long as it is well drained.
To improve drainage, dig in organic material like compost.
Chalky soil
Chalky soils have larger particles and are stonier than other soils. It is alkaline and, depending on its clay content, may be light or heavy.
First, we must lower the pH value by digging in lots of organic materials like compost or well-rotten manure but also half-rotten compost of conifers. Mulching with conifers in addition to other organic materials also improves the pH value long-term.
To break up the soil and add nitrogen, sowing leguminous plants is recommended.
Loamy soil
Loamy soil is usually a great mixture of sand, silt and clay. It’s nutritious and holds water easily. It warms up relatively quickly in spring and is easily cultivated.
Although loamy soil is already nutritious, it’s important to keep it that way. This is usually carried out best by adding organic material like compost and manure to the soil, making sure that it’s always covered with plants (green manure if necessary) and well-mulched. To aerate the soil, dig into it with a digging fork and jiggle it slightly. This is best done in autumn and early spring to ensure that enough oxygen gets into the soil without digging it up.
What to do to raise your soil’s pH?
If your soil’s pH is too low, that is if your soil is too acidic, you can add lime to your soil. But be careful, a too-high pH is equally unfavourable as a too-low pH. There are, however, good reasons to add limestone to your garden: it adds micronutrients to your soil which results in the plants not taking up too many heavy metals. especially loamy soil is better aired, more loose and thus easier for the roots to penetrate.
Different forms of lime
Lime is sold in different grain sizes. Powdered limestone has the smallest particles, granulated limestone consists of processed powdered limestone. the latter does not make a lot of dust and dissolves quickly into the soil. You can also buy lime chippings, but they dissolve relatively slowly.
Time and dosage
The best seasons to add lime are autumn and winter when rain and snow transport the lime into the soil.
The amount of lime you need depends on the soil type. Loamy soils usually need more to adjust the pH, sandy soils need less. As the lime products differ in their ingredients, you must follow the instructions valid for your product. If you prepare a new garden, you’ll need more lime than just for maintenance.
Conclusion
The first step for a healthy garden is determining your soil type. Different soil types require different improvement and maintenance methods. Every soil can be improved so that your garden provides the best conditions for your plants.
For quite a long time, I only ate asparagus with sauce hollandaise and young potatoes, topped with some bacon if I felt adventurous. Not because I like asparagus best that way but because I didn’t know it in any other way. So, when a short while ago, I tasted raw white asparagus for the first time I was thrilled by its fresh taste of young shoots. These days, whenever I buy asparagus, I have to force my willpower not to eat the whole bunch just like that. Spruce tips have a lemony, slightly dry taste and go well with the crisp asparagus. You can forage the spruce tips in April and May. The younger they are, the more delicate they taste. Alas, nothing is forever, and the season for both, asparagus and spruce tips is very short. What would be more logical than preserving both for when they won’t be available? And what better way than fermenting to keep the asparagus crisp and all the nutrients alive. The best thing is: you won’t need many ingredients for this simple recipe for fermented asparagus with spruce tips.
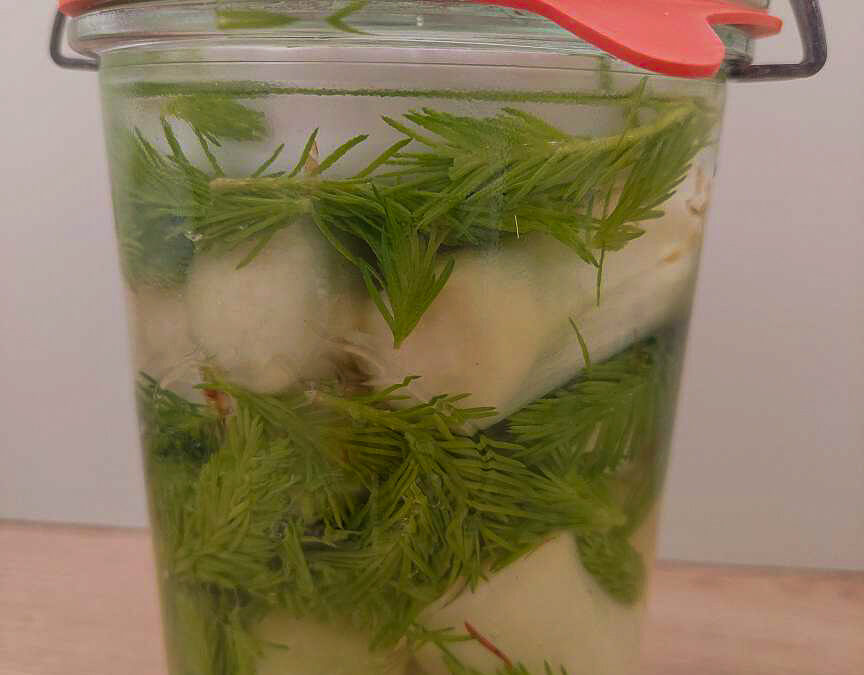
Fermented asparagus with spruce tips
Ingredients
Shelf life: several months
500 g white asparagus
salt
water
1 handful of spruce tips
Instructions
1. Peel the white asparagus and cut it into pieces of 4 – 5 cm (about 2 inches).
2. Mix the asparagus and the spruce tips with 30 g salt in a bowl and let it rest for 30 minutes.
3. Put the asparagus and spruce tips into glasses and fill them up with a salt solution of 3 % (30 g salt on 1 litre of water). Put a weight on top of the asparagus to keep everything well under the brine.
4. Close the lid and let the vegetables ferment at a dark and warm place for about one week.
5. When the taste is to your liking, store the asparagus in the fridge.
Both, asparagus and spruce tips are such great foods to experiment with. For example, have you tried out this recipe for tarte flambée with asparagus and walnuts? It’s delicious. Or get over here and read how you can make a very easy homemade spruce tip honey and preserve the flavour of a spring forest. I’m not done with trying out new recipes either. Stay tuned!
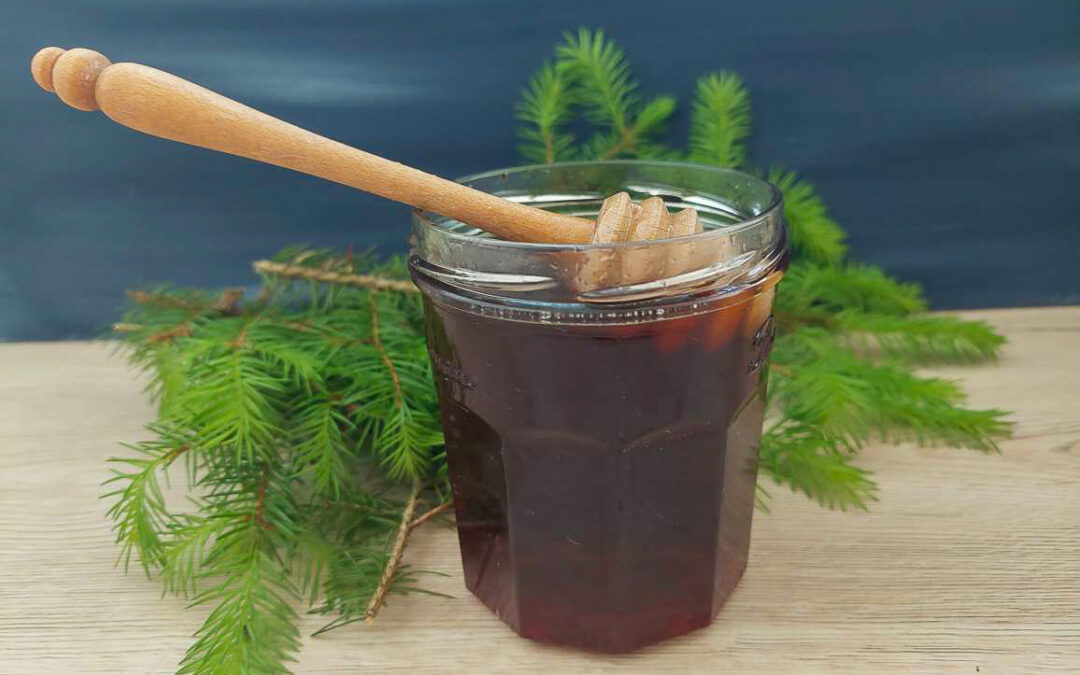
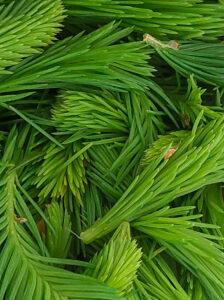
Every spring, the firs and spruces grow new, light green tips. Spruce tips start growing in April and, depending on the weather, you can forage them until the end of May, just as long as they are still light green. Spruce tips contain essential oils, but not as much as the older needles and the wood. They taste slightly lemony but sweet, and you can eat them directly from the tree. But did you know that you can also make “honey” from those spruce tips? It’s not real honey (’cause that’s only made by bees) but a thick sugar syrup with a golden-rosy colour and an amazing taste that you can use just like bees’ honey. With this recipe for spruce tip honey, you can preserve the forest’s flavour.
It’s easy to make spruce tip honey, especially with this simple recipe.
Spruce tip honey
Ingredients
Yield: about 1,2 kg spruce tip honey
Shelf life: at least one year
200 g spruce tips
1 litre water
1 kg sugar
1 organic lemon (optional)
Instructions
1. Wash the spruce tips and put them into a pot. Pour the water over them and cover them with a plate so that they stay underwater. Let them rest there for about 12 hours (best overnight).
2. Cut the lemon into slices and add those and the sugar to the water and spruce tips.
3. Bring the mixture to the boil while constantly stirring. Make sure that the sugar has dissolved completely. Let it boil at a low flame for about 30 minutes.
4. Sieve off the spruce tips and let the syrup simmer at a low flame. Stir from time to time.
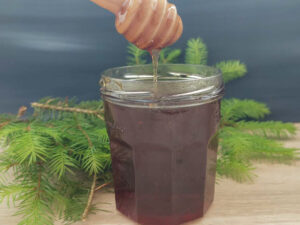
5. When the mixture starts to form a bubbly foam, it’s time to pour it into glasses. Securely close the twist-off lid and let the honey cool down.
Spruce tip honey, however, can not only be spread onto your buttered bread, or used in tea or marinades. It also contains lots of vitamin C and is a good remedy against colds.
Capture the essence of a spring forest with this delicate spruce tip honey that transforms young evergreen shoots into liquid gold with bright, citrusy notes.
Wash the spruce tips and put them into a pot. Pour the water over them and cover them with a plate so that they stay underwater. Let them rest there for about 12 hours (best overnight).
Cut the lemon into slices. Add the lemons and the sugar to the water and spruce tips.
Bring the mixture to the boil while constantly stirring. Make sure that the sugar has dissolved completely. Let it boil at a low flame for about 30 minutes.
Filter the spruce tips and let the syrup simmer at a low flame. Stir from time to time.
When the mixture starts to form a bubbly foam, it's time to pour it into glasses. Securely close the twist-off lid and let the honey cool down.
Note on foraging
Only take what you can classify without any doubts. Foraging and using plants at your own risk. Remember that some plants are toxic! Children, pregnant women, people under medication and those with chronic diseases should additionally consult with their medical practitioner before consuming foraged plants.
When I was a kid, woodruff sherbet powder was totally en vogue! Sometimes, when my friends and I were walking back from school, we went to the local store and bought some of it as a treat. There was also a “woodruff” jelly of a light green colour and overly sweet taste but my mum refused to buy “this purely chemical stuff” (she didn’t say “stuff”). So the only reference I had on woodruff taste For a long time, the only reference I had about how woodruff tasted were the sherbet powders.
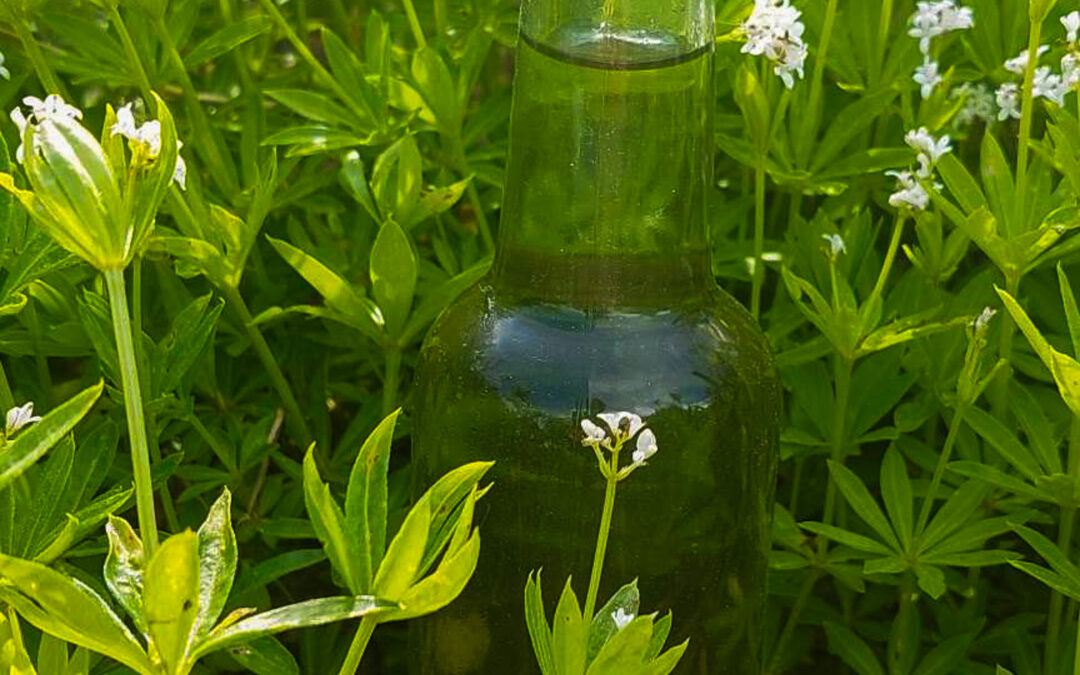
One day, when taking a stroll through the woods with my boys, I found some lovely flowers growing there in the half shade. I picked some and brought them home where I wanted to put them into a vase. Which I forgot to do. When I remembered the plants, they had already wilted – and were spreading the most wonderful scent of hay and vanilla (nothing chemical about that). We had accidentally found woodruff! Today, I grow woodruff in my herb garden and every spring (the best time is from April to June) I make some woodruff syrup from it to preserve that extraordinary scent. No chemical taste, no green colour, just four simple ingredients for a wonderfully herbal-hay-vanilla-fragranted syrup.
Woodruff Syrup
Ingredients
Yield: about 8 bottles of 250 ml
8 – 10 stalks of woodruff
1 litre water
1 kg sugar
1 lemon (organic)
Instructions
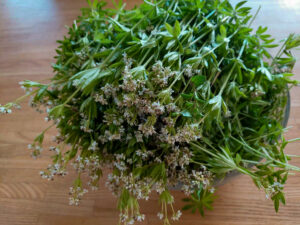
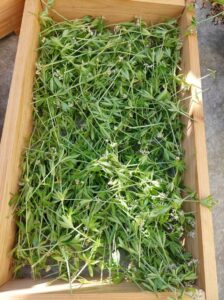
1. Pick the woodruff and let it wilt for several hours up to one day until you can clearly smell its scent.
Woodruff left to dry
2. Mix the sugar and water and bring it to the boil while constantly stirring. Make sure that the sugar is completely dissolved.
3. Cut the lemon into slices and add them to the mixture.
4. Let the sugar syrup cool down. When it reaches room temperature add the woodruff and leave it there for 2 – 3 days.
5. After that time, remove the lemon slices and the woodruff, bring the syrup to the boil and fill it into glass bottles.
Woodruff syrup will keep stable for about one year.
How to use woodruff syrup
You can add woodruff syrup to sparkling water to make it a lemonade or to sparkling wine for a great aperitif. Mix it with curd and yoghurt, fold in whipped cream and layer it into a bowl with fresh strawberries and ladyfingers to make a quick and easy dessert.
You can even use it as a base for kombucha or sweeten your rice pudding with it.