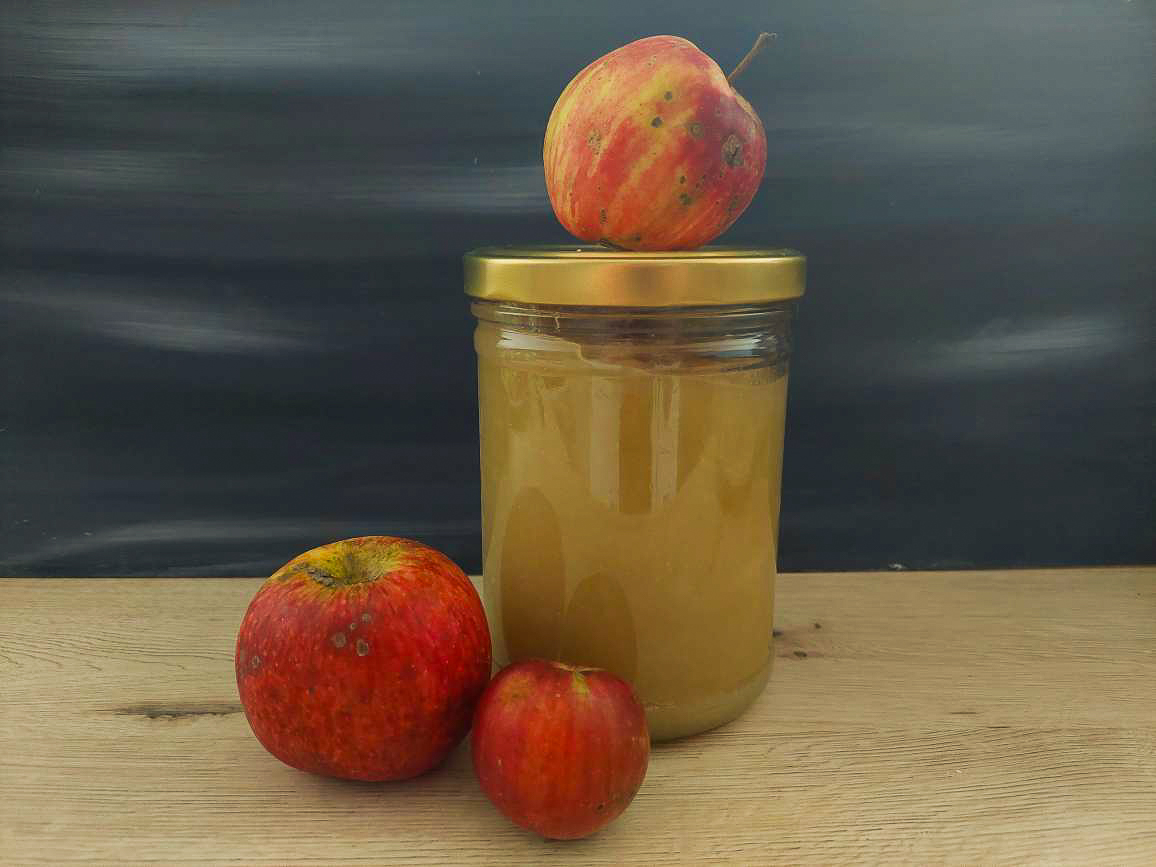
Apples are available all year round, especially when you grow a variety of them that ensure a long harvesting and shelf life. If you don’t have an orchard, you still can buy apples at any time of year. Nevertheless, fresh apples, plucked right from a tree when they are ripe are the privilege of autumn. I’m lucky enough to have a wonderful brother with a vast orchard and enough love for his sister that he allows her (that is: me) to have her share of his fruit harvest. Where we had very few fruits last year, this year has presented us with an abundance of them! Apart from eating the apples right from the tree and baking apple cakes in all varietes, what better way to preserve them for the upcoming winter than by canning apple sauce?
Ingredients and equipment for canning apple sauce
You’ll need a water bath canner (no pressure canner necessary for this recipe), appropriately large jars with well-closing lids and apples – at least one kilogram, the more the better – and sugar if you like.
Preparations
Prepare your jars by washing them and the lids in hot water or the dishwasher. Put the jar lids and rings or the rubber bands in a pot and cover them with water. Bring the water to a boil and let it all cook for five minutes. Remove the lids, rings and/or rubber bands from the boiling water and put them onto a clean dish towel on the kitchen counter. Let them dry.
Instructions for canning apple sauce
Rinse the apples in your sink to wash off any dirt. Also, remove any leaves, grass or other residues. Once washed, peel the apples, quarter them and cut out the cores. Cut off all rotten parts. If you want to make apple vinegar from the scraps, make sure that you only use unspoiled peels and cores. I usually take three bowls when preparing apple sauce: one for the apple quarters to be cooked, one for rotten apple parts or wormy cores to discard and one for all the scraps I later use for making vinegar.
Cooking
Once you’ve peeled and cut all the apples, wash the quarters again and put them into a large pot (or several if you have too many apples to fit into one, though you can also cook them in succession). Fill up water to about a quarter of the pot and put the apples to a boil. When the water’s boiling, carefully stir the apples from the top under so that they cook as well. After some minutes – depending on the sort – the apples become soft. Now use a hand blender to mix them into a smooth, homogenous mass. If you want, you can now optionally add some sugar to the apple sauce, but it isn’t necessary for preserving. I don’t use sugar in my apple sauce but if you want to and like your sauce sweeter, go ahead and add sugar to your taste.
When the sauce is blended stir it well until it’s boiling. Be very careful at this stage as the thick mass will easily bubble over and explosively release splashes of hot apple sauce that usually shoot at an unsuspecting arm or hand. I’ve gotten burnt more than once and know what I’m talking about…
Remove the pot from the stove and with the help of a funnel, ladle the apple sauce into the jars. Leave about one inch of headspace. Before closing the lids, make sure that the rim of the jar is clean. That’s best ensured by dipping a clean cloth (for example a towel) into some vinegar and wiping the rims clean. Seal the jars with the lids.
Canning
To can the jars, fill as much water into your water-bath canner as indicated in the manual and heat it. The water in the pot must have approximately the same temperature as the apple sauce in the jars. If we put the hot jars into cold to medium-warm water, they would break due to the huge temperature difference between the outside (water) and the inside (apple sauce). When the water has reached about 70 °C (160 °F), you can put the jars into the water bath canner (the apple sauce in the jars will have cooled down to approximately the same temperature by now). Make sure there is enough space between the jars and they don’t touch. Close the pot lid and bring the water to a boil. Once it boils, set the timer to 35 minutes and let the canner do its wonders.
When time’s up, carefully open the canner lid. Beware of the hot steam! Remove the jars with a glass lifter out of the canner and put them onto a towel on the counter to cool down.
When they’ve cooled down completely, store the apple sauce in a cool and dark place. It’ll last up to two years.
Apple sauce is a wonderful addition to pancakes or waffles, you can stir it into your morning yoghurt, make an autumnal apple tiramisu with it or just scoop it right from the jar.
Apple Sauce
Apple sauce is a wonderful addition to pancakes or waffles, you can stir it into your morning yoghurt, make an autumnal apple tiramisu with it or just scoop it right from the jar.
apples, at least one kilogram, the more the better
sugar (optional),to taste
Method
Prepare your jars by washing them and the lids in hot water or the dishwasher. Put the jar lids and rings or the rubber bands in a pot and cover them with water. Bring the water to a boil and let it all cook for five minutes. Remove the lids, rings and/or rubber bands from the boiling water and put them onto a clean dish towel on the kitchen counter. Let them dry.
Rinse the apples in your sink to wash off any dirt. Also, remove any leaves, grass or other residues.
Once washed, peel the apples, quarter them and cut out the cores. Cut off all rotten parts. If you want to make apple vinegar from the scraps, make sure that you only use unspoiled peels and cores.
Once you've peeled and cut all the apples, wash the quarters again and put them into a large pot (or several if you have too many apples to fit into one, although you can also cook them in succession). Fill up water to about a quarter of the pot and put the apples to a boil.
When the water's boiling, carefully stir the apples from the top under so that they cook as well. After 5 - 20 minutes - depending on the variety – the apples become soft. Now use a hand blender to mix them into a smooth, homogenous mass. If you want, you can now optionally add some sugar to the apple sauce, but it isn't necessary for preserving.
When the sauce is blended stir it well until it’s boiling. Be very careful at this stage as the thick mass will easily bubble over and explosively release splashes of hot apple sauce that usually shoot at an unsuspecting arm or hand.
Remove the pot from the stove and with the help of a funnel, ladle the apple sauce into the jars. Leave about one inch of headspace. Before closing the lids, make sure that the rim of the jar is clean. That's best ensured by dipping a clean cloth (for example a towel) into some vinegar and wiping the rims clean. Seal the jars with the lids.
To can the jars, fill as much water into your water-bath canner as indicated in the manual and heat it. The water in the pot must have approximately the same temperature as the apple sauce in the jars. If we put the hot jars into cold to medium-warm water, they would break due to the huge temperature difference between the outside (water) and the inside (apple sauce). Make sure there is enough space between the jars and they don’t touch. Close the pot lid and bring the water to a boil. Once it boils, set the timer to 35 minutes and let the canner do its wonders.
When time's up, carefully open the canner lid. Beware of the hot steam! Remove the jars with a glass lifter out of the canner and put them onto a towel on the counter to cool down.
When they’ve cooled down completely, store the apple sauce in a cool and dark place. It’ll last up to two years.
Never judge a book by its cover – or in this case: a vegetable by its appearance. Beetroots are not the prettiest of veggies. They are plump, dirty and make a hell of a mess when cut up. But if you get to know them, you’ll love them. You can eat them raw, cooked, steamed, boiled or roasted and preserve them by freezing, pickling, canning or fermenting them. Add to that a wonderfully unique taste and a bunch of nutrients and you have a veggie superstar! If you don’t know how to deal with an abundance of beetroots, look no further. In this post, I’ll show you two recipes for pickled beetroots so that you can enjoy their flavour and colour all winter long.
Pickled beetroots I
Yield: 5 jars of 350 ml Shelf life: up to two years
Ingredients
1,2 kg beetroots 3/4 l apple vinegar 1/8 l water 80 g sugar 1 tsp salt 4 tbsp grated horseradish 1 tbsp white peppercorns 1 tbsp caraway 5 cloves 1 bay leaf
Instructions
1. Put on an apron and always – ALWAYS – wear disposable gloves when handling beetroots. Otherwise, the stains will never come out of your clothes and your hands will have a butcherlike colour for quite some time.
2. Cut off the leaves to about 1 cm and put the beetroots onto a baking tray. Bake them in the oven at a temperature of 175 °C (350 °F) for 60 – 90 minutes, depending on their thickness. When they feel soft, they’re ready.
Put your beetroots onto a tray and bake them in the oven for about 1 – 1,5 hours.
3. In the meantime, mix the vinegar, sugar and salt and put it to a boil. Wash the horseradish, peel it and grate it.
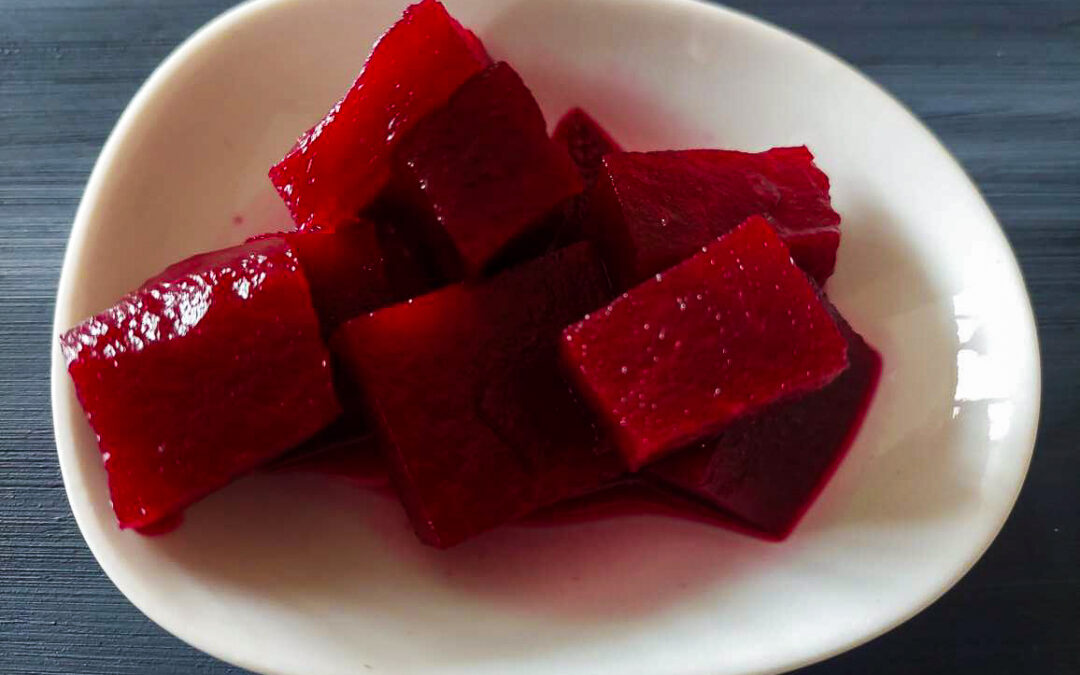
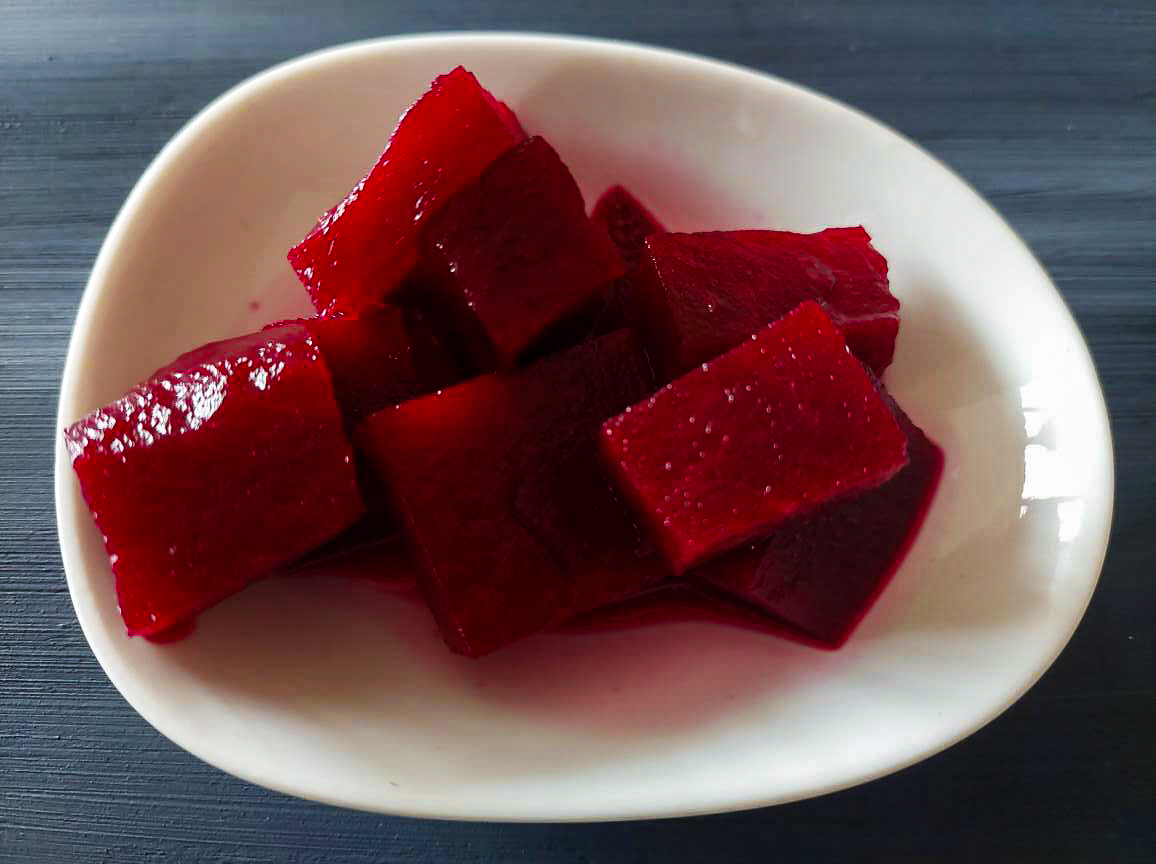
4. Peel the cooked beetroots and chop them into squares. I do not recommend slices as they fall apart easily.
5. Layer the still-warm beetroots with the spices into jars. Fill up with the hot fluid and close the jars tightly with lids. Store the pickled beetroots in a cool and dark place.
Put on an apron and always - ALWAYS - wear disposable gloves when handling beetroots. Otherwise, the stains will never come out of your clothes and your hands will have a butcherlike colour for quite some time.
Cut off the leaves to about 1 cm and put the beetroots onto a baking tray. Bake them in the oven at a temperature of 175 °C (350 °F) for 60 - 90 minutes, depending on their thickness. When they feel soft, they're ready.
In the meantime, mix the vinegar, sugar and salt and put it to a boil. Wash the horseradish, peel it and grate it.
Peel the cooked beetroots and chop them into squares. I do not recommend slices as they fall apart easily.
Layer the still-warm beetroots with the spices into jars. Fill up with the hot fluid and close the jars tightly with lids. Store the pickled beetroots in a cool and dark place.
Pickled beetroots II
If you like it a bit milder, the following recipe will suit you! It uses apple juice in combination with vinegar which leads to a more fruity taste. As we use less vinegar, however, the shelf life is only up to one year when stored in a cool place.
Yield: 5 jars of 350 ml Shelf life: up to one year
Ingredients
1,2 kg beetroots 1 l water 3/8 l apple juice 1/8 l apple vinegar 100 g sugar 1 tsp salt 1 tbsp black peppercorns 1 tbsp caraway
Instructions
The procedure is pretty much the same as in recipe I:
1. Cut off the leaves to about 1 cm and put the beetroots onto a baking tray. Bake them in the oven at a temperature of 175 °C (350 °F) for 60 – 90 minutes, depending on their thickness. When they feel soft, they’re ready.
2. In the meantime, mix the vinegar, sugar and salt and put it to a boil.
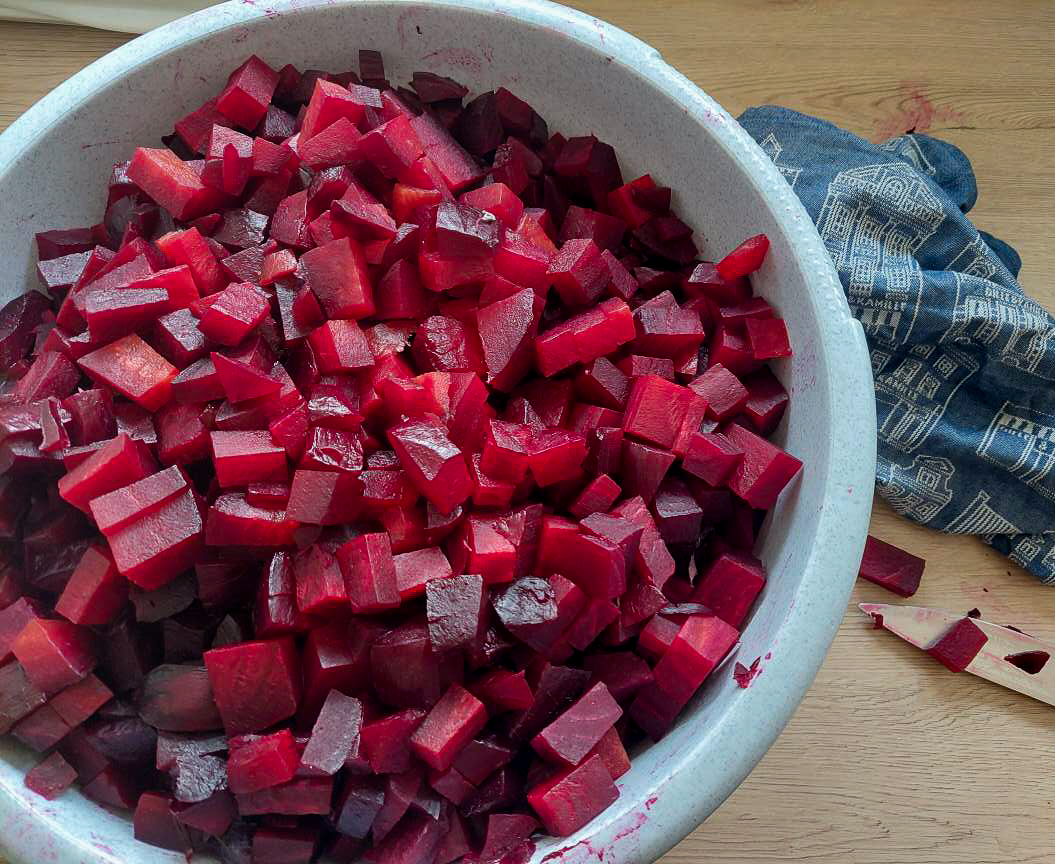
3. Peel the cooked beetroots and chop them into squares.
Once baked and peeled, chop the beetroots into squares
4. Layer the still warm beetroots with the spices into jars. Fill up with the hot fluid and close the jars tightly with lids. Store the pickled beetroots in a cool and dark place.
Pickled Beetroots II
This is a recipe for a milder version of pickled beetroots. The combination of apple vinegar and apple juice takes the edge off the vinegar while at the same time adding a fruity aroma to the pickles.
1. Put on an apron and always - ALWAYS - wear disposable gloves when handling beetroots. Otherwise, the stains will never come out of your clothes and your hands will have a butcherlike colour for quite some time.
Cut off the leaves to about 1 cm and put the beetroots onto a baking tray. Bake them in the oven at a temperature of 175 °C (350 °F) for 60 - 90 minutes, depending on their thickness. When they feel soft, they're ready.
In the meantime, mix the vinegar, sugar and salt and put it to a boil.
Peel the cooked beetroots and chop them into squares.
Layer the still warm beetroots with the spices into jars. Fill up with the hot fluid and close the jars tightly with lids. Store the pickled beetroots in a cool and dark place.
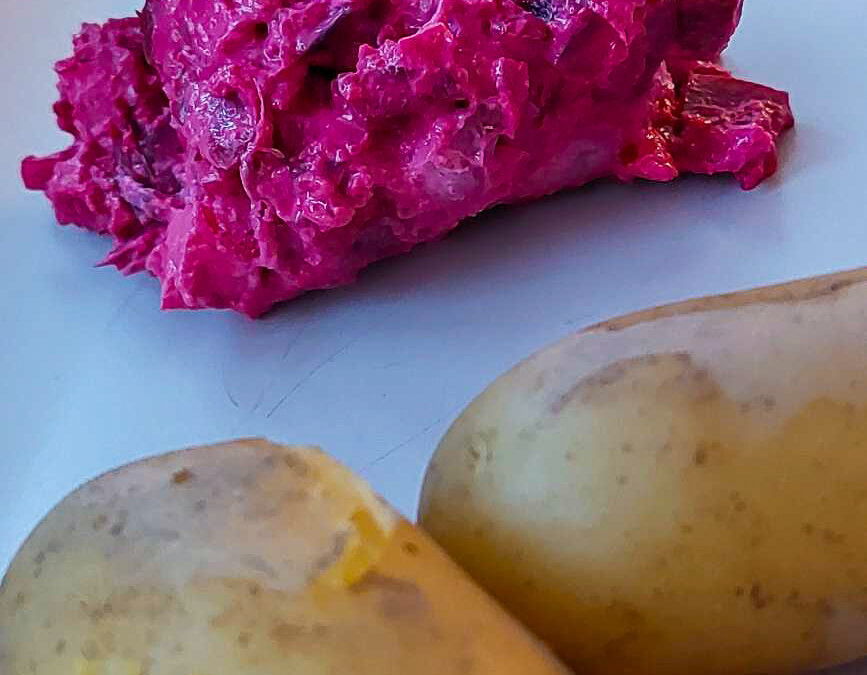
Pickled beetroots can be eaten with a cold supper or some sandwiches, but they also make a wonderful side dish to potatoes and herring as well as boiled beef. If you want to go a bit further you can make this tasty spread with pickled beetroots.
Sometimes, it has to be quick! Whether you don’t have the time or energy to cook or simply don’t want to spend more than five minutes in the kitchen, this quick and easy beetroot curd recipe will make a wonderful spread on bread or a dip for boiled potatoes. If you have pickled beetroots in your pantry, it’ll be done even faster.
Beetroot curd
Ingredients
150 – 200g pre-cooked or pickled beetroots 1 tbsp fresh lemon juice 2 tbsp sour cream 1/2 apple 3 young herring filets 1 small onion 1/2 bunch of dill 100 g curd salt, pepper
Instructions
1. If you use precooked beetroots, chop them into squares. Mix half of them with the lemon juice and sour cream and blend them with a hand blender. If you use pickled beetroots, strain them through a colander. Mix half of them with the sour cream and blend them (leave off the lemon juice as they are already a bit sour due to the vinegar we used for pickling).
2. Cut the apple into quarters and remove its core. Chop it into small cubes and mix with the remaining beetroots and the blended mass.
3. Cut off the tails of the herring filets. Dab the filets dry and also chop them into small cubes. Peel the onion and finely dice it. Wash and dry the dill and chop its leaves.
4. Mix the curd with the beetroots and the onion to a homogenous mass. Fold in the herring and dill and season it all with salt and pepper.
You can make this spread in advance and keep it in the fridge where it can be stored for up to two days.
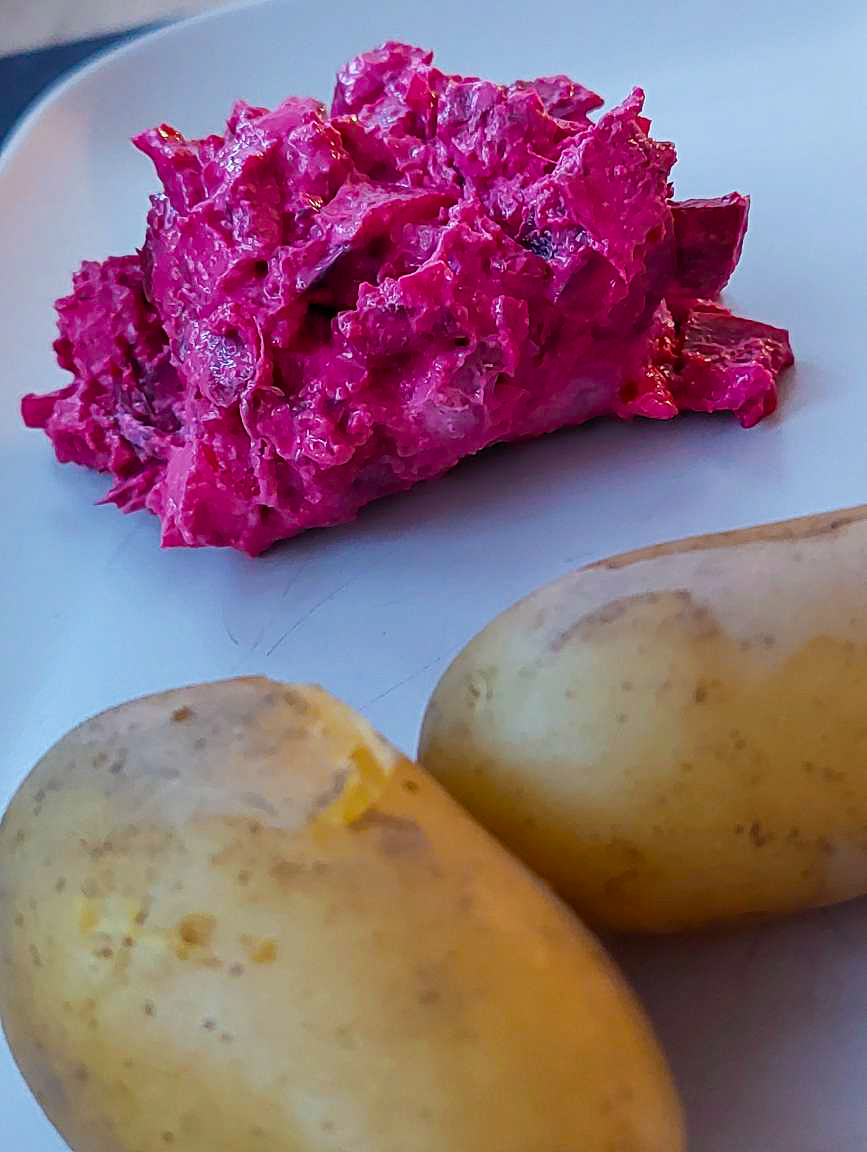
Beetroot curd
This quick and easy beetroot curd recipe will make a wonderful spread on bread or a dip for boiled potatoes. If you have pickled beetroots in your pantry, it'll be done even faster.
If you use precooked beetroots, chop them into squares. Mix half of them with the lemon juice and sour cream and blend them with a hand blender. If you use pickled beetroots, strain them through a colander. Mix half of them with the sour cream and blend them (leave off the lemon juice as they are already a bit sour due to the vinegar we used for pickling).
Cut the apple into quarters and remove its core. Chop it into small cubes and mix with the remaining beetroots and the blended mass.
Cut off the tails of the herring filets. Dab the filets dry and also chop them into small cubes. Peel the onion and finely dice it. Wash and dry the dill and chop its leaves.
Mix the curd with the beetroots and the onion to a homogenous mass. Fold in the herring and dill and season it all with salt and pepper.
You can make this spread in advance and keep it in the fridge where it can be stored for up to two days.
I harvested the first carrots and they smell and taste so good that usually I eat the first bunch of them raw. I love their sweet and earthy flavour, it’s delicious! However, it would be a pity to just eat them all up like that and not use them in some more elaborate recipes. One of my favourites with carrots is this easy recipe for carrot pizza.
How to make carrot pizza
Make a yeast pizza dough, put sour cream on it and coat it lavishly with carrots, herbs, onions and garlic. Top the pizza with cheese and bake it in the oven until it’s crisp and the cheese has melted. And voilà: a hearty and comforting dinner is ready to be served!
Even if you consider carrots bland, give this delicious meal a chance. The carrots taste even sweeter when cooked and the combination with sour cream, herbs, and salt makes this pizza a great dish for summer. It’s so tasty, I’m sure it’ll become your new favourite food.
Although I like it as a vegetarian dish, you could also put some bacon on it to add a smokey flavour. Either way, you’ll sure love this carrot pizza!
Recipe for Carrot Pizza
Ingredients (4 servings):
For the yeast dough
300 g flour 25 g fresh yeast or 3 g dried yeast 1 tsp salt 150 ml lukewarm water 2 tbsp olive oil
For the topping
450 g carrots 2 onions 1 clove of garlic 2 tbsp fresh thyme or 2 tsp dried thyme 200 g sour cream 4 tbsp olive oil salt pepper grated cheese (parmesan, mozzarella or emmentaler)
Instructions
1) Dissolve the yeast in the water and mix it with the flour, salt, and oil until it forms a smooth dough. Cover it and allow it to rise for 30 minutes.
2) In the meantime, clean the carrots, peel them, and cut them into thin slices. Peel the onions and cut them into slices, as well. Peel the garlic and dice it. Put some thyme aside for a garnish and chop the rest.
3) Mix garlic, carrots, onions, and chopped thyme with 2 tbsp oil and season it with salt and pepper.
4) Heat the oven to 250 degrees (fan: 230 degrees).
5) Roll out the dough and coat it with sour cream. Distribute the carrot mix evenly on the pizza and sprinkle the grated cheese on top. Bake it in the preheated oven for approx. 20 minutes. Garnish with the thyme and freshly ground pepper.
Carrot pizza
This carrot pizza makes for a hearty and comforting dinner.Even if you consider carrots bland, give this delicious meal a chance. The carrots taste even sweeter when cooked and the combination with sour cream, herbs, and salt makes this pizza a great dish for summer. It's so tasty, I'm sure it'll become your new favourite food.Although I like it as a vegetarian dish, you could also put some bacon on it to add a smokey flavour. Either way, you'll sure love this carrot pizza!
Dissolve the yeast in the water and mix it with the flour, salt, and oil until it forms a smooth dough. Cover it and allow it to rise for 30 minutes.
In the meantime, clean the carrots, peel them, and cut them into thin slices. Peel the onions and cut them into slices, as well. Peel the garlic and dice it. Put some thyme aside for a garnish and chop the rest.
Mix garlic, carrots, onions, and chopped thyme with 2 tbsp oil and season it with salt and pepper.
Heat the oven to 250°C / 480°F (fan: 230°C / 445°F).
Roll out the dough and coat it with sour cream. Distribute the carrot mix evenly on the pizza and sprinkle the grated cheese on top. Bake it in the preheated oven for approx. 20 minutes. Garnish with the thyme and freshly ground pepper.
What would cooking be without herbs? They not only are beneficial for our health but also add flavour to practically any dish. To make sure that we can use herbs all year round, we have to preserve them during summer. Drying is the most common practice to preserve herbs; as usual there is more than one way to do it. In this post I show you three different ways how to dry herbs.
Preparation
I know that many people tell you not to wash your herbs before drying them because that would enhance the risk of mildewing. But that’s only true if you don’t dab the herbs dry properly after washing or even bundle the stems together while they are still wet. I always wash my herbs before drying them because no matter where they grow, they’ll always be dirty or contain the occasional insect. After washing, shake the herbs out over your sink, then lay them out on a clean towel and cover them with a second towel. Now, gently squeeze out the remaining water and move the herbs over to a third (dry!) towel where you let them pre-dry for a few hours.
Now they are washed, your herbs are ready for being dried. Let’s start with
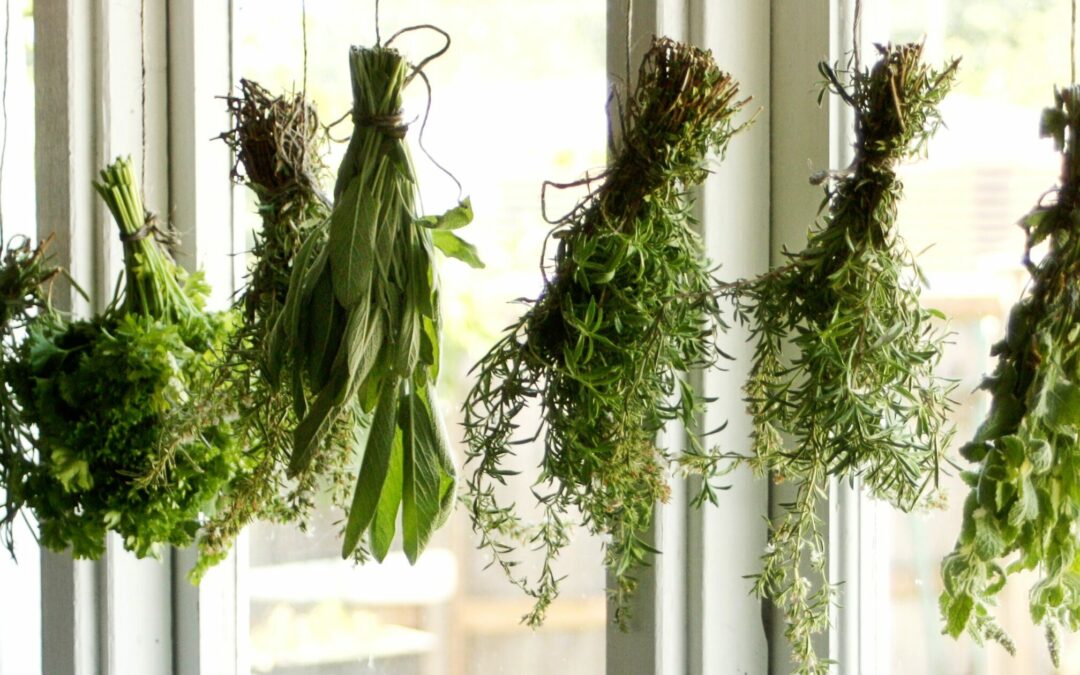
Air-drying
With this classic way of drying herbs, you bind the herbs into a bunch with a diameter of about 2 – 3 cm /1 inch. Hang it upside down at a temperate place with proper air circulation but without direct sunlight. Alternatively, you can put the herbs onto drying racks. Let them dry for about one week, depending on the herb. If you’re not sure whether they are dry enough for storage, you better leave them for one or two days longer. Otherwise, the herbs will develop mildew.
Dehydrating
You can dry herbs in a dehydrator. This is especially great if your dehydrator has mesh inserts that keep the leaves from falling through. Dry the herbs in your dehydrator according to the manual for about two to four hours.
Oven-drying
If you (like me) don’t have a dehydrator, you can also dry herbs in your oven. For that purpose, cover your trays with baking paper or silicone mats, put the clean herbs on them and let them dry at about 50 °C /120 °F. Stick a wooden spoon into your oven door to let the moisture evaporate. Dry the herbs until they are crisp to the touch and remove easily from the stems.
Storage of dried herbs
Dried herbs are best stored in clean glass jars or airtight plastic containers. You may also use brown-glass jars to keep out the light.
When your herbs are completely dry, put them onto a piece of baking parchment and strip the leaves from the stems. Dispose of the stems, slightly fold the baking paper in half so that a crease forms and let the dried herbal leaves glide into your container. I usually, store the whole leaves (well, as whole as they stay when removing them from the stems) and crumble them when I use them. That way they maintain more flavour.
Store the jars or plastic containers in a dark and dry place for about one year.