Looking for practical zero-waste uses for orange peels? Here are 13 creative and eco-friendly ways to use orange peels in the kitchen, for cleaning, and even for skincare. Instead of tossing those peels in the trash, transform them into useful products that save money and reduce waste. Using organic peels, you can make everything from candied treats to homemade vinegar cleaners.
How I discovered different uses for orange peel
As you know – at least if you’ve read my About Me Page – I work at a school. There, we have a contract with a local grocery distributor who delivers organic fruit or vegetables once a week for the pupils in primary school. Depending on the produce and size, some moms come over and chop the fruit (or veggies) into smaller pieces so that nothing gets wasted.
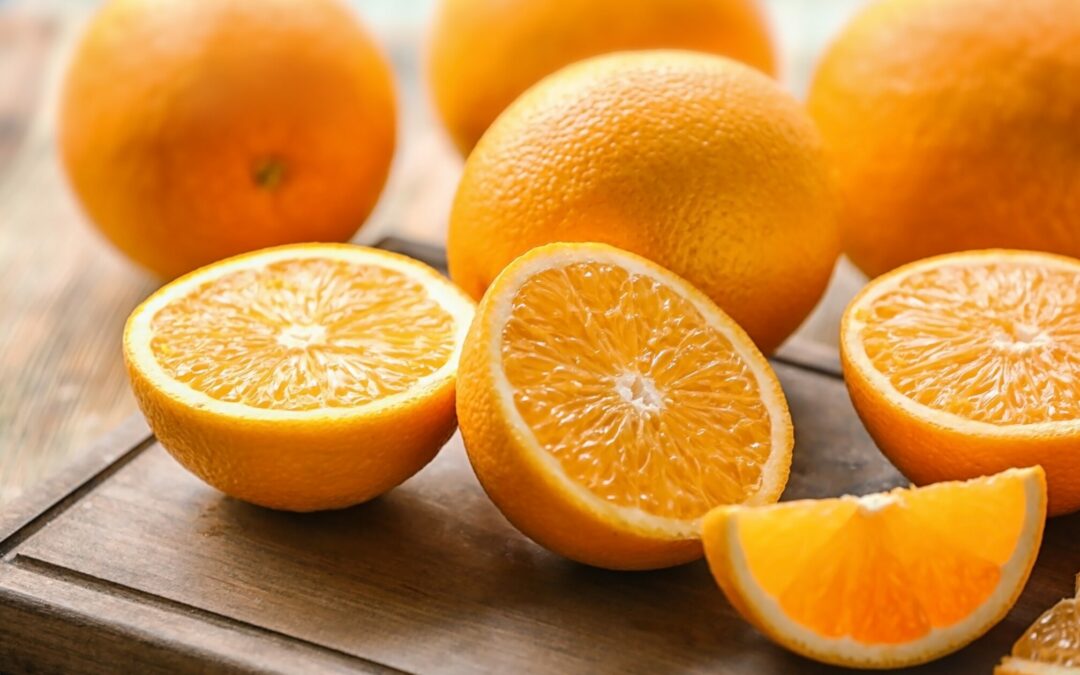
Last week, we got oranges, and I rubbed my hands with glee. When the moms came to prepare the oranges, I asked them to put the peels aside for me and in the end, I got 2 large bags full. My office smelled like an orange farm! I was astonished, though, that they had never heard of the different uses for orange peel, and so I decided this topic was worth a blog post.
Important: Always use organic oranges for edible recipes. Conventional oranges are treated with chemicals that concentrate in the peel.
How to use orange peels in the kitchen
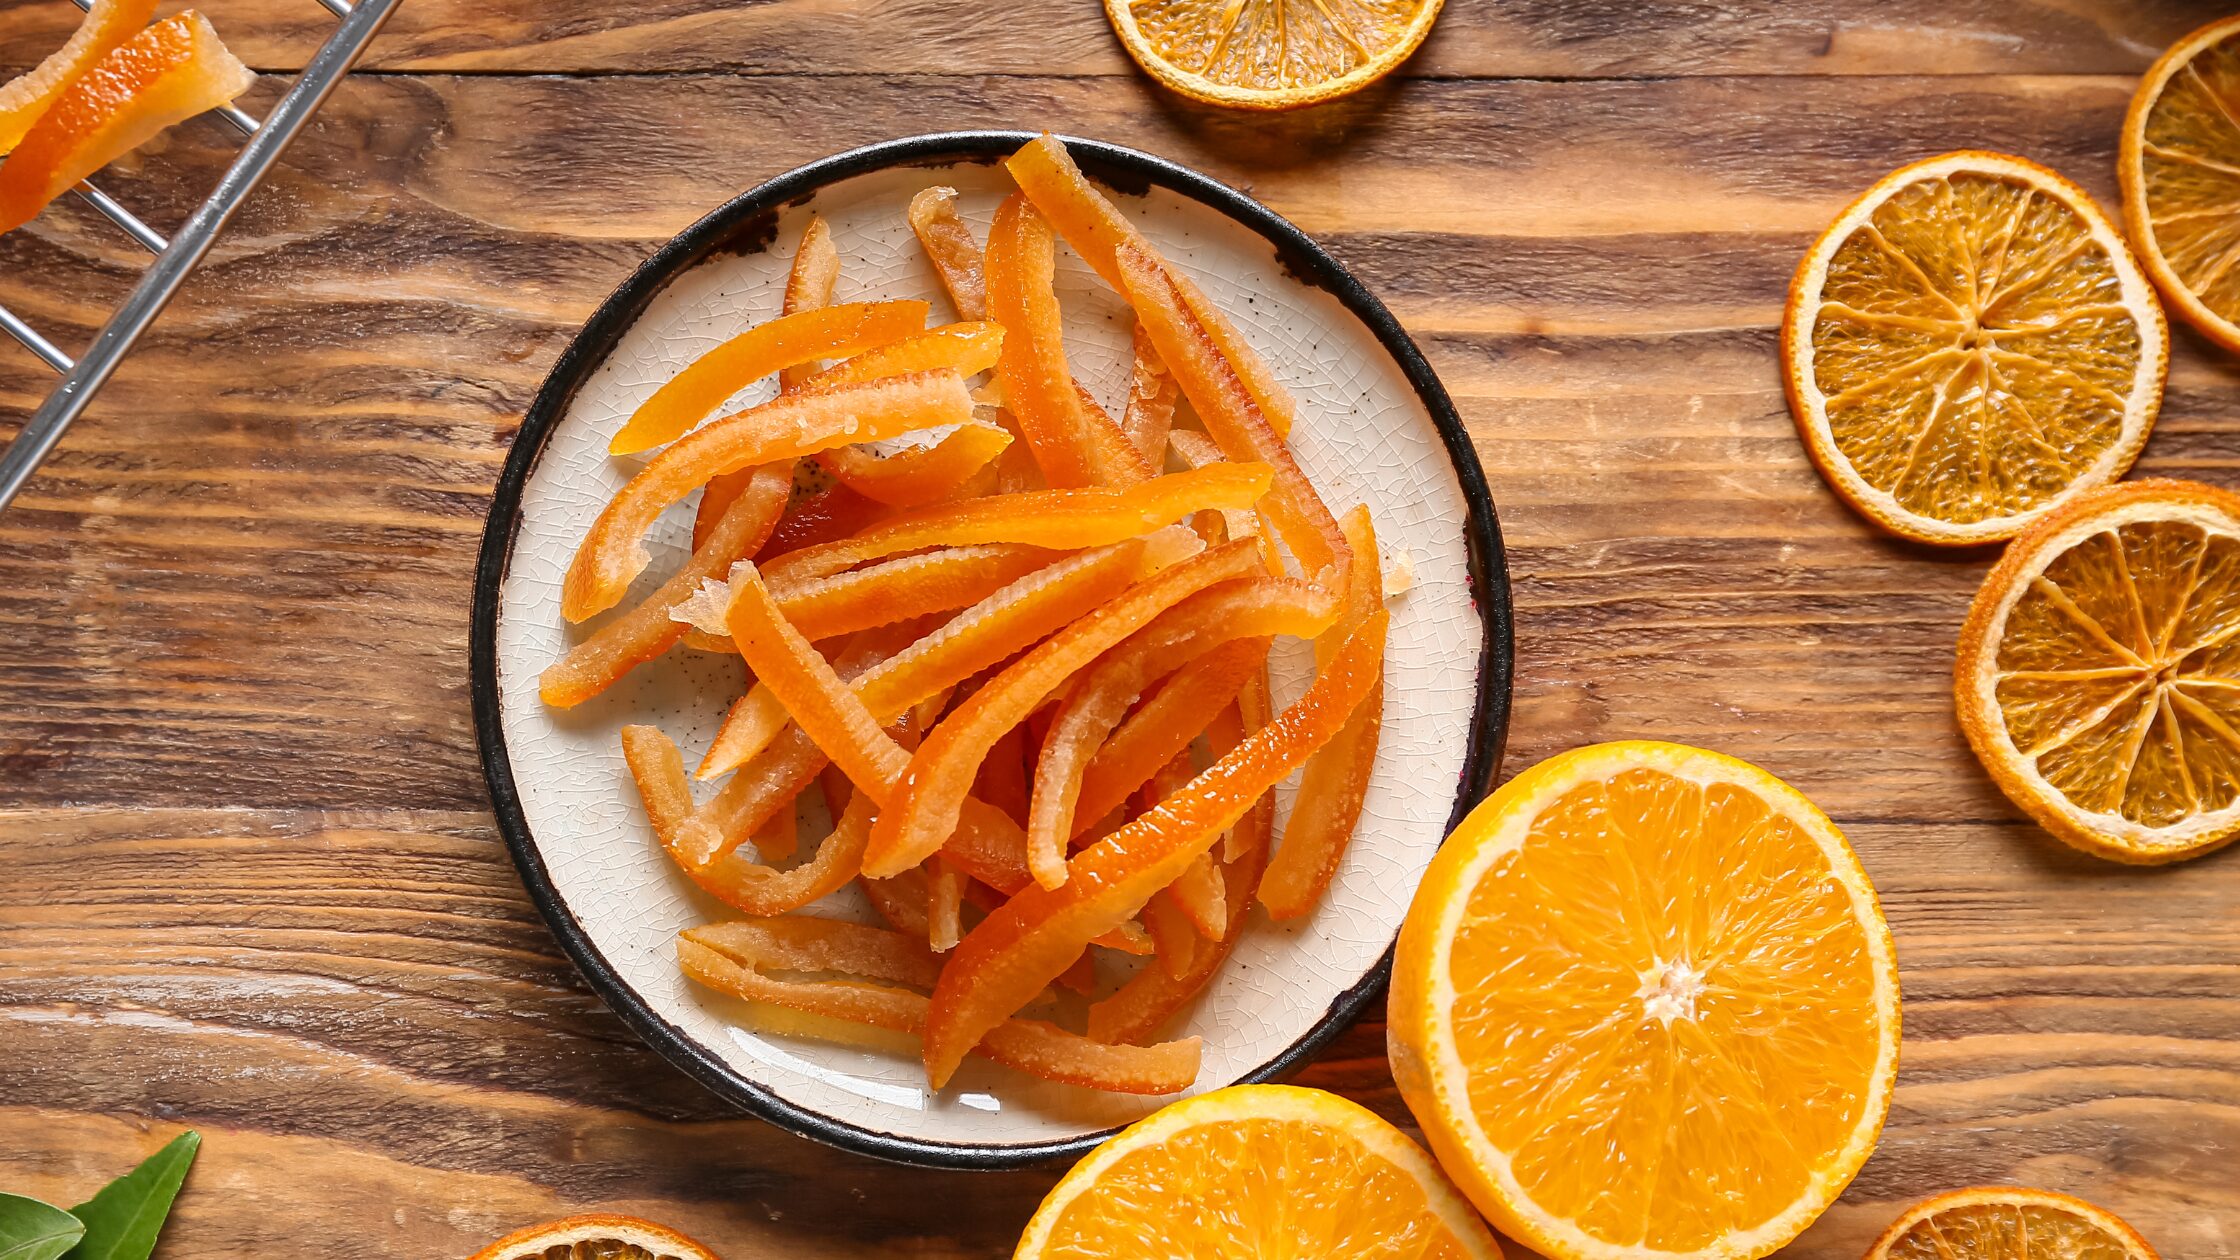
#1 Candied orange peel
For decades, I had loathed candied orange peel because I was only familiar with the store-bought version. It didn’t look or taste anything like orange at all, and even today I’m not sure if there is anything remotely orange in it (except, perhaps, some artificial orange colour). Whenever I made Christmas cookies, gingerbread, or other traditional baked Christmas goods that required candied orange peel, I either left it out completely or mixed it with fresh orange juice to form a paste, so I could incorporate some of the flavours. Yet, I was never satisfied until I tried some at a local market in Italy. It was heaven! Juicy and chewy and bursting with flavour. Back home, I researched recipes for making candied orange peel by myself, and you’ll be happy to know that it isn’t difficult at all!
Angela Braun
Candied orange peel
An easy recipe for the most yummy and flavourful candied orange peel!
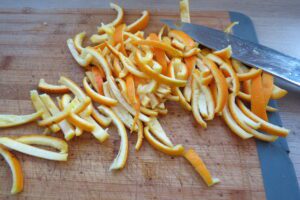
If you want to dry them afterwards and use them as snacks, leave them like that. If you want to use them in cakes or cookies, cut them up into tiny squares.
Now, put them into a pot and fill up with water so that the peels are covered. Bring to the boil and let it boil for about 10 minutes. Pour the peels into a sieve and let them drain. Repeat the whole process twice and rinse the peels. This pre-cooking removes the bitter taste from the peels.
Cooking
Put 0.5 l water into the pot and add 1 kg sugar or multiply the amounts if you have lots of peel. Just stick to the ratio of one part water to two parts sugar.
Bring this mixture to the boil while constantly stirring until the sugar is dissolved. When the syrup is boiling add the orange peels and let it simmer for about 30 minutes until the peels are well cooked.
Now, you either take the peels out onto a wire rack and let them dry for 12 – 24 hours until they are almost dry and still a bit sticky.
Storage Option I
Put some sugar into a bowl, add the peels in portions and mix them through until the peels are well-covered in sugar. In the fridge, they will last for up to one week.
Storage Option II
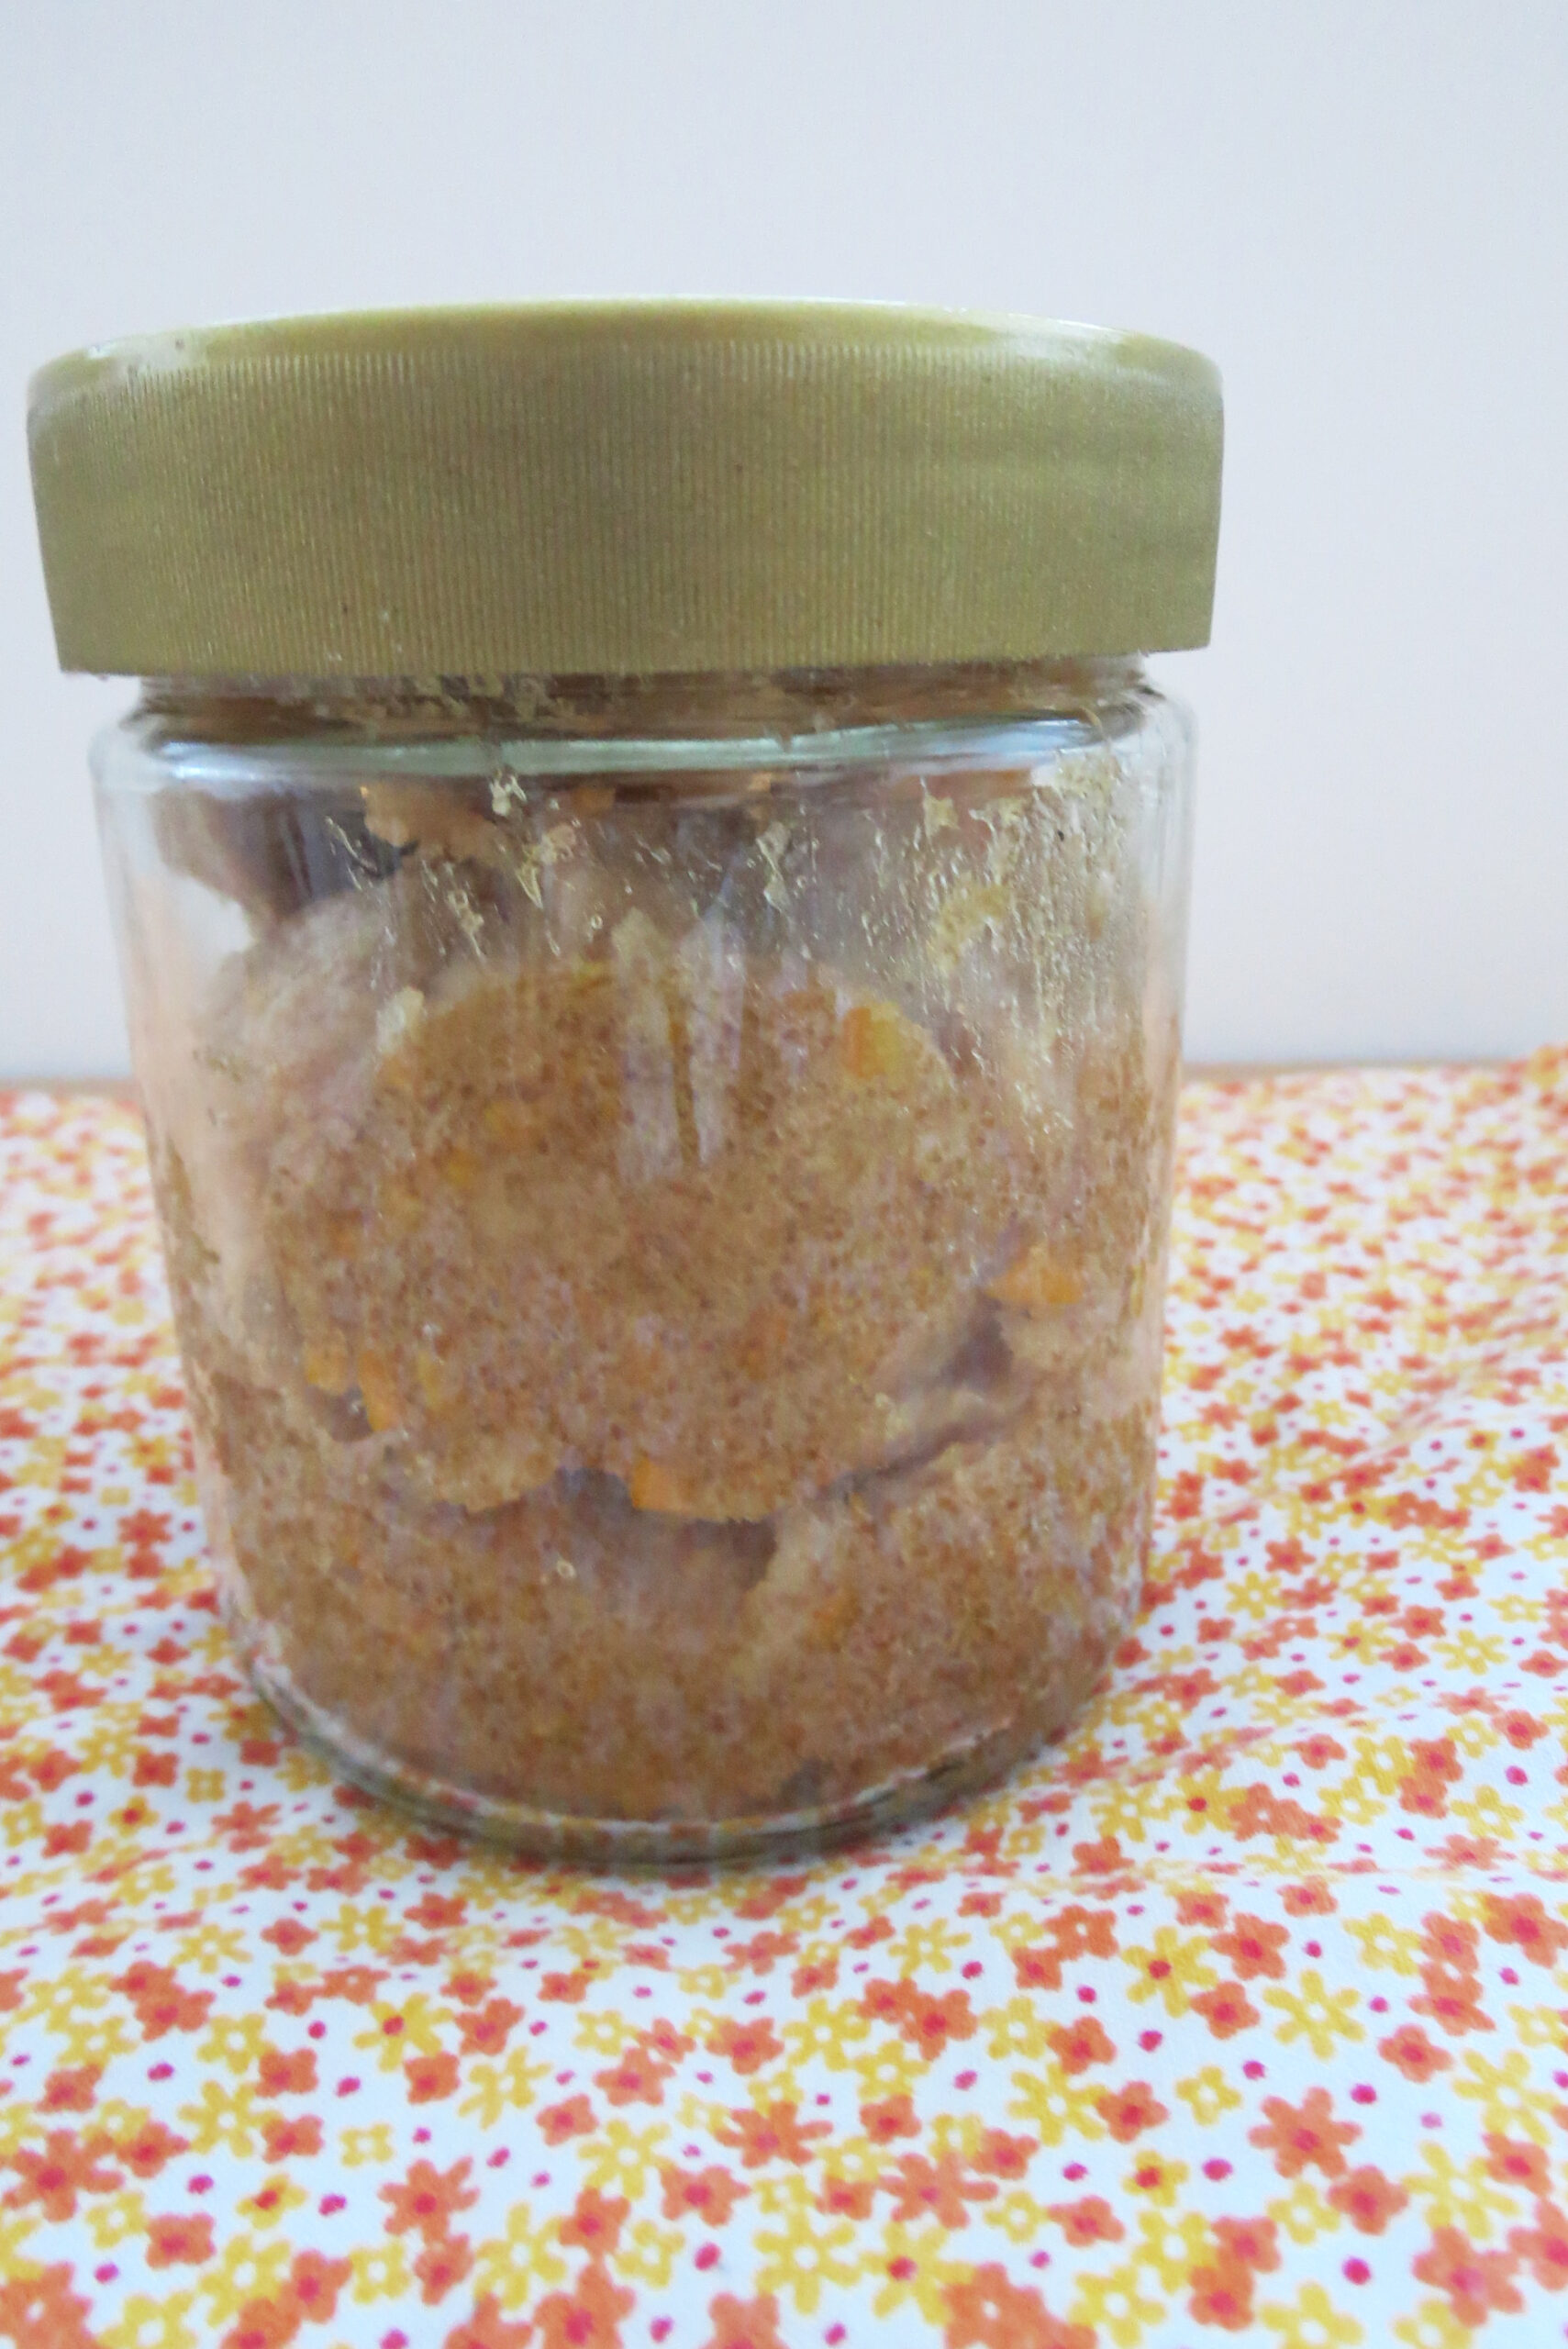
The other option is to put the cooked orange peel cubes into a glass jar and add some of the orange syrup so that the peels are covered in it. Close the jars with lids and once cooled down put them into the fridge. They’ll last for up to one year.
#2: Orange syrup
Bonus tip from the candied peel recipe:
Don’t throw away the syrup from the candied orange peels. It’ll make an amazing flavour addition to water, cocktails, soda and more. You can even add it to some apple vinegar, pour about 20 cl in a glass and fill it up with sparkling water. This makes a wonderfully refreshing, non-alcoholic drink for summer.
Looking for more syrup recipes? Have a look at those:
For this recipe, you must remove the white part of the peel (the "pith"): If the orange is already peeled with the pith still on the peels, put the peels upside down on a wooden board and, with a sharp knife, scrape the pith off the orange peel.Or, if the orange is still intact, thinly cut off the peel from the fruit, leaving the pith on the orange.
Either way, cut the peels into pieces, mix them with sugar and put them into a blender. Mix until the sugar and peel are powdery.
Distribute the moist mixture on a baking tray and let it dry in the oven at low heat until it’s completely dry.
Let the orange sugar cool down and, if necessary, break it up.
Store the orange sugar in a tight container. Essentially, it’ll last indefinitely, but it’s best consumed within a year of its creation. With time, it'll lose flavour.
Notes
Use your homemade orange sugar in cakes or desserts, mix it in hot cocoa or just drizzle it over pancakes.
Either cut the peel off the orange thinly so that you leave the pith (the "white stuff" underneath the peel) on the fruit. Or, if you just have the peels, put them upside down onto a wooden board and, with a sharp knife, scrape the pith off the peels.
Put the peels on a baking tray and let them dry in the oven at low heat. Alternatively, dry them in a dehydrator.
Test if the peels are completely dry by breaking them in half. If they're still bendy, put them back in the oven. If they break with a snap, they're ready.
Let the dried peels cool down. Put them into a blender and grind them until they've become a powder.
Store the orange powder in a closed jar at a cool, dry and dark place.
Notes
Use orange powder wherever you need a bit of orange flavour, i.e. in cakes, salad dressings or savoury dishes.
Either cut the peel very thinly off the orange so that the pith (the "white stuff" underneath the peel) stays on the fruit. Or, remove the pith by putting the peel upside down on a wooden board, and, with a sharp knife, scraping it off the peel.
Cut the peels into very small pieces.
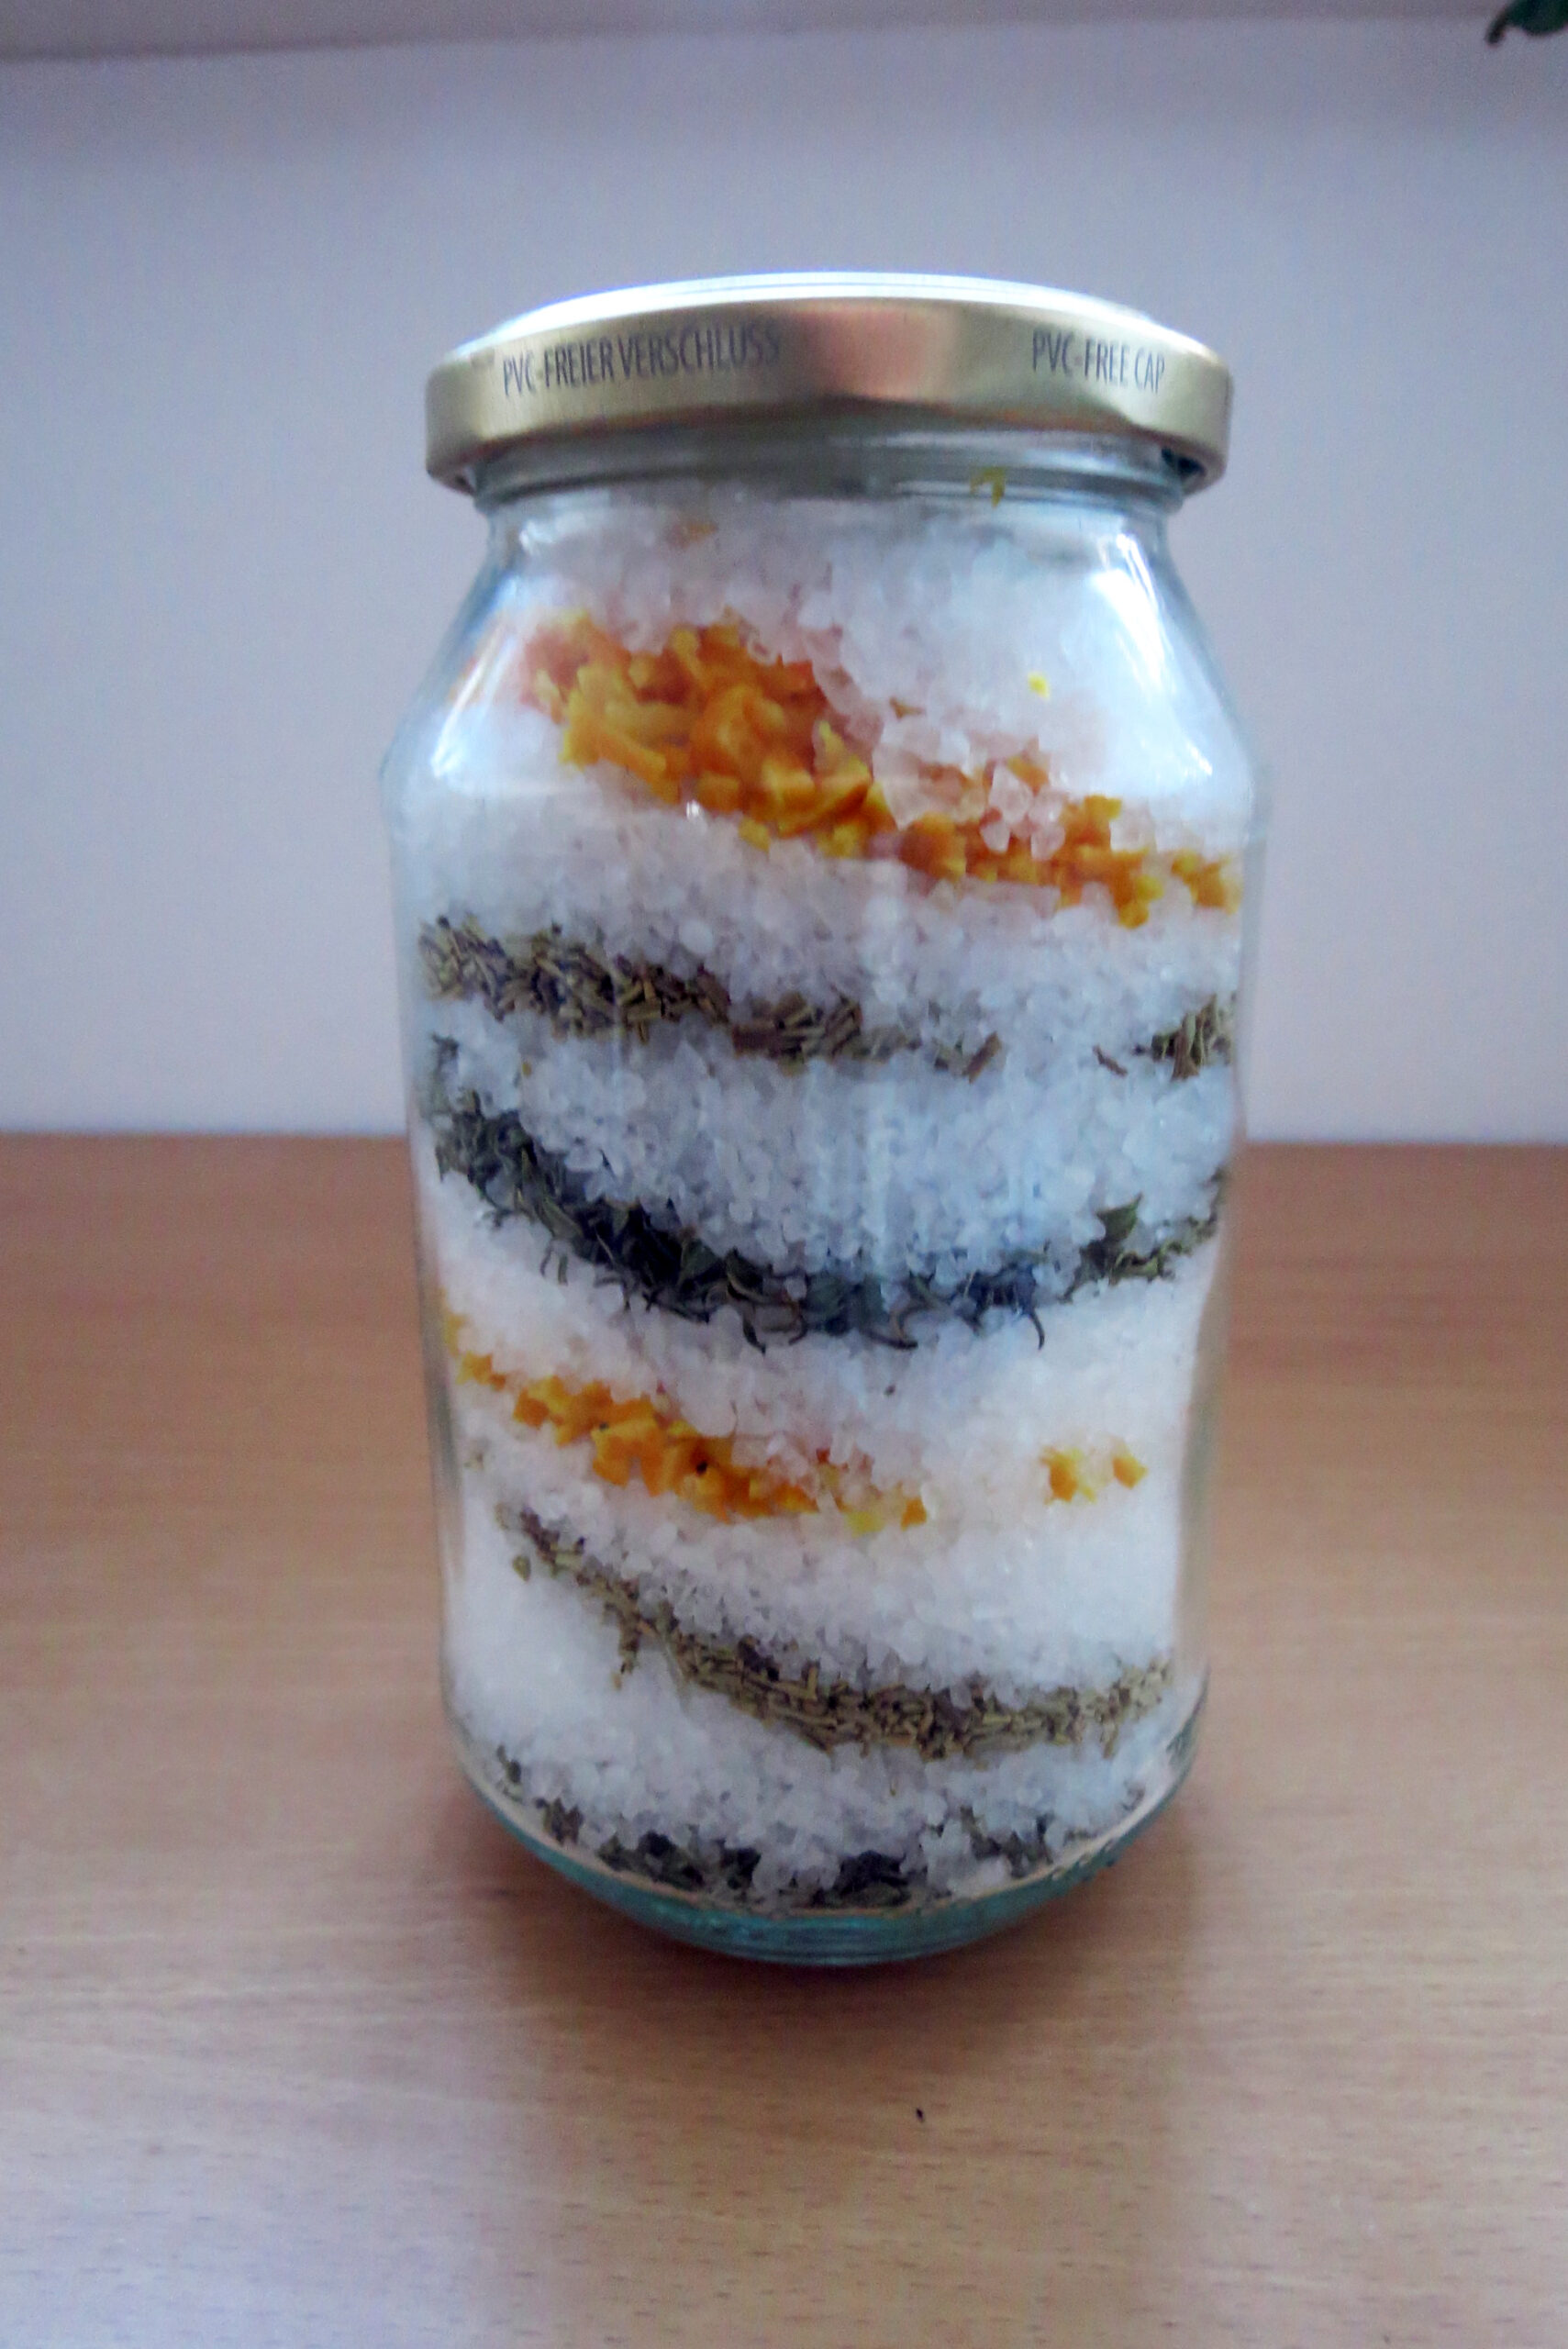
Wash the thyme and rosemary and dry them thoroughly.
Put the salt, the orange peels, thyme and rosemary in layers into a glass jar and close it with the lid. After two weeks, the salt has taken on the flavours. You can either let it be as it is (this will make for a beautiful gift) or put the mixture in a blender and mix it until it's powdery.
Notes
Use orange salt in soups, gravies, tartes and dressings or sprinkle it over oven-baked vegetables.
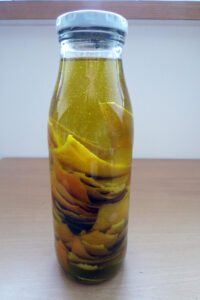
#6: Infused orange oil
To make infused orange oil, remove the white part (“pith”) of the orange peels and put them into a glass bottle until it’s about half full. Fill the bottle up with very good olive oil and let it sit for two weeks. Afterwards, remove the peels. You now have some great orange-flavoured oil that you can use for salad dressings, pasta sauces or even on your pizza.
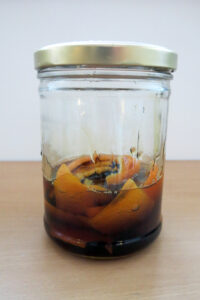
#7: Orange-flavoured honey
Cut the peel off one orange very thinly so that the pith stays on the fruit, or scrape off the pith from the peels.
Put the peels into a glass jar.
Add 250 grams of honey – either the real thing or one of your homemade herb kinds of honey, like this dandelion honey – and let it sit for 5 – 7 days.
The honey will get liquid during that time, but that’s fine.
Remove the peels and use your orange-flavoured honey in your tea or, instead of sugar, in pastry like this German yeast bun or “Martinsgänse”.
Either cut the peel very thinly off the orange so that the pith stays on the fruit. Or put the peels upside down on a wooden board, and, with a sharp knife, scrape the pith off.
Put the orange peels in a glass bottle so that it's about one-third full.
Fill the bottle up with clear alcohol. I prefer vodka because its taste is neutral.
Let the mixture sit for at least two weeks in a dark place. I usually put the bottle into my pantry.
There's no need to remove the peels. Just pour out as much extract as you need and, if necessary, fill the bottle up with vodka (or whatever you used) to keep the peels under the liquid.
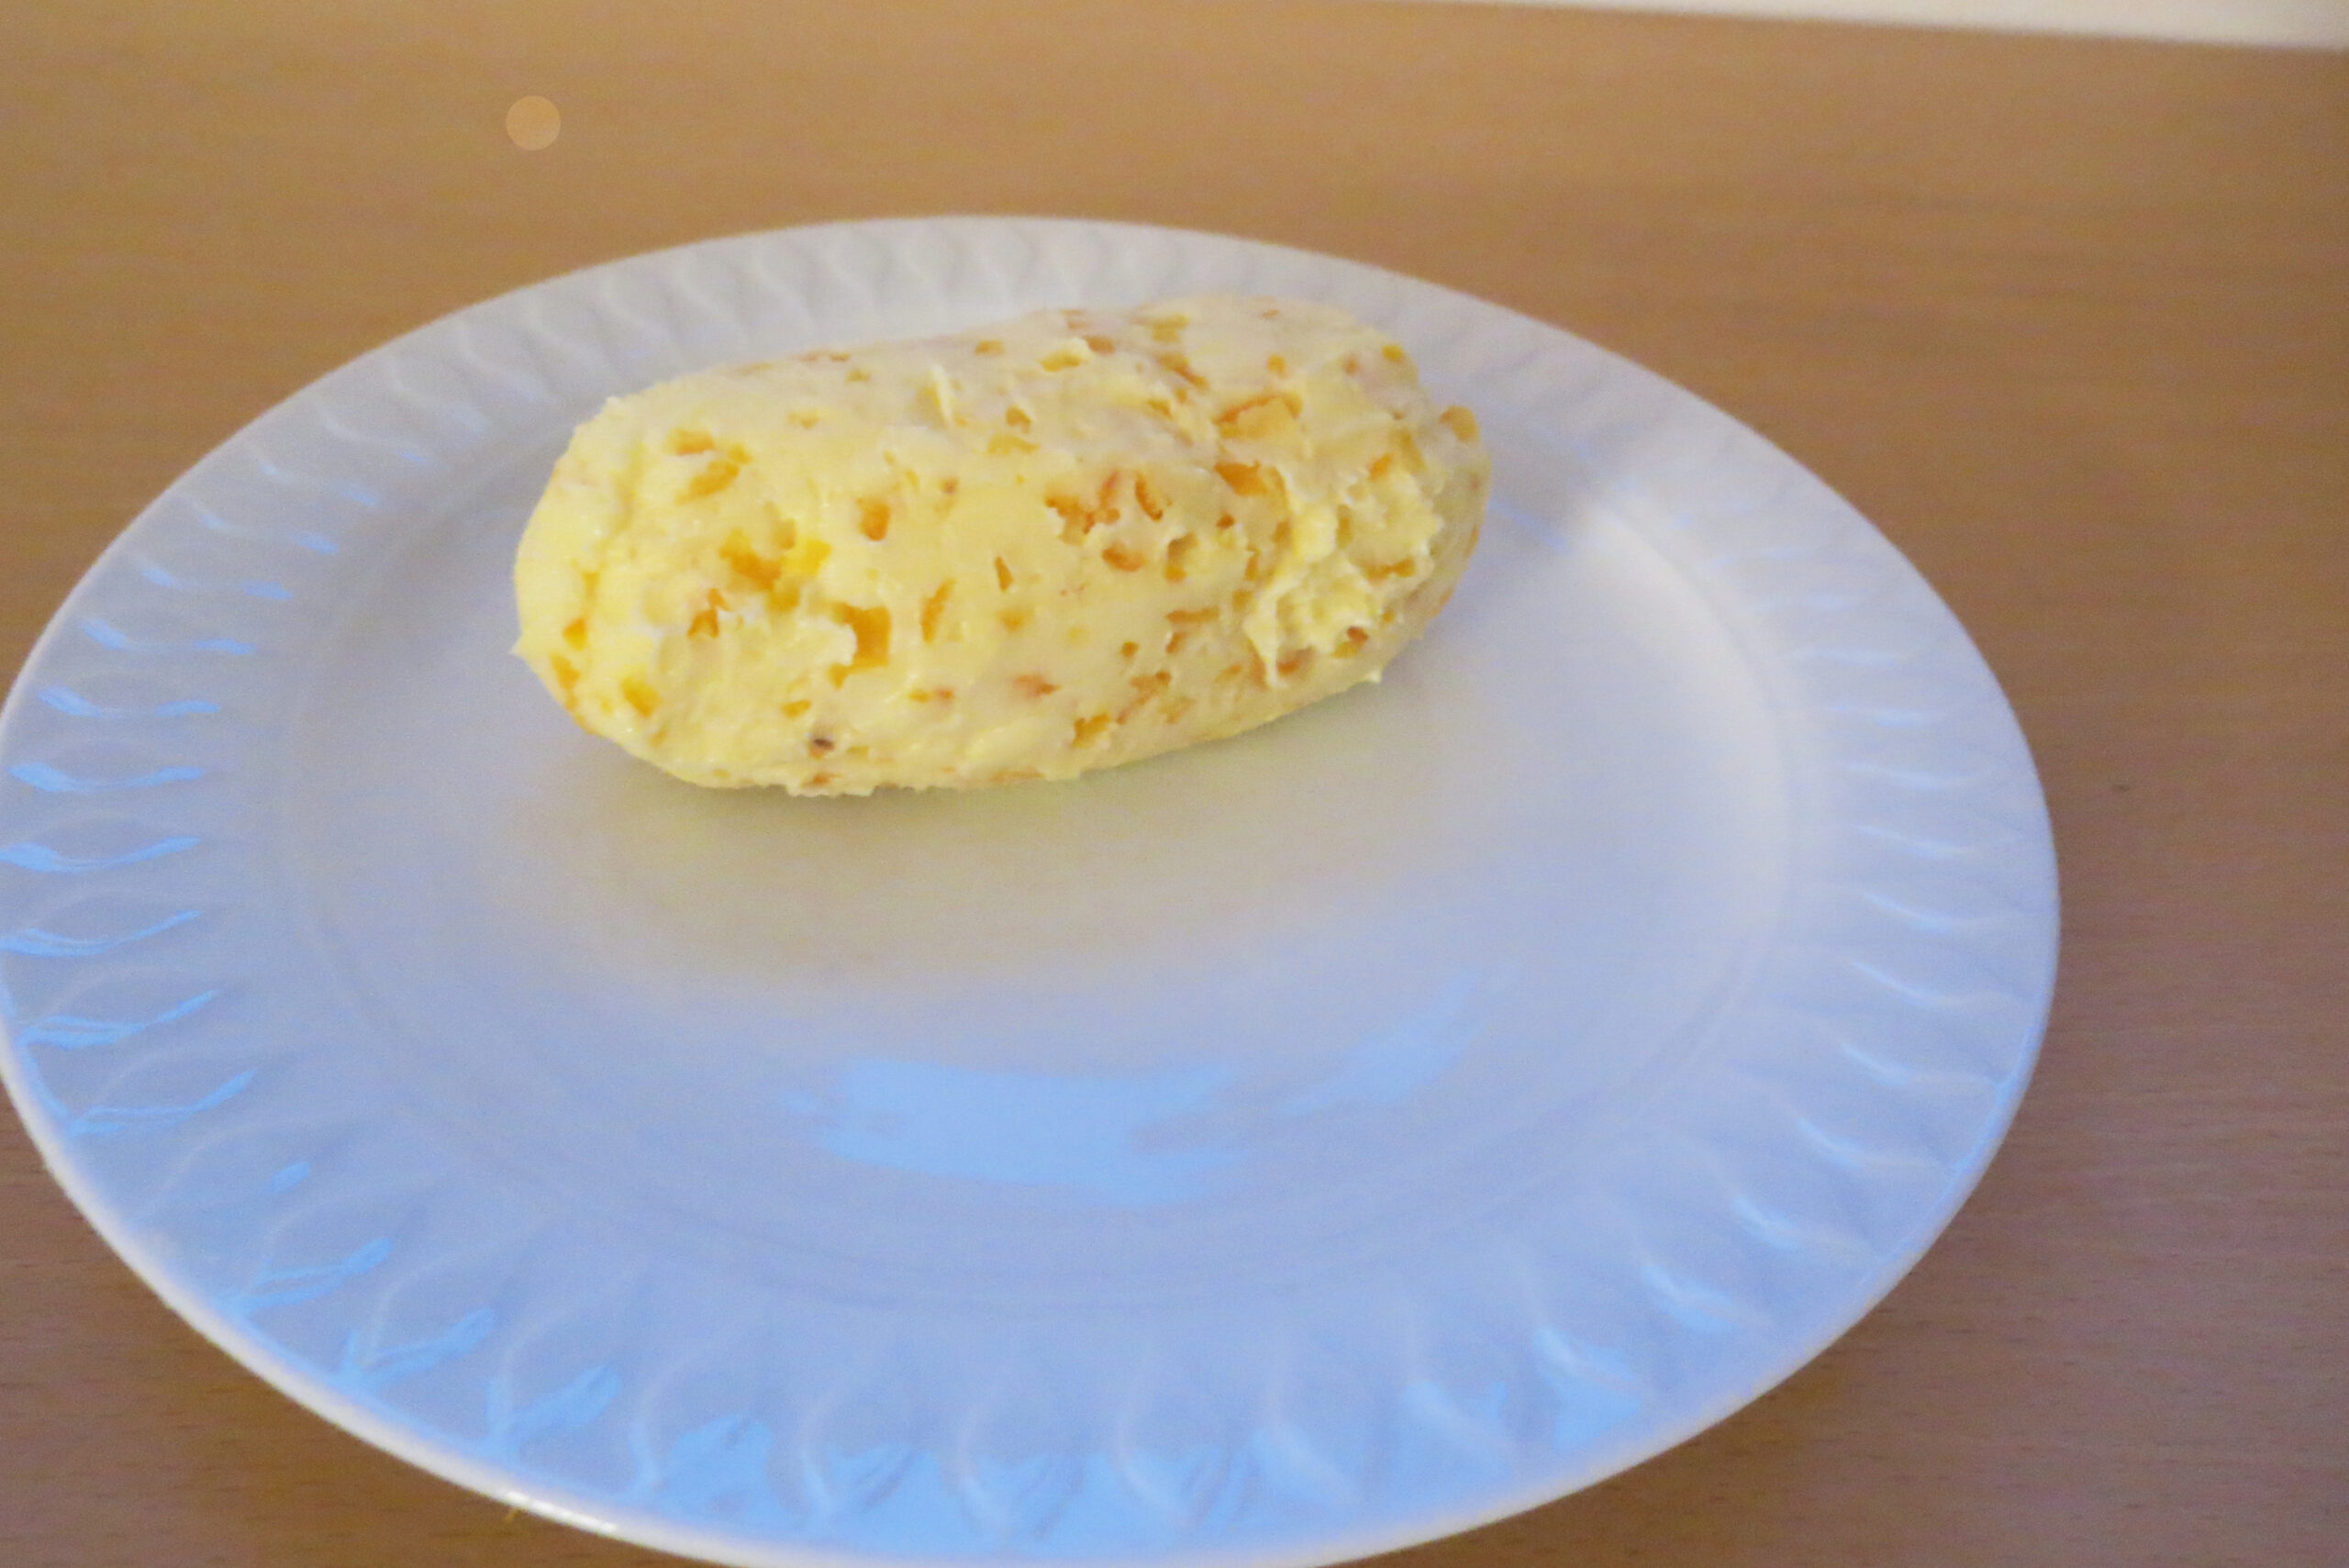
Cut the peel very thinly off of the orange so that the pith (the "white stuff" underneath the peel) stays on the fruit. Or put the peels upside down on a wooden board and scrape the pith off with a sharp knife.
Cut the peels into tiny pieces.
If you want to add herbs, wash them and dry them thoroughly, then cut them into tiny pieces.
Stir the butter to soften it, and then add the tiny orange peels, some salt and (optionally) herbs. Alternatively, you can use homemade orange powder (see blog for recipe) instead of the fresh peels or homemade orange salt.
Mix it all well and form the butter into a roll. Wrap the roll in cling film or aluminium foil and put it into the fridge until it's firm. This takes at least 30 minutes.
Notes
Enjoy homemade orange butter on some homemade bread or with grilled meat. Store the butter in the fridge where it will keep fresh for about one week. You can also freeze the orange butter so that you’ll have it available when the BBQ season starts. It'll store well for about 6 months.
#10: Ice cubes
This is a simple one: remove the white part (pith) of the orange peels, cut them into small strips and put them into ice cube forms. Fill up the forms with water and put them into the freezer. I love these orange ice cubes for all kinds of drinks as they don’t water them down but give them a subtle orange flavour.
DIY Orange Peel Cleaners
Not for consumption!
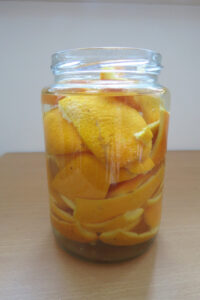
#11: Orange peel cleaner
I love cleaning with this orange peel vinegar cleaner. Not only does it remove stains well, but it also smells really good – not at all like vinegar.
To make your own orange peel cleaner, put some orange peels (no need to remove the pith for this one) into a large jar until it’s about three-quarters full.
Fill the jar up with white vinegar or vinegar essence and let it sit for two weeks. Remove the peels and fill the cleaner in a spray bottle. If you used vinegar essence to make the citrus cleaner, you must dilute it. Fill about two-thirds of the bottle with it, and fill it up with water. Fill the bottle up with water.
You can use this cleaner against water stains in the bathroom or for cleaning your kitchen or pantry surfaces. In short, almost everywhere you can use vinegar for cleaning. Just avoid using it on porous stone surfaces, as the vinegar can etch
Orange peels for homemade body care products
#12: Orange body scrub
Orange Body Scrub
This is a fast, cheap and easy way to make a healthy body scrub with totally natural ingredients that will do your body nothing but good!
Thinly cut the peels from the orange so that the pith stays on the fruit. Or put the peels upside down on a wooden board and, with a sharp knife, scrape off the pith.
Cut the peels into tiny pieces.
Mix the peels with the coconut oil, sugar and orange juice until everything is well combined.
Put the homemade orange body scrub into a glass and store it in the fridge for up to one week.
Notes
This also makes for a wonderful last-minute DIY gift!
Which oranges are best for making orange peel recipes?
Always go for organic and untreated oranges. That’s the single most important factor (especially for food or skin-related recipes).
Then, look out for oranges with a relatively thick and aromatic peel. A peel that’s not too thin helps when candying, infusing, drying or zesting: it gives more “substance” and oils.
Also, the bitterness and sweetness in the peel should be well-balanced. Some oranges have bitter pith, which can make peels unpleasant if not properly prepared; a less bitter variety helps.
Can you eat orange peels?
Yes, absolutely! As long as the oranges are organic, you can eat the peels. They’ve got a very intense flavour, and you can either eat them raw (straight from the fruit) or preserved like candied orange peel, orange sugar, etc.
Can I freeze orange peels?
Yes. Actually, I often freeze orange or lemon peels when I don’t have time to use them right away. When you want to use them, just take them out of the freezer and let them thaw before processing them.
How do you dry orange peels quickly?
Remove the pith from the peels or thinly cut the peel off. The smaller the peels, the quicker they’ll dry. If you’re in a hurry, cut the peel into tiny strips before dehydrating them in a dehydrator or the oven.
How long does homemade orange extract last?
Forever. Seriously, the alcohol keeps the extract fine indefinitely as long as the peels are under the liquid. However, when you take out some of the extract and fill the bottle up with vodka several times, you may want to consider removing the peels and adding fresh ones.
Stop Throwing Away Orange Peels!
Just like those moms at my school who were amazed by these ideas, I hope you’re now excited to transform your orange peels from trash to treasure.
From now on, you’ll never look at an orange peel the same way.
Whether you’re whipping up candied treats for the holidays, mixing natural cleaners for your home, or creating luxurious body scrubs, these peels are pure gold.
The best part? You’re saving money, avoiding chemicals, and keeping waste out of landfills – all while making your home smell amazing. So next time you eat an orange, save those peels. Your future self will thank you.
What’s your favourite way to use orange peels? Share your tips in the comments – I’d love to hear from you!
When I wander around in autumn and come across a chestnut tree, I always remember making little animals and people from chestnuts and toothpicks as a child. Today, I still can’t pass chestnuts lying on the ground, and I always stuff my pockets with as many as I can get into them. First of all, for decoration, but then for making chestnut laundry detergent. It’s so simple, sustainable, and eco-friendly – plus it’s completely free!
Which Chestnuts Are Suitable?
Just to clarify: When I speak of “chestnuts” in this recipe, I’m referring to the common horse chestnut (Aesculus hippocastanum) as opposed to the edible sweet chestnut (Castanea sativa). Horse chestnuts naturally contain soap compounds, so-called saponins. Due to this, chestnuts were (and still are) widely used as a washing detergent, much like a local alternative to washing nuts. Today, however, we want to use the saponins to enhance the washing characteristics of our homemade laundry detergent.
You can also use chestnuts to make homemade chestnut soap – check out my complete chestnut soap recipe for another sustainable way to use foraged chestnuts.
How to Make Chestnut Laundry Detergent – Step-by-Step Instructions
Step 1: Gather and prepare chestnuts
That’s easy: take a wonderful stroll in the crisp autumn air to your nearest (or most beautiful or largest, that’s up to you) horse chestnut tree. Advanced collectors always bring a bag. When you’ve reached your destination, bend down and gather as many chestnuts as you can carry.
Bring them home and wash them thoroughly.
Step 2: Chop chestnuts
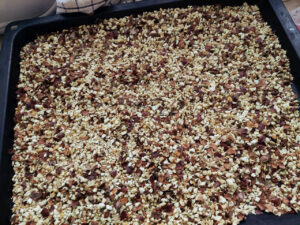
To extract the saponins, you must chop the chestnuts, either doing it roughly with a knife or – and this is my recommendation – by shredding them in a food processor. Process small amounts at a time to avoid damaging the blade or motor. And just in case you’re wondering: yep, I learned this the hard way!
If you want to store chestnuts for future use, you can shred them in the processor and dry them in the oven or a dehydrator.
Make sure they are completely dry; otherwise, they’ll mould. Store the dried chestnut shreds in a jar.
Ok, so there are two ways of making chestnut laundry detergent.
The short method is to put the chopped chestnuts into a pot, fill it up with water, and let the mixture simmer for about 15 minutes, then let it cool down.
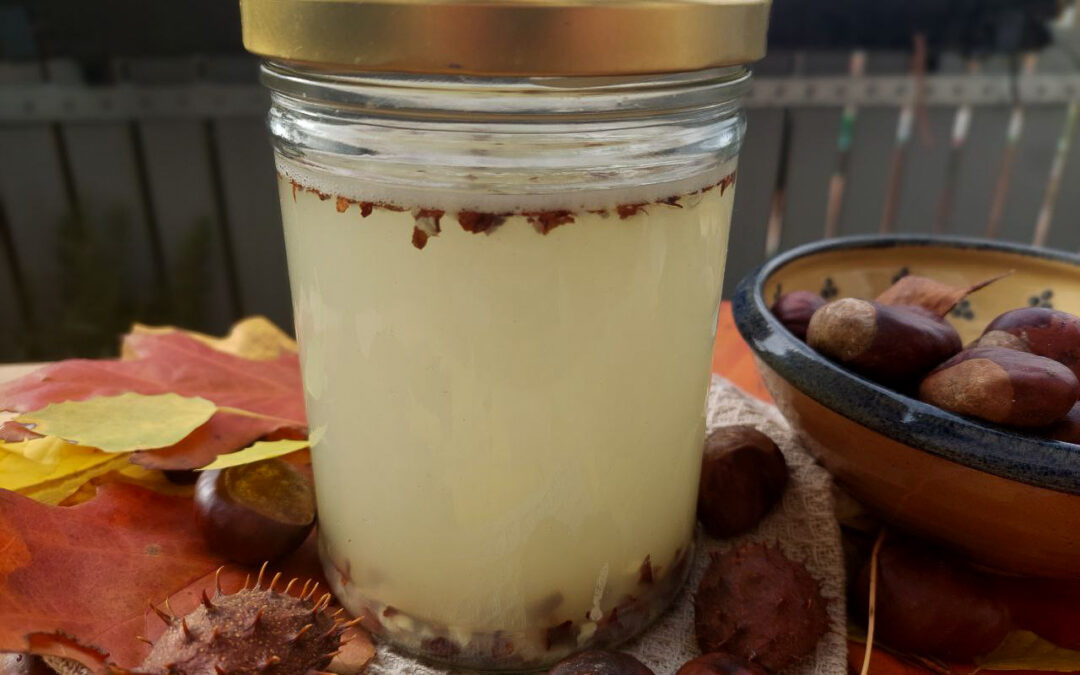
An alternative way – and that’s the one I always use – is to put the chopped chestnuts into a bottle or a jar, fill it up with water, and let it extract for about 24 hours.
Either way, strain the liquid laundry detergent through a fine-meshed sieve.
Homemade chestnut laundry detergent does not store very long. It’s best to make it fresh every few days or when needed, and use it up within a few days. I usually make about one litre and use it up within 5 – 7 days. I’ve heard that you can freeze it and use it just like the fresh detergent once it’s thawed, but I’ve never tried it myself.
How to wash with chestnut laundry detergent
While making homemade chestnut laundry detergent is already easy, washing with it is even simpler: Take your dirty laundry, put it in the washing machine, and add your homemade chestnut laundry detergent where you’d normally put your store-bought wash powder or liquid. Start the washing programme and that’s that.
I always use about 200 ml per load.
Industrially manufactured laundry detergents are made for severely dirty clothes, while our homemade chestnut laundry detergent only contains as much cleaning agent as necessary. That way, we not only save the fibres but also the environment.
Chestnut Laundry Detergent – FAQs
How can I store the chestnuts?
Unfortunately, chestnuts get mouldy quickly. For that reason, it’s best to dry them properly, either whole or shredded, and store them in an airtight container like a jar with a lid to keep moths away.
Can I just put the chestnut powder into the washing machine?
You can, yet not loosely, but in a sealable fine-meshed net or a sock. Otherwise, the powder or shreds will make your laundry dirty and clog the drain filter. However, the washing effect is better with the liquid laundry detergent because the saponins are better extracted this way.
How many chestnuts do I need per wash cycle?
I always use 2 – 3 tablespoons of chestnut shreds and add one litre of water. This laundry detergent is enough for about five wash cycles. I’d estimate then, that you need about 2 – 4 chestnuts per wash cycle.
My chestnut laundry detergent is yellow. Is that normal?
Unpeeled chestnuts make a yellowish extraction, but it won’t colour your laundry. To avoid greying of white laundry, you can peel the chestnuts before using them.
My chestnut laundry detergent has made my machine’s detergent dispenser dirty. What can I do?
Remove the dispenser and clean it with vinegar or citric acid. Use a cleaning brush, if necessary.
Is the chestnut laundry detergent suitable for all types of laundry?
Basically, it’s suitable for every laundry and every wash temperature. You can even use it for wool or delicate laundry. Pretreat stains with bile soap or curd soap before washing.
Can I wash white laundry with chestnut laundry detergent?
Homemade chestnut laundry detergent doesn’t contain optical brighteners like store-bought laundry detergent. For that reason, white laundry may develop a greyish tint after some wash cycles. You can prevent that by adding wash soda to your dispenser or vinegar where you’d normally put your fabric softener.
For bright white laundry, I also recommend adding one tablespoon of oxygen bleach.
Is chestnut laundry detergent safe for baby’s clothing?
Chestnut laundry detergent is milder than industrial washing detergents and thus suitable for baby clothing.
How does chestnut laundry detergent smell?
Chestnut laundry detergent doesn’t have a scent, so the laundry comes out fragrance-free. If you like, you can add essential oils and some alcohol as a binding agent to the detergent. However, essential oils are volatile and only last for a few hours in the detergent. For that reason, I use store-bought, eco-friendly washing powder for our sports clothing.
Do I need a fabric softener?
No, that’s not necessary. If you like, though, you can add vinegar to the fabric softener dispenser. It not only prevents greying but also makes the fabrics softer.
Aren’t horse chestnuts food for wild animals?
Yes, they are, but considering that there are so many horse chestnut trees in parks or on streets, and bearing in mind that we only need a small amount to make a year’s worth of laundry detergent, we don’t deprive the wild animals of their food.
If you want to help wild animals further, collect horse chestnuts and bring them to a forestry office or game park where staff can use them as feed.
Is chestnut laundry detergent eco-friendly?
Yes, definitely! First of all, chestnuts grow locally and therefore there’s no long-distance transportation. They also don’t need to be processed extensively.
The chestnuts’ saponins are milder than the washing agents in commercial laundry detergent. They’re much gentler than harsh surfactants (tensids) and other additives.
These gorgeous chestnuts we are showered with in autumn are not only a cute decorative element, but we can also use them for making a sustainable and completely free laundry detergent! If that’s not the perfect excuse for an adult to go foraging for chestnuts, I don’t know what is.
Admittedly, homemade chestnut laundry detergent is different from commercial detergents. It doesn’t carry a scent and its shelf life is only a few days, but it’s definitely worth a try. But honestly? You’ll be hooked once you try it! 😁
I feel so proud every time I make a new batch of creating something from foraged chestnuts. The feeling of having received a gift FROM nature and making the most of it is so wonderfully rewarding. But don’t just listen to me, try it for yourselves!
I don’t know about you, but whenever I pass a chestnut tree in autumn and see aaaaall those beautiful, smooth, glossy chestnuts lying there on the ground, I simply cannot pass them without taking as many as I can store in my pockets. First, of course, I use them as a decoration, sprinkling (or rather: throwing) them between all the pumpkins I use for decorations. Once the pumpkins make way for Christmas decorations, however, I don’t throw out the chestnuts but use them for making chestnut soap. Here’s how I do it:
Why Chestnuts?
Just to clarify: When I speak of “chestnuts” in this recipe, I’m referring to the common horse chestnut (Aesculus hippocastanum) as opposed to the edible sweet chestnut (Castanea sativa). Horse chestnuts naturally contain natural soap compounds, so-called saponins. Due to this, chestnuts were (and still are) widely used as a washing detergent, much like a local alternative to washing nuts. Today, however, we want to use the saponins to enhance the washing and foaming characteristics of homemade soap.
You can also use chestnuts to make homemade chestnut laundry detergent – check out my complete chestnut laundry detergent recipe for another sustainable way to use foraged chestnuts.
Disclaimer: This tutorial is for educational purposes. Soap-making involves sodium hydroxide (lye), which is caustic and can cause serious injury if mishandled. Always follow proper safety procedures, wear protective equipment, and work in a well-ventilated area. I cannot guarantee results or accept liability for any injuries, damages, or outcomes. You are responsible for your own safety when following this tutorial.
How to make chestnut extraction
To use the chestnuts for soap-making, we have to extract their soap-making properties first. To do that, we roughly chop the chestnuts, fill about 1/3 cup of the chopped chestnuts into a glass jar or bottle and fill it up with 500 ml of distilled water. This makes more than you need for making the chestnut soap (330 g), but it’s always good to have a backup.
Some people recommend peeling the chestnuts first, but for just making an extraction, that’s not necessary. The skin neither darkens the fluid nor does it have any other negative influence on the extraction.
Leave the jar with the chestnuts and water for at least 24 hours and up to 3 days. I personally couldn’t find a difference between the short (24 hours) and the long soaking time regarding washing properties or lather enhancement. 24 hours, however, are at least necessary to extract the saponins into the water.
Shake the mixture well twice a day and then pour the liquid through a fine-mesh sieve. Discard the chopped chestnuts and either use the extraction right away or store it in the fridge for up to 2 days.
How to make chestnut powder (optional)
If you want to give your chestnut soap a peeling effect, you can add chestnut powder. Now, to make that powder, we definitely have to peel the chestnuts first!
For this recipe, peel about 10 – 15 chestnuts (depending on the size) and let them dry for 5 – 10 days. Alternatively, you can dry them in the oven or dehydrator. Let them cool down and grind them finely in a food processor or a coffee mill. If you want to make sure that no coarse particles get into your soap, strain the powder through a fine-mesh sieve.
This will make more chestnut powder than you need for the soap, but as with the extraction, better safe than sorry, and you can use the excess fluid as laundry detergent.
How to Make Chestnut Soap – Step-by-Step
Step 1: Put on Your Protective Gear
In soap-making, we deal with lye, which is potentially hazardous. To protect ourselves from any accidental harm, therefore, we must wear protective gear throughout making the soap. This gear contains safety goggles, protective gloves and a face mask (the latter only until you’ve mixed the lye into the fats/oils), but you should also wear long-sleeved shirts that cover your arms and, if possible, an apron to protect your clothing. For more details about safety in soapmaking, especially if you’re new to soapmaking, read this article on soapmaking safety guidelines.
Step 2: Get all your Ingredients and Equipment Together
When making soap, we have several narrow time frames, which is why it’s crucial that we have all the ingredients and our equipment ready before we start. I usually weigh all my fats and oils first and then make the lye, but you can also start with the lye and heat the fats while the lye cools down. Nevertheless, make sure everything’s within reach. You cannot afford to head off and look for an oil or a spatula at a crucial point.
Step 3: Weigh the Ingredients
I always start by weighing all the fats and oils first and putting them in a pot for heating up later. Use a 0.5-gram-precise scale, as it’s essential to obtain the measures as accurately as possible. Even deviations of a few grams can have a negative effect on your soap, the worst being that you have to throw it away.
After weighing the fats and oils, weigh the chestnut extraction and pour it into a heat-resistant container.
Afterwards, carefully weigh the sodium hydroxide. Now, at the latest, should you wear your protective gear, including safety goggles, protective gloves and a face mask!
Step 4: Make the Lye
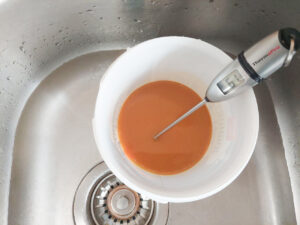
Pour the sodium hydroxide into the chestnut extraction, never the other way round! I always mix the lye in a heat-resistant glass jar that I put in the sink. That way, if anything should go wrong, both I and my kitchen surface are protected. Insert a thermometer into the lye and measure the temperature.
Gently stir the mixture with the thermometer to make sure that all the sodium hydroxide dissolves properly. The lye must now cool off to a temperature between 40 and 42 °C (104 – 107 °F). To speed up that process, you can put the container with the lye into a cold water bath or fill up the sink with cold water.
Step 5: Heat up the Fats and Oils
When the lye’s temperature approaches the recommended temperature range, it’s time to heat the fats and oils to the same temperature. Start with gently heating the solid fats, in this case the coconut oil, until it’s completely melted. Remove it from the stove and add the oils, stirring gently to combine all the ingredients. Measure the temperature and, if necessary, heat the mixture up again until it also reaches 40 – 42 °C (104 – 107 °F). Either leave the fat mixture in the pot (if it’s used for soap-making only) or fill it into a second container.
Step 6: Combine the Fats and Lye
Once the lye and the fats have reached the desired temperature, it’s time to combine them. I take the lye container out of the sink and put it onto the draining rack while putting the container with the liquid fat into the sink. For me, that’s the safest method to make soap.
Insert the stick blender into the fat mixture and slowly add the lye (not the other way round). Once all the lye is in the fat, start blending everything together without adding too much air. Do not turn on the blender until it’s fully submerged.
Stir the mixture well until it becomes thicker and shows traces when you move through it. It should have the consistency of Greek yoghurt.
When you can see those traces in the soap batter, it’s ready to be poured into the mould.
Step 7: Mix in the Additives
If you want to add chestnut powder for a peeling effect in your soap, now is the time. Add the powder all at once and carefully stir it into the soap batter with a whisk, as at this point, the blender might speed up trace too much. Also, take into consideration that adding the chestnut powder may accelerate the tracing process. So, make sure everything is combined homogeneously and work fast.
Step 8: Pour the Chestnut Soap into the Mould
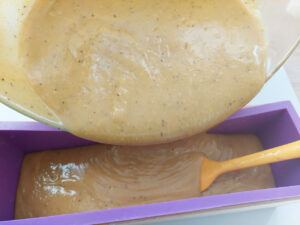
Once everything is combined well together and the batter starts to thicken, pour it into your mould. Scrape the edges of the bowl with a rubber spatula to make sure that you get all the soap into the mould. Flatten the batter in the mould with the spatula so that you achieve a smooth, level surface.
Step 9: Cover the Mould
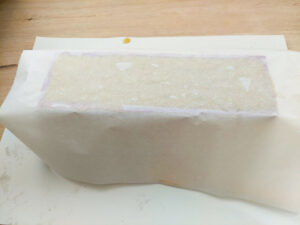
Cover the soap surface in the mould with a greaseproof paper or baking paper and wrap the whole thing with a towel to insulate the soap. This technique encourages the so-called gel phase, where the soap heats up before it hardens off.
Step 10: Cleaning your equipment
Although we’ve mixed the lye into the fat, the fresh soap batter is still slightly caustic. For that reason, we mustn’t just rinse off large quantities of residual soap batter into the sink. A good way to get rid of most of the soap batter is by wiping it off with a paper towel or toilet paper (which works just as well and is cheaper!) that you throw directly in the bin.
There’ll still be a thin coat on the bowl, blender, spatula, etc., but that’s okay. Just wash everything well with dish soap, rinse it with a bit of vinegar to neutralise the lye and wash it again with water.
Step 11: Unmould your chestnut soap
Leave the soap in the mould for at least 48 hours before you try to unmould it. Those 48 hours are necessary for hardening the batter, and every attempt to unmould it earlier will result in a smeary, unshapely soap. Believe me, I know what I’m talking about…
Step 12: Cut and Cure
When the soap is unmoulded, you can cut it into bars. The size and shape of the bars depend on the mould you used. I mostly use a rectangular mould and cut the soap into slices of about 1.5 – 2 cm (0.6 – 0.8 inches). As a rule of thumb, cut the bars so that they fit comfortably in your hand.
You can either cut the bars with a sharp knife or you can use a soap cutter that often comes as part of soap-making kit, together with the mould.
Cut straight through the soap and slide the soap off the knife. If the soap sticks badly to the knife, let it set for another day or two in a well-ventilated place. That way, it can dry out a bit before you start cutting it again.
After cutting, let the soap bars cure – again in a well-ventilated place – for about 4 – 6 weeks. Turn the bars twice a week to make sure that they cure and dry evenly. During this curing time, the soap will become milder, and the lather will improve.
Angela Braun
Homemade Chestnut Soap (5 % superfat)
Learn how to make natural chestnut soap from foraged horse chestnuts! This beginner-friendly, sustainable soap recipe uses the natural saponins in chestnuts to create a gentle cleanser with a rich lather. Optionally, you can add chestnut powder for exfoliation.This yields approximately 1400 g of soap.
1 heat-resistant container, about 500 ml for making the lye
1 large bowl for mixing fats/oils and lye
1 0.5-gram-precise scale
2 thermometers one for the lye, one for the fats
1 stick blender
1 whisk
1 spatula
1 soap mould volume: 1.5 kg
Your personal safety gear!
Method
Prepare the chestnut extraction by putting 1/3 cup of chopped chestnuts in a jar or bottle and adding 500 ml of distilled water. Let the mixture rest for 24 - 60 hours and strain it through a fine-mesh sieve.
Prepare the chestnut powder (optional) by peeling 5 - 10 chestnuts (depending on the size) and either dry them for about 5 days in a well-ventilated area or until completely dry in an oven or dehydrator.Grind them in a food processor or coffee grinder and sieve the powder once or twice through a fine-mesh sieve.
Put on your protective gear!
Make the lye by adding sodium hydroxide to the chestnut extraction (never the other way round!)
While the lye cools down, melt the fats and add the oils
When the lye and fats/oils have reached a temperature of 40 - 42 °C (104 - 107 °F), pour the lye into the fats/oils (never the other way round).
Stir everything well together with a stick blender, but make sure that you don't insert too much air.
When traces begin to form, add the chestnut powder with a whisk.
Pour the soap batter into a soap mould, cover it with greaseproof paper and insulate it by wrapping the mould in towels.
Let the soap set for about 48 h before unmoulding it.
Cut the soap in bars and cure it for 4 - 6 weeks in a well-ventilated space. Change the soap bars twice a week to make sure that they dry and cure evenly.
Notes
The soap bars can be stored in a cool and dry place for up to 2 years.
Enjoy Your Homemade Chestnut Soap
Homemade chestnut soap is a marvelously sustainable way of cleansing ourselves, as we use foraged chestnuts that not only don’t cost a dime but also drop at our feet in abundance each autumn. Just keep your eyes open and collect some when you stumble across them. Two handfuls are about enough to make this soap. But be wise and collect extra. They make a wonderful decoration 😁
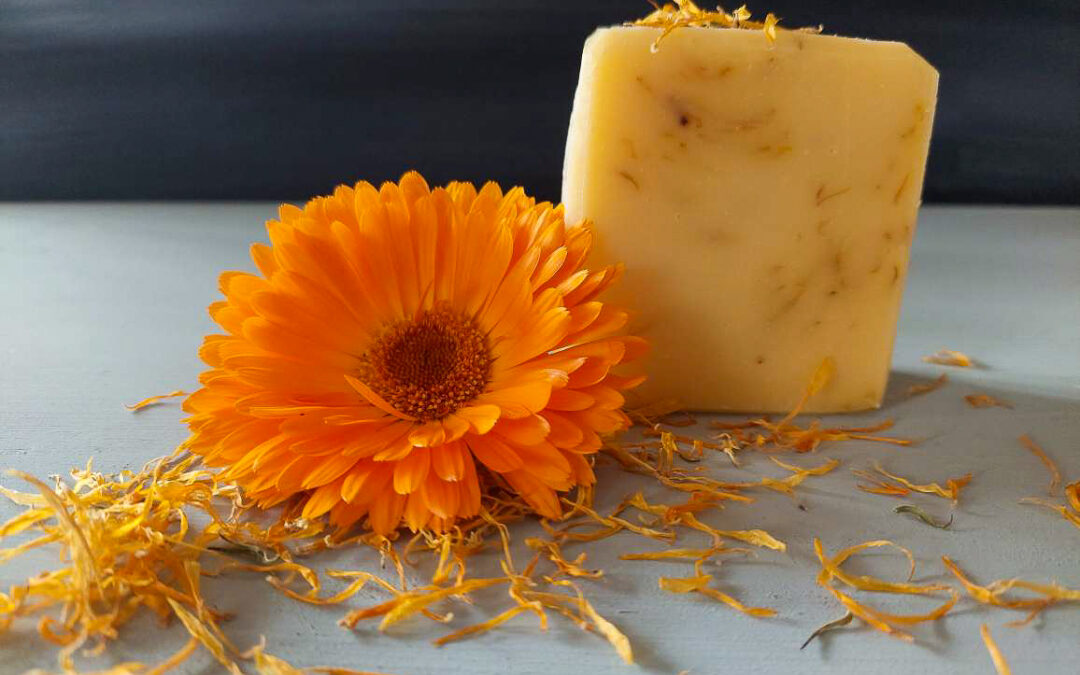
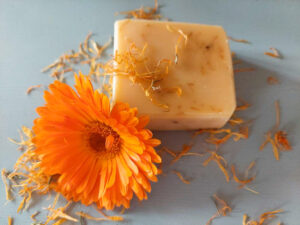
Calendula is known for its skin-soothing and wound-healing effects. This easy recipe for calendula soap makes for a very mild soap that’s even suitable for babies. The recipe is beginner-friendly which means that the process is not too complex. If this is your first soap, however, you should familiarise yourself with the soapmaking process and carefully observe the safety guidelines.
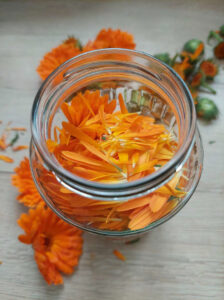
This soap can be used for the body and face. It’s especially suitable for sensitive skin due to the soothing effect of calendula. We use homemade calendula oil, calendula tea as a basis for the lye solution and dried calendula petals. As calendula is also a great colouring agent, we won’t need any clay or additional soap colours. The oil and tea will make for a beautiful yellow tint. (For more uses for calendula look here).
If you plan to use this soap for babies, do not use essential oil.
Calendula Soap
Superfat: 7 %
Ingredients
700 g calendula oil 200 g coconut oil 100 g sunflower oil 133 g sodium hydroxide (NaOH) 330 g water 5 tbsp dried calendula petals 20 g essential geranium oil (optional)
Instructions
1. Prepare your soap mould and put on an apron, gloves, breathing mask and safety goggles.
2. To prepare the calendula tea, put 3 tbsp of dried calendula petals into a jar. Weigh 350 g of water and put it to the boil. Pour the boiling water over the petals and let this tea rest for 30 minutes. Drain the tea and let it cool.
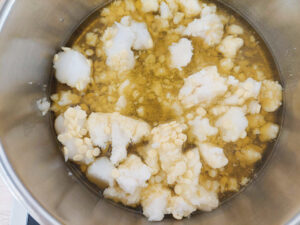
3. Weigh the oils. Slowly melt the coconut oil, then add the sunflower and calendula oil. Put a thermometer into the oil mixture and measure the temperature.
4. Weigh the calendula tea in a large enough, heat-proof container.
5. If you use essential oil, weigh it and put it aside for later use.
6. Weigh the sodium hydroxide. Put the water container into a sink and slowly pour the sodium hydroxide into the water (never the reverse!). Stir carefully and slowly with a spoon until the NaOH crystals have dissolved. Put a thermometer into the lye water and measure the temperature.
7. When the temperature of the lye-water and the oils has fallen to 40 – 45 °C, carefully pour the lye into the oils (never the reverse!). Fully immerse the blender and start mixing both liquids until they are well combined. Make sure that the blender stays in the batter to prevent air bubbles. Mix the batter until a trace forms.
8. If you use essential oil, add it to the soap batter and mix it well.
9. Add the dried calendula petals and mix them in with a hand whisk.
10. Pour the soap batter into the mould and either cover it with cling film or spray it with isopropyl alcohol. Cover the mould with towels to keep it warm. Leave the soap in the mould for 48 hours.
11. After 48 hours, carefully remove the soap from the mould and cut it into bars.
12. Let the soap bars cure at a cool and well-ventilated place for 4 – 6 weeks before use.
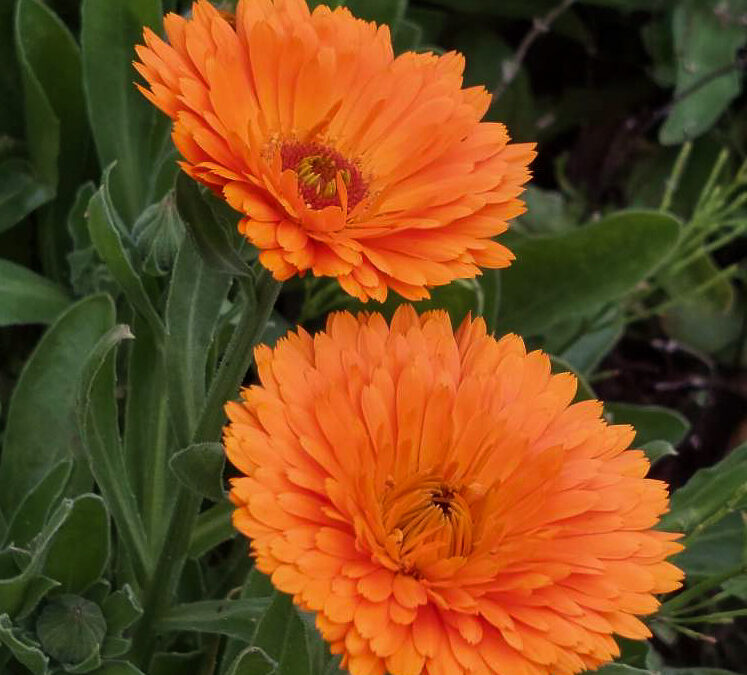
The first year I cultivated my garden, I decided to sow a few calendula between rows of red cabbage. The patch looked beautiful with its combination of thick violet cabbage heads and the bright orange calendula flowers floating above them like tiny suns. Not knowing how to use the flowers, I just let them wither and harvested only the cabbage. I don’t know what I had decided to plant on that patch the following year. What I do know, however, is that the only thing that grew there was calendula. They spread like the proverbial wildfire and it was time to get them under control (failed!) and learn how to use them (check!). This post shows you my five favourite uses for calendula.
Ingredients and benefits of calendula
Calendula is often used against skin problems like small wounds, burns, cracks, bruises and inflammation. Folk medicine also uses it for stomach and bowel disorders, emotional stress and injuries. Calendula contains flavonoids, triterpenes and saponines. Fat-soluble faradioles are mainly responsible for the wound-healing effects.
Among others, calendula shows antibacterial, decongestant, anti-inflammatory and anti-fungal as well as antispasmodic effects. Furthermore, it supports the formation of new connective tissue.
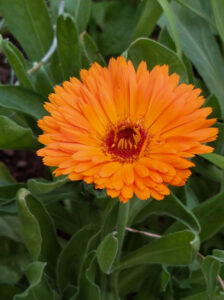
With its brightly warm and sunny orange nature, calendula heals not only physical wounds but is also said to have a soothing effect on an emotional level.
All recommendations in this post are based on my experience. I’m not a doctor and thus cannot be held liable for any adverse effects in connection with the use of the following recipes.
Five uses for calendula
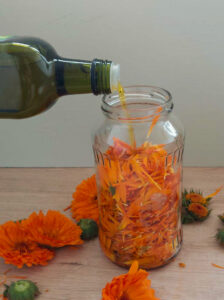
#1 Calendula oil
This is a classic and so easily made. All you need is
1 glass jar with lid Calendula flowers (fresh or dry) Olive oil
Pluck the petals from the calendula flowers and fill them loosely into the glass jar until it’s roughly full. Fill the jar up with the olive oil and close the lid. Put the jar onto a windowsill and let it rest for 10 – 14 days. Shake it every day.
After that time, strain the oil through a sieve into a second jar. Press the petals out thoroughly to remove every drop of oil. Close the jar and store the oil in a cool, dark and dry place for up to one year.
If you’re pressed for time, you can make a warm extraction. For that purpose, put the calendula petals and the oil in a jar and place that you place in a hot water bath. Let it simmer for about 30 minutes at no more than 60 °C while occasionally stirring. Let it cool and repeat the process. Then filter the mixture through a sieve and let it cool down.
Application
Calendula oil can be used as an alternative to calendula salve (see below) to support wound healing. It’s great for small injuries, inflamed skin, mastitis or nailbed infections. You can make compresses with gauze presses soaked with calendula oil. However, you should never apply it on deep or open wounds. Calendula oil is also an ingredient for calendula salve and calendula soap.
#2 Calendula salve
As I said before, calendula is THE herb for the skin. It soothes your skin and heals small wounds and irritations. Number 2 of my favourite uses for calendula is calendula salve. You’ll only need
250 ml calendula oil 25 g beeswax
Slightly warm the oil in a pot. Add the beeswax and let it melt until all is liquid. Make sure that the oil temperature won’t rise above 60 °C. Fill the mixture into small jars, close the lid tightly and let it cool. Store at a cool and dry place for up to one year.
Application
Use calendula salve as a soothing hand cream for working hands or to support the healing of irritations or small wounds. If you work in the garden and are a bit like me, you’ll always have scratches, skin irritations (hello stinging nettles) and overall rough hands. This is when calendula salve can do wonders for your skin. It soothes immediately and minor injuries seem to heal almost overnight!
#3 Calendula tincture
A tincture is a herbal extract in alcohol. For this calendula tincture, we need:
1 glass jar with lid Calendula flowers (fresh or dried) Alcohol (45 %)
Pluck the petals from the calendula flowers and fill them loosely into the glass jar until it’s roughly full. Fill the jar with alcohol (45 %) and close the lid. Put the jar in a warm place at room temperature but without direct sunlight and let it rest for 7 days. Shake it every day.
Strain the tincture through a sieve and press the petals out thoroughly. Fill the tincture into dark jars (e.g. amber glasses) and store at a cool, dark and dry place for up to one year.
Application
Like calendula oil and salve, you can use calendula tincture to support wound healing or prevent inflammation. However, tincture must be diluted. Add 1 – 2 tablespoons of calendula tincture to 1/4 l of distilled or boiled water. Soak a gauze pad in it and fix it with a dressing on the wound in question. Large, open wounds should be shown to a doctor.
Furthermore, calendula tincture may be used as a mouthwash in case of gum inflammation or other inflammation in the mouth. Add 1 tablespoon of calendula tincture to a glass of warm water and rinse your mouth with it.
#4 Calendula tea
This is the easiest way to preserve calendula flowers. You just pluck the petals off and let them dry. This is best carried out in a dry place (who would’ve thought it) without direct sunlight but enough air circulation.
When the petals are dry, store them in a glass jar or tea box.
To make calendula tea, put 1 – 2 teaspoons of dried calendula petals into a cup and pour hot water over them. Let it sit for 10 minutes before use.
Application
Calendula is often added to tea blends against stomach and bowel disorders or menstruation problems.
I often add a teaspoon of dried calendula to our morning tea blend. Apart from soothing the belly it always – at least in my opinion – adds a ray of sunlight to the day.
Calendula tea can also be used for washing out wounds or as a wound compress. Soak a gauze pad with calendula tea, put it onto a wound or irritation and fix it with a dressing. It can also be used as a wound pad for eyes, bruises, varicose veins or haemorrhoids. Breastfeeding mothers can use calendula compresses to soothe their irritated breasts. And, last but not least, you can rinse your mouth with calendula tea whenever you have an inflammation in the mouth or throat area.
#5 Calendula soap
This is a bit more complex to make and you should know about the basic processes of soapmaking. If you do make the effort, however, you’ll create a very mild soap that’s even suitable for baby’s skin care. For this easy beginner’s soap, you’ll need
700 g calendula oil (see above) 200 g coconut oil 100 g sunflower oil 133 g sodium hydroxide 330 g calendula tea 1 tbsp dried calendula petals
Calendula soap always reminds us of how wonderful summer is – even when it’s dark and cold outside. The special thing here is that we use calendula not only as a soap additive but also as a colouring agent. The calendula tea as the basis for the sodium hydroxide makes a beautiful yellow colouring of the soap. That way, we won’t have to use colouring additives like clays or soap pigments.
Calendula is a wonderful plant for body and soul and I hope I’ve inspired you to try out some of the easy recipes above to preserve it.
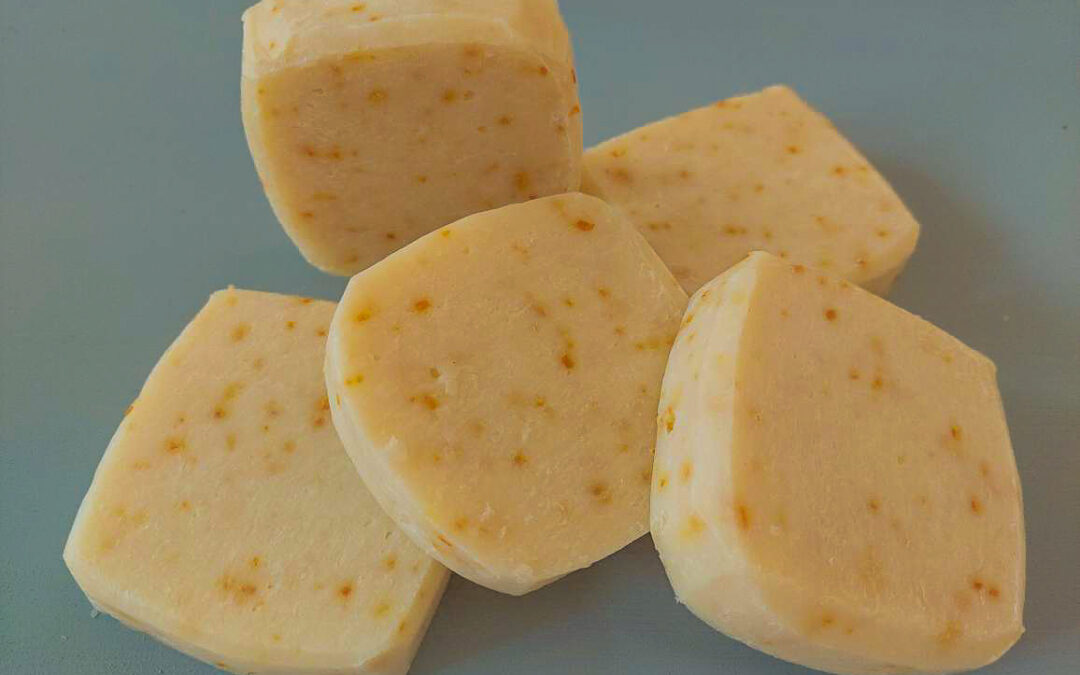
Earlier this year, I got my hands on some organic orange peel… well, ok: a lot of organic orange peel and apart from all the other things I made out of it, I tried my hand at making my first ever hydrolate. It turned out pretty well and I immediately thought about using it in a soap recipe. To enhance the “orange factor”, I added some of the dried and shredded orange peel and essential orange oil and I got a soap that smells and looks as good as it feels. This orange peeling soap appeals to (almost) all senses!
Even better, it’s an easy recipe, suitable for beginners. If you’re not familiar with the process of soapmaking yet, hop over and read this article first. Also, make sure you wear your protective gear throughout the whole soapmaking process. Better safe than sorry.
Orange peeling soap
Superfat: 7 %
Ingredients
350 g olive oil 75 g coconut oil 50 g sunflower seed oil 25 g castor oil 165 g orange hydrolate 64,5 g NaOH 5 g essential oil sweet orange 5 g essential oil bergamot 10 g dried and shredded organic orange peel
Instructions
1. Prepare your soap mould and put on an apron, gloves, breathing mask and safety goggles.
2. Weigh the oils. Slowly melt the coconut oil, then add the olive, sunflower and castor oil. Put a thermometer into the oil mixture and measure the temperature.
3. Weigh the hydrolate in a large enough, heat-proof container.
4. Weigh the essential oils and the shredded orange peel and put them aside for later use.
5. Weigh the sodium hydroxide. Put the water container into a sink and slowly pour the sodium hydroxide into the water (never the reverse!). Stir carefully and slowly with a spoon or rubber spatula until the NaOH crystals have dissolved. Put a thermometer into the lye-water and measure the temperature.
6. When the temperatures of the lye-water and the oils have fallen to 40 – 45 °C, carefully pour the lye into the oils (never the reverse!). Fully immerse a blender and mix both liquids until they are well combined. Make sure that the blender stays in the batter to prevent air bubbles. Mix the batter until a trace forms.
7. Add the dried and shredded orange peel and the essential oils to the soap batter.
8. Pour the soap batter into the mould and either cover it with cling film or spray it with isopropyl alcohol. Cover the mould with towels to keep it warm. Leave the soap in the mould for 48 hours.
9. After 48 hours, carefully remove the soap from the mould and cut it into bars.
10. Let the soap bars cure at a cool and well-ventilated place for 4 – 6 weeks before use.
Characteristics of orange peeling soap
This recipe makes for a great soap with a light peeling effect. It’s got a smooth lather (thanks to the castor oil) and is suitable even for sensitive skin. The orange and bergamot fragrance has a refreshing and awakening effect and the orange peeling particles shine out like little rays of sunlight.
All in all, it’s a perfect soap to use for your morning shower to awaken your body and mind and start the day fresh and energized.