What would cooking be without herbs? They not only are beneficial for our health but also add flavour to practically any dish. To make sure that we can use herbs all year round, we have to preserve them during summer. Drying is the most common practice to preserve herbs; as usual there is more than one way to do it. In this post I show you three different ways how to dry herbs.
Preparation
I know that many people tell you not to wash your herbs before drying them because that would enhance the risk of mildewing. But that’s only true if you don’t dab the herbs dry properly after washing or even bundle the stems together while they are still wet. I always wash my herbs before drying them because no matter where they grow, they’ll always be dirty or contain the occasional insect. After washing, shake the herbs out over your sink, then lay them out on a clean towel and cover them with a second towel. Now, gently squeeze out the remaining water and move the herbs over to a third (dry!) towel where you let them pre-dry for a few hours.
Now they are washed, your herbs are ready for being dried. Let’s start with
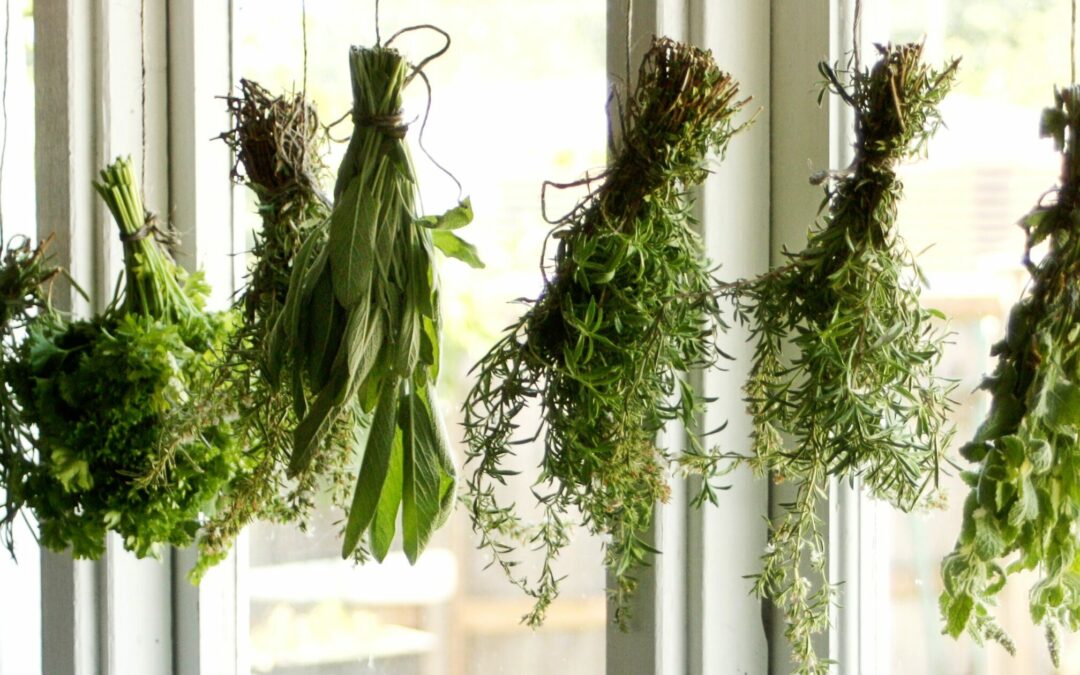
Air-drying
With this classic way of drying herbs, you bind the herbs into a bunch with a diameter of about 2 – 3 cm /1 inch. Hang it upside down at a temperate place with proper air circulation but without direct sunlight. Alternatively, you can put the herbs onto drying racks. Let them dry for about one week, depending on the herb. If you’re not sure whether they are dry enough for storage, you better leave them for one or two days longer. Otherwise, the herbs will develop mildew.
Dehydrating
You can dry herbs in a dehydrator. This is especially great if your dehydrator has mesh inserts that keep the leaves from falling through. Dry the herbs in your dehydrator according to the manual for about two to four hours.
Oven-drying
If you (like me) don’t have a dehydrator, you can also dry herbs in your oven. For that purpose, cover your trays with baking paper or silicone mats, put the clean herbs on them and let them dry at about 50 °C /120 °F. Stick a wooden spoon into your oven door to let the moisture evaporate. Dry the herbs until they are crisp to the touch and remove easily from the stems.
Storage of dried herbs
Dried herbs are best stored in clean glass jars or airtight plastic containers. You may also use brown-glass jars to keep out the light.
When your herbs are completely dry, put them onto a piece of baking parchment and strip the leaves from the stems. Dispose of the stems, slightly fold the baking paper in half so that a crease forms and let the dried herbal leaves glide into your container. I usually, store the whole leaves (well, as whole as they stay when removing them from the stems) and crumble them when I use them. That way they maintain more flavour.
Store the jars or plastic containers in a dark and dry place for about one year.
Herbs are often unremarkable to look at, but man, what would we do without their flavour? Can you imagine a tomato sauce without thyme, rosemary and basil? Or a roast without a bouquet garni? What about pesto and herb butter for a barbecue? Yet, herbs not only flatter our tongues but are also beneficiary to our health. Think of chamomile tea that we drink when we have an upset stomach. Unfortunately, most herbs are only available during the summer months. Some aren’t even winterhardy. To use herbs all year round, we must find a way to preserve them. Drying is the most common method but there are many more. I’ll show you six great ways to preserve herbs.
When to harvest herbs
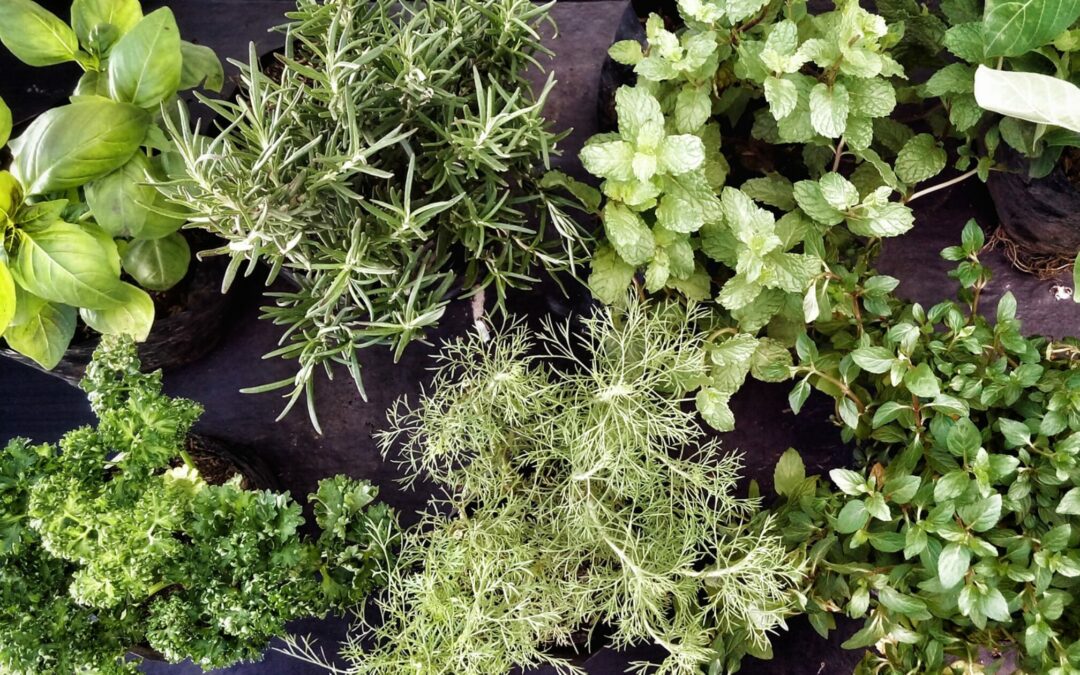
No matter what herb you want to use, the amount of essential oils must be high when harvested. There are some tips you might want to observe to make sure that you harvest your herbs at the best possible time:
The best time of day to harvest herbs is the late morning. The dew has dried off and it’s not yet so hot that the essential oils evaporate.
Most herbs are best harvested before they burst into bloom. Herbs like chive and mint, for example, lose taste as soon as they’re blooming.
Cut your herbs at the stems where they are still green and haven’t lignified yet. That way, they can continue to grow and you can have a second (or even third) harvest.
Drying
You can practically dry every herb. Just cut the stems off as described above. I know that many people tell you not to wash your herbs before drying them because that would enhance the risk of mildewing. But that’s only true if you don’t dry the herbs properly after washing or even bundling the stems together while they are still wet. I always wash my herbs before drying them because no matter where they grow, they’ll always be dirty or contain the occasional insect. After washing, shake the herbs, lay them on a clean towel and cover them with a second towel. Now, gently squeeze out the remaining water and move the herbs over to a third (dry!) towel where you let them pre-dry for a few hours.
Some herbs are suitable for freezing. Depending on the herb you want to preserve that way, however, there are different methods.
Freezing chopped herbs
This is a great way to preserve herbs, especially parsley, chive, borage, chervil and great burnet. Chop the herbs, press them tightly into an airtight plastic container and put them into the freezer. When you want to add some frozen herbs to your soups or sauces, remove the amount you need with a spoon or a fork and put the rest back into the freezer.
Freezing in water
This is a lovely way to preserve herbal flowers, for example, borage, chamomille or elderflowers. Put the freshly plucked flowers into an ice cube form, fill it up with water and put it into the freezer. Flower ice cubes are charming in drinks.
In the same way, you can also freeze herbs like mint or melissa and pimp your water or iced tea with it.
Freezing in oil
When you freeze herbs in oil, you can add them directly from the freezer into a sauce. For this method, I recommend a mixture of Italian herbs like rosemary, thyme, sage, oregano and marjoram. Chop the herbs, put them into an ice cube form and fill it up with olive oil. Put the form into the freezer and remove one to two ice cubes for spicing up a tomato sauce meat sauce.
Freezing herb butter
This is an easy one: finely chop ½ cup of herbs and mix it with one teaspoon of salt and 200 g (1 cup) of butter. Roll the butter into a “sausage” with 2 – 3 cm /1 inch in diameter and put it into the freezer. Alternatively, you can put the roll into the fridge first. When it has cooled enough to set, cut the roll into slices (about 1 cm / 1/3 inch) and freeze them in a freezing bag. Either put the frozen herb butter slices onto grilled meat or corn or thaw the whole roll before serving it to a barbecue.
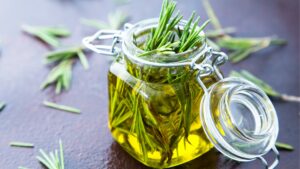
Herbs in oil
You can infuse oil with herbs to flavour salads, sauces, stews or vegetables. The basic method is to put 2 – 3 stems of clean fresh or dried herbs into a ½ litre bottle and fill it up with good olive oil. Either use one herb or a mixture of different herbs. Make sure that the herbs are covered with oil, otherwise they will become mouldy. You can also use sunflower oil but it has a shorter shelf life than olive oil and becomes rancid sooner. Let the oil infuse for about four weeks and afterwards, remove the herbs. Infused oil can be stored for 6 months up to one year.
Try out oven potatoes with rosemary oil or add thyme-infused oil to a fish steak.
Herbs in vinegar
Like oil, you can also infuse vinegar with herbs to add new flavours to your salad. Best vinegars used for infusing are wine and apple vinegar. Put 3 – 5 stems of clean fresh or dried herbs into a ½ litre bottle and fill it up with the vinegar of your choice. Again, you can either use just one herb to infuse the vinegar or an herbal mixture like herbs de Provence. Let the vinegar infuse for 4 – 6 weeks, then remove the herbs. Infused vinegar has a shelf life of up to one year.
Herb-infused vinegar and oil make great gifts!
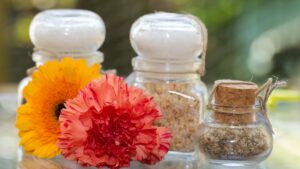
Herbal salt
To make herbal salt, chop fresh, clean herbs into fine pieces and layer them alternatingly with salt into a glass jar. Lay the lid loosely onto the jar, don’t close it tightly. Let the mixture sit for 1 – 2 weeks and spread the salt-herb mix onto a baking tray. Dry the salt at a low temperature in the oven. When the salt has cooled down, put it into the blender and blend it until it’s homogenous. Fill the salt back into the glass jar and close the lid tightly. Stored in a dry place, the salt will last practically indefinitely.
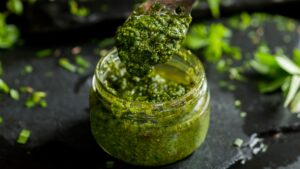
Pesto
We all know the pesto “Genovese”, the famous mixture of basil, olive oil, pine nuts and parmesan that we love to add to pasta. But did you know that you can make pesto with many other herbs, too? Try out wild garlic, for example. It’ll add a wonderful taste to your dish. Or use a mixture of Italian herbs like rosemary, oregano, thyme and sage for our pesto. Even wild herbs like dandelion and goutweed can be processed into a great pesto.
Unfortunately, the shelf life of pesto isn’t very long. You can store it in a closed jar in the fridge for 3 – 4 weeks. Once it has been opened, it’ll only last for 3 – 4 days. But with all the fresh herbs from spring to autumn, we can always make fresh pesto whenever we like.
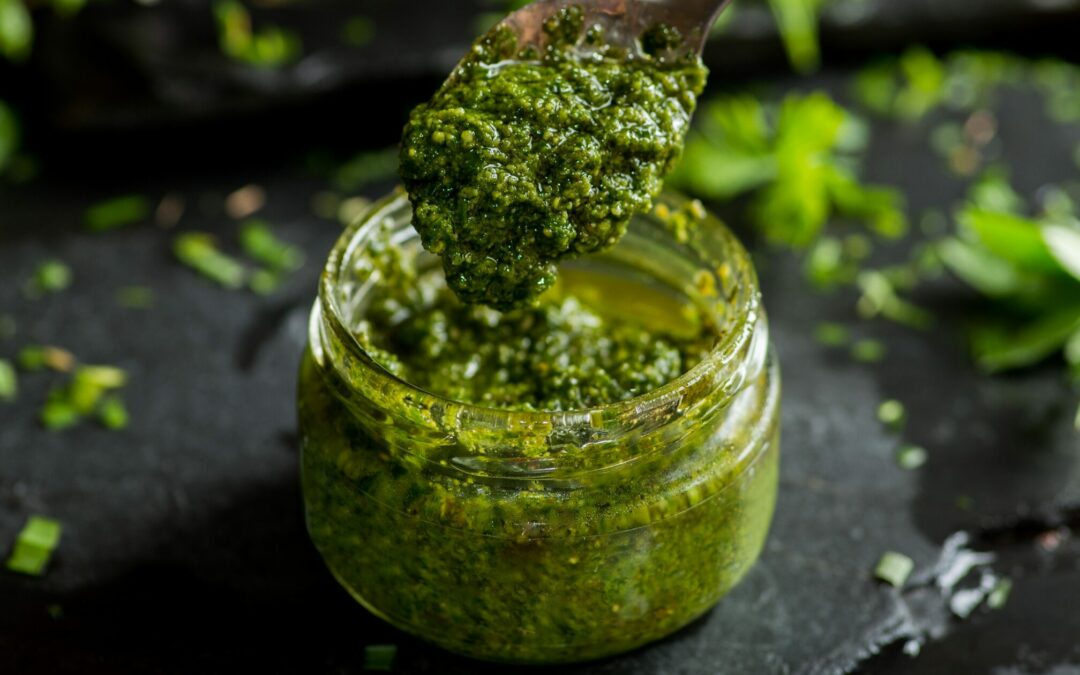
Aficionados of pasta and fresh vegetables appreciate the fresh and aromatic flavour of pesto. If you have fresh herbs at hand you can make some delicious herb pesto with simple means and relatively few ingredients. The big advantage compared to the store-bought version is that you can decide what herbs to put in and adjust the flavour to your liking. Below I’ll show you three great recipes for different herbal pesto that you can make in almost no time.
Tips for making pesto
Making herbal pesto is a fast and easy way to process fresh herbs.
Necessary devices
Pesto recipes always recommend using pestle and mortar. The reason behind this is not to make your arms go lame during the process of shredding and mixing the ingredients but to keep the herbs’ essential oils from evaporating. Electric devices like kitchen blenders or mixers can destroy valuable aroma substances of the herbs. Some essential oils evaporate at 40 °C already and the mentioned devices can reach those temperatures in a relatively short time. Thus, using a pestle and mortar is the first choice for making pesto.
However! If you chop the ingredients into very small pieces, use the pulsing function of your hand blender and pause the device whenever it gets warm, you’ll also get a formidable pesto. The choice of device is up to you.
What you should do in any case is wash the herbs and dry them thoroughly, then chop them finely with a knife before putting them either into the mortar or bowl for further processing.
Basic pesto ingredients
For an aromatic pesto, you always need two main ingredients: oil- or fat-containing nuts or seeds and an appropriate plant oil. One of the most famous recipes for a classic pesto, the Pesto alla Genovese, uses pine nuts and high-quality cold-pressed olive oil.
You can experiment like a crazy scientist with the nuts and seeds. Try out walnuts, for instance, or pistachios, hazelnuts, almonds, sunflower or pumpkin seeds, cashew nuts or – as in the original – pine nuts. Apart from olive oil, you can use sunflower oil, pumpkin seed oil or walnut oil. There is (almost) no limit to the imagination!
A further important ingredient is well-matured aromatic hard cheese – at least for all non-vegans. You can either use pecorino cheese which is mostly made of sheep milk or a good parmesan. Or both.
The last basic ingredient for our herb pesto is – tadaa! – herbs. You can use almost all herbs. If you use a mix of herbs, make sure that they harmonize well. When in doubt, stick to the classic Mediterraneans like rosemary, sage, thyme, savoury, basil and oregano. Either use the single herbs or a combination.
Further possibilities are kitchen herbs like lovage, bear’s garlic, parsley and tarragon or wild herbs like dandelion, sorrel or goutweed.
Recipes for homemade herb pesto
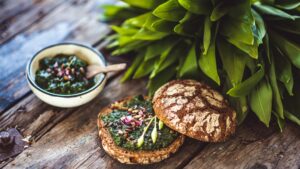
It’s quite easy to make herb pesto by yourself. In a few easy steps, you can make some tasty variations that are great in Italian dishes, on fresh bread or as salad dressing. I show you some simple recipes that you can adapt to your liking.
Bear’s garlic pesto
Bear’s garlic or wild garlic is a very popular spring herb. You may have tried already these recipes for bear’s garlic bread and bear’s garlic brioche braids. Wild garlic pesto is another great recipe for this flavoury herb. Its delicious taste is wonderful with pasta and fried potatoes. You can use it in a risotto or spread it on freshly baked rustic bread.
Ingredients for 250 ml pesto
50 g bear’s garlic 125 ml olive oil 5 walnuts 50 g pecorino ½ tsp salt
Instructions
Wash the wild garlic leaves and chop them finely. Grind the walnuts with a pestle in the mortar until they’re creamy, then add the chopped wild garlic. Add the pecorino. Alternatively, put all the ingredients into a bowl and mix them with a blender. Remember to only pulse the blender. Add the oil and salt to your taste.
Mediterranean herb pesto (vegan)
Combine Mediterranean herbs like thyme, lavender, basil, oregano, savory, rosemary and sage and use it for an extraordinary vegan herb pesto. A bit of garlic enhances the flavour of the herb mix.
Ingredients for 250 g pesto
10 g thyme 10 g lavender 15 g basil 15 g oregano 1 – 2 garlic cloves 20 g pine nuts 125 ml olive oil 1 tsp of salt and pepper each
Instructions
Chop the herbs and the garlic. Roast the pine nuts without oil in a pan until they turn light brown. Put the nuts and the chopped herbs in a mortar and mash them together with a pestle. Add the oil and salt and mix all thoroughly. If you want – and don’t insist on this pesto variant being vegan – you can also add hard cheese, for example, parmesan.
Wild herb pesto with dandelion, sorrel and goutweed
Wild herb lovers will adore this pesto that’s perfect for noodles, gnocchi or wild herb salads.
Ingredients for 250 ml wild herb pesto
50 g wild herbs (dandelion, sorrel and goutweed) 25 g sunflower seeds 10 g walnuts 125 ml olive oil (alternative: grape seed oil) 2 tsp lime juice (alternative: lemon juice) 2 tbsp parmesan 1/2 – 1 tsp salt 1/2 – 1 tsp pepper
Instructions
Wash the fresh herbs thoroughly, then dry and chop them. Put the sunflower seeds, walnuts and chopped herbs into a mortar and mash all together with a pestle. After that, add the oil, lime juice and cheese and mix it all thoroughly. Add salt and pepper to your taste.
Storage time of homemade pesto
Making herb pesto is a fast process and you may be tempted to make a lot of it when your herb harvest is abundant. However, pesto can’t be stored for a long time. The oil and salt in pesto are usually preserving foods that help to prolong the storage time of the pesto. The nuts, however, become rancid after some time and thus make the pesto inedible. The same goes for the hard cheese.
Therefore, homemade pesto can be stored unopened for three to four weeks in the fridge, depending on the quality and amount of oil and cheese in it. Storage time can be enhanced when you fill up the jar with oil so that the pesto has no contact with the air. Another possibility to prolong storage time is to add the hard cheese not until you eat the pesto.
So, making pesto is a great idea but making large amounts of it may not be the best way to preserve your abundant herb harvest. If you need other ideas to have herbs all year round, take a look at this post.
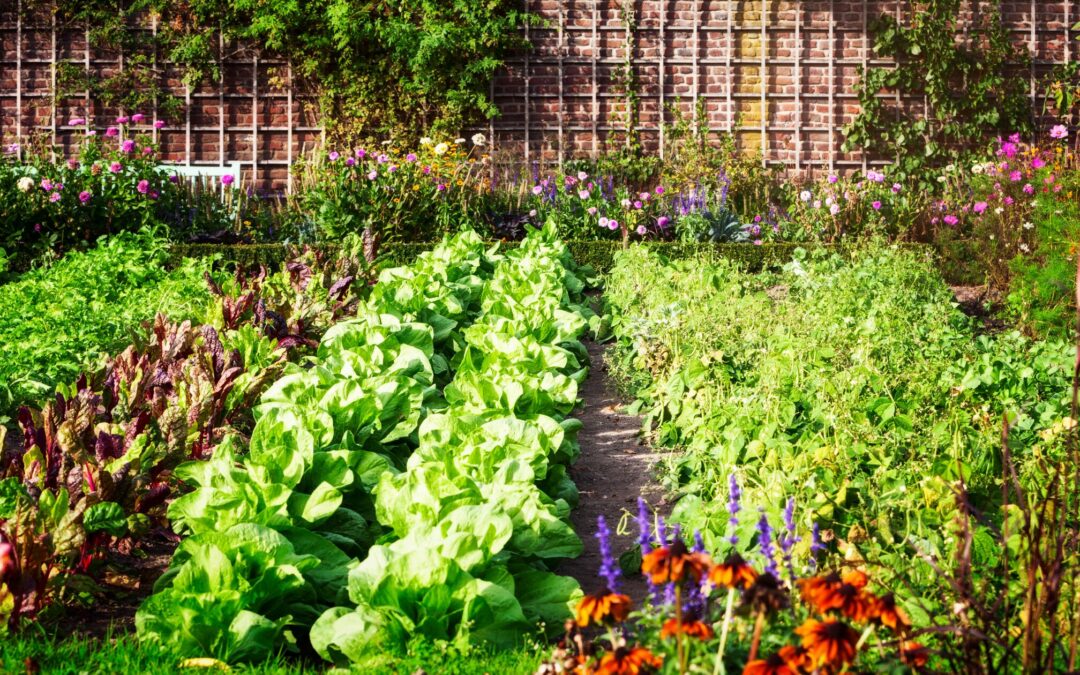
In July it’s time to sow many vegetables we want to harvest later in the year. In this post, I’ve created an overview to show you what to do in the garden and what vegetables to sow (indoors and outdoors) and plant in July.
What vegetables to sow indoors in July
You can sow the following plants indoors to plant them out later:
Here’s a list of plants you can plant out into your vegetable garden in July.
Broccoli Brussel’s sprout Cabbage Cauliflower Kale Kohlrabi Leek Lettuce Zucchini
General garden tasks in July
Mulch all plants larger than 10 cm / 4 inches. Mulching means you cover the soil with organic material like grass clippings, leaves, straw or wood chips. By mulching, you make sure that less water evaporates. Additionally, mulch suppresses weeds and thus your “weeding time” will be reduced considerably 🙂
Harvest whatever is ready in your garden. July is also the perfect time to harvest and dry herbs for later use.
Fertilise strong uptakers like cabbage plants, tomatoes, pumpkins and zucchini that were planted in May. Ideally, you have given them basic fertilisation when you planted them. Now it’s time for maintenance fertilisation. For that purpose, you can either use fertiliser from animals, fertiliser from plants or even fertiliser from humans.
Still not enough garden talk? Then these posts may interest you:
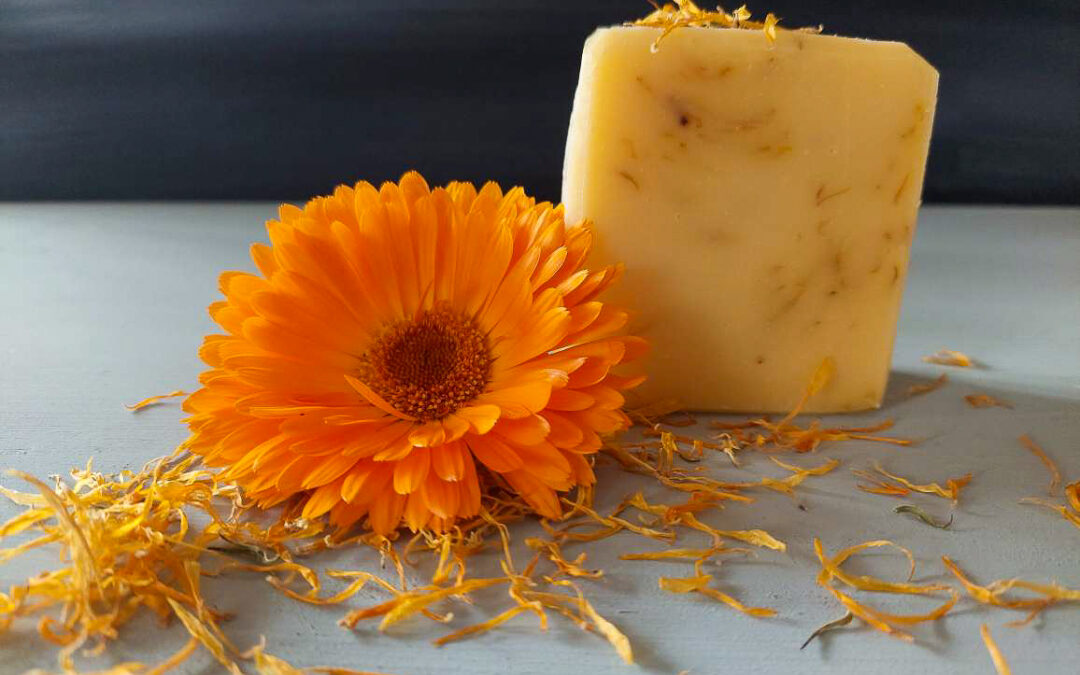
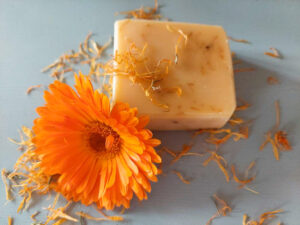
Calendula is known for its skin-soothing and wound-healing effects. This easy recipe for calendula soap makes for a very mild soap that’s even suitable for babies. The recipe is beginner-friendly which means that the process is not too complex. If this is your first soap, however, you should familiarise yourself with the soapmaking process and carefully observe the safety guidelines.
This soap can be used for the body and face. It’s especially suitable for sensitive skin due to the soothing effect of calendula. We use homemade calendula oil, calendula tea as a basis for the lye solution and dried calendula petals. As calendula is also a great colouring agent, we won’t need any clay or additional soap colours. The oil and tea will make for a beautiful yellow tint. (For more uses for calendula look here).
If you plan to use this soap for babies, do not use essential oil.
Calendula Soap
Superfat: 7 %
Ingredients
700 g calendula oil 200 g coconut oil 100 g sunflower oil 133 g sodium hydroxide (NaOH) 330 g water 5 tbsp dried calendula petals 20 g essential geranium oil (optional)
Instructions
1. Prepare your soap mould and put on an apron, gloves, breathing mask and safety goggles.
2. To prepare the calendula tea, put 3 tbsp of dried calendula petals into a jar. Weigh 350 g of water and put it to the boil. Pour the boiling water over the petals and let this tea rest for 30 minutes. Drain the tea and let it cool.
3. Weigh the oils. Slowly melt the coconut oil, then add the sunflower and calendula oil. Put a thermometer into the oil mixture and measure the temperature.
4. Weigh the calendula tea in a large enough, heat-proof container.
5. If you use essential oil, weigh it and put it aside for later use.
6. Weigh the sodium hydroxide. Put the water container into a sink and slowly pour the sodium hydroxide into the water (never the reverse!). Stir carefully and slowly with a spoon until the NaOH crystals have dissolved. Put a thermometer into the lye water and measure the temperature.
7. When the temperature of the lye-water and the oils has fallen to 40 – 45 °C, carefully pour the lye into the oils (never the reverse!). Fully immerse the blender and start mixing both liquids until they are well combined. Make sure that the blender stays in the batter to prevent air bubbles. Mix the batter until a trace forms.
8. If you use essential oil, add it to the soap batter and mix it well.
9. Add the dried calendula petals and mix them in with a hand whisk.
10. Pour the soap batter into the mould and either cover it with cling film or spray it with isopropyl alcohol. Cover the mould with towels to keep it warm. Leave the soap in the mould for 48 hours.
11. After 48 hours, carefully remove the soap from the mould and cut it into bars.
12. Let the soap bars cure at a cool and well-ventilated place for 4 – 6 weeks before use.