
.
Peppers and chillies are among the most rewarding vegetables to grow in your garden. With the right care and timing, even complete beginners can harvest an abundant, colourful crop bursting with flavour, that puts store-bought peppers to shame.
Last week, a friend waved away my suggestion to grow peppers this year, “Ah, peppers are too much trouble! I’ve given up on them; they never grew well in my garden.”
I couldn’t agree less. That would be such a pity! Yes, peppers and chillies have a reputation for being fussy, but with a few key techniques, everybody—even those who have tried and failed before—can grow them successfully.
She laughed and said she’d be willing to give it another try this year if I showed her how to grow peppers and chillies from seed.
Well, if that’s the only obstacle, I’m happy to remove it! In this guide, I’ll show you everything I know about growing peppers and chillies — from starting seeds and creating the right growing conditions to harvesting an abundant, colourful crop.
And by the way: Growing peppers in containers is often even easier — see my complete guide to growing peppers and chillies in pots.
Quick Overview
| Stage | Key Requirement | Timing |
| Seed-starting | 25 – 28 °C (77 – 82 °F) soil temperature | January / February |
| Germination time | 10 – 15 days | |
| Transplanting | After the last frosts | Mid to end of May |
| Sunlight | 6 – 8 hours per day | All season |
| Nutrients | Nitrogen and potassium; phosphorus when blossoms form | Every 3 – 4 weeks |
| Harvest | When fully coloured | Late summer to early autumn |
🌱 Stage 1: Understanding Peppers
Why Grow Peppers & Chillies?
So, why should we grow peppers and chillies in our gardens when we can easily buy them at the store?
Variety
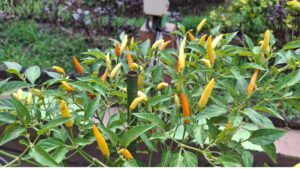
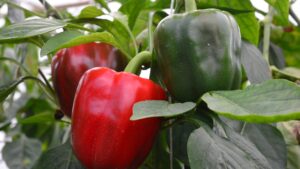
There are more than 2,000 pepper varieties worldwide – and this list is growing. When you look at the selection in your local grocery shop, it looks meagre: there are usually red, yellow and green (sometimes even orange, if they’re hip) bell peppers and a green and a red variety of chillies.
But there is so much more out there! It’s a bit like with tomatoes: once you realise how many colours, sizes, forms and flavours of just THIS ONE vegetable there are, you can’t help wanting to try them. Or at least some.
Flavour
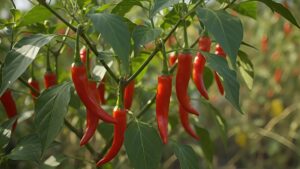
Peppers and chillies from the store already have a long journey behind them. They’re harvested only half-ripe, packed and shipped, driven to the store by train and truck until they finally land on the shelf.
Naturally, their flavour will never reach its full potential.
But bite into a freshly harvested, ripe pepper, and you’ll get quite a different experience. It bursts with flavour and its rich, fruity, tangy taste is nothing like that of its sad cousin from the store.
Sweet vs hot – you choose
My eldest son loves to add hot chilli flakes to many of his dishes (I once stole a forkful from his plate, and boy, it nearly blew my tongue out!), and he begs me every year to cultivate “some hotter chilli”.
You may have guessed that I’m more of a sweet-and-fruity pepper kind of person.
Nevertheless, I want some marginally hot peppers for making kimchi and other stuff.
And that’s the cool part about cultivating peppers and chillies in your garden: you can choose what flavours you want and grow multiple varieties to cover all your family’s preferences.
But before we dive into seed-starting, let’s first understand what we’re actually growing.
Pepper Basics — Understanding the Plants
What are Peppers?
Peppers are botanically fruits, but we use them as vegetables. They are all forms of the Capsicum genus and include both sweet (bell peppers) and hot (chilli peppers) varieties. Vegetable peppers have nothing to do with peppercorns. In fact, it was Columbus who made that mistake: thinking he was in India, he thought the hot and spicy plant he found was pepper.
Heat levels
When I was growing up, I only knew bell peppers in different colours that we used in salads, snacks, and dishes. When I accidentally bought a pepper seedling from the nursery, and I nearly ignited when I tasted one of its fruits, I learned about the Scoville Heat Unit Scale (SHU).
This scale rates how spicy peppers are. It goes from 0 to 16 million, with 0 indicating no spiciness (that would be bell peppers) and 16 million extreme pain. Although 16 million is only a value that exists on paper, at least up to now. The spiciest pepper to date is the variety “Pepper X” with an official SHU of 2.69 million.
Common pepper types
Here are the basic pepper groups from mild to insanely hot:
Sweet peppers
As the name indicates, sweet peppers are sweet with either no or just a tiny hint of heat. Bell peppers belong to that group, as well as banana and pimento peppers.
Mild to Medium Heat Peppers
These peppers have a clearly discernible spiciness and range from mild chillies like Poblano and Anaheim to hotter varieties like Jalapeño.
Hot Peppers
Hot peppers are clearly hot and range from Serranos, which are often used for spicy salsas, to Cayenne peppers and Thai chillies. Whenever you work with these peppers, wear gloves and avoid touching your face, eyes, or nose. It burns intensely!
Super Hot Varieties
When (or rather: if!) you eat super hot pepper varieties, you’ll pay at least with profuse sweating. Habaneros, for example, show between 100,000 and 600,000 Scoville. Bhut Jolokia, or “ghost peppers” as they are also called, even reach 1,000000 Scoville. Untrained chilli eaters were known to require medical treatment from ghost peppers. “Carolina Reaper”, the elder brother of “Pepper X”, can show up to 2.7 million SHU.
These peppers are not for beginners or the faint of heart! Even in handling the plant, you need to wear protective equipment such as gloves, a mask and safety goggles.
🌞 Stage 2: Creating Ideal Growing Conditions
Growing Conditions for Peppers and Chillies
Temperature
Peppers and chillies are heat lovers and therefore must not be planted out until after the last frosts. In my zone 7b, that’s around mid-May. If you’re not sure what your hardiness zone is, head over to this site, where you can look it up. But temperature isn’t the only requirement.
Light
Peppers and chillies need at least 6 hours of sunlight per day, better 8 or more. Choose a spot in your vegetable garden that lies in full sun and is protected from harsh winds.
My garden, for example, is facing southwards and has no houses or trees on the east and west sides that could cast a shadow on the vegetable patches.
Normally, that would expose the garden to the west winds that usually blow here, but it lies in a slight hollow, which creates a microclimate that’s slightly warmer than the surroundings.
Water
Naturally, peppers and chillies need water to survive and thrive. Their roots are sensitive, rather shallow and fine, though, which is why the soil in which they grow shouldn’t be too wet.
While we water tomatoes sparsely but thoroughly, peppers and chillies must be watered more regularly but in smaller amounts.
Outside in the garden, I usually water them twice a week or, when it’s really hot and dry, every other day. To check if they need water, I poke a hole of about 2 -3 cm (1 inch) in the soil with my finger. If it’s still moist under the surface, I don’t do anything, but if it’s dry, I get the watering can.
In the greenhouse, where temperatures are usually higher, I water them every day or at least every other day.
In pots, watering daily is a must, especially when it’s hot outside.
No matter where you grow your peppers and chillies, though, it’s always better to water them in the mornings rather than in the evenings and avoid splashing water onto the leaves to prevent fungal diseases.
Garden vs containers
You can cultivate peppers and chillies outside in a garden patch, indoors in a greenhouse or even in containers on a balcony or patio.
I’ve tried all three methods and learned the following:
Peppers can grow well outside in a patch in your vegetable garden, but only if the summer is warm and dry. Unfortunately, last summer was quite rainy, and sometimes temperatures dropped below 20 °C (68 °F), which didn’t suit the peppers. They grew reluctantly and produced less fruit than in the year before, when the summer was very hot and dry.
For that reason, I like to grow some peppers and especially chillies in the greenhouse as well (chillies like it even hotter than peppers). There, I’m in control of watering, and temperatures are always a bit higher than outside. It’s important, however, to keep the greenhouse properly ventilated so that temperatures don’t climb too high.
Lastly, I also grew some peppers and chillies in containers on my balcony. I chose pots with about 10 L volume, which turned out to be ok. Ensure the seedlings get enough light while being protected from rain. When it gets too cold or moist outside, you can easily carry them in and pamper them there until the weather’s right again.
Soil
Peppers and chillies need nutritious, well-draining soil that’s slightly acidic to neutral (pH 6.0–6.8). To prepare your garden or greenhouse before planting, distribute compost on the patch and rake it roughly in.
Before you plant pepper and chilli seedlings, make sure the soil is warm, between 15 – 18 °C (60 – 65 °F). Otherwise, they’ll stop growing for quite some time.
If you grow peppers and chillies in containers, fill them with mature compost, mixed with rock flour, nettles and well-rotted manure or sheep wool. The nutrients in these components will slowly release into the soil, where they can be absorbed by the plants.
Spacing
As pepper and chilli plants grow, they become broader. It’s important, therefore, that we plant them with enough space between them and also between the rows so that they have enough space.
If we plant them too closely, they’ll not only produce less fruit but will also be prone to diseases and pests.
In the patch, the right spacing between pepper and chilli plants is 50 – 60 cm (20 – 25 inches) and 80 – 100 cm between rows (2 – 3 feet).
In the greenhouse, there’s usually not enough space for rows, and we have to plan a bit differently. It’s a tried-and-tested method to plant peppers (or tomatoes, for that matter) diagonally instead of in rows, making the most of the limited space.
That means, we plant one pepper at the front and diagonally offset at a distance of 50 cm (20 inches) at the back, then again, one plant diagonally offset at the front and so on.
In containers, logically, we put only one pepper or chilli plant. When they grow larger, we can easily pull the pots apart, creating enough space for our plant babies.
Now that we know the growing conditions for peppers and chillies, let’s start growing them from seeds!
🌱 Stage 3: Starting Peppers from Seed
Seed Starting Peppers and Chillies— The What, When & How
When to start pepper and chilli seeds indoors
Many guides tell you to count back 8 – 10 weeks from your last expected frost date to seed-start peppers and chillies. In Bavaria, the last frost is expected in mid-May, so that would allow a time window of beginning to mid-March for seed-starting.
In my opinion, however, that’s too late. While peppers can be started 8-10 weeks before the last frost, they’ll only begin producing heavily much later in the season — potentially not until September or October when cooler weather slows them down again.
Let me show you my calculation:
Peppers and chillies take about 7 months to grow from seed to harvest; some very hot varieties need even longer. For that reason, we have to start them indoors a good deal earlier than March.
For a first harvest in July/August, seed-starting should take place in January already. Some people even start them around Christmas. Mid-February is the latest time you should put the seeds in the soil.
If you missed that window, you can, of course, start peppers and chillies until the beginning of March. Harvest will be in September then, and – depending on your climate – could be less than peppers that have been started earlier. In that case, I’d recommend growing them either in a greenhouse or in pots on the balcony or patio. When it gets too cold outside, you can easily put the pots indoors and still get a good harvest.
If starting in March, focus on faster-maturing sweet peppers rather than super-hot varieties, which need the full growing season.
Preparing to Sow
Planting is a bit like cooking – only quality ingredients lead to great results. Make sure, then, to select high-quality seeds for the peppers and chillies you’re going to grow.
Heirloom seeds
Heirloom pepper and chilli varieties offer a huge diversity in shape, colour, size and flavour, and their origins sometimes go back hundreds of years!
They often have a very unique visual appearance, and can be as large as a forearm or as tiny as cherries.
Seeds from heirloom varieties can be harvested and used for the next season.
My favourite varieties are “Roter Augsburger” (pointed pepper), “California Wonder” (bell pepper), Yellow stuffer (tomato pepper), “Anaheim” (mild chilli) and “Joe’s Long” (peperoni)
F1-Hybrids
Hybrid varieties, indicated by the addition F1, are selected by plant breeders in a complex method. They also come in all sizes, forms and colours and produce great fruits. Unlike heirloom varieties, however, their seeds are not of pure origin and produce different varieties than the parent plant.
F1 hybrids are often more disease-resistant and produce more uniform harvests, making them reliable for beginners.
Widely used F1 hybrids are “Kostas” (pointed pepper), “Paladio” (bell pepper) and “Estino” (chilli)
Sowing Process
When you’ve chosen which varieties you want to grow, the next step is to get your equipment ready.
Containers
There are, of course, those mini greenhouses for seed-starting, which come with a transparent lid to create a protected micro-environment. They’re wonderful for growing seedlings of any kind. I have some of them myself and use them every year.
If you’re new to gardening, however, and don’t want to invest too much money, you can use almost any container:
- Cut open empty milk or juice cartons (lengthwise or crosswise), clean them and fill them with soil.
- Recycle old planting pots that are not too deep.
- Glass jars (without lids) you’d otherwise throw out can also be of use
- Egg cartons are a wonderfully recyclable way to start any vegetables
- Make four cuts of about 2 cm (1 inch) in empty toilet paper rolls, fold the cuts inwards and fill the roll with planting soil.
- To grow a large-ish amount of plants, you can use flat plastic boxes with lids.
Just look around your house, and you’ll find plenty of containers you can use for seed-starting peppers and chillies.
One word on water-logging: many guides tell you to poke holes in the containers to prevent it, and by all means, do that if it makes you feel safer. I don’t do it because, let’s be honest, it can be a real mess when water drains out of the holes. Once, I had to paint my living room wall anew because the (dirty) water ran across the windowsill and down the wall, where it left nasty smudges.
I, therefore, use the containers as they are and try to be careful not to water too much.
Soil mix
The best soil for seed-starting peppers and chilli is either store-bought cultivation soil or well-rotted compost. Seeds have all the nutrients they need for germination in themselves. A rich, nutrient-dense soil would only lead to spindly and weak seedlings.
Put the soil in the containers you want to use and make sure to distribute it well to the edges. Press it slightly flat and fill up more soil if necessary. There should be a gap of about 1 cm (0.4 inches) from the soil to the edge of the container.
Soaking (optional)
Some people swear by pre-soaking pepper and chilli seeds in warm water or tea for 12 – 24 hours. I’ve tried it and couldn’t see any difference in germination between unsoaked seeds. But that’s just my experience. Go ahead and try it for yourself.
Seed-depth and spacing
When the containers are prepared, I poke holes of 0.5 – 1 cm (0.2 – 0.4 inches) in them where the seeds go in. If I use containers where only one seed will go in, for example, small pots, egg cartons, or toilet paper rolls, I (naturally) make only one hole in the middle of the pot.
With larger containers like mini-greenhouses, empty milk cartons or larger plastic containers, I first draw several rows with my finger and then poke holes along these lines. The seeds should be about 2 cm (0.8 inches) apart. Later, when the first pair of seed leaves shows, they’ll be thinned out and planted in larger pots.
When all seeds are in the pots, water them carefully and cover them either with a transparent lid (if part of a kit) or just wrap them with cling film. That way, we create a greenhouse-like atmosphere that holds the warmth and moisture at a constant level.
It’s important to open the covering daily to allow airflow and prevent fungal diseases.
Temperature
Peppers and chillies are heat-lovers, and that shows already at seed-starting. To germinate, pepper and chilli seeds need a soil temperature between 25 and 28 °C (77 – 82 °F). That’s a temperature that cannot be reached with normal room temperature. Instead, you’ll need a heating mat or just a (not too) hot water bottle that you put under the pots.
If you don’t have a heating mat and prefer to use your hot water bottle for yourself, you could place the containers on a windowsill above a radiator.
With constant temperatures in this range, the pepper and chilli seeds will sprout in 10 – 15 days.
Light for Seedlings
When the seedlings show, you can remove the heating mat and put them at slightly lower temperatures, but you must ensure that the seedlings get enough light. Here, too, normal daylight isn’t enough, especially when we seed-start in winter. A plant lamp is a great solution. It shines on the plants with just the right light frequency that they need, and we can adjust the “light hours” with a timer.
Peppers and chillies need 8 – 10 hours of light. When they get less than that, or it’s too dark, they’ll become “leggy”. That means, they grow long, thin stems that reach toward the light but are too weak to hold themselves. Leggy seedlings eventually fall over.
Putting the seeds in the soil is one thing. Now we must tend to our plant babies.
Growing Strong Seedlings
Watering & Feeding Seedlings Indoors
Throughout the whole growing process, we must verify that the soil in which our seedlings grow is always moist. Now “moist” doesn’t mean “wet”. If you’re not sure, carefully feel the soil or even poke your finger in a little bit. If it’s moist to the touch, leave it as it is. If it feels dry, water it with measure.
When watering, only moisten the soil and check that water doesn’t splash on the leaves.
From water alone, however, plants can’t live. When the first true leaves are fully open, I mix a bit of fertiliser into the water. You can either use a ready-mixed tomato fertiliser, or you can use diluted home-made nettle manure, at best mixed with comfrey. As peppers and chillies are cultivated for their fruit, they not only need nitrogen and potassium but also phosphorus for fruit development.
Thinning Peppers and Chillies
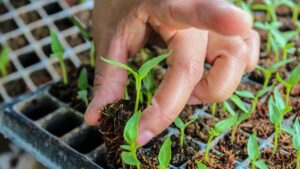
When the seedlings have developed their first pair of true leaves (the seed leaves don’t count), it’s time to thin them out by transplanting them into larger pots. This not only provides them with more space for developing roots but also with more light and nutrients.
For thinning, I always get the new pots, which should have a diameter of 8 – 10 cm /3 – 4 inches, ready. Then, I fill them with compost and press the soil slightly. Next, I carefully loosen the seedlings in the tray or pot with the pointed end of a dibber. Holding the seedling by its stem with one hand, and helping with the dibber in the other hand, I meticulously remove the plant from the soil. Sometimes the roots get entangled with those from the neighbouring plant. Here also, the pointy end of the dibber comes in handy for cautiously “combing” them out of each other.
Now, I poke a hole with the round end of the dibber in the soil of the new pots and put the seedling in there. I always ensure that the seedling sits as deep as before.
Pruning & Shaping
Strictly speaking, pruning peppers and chillies is not necessary to produce fruits, but careful and regular pruning can bring even more harvest.
Why prune peppers and chillies?
Pruning encourages the plant to form new twigs and grow sturdier. A sturdy plant can bear more or larger fruits without collapsing.
With fewer leaves, the air can flow better through the twigs, drying off faster any moisture due to watering/rain or condensation faster. This reduces the risk of fungal diseases.
It also induces the plant to form more blossoms (more blossoms = more fruits) over a longer period of time (longer time = longer harvest).
At the same time, the sun can reach the whole plant, which induces the pepper and chilli fruits to become larger and sweeter.
How and when to prune peppers and chillies?
When the plant is about 15 – 20 cm (6 – 8 inches) high, cut off the tip of the main stem. Use a pair of clean gardening scissors and cut directly above a pair of leaves.
This first pruning makes the plant form more side twigs, leading to sturdy growth and more fruits.
When there are too many side shoots and leaves, thin them by thoughtfully cutting some of them off. Don’t remove too many leaves, though. The plants need them for photosynthesis.
This thinning improves the airflow and decreases the risk of fungal diseases, and the plants can also absorb more sunlight.
Always cut off shoots near ground level, little shoots that sprout out of the stem very near or even under the ground. They’re just side stems and only cost the plant energy.
King blossom
Many guides advise breaking out the king blossom, the first flower that appears at the Y-junction where the stem splits. I’ve tried doing just that, and I can’t say I saw any difference in yield, so I leave it on the plant. There’s one exception, however: when the king blossom forms on a seedling in the pot, it’s better to break it out, as it would cost the plant too much energy at that stage.
If the plants bear many but small fruits, I remove some of them. That way, the plants have more energy for the remaining fruits, which then grow larger and, in my opinion, yummier.
In addition to pruning, it’s always a good idea to support the plants by poking a stick into the soil and binding the stem loosely to it.
Hardening Off
Before we can release the seedlings into the wild outdoors, we have to harden them off. Start about a week before transplanting and put the seedlings outside for a couple of hours.
It’s important to monitor the temperature, as peppers and chillies are very, very fussy. Make sure it’s a warm day and put the seedling tray or pots in the shade so they don’t get too hot or even sunburnt.
Each day, prolong the time the plants stay outdoors, and after 3 days, you can start placing them in the sunlight (not around noon, that would be too much).
To make them accustomed to the wind, gently brush them with your hand, simulating wind movement.
After one week of hardening off, the peppers and chillies are ready for transplanting.
🌿 Stage 4: Transplanting & Early Care
Transplanting to the Garden or Containers
When the nights finally stay warm, it’s time to get our peppers and chillies outside.
I always transplant my seedlings on a cloudy day or in the late hours of the afternoon to reduce the risk of plant shock.
First, I lay the pots or carefully uprooted plants out on the patch so that I can adjust the distance between them. Remember: it’s 50 – 60 cm (20 – 25 inches) between plants and 80 – 100 cm between rows (2 – 3 feet). If you plant in large pots, you can skip that step, of course, as it’s only one plant per pot.
In each planting hole, I put a small shovel full of moistened, well-rotted manure and half a handful of rock flour as a long-term fertiliser. This provides my peppers and chillies with some quickly available nutrients (manure) and a long-term fertiliser (rock flour). More on fertilising in “Daily Care and Maintenance”.
Then I put the plants in slightly deeper than they were in the pots. I cover the hole with the soil I removed earlier and carefully press it down around the roots.
I water the seedlings properly after planting so that the soil settles around the roots, leaving no air holes.
When all my peppers and chillies are in the ground, I cover the soil between them with mulch. This could be hay, straw, pulled weeds, leaves, sheep wool, or wood shavings. If you plant in pots, mulch as well. Mulch helps reduce water evaporation, so you don’t have to water too often. It also reduces the growth of weeds, which I appreciate because weeding is not my favourite task.
If you live in a cooler climate and don’t have a greenhouse, you may want to consider foil tunnels around the plant rows. I wouldn’t use covers as they are too heavy and could eventually break the plants off.
🌶 Stage 5: Caring for Mature Plants
Daily Care & Maintenance for Garden Plants
Watering Routines
To check if my peppers and chillies need watering, I test the soil by touching the surface and even poking my finger into the ground. If it feels dry, it’s time to water.
I water the plants thoroughly, but ensure I don’t overwater them. With good drainage, either in the patch or the pot, that’s no problem.
Unlike tomatoes, which have deep roots, peppers and chillies grow shallower roots. For that reason, they need to be watered more often as they can’t get water from deep down.
Fertilising
Once your plants are thriving, the next step is to support them with the right nutrients.
Peppers and chillies are heavy feeders, which means they need a lot of nutrients. I prepare the patches in spring by adding compost and raking it in.
After the first fertilisation during transplanting (see above), I don’t feed the plants until the first buds show. Now they need phosphorus and potassium, and we can feed them with a tomato fertiliser.
Every 3 – 4 weeks, I add some nettle manure to the water and water my peppers and chillies with it. When the fruits start to change their colour, I don’t fertilise them anymore; it would only lead to watery, bland fruit.
After harvesting, however, another dose of fertiliser can be good for the plant, especially when it’s still early enough to expect a second (smaller) harvest.
Temperature control
We can’t control the temperature outside, of course, but we can monitor it in a greenhouse. I also had times when I forgot to open the windows of my greenhouse and only got there around noon or even later. Especially on sunny summer days, temperatures get high very fast in a greenhouse, and although peppers and chillies need it warm, hot is too hot and temperatures above 35 °C (95 °F) can stress plants and cause blossoms to drop.
The same goes for colder temperatures. Below 13 °C (55 °F), peppers and chillies will stop growing. When low temperatures are forecast, we just protect our babies with a foil tunnel or by closing the greenhouse windows.
If you cultivate peppers and chillies in pots, put them indoors when it’s too cold outside. If it gets warmer, you can always put them back out.
Pollination of Peppers and Chillies (For More Experienced Gardeners)
The blossoms of peppers and chillies have both male and female parts, which means they’re self-pollinating, helped by movement through wind or insects.
It’s never guaranteed, though, that the blossoms are pollinated, especially when you grow peppers and chillies in pots on a balcony. Pollination can also be an issue in small greenhouses where insects don’t get in easily. (My greenhouse is quite large and has huge windows, so pollination is not a problem.) Here’s how we can help the plants:
The right time for pollinating peppers and chillies is when the blossoms open in the morning. The high humidity and cooler temperatures make the pollen moist and sticky, which makes pollination easier.
Either use a soft paint brush or your finger to transfer the pollen. Gently brush over the open blossom to get the pollen stuck where it should, and repeat that action after three days.
Another, easier method is to tap the blossom a few times with your finger to make it self-pollinate or just to carefully (!) shake the plants. The movement will brush the pollen onto the female parts of the blossom.
Although pollination is mostly an issue with plants on balconies or in a greenhouse, it can be useful to help pollination with plants in the garden, especially when you want to harvest the seeds for the next season. By pollinating by hand, we remove the risk of cross-pollination. There won’t be any unforeseen cross-breeds, which could have negative effects on the peppers’ characteristics.
Companion Planting with Peppers and Chillies
The right companions can protect plants from pests and enhance growth, while wrong companions compete, for example, for space or nutrients.
Good companions for peppers and chillies help repel pests, attract beneficial insects, or have complementary growing habits:
- Basil: Repels pests, attracts pollinators and promotes growth
- Dill: Attracts pollinators
- Cucumbers: Similar light and water requirements
- Nasturtium: Attracts aphids away from peppers (trap crop)
- Garlic: Protects from fungal diseases and aphids
- Onions: Repel pests like white fly
- Carrots: Loosen the soil
- Parsley: Attracts pollinators
- Calendula: Repels nematodes
- Lettuce: Keeps the soil moist
- Spinach: Keeps the soil moist
Avoid planting peppers near these crops, as they compete for nutrients or share diseases:
- Potatoes: Same plant family, i.e. similar requirements and susceptibility to diseases
- Tomatoes: Same plant family, i.e. similar requirements and susceptibility to diseases
- Eggplants: Same plant family, i.e. similar requirements and susceptibility to diseases
- Peas: Attracts aphids without drawing them away from peppers
- Fennel: Inhibits the growth of peppers and chillies
- Celery/Celeriac: Heavy-feeder
Protecting Your Peppers from Pests and Diseases
While peppers are relatively hardy plants, they can encounter a few common issues. The most frequent problems include aphids, spider mites, and blossom end rot (dark spots on fruit bottoms caused by irregular watering).
I’ve written a comprehensive guide covering all the pests and diseases that can affect peppers and chillies, with detailed prevention and treatment strategies. Look there for a comprehensive overview.
The best prevention? Healthy plants! Follow the care guidelines in this article—consistent watering, proper spacing, good air circulation, and companion planting—and you’ll avoid most problems.
But how do we know when peppers and chillies are ready to harvest? And how to harvest them properly? I’ll show you.
🍅 Stage 6: Harvesting & Storing
Harvesting Peppers and Chillies — When & How
Knowing When Peppers and Chillies are Ready to Harvest
Timing
As a rule of thumb, most varieties need 60 – 80 days from flowering to full ripeness. Depending on whether they grow in a greenhouse or outdoors, this is between mid-July and mid-August. Outdoors, it takes longer and larger fruit also take longer to get ripe than smaller ones.
Colour, firmness and size
Peppers and chillies are ready to harvest when they’ve developed their variety-specific colour. Ripe peppers and chillies feel firm and have a slightly glossy appearance. They have reached their expected full size (which you can check on the seed package), and the colour should be deep and uniform, not pale or patchy.
Green peppers are unripe, but can, of course, also be eaten. Their taste may not be fully developed, though, and they might taste less sweet and more bitter than ripe ones.
Harvesting green peppers can be sensible when there are (too) many fruits on one plant, increasing the risk of collapse. In fact, harvesting the first pepper, the so-called “king pepper”, when it’s still green, is often done to encourage the plant to form more fruit.
How to Harvest Peppers and Chillies Properly
Cutting technique
To harvest peppers and chillies, cut them off with a sharp knife or garden scissors. If you try to rip the fruits off the branch, you usually either rip off the branch or part of the fruit. I know this all too well, because there always comes that day, when I’m too lazy to grab my garden scissors, and I either damage the plant or the fruit in the attempt to tear it off. And just in case you think „I’ll just twist the pepper until it comes off“: Nope, that doesn’t work either.
The fruit stem, or at least part of it, should always remain at the fruit so that it stays closed. This is especially important when you want to store the fruit.
Harvesting frequency
I usually check my plants every 2 – 3 days during peak season and regularly harvest the ripe fruits. This encourages the plant to produce even more fruits. When you leave overripe fruits on the plant, that signals it to stop producing.
Hot Pepper Safety
When harvesting hot peppers and chillies, we MUST wear gloves. For some super-hot varieties, you should also wear safety goggles and a mask, as the capsaicin that causes burning is so strong that it can irritate your eyes and respiratory system.
After handling hot peppers and chillies, avoid touching your face, especially your eyes. Wash your hands thoroughly, even if you’ve worn gloves.
The hotter the pepper or chilli, the more irritating it can be.
Ripening indoors
When nighttime temperatures drop below 17°C (63°F), peppers will stop ripening on the plant. What should you do then when your plants are full of green peppers or chillies, but cold weather is coming?
You can either protect the plants with a fleece, but there’s always the risk that twigs or fruits break off.
Alternatively, harvest the unripe peppers or chillies and let them ripen on a sunny windowsill indoors.
Some guides recommend putting an apple or a tomato next to the unripe peppers on the sill. Both fruits emit ethylene, a gas that induces ripening in some fruits. With peppers and chillies, however, that doesn’t work.
Some gardeners even pull up the whole plants and hang them upside down indoors to let the remaining fruits ripen. I haven’t tried that, but go ahead if you have the space.
How to Store Peppers and Chillies
Short Storage of Peppers and Chillies
Fresh peppers and chillies should always be stored in a dry and cool place, optimally at 7-10°C (45-50°F). If your fridge has a vegetable crisper drawer, that’s ideal. Here, they stay fresh for up to one week, green fruits even longer.
Long Storage of Peppers and Chillies
There are several ways to store peppers and chillies long-term, from freezing to drying, fermenting and pickling. The longer we store the product, however, the worse its quality gets. It’s best, therefore, to use up stored peppers and chillies within one year.
Freezing peppers and chillies
We can either freeze peppers and chillies whole or cut in strips or squares. Wash the peppers and dry them thoroughly. Then put them whole or cut up on a baking tray or wooden board with parchment or baking paper, and put them in the freezer. It’s important to freeze peppers and chillies separately first, to prevent them from sticking together and getting damaged when we take them out of the freezer.
When the fruits are completely frozen, put them in a freezer bag, press out the air and label it. Labelling is important, even when you think you can always see what’s inside the bag. Let me tell you, as someone who wanted to add red pepper to a hearty stew. Turned out what I put (frozen) in the stew wasn’t peppers, and I ended up eating fruity rosebud soup instead!
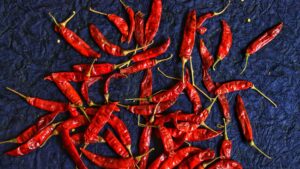
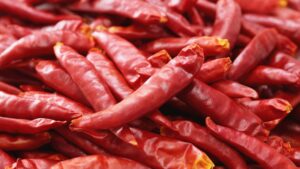
Drying peppers and chillies
A different method of preserving peppers and chillies is drying, which is ideal to keep their full taste.
We can either dry them by cutting them into rings (or leaving them whole when they’re small), threading them on a string and hanging them in an airy, warm place for 2 – 4 weeks, depending on the humidity. It’s quicker, though, to dry them in a dehydrator or in the oven at 60-70°C (140-160°F) for 6-12 hours.
Store dried peppers and chillies in tightly closed jars or containers. Before doing so, you can also grind them finely.
Pickling chillies
Pickling chillies is less common than freezing or drying them, but no less yummy!
Make a brine from water, vinegar, salt, sugar and optionally herbs and spices to your taste. Boil that mixture until the salt and sugar dissolve. Pack the whole or cut up chillies in a jar, pour the hot brine in so that they’re all covered and immediately close the lid tightly.
Normally, they need about 24 hours to absorb the flavours of the vinegar brine, but I’d suggest letting them rest for 1 – 2 weeks before opening a jar. That way, the aroma is even more intense.
Store pickled chillies in the refrigerator for up to 3 months, or process in a water bath for long-term shelf storage.
Fermenting peppers and chillies
If you’d like to go one step further, chillies can easily be lacto-fermented. Wash them and dry them thoroughly, and cut them into pieces (I usually cut them into fine strips). Make a 3% brine from 30 g salt and 1 litre of water.
Pack the chillies in a jar and pour the brine in so that all chillies are under it. Now, cover it with a fermenting weight of any kind and loosely close the lid. Let the jar sit at room temperature but away from direct sunlight for 7 – 10 days. When bubbling decreases, store the jar in a cool, dark and dry place like a cool basement or the fridge.
Don’t throw away the seeds from your homegrown peppers and chillies. With the right plants and technique, you can save them for the next season.
🌱 Stage 7: Saving Seeds & Overwintering
Saving Seeds From Peppers and Chillies

What plants can be used?
Saving seeds from our own pepper and chilli plants is a simple method to preserve our favourite plants after harvest. It’s important, though, that we know what we’re doing: Only seeds from open-pollinated or heirloom plants can be used for saving. Seeds from F1-hybrids are not suitable, as their offspring will not be the same as the parent plant.
It’s equally important to make sure that the fruits from which we want to save the seeds have not cross-pollinated with other pepper and chilli varieties from our (or our neighbour’s) garden.
It’s easiest to hand-pollinate the blossoms when they’re not fully open. Break them open, pollinate them with your finger or a brush and – if you want to be 100 % sure – fix a finely-meshed cloth around the blossom with a rubber band or string. The resulting fruit is true-to-type. This is mainly necessary if you’re growing multiple varieties close together.
Always check that the fruits you take for seed saving are healthy.
How to save seeds from peppers and chillies
Take a fruit that’s a bit riper than those you’d normally harvest for eating. It should show its characteristic end colour and smell ripe. (Be careful, though, to check the smell of hot or even super-hot varieties as they can irritate the respiratory system. With them, you have to rely on colour and firmness as indicators for ripeness.
Cut the pepper or chilli open and cautiously remove the seeds without squeezing them.
Put the seeds loosely on a kitchen towel or plate and put them in a dark and dry place (not above a radiator) with adequate airflow.
Dry the seeds until they’re hard and rustle when you handle them.
Put them in a paper bag, label it and store the seeds in a dark and dry place.
That way, you can start peppers and chillies from seeds again next year without buying new seeds.
Properly stored pepper seeds remain viable for 2-4 years, though germination rates decline over time.
If you’re interested in saving your own seeds, check out this guide on how to save tomato seeds.
Overwintering
This step is optional, but so rewarding:
In my hardiness zone, I can harvest peppers and chillies until around the beginning to mid-October. After that, it gets too cold, even in the greenhouse. When the plants are in pots, you can put them indoors and prolong the harvest time until November.
Experimental – My Experience So Far
Strictly speaking, peppers and chillies are perennials, not annuals. Last year, I dug up some pepper and chilli plants from the greenhouse, planted them in pots and brought them indoors to overwinter. Unfortunately, they were infested by aphids and lost all their leaves. Two plants have survived so far (at least I think they’re still alive).
My first overwintering attempt taught me that overwintering peppers indoors is possible, but challenging — pests and low light are the main obstacles. I’m still experimenting with this and will share what I learn.
You’ve harvested a basket full of colourful peppers and chillies, more than you can eat right now. Some you might want to eat within the next few days, but the others you can preserve for winter.
🔧 Stage 8: Common Problems & Solutions
Troubleshooting
Why aren’t my pepper seeds germinating?
The Problem: The seeds have been in the soil for 3+ weeks, but haven’t sprouted yet.
Common Causes & Solutions
- Temperature is too low – Pepper seeds need 25-28°C (77-82°F) to germinate.
Use a heating mat or a hot water bottle to increase the temperature. - The seeds are too old – Pepper seeds lose their viability after 2-4 years.
Always check the date and do a germination test with a few seeds on a damp paper towel first. - The seeds are planted too deep – Seeds should be only 0.5-1 cm (0.2-0.4 inches) deep. Deeper than this, and they won’t reach the surface.
- The soil is either too wet or too dry – Keep the soil consistently moist, but not waterlogged. Check daily and mist if needed.
My seedlings are tall, thin, and falling over. What’s wrong?
The Problem: The seedlings are leggy and weak and can’t support themselves.
The Cause: Is always insufficient light. Pepper seedlings need 8-10 hours of bright light per day, especially when they’ve been started in winter.
Solutions:
- Add a grow light immediately and place it 10-15 cm (4-6 inches) above the seedlings
- Move to the brightest window you have (south-facing is best)
- When transplanting, bury the leggy stem deeper to provide support
- Going forward, start seeds later (February instead of January) when the natural light is stronger, OR invest in proper lighting from the start
Why are my pepper plants flowering but not producing fruit?
The Problem: Your plants produce lots of beautiful flowers, but they drop off without forming peppers.
Common Causes & Solutions:
- Temperature issues – Peppers drop their blossoms when it’s too hot (above 35°C/95°F) or too cold (below 13°C/55°F). Provide shade in extreme heat and protect your plants from cold nights with fleece or bring the pots indoors.
- Lack of pollination – Especially in greenhouses or on balconies without wind/insects. Hand-pollinate by gently tapping flowers or using a soft brush to transfer the pollen between blooms.
- Inconsistent watering – Stress from drought causes blossoms to drop. Water regularly (every 2-3 days) and mulch to retain moisture.
- Too much nitrogen – Overfertilizing with nitrogen-rich fertilisers produces lots of leaves and flowers but no fruit. Switch to a balanced or phosphorus-rich fertiliser instead (tomato fertiliser works well).
The leaves on my pepper plants are turning yellow. Is my plant dying?
The Problem: Yellowing leaves, starting from the bottom or throughout the plant.
Diagnosis depends on the pattern:
- Lower leaves yellowing – Usually normal ageing OR nitrogen deficiency. Feed with a balanced fertiliser or nettle manure.
- Yellowing between veins (leaves stay green along veins) – Magnesium deficiency. Add Epsom salt solution (1 tablespoon per 4 litres of water).
- All-over yellowing + wilting – Overwatering or root rot. Let the soil dry out between waterings; ensure good drainage.
- Yellowing + curling + stunted growth – Could be pests (check for aphids, spider mites) or a viral disease. See the pest and disease guide [link].
My peppers have dark, sunken spots on the bottom. Can I still eat them?
The Problem: Blossom end rot – dark, leathery patches on the blossom end (bottom) of fruits.
The Cause: Calcium deficiency, usually triggered by inconsistent watering rather than a lack of calcium in the soil.
Solutions:
- Water consistently – This is the #1 fix. Water deeply every 2-3 days rather than lightly every day.
- Mulch heavily to maintain even soil moisture
- Remove affected fruits – They won’t recover, and removing them lets the plant focus energy on new, healthy fruit
- Add calcium – Work crushed eggshells or bone meal into the soil for long-term prevention
- Reduce nitrogen fertiliser – Too much nitrogen interferes with calcium uptake
The good news: Blossom end rot isn’t a disease and won’t spread. New fruits will be fine once you fix the watering.
How long does it take to get peppers after transplanting?
The Problem: Impatience! “I transplanted 3 weeks ago and still no peppers!”
The Reality: After transplanting outdoors in mid-May, expect:
- First flowers: 3-4 weeks
- First small fruits: 6-8 weeks
- First ripe, harvest-ready peppers: 10-14 weeks (mid-July to August)
Bell peppers and larger varieties take longer than small chillies. Hot varieties often mature faster than sweet peppers.
Be patient! Peppers spend the first weeks after transplanting establishing roots and adjusting to outdoor conditions. Once they start producing, they’ll continue until frost.
Can I grow peppers successfully if I missed the January/February seed-starting window?
The Problem: It’s March or even April, and you want to grow peppers, but you feel it’s too late.
The Answer: Yes, but adjust your expectations and strategy.
Options:
- Buy seedlings – Most garden centres sell pepper seedlings in April/May. You’ll skip the seed-starting challenge and still get a harvest.
- Start seeds in March – You can still start seeds, but harvest will come in September, instead of July/August. Grow in pots or a greenhouse so you can extend the season by bringing plants indoors when it gets cold.
- Choose fast-maturing varieties – Look for varieties that mature in 60-70 days rather than 80-90 days. Small chillies generally mature faster than large bell peppers.
- Plan for next year – Mark your calendar to start seeds in January or February for best results.
Late-started peppers can still produce well, especially if you give them extra care and protection as autumn approaches!
FAQs – Questions and Quick Answers
✓ When should I start pepper seeds indoors?
In most temperate climates, January to mid-February.
✓ Why are my pepper seedlings leggy?
They got too little light. Put them under a plant lamp immediately.
✓ How often should I water pepper plants?
Check the soil and water when it feels dry. Outdoors, water regularly and deeply every 2 – 4 days.
✓ How long do peppers take to ripen?
This varies depending on the variety and may take between 6 and 10 weeks.
✓ Why are my pepper flowers falling off?
Temperatures are either too high (> 35 °C/95 °F) or too low (< 13 °C / 56 °F).
✓ Can I grow peppers in containers?
Absolutely, just make sure they are large enough (at least 10 litres).
✓ How hot is a jalapeño on the Scoville scale?
Between 2,500 and 8,500 SHU, depending on ripeness and growing conditions.
Why are my peppers not turning red?
It’s either too cold, they need more time, or your variety has a different end colour, like yellow or orange.
When should I transplant peppers outdoors?
After the last night frost, in zone 7b, that’s mid-May.
Wrap-Up & Seasonal Tips
Growing peppers and chillies from seed is absolutely manageable – even for complete beginners. The key is to start early, in January/February already, and keep them warm enough to sprout. When they’ve grown their first real pair of leaves, thin them and plant them in single pots.
Before transplanting them outdoors, harden them off properly and wait until temperatures are warm enough, even at night.
Consistent watering and proper feeding help them stay strong and healthy and produce an abundance of those peppers and chillies you like.
Start small if you’re new to this. Try 2-3 plants of an easy variety like ‘California Wonder’ or ‘Anaheim’, learn what works in your specific garden conditions, and expand from there.
I’ve been growing peppers for years, and I’m still learning new tricks every season. That’s what makes gardening so rewarding—there’s always something new to discover.
And my friend who “gave up” on peppers? She has already ordered new seeds and sown them in a container that’s now happily sitting on a warm windowsill.
Ready to get started as well? Your pepper-growing adventure begins now! 🌶️
Want more gardening guides? Check out these related articles:
0 Comments