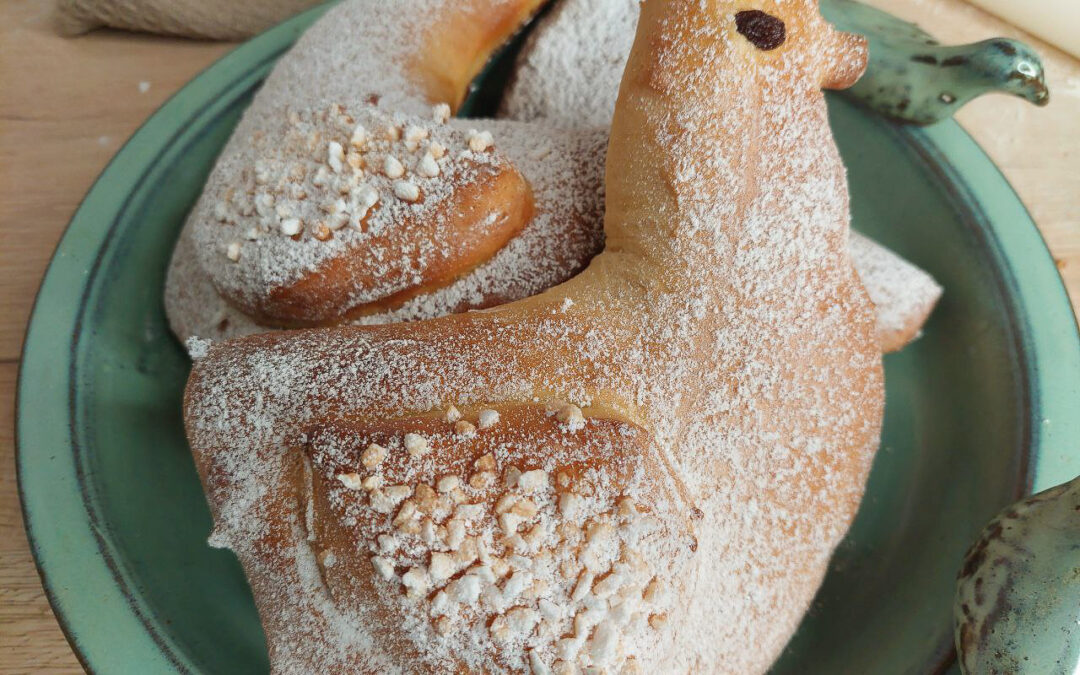
November 11 is St. Martin’s Day, an important holiday in German-speaking regions. We celebrate this day extensively with lantern processions: Children (and their parents) walk through their town or village with handcrafted lanterns, singing songs about St. Martin and performing a play about his good deeds. Afterwards, everybody gets hot tea and Saint Martin’s geese, sweet yeast pastries that are shaped like geese (more on the geese connection later). Although my boys are no longer children, the scent of spiced tea and the rich dough of Saint Martin’s geese bring up treasured memories of the lantern-lit streets and the wonderful sense of community at the procession. To keep the seasonal traditions alive (and satisfy our sweet teeth), we still bake Saint Martin’s geese every year, and I want to show you how it’s done.
The Story Behind the Tradition
Martin was a Roman soldier, born around 316. When riding along on a cold winter’s day, he came across a hungry and freezing beggar. Martin, moved by pity, cut his warm cloak in half with his sword and gave half to the beggar. At night, the beggar appeared in Martin’s dreams, revealing that he was Jesus Christ.
Why geese?
After this incident, Martin converted to Christianity and studied the Christian faith. Later, the people of Tours (France) asked Martin to become bishop. Martin, however, modest as he was, didn’t consider himself worthy enough for the task and hid in a goose barn. The geese started quacking, betraying Martin’s whereabouts. He became bishop and served for about 30 years, said to have worked several miracles during that time. Martin died on November 11, 397 and was later canonised. After his death, eating goose on his memorial day became a tradition.
But is that really the reason why we eat geese (real or baked ones) on that day? Historians have another explanation for the tradition of the Saint Martin’s geese: for one, November 11 was the day when taxes or feudal dues were collected. The payment was often made in goods, such as a goose. At the same time, November 11 was the last day before the 40 days of Advent fasting (historically called “Saint Martin’s Lent”) before Christmas, and people indulged in a last hearty (goose) roast and other food that were taboo during the fast.
From harvest fires to lantern processions
I can’t believe how long it has been since that day when my boys attended St. Martin’s lantern processions! And did you see that my youngest had made a goose? 😏
And what does Saint Martin have to do with lantern processions? Light processions were already a tradition among early Christians, and this practice was adopted to honour Saint Martin on his memorial day. Additionally, people lit fires in November in the fields in gratitude for the harvest and as a symbolic farewell to the harvest year. The children crafted torches from straw and lanterns from hollowed turnips with which they wandered through the streets. Sound familiar? Rightly so: this is similar to the original Celtic harvest traditions that resulted in Halloween.
About the Dough: Enriched Yeast Dough
Now that we’ve covered the tradition’s history, let’s dive into baking Saint Martin’s geese!
While you may find recipes using different doughs, the classic dough to make the geese is an enriched yeast dough. “Enriched” simply means that apart from flour and yeast, our dough includes ingredients like butter, eggs, milk and sugar. Enriched yeast dough is perfect for special occasions as it’s sweet, softer and, well, richer than just plain yeast dough. It’s also perfect for shaping, which is ideal for cutting out our geese. Another sweet treat made from enriched dough is this braided yeast bun.
One of the secrets of enriched dough is to give it enough time to rise properly. Once you’ve got your core dough right, you allow it to rise and prove fully. You must be patient here and give it enough time; otherwise, you’ll end up with a brick.
But don’t worry: once you know what to watch for, it’s straightforward to make and a real treat to eat.
Ingredients & Equipment Needed
For making the enriched yeast dough for our Saint Martin’s geese, you’ll need
Flour: Pastry or all-purpose flour is equally good
Yeast: You can either use fresh or dry yeast, but keep in mind that you have to activate fresh yeast before adding it to the other ingredients
Sugar: either use granulated sugar or icing sugar
Egg
Milk: whole milk is best – I don’t recommend low-fat milk
Butter: alternatively, you could use margarine, but honestly, the taste will not be the same
For the decoration, you’ll need
Raisins for the eyes
Pearl sugar
You don’t need any special equipment to make Saint Martin’s geese. A goose-shaped cookie cutter makes the job easier, but it’s not essential – I cut out my geese using this template (download and print at 100%):
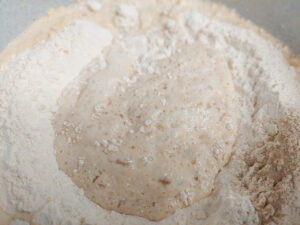
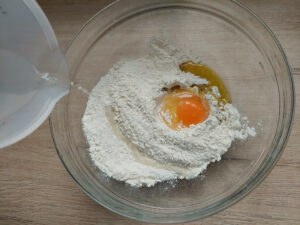
Put the flour and sugar in a large bowl. If you use dry yeast, add it as well. In case you use fresh yeast, however, you must activate it now: warm up the milk until it is lukewarm (not warmer or the yeast will die!) and crumble the fresh yeast into it. Stir until it’s dissolved. Make a well in the centre of the flour and pour the yeast milk into it. Cover the bowl and let the yeast activate for about 20 minutes. After that time, the yeast liquid will be bubbly and considerably risen.
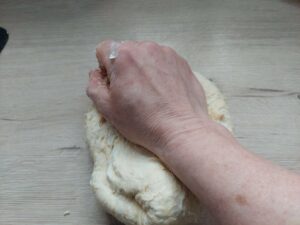
Melt the butter and pour it into the bowl. Now add the egg and start kneading the dough, either by hand or with a food processor. Knead for about 5 minutes. The dough is ready when it’s soft and smooth and doesn’t stick to your fingers.
First rise
Form the dough into a ball, put it back in the bowl and cover it with a kitchen towel to prevent it from drying out. Let it sit for about 60 minutes in a warm place. The dough is ready when its volume has at least doubled.
This dough has risen perfectly and is ready to be rolled out and cut into Saint Martin’s geese!
Cutting the geese
Line two to three baking trays with parchment paper or brush them with some butter, lard or tallow so that the geese won’t stick.
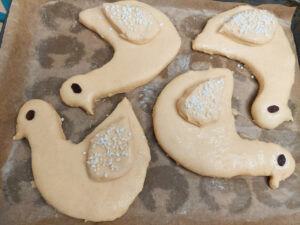
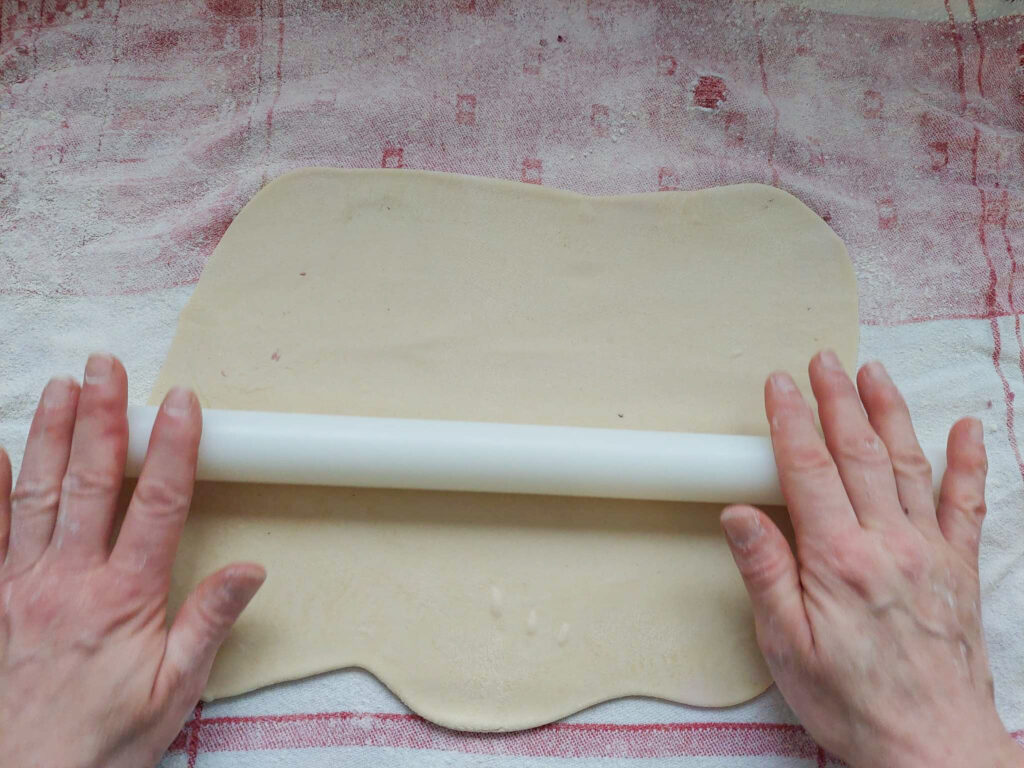
Lightly flour your work surface and roll out the yeast dough to about 1 cm (1/2 inch). Cut out the geese with a cookie cutter, the template or by hand and put them on the baking trays, leaving some space between them as they’ll expand during rising. If you use my template, also cut out one wing per goose.
Brush the wings with egg wash and gently press them onto the geese. Press a raisin into place for the eye.
Second rise
Now, let the geese sit for another 20 minutes. During that time, the dough will rise again, making the baked pastry all fluffy and soft.
In the meantime, preheat the oven to 175°C (350 °F).
Last decorations and baking
After the second rise, lightly brush the geese’s wings with egg wash and sprinkle pearl sugar on them. I prefer to sprinkle just the wings, but you can, of course, sprinkle the whole goose with pearl sugar.
Put the trays in the preheated oven and bake them for 20 minutes until they are golden brown.
When the geese are baked, take them out of the oven and let them cool down. If you like, you can dust them with icing sugar.
Put the flour and sugar in a large bowl. If you use dry yeast, add it as well. In case you use fresh yeast, however, you must activate it now: warm up the milk until it is lukewarm (not warmer or the yeast will die!) and crumble the fresh yeast into it. Stir until it's dissolved. Make a well in the centre of the flour and pour the yeast milk into it. Cover the bowl and let the yeast activate for about 20 minutes. After that time, the yeast liquid will be bubbly and considerably risen.
Melt the butter and pour it into the bowl. Now add the egg and start kneading the dough, either by hand or with a food processor. Knead for about 5 minutes. The dough is ready when it’s soft and smooth and doesn’t stick to your fingers.
First rise
Form the dough into a ball, put it back in the bowl and cover it with a kitchen towel to prevent it from drying out. Let it sit for about 60 minutes in a warm place. The dough is ready when its volume has at least doubled.
Cutting the geese
Line two to three baking trays with parchment paper or brush them with some butter, lard or tallow so that the geese won’t stick.
Lightly flour your work surface and roll out the yeast dough to about 1 cm (1/2 inch). Cut out the geese with a cookie cutter, the template or by hand and put them on the baking trays, leaving some space between them as they’ll expand during rising. If you use my template, also cut out one wing per goose.
Brush the wings with egg wash and gently press them onto the geese. Press a raisin into place for the eye.
Second rise
Now, let the geese sit for another 20 minutes. During that time, the dough will rise again, making the baked pastry all fluffy and soft.
In the meantime, preheat the oven to 175°C (350 °F).
Last decorations and baking
After the second rise, lightly brush the geese’s wings with egg wash and sprinkle pearl sugar on them. I prefer to sprinkle just the wings, but you can, of course, sprinkle the whole goose with pearl sugar.
Put the trays in the preheated oven and bake them for 20 minutes until they are golden brown.
When the geese are baked, take them out of the oven and let them cool down. If you like, you can dust them with icing sugar.
Notes
The baked geese store well in a linen bag or bread bin for several days. Alternatively, you can freeze them for up to 6 months, but remove any sugar because it will turn liquid when defrosted.
FAQs
How to tell when the yeast is properly activated?
After 20 minutes, properly activated yeast will be bubbly and noticeably risen. If it looks flat or unchanged, your yeast may be dead, or the milk was too hot.
What’s the right dough consistency?
Once you have added all ingredients to the bowl, mix them well together and knead the dough for about 5 minutes. Another option is letting it knead in a food processor. Anyway, the dough is ready for rising when its surface is smooth and it doesn’t stick to your fingers, your work surface or the bowl.
How do I keep the shapes defined during rising and baking?
The geese will enlarge by about 10% during rising, but the shape will stay the same, only become, well, larger. After rising, you can make small adjustments if you deem them necessary, like changing the bend of the neck, for example, or sharpening the beak. All in all, though, the shapes will stay much the same as the freshly cut out dough.
During baking, there may be a slight additional rise, but that’s it.
How long can I store baked Saint Martin’s geese?
Put any leftover geese in a linen bag or the bread bin, where they can be stored for several days.
Alternatively, you can freeze them. Just make sure not to use icing sugar and scrape off the pearl sugar, as it would turn liquid when the geese are defrosted. Frozen geese can be stored up to 6 months.
Serving Suggestions
Traditionally, Saint Martin’s geese are given to the children after the lantern procession, but they also make a great gift for friends and neighbours. A few years ago, I brought a batch to work and left them in the teachers’ room. Boy, it was like throwing a steak in a lion’s den! The geese were gone within a few minutes.
If you host a tea or coffee party at St. Martin’s Day, the geese make a wonderful treat with coffee, spiced tea or hot cocoa (my favourite!). Any seasonal hot drink, like pumpkin spice latte or gingerbread hot cocoa, as well as chai tea, is also a wonderfully fancy pairing for Saint Martin’s geese.
If there are some geese left the day after baking (or if you’ve made enough to store or freeze them), try them instead of bread for breakfast. The sweet pastry goes marvelously with butter and jam, for example one of these pear jam variations.
Variations & Creative Ideas
Now that you’ve mastered the sweet yeast dough, you can get creative.
Different shapes
Who says that you can only make geese from this dough? Try making large gingerbread men shapes that you decorate with raisins for the eyes and buttons for the shirt. For New Year’s Eve, you can form tiny pig heads or fish; they‘re considered to bring luck. Or you can just make this braided yeast bun.
Flavour additions
In this post, I’ve shown you the recipe for a basic enriched yeast dough. If you like, you can add different flavours to the dough, like for example the zest of an orange, the pulp of half a vanilla pod or ¼ teaspoon of cardamom.
Filling options
Try filling the geese with marzipan, Nutella or jam. For that purpose, roll out the dough only to 0.5 cm (1/4 inch), cut out the geese and put your preferred filling in the middle of the belly of half of the geese. Brush the edges of the geese with egg wash and stick the unfilled geese on top, gently pressing the seams closed. Let the geese rise as described in the recipe, decorate them as you like and bake them for 20 – 25 minutes.
Bake Saint Martin’s Geese!
Although we have stopped attending lantern processions, we still make Saint Martin’s geese every year to celebrate this day – and indulge in these sweet, fluffy pastries. I think it’s important to keep traditions, even if you bend them slightly. It would be a pity if these recipes and traditions vanished! And besides, for me, this seasonal recipe is the signal to start baking Christmas cookies!
These geese are so easy and fun to make that I encourage you to try making them with your children or grandchildren, nieces, nephews or friends’ kids. They’ll love it, cherish this memory of baking geese with you forever and hopefully will carry on this tradition.
Looking for Christmas recipes? These may interest you:
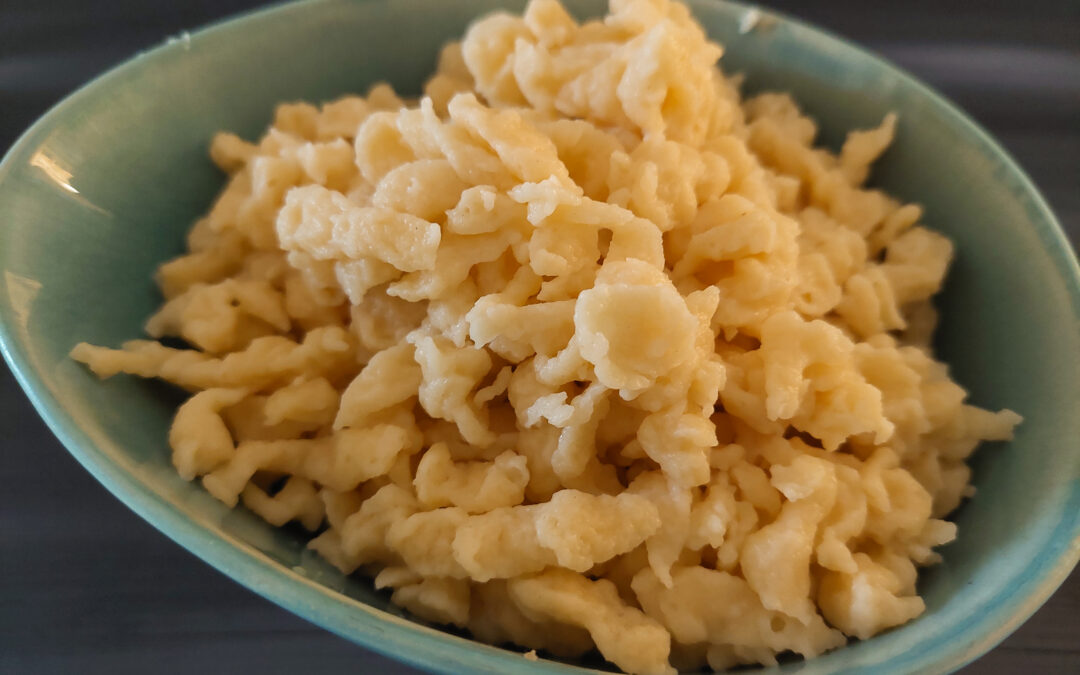
If you have ever been to Southern Germany, I hope you have tried our Spätzle! If you have, I just know that you loved them. If not, let me explain what we’re talking about here: Spaetzle are a kind of pasta where the raw dough is pressed into boiling water. You can either eat them as a side dish to beef or veggies with sauce or as a main dish, for example, with cheese (“Kässpätzle”), homemade sauerkraut (“Krautspätzle) or herbs.
Here in Southern Germany, spaetzle (which translates as “little sparrows”) is a common traditional dish. Although there are ready-made spaetzle available in the supermarkets here, it’s so easy and way yummier to make them yourself. With this traditional spaetzle recipe, I’ll show you how you can make these yummy egg noodles at home and add a new dish to your collection of recipes.
Pro tips for great Spaetzle
Before we start, I’m going to share some pro tips that will help you create great Spaetzle! After all, when you go to all the length to try a new recipe, you want it to be a success!
Spaetzle recipe: Dough
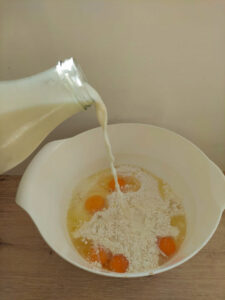
The recipe for Spaetzle dough is quite simple, actually, as it only consists of flour, eggs, a pinch of salt and water or milk. Use all-purpose wheat flour or spelt flour. You can even take wholemeal wheat or spelt flour, but it requires more liquid.
The basic spaetzle recipe per person is
100 g flour
1 egg
1 pinch of salt
50 ml milk or water
That’s it. Easy, right? You’ll probably have all the ingredients at home already.
Many recipes use water for the dough, but in my opinion, spaetzle taste a lot better when made with milk. This spaetzle recipe, therefore, uses milk. If you don’t want to or can’t consume milk, feel free to substitute it with water.
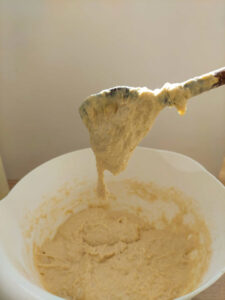
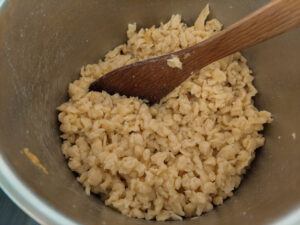
Spaetzle dough is best made by hand in a large bowl with a wooden spoon. That way, you can feel how thick the dough is and add some liquid to make it thinner or flour to thicken it. You can, of course, also mix the dough with a hand mixer.
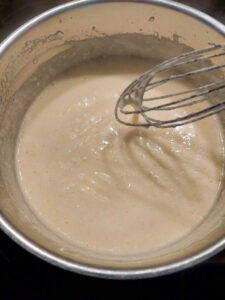
You can tell that the dough is ready when it is thick and falls slowly from the spoon. Now let it rest for about 15 minutes.
Further down in the recipe, you’ll find a detailed description of how to make Spaetzle.
Equipment
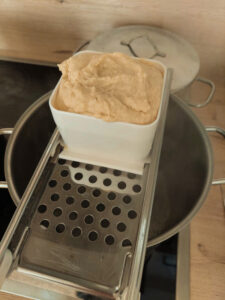
It’s easy to mix the Spaetzle dough, but to press it into the water, you have to use either a “Spaetzlehobel” or a kind of ricer with larger holes. If you have neither and just want to try out the recipe, take a sieve with large holes and scrape the dough through with a wooden spoon or a dough scraper. For completeness, let me tell you that you could also flatly spread the dough onto a cutting board and scrape it into the boiling water with the back of a knife. This method, however, requires experience and takes longer. But don’t let me keep you from trying it!
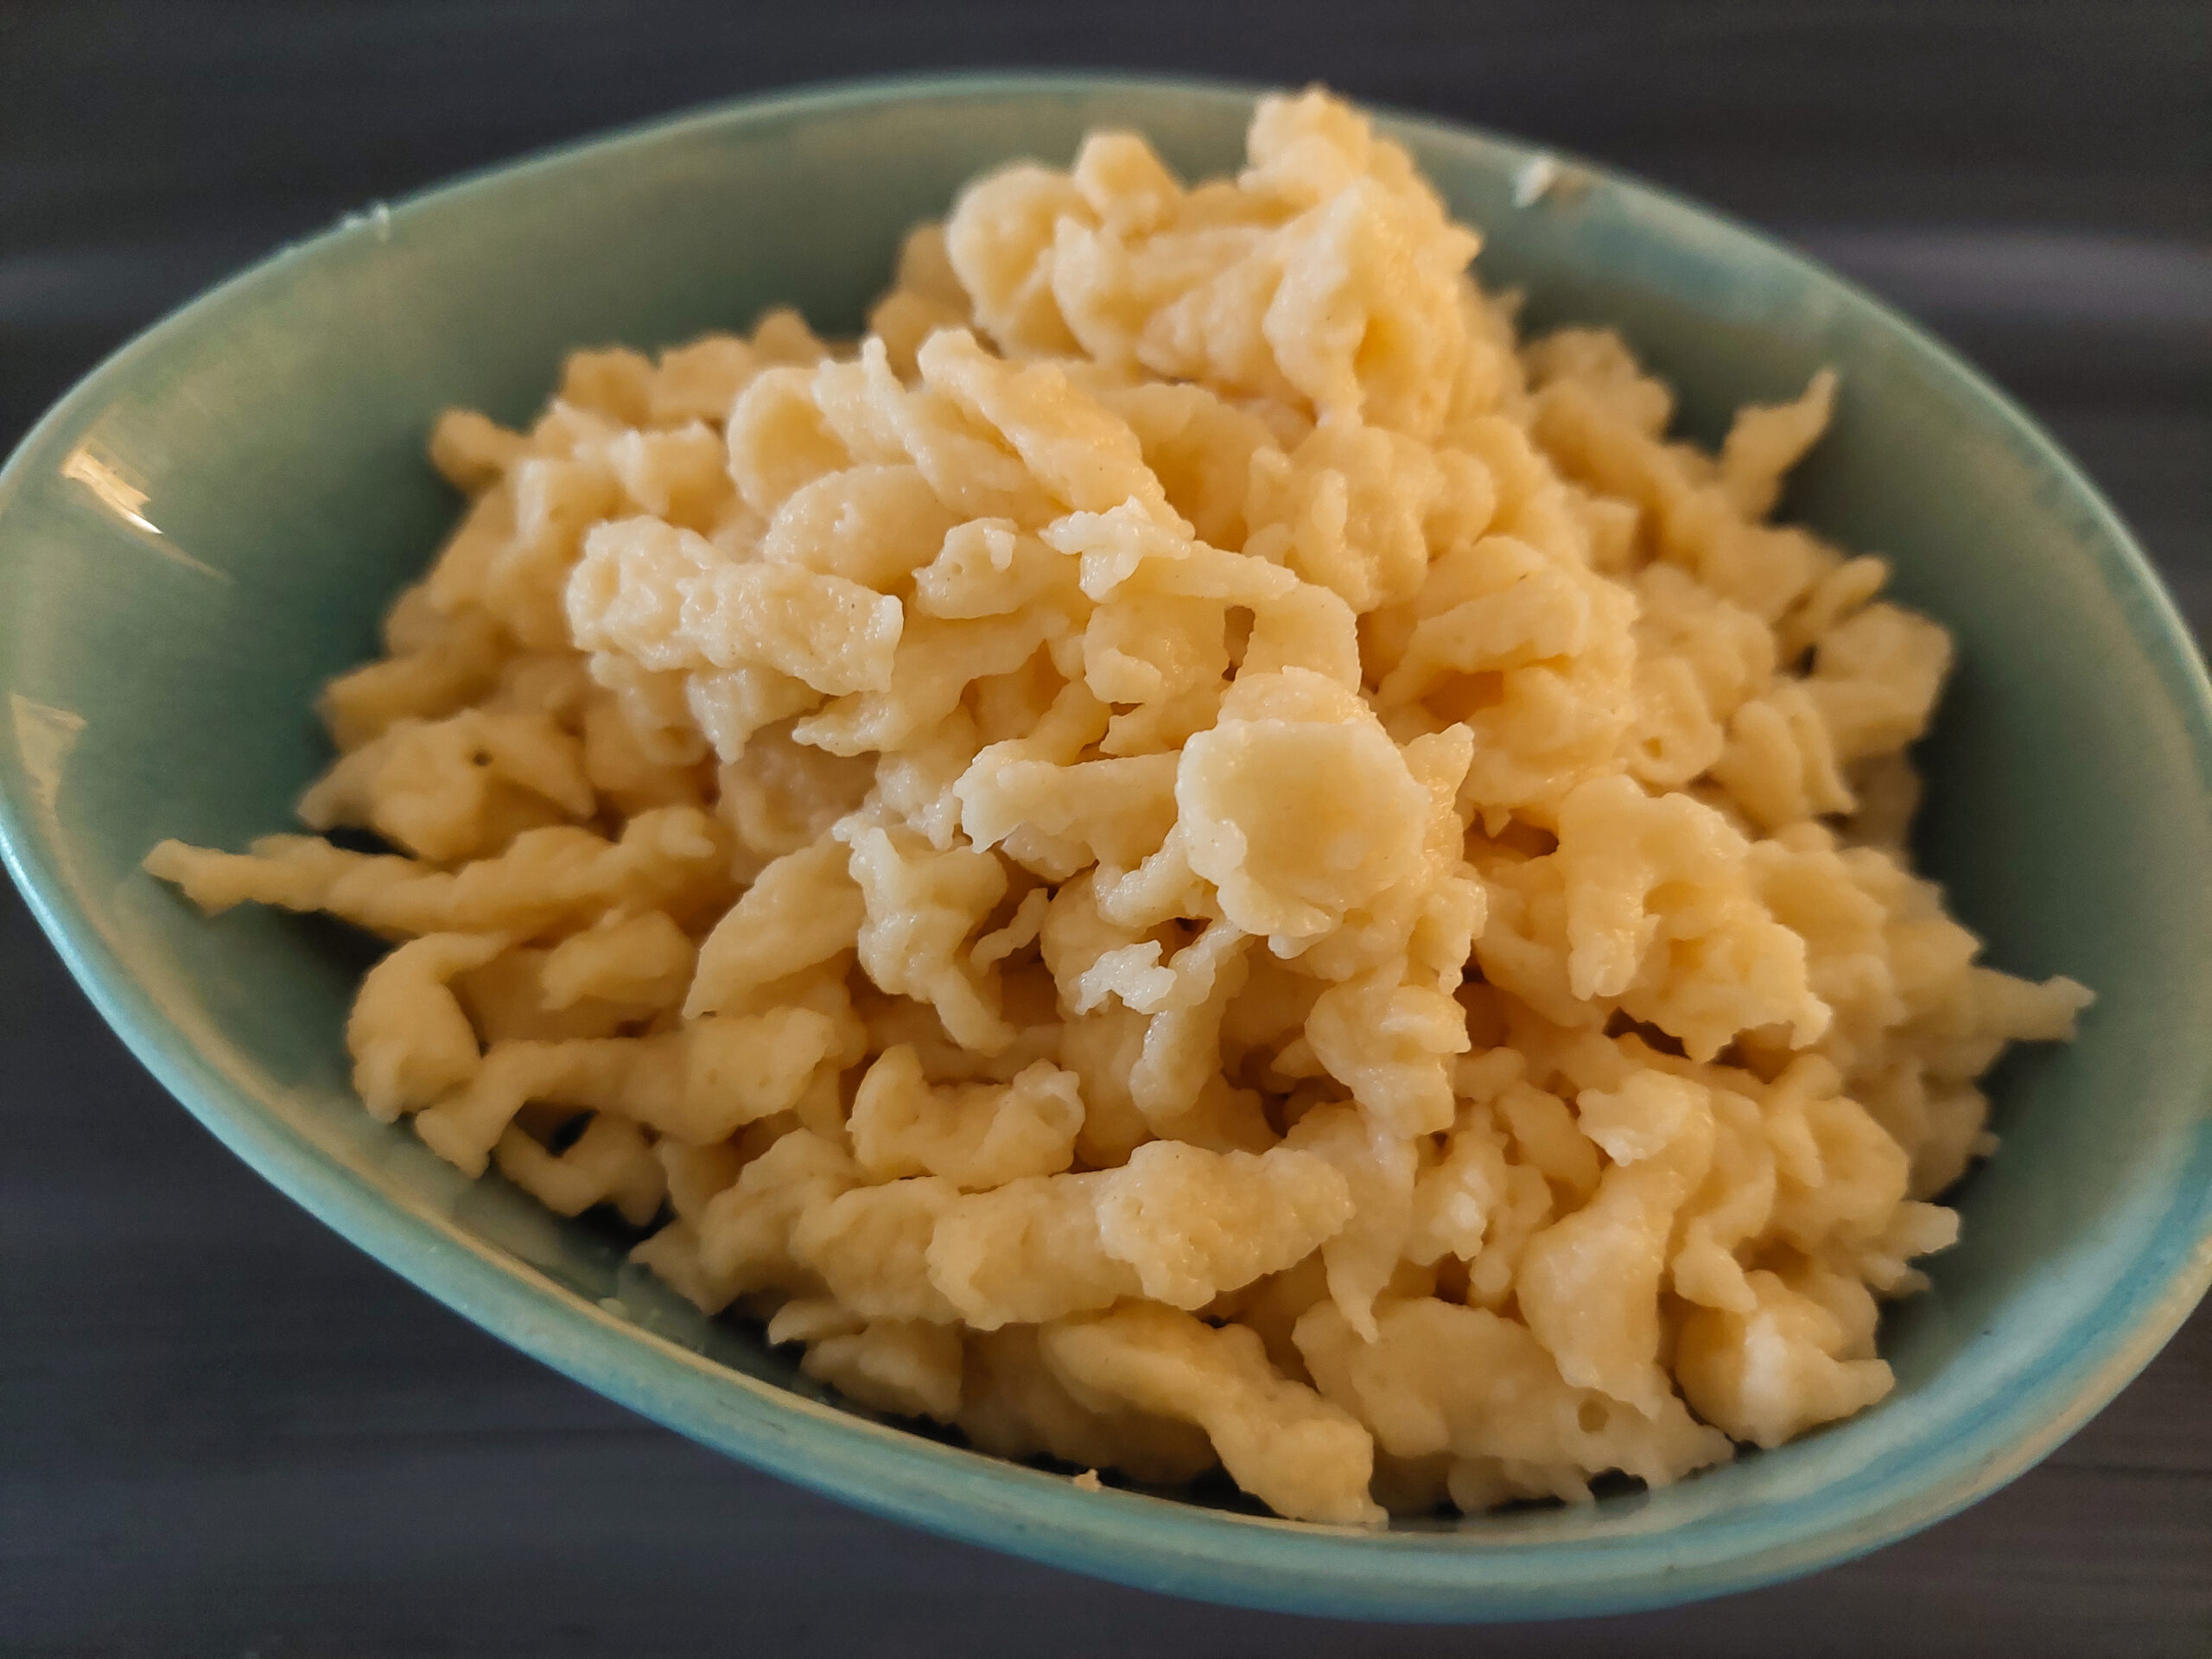
Spaetzle that are pressed through a ricer are long and thin, whereas Spaetzle formed with a “Spaetzlehobel” are short and round (sometimes, those are called “Knoepfle”, which means “buttons”).
I prefer making our Spaetzle with a Spaetzlehobel. Put the device safely onto the pot, fill in a portion of the dough and move the sledge forward and backwards so that the dough will be scraped through the holes into the water.
How to make Spaetzle
Make sure the water is boiling before you press the dough in portions into it, the Spaetzle won’t be cooked through and become a slimy mass.
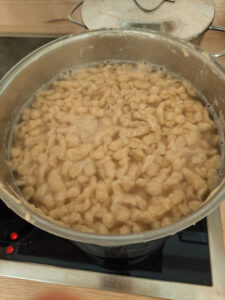
When the Spaetzle are ready, they’ll swim on the surface. It’s okay to make all the Spätzle before straining. The first batch can stand that.
When all the dough is used up and all the Spaetzle are ready take them off with a skimmer or strain them through a colander and shortly rinse with hot or cold water.
Drying
Although Spaetzle are usually used immediately, you can also prepare them several hours up to one day in advance. Either way, it is necessary to dry off excess water or the Spätzle will become doughy and stick together.
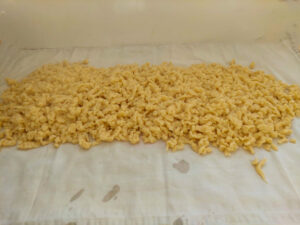
To dry the Spaetzle, put them onto a kitchen towel after straining them and distribute them evenly.
Let them dry for at least 5 minutes.
If you use them later, scrape them off the towel once they’re cool and dry and put them into a plastic container.
How long does raw Spaetzle dough last?
You can, of course, prepare Spaetzle dough and keep it in the fridge for several hours before using it. As it contains raw eggs, however, the raw dough shouldn’t be kept any longer.
It’s better to store the cooked Spaetzle. Dry and cool them as described above, and put them into plastic containers where they will last 2 – 3 days in the fridge.
Angela Braun
Spaetzle - A Traditional Recipe from Southern Germany
Making traditional Spaetzle, a traditional dish from Southern Germany, is easier than you might think and once you've tasted them you'll want to make them time and time again!
Put the flour, eggs and salt into a bowl. Slowly add the water and mix the ingredients with a wooden spoon or a hand mixer. The dough should be thick and fall slowly from the spoon. You may even observe small bubbles under the surface.
Once the dough is ready, let it rest for about 15 minutes. This time is necessary for the dough to hold together and become more stable.
Heat water in a pot. When it comes to a boil either press the Spaetzle in portions through a Spaetzle ricer or a Spätzlehobel. Make sure that the device is about 2 – 3 cm (1 inch) above the water surface which should only be simmering now. Make all the Spätzle until you’ve used up the whole dough.
Cook the Spaetzle in the open pot until they well up several times and swim on the surface. Depending on the size and amount of Spaetzle this takes 2 – 3 minutes.
When the Spaetzle are cooked, take them out of the pot with a skimmer or strain them through a colander and shortly rinse with hot or cold water.
Place a kitchen towel on your kitchen surface and dump the Spaetzle on it. Distribute them evenly on the towel to let them dry and cool off.
Melt butter in a large pot until it sizzles and brown the Spaetzle gently in the hot butter. Serve immediately.
Spaetzle dough variations
Once you’ve developed your taste for Spaetzle (that is: after the first bite 😉), you can try many different variations of the dough.
Mix finely ground hard cheese, like parmesan, for example or season the dough with spices like paprika or chilli powder. You can also add finely chopped herbs like bear’s garlic or parsley to alter the taste. Or take a mix of curd or sour cream and milk to serve as liquid for the dough.
There are almost no limits to the variations a Spaetzle dough provides.
Left-over Spaetzle
What to do with leftover Spaetzle? As you know, you can keep them in the fridge for a few days, and then you can re-heat them in a pan with hot butter and season with salt, pepper and nutmeg.
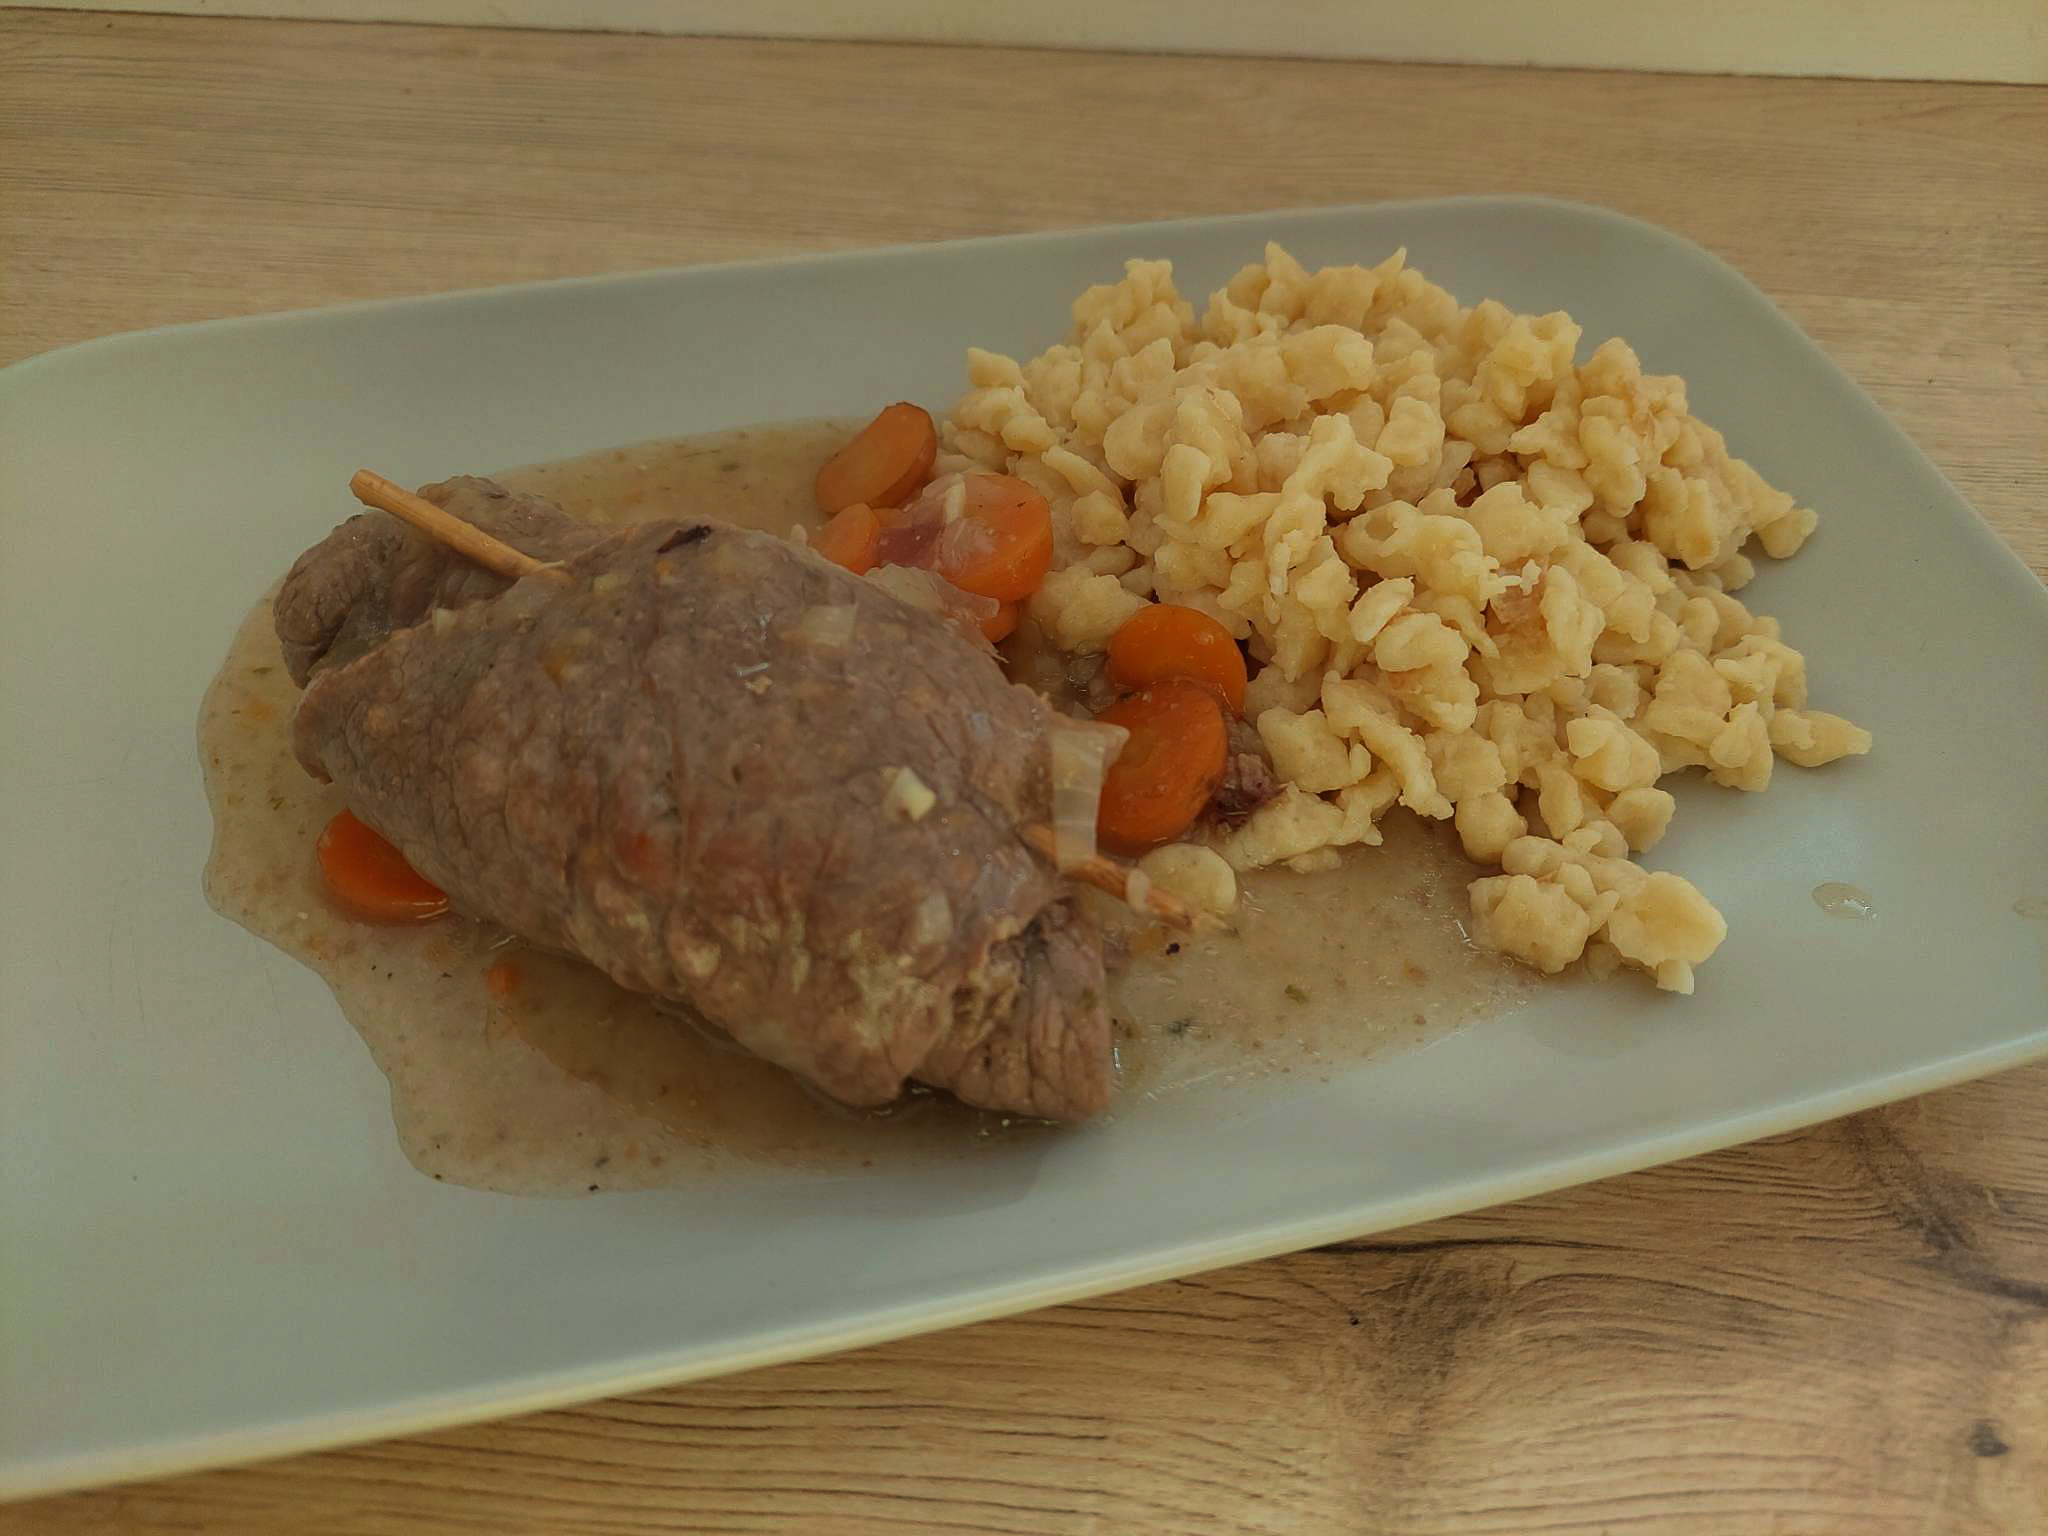
Basically, Spaetzle can be treated like pasta or rice as a side dish to beef dishes with sauce, like these beef rolls.
Or you layer them with cheese into a pan, fill in some milk and bake it in the oven for 25 – 30 minutes, which makes for a yummy main dish, called “Kässpätzle” (cheese Spaetzle). Served with fried onions and a salad, that’s a wonderful meal.
Spaetzle wrap-up
Congratulations! You’ve just mastered one of Southern Germany’s most beloved dishes. Now comes the fun part: experimenting with variations. Will you try the cheese version (Käsespätzle) first, or add herbs to the dough? Let me know how your first batch turns out—I remember mine being slightly wonky, but absolutely delicious!
Hearty German beef rolls, the so-called “Rouladen”, are a popular dish for Sunday lunch or holiday feasts here in Southern Germany. Traditional restaurants have this delicious comfort food on their menus, and although they may seem “vintage”, they are still a big hit.
When my mom made beef rolls – or Rouladen as we call them – I loved to watch her as she worked methodically, spreading mustard over thin slices of beef, tucking in bacon, onions and pickles and then rolling them into neat packages. She had been taught how to do it by her mom, who had it from her mother.
Rouladen aren’t just dinner – they’re history on a plate. Back in the days when times were lean, those beef rolls were a clever solution to transform ordinary ingredients and very thin slices of meat into something spectacular.
Many families have slight variations of the recipe, but these differences are more than just tweaks; they’re family legacies and regional identities.
So, when you slice into a perfectly cooked Roulade, you’re not only enjoying dinner, but you’re participating in a tradition that has nourished generations!
A few weeks ago, my brother slaughtered an ox, and I—like my siblings—got a mix of meat cuts, including beef rolls. Last Sunday, then, when the inevitable question of “What’s for lunch?” came up, I could tell my sons that I’d make Rouladen with Spaetzle. You should have seen how their eyes lit up, and they looked at me like starving men who are offered a feast. My eldest even delayed a trip for several hours so that he could have lunch at home! As if we only had water and bread all year round…
As it was such a hit, today, I’m going to share my variation of Rouladen with you. This simple recipe for classic German beef rolls doesn’t require many ingredients and is easy to make.
Classic Rouladen are really easy to make
Making beef rolls is super simple – a lot simpler than you may think. The most important ingredient is time for chopping vegetables and cooking the meat. But believe me: it’s so worth it! It’s also a great dish to serve guests or to impress the in-laws because, besides it being delicious, you’ll have plenty of time to make everything, including yourself, pretty while the beef is cooking.😉
Beef rolls go well with bread dumplings or homemade spaetzle (a kind of Bavarian pasta) as well as mashed potatoes and vegetables.
What you need to know about my beef roll recipe
In some recipes, you get an exact amount of ingredients, but I find that very difficult to work with. After all, the size of the rolls differs from butcher to butcher and depends on which part of the meat they have been cut off. Please bear that in mind when you make this recipe and take more or fewer onions, pickles and mustard. You’ll see for yourself when the filling is too thick to roll.
There are lots of recipe variations, and every family has their own, I think. This is my favourite recipe for classic Bavarian beef rolls.
root vegetables like carrots, celery, parsnips, roughly chopped
1 tbsp tomato puree
¼ l red wine
¼ – ½ l vegetable broth
½ – 1 tbsp flour
Instructions
Carefully flatten the beef slices with a meat tenderiser or by pressing them with a pan.
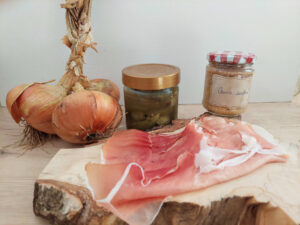
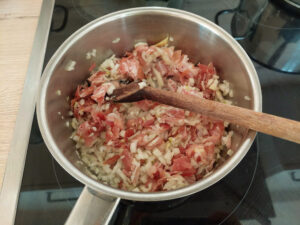
Prepare the filling: finely chop the onions, the bacon or smoked ham and the parsley. Sauté the mixture in a bit of butter or tallow.
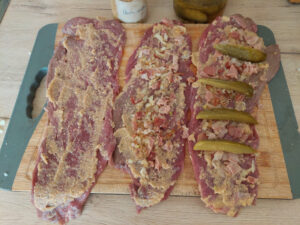
Spread each beef slice thinly with mustard, then with the filling.
Beef rolls in preparation: left with mustard, middle with onions and bacon and right with pickles, ready to be rolled.
Quarter the pickled gherkins lengthwise, or slice small ones in half and put them onto the beef slices.
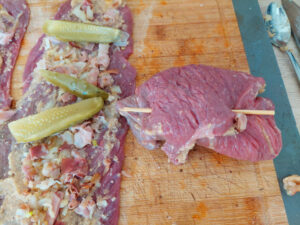
Roll the filled slices carefully so the filling doesn’t spill out. Close the rolls by binding them with kitchen yarn or by fixing them with a skewer.
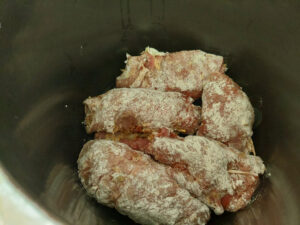
Salt and pepper the beef rolls and roll them in flour.
Chop the onion; heat tallow in a large pan or pot and sear the beef rolls until they are browned.
Add the onions, vegetables and tomato puree to the pot and brown them as well.
Deglaze it all with the wine and let it simmer for a few minutes. Then, add the broth and let the whole thing simmer for 1.5 hours (40 minutes if you have loin beef) or 25 – 30 minutes if you stew it in a pressure cooker.
After stewing, remove the rolls from the sauce and blend it with a hand-blender. If the sauce is too thin, mix a tbsp of flour with some water into a thin liquid and add it to the sauce. Bring it to the boil and thus thicken the sauce.
Classic Bavarian Beef Rolls go well together with Bavarian Spätzle (a kind of noodles), pasta, bread dumplings or mashed potatoes as well as steamed vegetables or salad.
German Beef rolls
Hearty German beef rolls, the so-called "Rouladen", are a popular dish for Sunday lunch or holiday feasts here in Southern Germany.
mustard to tastehomemade quince mustard for example
For the filling:
100gbacon or smoked ham
2onions
parsley
2– 4 pickled gherkins
For braising:
40– 50 g fat
1onion
root vegetables like carrotscelery, parsnips, roughly chopped
1tbsptomato puree
¼lred wine
¼ - ½lvegetable broth
½ - 1tbspflour
Equipment
1 Pressure cooker optional
Method
Carefully flatten the beef slices with a meat tenderiser or by pressing them with a pan.
Prepare the filling: finely chop the onions, the bacon or smoked ham and the parsley. Sauté the mixture in a bit of butter or tallow.
Spread each beef slice thinly with mustard, then with the filling.
Quarter the pickled gherkins lengthwise or slice small ones in halves and put them onto the beef slices
Roll the filled slices carefully so the filling doesn’t spill out. Close the rolls by binding them with kitchen yarn or by fixing them with a skewer.
Salt and pepper the beef rolls and roll them in flour.
Chop the onion; heat tallow in a large pan or pot and sear the beef rolls until they are browned.
Add the onions, vegetables and tomato puree to the pot and brown them as well.
Deglaze it all with the wine and let it simmer for a few minutes. Then, add the broth and let the whole thing simmer for 1.5 hours (40 minutes if you have loin beef) or 25 – 30 minutes if you stew it in a pressure cooker.
After stewing, remove the rolls from the sauce and blend it with a hand-blender. If the sauce is too thin, mix a tbsp of flour with some water into a thin liquid and add it to the sauce. Bring it to the boil and thus thicken the sauce.
Notes
Classic Bavarian Beef Rolls go well together with Bavarian Spaetzle (a kind of noodles), pasta, bread dumplings or mashed potatoes as well as steamed vegetables or salad.
There you have it—the Rouladen recipe that’s been warming German hearts (and bellies) for generations. Do you have your own family variation? Maybe your grandmother used a different mustard, or your mom had a secret ingredient? I’d be fascinated to hear how different families make this classic their own.
Looking for a dessert after this feast? Try this one:
When my siblings and I were children, we used to play outside a lot (those were the days), even in winter. Or rather: especially in winter. We had a (small but great) hill in our back garden that used to be frequented by all the children in the neighbourhood as a sledge hill. When, after a long day of bobsleighing, building snowmen and doing snowball fights, we came back into the house, cold and wet with snow, my mum sometimes had made an authentic Bavarian apple strudel (what else?) to warm us up and get us back our strength. It was heaven! Even today, when I eat apple strudel, I remember those days and sometimes I still can smell the snow.
However, apple strudel is not only for winter but it’s a year-round sweet dish or dessert that’s best served with vanilla sauce. Our Bavarian strudel has a slightly thicker dough and is crispier than its Austrian brother which requires pulling the strudel dough very thinly. If you are new to making strudel dough or a bit intimidated by the pulling process, read this article where I’ve described step-by-step how to do it.
But no matter which strudel you prefer, just make sure you bake plenty of it. There won’t be any leftovers. 😉
You are currently viewing a placeholder content from Default. To access the actual content, click the button below. Please note that doing so will share data with third-party providers.
Sieve the flour into a bowl, add the other ingredients and knead it all into a smooth dough. Brush the dough with oil, put it back in the bowl, cover that with cling film and let it rest for at least 30 minutes (the longer, the more elastic the dough gets).
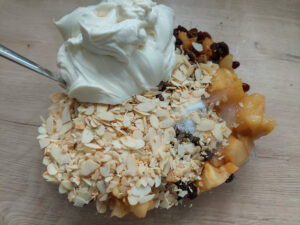
If you use fresh apples, peel and core them and cut them into thin slices. Put them in a bowl and mix them with lemon juice to prevent them from browning. If you use dry-canned apples, just put them into the bowl.
Roast the nuts in a pan without fat until they are lightly brown. Immediately get them out of the pan and either grind them finely in a kitchen mixer or put them as they are (as chops or flakes) to the apples.
Add the raisins (if you like), sugar and cinnamon and mix it all well.
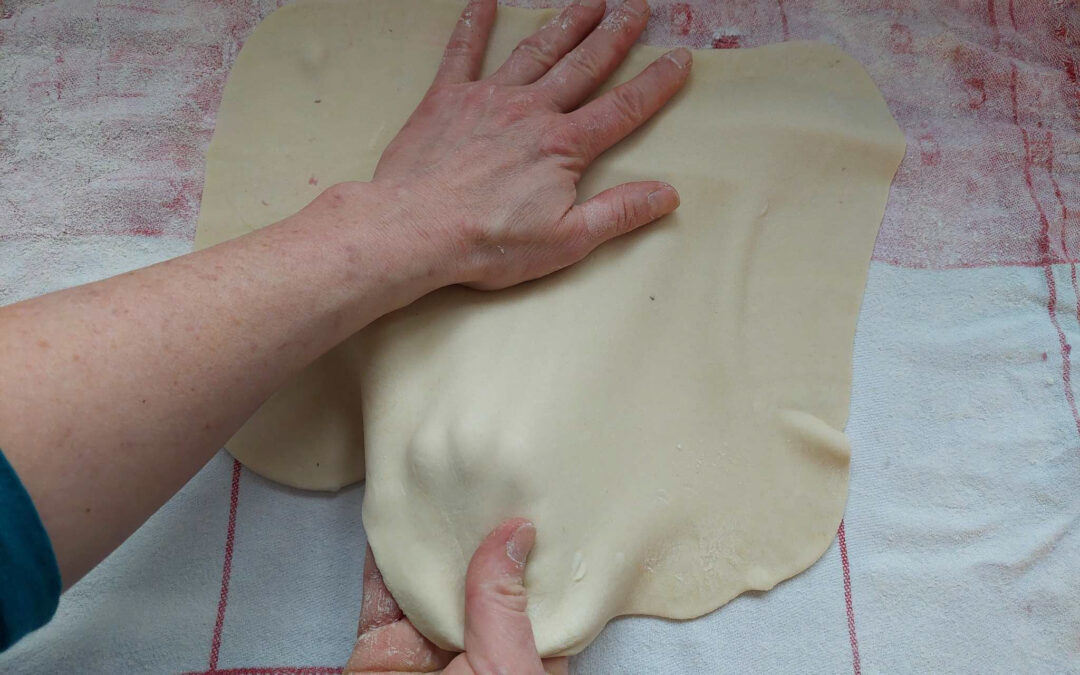
Dust a kitchen towel with some flour and roll out the strudel dough on it with a rolling pin. Now pull the dough with your hands to the desired size.
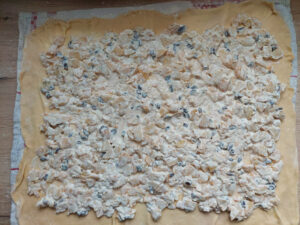
Spread the filling evenly across the whole dough but leave out about 2 cm (1 inch) from the edges.
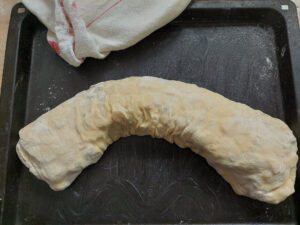
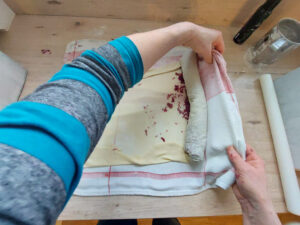
Fold the shorter edges in and roll the strudel with the help of the kitchen towel. Put the strudel either on a baking tray or in a roasting pan that is either covered with a baking tray or greased with butter, lard or tallow.
Brush the strudel with butter and egg yolk and bake it in the preheated oven for 45 minutes at 180 °C (350 °F) (no fan-oven).
Vanilla sauce
Ingredients:
1/2 l milk
1/2 vanilla pod
80 g sugar
2 tbsp cornstarch
2 eggs
Instructions:
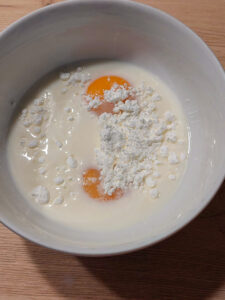
Separate the eggs and mix the egg yolks with sugar, corn starch and a bit of the milk to a homogenous mass.
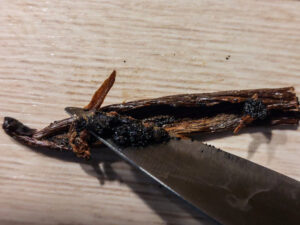
Cut the vanilla pod lengthwise in half, scrape off the seeds and put the seeds and the pod in a pot. Add the milk and put it to the boil.
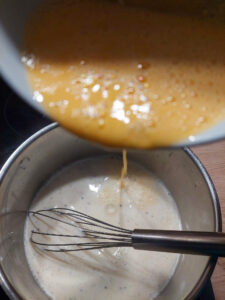
When the milk wells up, add the egg yolk mixture.
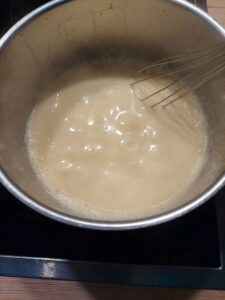
Stir it all well until the sauce thickens. Put the pot off of the plate.
While the sauce cools down, beat the egg whites and fold them into the (still hot) sauce.
Let it cool and stir once more before serving.
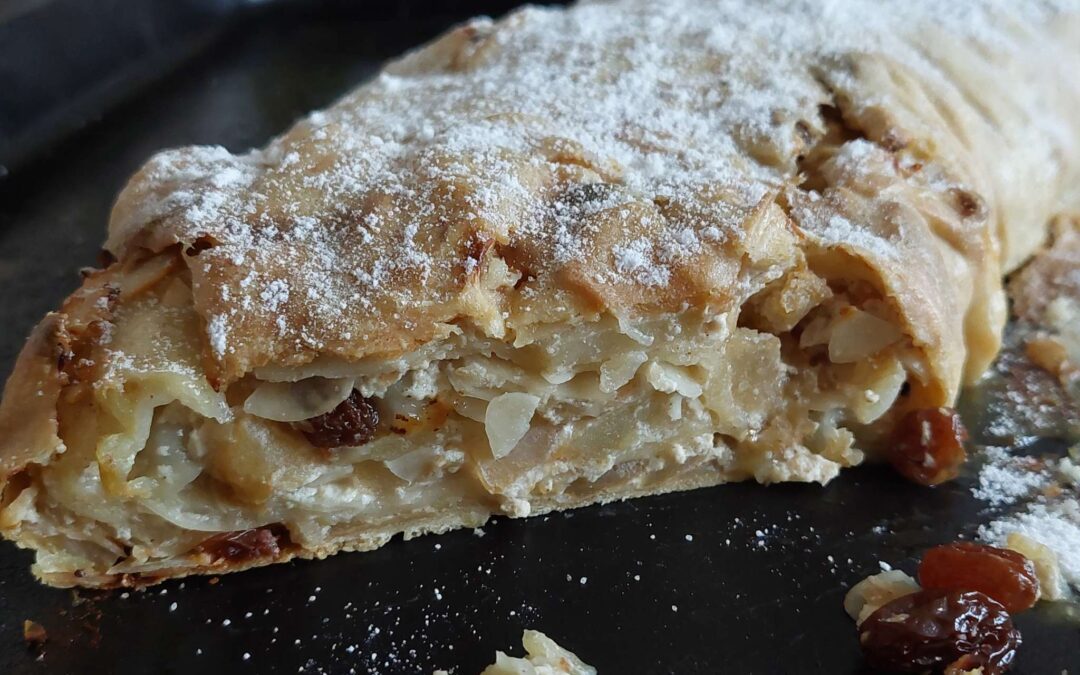
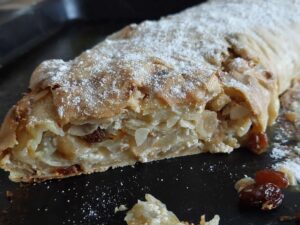
Cut this Authentic Bavarian apple strudel into slices and serve them with a huge dollop of vanilla sauce.
Variations
Finely grind the nuts or almonds and add them with 200 g cream cheese to the filling.
Bake the strudel in a deep roasting pan. Bring 120 ml milk, 25 g butter and 20 g sugar to the boil and add the mixture after 20 – 25 minutes of the baking time to the strudel. Let it bake until the strudel has soaked up all the milk (total baking time about 40 – 45 minutes).
If you don’t want to make vanilla sauce, you can serve the strudel with vanilla ice cream as well.
Authentic Bavarian Apple Strudel
Authentic Bavarian apple strudel is not only a main dish for autumn and winter but a year-round dessert that's best served with vanilla sauce.
Sieve the flour into a bowl, add the other ingredients and knead it all into a smooth dough. Brush the dough with oil, put it back in the bowl, cover that with cling film and let it rest for at least 30 minutes (the longer, the more elastic the dough gets).
If you use fresh apples, peel and core them and cut them into thin slices. Put them in a bowl and mix them with lemon juice to prevent them from browning. If you use dry-canned apples, just put them into the bowl.
Roast the nuts in a pan without fat until they are lightly brown. Immediately get them out of the pan and either grind them finely in a kitchen mixer or put them as they are (as chops or flakes) to the apples.
Add the raisins (if you like), sugar and cinnamon and mix it all well.
Dust a kitchen towel with some flour and roll out the strudel dough on it with a rolling pin. Now pull the dough with your hands to the desired size.
Spread the filling evenly across the whole dough but leave out about 2 cm (1 inch) from the edges.
Fold the shorter edges in and roll the strudel with the help of the kitchen towel. Put the strudel either on a baking tray or in a roasting pan that is either covered with a baking tray or greased with butter, lard or tallow.
Brush the strudel with butter and egg yolk and bake it in the preheated oven for 45 minutes at 180 °C (350 °F) (no fan-oven).
Vanilla sauce
While the strudel is baking, prepare the vanilla sauce:
Separate the eggs and mix the egg yolks with sugar, corn starch and a bit of the milk to a homogenous mass.
Cut the vanilla pod lengthwise in half, scrape off the seeds and put the seeds and the pod in a pot. Add the milk and put it to the boil.
When the milk wells up, add the egg yolk mixture.
Stir it all well until the sauce thickens. Put the pot off of the plate.
While the sauce cools down,beat the egg whites and fold them into the (still hot) sauce.
Let it cool and stir once more before serving.
When the apple strudel is baked, dust it with icing sugar, cut it into slices and serve it with a huge dollop of vanilla sauce.
Notes
Variations:
Finely grind the nuts or almonds and add them with 200 g cream cheese to the filling.
Bake the strudel in a deep roasting pan. Bring 120 ml milk, 25 g butter and 20 g sugar to the boil and add the mixture after 20 - 25 minutes of the baking time to the strudel. Let it bake until the strudel has soaked up all the milk (total baking time about 40 - 45 minutes).
If you don't want to make vanilla sauce, you can serve the strudel with vanilla ice cream as well.
Apple strudel is one of my favourite sweet dishes and although I’ve made lots of them myself and have eaten even more in restaurants and cafés, my mum’s apple strudel is still the best I’ve ever tasted. She always made two baking trays of strudel for our large family, plus two generous cans of vanilla sauce. What shall I say? There never were any leftovers! It tasted too good to leave a single crumb on the plate (especially for my brothers who always ate like there was no tomorrow).
When I tried to make my first strudel, it was, well, not a disaster but not a pretty sight either. The dough was too thick in some parts and so thin in others that it tore and had holes in it. It tasted good, however, and that kept me going. Since then I’ve gathered a lot of experience in making strudel dough and pulling it without tearing – although the occasional hole may form.
If you’ve ever wanted to make an apple strudel by yourself but have shrunk back from pulling the strudel dough, here’s your chance to learn how to do it. Some basic ingredients and a few knacks to observe are all you need for a delicious strudel dough for all kinds of fillings!
Strudel basics
What makes a strudel into a really good strudel?
A good strudel has a beautiful colour. It is usually golden yellow, but it can also be almost black, for example, when the dough is coloured with cocoa or sepia.
The outer layers should be crispy and the strudel should look good when cut into pieces.
Nevertheless, the most important thing about a strudel is the filling which may be sweet or savoury.
What kinds of strudel doughs are there and what do you use them for?
The classic strudel dough is a pulled dough which refers to the fact that you have to pull out the dough very thinly before you spread the filling on it. Pulled strudel dough is typically used for apple or vegetable strudel.
Other strudel doughs include for example puff pastry, shortcrust, yeast dough, curd cheese dough and even pancake dough.
In this post, we’re gonna learn to make a classic Bavarian and an Austrian pulled strudel dough.
Basic knowledge about pulled strudel dough
Most beginners are not afraid of the simple kneading of the dough but the “pulling” part. When pulled properly, the dough should be very thin (some say you should be able to read a newspaper through it) and it shouldn’t tear.
How do we manage that?
By mixing flour with water. The flour proteins (gluten) build a network with the water and form a rubber-like, elastic mass. This network enables us to pull the dough very thinly without tearing it. The longer the dough can rest, the better its capacity to be pulled. The dough should rest for at least half an hour, but it’s better to let it rest for 1 – 2 hours or even overnight in the fridge.
If you want to use the dough now, it still needs to rest for about 30 minutes but my mum always used to cover it with a hot metal bowl: she poured hot water into a metal bowl that was slightly smaller than the dough bowl opening, drained off the water and dried the bowl. Then she put the bowl upside down over the dough.
Ingredients like oil, vinegar and egg also enhance the dough’s elasticity.
It’s also important to knead the dough thoroughly as kneading intensifies the protein-water-reaction. When you work the dough for some time you’ll realize that it starts to feel elastic, smooth, even and not in the least sticky.
What flour should you use?
As you heard before, the proteins (= gluten) in the flour are important. The higher the protein content, the more elastic the dough.
Worldwide there are different flour types. What we in Germany know as “Type 550” (wheat flour) is the “all-purpose” flour in English-speaking countries. Flours of a higher type like bread flour or high-gluten flour are also suitable. The same goes for spelt flour.
No matter what flour you use, however, it’s important to observe the water-flour ratio. After kneading the dough should be smooth, elastic and a little bit moist but not sticky.
Storage
Strudel dough can be kept in the fridge for about 2 days. It may change its colour to a light grey but that’s quite normal and will lighten when kneaded. Always let the dough reach room temperature before processing it further.
You can even freeze raw strudel dough and let it thaw overnight before processing it.
If you want to freeze a whole (or parts of a) strudel, put the (raw or baked) strudel onto a tray with baking paper and put it into the freezer until it’s completely frozen. Afterwards, put it into a container or freezer bag.
How to fill a strudel
There are two different methods to fill a strudel.
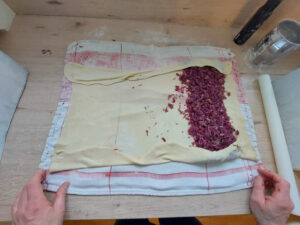
1) Put the filling on the first third of the dough
With this method, it’s important to have a thin strudel dough as you have several layers of it on the outside when it’s baked. If the dough were too thick, the outer layers would be hard and you couldn’t cut them well.
Always leave out the edges which will be folded inwards before rolling the strudel.
This method is recommended.
when you have a relatively moist and hardly compact filling
when the filling contains a good amount of eggs that will rise during baking
when you want to get more crispy strudel dough instead of only one layer
when you want to make sure that the strudel dough won’t tear
when you want to make an elegant strudel that can also be presented standing
when you want to use store-bought dough like filo, yufka or strudel dough. Brush each layer with melted butter before adding another dough leaf (not more than 4 – 6 leaves)
2) Put the filling on the whole dough
For this method, you can use thin and (even better) thicker doughs which stay more compact during baking and don’t tear as easily as thin doughs. If your filling contains eggs or beaten egg whites, the risk of tearing is higher during baking as the filling expands. Just make sure to roll the strudel not too tightly.
Sieve the flour into a bowl, add the other ingredients and knead it all into a smooth dough.
Brush the dough with oil, put it back into the bowl, cover the bowl with cling film and let the dough rest for at least 30 minutes, the longer the better. If you want to use it right away, cover it with a hotly rinsed and dried metal bowl for 30 minutes.
This dough is traditionally pulled very thinly.
Strudel dough – step-by-step instructions
1. Put the flour, egg/vinegar, salt and oil into a bowl and add the lukewarm water
2. Mix the ingredients thoroughly and knead the dough…
3…. until it’s smooth. Form the dough into a ball, brush it with oil, put it back in the bowl that you cover with cling film. Let it rest for at least 30 minutes.
4. Dust a kitchen towel with flour and roll out the dough with a rolling pin.
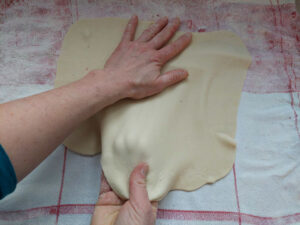
5. Start pulling the dough carefully at the edges with your fingers.
6. Pull the dough with the back of your hand while holding it with the other hand.
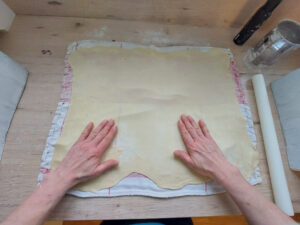
7. Pull the dough thinly into a rectangle. You should see slightly through it.
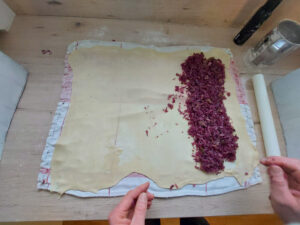
8. Either spread the filling on one-third of the dough…
9. … or across the whole dough. Leave out the edges.
10. No matter how you placed the filling, fold in the edges.
11. Gently roll the strudel with the help of the towel.
12. Prick the strudel with a pin so that moisture can evaporate during baking.
13. Bake the strudel at 180 °C (350 °F) for 35 – 45 minutes and let it cool down a bit before serving.
Bavarian Strudel Dough
This authentic Bavarian strudel dough recipe creates a delicate, paper-thin pastry that's both elastic and tender. When stretched correctly, this dough becomes nearly transparent—the hallmark of traditional strudel. Mastering this technique opens the door to countless sweet and savory fillings, from classic apple to savory meat variations.
Put the flour, egg/vinegar, salt and oil into a bowl and add the lukewarm water.
Mix the ingredients thoroughly and knead the dough until it's smooth.
Form the dough into a ball, brush it with oil and cover it with cling film. Let it rest for at least 30 minutes.
Dust a kitchen towel with flour and roll out the dough with a rolling pin.
Start pulling the dough carefully at the edges with your fingers.
Pull the dough with the back of your hand while holding it with the other hand.
Pull the dough thinly into a rectangle. You should see slightly through it.
Either spread the filling on one-third of the dough or across the whole dough. Leave the edges out.
No matter how you placed the filling, fold in the edges.
Gently roll the strudel with the help of the towel.
Prick the strudel with a pin so that moisture can evaporate during baking.
Bake the strudel at 180 °C (350 °F) for 35 - 45 minutes and let it cool down a bit before serving.
Tips and tricks for a perfect strudel
Dust the kitchen towel with flour before you roll the dough out with a rolling pin. Remove rings, bracelets, watches etc., they only cause holes. Always pull with the whole (back of the) hand and work slowly and relaxed.
Before rolling, fold in the short edges. That way no filling can spill.
Make sure that the seams of your strudel are tightly closed so that no filling gets out during baking.
If your filling contains eggs, it’ll rise during baking and will need more room. Don’t roll the strudel too tightly.
Prick the strudel with a pin before baking so that moisture can evaporate and the dough won’t tear.
If you brush the strudel with egg yolk before baking, it gets a beautiful colour and becomes crispy.
Brushing with olive oil or butter also makes the strudel crispy.
If the dough has become too hard after baking, cover the strudel with a cloth or brush it lightly with salt or sugar water and let it cool. It becomes softer.
Troubleshooting
The strudel dough is too moist.
The right ratio between flour and water is essential for a strudel dough which should be smooth and elastic, slightly moist but not sticky. If the dough is too moist, knead in some flour, a little at a time.
The strudel dough is too dry.
If the dough tears when kneaded, it usually is too dry. Wet your hands repeatedly when kneading and thus moisten up the dough.
What to do when strudel dough tears
You did everything right but your dough has torn nevertheless? The flour may be the reason. Flour is a natural product and the protein (gluten) content can vary.
However, it’s no drama if your dough has torn. That has happened (and still does) to everyone who has ever done a strudel. There are, however, a few things you can do:
1) Most tears and holes aren’t large. Just press the dough together with your fingers and close the hole.
2) Depending on where the holes have formed, you may not see them when the strudel has been rolled up. “Mending” won’t be necessary then.
3) If there are really many holes (think Swiss cheese) you could put the dough together, knead it through and try to pull it out again. Or you cut off parts of the edges and stick them onto the holes. You could even cut off dough strips and decorate the wrapped-up strudel creatively. Remember, the most important part of the strudel is the filling!
Making strudel dough is very easy and pulling it thinly without tearing is also not rocket science. If you’re a newbie to strudel making, I suggest starting with the Bavarian strudel dough as it needn’t be pulled out too thin and is more forgiving. Make sure that you observe each step and you’ll be on your way to becoming a strudel master before you can say “apple strudel”!
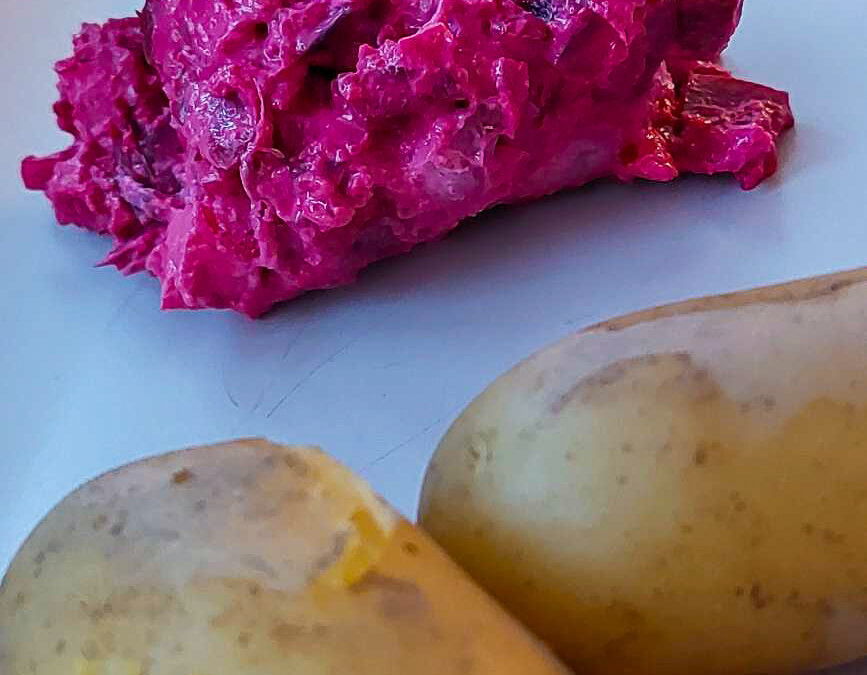
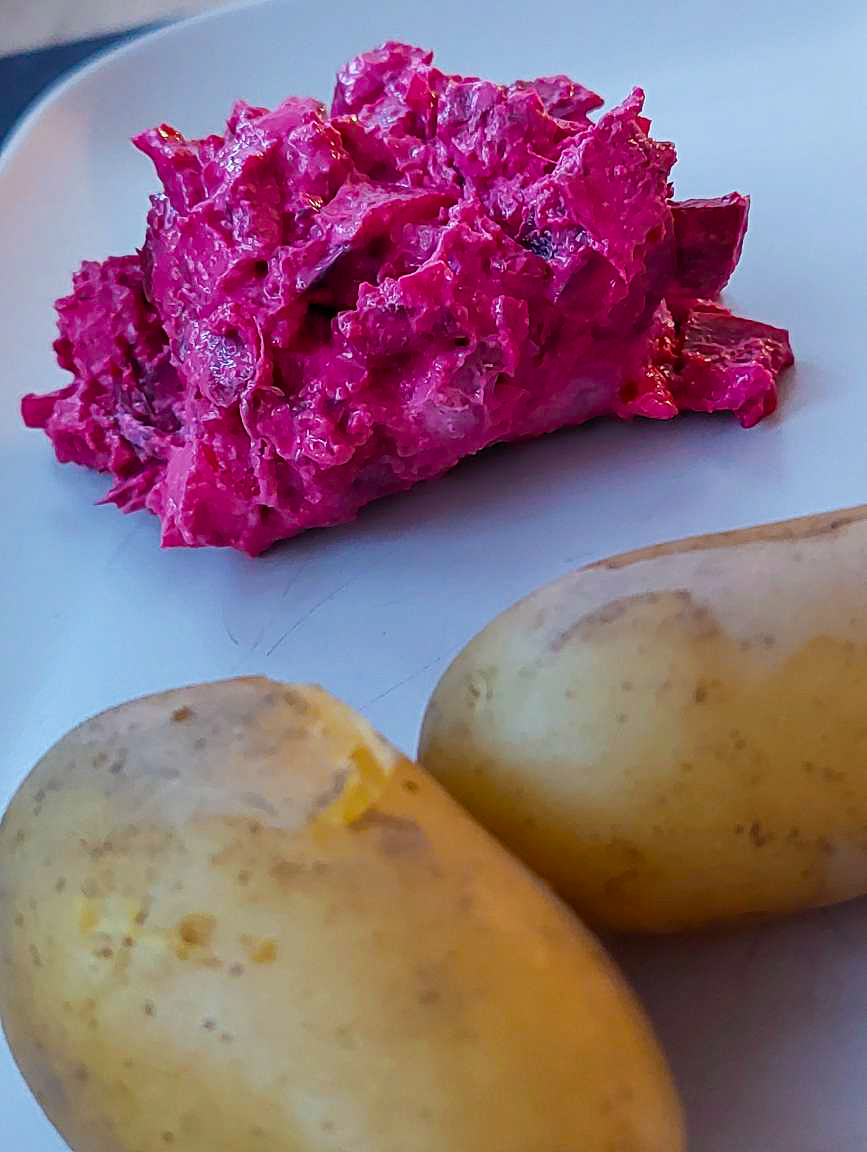
Sometimes, it has to be quick! Whether you don’t have the time or energy to cook or simply don’t want to spend more than five minutes in the kitchen, this quick and easy beetroot curd recipe will make a wonderful spread on bread or a dip for boiled potatoes. If you have pickled beetroots in your pantry, it’ll be done even faster.
Beetroot curd
Ingredients
150 – 200g pre-cooked or pickled beetroots 1 tbsp fresh lemon juice 2 tbsp sour cream 1/2 apple 3 young herring filets 1 small onion 1/2 bunch of dill 100 g curd salt, pepper
Instructions
1. If you use precooked beetroots, chop them into squares. Mix half of them with the lemon juice and sour cream and blend them with a hand blender. If you use pickled beetroots, strain them through a colander. Mix half of them with the sour cream and blend them (leave off the lemon juice as they are already a bit sour due to the vinegar we used for pickling).
2. Cut the apple into quarters and remove its core. Chop it into small cubes and mix with the remaining beetroots and the blended mass.
3. Cut off the tails of the herring filets. Dab the filets dry and also chop them into small cubes. Peel the onion and finely dice it. Wash and dry the dill and chop its leaves.
4. Mix the curd with the beetroots and the onion to a homogenous mass. Fold in the herring and dill and season it all with salt and pepper.
You can make this spread in advance and keep it in the fridge where it can be stored for up to two days.
Beetroot curd
This quick and easy beetroot curd recipe will make a wonderful spread on bread or a dip for boiled potatoes. If you have pickled beetroots in your pantry, it'll be done even faster.
If you use precooked beetroots, chop them into squares. Mix half of them with the lemon juice and sour cream and blend them with a hand blender. If you use pickled beetroots, strain them through a colander. Mix half of them with the sour cream and blend them (leave off the lemon juice as they are already a bit sour due to the vinegar we used for pickling).
Cut the apple into quarters and remove its core. Chop it into small cubes and mix with the remaining beetroots and the blended mass.
Cut off the tails of the herring filets. Dab the filets dry and also chop them into small cubes. Peel the onion and finely dice it. Wash and dry the dill and chop its leaves.
Mix the curd with the beetroots and the onion to a homogenous mass. Fold in the herring and dill and season it all with salt and pepper.
You can make this spread in advance and keep it in the fridge where it can be stored for up to two days.