
.
Originally published October 12, 2025 · Updated July 23, 2026
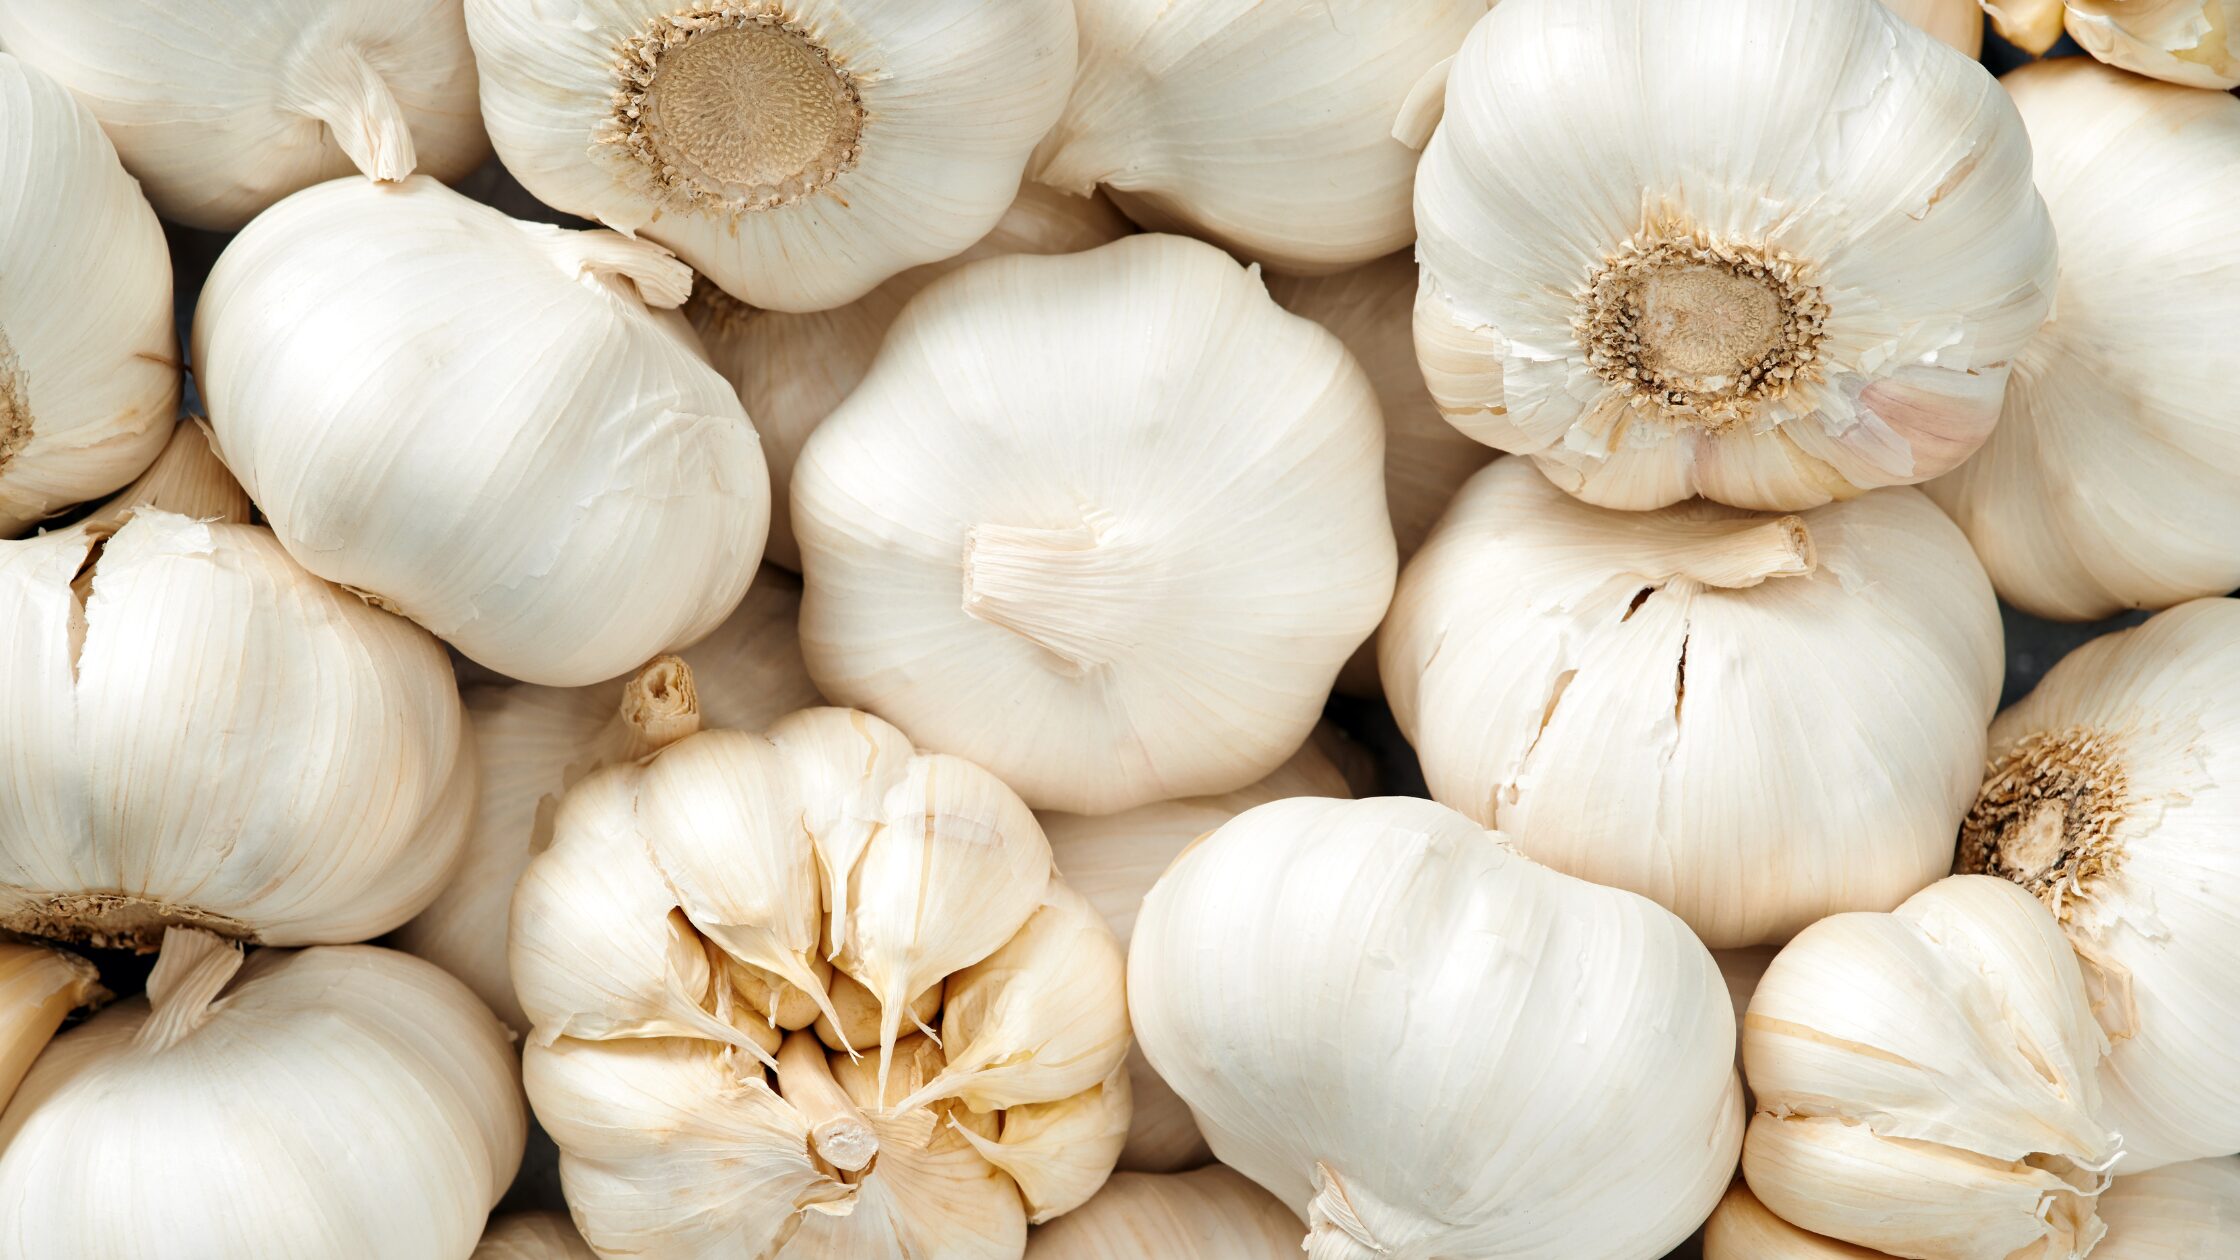
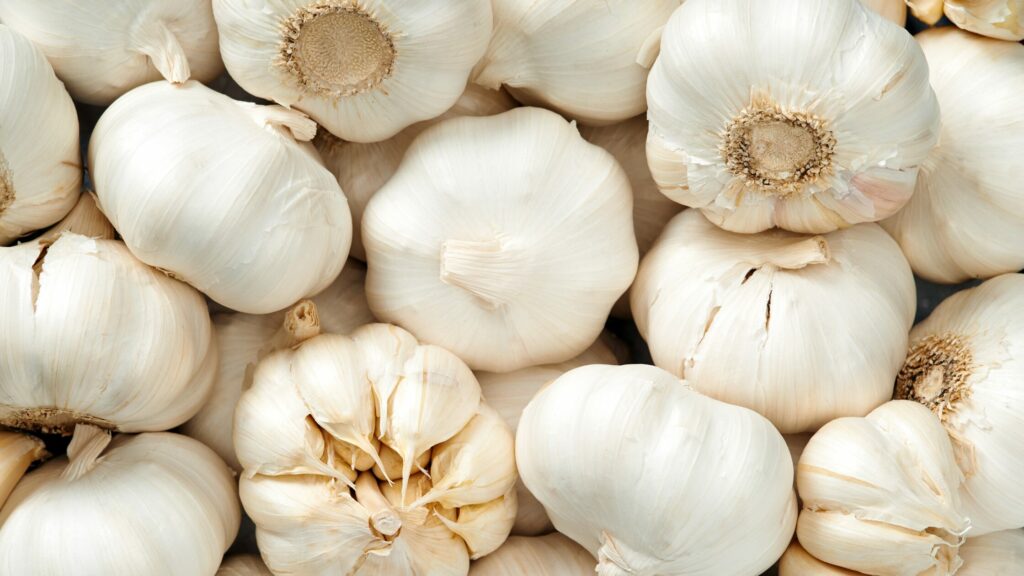
Garlic is one of the easiest vegetables you’ll ever grow. Plant one clove in autumn, give it a sunny spot, and by next summer you’ll harvest an entire bulb packed with flavour—often far better than anything you can buy in the supermarket.
In this complete beginner’s guide, you’ll learn when and how to plant garlic, how to care for it through the seasons, solve common problems, and harvest bulbs that store for months.
Following these steps gives you the best possible chance of harvesting beautiful, healthy bulbs.
Quick Overview on planting garlic
| Difficulty | Easy |
| Best planting time | October (or early spring) |
| Sun | Full sun |
| Soil | Fertile, well- drained |
| Spacing | 10 cm (4 inches) |
| Harvest | June - July |
| Suitable for Containers | Yes |
When to plant garlic
✅ Best: October
✅ Second choice: February
✅ Needs winter cold
✅ Autumn planting = larger bulbs
There are two possibilities for when to plant garlic:
Autumn
Planting garlic cloves between the end of September and the beginning of November will give them a head start. They’ll grow until it becomes too cold, overwinter and restart growing in spring. That way, the bulbs will be much larger, and that’s why I recommend planting garlic in autumn.
Spring
If you didn’t plant garlic in autumn, you can still do so in early spring. Plant the cloves as soon as the soil is workable. Depending on your growth zone, that’s between mid-February and late March.
Garlic needs some cold to develop bulbs and not shoot into bloom; therefore, you must plant it early enough to catch some of the cold weather still.
Garlic planted in spring will develop equally fine bulbs, albeit smaller ones, that you can harvest the same year.
Choosing your garlic
Hardneck vs Softneck
Garlic is divided into two groups: hardneck and softneck varieties.
Hardnecks, as the name indicates, develop a hard flower stem or scape, which is edible, as well. Their bulbs form a single ring of large, easy-to-peel cloves around a central stem and, in general, the bulbs (and cloves) are larger than those of softnecks. The outer peel colour can vary from white to violet.
Hardnecks are more cold-tolerant than softnecks, which makes them wonderful for planting in autumn, and they have a strong, sharp flavour.
My favourite hardneck varieties are ‘Ajo Rosa’, ‘Deutscher Porzellan’ and ‘Chesnok Wight’.
Softneck varieties, on the other hand, build a soft stalk, which makes them suitable for braids. The bulb usually consists of several layers of cloves in a concentric circle around the stalk. The outer peel is usually white or beige; the cloves are beige or light brown.
Softneck varieties are better suited for warmer climates or spring cultivation (although it’s possible to plant them in autumn, as well).
The garlic found in stores is usually a softneck variety, as these types are better suited for machine handling. Softneck varieties I like are ‘Thermidrome’, ‘Germidour’ and ‘Cledor’.
If you’re new to growing garlic, I recommend starting with hardneck varieties. They’re more reliable, produce bigger cloves, and you get the bonus of garlic scapes to cook with.
Even though its name suggests otherwise, elephant garlic is not a garlic variety but a leek relative. Nevertheless, it can be harvested and used just like real garlic.
Cloves vs Bulbils
There are two different ways of planting garlic:

The first option is planting cloves. You simply put single cloves into the earth, and each clove grows into a garlic bulb. It’s simple, easy and the fastest way to get a good harvest.
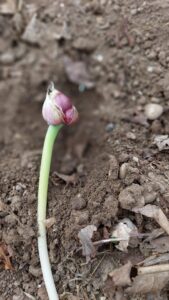
Option number two is planting bulbils.
When we let garlic blossom, it will produce tiny mini-cloves or bulbils on the scape. You can plant them as well, but in their first year, they may produce a small, undivided round. Often, it’ll produce a bulb in the second year, but depending on the variety and growing conditions, it may take longer than two seasons to produce a fully sized, divided bulb.
Cultivating garlic from bulbils is more cumbersome and takes longer to produce a harvest. On the pro side, you don’t have to sacrifice cloves from your harvest. I mostly choose the faster way of planting cloves, but this year, I’ve let some garlic develop bulbils, which I harvested and put right back into the soil of a seed tray. I’ll keep you updated.
Where to buy seed garlic
It seems easy to buy some garlic in the supermarket and plant it in your garden. However, supermarket garlic usually comes from sites in very warm climates. If your climate is colder (like mine), store-bought cloves won’t grow very well in your garden.
Furthermore, and even more important, supermarket garlic may have been treated to delay sprouting, and imported varieties may not be well adapted to your climate.
If you must buy garlic for growing in the supermarket, go for organic garlic, which is less likely to have been treated with an inhibitor.
A better possibility to get good garlic seeds for planting is to look for local seed manufacturers. Their cloves are well-adjusted to your climate. Or ask friends who already cultivate garlic if they’ll give you a few cloves for planting.
I always set the largest bulbs of my garlic harvest aside and use their cloves for planting. That way, I develop and gather garlic cloves that are perfectly adjusted to my garden conditions.
Choosing the right planting site for garlic
Sunlight
First of all, select an area that gets at least 6 – 8 hours of full sunlight per day. Light shade is ok, but the bulbs and thus the yield will be smaller. The best position for planting garlic is on a south-facing bed without any tree shade.
Soil
Garlic is a bit fussy about the soil it needs: It likes a loose, crumbly, yet not too light soil that its roots can easily penetrate. By the way, if you’re not sure about your garden’s soil type, this article will help you determine it.
The most important factor for where to grow garlic is drainage. Garlic will rot in waterlogged soil, so good drainage is essential.
Garlic doesn’t compete well with weeds, so make sure that the bed you want to cultivate garlic in is weed-free.
Also, mixing in compost won’t hurt, as it’ll help to improve the soil structure, drainage and fertility.
Only use mature compost, though. Fresh manure, for example, is not suitable for the soil you want to plant garlic in, as it causes bulb splitting.
If your garden doesn’t provide good conditions for garlic, think about creating a raised bed or planting it in pots.
Growing garlic in containers
If you don’t have a garden space, you can still grow your own garlic in containers. In fact, it’s quite easy to cultivate garlic without a garden bed, making it the perfect crop for people who only have a patio or a balcony.
There are, however, a few things you need to observe when growing garlic in containers.
Container requirements
The container you want to grow garlic in should be at least 30 cm (12 inches) deep to give the roots enough space. The width is not that important; any size will do. The wider your container is, the more cloves you can plant.
The material does not matter. Your planting container can be made from terracotta, plastic or even fabric; all pots work.
What is essential, however, is that the container has some holes in it to ensure good drainage. Garlic is much more likely to rot in poorly drained soil, so it’s important that water can drain off quickly.
Spacing
When planting garlic cloves in containers, you must observe the same spacing as in a garden bed. Put the cloves 10 – 15 cm (4 – 6 inches) apart. If you just have small one-litre pots, put one clove per pot. In a larger pot with a diameter of 40 cm, you can put 6 – 9 cloves.
Container care differences
Caring for garlic in containers is slightly different from a garden bed.
For example, containers tend to dry out faster. For that reason, you must check the soil regularly, at best daily, and water if necessary.
Use a good-quality, multi-purpose compost mixed with 20% perlite or grit for drainage. Replace or refresh the potting mix before growing garlic in the same container again to reduce disease problems.
Also, garlic in containers may need a light feeding in spring as the container soil has limited nutrients.
If you plant your garlic in autumn, which I recommend, you must put the container against a wall or insulate it if the weather gets very cold.
In general, put the containers in a place with full sun. Move them to track the sun if possible.
Leave the containers outside all winter to give your garlic that cold kick it needs for forming bulbs.
Planting and harvesting timing are the same as for garlic cultivated in patches.
Crop rotation
Crop rotation is essential for a sustainable gardening practice; it balances soil nutrients and thus improves soil health in the long run.
As with most vegetables, it’s not advisable to plant garlic in the same place year after year. Not only would it leach out the soil, but it would pave the path for pests and diseases.
Instead, wait at least 3 – 4 years before replanting garlic in the same spot and don’t plant it where any other members of the allium family (onions, leeks or shallots) have grown this season or the season before.
Unfortunately, if white rot becomes established, avoid growing garlic, onions, leeks or shallots in that spot for at least 15 years.
Companion planting
Like in human life, vegetables also don’t love each other unconditionally. Some will always be BFFs, and others don’t get on that well if planted in close vicinity.
As I already told you, garlic shouldn’t be planted near members of its own family, like onions, leeks, or shallots, as they would compete for the same nutrients.
Other plants that don’t grow well with garlic are peas and beans, potatoes, parsley and sage.
It fits conveniently, though, between many slower-growing or widely spaced crops, including
- strawberries
- raspberries
- cucumbers
- peppers
- tomatoes
- eggplants
- lettuce
- carrots
- parsnips
- cellery/celeriac
- dill
- spinach
- beetroot
You’ve learned all about the requirements for a good garlic harvest. Now, let’s dive right into planting!
How to plant garlic: step-by-step
If you follow this step-by-step guide, you’ll be rewarded with an abundance of garlic next summer!
How to plant garlic
Soil preparation
Before planting, thoroughly remove any weeds from the patch as they compete for nutrients.
If you have it, add some mature compost to the patch to enhance nutrients and organic matter in the soil.
Loosen the soil with a garden fork by digging into it and wiggling the fork a bit. That way, the garlic can set its roots deeply into the ground, and it may even be easier to harvest the bulbs in summer.
Both the compost and the loosening of the soil support good drainage and soil structure.
Planting garlic
The easiest and most common way is to break up the bulb and stick the single cloves into the soil.
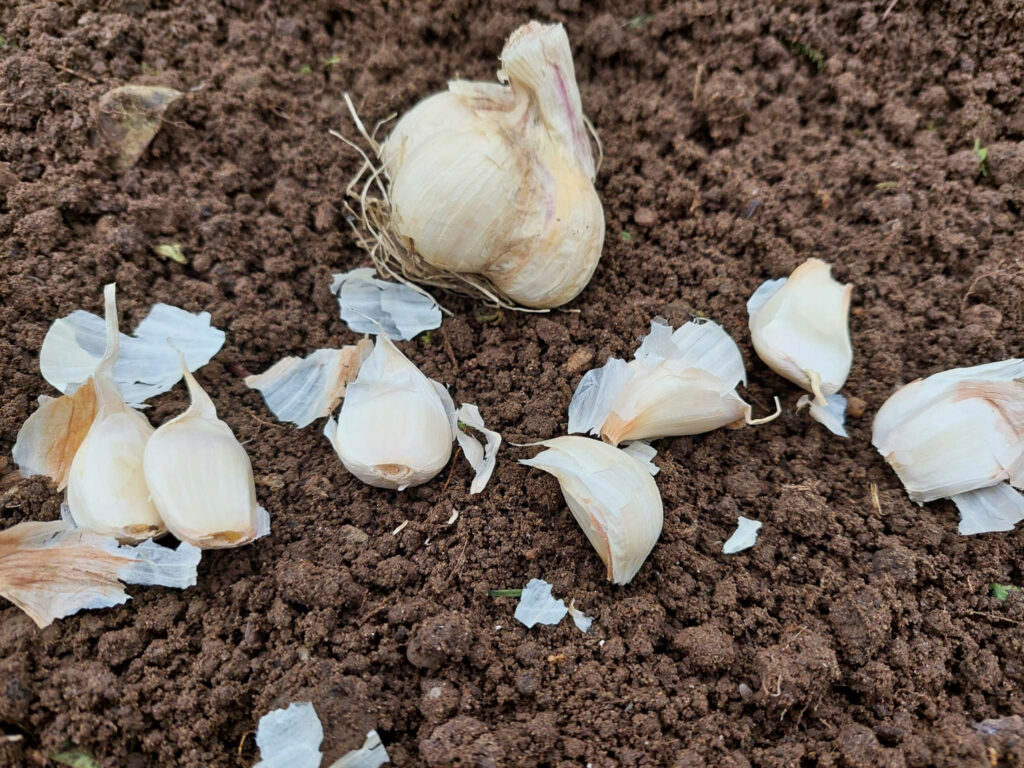
Break up the bulb so that you get out the single cloves.
Use the largest and healthiest cloves – usually the outer ones – and leave the papery skin on as it protects the clove from rot and disease. Discard any cloves that are soft or squishy, discoloured, diseased or in any other way damaged.
When you plant a clove, its pointed tip must face upwards. That’s where it’ll start sprouting, and we want it to be able to sprout upwards via the sunlight. The flat, rounded end will produce the roots and therefore point into the earth.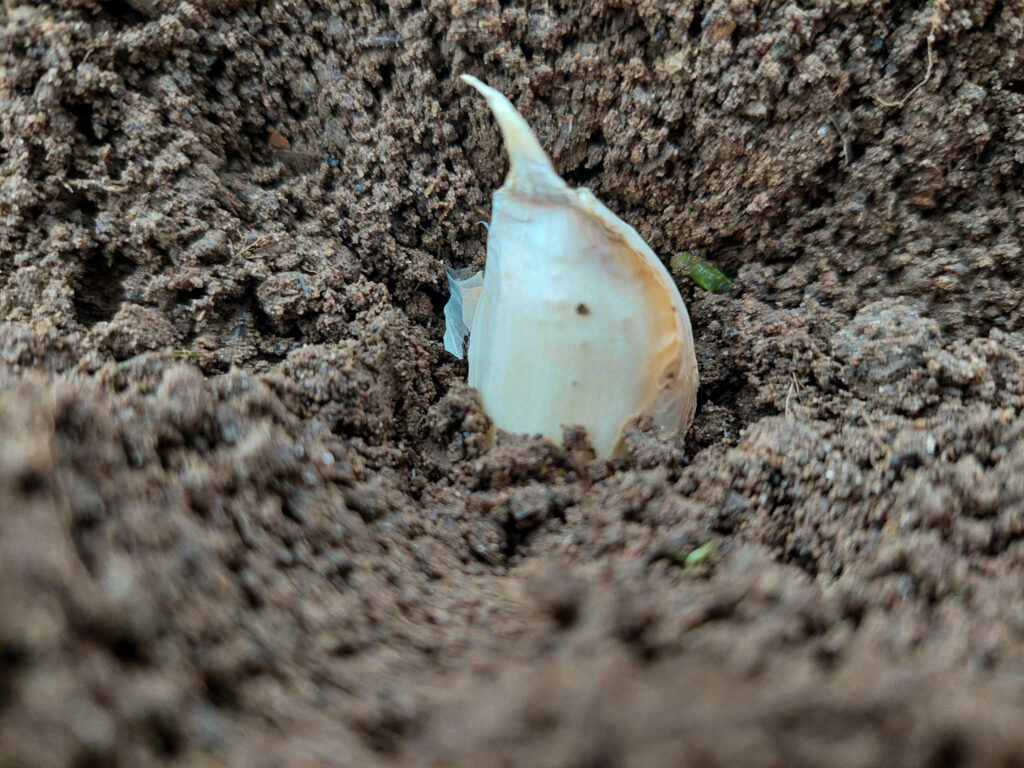
I recommend planting garlic in rows with 15 cm between cloves and 25 cm between rows. Within the rows, you make holes of about 4 – 6 cm (1,5 – 2,5 inches) deep for cloves and 1 – 2 cm (0.3 – 1 inch) deep for bulbils. A dibble can help here.
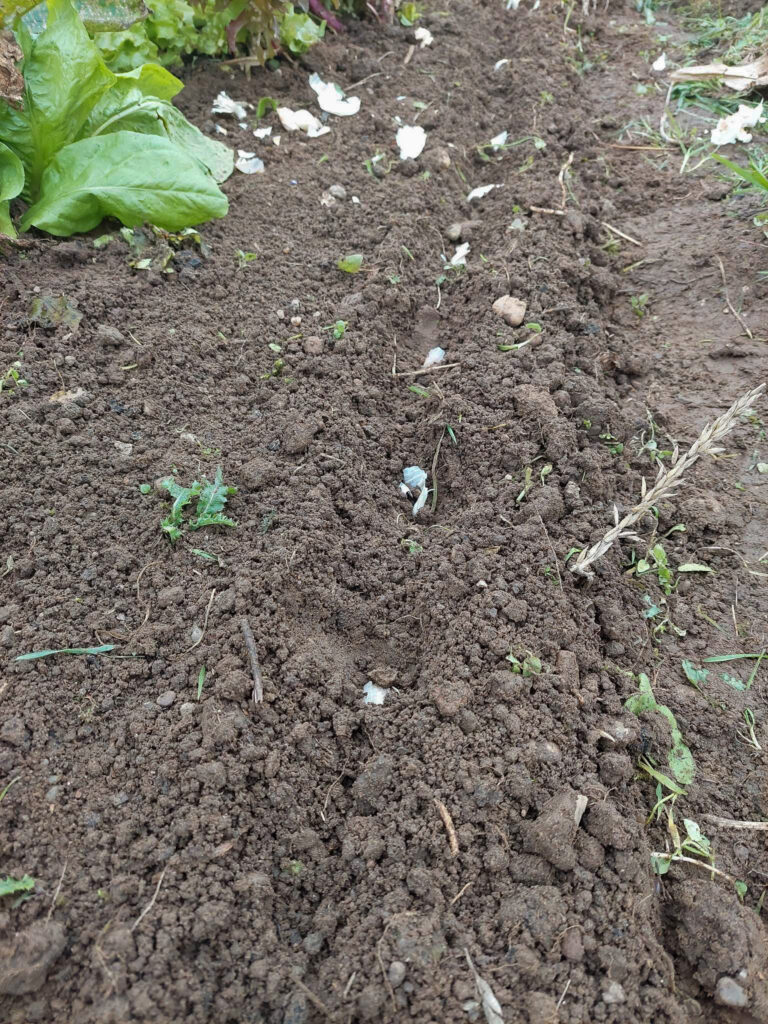
Put one garlic clove or bulbil per hole and cover it with soil; press the soil slightly around the clove so that it sits firmly in its spot.
Watering and mulching
A great advantage of planting garlic in autumn is that usually the soil is already sufficiently moist. That way, we don’t have to water the cloves. I don’t water my garlic after planting, but depending on your climate, it may be necessary to do so.
If you’ve followed me for some time, you know that I’m a huge fan of mulching. So, when I’ve planted my garlic, I put on a thin layer of mulch, either straw, dried leaves, well-rotted compost or grass clippings. When the sprouts show, and the weather tends toward freezing, I add more mulch to protect the cloves from extreme cold and keep the soil moist and weed-free.
If it’s mulched too thickly, though, garlic can develop fungal and viral diseases, so make sure that the mulch layer doesn’t exceed about 3 – 5 cm (1 – 2 inches).
How much to plant
As a rule of thumb, I calculate 8 – 10 cloves per person. For my family of three, that means about 30 cloves of garlic, which may sound like a lot but, thankfully, doesn’t take up much space.
If you’re very pressed for space, garlic can be planted well between strawberries, carrots, parsnips, lettuce or tomatoes, where it’s more of a gap filler. As a side effect, those plants profit from garlic’s antifungal characteristics as well as its repellent smell. In this article, you*ll find more information on companion planting and what veggies go well together.
If you’re a beginner to vegetable gardening, I recommend starting with 10 – 20 cloves to get a feel for it.
Stay on Track in the Garden
Wondering what else needs doing in the garden this month?
Join my seasonal newsletter and receive practical gardening advice, new growing guides and a free monthly garden checklist to help you keep track of the most important jobs—without feeling overwhelmed.
Garlic Care – Timeline
Autumn (if Autumn-planted)
2 -4 weeks after planting, green shoots will appear. When it gets too cold, the plants will stop growing and go dormant. Don’t worry, they’re fine, even though they have sprouted already.
Apart from removing weeds, you don’t have to do anything for your garlic now. If it’s very dry, water it, but that’s usually not necessary. Cover it with mulch, though, to protect it from cold temperatures and drying out.
Winter (December – February)
In winter, the plant is dormant, and although there’s no visible growth above ground, the roots develop further underground. As I described earlier, this cold period is essential for producing bulbs.
During this time of rest, you’ve got nothing to do. Don’t disturb your plants, not even to “just have a look if they’re fine” (which I admittedly did, but only once, so it doesn’t count).
After severe frost periods, you’re allowed to check that the cloves have not been heaved out of the ground. If so, just press them back in carefully.
Spring (March – May)
When the air grows warmer in spring, scrape the mulch away so that the soil can warm up.
If you haven’t planted garlic in autumn, early spring is the second-best time to do so. As soon as the soil is workable, plant the cloves as described above.
Weeding
Remove weeds as they will compete with the garlic for nutrients and water. It’s best to weed by hand as garlic has shallow roots that can easily be destroyed by hoeing.
The leaves will grow tall and lush now, even those of spring-planted garlic, and the plant builds up energy for bulb development.
If the soil is compacted, gently loosen it around the garlic plants to improve drainage.
Watering
Keep the garlic well-watered, especially as the weather gets warmer, but avoid overwatering it.
Inconsistent watering can cause bulb splitting. That’s why keeping the soil consistently moist is better than occasional soaking. Always water at ground level and not overhead to avoid diseases. The best time for watering is early morning.
To check your soil’s moisture, poke in about 2 – 5 cm (1-2 inches) with your finger: the soil should be moist but not soggy. If it’s dry at that depth, it’s time to water.
Fertilising
A healthy dose of a light nitrogen-emphasised fertiliser, for example, stinging nettle manure or blood meal, provides nutrients in spring. By mid-May, once the bulbs begin to swell, you should stop all feeding. Too much nitrogen will induce the leaves to grow when we want large bulbs instead.
Pest and disease control
Keep an eye out for pests and diseases like thrips or mould. Remove infected or infested plants immediately to keep pests and diseases at bay.
Scape removal (hardneck varieties only)
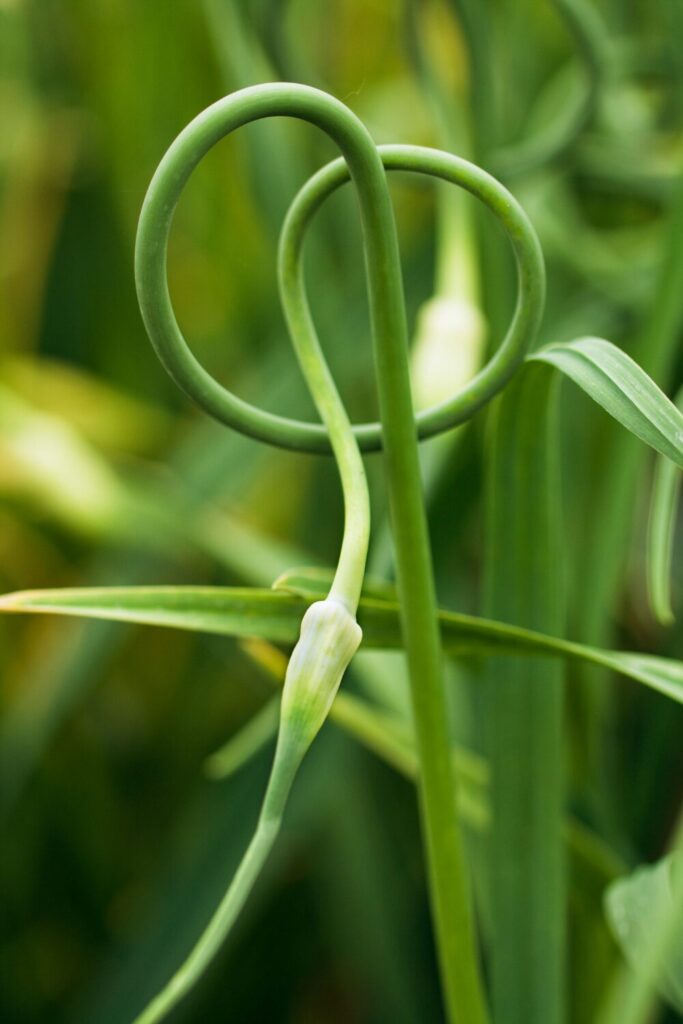
These beauties are the scapes. If you let them on the plant, they’ll burst into bloom, which is quite a pretty sight, and later on develop bulbils. If you want to get large garlic bulbs, however, you must cut off the scapes.
If you cultivate hardneck garlic, remove the scapes (i.e. flower stalks) before they bloom. Otherwise, the plants will use all their energy to form bulbils, instead of large bulbs.
The scapes are ready to harvest when they’ve made 1-2 complete curls and are still tender and flexible. You should be able to snap them off easily with your fingers. If you wait too long, they’ll straighten out, become woody and fibrous, and will be tough to eat.
The best test is to gently bend the scape – if it bends easily, it’s perfect. If it feels stiff or starts to crack rather than bend smoothly, you’ve waited a bit too long (though they’re still edible, just tougher).
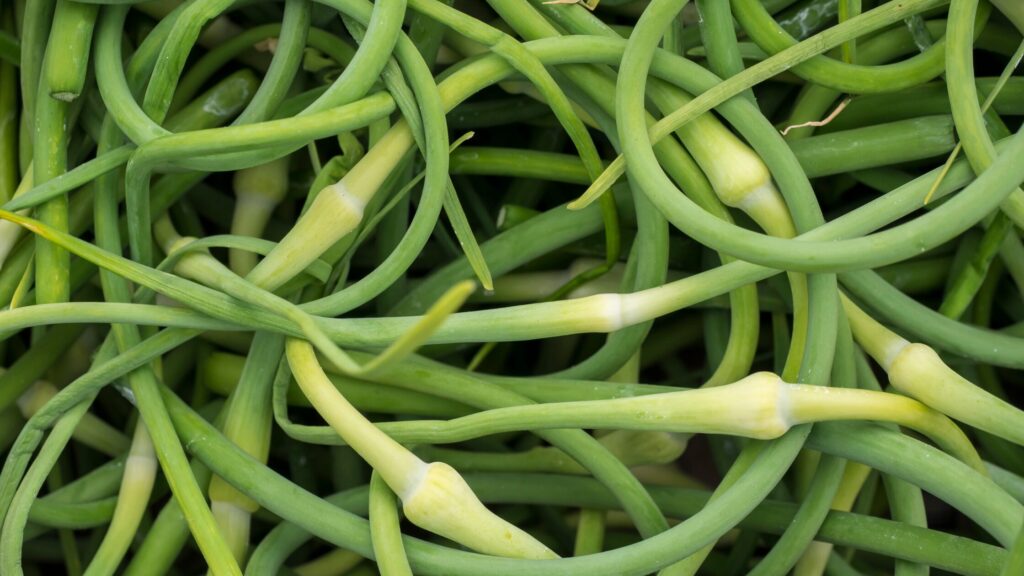
The cool thing is that scapes are quite delicious! They have a mild garlic flavour, and you can use them like spring onions. Chop them into stir-fries, pasta or pesto, for example, or grill them whole as a side dish. Once cut off, they can be stored in the fridge for 2 – 3 weeks.
Common problems and solutions
We always hope that our crops go through the seasons without any problems and reward us with a large harvest. But although garlic is a very undemanding crop, some issues may occur. Let’s have a look and see how we can deal with them:
Yellow Leaves
If your garlic’s bottom leaves turn yellow in June/July, that’s perfectly normal: the bulbs are maturing.
If the problem occurs in spring, however, we’ve got a problem! Usually, the cause is overwatering or a nutrient deficiency.
What to do: Check if the soil is waterlogged. If it’s dry, feed the garlic with dissolved nettle manure or another liquid, fast-available fertiliser.
White Rot
White rot is a serious disease! The first sign is an early yellowing of the leaves and the formation of a white, fluffy mould on the bulb base. Eventually, the bulb becomes soft and decays, developing a strong odour.
What to do: Remove the affected plants immediately and throw them in the bin. Do NOT compost them!
White rot cannot be cured or treated, and it remains in the soil for 15 – 20 years. That means, if you get white rot in your garden, you can’t plant any alliums (garlic, onions, leeks) on that patch for at least 15 years.
To prevent white rot, you should only use certified seed garlic and practice crop rotation. Also, make sure your soil has good drainage.
Rust
When your garlic leaves show orange-brown spots or streaks, they have caught rust. It usually appears in damp conditions and is more common in softneck varieties.
What to do: Improve the air circulation by removing weeds and – in the first place – planting your cloves with enough space in between.
Rust usually doesn’t kill the plant, but you should remove all badly affected leaves. Do NOT compost them.
You’ll still get a usable harvest, but it may be slightly reduced.
No Bulbs Formed
The main cause for no bulbs forming is the wrong timing in planting. If you’ve planted too late and the garlic didn’t have a cold period, it didn’t get the trigger to form bulbs.
Another, less common cause is that you fertilised with too much nitrogen late in the growing season. Nitrogen enhances leaf growth but not fruit (or in this case: bulb) formation.
What to do: Stick to autumn planting for reliable results and stop fertilising once bulbs form.
Harvesting and storing garlic
When to harvest garlic
As a rule of thumb, garlic takes 8 – 10 months if it’s an autumn variety and 4 -5 months for spring varieties to become ready for harvesting.
In my zone, I can harvest garlic in June and July if it was planted in autumn and in July and August if it was planted in spring.
The exact timing, of course, depends on the variety and the weather.
How to know when garlic is ready to be harvested?
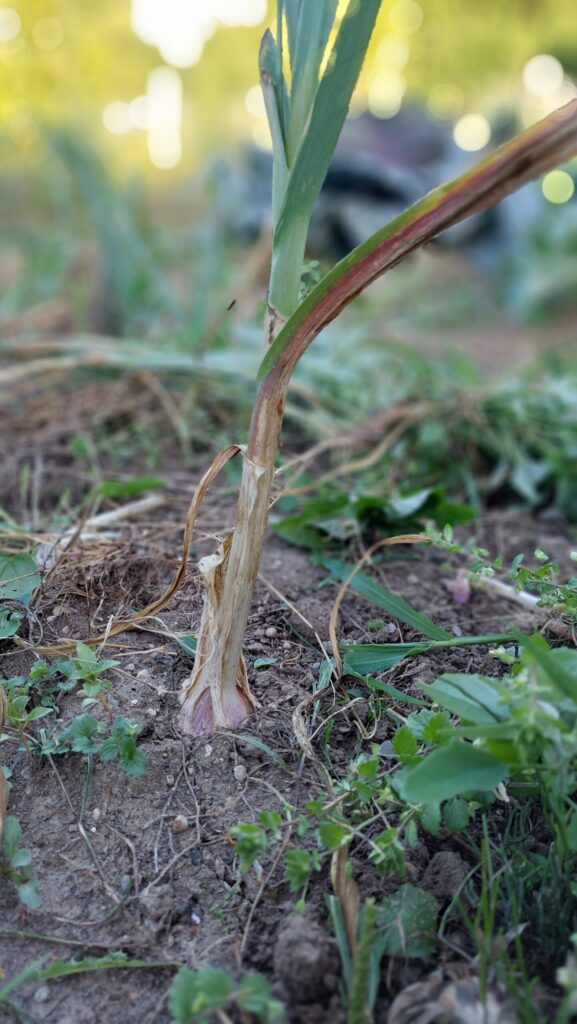
You know that the garlic is ready for harvesting when the bottom third to half of the leaves have turned yellow or brown, while the upper leaves are still green and start to flop over. Don’t wait until the leaves die back or collapse completely.
Also, the bulb wrapper must still be intact, and the bulbs should be closed.
If you wait too long, the bulbs may open up, which reduces their storage time.
If you’re unsure about whether your garlic is ready to harvest, carefully dig up one bulb to check its size and development. If the bulb is clearly defined and shows a tight skin, it’s ready.
Harvesting garlic
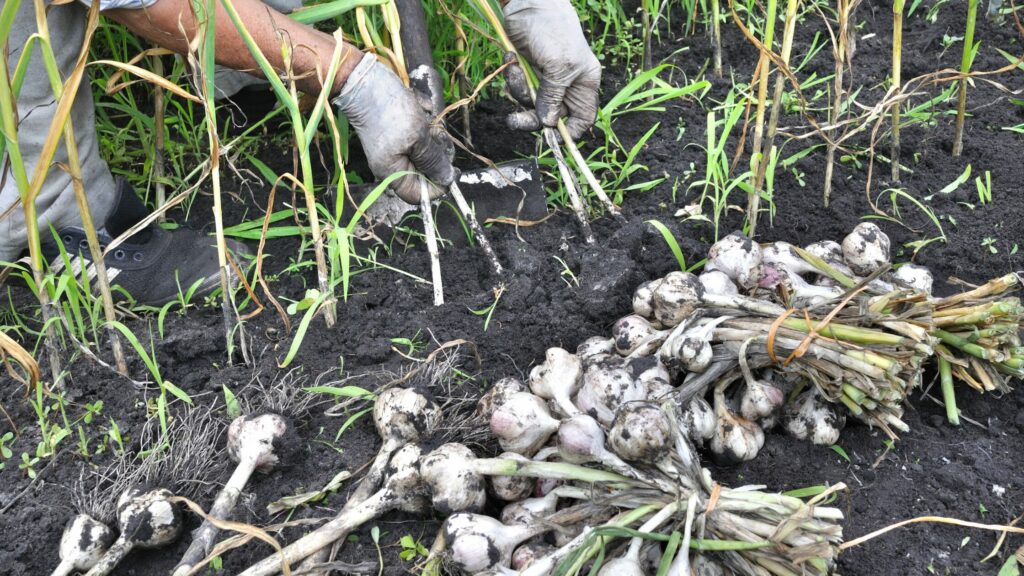
Choose a dry day for harvesting. Dry soil makes lifting the bulbs out easier and cleaner, and they can be stored for a longer time.
Loosen the soil around the garlic with a garden fork and pull out the bulbs. Clean up the garlic right on the bed by gently brushing off the soil. Now it’s ready to cure.
Curing Garlic After Harvest
Curing is an essential step after harvesting garlic. It dries the outer skins and seals the cloves, and by that dramatically extends the garlic’s storage life. If you skip this step, your garlic will rot within a few weeks!
For curing, place the garlic into bundles and hang them in a dry, well-ventilated area for about two weeks. If you have a canopy at your house, a garage or even a balcony that’s protected from rain, that’s an ideal place. Just make sure that the garlic is out of direct sunlight, as that would cause bleaching and a degradation of the flavour.
If you, like me, don’t have a place to hang your garlic up to cure, however, you can always cure it lying flat on a rack or a slatted shelf. Keep the stems attached (they’ll dry down into the bulb) and don’t pile the bulbs on top of each other. Every few days, you should turn the bulbs to ensure that they’ll dry evenly. If you’ve got no place outdoors, cure your garlic indoors in a dry place (no moist basements!).
Depending on your curing location (and the weather, if it is outdoors), curing takes between 2 and 4 weeks. The garlic is ready for storage when the bulbs’ outer skins have become papery and dry, the stems are completely dry and brittle, and the roots have shrivelled.
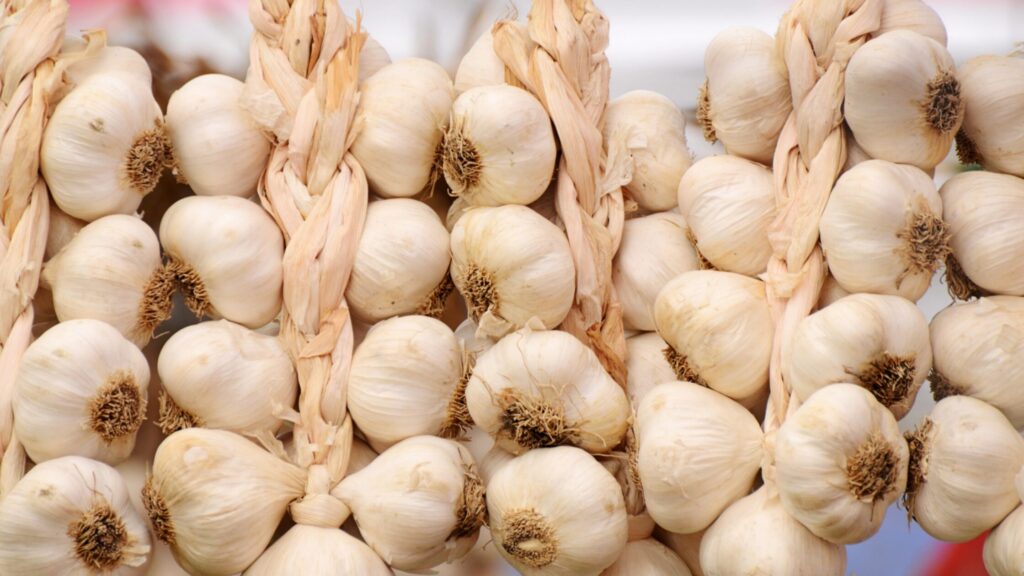
Once your garlic is fully cured, brush off any remaining soil, but don’t wash the garlic! Then, either braid the stems if you have softnecks or bind the hardnecks together. Now it’s ready for storage.
How to store garlic
There are a few things we need to observe when storing garlic.
Optimal Storage Conditions
The perfect environment for storing garlic is a cool place with temperatures between 10 and 15 °C (50 – 60 °F). It should be dark or at least dim, because light causes sprouting. The place should have low humidity (about 50 – 60 %) and good air circulation.
These conditions are commonly found in a pantry, utility room, or spare room. I store my garlic in the basement, which is cool and dim, but thankfully not damp.
There, my garlic can be stored till the next harvest.
Storage methods
There are some ways to store garlic in such a way that it will last until the next harvest:
Mesh bags or nets
Putting garlic bulbs into mesh bags or nets is an easy method to store garlic, especially hardneck varieties, for the long term. The bags or nets provide excellent air circulation and make it easy to check on the bulbs. You can easily hang them from the ceiling or a shelf, and thus they won’t take up too much room.m
Braiding (softneck only)
Braid the stalks of softneck garlic while they’re still slightly flexible and hang them from the ceiling or a shelf in a cool and dry place. As with mesh bags, braids provide good air circulation and don’t take up much room.
Wooden crates or boxes
Put an old newspaper on the bottom of a crate or box and put garlic bulbs on it. The bulbs should not touch. Cover the bulbs with a second newspaper and continue layering the bulbs in the crate. Don’t stack them too deep, though. 3 – 4 layers is the maximum.
This is a good method of storage for large harvests, but you must check the bottom layers occasionally and discard any rotten bulbs as soon as possible.
Paper bags
This is a good method for small quantities: poke some ventilation holes in a paper bag and put the bulbs in. You can hang the bag from the ceiling or a shelf if it’s not too heavy, or just store it on the shelf.
No matter how you store your garlic, check it every few weeks and remove any bulbs that become soft or mouldy.
Preserving garlic
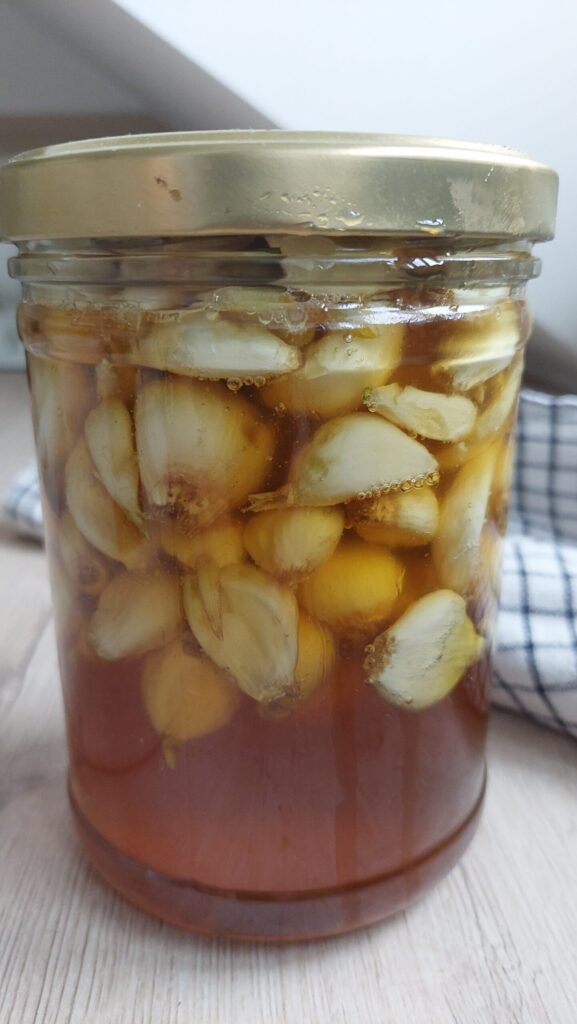
If the conditions for storing garlic are not optimal where you live, for example, if it’s too warm throughout your flat, preserving is a great way to store your garlic.
One of my favourite preservation methods for garlic is fermenting it in honey. In this recipe for fermented garlic in honey, I’ll show you how it’s done. It’s very easy and only requires two ingredients: garlic and honey.
How NOT to store garlic
There are some mistakes in storing garlic that you need to avoid.
- In sealed plastic bags: they don’t allow for air circulation, trap moisture and the garlic will rot.
- In the fridge, if you want to prevent premature sprouting.
- In damp or poorly ventilated rooms
- In direct light
Frequently Asked Questions
Can I grow garlic from supermarket cloves?
Technically, it’s possible, but I don’t recommend it for several reasons:
First of all, supermarket garlic is mostly imported and mostly from climates that are very different from yours.
And although it may look good and is safe to eat, the cloves may carry diseases that you’d spread in your garden when planting them.
Lastly, supermarket garlic is almost always treated with sprouting inhibitors to prevent the bulbs from sprouting in the market.
If you want to experiment, though, choose organic supermarket garlic, which is less likely to be treated. You must understand, however, that the results will be unpredictable.
My recommendation: Instead of using supermarket garlic, spend a few Euros, Dollars or Pounds (or whatever your currency is) on certified seed garlic for much better results.
Can I plant garlic cloves that have sprouted in storage?
Yes!
Sprouted garlic cloves from your pantry or storage can still be planted, and they’ll often grow just fine. The green sprout shows the clove is viable and ready to grow, and it’s actually a great way to use up garlic that’s past its prime for cooking!
However, sprouted cloves may have used some of their stored energy, so they might produce slightly smaller bulbs than unsprouted ones. Plant them as you would any other clove, with the sprout pointing upward. Just make sure the clove itself is still firm – if it’s soft, mushy, or mouldy, discard it.
Is it too late to plant garlic now?
That depends on the current month:
October-early November: Perfect timing! This is prime garlic planting season.
Late November-December: Still possible in mild winter areas if the soil isn’t frozen. Get the garlic in the ground ASAP.
January: It’s risky. I’d only attempt planting garlic now in very mild areas. The bulbs will be small, though.
February-March: When you’ve missed autumn planting, switch to spring planting. Plant your garlic cloves as early as the soil is workable.
April-September: Now it’s too late for spring planting. Use this time to prepare your bed and buy quality seed garlic for October planting.
How much garlic will I harvest from one clove?
One planted clove will result in one full bulb. Each bulb contains between 5 and 12 cloves, depending on the variety. So, one clove becomes 5 – 12 cloves at harvest.
Hardnecks typically produce larger but fewer cloves, usually around 6 – 8 large cloves.
Softneck varieties have smaller but more cloves, usually around 10 – 12 small cloves per bulb.
My garlic sprouted over winter – is that okay?
Yes, that’s completely normal for autumn-planted garlic!
2 – 4 weeks after planting in autumn, the cloves sprout, and the green shoots reach a height of 5 – 10 cm (2 – 4 inches) before winter. In winter, growth stops or slows down considerably, only to restart vigorously again in spring.
So, if your garlic sprouted over winter, this is exactly what should happen!
Can I leave garlic in the ground too long?
Yes and no. If you miss the right harvesting timing, the bulbs will split open, and the cloves will forfeit storability.
If you’ve completely overlooked a bulb in the soil, the cloves will sprout anew later and try growing new bulbs. Due to the minimum spacing, they won’t grow large, though.
Should I soak garlic before planting?
No. Soaking would enhance the risk of mould or rot.
Can I plant garlic in raised beds?
Yes, the steps are the same as with growing garlic directly in the soil. You may only have to water it more frequently.
Can I grow garlic from a single clove?
Yes, one clove of garlic will produce one bulb.
Why is my garlic flowering?
You’ve let the scape on the plant for too long, and it burst into bloom. You can still harvest the bulb, but it will stay smaller.
- Planting unsuitable or unhealthy cloves
- Planting too late for sufficient winter cold
- Setting cloves upside down
- Growing garlic in waterlogged soil
- Applying too much nitrogen late in spring
- Leaving mature bulbs in the ground too long
Make Seasonal Garden Planning Easier
Get my free monthly garden checklist, along with practical growing advice and new seasonal guides delivered to your inbox.
Why you should grow garlic
Garlic is one of those rare vegetables that asks for very little and gives back a great deal. Plant a handful of cloves in autumn, give them sunshine, well-drained soil and a little patience, and by next summer you’ll be harvesting beautifully aromatic bulbs you’ll be proud to use in your kitchen. Once you’ve grown your own garlic, it’s surprisingly difficult to go back to supermarket bulbs.
If you’re planning your vegetable garden, explore the rest of the Gardening Hub for more practical growing guides and seasonal advice.
0 Comments