
.
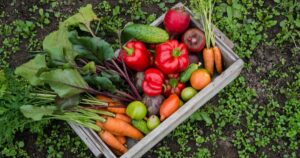
Imagine walking into a nursery in May and seeing healthy tomato transplants for €4 each. That’s exactly why starting seeds indoors is one of the best skills a vegetable gardener can learn — a whole packet of ten tomato seeds costs the same €4, meaning you could grow all ten plants for the price of one. Last year, I grew 40 tomato plants that way and saved 144 euros. Not bad for a bit of soil and some windowsill space.
Saving money is only one part of the story, though. Starting seeds indoors gives your plants a 6-8 week head start on the season.
But do you know what’s the best part of seed starting? The satisfaction and pride when you have coaxed those tiny seeds into sturdy, healthy, and yummy vegetables!
Now, I’ll be honest with you: it does take some effort and a bit of know-how. Sow your tomatoes too early, for instance, and by transplanting time, you’ll have a leggy, floppy mess that can barely hold itself upright, let alone produce a decent harvest. (I know what I’m talking about here.) Get the timing, light and soil right, though, and the results will make you wonder why you ever bought a seedling in your life.
This guide covers everything: which supplies you actually need (and which you can skip), when to start what, and how to nurse your seedlings from first sprout to garden-ready transplant — including how to fix the most common problems along the way.
Not sure if you can manage seed starting? Let me show you:
Is seed starting for me?
When do I start?
It depends on what vegetables you want to start from seed, but as a rule of thumb, start 6 – 8 weeks before your last frost date.
What should I start?
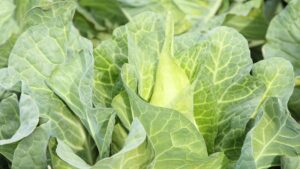
As a beginner, I recommend starting small with lettuce, cabbage, tomatoes and zucchini because they sprout effortlessly and fast.
Do I need lots of stuff?
No, you’ll probably already have most of what you need to seed-start: pots (any form of container will do, e.g. empty milk jugs or egg cartons), cultivation soil, seeds of course, and plant labels.
What’s the biggest mistake?
Getting impatient and starting too early 😏.
How long does this take?
Most seeds germinate within a week; some (like peppers and chillies, for example) take longer. The seedlings will stay several weeks indoors before transplanting.
Can I actually do this?
Absolutely! You’ll make mistakes along the road, as we all have done (and still do), but this guide will show you exactly what to do and what to avoid.
Now that we’ve clarified that you can successfully start vegetables from seed, let’s see why it’s absolutely worth it.
Why seed starting?

Many gardeners shy away from seed starting. Too much work, too little space, too tedious. But that’s not true!
Look, I won’t sugar-coat it: you do have to spend some time starting vegetables (or flowers for that matter) from seed and tending to the seedlings, but it’s worth every minute!
Let me show you why:
Saving costs
Seed starting will save you an enormous amount of money. Don’t believe me? Let me show you a small calculation:
As I said earlier, one seed package of tomatoes, containing 10 seeds, costs about 4 €, that is 40 cents per plant. One tomato plant at the nursery costs at least 4 €, sometimes even more, depending on the variety.
That’s ten times the amount you pay for seeds.
Seeing as I grew about 40 tomato plants last year, that’s a saving of 144 € or a saving of 90 %!
Even if you have just a small garden or even only pots for your vegetables, your savings will still be considerable.
Variety
When you buy seedlings from a nursery, you usually can’t choose the variety of vegetables you want to plant. Or – if you can choose – they only have very few of the most common types.
BUT: when you decide to start your own vegetables and browse your first seed catalogue, you’ll find a whole new world of seed varieties. It’ll be almost as if suddenly you’ve discovered the door to Narnia!
You can choose from varieties that are perfect for your climate, heirloom varieties, old varieties and even varieties that have become almost extinct! By supporting this diversity, you not only get healthier plants that are better adapted to your climate, but you also contribute actively to preserving the diversity of varieties.
Headstart
We all love tomatoes, eggplants, chillis and peppers, but they need a long time to mature. If we were to sow them only when it’s warm enough outside (in my zone 7b, that’s mid-May), they would never have enough time to ripen, and they’d only get to produce some green fruit before autumn frosts fall.
By starting them from seed, we fool those plants a bit by pretending that it’s warmer and sunnier than it actually is, inducing them to germinate. By the time we can transplant them, they’ll have grown into healthy and sturdy young plants already.
That way, we give your plants a headstart of 6 – 8 weeks.
(Here you can learn more about how to grow tomatoes in 14 easy steps, and here about how to grow peppers and chillies from seed.)
Plant protection
Indoors, your seedlings are safe from hungry pests—snails, cabbage flies, and voles can’t reach them.
They’re also protected from harsh weather. Rain, wind, and intense sun can damage young seedlings before they’re strong enough to handle it.
By starting them indoors, we can pamper our veggie babies until they become strong enough to face the outside world.
Efficient use of garden space
Seed starting is not only a task for spring, though. By continually starting lettuce, for example, we always have plants ready to be planted outdoors and fill the gaps we get by harvesting earlier vegetables.
When your beds are fully planted in early summer, start autumn vegetables indoors. When you harvest a vegetable variety, you can already plant the next batch, ensuring there won’t be a gap for too long.
Now that you know WHY seed starting is worth your time, let’s talk about WHEN to begin.
When to Start Seeds Indoors

Every vegetable has its own special requirements regarding the time of sowing, and we gardeners must stick to that time frame as if our veggies’ lives depended on it.
Which they do.
I know how tempting it can be to sow tomatoes in January already, but believe me, you’ll regret it. Yep, speaking of experience here. By the time you can finally plant your tomatoes outside, they’ll be too long and weak to bear their own weight, let alone bear lots of fruit.
The right timing is a decisive factor for healthy and fruitful plants. It mostly depends on the last frost dates in your hardiness zone.
Some vegetables must be started early from seeds, while others have a longer time frame. If you want to harvest continually (and who doesn’t?), one-time sowing is not enough. That’s why we sow vegetables like spinach, radishes, lettuce and carrots several times a season. This principle of staggered sowing and planting is called succession planting and is a total game-changer in the vegetable garden!
(This article will give you all the details on succession planting.)
When to Start Seeds indoors by vegetable
Now, this depends on the growing or hardiness zone you live in. To check out your hardiness zone, this site is quite useful.
Your zone tells you when the last frost will likely fall and when to expect the first frost. These are important for calculating when to start vegetables indoors.
Which vegetables to start indoors vs direct sow
Basically, there are three groups of vegetables:
– those that MUST be seed-started to get a chance of harvest
– those that CAN be seed-started but needn’t necessarily be, and lastly
– those that NEED NOT be seed-started.
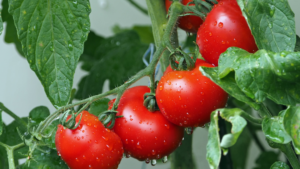
The sloths amongst our vegetables are cucumbers, tomatoes, eggplants, peppers, chillis and physalis. They need a long time to mature, and for that reason, must be sown indoors between January and March already. Later would be too late.
Then we have the “sensitive souls” like lettuce and all cabbages. Theoretically, you can sow them directly outside, but they are prone to being devoured by slugs while still young and their chances of surviving an attack of the pests are meagre.
Starting them indoors, however, and not transplanting them before they have become healthy, sturdy seedlings, makes them stronger and less vulnerable to pests.
The third group are those vegetables that can’t cope with transplanting, among them almost all root vegetables, for example, carrots and turnips. Think about it: their goal is to develop long and big roots, so they don’t like being removed from the soil (even for a short time) to be transplanted again. Root vegetables are best sown directly into the bed, except for knob celery.
When in doubt, look at the back of your seed packages: most of them have a recommendation as well as the appropriate sowing and planting times there.
Best seeds to start indoors for beginners
Some vegetables are almost no-brainers when it comes to starting them from seed, and some we could use some experience before we try them.
Beginner-friendly
For a beginner, tomatoes are the best first choice when it comes to seed-starting. They germinate and grow quite fast, are resilient, and the savings are large. One of my favourite beginner tomato varieties is “Sunviva”, a cocktail tomato that you can even cultivate in a pot.
Zucchini and pumpkins are also an excellent choice for beginners, because you just sow one seed per pot and can skip the thinning process entirely. For zucchini, I recommend the variety “Black Beauty”, and one of my favourite pumpkin varieties is “Amish Pie”.
Lettuce and other salad leaves are fast, satisfying and also very tolerant of beginner mistakes.
Confident beginners
Basil is quite easy to grow from seed, but it needs warmth and a little more attention. You also must observe not to cover it with soil, as basil needs the light to germinate.
Cabbages of all sorts and kohlrabi are good choices for confident beginners. They’re best started indoors to protect them from slugs. If you want to cultivate white cabbage in your garden, try “Brunswijk”; the best kohlrabi variety I know (because it doesn’t become “woody”) is “Superschmelz”.
Once you understand that cucumbers need it hot to germinate, you can try these as well. A wonderful salad cucumber is “Telegraph Improved”, and for pickling cucumbers, I recommend “Boston Pickling”.
Advanced
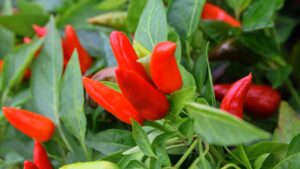
Slow-growing crops like peppers, chillies and eggplants have special needs — consistent heat being the main one — and they can be frustrating in a first season. But don’t let that put you off starting those veggies from seed eventually. My favourite variety for sweet peppers is “Roter Augsburger”. Just saying.
Essential Supplies for Seed Starting
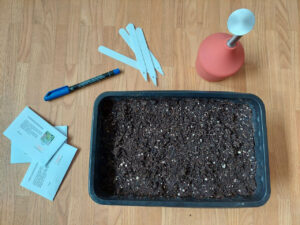
Don’t worry, you don’t need to order fancy equipment to start plants from seed. In fact, you’ll have most of the must-haves already at your house. There are a few nice-to-have items, though, that’ll make seed starting easier, but if you’re just starting, there’s no need to order any of this yet.
When you’re hooked, which I’m sure you’ll be, you can think about buying some of the advanced stuff.
Must-have supplies
Now these are the non-negotiable items, but you can easily find alternatives for some of them.
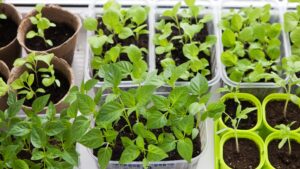
Planting pots
Basically, we can use all sorts of planting pots and trays as long as they are not too high (which would require too much soil) and have good drainage.
You can reuse plastic pots from former plants, special cultivation trays and even plastic fruit boxes.
There are ready-made biodegradable pots that you can plant out.
Alternatively, you can make paper pots that you fill with soil by yourself, or you can use egg cartons or even eggshells.
Cut open empty milk or juice cartons (lengthwise or crosswise or use glass jars.
There’s almost no limit to the variety of pots you can use. Just look around your house, and you’ll find plenty of containers you can use for seed-starting.
No matter what containers you use, you should have a kind of transparent hood you can put onto them to create a greenhouse atmosphere that creates warm temperatures and relatively high humidity. If you don’t have a hood, you can also use glass covers or even cling film.
Make sure that you lift it several times a day to prevent mould or other fungi from growing. Once the seedlings are large enough to be separated, you can leave them without this protection.
Wash the containers thoroughly with hot water before using them for seedling cultivation. That way, you can destroy germs and fungi before they can wreak havoc.
Cultivation soil
No matter the outer appearance of your pots or trays, their “inner value” – aka cultivation soil – is what counts! A good cultivation soil is crumbly and low in nutrients. “Normal” potting soil is not suitable for seed-starting as it contains too many nutrients. Seedlings don’t need nutrients yet. If the soil contains too many nutrients, the seedlings grow too fast, become leggy, and the roots may be damaged.
You can either buy ready-made cultivation soil or use a mixture of equal parts garden soil, well-rotted plant compost and sand. Manure compost is not suitable as it contains too many nutrients.
If you use homemade soil, you’ll want to bake it at 150 °C (300 °F) for 20 minutes to kill weed seeds and diseases.
Seeds
For me, seed catalogues are a bit like Santa’s grotto. I can spend hours – days even – browsing through them and noting down every plant I’d like to grow, although I don’t buy all of those seeds in the end. But still plenty. Well, other women buy shoes…
Anyway, with newly bought seeds, you can be sure that they’ll germinate, but often there are more seeds in a package than you’ll need in one season. Likely, you’ll have seeds from last year – or even the year before. As seeds can germinate, you’ll have to check if they still germinate with this simple trick:
Fold two paper kitchen towels in half and moisten them with water. Put 10 seeds from one seed package onto one towel and cover them with the second one. Keep it all moist and wait until the seeds start to germinate. When at least 8 out of the 10 seeds start growing (that’s 80 %), this package is still ok to use.
Plant labels
There was a time when I passed labelling my plants because I knew I’d recognise them once they had germinated simply by looking at their leaves… Ok, I was just too lazy to label.
Long story short: I didn’t know which plant was which, and my garden became a huge Surprise Egg. It was a bit like buying a truckload of tins, scraping off the banderoles, mixing them up and playing food roulette.
An easy way to label your plants is with ice sticks. Write the name of the vegetable and variety with a pencil on the stick and put it into the pot. For outdoors, plastic or slate labels are better suited to endure weathering.
Watering
For watering the seeds and later the tiny seedlings, a watering ball or a spray bottle is better than a watering can. They don’t produce a hard jet of water, which could either water off the seeds to the corners of the pot or make the sensitive seedlings bend.
Nice-to-have equipment
Plant lamps
Light is an important factor when it comes to seedling cultivation. I have a rather large south window that’s occupied with seedlings from February to summer, and that’s good. Nevertheless, when the seedlings develop a certain stage of maturity, I put them in the (cooler) guest toilet and install a plant lamp. These lamps not only have the ideal light range for plants (which is why they have a very nasty violet shade for our eyes), but they can also be timed to shine for 12 – 16 hours, depending on the plants’ needs. You’ll never get this amount of light time, not even at a sunny window.
As a beginner, however, a sunny south-facing window where there’s enough room for the seedlings even when they require more space, will do for a start.
Heating mat
I’ve seed started for years without a heating mat, and it worked just fine. Well, at least as long as I dispensed with my hot water bottle that was busy warming the seeds.
Last year, I decided that I deserved some warmth, too, and I bought a heating mat for my warmth-loving plants. And it’s a real game-changer, because now I can snuggle up with my hot water bottle and get cosy in the evening without freezing my toes off.
And the plants are growing great, as well.
For warmth-loving plants such as tomatoes, eggplants, physalis, peppers and chillies, you may want to use a heating mat on which you can put the containers. These mats work like a hot water bottle and warm up the soil, inducing the seeds to germinate.
Dibber
A dibber is used for thinning the seedlings, that is, for putting them out of their initial seed-starting tray and repotting them into a larger container. For starting out, though, you can easily use a pencil.
Advanced supplies
Plant shelves
There are these shelves you can use for cultivating seedlings that come with a tent covering the whole shelf. That way, you don’t have any of this weird eye-hurting light from the plant lamps that are installed on the underside of each shelf board coming out. At the same time, it saves so much space when you can stack the seed trays above one another, instead of putting them side by side.
Soil blocker
A soil blocker is a device that makes square blocks from soil. Sow one seed per block and, instead of uprooting the seedlings and replanting them in a larger pot, you simply pull the blocks apart and repot them. This is especially good for vegetables that don’t like their roots to be messed with, like cucumbers, zucchini or pumpkins.
Ideal place for seedling cultivation
Seedling cultivation will occupy some space indoors for quite a long time. So, where to put all those plants? The most important factor to consider when choosing a place is temperature.
It shouldn’t be too warm. A cool stairwell, a non-heated guest toilet or even the basement are great. Although some vegetables like tomatoes, peppers and eggplants need it warm to germinate, once they are large enough to be separately planted into larger pots, they are happy with cooler temperatures.
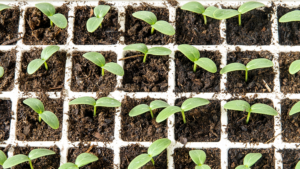
You’ve got your supplies sorted—now let’s walk through the actual process, step by step.
Seed starting timeline: what happens after sowing
Below is a typical indoor seed-starting timeline. Use it as a framework — exact timing varies by crop, temperature, and light conditions.
| Sow | Germinate | Thinning | Harden off | Transplant |
| Usually, 6 – 8 weeks before transplanting, sometimes before | 5 – 20 days | When the first pair of real leaves shows | One week before transplanting | Depending on plant and zone, between end of March and mid-May |
Think of this timeline as plant-stage guidance rather than strict dates. Some seeds germinate in a few days, while others take weeks. When in doubt, follow your seed packet first and use this timeline as orientation.
The most important milestone is the appearance of true leaves — this signals when seedlings are ready for the next step.
Seed Starting Process step-by-step
Got everything you need for seedling cultivation? Great! Let’s get started.
#1 Sowing
Put the soil into your containers and moisten it. Sow the seeds as deep as they need to be sown (look for that information on the back of the seed packages), lightly press the soil so that the seeds are pressed down and water it all with a spray bottle or a watering ball.
Oh, and remember to label your plants 😉
Some plants, like lettuce or basil, mustn’t be covered with soil but need the light to germinate.
#2 Temperatures
Some vegetables need relatively high temperatures (24 °C / 75 °F and above) to germinate, while others like it cooler. You can usually find this information on the back of the seed package.
As a rule of thumb, veggies that like it hot outside usually like it hot indoors. These veggies are, for example, cucumbers, tomatoes, peppers and chillies, pumpkins, zucchini and eggplants.
All other vegetables germinate at slightly lower temperatures between 18 and 22 °C (64 – 72 °F).
Giving your seeds the right temperature is vital for germination, so make sure to hit it right off. At this early stage, the right temperature is even more important than light. So, regularly check the temp, keep the soil moist and wait.
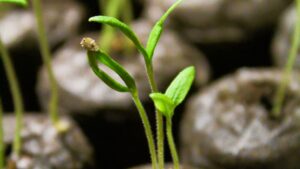
#3 Germination
The first green tips are showing out of the soil. Hurray! In case of warmth-loving plants, it’s now time to move the seedling trays to a slightly cooler environment, ideally with plant lamps installed.
#4 Care
When your plants have their first growth spurt, you needn’t do much. Just water the seedlings regularly to keep the soil moist. Yet, while before you could water from above, right onto the soil, now I recommend watering either from the side or into the saucers your trays stand in and let the soil absorb the moisture. That way, the leaves won’t get wet, which could cause diseases.
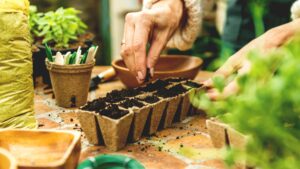
#5 Thinning
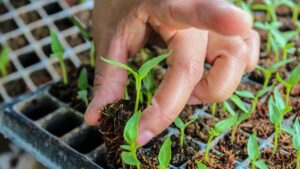
When the seedlings have developed their first pair of real leaves (the seed leaves don’t count), it’s time to thin them out by transplanting them into larger pots. This not only provides them with more space for developing roots but also with more light and nutrients.
For thinning, I carefully loosen the seedlings in the tray or pot with the pointed end of a dibber or a pencil. Holding the seedling by its stem with one hand, and helping with the dibber in the other hand, I meticulously remove the plant from the soil. Sometimes the roots get entangled with those from the neighbouring plant. Here also, the pointy end of the dibber or pencil comes in handy for cautiously “combing” them out of each other.
Now, I poke a hole in the soil of the new pots and put the seedling in there.
Make sure you plant the seedlings as deep as they were before. Tomatoes are an exception: plant them deeper than before because they can grow new roots on their stem which makes them grow sturdier.
If you are intimidated by thinning, why not start with vegetables like pumpkin, summer squash or sunflowers? You can sow one seed per pot and needn’t thin them out.
#6 Growth
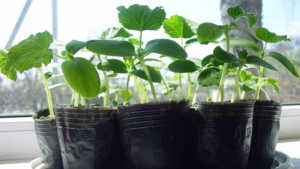
Repotted, put your seedlings back in the cultivation station. Make sure the soil is kept moist and lightly fertilise cabbages and tomatoes.
It’s important to check your plants every day, water them when needed and make sure they don’t develop any diseases.
#7 Hardening off
Before we can release the seedlings into the wild outdoors, we have to harden them off.
Start about a week before transplanting and put the seedlings outside in the shade for a couple of hours.
Each day, prolong the time and after 3 days, even put them into the sunlight (not around noon, that would be too much).
To make them accustomed to the wind, gently brush them with your hand, simulating wind movement.
#8 Transplanting
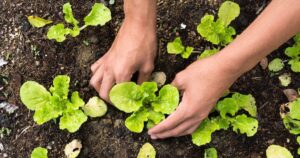
You’ve grown healthy, sturdy plants that have already hardened off. Now it’s ready to plant them outside. Transplant your seedlings on a cloudy day or in the evening to reduce the risk of plant shock. Make sure you plant them at the right distance from one another (again: check your seed package).
Water the seedlings properly after planting so that the soil washes around the roots, leaving no air holes. If necessary, cover the seedlings with nets to protect them from the weather and/or pests.
Seed starting mistakes beginners make
Even with perfect conditions, problems can arise. Here’s how to troubleshoot the most common issues.
Now these mistakes are mostly made by beginners, but experienced gardeners sometimes get them wrong, as well.
Timing
Sowing too early is a classic. Remember when I started those tomatoes way too early, and they became all leggy and weak? Yes, I’ve also made that mistake. And more than once.
Sowing too late, however, is equally common, especially with slow-growing veggies like peppers and eggplants.
A further timing mistake beginners often make is to sow everything at once rather than in stages for succession planting.
Temperature and light
Temperature and light errors trip up a lot of people. Not providing enough light is probably the single most common reason for leggy, weak seedlings. Keeping seedlings too warm once they’ve germinated is another frequent mistake — people assume warmer is always better, but most seedlings actually prefer cooler temperatures after sprouting.
Soil
A common mistake I’ve seen beginners make (ahem… and myself for that matter) is using regular potting soil instead of a seed starting mix. Potting soil has too many nutrients, “burning” the seeds or making the seedlings weak.
Watering
Overwatering is much more common than underwatering with beginners. Let’s not drown the seeds, please!
Once the seedlings have emerged, they should only be watered from the side or in the tray their pots stand in.
Skipping key steps
One of the important steps that’s often rushed or even skipped is hardening off the seedlings before transplanting them. That’s a sure way to devastate an otherwise healthy batch of seedlings!
Another step that’s not paid too much attention to is thinning out as soon as the first pair of real leaves show. When you leave the seedlings too long together in their starting tray, they become overcrowded and compete for light and nutrients, which makes them weak.
Oh, and always remember to label the seeds right after sowing them. Otherwise, you’ll get a surprise garden like me that one year.
Giving up too soon
Look, we all have had bad seasons where nothing seemed to go right. I, too, have lost batches of vegetables I started indoors – and not in my first year of seed starting. Don’t abandon seed starting just because it didn’t work the first time!
Sometimes, beginners also start with crops that are known to be difficult to grow from seed, like celery or celeriac. Choose more forgiving vegetables instead, like tomatoes, pumpkins/zucchini or lettuce.
Common Problems and Solutions
There are a few common problems that may show when seed-starting vegetables:
Mould/fungal diseases
Fungal diseases spread best in damp and relatively cool environments. If you have mould or other diseases in your trays or on your seedlings, you probably haven’t ventilated the trays enough.
Solution: Open the hood more frequently and for a longer time. Also, make sure that the soil is only moist but not wet.
Leggy seedlings
When your seedlings grow very long (“leggy) and have rather light-green leaves, they usually don’t get enough light and try to compensate by spindly growing towards the light.
Other reasons for leggy growth are too high temperatures or too many nutrients in the soil.
Solution:
Install plant lamps
Move the seedlings to a cooler place.
Repot the seedlings into nutrient-low soil.
Nutrient deficiencies
If your seedlings stagnate or even get yellow leaves, they may need nutrients. Hungry plants like tomatoes and cabbage need their first gift of fertiliser already about two weeks after germination.
Solution: Add some diluted liquid vegetable fertiliser
Pests
Obviously, we’re not talking about snails or voles here. Yet, there is the risk, for example, of fungus gnats in the soil. Last year, I had an invasion of those blighters and didn’t realise it until the little black flies were everywhere and my seedlings started to wilt.
Solution: Fungus gnats can be fought off with neem oil, for example, nematodes or other predatory mites, which you can buy (online) and add to the water. For more information about how to get rid of fungus gnats, look at this article.
Watering issues
Overwatering can cause root damage, while underwatering causes wilting. Both will eventually kill your seedlings.
Control your seedlings every day and adjust your watering routine to their needs.
Solution: Water until the soil is moist but not wet. Check your trays regularly.
Frequently Asked Questions About Seed Starting
How early should I start seeds indoors?
Most vegetables need 6-8 weeks indoors before transplanting. Tomatoes and peppers need 8-10 weeks. Check your seed packet for specific timing.
Do I need grow lights to start seeds?
A bright south-facing window can work, but grow lights produce sturdier seedlings by providing 12-16 hours of consistent light. If your seedlings get leggy, you need more light.
Can I use regular potting soil for seed starting?
No. Regular potting soil is too rich in nutrients for seeds. Use a seed starting mix, which is lighter, sterile, and prevents seedlings from growing too fast.
Which seeds are easiest to start indoors?
Tomatoes are very forgiving, as are zucchini, pumpkins and lettuce.
What temperature do seeds need to germinate?
Most seeds germinate at 65-75°F (18-24°C). Heat-loving plants like tomatoes and peppers prefer 75-85°F (24-29°C). Check your seed packet for specifics.
How do I prevent leggy seedlings?
Provide adequate light (12-16 hours under grow lights), maintain proper temperature (cooler after germination), and use a low-nutrient seed starting mix.
Ready to Start Your Seeds?
You now know what seed starting really takes — not perfection, but the right timing, enough light, and a little daily attention.
And the best part? You don’t need to start big.
A few pots on a windowsill are enough to experience that quiet magic of watching the first green tips emerge, and realising you grew them yourself.
You’re no longer just planting vegetables. You’re growing them from the very beginning.
Seed starting is one of those gardening skills that looks complicated from the outside but quickly becomes second nature once you begin. And every season, you’ll learn a little more.
If you ever feel unsure, come back to this guide and follow the steps one by one.
You can do this.
Happy growing,
Angela
Your next steps:
- Read the February Seed Starting Guide to see what you can start right now
- Continue with the March Seed Starting Guide, so you stay on schedule
- Explore the gardening library for deeper guides on specific vegetables
👉 Start small. Start this week. That’s enough.
0 Comments