.
Tomatoes are one of the most popular vegetables in the whole wide world, not only among gourmets but also among us gardeners. And there are so many varieties out there: from teeny-tiny, pinhead-sized beads to enormous, almost melon-like specimens, in colours ranging from the classic red to orange, yellow, white, green and even black. There’s a tomato for everyone’s heart. There are so many varieties, I’d either need a much larger garden or at least three lives to try them all. When I’ve found a variety I love, however, I want to grow it every year. But why invest in seeds for tomatoes you’ve already successfully cultivated, when you can save them from your own fruits? It’s easier than you think, and it’s so satisfying to be part of the cycle of seed, becoming fruit, becoming seed again. I’ll show you which tomatoes you can harvest seeds from, what to look out for and how to make sure that they germinate well next season.
Why save tomato seeds?
Apart from the magic and fun, there are many more reasons to save your tomato seeds:
Cost
One seed package with 6 – 8 tomato seeds costs around 3 €. Now, I don’t know about you, but I’m not known for cultivating only one variety. More like 10 – 15. That would be 30 – 45 € just for tomato seeds every single year! Ehm…. no. Especially not, when I can get hundreds of seeds for free.
Adaptation
Plants adapt to their growing conditions. So, no matter what your garden’s conditions are, your tomatoes will, within one life cycle (!), adapt to them. Seeds from the plants in our garden, therefore, are better adjusted to your microclimate than any store-bought seeds ever will be.
Moreover, plants become increasingly resilient over generations. When you save seeds from your healthy tomato plants, you contribute to their future health.
Variety Preservation
Many heirloom tomatoes are bordering on extinction, and there are also quite a few rare or hard-to-find varieties. By saving their seeds, you take an active part in preserving those precious tomatoes and making sure that generations to come will still be able to cultivate and taste them.
Understanding Tomato Varieties for Seed Saving
Now, do we just go out and save tomato seeds? Not quite! First, you must understand that not all tomato varieties can be propagated by saving their seeds.
Open-pollinated tomatoes
Tomato blossoms have male and female parts. The male parts (anthers) contain the pollen, while the female parts (pistils) receive it and produce fruits and with them seeds. That way, tomatoes can be self-pollinating, seeing that male and female parts are so closely together, but they often get help in pollination from insects.
“Open-pollinated” means that those tomatoes are pollinated naturally, either by self-pollination or with the help of insects.
The cool thing about that is that open-pollinated tomatoes always produce the same kind of tomato (e.g. an ‘Indigo Rose’ plant produces only ‘Indigo Rose’ tomatoes) and all seeds harvested from an open-pollinated tomato will produce exactly the same variety next season. They breed “true to type”.
Which is great for us seed-collectors as we only have to, well, collect their seeds to make sure we can cultivate the same variety next year.
Heirloom tomatoes
We speak of heirloom tomatoes when the variety has been cultivated for at least 50 years or was commercially introduced before 1940.
All heirloom tomatoes are open-pollinated, but not all open-pollinated tomatoes are heirlooms.
Hybrid tomatoes
Hybrid tomatoes are a cross between different varieties. They have been created to enhance characteristics we want, like flavour, size, pest and disease resistance, colour and longevity. Unlike open-pollinated tomatoes, hybrids don’t produce seeds true to type; instead, they revert to their parents’ genes, either recreating one of them or creating a tomato with different characteristics. Hybrid tomatoes, therefore, are not suitable for seed-saving.
When you look at your seed package and F1 is printed behind the name, it’s a hybrid.
Open-pollinated vs cross-pollinated
Cross-pollination means that pollen from one variety has pollinated the blossom of another variety. It doesn’t alter the fruits, but the seeds are no longer true to type. In fact, cross-pollination creates hybrids and, as we’ve learned, hybrids are not suitable for seed-harvesting.
To avoid cross-pollination in our gardens, we should plant different varieties at a distance of about 3 m (10 feet) from each other. Another good method for guaranteeing that our varieties stay true type is to cover them with a finely-meshed cloth once they show buds. When the buds have opened, carefully shake the plant so that the pollen can reach its destination.
A good method to help pollination is to use an old electric toothbrush that you brush across the blossoms. The vibration of the toothbrush loosens the pollen from one blossom and lets it fall readily onto the next one, thus fertilising it.
When tomatoes form, you can remove the cloth.
The crucial step: Fermentation
Saving tomato seeds is easy, but it comes with a little catch: to make sure that the seeds germinate well next year and do not carry any diseases, we must ferment them.
Tomato seeds are enclosed in gel casings. These casings contain growth inhibitors that keep the seeds from starting to sprout inside the tomato. Fermentation breaks up the gel casings and removes the growth inhibitor. If we used the seeds without fermenting them, the gel casings and with them the growth inhibitors would still be intact and prevent most of the seeds from growing.
In our garden, when tomatoes fall to the ground, they decay and by that break up the gel casings. Fermentation copies that process.
By fermenting the seeds, we also make sure to kill any seed-borne pathogens and only cultivate inherently healthy plants.
How to save tomato seeds
Step 1: Choose the right fruits

Choose tomatoes that are ripe and healthy and show all the signs you like in a variety, that is, the appropriate (or even larger) size and flavour.
You can use overripe tomatoes, but make sure they aren’t damaged.
Always use tomatoes from more than one plant to maintain the genetic diversity. Also, if one tomato plant turns out to have a disease, e.g. the blight, you’ll still have healthy seeds from another plant.
It’s best to use tomatoes from mid to late season as they have adapted better to your specific garden conditions and climate.
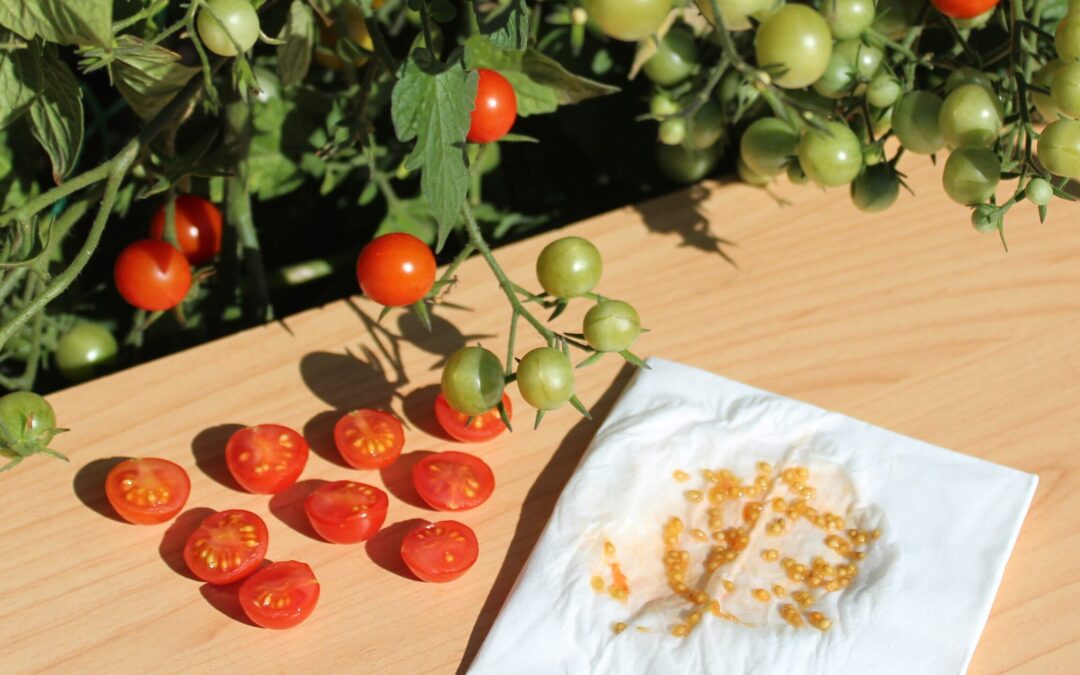
Step 2: Get the seeds
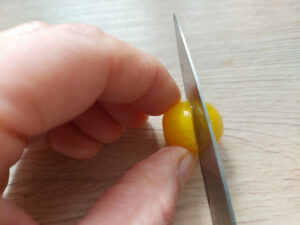
Wash them and cut them open around the middle.

With a finger or a spoon, scrape out the seeds and the jelly they’re in into a jar. Use the now seedless tomatoes for a salad or pasta sauce, or whatever you like to do with them.
Step 3: Water
Add water to the jar so that the seeds and the pulp can be stirred. I usually add about two fingers of water. Cover the mixture with a cloth; it needs air circulation.
Step 4: Labelling
Never trust your memory, but label the jar with the tomato variety you’ve got in there. You’ll thank yourself later.
Step 5: Fermentation
Put the jar in a warm place. I usually put it on the windowsill, but you should make sure that the temperature doesn’t change too much. Avoid any drafts. Temperatures between 20 and 25 °C (70 – 80 °F) are ideal for fermentation. If it’s colder, fermentation will still work, but it’ll take longer.

Stir your seeds every day. Usually after 3 – 5 days (depending on the temperature), they’ll sink to the ground. A little time later, an opaque film will form on the surface and – I’m sorry to say – the mixture will start to stink abominably. Take that into consideration when looking for a fermentation place. The kitchen may not be the best option.
The good news is: all these signs show that fermentation has started!
Step 6: Rinse
The good news is that once fermentation has started, you can remove the seeds from the jars. Pour them into a sieve and rinse them thoroughly. Take this process seriously. Rinsing not only removes the pulp and the now dissolved gel casings around the seeds, but it also stops the fermentation process.
Put the seeds back in the jar and fill it with water. Any seeds that float on the surface after this final rinse are bad and can be discarded.
Step 7: Dry the seeds

Rinse the rest again and put them on a tissue paper to dry. I either use the scrap of a kitchen towel or half a paper tissue, but you can also use waxed paper, parchment paper, coffee filters or a mesh screen over a plate. Remember to label whatever your seeds dry on. Stir the seeds so that they don’t clump.
Put the seeds in a warm place, away from direct sunlight. A good place in my house is the top of the fridge. Make sure temperatures are not too high, or else the seeds will sprout.
After one to two weeks, depending on your drying medium, the seeds will have dried.
Step 8: Storage
To check if your seeds are completely dry, try to break them. A dry seed breaks in half with a snap, while a still moist seed will bend or rip. Once the seeds are completely dry, you can store them in paper envelopes, brown glass jars or plastic bags. Make sure the seeds are really 100 % dry, especially when stored in plastic or glass containers. Otherwise, the moisture will make them mould and rot.
Remember to label the seed packages with the variety and harvest date.
Store the seeds in a cool, dry place. They are usually good for 4 – 6 years.
Final thoughts
As you can see, saving tomato seeds is easier than it sounds, and it’s so rewarding. One year from now, you’ll be making a tomato salad from fruits that only exist because of your seed-saving efforts. And imagine the satisfaction of telling your friends and family that the tomato salad they’re eating right now is not only from your garden but also grown from seeds you saved yourself! Admiring looks included.
Start now, choose some tomatoes you like, even if it’s only one variety, and save their seeds. You’ll be proud of yourself!
Wanna learn more about tomatoes? This article is for you then:
How to plant, grow and harvest tomatoes in 14 steps
Seed starting for beginners: A step-by-step guide for growing healthy seedlings
For more articles about gardening, view this site: Gardening – seasonalsimplelife.com