.
When the first pears are ready to be harvested, we know autumn has arrived – no matter how warm the weather still feels. The first pears are ready for picking in August, while late-season varieties can hang on the tree until the end of October. But here’s the dilemma: you can only eat so many fresh pears before they start to turn. That’s where the magic of pear jam comes in.
Unlike juicy berries, pears are comparatively dry fruits, which means making thick, spreadable jam requires a few key techniques. Today, I’ll walk you through my step-by-step method for creating a wonderfully velvety, sweet pear jam that captures all the golden abundance of autumn.
Choosing your pears
Varieties
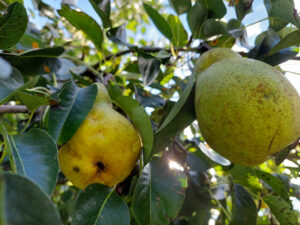
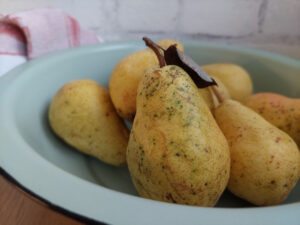
You can use virtually any pear variety, except the small, sour cider pears. Excellent choices in my area include Williams Christ, Clapp’s Liebling, Gellert’s Butterbirne and Conférence. With over 1500 pear varieties worldwide, use whatever grows well in your area.
Ripeness is crucial
Test ripeness by gently pressing the fruit with your fingers. If the pear is rock hard, it needs more time on the tree to develop its full flavour. When the flesh feels soft to the touch, the pear is ready for jam-making. Process harvested pears within a few days – they quickly transition from perfect to overripe.
Essential Equipment and Ingredients
Equipment You’ll Need
To make pear jam, you will need a sharp knife and a cutting board to peel and chop the pears.
For “storing” them between quartering and chopping, you need a large bowl.
Then you need a heavy-bottomed pot for cooking the jam and a wooden spoon for stirring it to prevent it from burning.
Lastly, of course, you need suitable jam jars with lids. I prefer jars of 250 ml (0.4 pt / 9 oz), because they’re large enough to be practical, yet small enough to finish the jam before it spoils. You can choose smaller or larger jars, just as it suits you. I just wouldn’t recommend jars of more than 400 ml (0.7 pt / 14 oz).
Ingredients
Pears
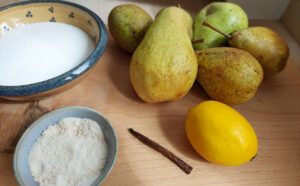
Obviously, we need pears 😊! For 6 jars of 250 ml, we need 1 kg (2.2 lbs) of pears, net weight after peeling and coring.
You can upgrade or downgrade the amount, but I don’t attempt more than 2 kg of pears (plus sugar), because larger batches won’t set properly.
Sugar
Although pears are sweet already, we need sugar to preserve the jam. The classic choice is jam sugar, where the pectin is already included. Now, if you like your jam very sweet, use jam sugar 1:1, which means that you take the same amount of sugar as fruit. For 1 kg of pears, we need 1 kg of sugar.
As pears are very sweet already, however, jam sugar 2:1 is also a good choice. It means taking half the amount of sugar compared to fruit. For 1 kg of pears, now, we need 500 g of sugar.
I personally prefer using household sugar and adding pectin. There are sachets of pectin, which also come in ratios of 1:1 and 2:1 (even 3:1 for very sweet fruit). So, when I have 1 kg of pears, I use 500 g of household sugar and one sachet of pectin 2:1.
To sum it up, choose the type and the amount of sugar based on your sweetness preference:
- Jam sugar 1:1 (that means equal weight of sugar and fruit) for a very sweet jam
- Jam sugar 2:1 (half the amount of sugar compared to the amount of fruit) for moderately sweet jam
- My preference: regular sugar (500 g per 1 kg pears) plus one sachet of pectin 2:1
Lemon juice
Raw pears have a wonderful aroma, but when they are made into jam, they can taste a bit one-dimensional. To balance the sweetness of the pears, we add the juice of one lemon. It doesn’t make the jam sour but adds a zesty nuance to the overall flavour.
Flavour enhancers (optional but highly recommended)
Strictly speaking, you don’t need to add anything to your pear jam, but some herbs and spices enhance the pears’ flavour even further:
- Vanilla: Half a pod (or quarter if very fresh) transforms the jam
- Warm spices: Cinnamon, cardamom, clove, or nutmeg
- Fresh herbs: Rosemary, lemongrass, lemon balm, or thyme
Get creative with combinations! If you need some inspiration, look at this article where I have listed different pear jam variations.
Step-by-Step Instructions
Got everything you need? Wonderful! Let’s start then.
Sterilise Your Jars
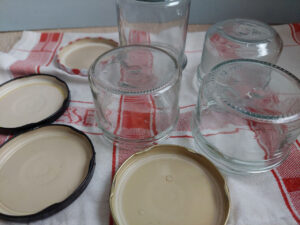
We want our jam to be shelf-stable for as long as possible. In an anaerobic (that is, oxygen-free) environment, however, certain bacteria and germs can grow well, and thus we must sterilise our jars to make them germ-free. If you want to read up on how to sterilise your jars properly, have a look here.
Prepare the Pears (Without Browning)
Pears turn brown quickly once they’re peeled. Although this change of colour doesn’t alter the taste, we want our jam to be the typical beautiful cream colour. To prevent the pears from browning, we must ensure that they’re not exposed to air for too long. Additionally, we must use acid, either in the form of lemon juice or vinegar, for preventing colour change.
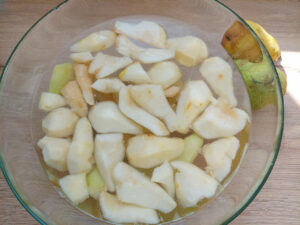
For that purpose, fill a large bowl with water and add either the juice of one lemon or a splash of vinegar.
Now, peel, quarter, and core the pears, and immediately put them into the bowl.
When all pears are prepared that way, we can remove the single quarters and slice them lengthwise into 3-4 pieces.
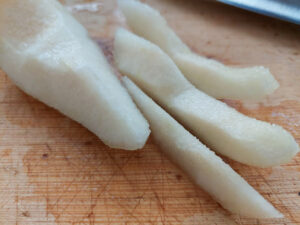
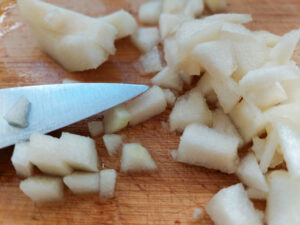
Now chop them finely crosswise. If necessary, cut the chops further. Be careful, though: we don’t want pear pulp but small, yet distinct pieces.
The Crucial Resting Period
If we cooked jam from pears immediately after chopping them, the jam would become relatively dry and compact. So, we must induce the pears to remove some of their juice, and that’s best done by mixing them with sugar and letting them rest for a few hours. This step makes all the difference between dry, compact jam and a perfectly textured preserve:
Put the pear chops in a pot and add the sugar, pectin (if necessary), lemon juice and spices.
Mix it all thoroughly and let it rest for at least 3 hours, or overnight if possible.
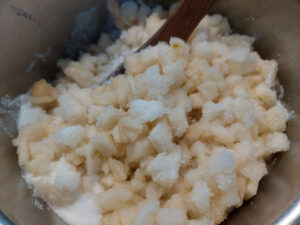
During that resting period, the pears release their juices while absorbing the sugar, thus creating the perfect base for jam.
Cook to Perfection
Now it’s time to cook the jam!
Bring the pear mixture to a rolling boil over medium-high heat.
Set your timer for 4 minutes and let it all boil for that time. Stir the mixture regularly to prevent it from burning.
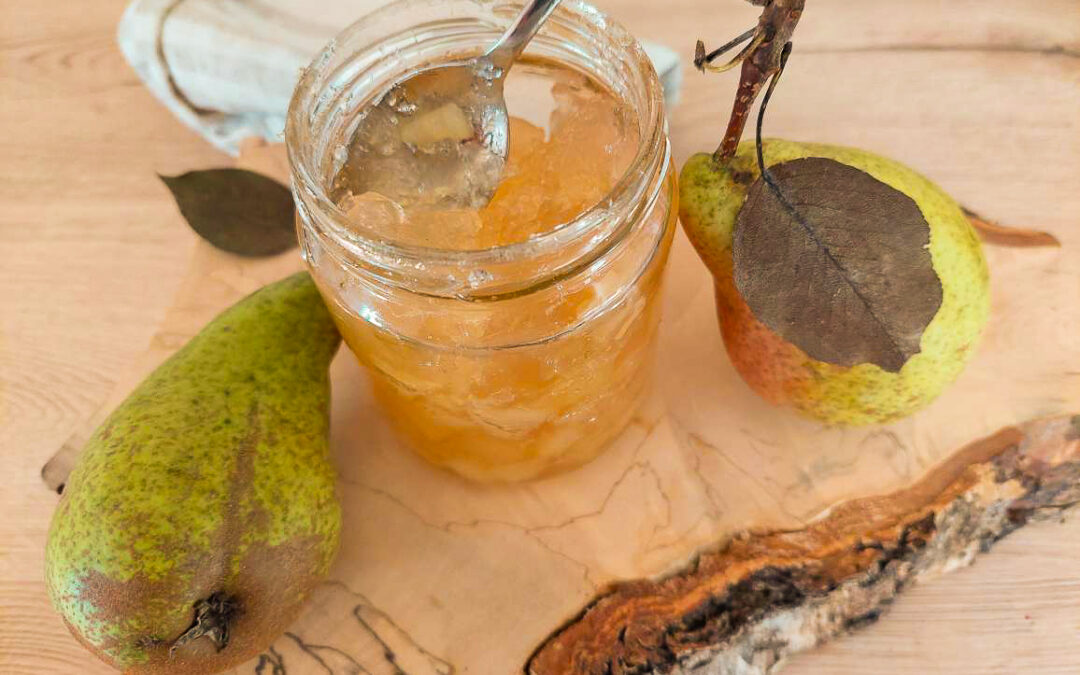
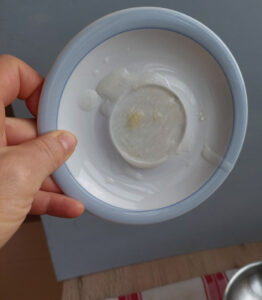
Test if the jam is done by dropping a spoonful of hot jam onto a cold plate. Now, tilt the plate and watch the jam: if it runs like water, it must be cooked for another minute. If it flows like thick honey, it’s ready!
Fill and Seal
Ladle hot jam into the sterilised jars. To make sure you don’t spill jam on the rims, a funnel comes in handy.

Clean the jar rims if necessary, and immediately seal the jars with tight lids.
Flip the jars upside down onto a clean kitchen towel and leave them like that for about 10 minutes to create a vacuum seal.
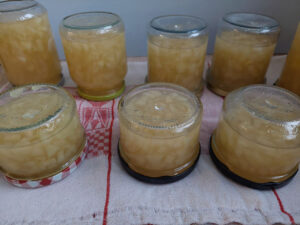
Turn the jars right-side up and let them cool completely.
Listen for the satisfying “pop” as vacuum seals form. When the jars are completely cooled off, press the centre of each lid: is it firm? Wonderful, everything’s fine! If it moves, the lid’s not properly sealed. Put that jar in the fridge and eat it within 1 – 2 weeks.

Ingredients
Equipment
Method
- Sterilise your jars
- Fill a large bowl with water and add either the juice of one lemon or a splash of vinegar.
- Peel, quarter, and core the pears and immediately put them into the bowl.
- Remove the quarters one at a time and slice them lengthwise into 3 - 4 pieces.
- Now chop them finely crosswise. If necessary, cut the chops further, but be careful: we don't want pulp but small, yet distinct pieces.
- Put the pear chops in a pot and add the sugar, pectin (if necessary), lemon juice and spices.
- Mix it all thoroughly and let it rest for at least 3 hours, or overnight if possible.
- Bring the pear mixture to a rolling boil over medium-high heat
- Set a timer for 4 minutes and maintain the boil. Stir regularly to prevent the mixture from burning.
- Test for doneness by dropping a spoonful of hot jam onto a cold plate. Tilt the plate- if the jam flows like thick honey, it's ready
- Ladle hot jam into sterilized jars (a funnel prevents messy rims)
- Clean jar rims if needed and immediately seal with tight lids.
- Flip jars upside down on a clean towel for 10 minutes to create a vacuum seal.
- Turn the jars right-side up to cool completely.
Notes
Storage
Like all jams, pear jam is best stored in a dark place at room temperature. Here, it is shelf-stable for up to 2 years. Once a jar is opened, keep it in the fridge and enjoy it within several weeks.
Your Gateway to Creative Jam-Making
Making pear jam is satisfying beyond words. Once you’ve mastered the basic technique, I guarantee you’ll soon find yourself experimenting with exciting flavour combinations.
But the best of all is that you’ll have a wonderful preserve for your pantry that brings the golden abundance of an autumn orchard onto your breakfast roll.
If you liked this jam, these posts may also interest you:
From Orchard to Jar: 4 Heavenly Pear Jam Variations
My favourite strawberry jams with a twist
Want more preserving ideas? Check out my Preserving Guide for canning, fermenting, and storage tips