.
When you want to plant and grow your own tomatoes and want to get a great harvest, it’s important to suitably care for your plants and provide them with optimum growing conditions. In 14 steps, I’ll show you everything you need to know about tomatoes – whether you’ll grow them in the open, in a greenhouse or in pots. Let’s start!
Step #1: Choosing the right tomato seeds
Of course, you can buy pre-cultivated tomato plants from a nursery. Those plants, however, will often be hybrids which means that their seeds are not seedfast. In other words, you cannot take seeds from those plants to cultivate new tomatoes next year as they will not create the same tomato variety. If you’re fine with that, go ahead and buy plants.
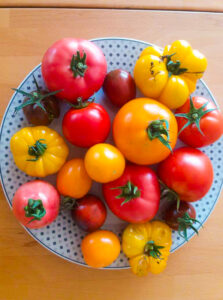
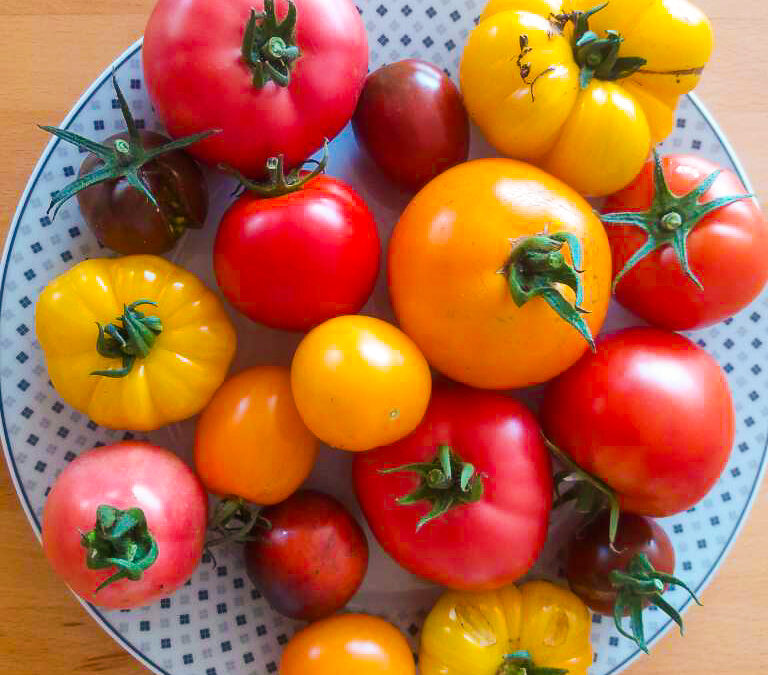
If, on the other hand, you want to choose from the immense number of tomato varieties and cultivate some rare types, you’ll want to start your plants from seeds. Make sure that you always buy seedfast seeds that are suitable for your climatic conditions and – of course – your preferences. If you don’t have favourites yet, try out different types: cherry tomatoes for snacking, tomatoes for salads, plum tomatoes for tasty sauces, tomatoes in different colours etc. Note down which ones you liked best and harvest their seeds for next year.
Step #2: Sowing the seeds
When you’ve got your seedfast tomato seeds, sow them into a plastic container with herbal soil. Tomatoes are warmth-loving plants, which means they need temperatures between 18 – 23 °C to propagate.
They also need plenty of (sun-)light. A windowsill facing south or west is good for seedstarting. Alternatively, you can put your planting containers below a plant lamp. Make sure your plants get 14 – 18 hours of light per day, otherwise they will become leggy.
Step #3: Pricking tomato seedlings
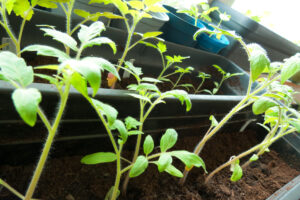
As soon as your tomatoes show the first pair of real leaves (not the seed leaves that come first), it’s time to move them into separate planting containers. Fill a pot of about 15 cm in diameter with planting soil and plant the tomatoes deeper by burying them up to the seed leaves. By that, they can grow more roots from the stem and become more robust.
The tomato plants still need warmth and enough light, so let those plant lamps shine.
Step #4: Hardening off

About 14 days before you want to plant out your tomatoes*, you must harden them off to prepare them for the different conditions outside or in your greenhouse. This is an important step as otherwise, your plants could die from the sudden changes in temperature and exposure to sunlight.
To toughen the tomatoes, put them out into the shade on a warm day (10 °C and above) for a few hours each day. Start with 1 – 2 hours and prolong those phases up to 4 – 6 hours. Make sure that on the first days of outdoor hardening off, your plants are protected from direct sunlight and wind. After a few days, you can put them for one hour in the morning sun and a few days after that into the full sun. Always take a look at your plant every hour or so to make sure that they don’t get scorched or suffer in some other way. Get the plants in during the night.
Another thing you can do to harden your tomatoes off is to tenderly brush over them with your hand. This imitates wind and causes minuscule breakings in the stems which the plant can repair and thus becomes harder and stronger.
*If you just asked yourself when’s the right time to plant out your tomatoes: after the last night frosts, better still when night temperatures do not drop below 10 °C. In Central Europe that’s about mid-May. If you have a greenhouse, you can plant them out already starting mid-April.
Step #5: Soil preparation
Tomatoes have a high demand for nutrients. In other words, they eat like a teenager after a rugby match! To give them a good start and plenty of “food”, we must prepare the soil before planting them out. To do so remove all weeds and the mulch. By exposing the soil to the sun it will warm up and, as I said before, tomatoes love warmth.
To enhance nutrient density, work some ripe compost into the soil.
Step #6: Planting out
Plant your seedlings outside when all danger of frost is over and the soil has reached a temperature of at least 15 °C.
Dig out planting holes and add some organic tomato fertilizer and a handful of bone meal. As an alternative to the ready-made fertiliser, you can put some stinging nettles into the plant hole. I always put some composted and wet cattle dung into the plant hole and plant the tomatoes directly into it. That way, they not only have fertiliser but also enough moisture to last for the first few days of growing in.
As you did when pricking, plant your tomatoes deeper than before by burying them up to the first leaves. To help them grow more roots and thus become more anchored into the ground, I always plant them at an angle of 45 degrees. That makes sure that additional roots will sprout out of the stem. Remove any leaves that touch the ground.
Plant your tomatoes about 45 centimetres apart.
If you use pots for planting, make sure that you use good-quality pots. Black ones are not great as they’ll heat up too much in summer and by that burn the roots. Wooden, terracotta or plastic pots with a capacity of at least 20 litres are ideal. Put some drainage in so that your plants won’t drown, add the soil – either compost or ready-made tomato planting soil – and plant your tomatoes as described above.
After planting, water your tomatoes thoroughly.
Step #7: Staking
We distinguish between indeterminate and determinate tomatoes.:
Determinate varieties, also known as bush varieties, grow about 60 – 100 centimetres tall. They produce fruit for a relatively short period of time as they tend to provide ripe tomatoes at the same time which makes them great for making sauce and canning. Determinate varieties don’t need any staking and are great for small places or pots.
Indeterminate varieties, or vining varieties as they are often called, produce large tomatoes all summer long, mostly starting mid- to late-season. Indeterminate tomatoes need staking to help them support their weight and height. For that matter, you can put a stake next to each plant into the soil and as the tomato grows, fix it loosely with a twine to it. A possibility you can use in your greenhouse is to fix a twine loosely at the ceiling and fix it around your tomato plant. As the tomato grows you wind it around the twine until it reaches the ceiling.
Step #8: Watering
Most gardener’s favourite activity is watering and that’s great for the first week or so after planting your tomatoes to make sure they root well. Afterwards, however, you can cause real damage to your plants when watering them too much: they will grow only shallow roots and thus not be firmly rooted in the ground and their fruit will taste watery.
It’s best to leave tomatoes out when watering and only water them if they really need it which they show by wilting leaves. Even in the greenhouse, my tomatoes can grow their roots deep enough to tap the water sources deep down in the earth. Don’t spoil your plants but raise them to become healthy, sturdy adult tomatoes with plenty of tasty fruit!
When you must water, however, water them deeply and make sure that the water soaks at least 10 – 15 centimetres into the ground. Always water at the base of the plant and don’t splash the leaves as this might cause diseases.
Step #9: Mulching
I’m a huge fan of mulch and I recommend mulching your tomatoes as soon as the soil is warm enough. Mulch not only helps your plants to retain moisture (see step #8: watering) and prevents soil-bourne diseases from splashing up onto the leaves. It also controls weeds and shades the soil. Did I say that I love mulch? I love mulch!
Step #10: Pruning
If you’re growing vining tomatoes, you must prune, that is: pinch off the suckers. Suckers are those tiny stems that form between the main stem and branches. They will not produce fruit but only take energy from the plant. It’s best to prune or pinch the suckers as soon as you notice them. When they’ve grown large already, it’s hard to just rip them off without damaging the plant. Also, the wound becomes too large and may invite diseases.
You can just use the suckers as mulch or you put them into a glass with water where they’ll soon form roots and thus new plants.
Step #11: Companions
Tomatoes are a sociable lot and love having companion plants around. The right partners will not only fight off pests and diseases but will also prepare the soil ideally for our hungry fellows.
Good vegetable partners are beans, lettuce, celery, cabbages, onions and garlic. Tomatoes also love basil – on the plate as well as in the soil – and if you want to add a pretty eyesight you can plant marigolds.
Step #12: Fertilizing
As I said before, tomatoes are gluttons. To make sure they get all they need, it’s best to give some long-time fertiliser into the plant hole. This can either be some ready-made tomato fertilizer, bone meal, a mixture of horn shavings and rock powder, stinging nettles or composted dung. This year, I’ll try out different methods to compare what works best (for me). I’ll keep you updated.
Nevertheless, during their main period of growth, tomatoes still need some quickly available fertiliser that provides them with nitrogen, potassium and phosphate. I always prepare a “manure” from stinging nettles and comfrey and add about 100 – 200 ml of the ready manure to 10 l water.
Be careful, though, to not over-feed your plants. Too much fertilizer will weaken them and make them produce many leaves but few, tasteless fruit. Fertilizing every four weeks is enough to provide your plants with sufficient nutrients so that they’ll produce a great harvest!
Step #13: Pollinating
During relatively cold summers but also in greenhouses with insufficiently large windows, pollination may be a problem. When it’s too cold, bees and other pollinators won’t be around that much and in the case of greenhouses they may not find their way in. Those wonderful blossoms on your plants will not be pollinated and just fall off instead of transforming into wonderfully tasty tomatoes. That’s a shame!
To support the bees, you can carefully (!) shake the plants a bit so that the pollen gets loose and swirls through the air. Tomatoes have bisexual flowers and can pollinate themselves when the pollen is released – by insects or by shaking the plants.
Step #14: Harvesting
Hooray, the time to harvest has come! Harvest your tomatoes when they have the right colour (depending on your variety this can be red, orange, yellow, blue, violet, white or green in different shades), smooth and firm skin and easily remove from the plant. If you have to pull hard, they’re not ready yet.

If temperatures threaten to drop too low and there are still unripe tomatoes on your plants you can either pull out the whole plant (with roots) and hang it upside down from the ceiling of a cool basement or garage. Or you place the unripe tomatoes into a cardboard box or a paper bag and put it on the counter. With both methods, the tomatoes will ripen and you may have fresh tomatoes till Christmas.
You got more tomatoes than you can eat? No problem! Preserve them for winter by cooking and canning a tomato sauce. Nothing better than some pasta with homemade tomato sauce on a cold winter’s day.
Drying and soaking them in oil is another wonderful way to preserve your tomatoes. Cut small fruits in half or larger into quarters, put them onto a tray and dry them in the oven at 40 – 50 °C until they are dry but still chewy. Put them tightly into small glasses and fill them up with olive oil.
You see, when you observe these 14 steps it’s quite easy to plant, grow and harvest your own tomatoes and they taste sooo much better than the ones from the store. Is there anything yummier than eating warm ripe tomatoes right from the plant? Mmmh….

