
.
You think you can’t grow peppers and chillies because you don’t have a garden? Think again! In this complete container growing guide, you’ll learn exactly how to grow peppers and chillies in pots, which containers to choose, how often to water and fertilise them, and how to maximise harvests in small spaces. This guide is part of my complete pepper and chilli growing series, including seed starting, pest control and disease prevention.
How I Started Growing Peppers and Chillies in Pots
One year, I really overdid it. I sowed half a handful of pepper and chilli seeds, and almost all germinated. When I finally counted my seedlings, there were 60 of them! Way too much for my garden, and even the greenhouse couldn’t possibly have enough space for all of them.
I know what you’re thinking now: give them away to friends and neighbours, but honestly, I couldn’t bring myself to do it. It felt like I was being forced to give one of my children away.
Weird, I know, but that’s how we gardeners are.
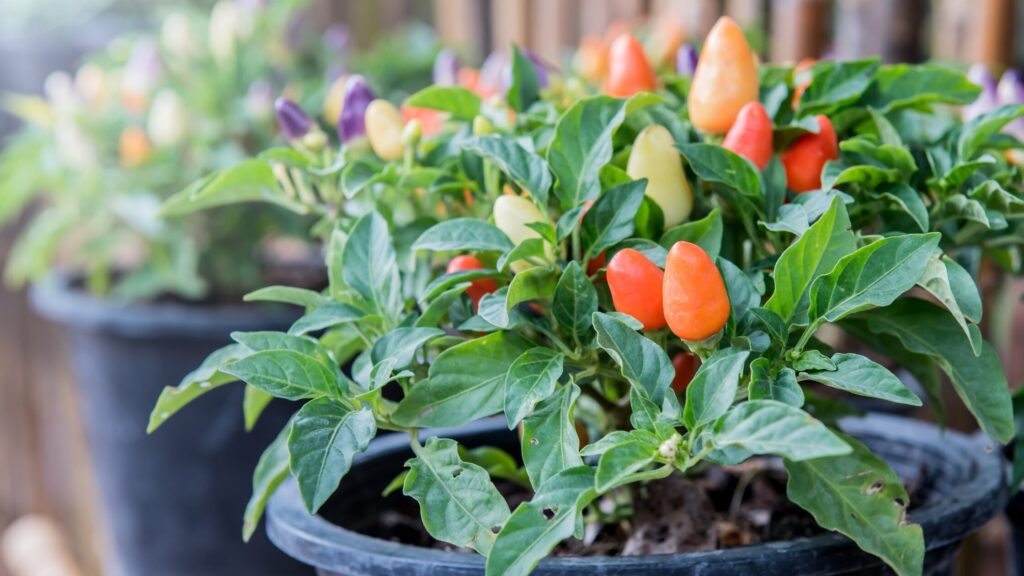
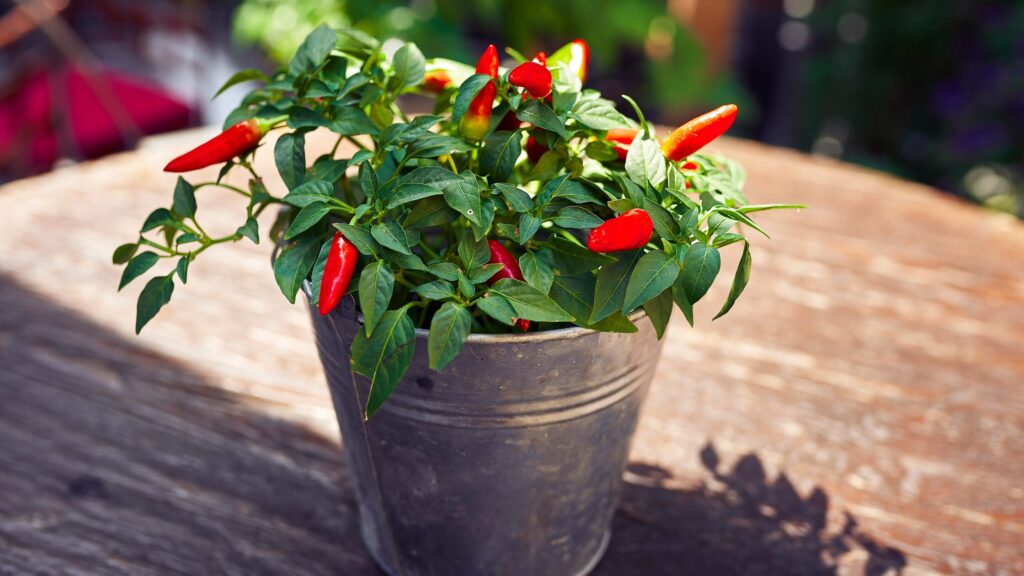
In the end, I planted all the peppers and chillies I didn’t have space for in the garden into pots and cultivated them on the balcony and in my living room.
It worked so well that I want to share the experience here with you and show you that you don’t need a garden to grow peppers and chillies. In fact, they are the perfect crop for urban gardeners who don’t have much space. And container growing turns peppers from climate-dependent crops into highly controllable plants.
So yes — growing peppers and chillies in pots absolutely works. Let’s look at why containers are often even better than garden beds.
Quick Start: Growing Peppers and Chillies in Pots
- Use pots 7–20 litres
- Place in full sun (6+ hours)
- Use well-draining vegetable soil
- Water whenever top soil dries
- Feed every 2–3 weeks
- Move pots to extend the season
Can You Really Grow Peppers and Chillies Successfully in Pots?
✅ are perfect for beginners
✅ work in small spaces
✅ are highly productive
The short answer is: Yes. In fact, peppers and chillies often grow even better in pots and containers than in the ground.
The simple reason for that is that heat-loving plants – like peppers and chillies – can be moved indoors when temperatures drop, or heavy rain or strong winds are forecast. That way, they can be protected from harsh weather with very little effort.
Another advantage is that we have complete control over the soil when we plant peppers and chillies in containers.
Later on, they need to be fertilised, of course, but that’s also easier with containers than outdoors.
Additionally, chillies and peppers grown in containers have a much longer season, resulting in higher yields. In fact, you can even overwinter them in the pots and have an early start next season.
Let’s see which varieties are the most suitable for containers.
Choosing the Right Pepper Varieties for Containers
Basically, you can grow any pepper or chilli variety in a pot, but if you can choose beforehand (and not have to see what seedlings remain, as I had to that year), look out for certain characteristics.
What Makes a Pepper Good for Pots?
If you know upfront that you want to cultivate peppers and chillies in pots, look for varieties that grow compact and bushy instead of long and thin.
In many cases, growth above the soil often mirrors the root growth underground. That means that compact and bushy plants usually have compact and bushy roots. This is much better for the cultivation in pots than roots that strive to grow deep.
Lastly, choose varieties that produce well. After all, with pots, you can adjust the space between plants when they grow bushy and bear many fruits.
Best Types for Containers
Here’s a short list of my favourite pepper and chilli varieties for containers:
Sweet peppers
- California Wonder
- Roter Augsburger
- Mini Bell varieties
- Lunchbox peppers
Mild chillies
- Jalapeño
- Anaheim
- Hungarian Wax
Hot varieties
- Cayenne
- Thai chilli
- Habanero (with larger pots)
Now that we’ve determined which varieties are best for container planting, let’s have a closer look at the containers themselves.
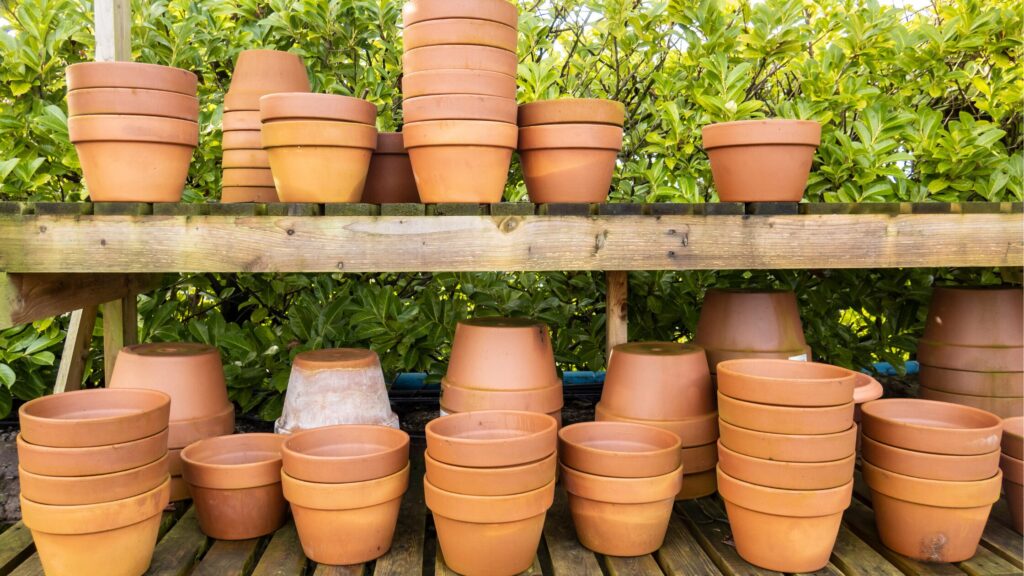
The Best Pots and Containers for Pepper Plants
Let’s start with the size.
Ideal Pot Size
| Plant type | Minimum size (in l) | Ideal size (in l) |
|---|---|---|
| Chillies / Snack peppers | 7 - 10 | 12 |
| Bell peppers | 10 | 15 |
| Large varieties | 12 | 20 |
It may be tempting to use a small pot for your pepper plant, especially when your growing space is limited. But don’t be fooled.
Peppers and chillies need sufficient space to develop strong roots. For that reason, choose a container of at least 7 – 10 litres for small varieties and up to 20 litres for larger plants.
At first, the seedlings may look a bit forlorn, but they’ll grow into it, I promise.
The bigger the pots, the easier it is to care for the plants.
Container materials
The right container material is equally important for a successful harvest.
Clay or terracotta pots look nice, but they dry out easily and can even break under extreme temperatures. On the other side, they store warmth and release it slowly at night.
Plastic containers on the other side contain the moisture better and can be moved more easily. On the downside, they can grow really hot in strong sunlight and then damage the roots.
If you’re unsure, plastic or fabric pots are usually the easiest choice for beginners.
And another quick word: One pepper plant per pot almost always produces better harvests than several crowded plants.
Drainage — The Most Important Rule
Peppers and chillies hate wet feet.
No matter what container you choose, make sure it has drain holes. They not only prevent waterlogging but also make sure that the chance of fungal diseases is minimised.
If you want to learn more about what can befall peppers and chillies, read my comprehensive list of pepper plant diseases.
Soil and Compost — The Secret to Healthy Container Peppers
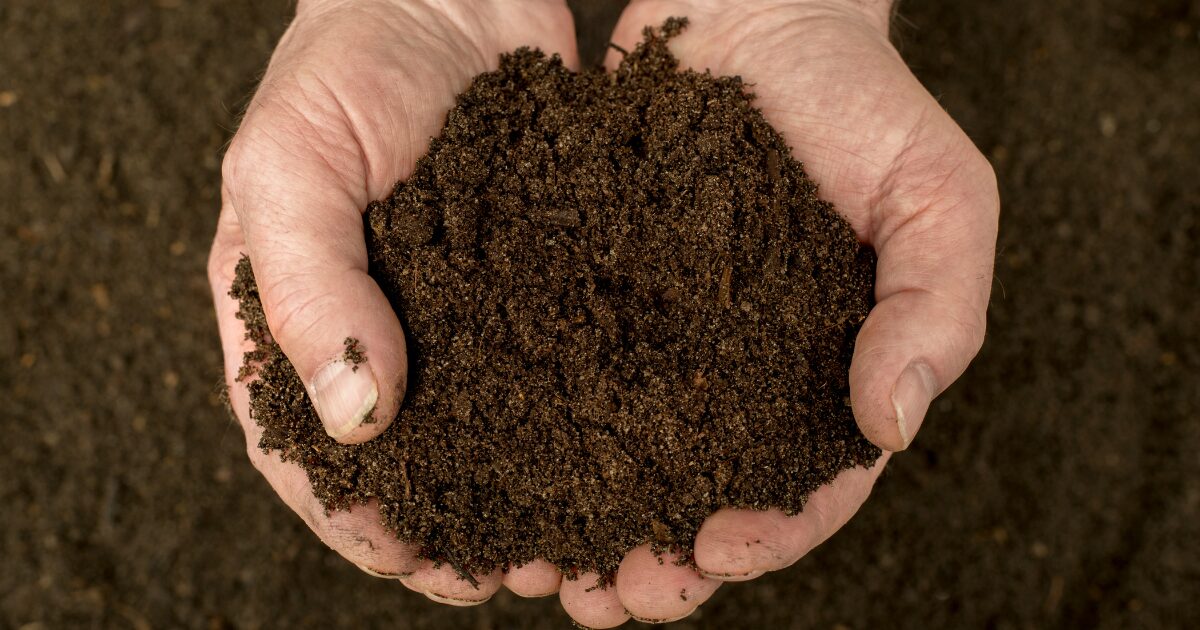
Normal garden soil or standard potting soil intended for flowers is not ideal for potted pepper plants. In fact, that’s one of the main reasons why pot-grown peppers fail.
The reason: Garden soil becomes compacted in containers, preventing proper drainage and airflow around the roots. And flower-soil has not the right nutrients for peppers.
Peppers need a well-drained soil with plenty of nutrients. Special vegetable soil mixes already contain these relevant nutrients like nitrogen, potassium and magnesium that are necessary for good and healthy growth.
❗ The most common reason container peppers fail is heavy, compact soil.
I often use a mix of one part garden soil and one part well-rotted compost, plus a handful each of horn shavings and rock flour as soil for peppers in pots. The compost adds nutrients and organic material, while the shavings and flour work as long-term fertiliser, releasing their nutrients slowly.
Additionally, I put a layer of well-rotted cow manure at the bottom of the pot, which contains highly available nitrogen, stimulating initial growth.
How to Plant Peppers in Pots (Step-by-Step)
- Prepare the pot
- Add drainage
- Fill in the soil
- Plant at the right depth
- Water in
- Place in the sun
Let me show you how to plant your pepper and chilli babies into pots.
1) Prepare the pot
If your pot is new, that’s great; you don’t have to do anything. But if you’ve used the pot before, especially for other plants of the nightshade family, like tomatoes or eggplants, you should scrub it first to remove old soil.
2) Add a drainage layer
Peppers need plenty of water, but they absolutely hate wet feet. In fact, too much water at the roots can kill them. To prevent that, some gardeners (like me) put a drainage layer at the bottom of the pot (or whatever container you use): I usually fill in about 2 inches of pebbles, but you could also use clay shards from a broken pot or bowl.
You can either add a drainage layer or rely on well-structured potting soil — both methods work as long as water drains freely.
3) Fill in the soil
If you want, you can now put some well-rotted manure into the pot, or you can just fill in soil. No matter what variant you choose, only fill the pot until it’s roughly half full. Press it down lightly to compress it a bit and, if necessary, add some more soil.
4) Planting

Now comes the greatest part: carefully take the pepper or chilli seedling out of its pot and place it in the middle of the new pot onto the soil.
Hold it with one hand and with the other hand fill soil into the pot until your pepper plant is a bit deeper than in the original seedling pot. That way, it’s more secure.
Press the soil well around the roots and fill in more, if necessary.
5) Watering in
To make sure that the soil connects with the roots, we now water the newly potted seedlings thoroughly. This removes any air pockets and attaches the soil to the roots, which, in return, can extract the nutrients and transport them into the plant.
Make sure that you only water the soil and not the leaves.
Congrats, you have successfully transplanted a pepper or chilli seedling into a container. Now, let’s move it into the sun.
🌶️ Growing peppers for the first time? Join the newsletter for seasonal reminders, practical tips, and updates from my own garden — including how my overwintering experiment turns out this year.
Where to Place Potted Pepper Plants
For peppers and chillies in pots, the location is crucial.
🌞 Sunlight Requirements
Peppers and chillies like it warm and sunny. A minimum of 6 hours of direct sunshine per day is necessary for them to thrive and build plenty of fruit.
South-facing balconies or sunny patios are ideal for cultivating peppers and chillies in containers.
🍃 Wind Protection
Pepper plants can’t stand wind, as it damages their sensitive stem and leaves. The location you put the pots in, therefore, must be protected from the wind.
I grow my peppers and chillies on my west-facing balcony. When there are strong winds or a storm is forecast, I put the pots inside to protect them.
🌡️ Temperature Requirements
Peppers and chillies thrive best at temperatures between 20 and 30 °C (70 – 85 °F). Depending on your growth zone, of course, you won’t always have these ideal conditions. This is one of the reasons we may want to cultivate peppers in pots that we can shove inside when it gets too cold outdoors.
Temperatures between 15 and 20 °C (60 – 70 °F) are okay, but the plants will grow more slowly and ripen later.
Below 12 °C (54 °F), growth will stop completely. Check the weather forecast for night temperatures and when they fall below that mark, get your pots in.
If the plants get a frost, they’ll die.
Balconies vs Garden vs Windowsill
| Location | Difficulty | Yield | Best for |
|---|---|---|---|
| Balcony | Easy | High | Beginners |
| Patio | Easy | High | Warm Climates |
| Windowsill | Medium | Moderate | Indoor growers |
Growing peppers and chillies on the balcony, the garden or simply the windowsill – what is the best method?
If you have a garden (or even a greenhouse) that gets enough sun and is protected from the wind, and if your hardiness zone is 6 and above, I’d suggest cultivating peppers in the garden.
However, space is often the problem, even if we do have a garden (even if the garden is larg-ish; mine’s never enough).
A balcony or patio, therefore, is the logical next step. Grow peppers in pots and put them there in a sunny and wind-protected corner. Place the containers near a house wall that absorbs warmth during the day and slowly releases it during the night.
If you do not have any outside space at all, you can still grow peppers and chillies in pots on your windowsill. Now, window glass filters out certain light waves that are necessary for healthy plant growth. It’s best, therefore, to open the windows as often as possible and let the plants enjoy unfiltered sunlight.
Peppers on windowsills are often prone to pests like fungus gnats or aphids. Check them daily for infections and act quickly so that the pests don’t get the upper hand.
You can look up how to battle them in this guide on how to get rid of fungus gnats, and in this one about how to get rid of aphids naturally.
Moving Pots Through the Season
You know the saying, “If you don’t like where you are, move. You’re not a tree.”
Peppers in pots combine both advantages: they are deeply rooted in the soil AND can be moved. If not by themselves, then by us.
In fact, we have to move our pepper pots around pretty much throughout the year:
Hardening off
To get the sensitive plants used to outdoor conditions, we must harden them off. Put the pots outside when the weather is warm for about two hours. Make sure to put them in the shade first, so that the harsh sunlight won’t stress them.
Each day, prolong the time the plants stay outdoors, and after 3 days, you can start placing them in the sunlight (not around noon, that would be too much).
To make them accustomed to the wind, gently brush them with your hand, simulating wind movement.
You’ll find a detailed section about how to harden off peppers and chillies in my complete beginner’s guide on seed-starting
Moving for storms
When storms are forecast, get your pepper pots inside. During a storm, pepper and chilli stems can easily snap, especially when the plant bears fruit.
Summer heat
Although peppers and chillies like it hot, temperatures above 32 °C (90 °F) can stress and even damage them. When the heat rises in summer, put your pots in the shade or even indoors, if necessary.
Wall heat
This is a factor that’s often overlooked: walls reflect heat and duplicate it. What’s great during the night, when a wall releases heat that it stored during the day, can be devastating to the plant during the day. Then, the heat from the sun is reflected by the wall, which makes a spot there even hotter.
Install a thermometer on the wall where you’ve got your pots and move the plants in the shade when it gets too hot.
Bringing indoors before frost
It goes without saying that you should move peppers and chillies indoors before frost strikes. I even recommend getting the pots in when temperatures fall below 12 °C (54 °F), as the plants stop growing then.
- Spring — harden off
- Summer — water daily & feed
- Autumn — harvest & reduce watering
- Winter — overwinter indoors
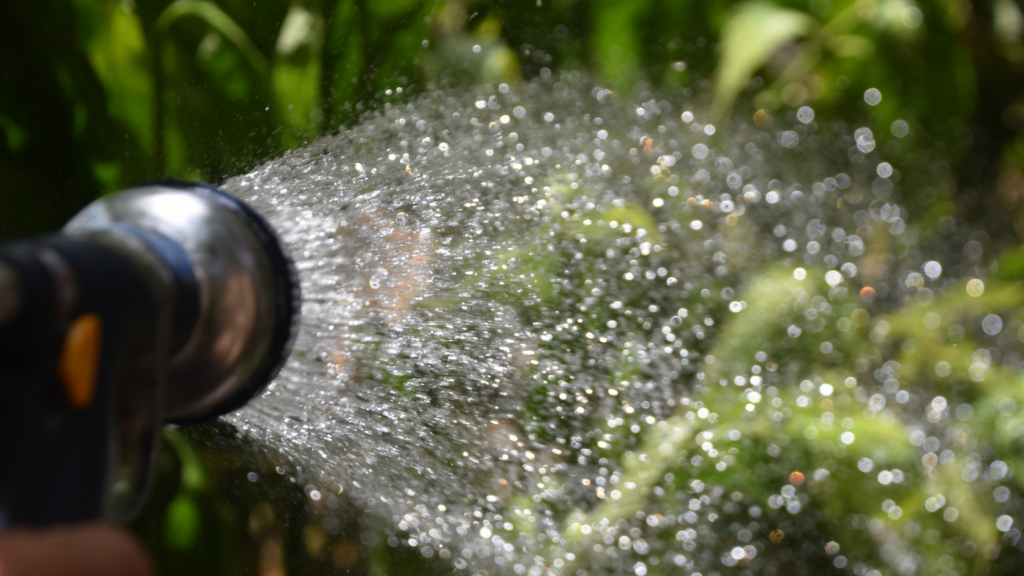
Watering Container Peppers (Most Common Failure)
Containers dry out faster than soil in the garden, simply because the volume is smaller (a pot always contains less soil than a whole garden, however small).
For that reason, we must water peppers in pots more often than those in the garden or a greenhouse. In hot summers, we must water daily.
In midsummer, peppers in small pots may need watering every morning — sometimes twice daily during heatwaves.
Check the soil for moisture by poking a finger into it: when it feels dry, water the pot thoroughly. Also, check the plants for signs of underwatering, like hanging, wilting leaves and water them regularly.
Avoid overwatering, though. Peppers will die when their roots are too wet. A clear sign of overwatering is plants that seem to wilt and even rot, although the soil is moist.
Feeding and Fertilising Container Peppers
We all know that we have to fertilise, but plants in pots have different requirements:
First of all, peppers and chillies are heavy feeders, which means they need lots of nutrients to thrive and produce fruit. So, we have to feed them with fertiliser, no matter where we grow them.
While for plants in garden soil, fertilising every 4 – 6 weeks is ok, peppers in containers need more frequent feeding. The soil in pots depletes sooner, simply because there’s not much of it compared to the garden.
For that reason, peppers and chillies in pots must be fertilised every 2 – 3 weeks, but with a smaller amount.
If you, like me, put well-rotted manure in the pot, this provides an initial boost of nutrients, additional to the fertiliser in store-bought soil or the compost in home-mixed soil. After about 4 weeks, give your potted plants another portion of nutrients, especially nitrogen. A good (and cheap) way to produce organic, nitrogen-rich fertiliser is with this homemade nettle manure.
When the plant builds blossoms, it needs more potassium and phosphorus, which you can either get by making liquid manure with comfrey or with a store-bought tomato fertiliser.
Even during harvesting, you can feed your plants to encourage them to create new blossoms and fruits. A potassium-rich fertiliser helps the plant build large fruits. This is especially important when you plan to harvest regularly until the first frost.
Pruning Pepper Plants in Pots
Pruning is optional but can improve airflow and plant structure.
Like in the garden, peppers and chillies in containers can be pruned. Pruning encourages the plant to form new twigs and grow sturdier. A sturdy plant can bear more or larger fruits without collapsing.
If you want to prune your pepper plants, cut off the tip of the main stem when it’s about 15 – 20 cm (6 – 8 inches) high. Use a pair of clean gardening scissors and cut directly above a pair of leaves.
When there are too many side shoots and leaves, thin them by thoughtfully cutting some of them off. Don’t remove too many leaves, though. The plants need them for photosynthesis.
This thinning improves the airflow and decreases the risk of fungal diseases, and the plants can also absorb more sunlight.
Always cut off shoots near ground level, little shoots that sprout out of the stem very near or even under the ground. They’re just side stems and only cost the plant energy.
Common Problems When Growing Peppers in Pots
As easy as growing peppers and chillies in pots may be, there are still some problems that could arise. Let me show you the most common ones and how to avoid them.
Yellow leaves – Cause & Solution
This is almost always a sign of nutrient deficiency and false watering.
Solution:
- If the soil is too wet, let it dry off; if it’s too dry, water the plant.
- Add some liquid fertiliser to the water, either homemade nettle manure or store-bought tomato fertiliser.
Flowers dropping – Cause & Solution
When peppers and chillies drop off buds and blossoms, the temperature is usually not right for them. When temperatures get over 32 °C (90 °F) or fall below 12 °C (54 °F), the plants get stressed and throw off all their blossoms.
Other reasons for blossom drop can be inconsistent watering or over-fertilisation, especially when you feed your plants too much nitrogen.
Solution:
- Shade the pots in hot weather and get them in when temps fall below 13 °C.
- Check your watering and fertilising schedule and adjust it if necessary.
Small fruits – Cause & Solution
When the plant bears too many fruits, they will stay small.
Solution:
- Cut off some small fruits
- Remove some of the newly-built flowers
Slow growth – Cause & Solution
This is mostly due to inadequate temperatures, as described with falling flowers.
Solution:
- Shade the pots in hot weather and get them in when temps fall below 12 °C.
Pests in containers – Cause & Solution
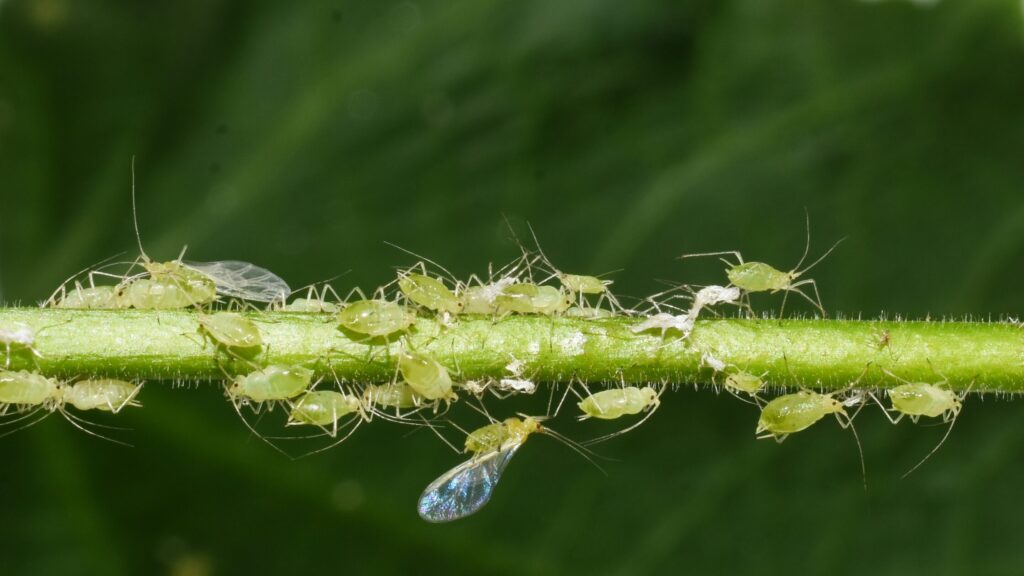
Unfortunately, peppers and chillies in pots will still be found by pests. Check your plants regularly for any pests and remove them as soon as possible to keep them at bay. Also, protective nets can prevent them from reaching the plants.
Solution:
- Check your plants regularly and remove pests as soon as you find them
- Cover your plants with protective nets
For more detailed information about what can befall pepper and chilli plants, read the comprehensive guide on common pepper plant diseases and my compendium on pepper plant pests.
Harvesting Peppers from Container Plants
As a rule of thumb, most varieties need 60 – 80 days from flowering to full ripeness. For peppers in pots, this is between mid-July and mid-August. Larger fruit takes longer to get ripe than smaller ones.
Colour, firmness and size
Frequent harvesting encourages the plant to produce more flowers and fruits.
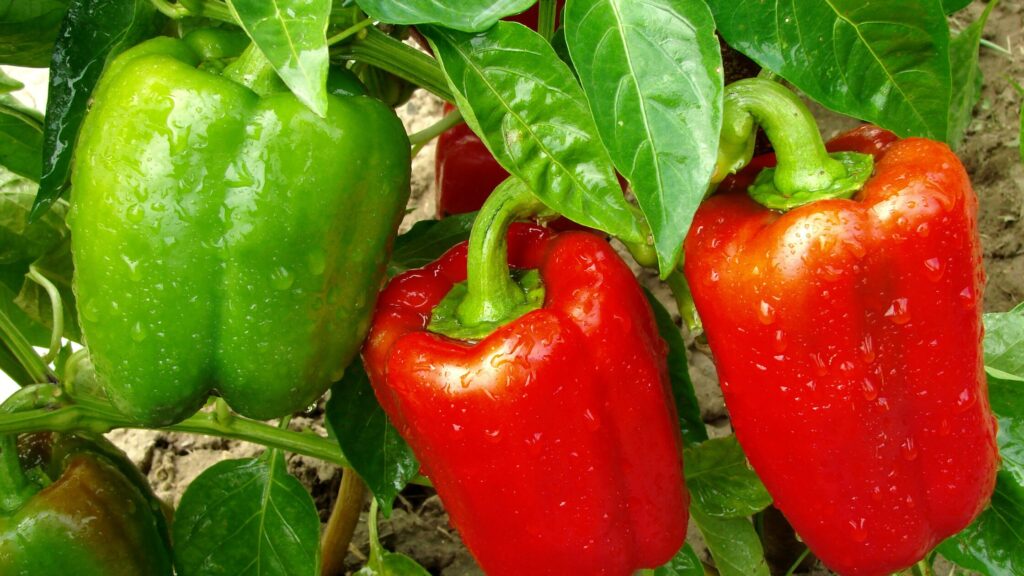
Peppers and chillies are ready to harvest when they’ve developed their variety-specific colour. Ripe peppers and chillies feel firm and have a slightly glossy appearance. They have reached their expected full size (which you can check on the seed package), and the colour should be deep and uniform, not pale or patchy.
Green peppers are unripe, but can, of course, also be eaten. Their taste may not be fully developed, though, and they might taste less sweet and more bitter than ripe ones.
Harvesting green peppers can be sensible when there are (too) many fruits on one plant, increasing the risk of collapse. In fact, harvesting the first pepper, the so-called “king pepper”, when it’s still green, is often done to encourage the plant to form more fruit.
Overwintering Pepper Plants in Pots
After growing peppers both in the garden and in containers for several seasons, I’ve found that pots often produce healthier and more productive plants.
Strictly speaking, peppers and chillies are perennials, not annuals. Last year, I dug up some pepper and chilli plants from the greenhouse, planted them in pots and brought them indoors to overwinter. Unfortunately, they were infested by aphids and lost all their leaves, and eventually, they died.
My first overwintering attempt taught me that overwintering peppers indoors is possible, but challenging — pests and low light are the main obstacles.
This year I’m going to cultivate peppers and chillies in pots again, which will make it easier to overwinter them. I think the main reason last year’s plants died was that they hadn’t grown well into the pot and their roots hadn’t found hold yet.
Even if overwintering fails the first time, the experiment is worthwhile — and far easier when peppers are already growing in pots. I’m still experimenting with this and will share what I learn.
Frequently Asked Questions
How big should a pot be for peppers?
Most pepper plants grow best in containers between 7 and 20 litres (2–5 gallons), depending on variety.
Can peppers grow on a balcony?
Absolutely, as long as they get enough light. Choose a south or west-facing balcony.
How many peppers can I plant per pot?
Just one. Peppers need lots of nutrients, which are limited in pots. If you cultivate more than one plant per pot, nutrients will deplete too soon.
Do chillies grow better in pots or in the ground?
That depends on the location rather than the planting medium. Peppers and chillies need enough sunlight, warmth, nutrients and water. If you can provide that in the garden, grow them in the ground. But if your garden doesn’t meet these requirements, it’s better to grow them in pots.
How often should I water container peppers?
Usually every day in summer, and whenever the top 2–3 cm of soil feels dry.
Do peppers in pots need full sun?
Yes — peppers require at least 6–8 hours of direct sunlight daily to produce fruit.
Why are my potted peppers not producing fruit?
This is either a question of wrong nutrients or temperature:
1) Nutrients: To grow flowers and thus fruits, peppers need potassium and trace elements like magnesium. As a beginner, you can use ready-made tomato fertiliser, which contains all those nutrients in the appropriate amounts.
2) When temperatures are under 20 °C (68 °F), growth is slower; with temps below 12 °C (54 °F), growth even stops completely. Make sure your peppers are warm.
Can I grow peppers indoors on a windowsill?
Absolutely, but you have to make sure they get enough direct sunlight. At best, open the window every day for several hours.
When should I start pepper seeds indoors?
As early as January and by February at the latest.
How long do peppers take to ripen?
Depending on the variety, peppers and chillies need between 60 and 80 days from seed-starting to harvesting the first fruits.
Why Growing Peppers in Pots Might Be the Best Method of All
Growing peppers and chillies in pots changes the way we think about gardening. Instead of depending on perfect soil or a large garden, we create ideal conditions wherever we live — on a balcony, a patio, or even a sunny window.
Containers give us control: we can follow the sun, protect plants from bad weather, extend the season, and even grow peppers as perennials. What begins with a single pot often turns into a small collection of thriving plants and an unexpectedly abundant harvest.
If you’ve been waiting for the “right space” to start growing your own food, this is your sign: you already have everything you need. One pot, one plant, and a bit of curiosity are enough to begin.
🌶️ My Other Pepper Growing Guides:
Can’t get enough of gardening? Check out all the articles in my garden hub.
If you want to hear more about gardening and preserving your harvest, you can join the newsletter here:
0 Comments